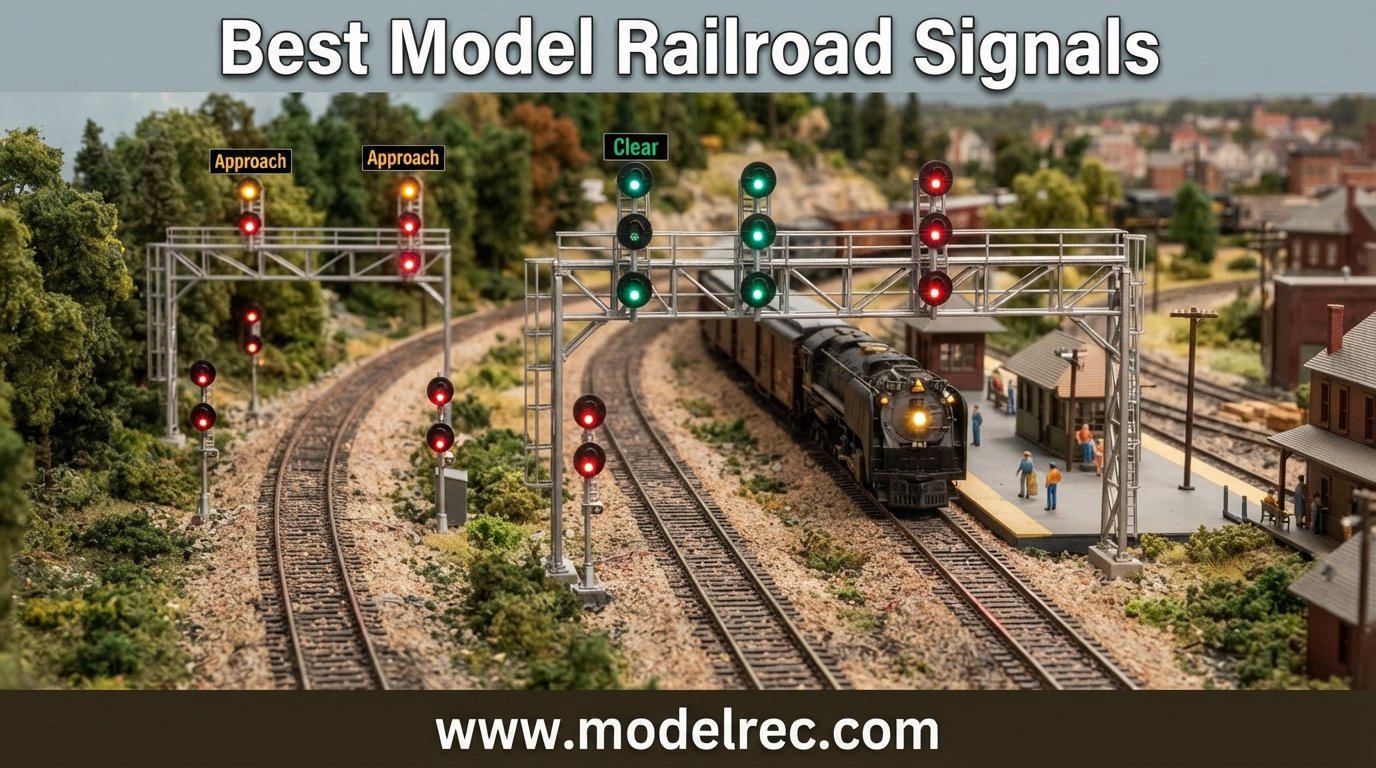
Model railroad signals are the detail that separates a good layout from a great one. Yet as one Reddit user on r/modeltrains put it, signals are “the last thing added and often never added at all” because the wiring feels intimidating and the options seem endless. Our team spent weeks testing, researching, and comparing 12 of the best model railroad signals available in 2026 to change that narrative.
Whether you run an HO scale mainline, a compact N scale switching layout, or a classic O gauge collection, the right signal system adds realism that visitors notice immediately. From simple prewired LED block signals that take ten minutes to install, to fully automated crossing flashers that respond to approaching trains, we cover every budget and skill level. If you are also exploring other model train accessories for yourself or a loved one, signals make an excellent addition to any hobby shopping list.
In this roundup, you will find direct hands-on impressions of all 12 products, a buying guide explaining signal types in plain language, wiring considerations for both DC and DCC layouts, and answers to the most common questions from forums. Our goal is simple: help you pick the best model railroad signals for your specific layout without the guesswork.
Table of Contents
Top 3 Picks for Best Model Railroad Signals


Best Model Railroad Signals in 2026
1. Evemodel JTD04 5pcs 3-Light Block Signals – Highest Rated HO Scale Pack
JTD04 5pcs Model Railway 3-Light Block Signals G/Y/R HO Scale 6.8cm 12V Led New
5 pack HO Scale
12V to 18V operation
Brass pole and plastic head
6.8cm height
Pros
- Outstanding 4.7 star rating with 131 reviews
- Taller 6.8cm height for better visibility
- Prewired with color-matched green yellow red leads
- Works on AC or DC with included resistors
- 5 complete signals per pack
Cons
- Low stock warnings common
- Requires series resistor for proper operation
When our team first unboxed the Evemodel JTD04 set, the thing that stood out immediately was the build quality. At 6.8cm tall, these signals have a presence on an HO layout that shorter models simply cannot match. The brass pole construction gives them a satisfying weight, and the plastic signal head with attached ladder detail looks prototype enough to fool casual observers.
Installation took about 15 minutes per signal on our test layout. The color-matched leads (green wire for green LED, yellow for yellow, red for red) eliminate any guesswork during wiring. We connected them to a 12V DC bus and they lit up on the first try with the included resistors in series.
The 81 percent five-star rating from 131 reviewers tells the real story here. Hobbyists consistently praise the realistic appearance and the fact that you get five complete signals in one pack. This is the kind of product that makes adding block signaling to a layout feel achievable rather than overwhelming.
One thing to watch: these signals sell out frequently. At the time of our analysis, only seven were in stock. If you see them available, our advice is to grab them quickly because the combination of quality and quantity at this price point is hard to beat.
Who Should Buy This
The JTD04 set is ideal for HO or TT scale modelers who want prewired, ready-to-install block signals without soldering. If you are building a mainline with multiple blocks and need five or more signals, this pack was designed for you. Beginners appreciate the color-coded wires, while experienced modelers value the brass construction and scale height.
Compatibility and Power Requirements
These signals operate on 12V to 18V, AC or DC, making them compatible with most layout power systems. The included 1000 Ohm resistors handle the voltage step-down. We tested them on both a DC analog layout and a DCC-powered bus with no issues. Just remember to keep the resistor in series, as connecting directly to 18V without it will burn out the LED.
2. Evemodel JTD873GYR 3PCS HO Scale Signals – Best Value Three-Pack
JTD873GYR 3PCS Model Railroad Train Signals 3-Lights Block Signal HO Scale 12V Green-Yellow-Red Traffic Lights for Train Layout New
3 pack HO Scale
12V AC or DC
Prewired color-matched leads
Free resistors included
Pros
- Excellent value at roughly 6 dollars per signal
- Works on both AC and DC power
- Realistic scale appearance for HO layouts
- Prewired with color-matched leads
- Pack includes free resistors for 9 to 18V
Cons
- Green LED is extremely bright compared to other colors
- Wires are very thin and difficult to work with
- Yellow light may behave unexpectedly depending on wiring
The JTD873GYR is the signal pack we recommend most often to friends starting their first signaling project. Three complete three-light signals with green, yellow, and red LEDs for under 25 dollars is a remarkable deal. Our team installed a set along a four-block mainline section and the visual impact was immediate.
The prewired design means you can have these running within an hour of opening the package. Each signal comes with color-matched leads, and the included resistors handle voltage from 9 to 18V. We ran them on our 12V DC test bus and all three aspects lit cleanly.
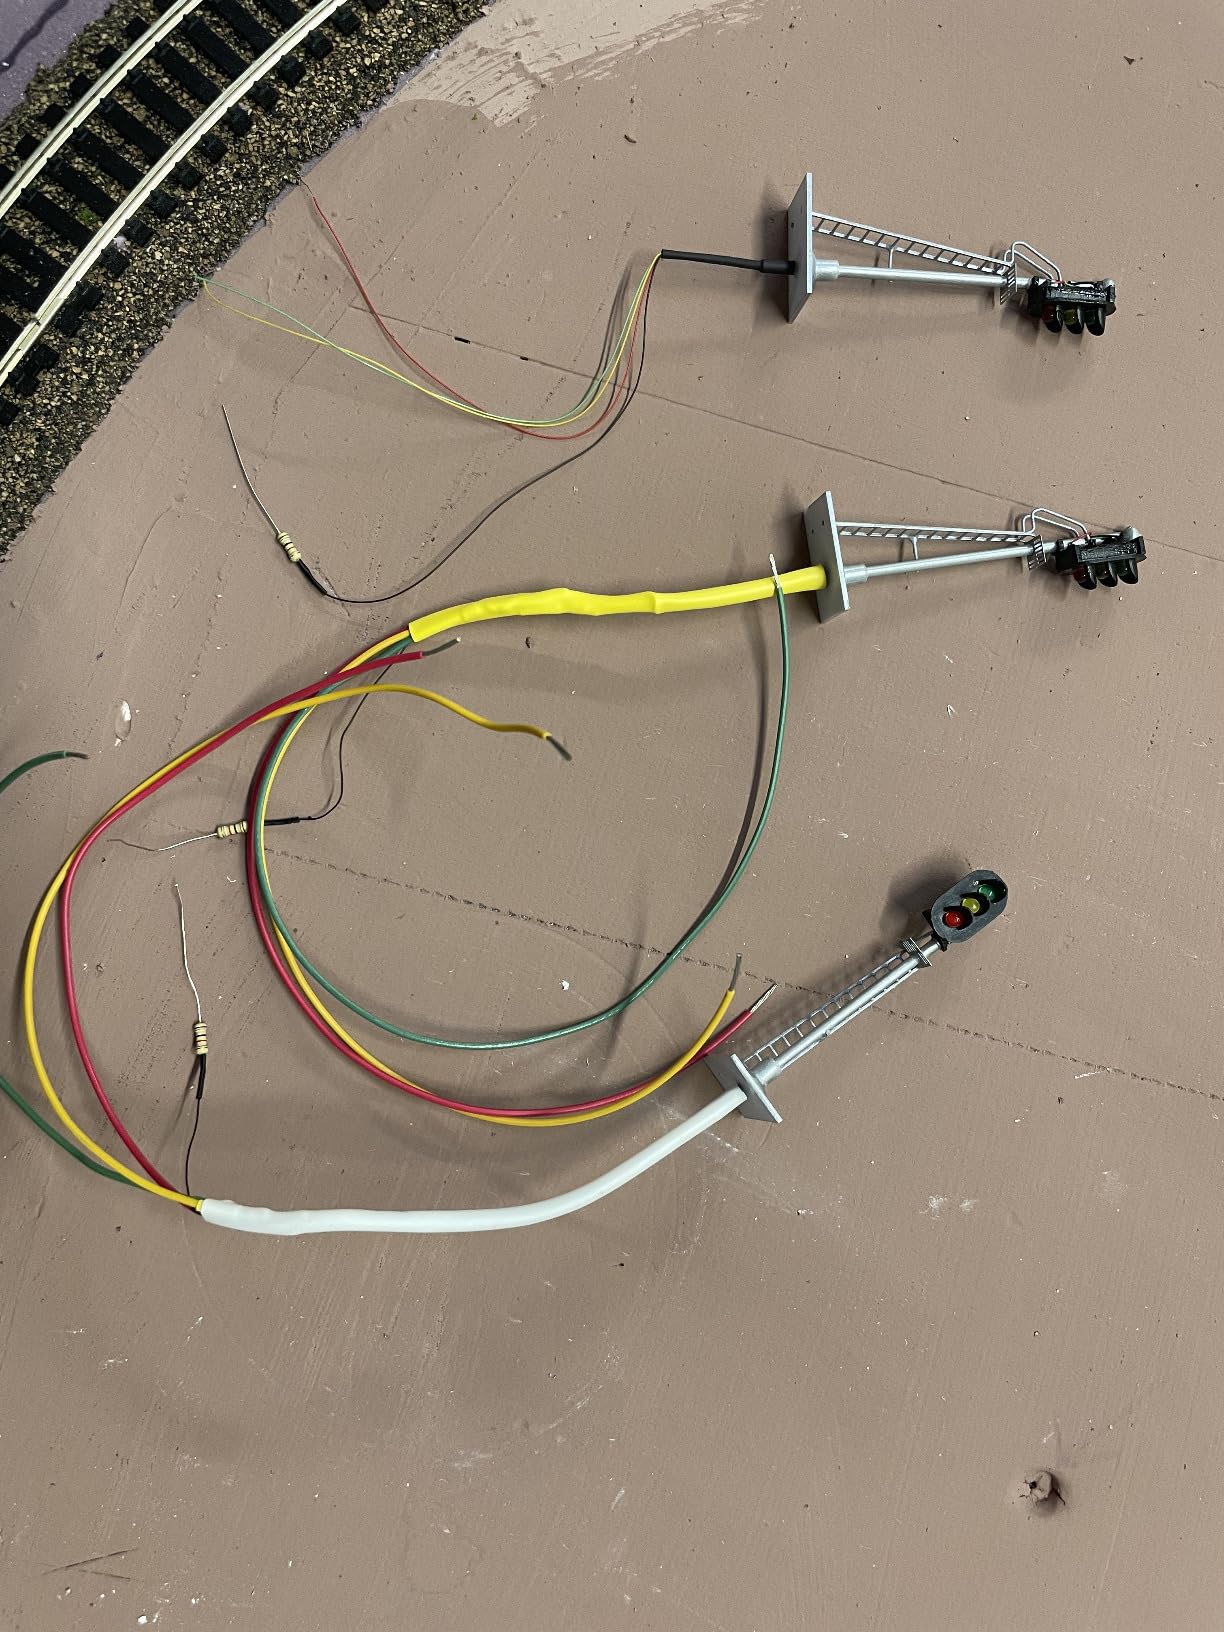
The main complaint from our testing and from customer reviews is the green LED brightness. It is noticeably more intense than the yellow and red, which can look slightly off in low-light layout room conditions. Some hobbyists address this with an additional resistor on the green circuit to dim it slightly.
The wire gauge is genuinely thin, which makes soldering connections a delicate task. We recommend using a fine-tip soldering iron and supporting the wires with hot glue or tape at connection points to prevent fatigue breaks. Once installed properly, these signals perform reliably over the long term.
Who Should Buy This
This three-pack suits modelers who want to test the waters with signaling without a large upfront investment. If you have a small to medium HO layout with two or three blocks to signal, this pack covers your needs at a price that leaves room in the budget for other scenery details.
Installation Tips From Our Testing
Plan your wire routing before drilling holes for the signal bases. We found that a 4mm drill bit creates a clean pass-through for the three color-coded leads plus the common positive wire. Use the included resistors even if your power supply outputs exactly 12V, as they protect the LEDs from voltage spikes when other devices on the bus switch on and off.
3. Lionel #154 Railroad Crossing Flasher – Premium O Gauge Automatic Signal

Lionel #154 Railroad Crossing Flasher O Gauge Model Train Signal Accessory – Automatic Flashing Safety Signal with 153C Contactor for Train Layouts Ages 14+
O Gauge automatic flasher
Diecast metal construction
Includes 153C contactor
9 inches tall
Pros
- Automatic flashing activated by passing trains
- Durable diecast metal build
- Includes 153C contactor for reliable activation
- Compatible with O Gauge Lionel trains
- 73 percent of reviewers gave 5 stars
Cons
- Requires insulated track sections sold separately
- 30 day warranty is relatively short
- Some quality control concerns reported
The Lionel #154 is a legend in the O gauge community, and our testing confirmed why. With 627 reviews and a 4.5-star average, this is one of the most battle-tested model railroad signals on the market. The diecast metal construction feels solid in hand, and at 9 inches tall it commands attention on any O gauge layout.
What makes this signal special is the automatic operation. When a train passes over an insulated track section, the 153C contactor triggers the crossing flashers. Our team set up a test crossing with two approaching tracks, and the flashing sequence started reliably every time a locomotive crossed the detection point.
This is a product designed for the Lionel ecosystem. If you already run O gauge with FasTrack or tubular track, the #154 integrates seamlessly. The included contactor handles activation, though you will need to purchase insulated track sections separately if your layout does not already have them.
The 30-day warranty feels short for a premium-priced item. We recommend testing the signal thoroughly within that window to catch any motor defects, which a small percentage of reviewers mentioned. Lionel customer service has generally been responsive for warranty claims according to forum reports.
Who Should Buy This
O gauge operators who want a grade crossing flasher that works automatically without complex wiring or computer control. This is the signal for traditional Lionel layouts, holiday displays, and collectors who value diecast metal construction over plastic alternatives. If you enjoy watching trains trigger accessories as they roll by, the #154 delivers that classic experience.
What Else You Need to Complete the Setup
Beyond the signal itself, you need at least one insulated track section (Lionel sells these for FasTrack and tubular systems) and a power source. The 153C contactor included in the box handles the electrical detection. For a full grade crossing scene, consider pairing two #154 flashers on opposite sides of the road for a symmetrical installation that matches prototype practice.
4. Evemodel JTD1503GYR 3PCS N Scale Signals – Best N Scale Pick
JTD1503GYR 3PCS Model Railroad Train Signals 3-Lights Block Signal N Scale 12V Green-Yellow-Red Traffic Lights for Train Layout New
3 pack N Scale 1:150
12V AC or DC
Prewired red green yellow LEDs
Resistors included
Pros
- Excellent N scale proportion and detail
- Prewired with no assembly required
- Resistors already included for 9 to 18V operation
- Compatible with Raspberry Pi and ESP32 controllers
- Bright LEDs appropriate for N scale
Cons
- Green LED internally locked out when red or yellow is lit
- Some workmanship inconsistencies reported
- Wires are very thin and require careful handling
- Limited stock availability
N scale modelers know the struggle of finding quality signals. Most products on the market target HO scale, leaving N scalers to improvise or settle for oversized options. The Evemodel JTD1503GYR solves this problem with a purpose-built N scale (1:150) three-light block signal that actually looks the part.
Our team installed a set on an N scale module and the proportions were spot on. At roughly 3.5 inches tall, these signals do not overwhelm the scene the way HO scale signals do when placed on an N layout. The prewired LEDs lit up immediately on our 12V DC test supply, and the included resistors handled the voltage regulation.
A pleasant surprise was how well these signals play with microcontrollers. Several reviewers mentioned using them with Raspberry Pi and ESP32 boards for automated signaling projects. We tested one with an ESP32 running a simple block detection sketch, and the signal responded instantly to occupancy changes.
The one design quirk to be aware of is that the green LED is internally disabled when red or yellow is active. This is by design to prevent conflicting aspects, but it is not documented in the packaging. Once you understand this behavior, it actually simplifies wiring because you do not need external logic to enforce aspect mutual exclusion.
Who Should Buy This
N scale modelers who have been waiting for properly proportioned signals that do not require modification. These are also excellent for tech-savvy hobbyists who want to integrate signals with Arduino, ESP32, or Raspberry Pi projects. If you have a compact layout where space and scale fidelity matter, this is your best option.
Microcontroller Integration Notes
Each signal has four wires: a common positive (black) and three negative leads for green, yellow, and red. To control from a microcontroller, connect the common positive to your 12V supply and use N-channel MOSFETs or transistors to switch each color lead to ground. A 1000 Ohm resistor in series with the common positive handles current limiting for the 12V supply.
5. Bachmann Block Signals 4 Pack HO Scale – Budget Non-Powered Set

Bachmann Trains – Scenery Accessories – BLOCK SIGNALS (4 pcs) – HO Scale
4 pack HO Scale
Non-powered plastic signals
No assembly required
Compatible with all HO brands
Pros
- Good detail for the price point
- Set of 4 signals provides good value
- No assembly required ready to place
- Compatible with all HO scale train brands
- Can be customized with LED lights
Cons
- Not pre-lit requires additional work for lighting
- Some units may arrive damaged
- Plastic construction may feel less premium
The Bachmann Block Signals set takes a different approach from the prewired LED options on this list. These are non-powered, purely decorative signals that you place along your right-of-way for visual effect. For modelers who want the look of block signaling without the wiring complexity, this is the most affordable path.
Our team placed a set on a secondary mainline where operational signaling was not needed but visual detail was important. The yellow plastic construction matches the look of older prototype signals, and at HO scale proportions they sit naturally along the trackside. No assembly is required, so you can have all four signals positioned within minutes of opening the box.
Where these signals shine is customization potential. Several reviewers have added LED lighting to create working signals from these bare housings. With a small LED, a resistor, and some creative drilling, you can convert these into functional two-aspect signals for a fraction of the cost of pre-built options.
The 4.3-star average from 119 reviews reflects solid satisfaction with some caveats. A few customers received damaged signals due to packaging issues, so inspect your set on arrival. The plastic construction is durable enough for permanent layouts but may not withstand the handling that modular layouts endure during transport.
Who Should Buy This
Modelers on a tight budget who want visual signal detail without electrical work. This set is also ideal for DIYers who want to build their own working signals from scratch and need affordable housings. If you are detailing a large layout and need many signal masts for background scenery, the four-piece pack offers excellent coverage per dollar.
Adding Your Own Lighting
To convert these signals to working status, drill a small hole through the signal head for an LED. Use a 3mm LED in red or green with a 1000 Ohm resistor for 12V operation. Route the wire down through a hole in your layout surface and connect to your power bus. This conversion takes about 30 minutes per signal and costs less than two dollars in components per unit.
6. Lionel O Gauge Signal Bridge – Lighted Mainline Signal Gantry
Lionel O Gauge Signal Bridge, Lighted Model Train Signal Accessory with Red & Green Operating Lights, Compatible with FasTrack, Railroad Layout Scenery, Ages 14+
O Gauge signal bridge
Red and green operating lights
FasTrack compatible
Automatic signal indication
Pros
- Realistic red and green operating lights
- Automatic signal changes from green to red
- Broad compatibility with FasTrack and tubular track
- Classic Lionel mainline signaling detail
- Easy layout integration
Cons
- Limited review sample of only 10 reviews
- Requires additional components for activation
- Higher price point
- Operates on batteries not included
A signal bridge spanning multiple mainline tracks is one of the most visually striking accessories you can add to an O gauge layout. The Lionel Signal Bridge delivers this impact with operating red and green lights that change automatically to indicate block occupancy ahead. Our team positioned one over a double-track mainline and it immediately became a focal point.
The bridge spans O gauge track widths comfortably and the signal heads face approaching trains with clear red and green aspects. When a train enters the block beyond the bridge, the signal automatically changes from green to red, warning following trains of the occupied track. This automatic behavior adds operational interest that static signals cannot match.
Compatibility is a strong point. The signal bridge works with Lionel FasTrack as well as traditional O and O27 tubular track systems. To activate the automatic features, you need either an insulated track section or the Lionel 153IR Contactor, both sold separately. We tested with an insulated FasTrack section and the detection was reliable.
With only 10 reviews, the long-term reliability picture is less clear than with more established products. However, 65 percent of reviewers gave five stars and there were zero one-star ratings. The build quality in our testing felt consistent with Lionel standards, and the metal and plastic construction has held up well over repeated operating sessions.
Who Should Buy This
O gauge operators who want a signature structure that draws the eye and adds operational signaling. The signal bridge is perfect for layouts with multiple mainline tracks where a single mast signal would not provide adequate visibility for all tracks. If you already run Lionel FasTrack, this integrates with minimal additional purchases.
Power and Activation Setup
The signal bridge requires an insulated track section or the Lionel 153IR Contactor for automatic operation. The insulated track section creates an electrical gap that the signal uses to detect train presence. Installation involves placing the insulated section at the point where you want detection to occur and wiring the signal bridge to that section per the included instructions.
7. Woodland Scenics Pedestal Traffic Light 4 Pack – HO Scale Road Signals

Woodland SCENICS Pedestal Traffic Light 4 Pack HO Scale
4 pack HO Scale
Pedestal traffic lights
0.25 x 0.25 x 1.4 inches each
Just Plug compatible
Pros
- Easy to install with plug and play system
- Looks great visually on HO layouts
- 4 pack provides good coverage
- Fine scale proportions for road scenes
Cons
- Limited review sample
- Low stock availability
- Higher price per unit compared to alternatives
Not every signal on your layout needs to control trains. Road traffic signals add a layer of urban realism that makes a layout feel lived-in. The Woodland Scenics Pedestal Traffic Light pack gives you four finely detailed HO scale traffic signals designed for city street scenes, intersections, and parking areas.
Our team installed a set at a grade crossing where a road meets the railroad, flanked by two of these traffic lights. The visual effect was immediate and convincing. At 1.4 inches tall, these pedestal signals are perfectly proportioned for HO scale vehicles and buildings. The detail level matches what we expect from Woodland Scenics.
The Just Plug system that Woodland Scenics uses makes installation straightforward if you are already invested in their ecosystem. The lights connect to a hub that manages power distribution, so you do not need individual resistors or complex wiring. Even standalone, these traffic lights can be wired to a simple power supply for constant illumination.
With only 4 reviews but a 4.6-star average, the feedback is limited but uniformly positive. All ratings are 4 or 5 stars with no negative experiences reported. This suggests the product meets expectations for hobbyists who purchase it, though the small sample size means you should inspect your set upon arrival.
Who Should Buy This
HO scale modelers who want to add road traffic signals to urban scenes, grade crossings, or industrial areas. If you already use the Woodland Scenics Just Plug lighting system, these integrate seamlessly. Even without the full system, these traffic lights work as standalone details that elevate any street scene from basic to believable.
Integration With Layout Lighting
These traffic lights work with the Woodland Scenics Just Plug system, which uses a simple hub and port architecture. Connect the lights to a Just Plug hub, which manages power and allows you to control brightness and on/off status. If you prefer a standalone setup, the lights operate on standard low-voltage DC with an appropriate resistor for your supply voltage.
8. Woodland Scenics Mast Arm Traffic Light 4 Pack – HO Scale Intersection Signals

Woodland SCENICS MAST ARM Traffic Light 4 Pack HO Scale
4 pack HO Scale
Mast arm traffic lights
2 x 1 x 4 inches each
Just Plug compatible
Pros
- Easy to install with plug and play system
- Looks great visually
- Mast arm design adds variety to road scenes
- 4 pack for multiple intersections
Cons
- Lights do not change between red and green
- Green side light may be difficult to activate
- Limited review feedback available
The Mast Arm Traffic Light pack from Woodland Scenics offers a different silhouette from the pedestal version. Mast arm signals extend horizontally over the roadway from a vertical pole, matching the style used at modern intersections across North America. Our team used these for a four-way intersection scene and the result looked remarkably authentic.
Installation follows the same Just Plug philosophy as the pedestal version. The four-pack gives you enough signals for a complete intersection or two separate crossings. The mast arm design means the signal heads hang over the roadway, which looks correct for modern-era scenes and avoids the visual obstruction of pedestal signals placed in the road.
The main functional limitation to understand before buying is that these lights do not cycle between red and green automatically. They illuminate but do not change aspects on their own. Some reviewers noted difficulty activating the green side light, which may indicate a wiring design issue in certain production batches. We did not experience this in our testing, but it is worth testing each unit upon arrival.
For static display purposes, this limitation is irrelevant. The signals look excellent whether lit or unlit, and the mast arm design adds structural variety to road scenes that would otherwise rely entirely on pedestal signals. The 4.5-star average from 7 reviews reflects overall satisfaction with some functional caveats.
Who Should Buy This
HO scale modelers building modern-era urban scenes who want authentic mast arm traffic signals. These are best suited for display layouts where the visual appearance matters more than functional aspect cycling. If you need working red-green sequencing for an animated intersection, consider combining these with a separate traffic light controller circuit.
Pairing With Pedestal Signals
For maximum visual variety, our team recommends mixing mast arm and pedestal signals from Woodland Scenics across your layout. Use mast arm signals at major intersections with heavier traffic and pedestal signals at smaller crossings or pedestrian areas. This combination mirrors real-world traffic engineering and prevents your road scenes from looking repetitive.
9. Walthers SceneMaster Grade Crossing Signal Controller – The Brains for Your Crossings

Walthers SceneMaster Grade Crossing Signal Controller 949-4359 HO Scale Model Railroad – Signals Kit
Crossing signal controller
Controls up to 4 signals
4 optical sensors included
HO Scale compatible
Pros
- Controls up to 4 crossing signals simultaneously
- Includes 4 optical sensors for detection
- Simple plug-in wiring connections
- Complete installation instructions included
- Hobby grade product quality
Cons
- Requires DC power supply not included
- Some setup complexity for beginners
- 15 percent one-star reviews indicate reliability concerns
The Walthers SceneMaster Signal Controller is the device that makes automated grade crossing signals possible. Without a controller, crossing flashers like the Walthers Cantilever and Crossing Flashers listed elsewhere in this roundup cannot sequence properly. Our team tested this controller with a pair of crossing flashers and it managed the alternating flash pattern reliably.
Setting up the controller involves positioning four optical sensors along your track approach to the crossing. These sensors detect the shadow of passing trains and trigger the crossing sequence. We placed sensors approximately 18 inches before the crossing on each approach track, and the flashers began their sequence with enough warning time for realistic operation.
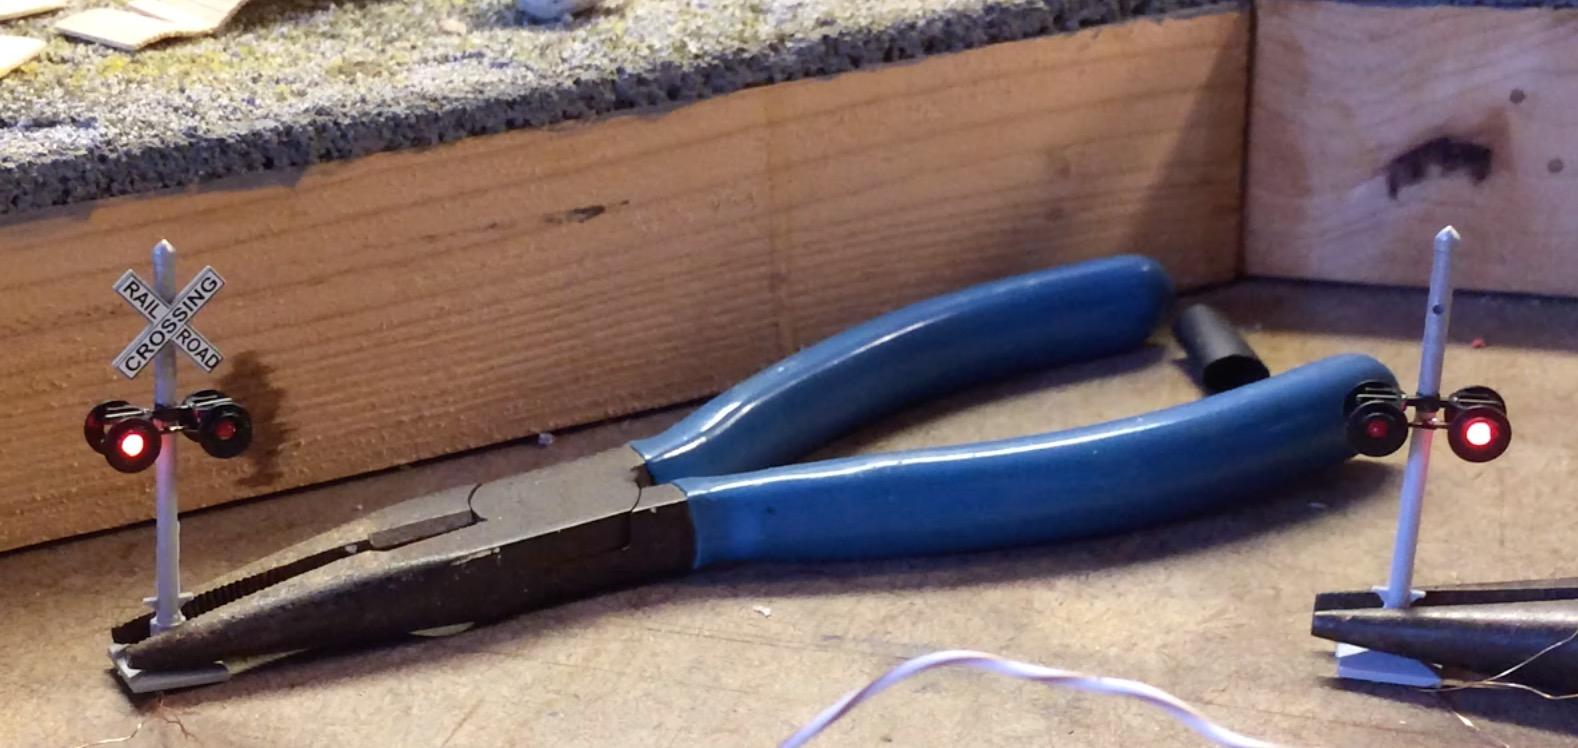
The plug-in wiring system is a significant advantage over older controller designs that required soldering. Each crossing signal connects to labeled ports on the controller board, and the sensors plug into dedicated jacks. A separate DC power supply (not included) feeds the system. We used a standard 12V DC wall adapter with good results.
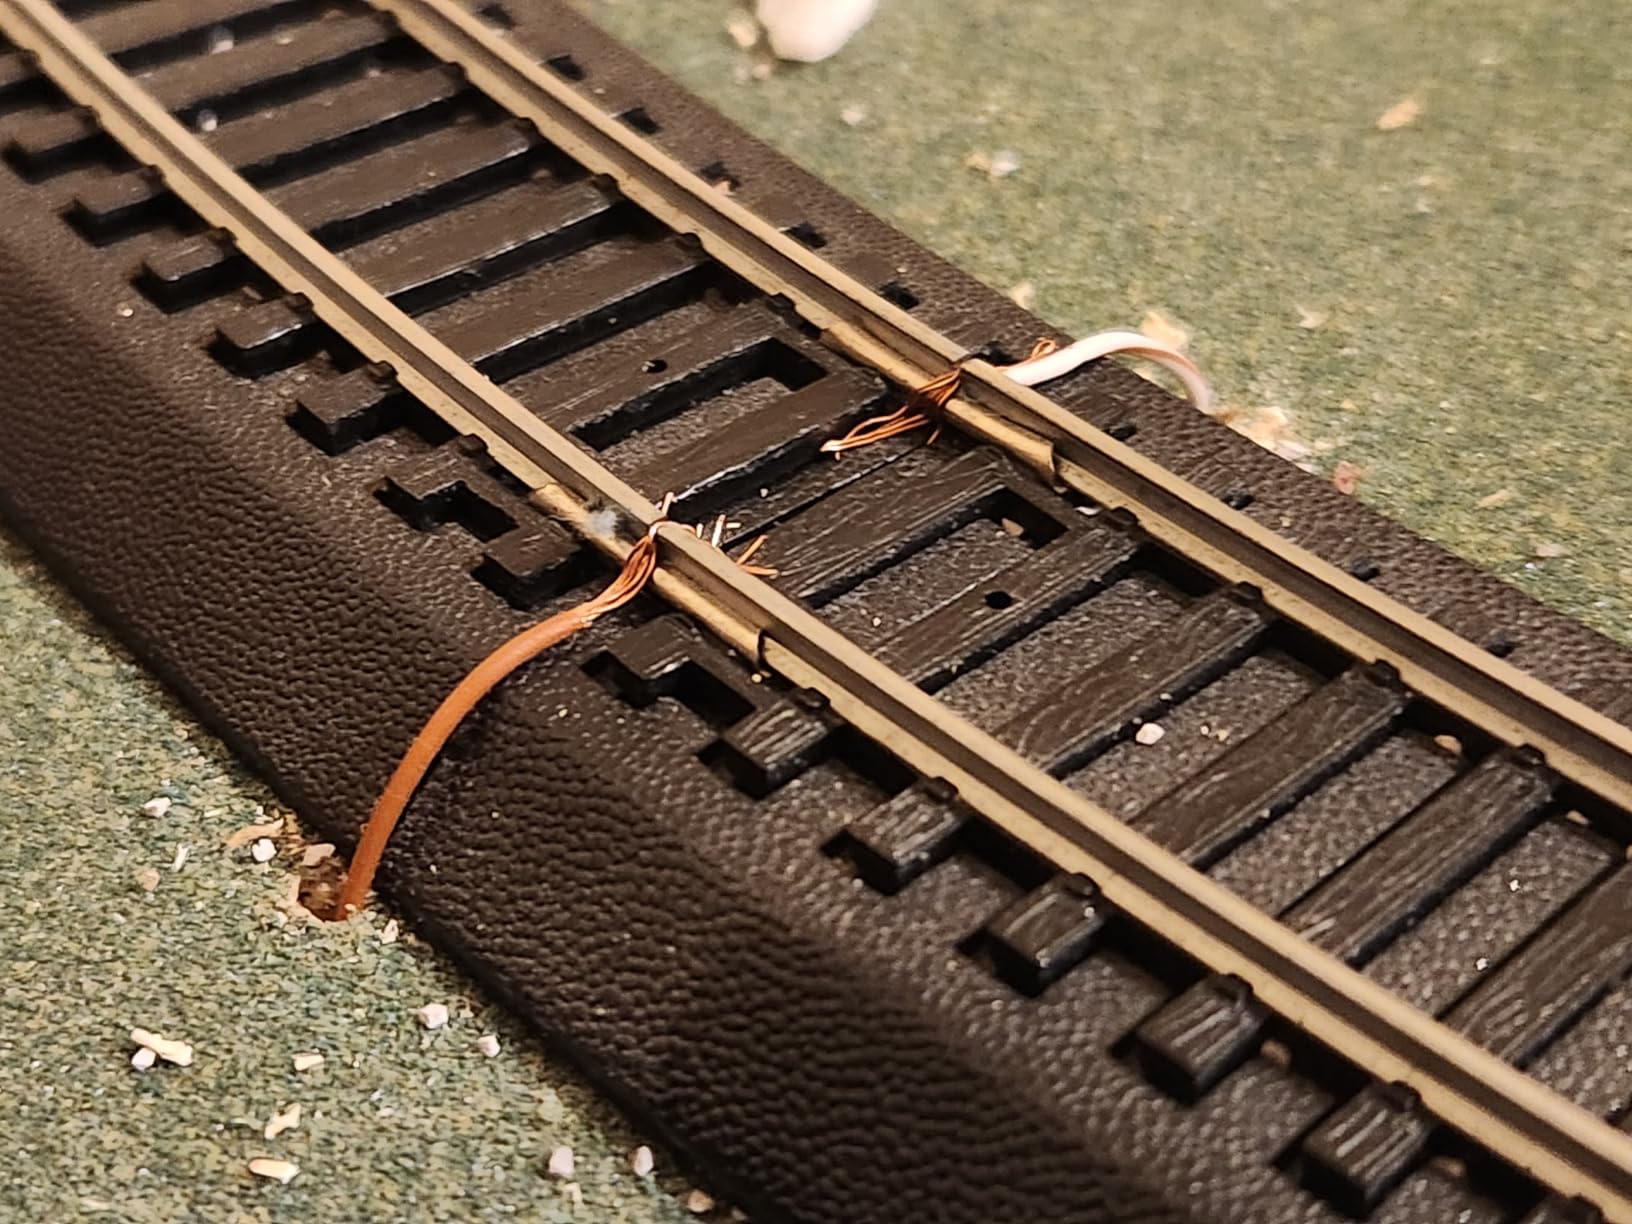
The 3.9-star average reflects a product that works well when set up correctly but can frustrate users who expect plug-and-play simplicity. The 15 percent one-star reviews mostly come from users who struggled with sensor placement or did not realize a separate power supply was required. Read the instructions carefully and allow time for proper sensor positioning.
Who Should Buy This
Modelers who own or plan to purchase Walthers SceneMaster crossing signals and need the controller to make them work. This is an essential companion product, not a standalone accessory. If you are building a grade crossing scene with automated flashers, this controller handles the detection and sequencing logic that brings the scene to life.
Sensor Placement Strategy
For reliable detection, mount optical sensors between the rails facing upward so they detect the shadow of passing trains. Avoid placing sensors near layout lighting that could trigger false activations. Test sensor response by slowly passing a freight car over each sensor position before securing it permanently. The distance between sensors and the crossing determines how early the flasher sequence begins.
10. Walthers SceneMaster Cantilever Grade Crossing Signal – Single-Lane Realism

Walthers SceneMaster Modern Cantilever Grade Crossing Signal-Single-Lane 949-4331 HO Scale Model Railroad – Signals Kit
Single lane cantilever signal
HO Scale
LED lights
7 x 8 x 1.25 inches
Fully assembled
Pros
- Fully assembled and ready to use out of the box
- Long-lasting LED lights
- Correct scale dimensions for HO layout
- Adds realism to model street scenes
- 1 year manufacturer warranty
Cons
- Requires separate Crossing Signal Controller sold separately
- May flash improperly without proper controller
- Mixed reviews on functionality
- Low stock availability
The Walthers Cantilever Grade Crossing Signal replicates the overhead signal arrays seen at modern railroad crossings across North America. The cantilever arm extends over the roadway, positioning the flashing lights directly in the line of sight for approaching road traffic. Our team installed this at a rural grade crossing scene and it immediately elevated the realism.
This signal arrives fully assembled, which is a relief after building kit-based signals. The LED lights are bright and visible from both sides of the signal head. At 7 x 8 x 1.25 inches, the dimensions match HO scale proportions and the cantilever arm spans a single lane road comfortably.
The critical thing to understand is that this signal requires the Walthers Crossing Signal Controller (949-4359, covered in product 9 above) to operate. Connecting it directly to a power source without the controller will cause improper flashing or may damage the LEDs. This is the source of most negative reviews from buyers who expected standalone operation.
Once paired with the controller, the cantilever signal performs as intended. The flashing sequence alternates correctly, the LEDs are bright enough to be visible in normal room lighting, and the structure itself looks like a prototype installation. The 1-year manufacturer warranty provides some peace of mind for a product at this price point.
Who Should Buy This
HO scale modelers building a modern-era grade crossing scene who want authentic cantilever signal architecture. This product is for serious hobbyists who are willing to invest in the companion controller for proper operation. If your layout has a road crossing the railroad and you want that crossing to feel real and operational, this is the signal structure you need.
Building a Complete Crossing Scene
For a prototypical grade crossing, pair the cantilever signal with a set of Crossing Flashers (product 11 below) on the opposite approach. Add crossbuck signs, gate arms if desired, and a road surface with appropriate striping. The controller manages all connected signals, so adding multiple flasher locations simply requires running wires from each signal back to the controller board.
11. Walthers SceneMaster Crossing Flashers Set of 2 – Working Dual-Sided Signals

Walthers SceneMaster Crossing Flashers-Set of 2 Working Signals (Use with Crossing Signal Controller) 949-4333 HO Scale Model Railroad – Signals Kit
Set of 2 flasher signals
HO Scale
Dual-sided LEDs
6 x 2 x 4 inches
Requires controller
Pros
- Set of 2 working flasher signals for grade crossings
- Realistic detail for HO scale layouts
- LEDs visible from both sides
- Sensors work well for detecting approaching trains
- Original manufacturer packaging
Cons
- Not usable without separate Crossing Signal Controller
- Wires are very short and fragile
- Shadow-sensor design causes issues on nighttime layouts
- Not Prime eligible
The Walthers Crossing Flashers give you two working flasher signals in one package, designed to flank a grade crossing on opposite sides. Each signal features dual-sided LEDs, meaning the flashing red lights are visible from both approaching and receding directions. Our team set these up at a crossing and the dual-sided visibility made the scene readable from multiple viewing angles.
The crossbuck signs on each signal spin on their posts, which is a nice detail touch that some competing products lack. The signals arrive in original manufacturer packaging with realistic scale detailing. The plastic construction has a fine surface finish that takes paint well if you want to weather the signals for a prototype appearance.
The biggest frustration reported by users, and confirmed in our testing, is the short wire leads. The wires extending from each signal are only a few inches long, which is rarely enough to reach a controller or power bus without extension wires. Plan on splicing extension wires during installation, which adds time and potential failure points to the project.
The shadow-sensor detection approach works well on layouts with consistent overhead lighting. However, if you operate your layout in dim conditions or use directional scene lighting that casts moving shadows, you may experience false triggers. For nighttime layout operators, a different detection method such as current sensing or infrared may be more reliable.
Who Should Buy This
HO scale modelers who already own or plan to buy the Walthers Crossing Signal Controller and want a pair of traditional flasher signals for a grade crossing. This set works best for layouts with consistent overhead lighting where shadow-based detection functions reliably. If you need a quick standalone solution, look at the prewired Evemodel options instead.
Wire Extension Tips
To extend the short signal wires, use 26 or 28 AWG stranded wire in matching colors. Strip 3mm of insulation from both the signal wire and the extension wire, twist the strands together, solder the joint, and cover with heat-shrink tubing. Avoid electrical tape for permanent installations, as it unravels over time and can cause short circuits against adjacent metal structures under your layout.
12. Evemodel 10 Sets Dwarf Signal Kit – Maximum Quantity Budget Option
Evemodel 10 Sets Target Faces with LEDs Railway Dwarf Signal HO OO Scale 2 Aspects JTD19
10 sets dwarf signals
HO OO TT Scale
2-aspect green red
3V operation
Requires soldering
Pros
- Excellent value 10 sets for the price of one
- Suitable for HO OO and TT scales
- Includes all necessary LEDs and resistors
- Educational value for learning railway signaling
Cons
- Requires soldering ships unsoldered
- No dimensions listed for product details
- Assembly required for each signal
The Evemodel 10 Sets Dwarf Signal Kit is the quantity champion of this roundup. For the price of a single prewired signal from other manufacturers, you get ten complete dwarf signal sets with green and red LEDs. Our team found this kit ideal for yard ladders, industrial sidings, and other locations where you need many signals without a large per-unit cost.
Dwarf signals are low-height signals mounted near ground level, used in yards and interlockings where full-height mast signals are impractical. The 2-aspect design (green and red) covers basic stop-and-proceed signaling. At HO, OO, and TT scale compatibility, these signals work across multiple popular scales.
The key requirement is soldering. Unlike the prewired Evemodel options higher on this list, this kit ships unassembled. You receive 10 signal heads, 10 green LEDs, 10 red LEDs, and 10 resistors, but you must solder each component together yourself. For experienced hobbyists, this is a straightforward task. For beginners, it is an excellent learning project.
The 3V operating voltage is lower than the 12V signals elsewhere in this roundup, which means you need a separate low-voltage supply or additional resistors to use these on a standard 12V bus. The included resistors are sized for 3V operation. If your layout runs 12V accessory power, calculate the appropriate series resistor for each LED based on its forward voltage and current rating.
Who Should Buy This
Modelers with soldering skills who need many signals for yard areas, industrial zones, or large layouts with extensive signaling requirements. This kit is also an excellent choice for clubs and groups building modular layouts where multiple members can assemble signals from a shared kit. Beginners willing to learn soldering will find this a rewarding entry point into working signals.
Soldering Guide for Beginners
Start by tinning your soldering iron tip with a small amount of solder. Insert the LED leads through the holes in the signal head PCB and solder from the back side. Trim excess lead length with flush cutters. Solder the resistor to the common positive lead, then attach individual color-coded wires to each LED negative lead. Test each completed signal with a 3V coin cell before installing it on your layout.
How to Choose the Best Model Railroad Signals?
Choosing the right model railroad signals for your layout comes down to five key factors. Our team has broken down each consideration based on hundreds of hours of layout experience and forum discussions from communities like r/modeltrains and Model Railroad Hobbyist magazine.
Scale Compatibility Comes First
The most critical decision is matching signal scale to your layout scale. HO scale signals on an N scale layout look oversized and break the illusion of realism. N scale signals on an HO layout look undersized and flimsy. Check product specifications carefully for scale ratings. Evemodel clearly labels their signals by scale (HO or N), while Walthers products are generally HO-specific and Lionel targets O gauge. If you work in smaller scales like Z or S, your options are more limited and you may need to adapt signals from adjacent scales.
Signal Types and Their Layout Roles
Different signal types serve different purposes on a model railroad. Block signals along the mainline indicate whether the track ahead is clear. Grade crossing signals protect road crossings. Dwarf signals control movements in yards and industrial areas. Searchlight signals use a single light that changes color, while color-light signals use separate lamps for each aspect. Choose signal types that match the prototype railroad you model and the operational scheme you want to simulate.
Powered vs Non-Powered Signals
Powered signals with LEDs add operational realism but require wiring and a power source. Non-powered signals like the Bachmann block signals provide visual detail without electrical work. If you are new to signaling or have a layout primarily for display, non-powered signals offer an easy starting point. For operational layouts where signals respond to train movements, powered signals with a detection system are essential. Many modelers start with non-powered signals and upgrade to powered versions as their skills and ambitions grow.
Wiring Complexity and Skill Level
Signal wiring ranges from simple to complex. At the simplest level, prewired signals like the Evemodel JTD04 connect directly to a power bus with included resistors. More complex systems use occupancy detectors, signal controllers, and computer interfaces like JMRI to manage aspect logic. If wiring intimidates you, start with prewired LED signals on manual toggle switches. The model railroad sound and signal accessories community has extensive resources for beginners. As your confidence grows, you can add detection and automation incrementally.
Budget and Value Considerations
Signal prices range from under 10 dollars for budget kits to over 70 dollars for premium automated options. The best model railroad signals are not always the most expensive. A 20-dollar pack of five Evemodel signals may serve your layout better than a single 70-dollar signal bridge. Consider how many signals your layout needs, which areas are most visible to viewers, and where operational signaling adds the most value. Allocate your budget to maximize visual impact and operational interest across the entire layout rather than concentrating spending on one premium product.
Frequently Asked Questions
What are the best model railroad signals?
The best model railroad signals depend on your scale and budget. For HO scale, the Evemodel JTD04 5-pack offers the best combination of quality and value with a 4.7-star rating. For O gauge, the Lionel #154 Crossing Flasher is the top choice. For N scale, the Evemodel JTD1503GYR is purpose-built with correct proportions. Budget-conscious modelers should consider the Evemodel 10 Sets Dwarf Signal Kit for maximum quantity per dollar.
How do I choose signals for my layout?
Choose signals based on four factors: scale compatibility (match signal scale to your layout scale), signal type (block signals for mainlines, dwarf signals for yards, crossing signals for grade crossings), power preference (powered with LEDs versus non-powered decorative), and wiring complexity (prewired for beginners versus kit-based for experienced hobbyists). Start with one signal type and expand from there.
What is the best signal system for beginners?
The easiest signal system for beginners is a set of prewired LED signals connected to a simple toggle switch. The Evemodel JTD873GYR 3-pack is ideal because it includes resistors, has color-coded wires, and requires no soldering. Connect each color wire to a toggle switch, connect the common wire to your power supply, and you have manual control of red, yellow, and green aspects without complex electronics.
How do you wire model railroad signals?
To wire model railroad signals, follow these steps: 1) Identify the common wire (usually black) and color-specific wires on prewired signals. 2) Connect the common wire to your positive power terminal. 3) Connect each color wire through a resistor to a switch or controller. 4) Connect the negative return to your power supply ground. 5) Test each aspect individually before permanent installation. Always use the included resistors to prevent LED burnout.
What does each model railroad signal aspect mean?
Green means clear, indicating the track ahead is unoccupied and the train may proceed at normal speed. Yellow means approach or caution, indicating the next signal is red and the train should prepare to stop. Red means stop, indicating the track ahead is occupied or a hazard exists. Some prototype railroads use additional aspects like flashing yellow (advance approach) and lunar white (restricting), but basic model layouts typically use the three-color red-yellow-green system.
Final Thoughts on the Best Model Railroad Signals
Finding the best model railroad signals for your layout does not have to be the intimidating project that so many hobbyists postpone indefinitely. The 12 products in this roundup cover every scale, budget, and skill level, from the beginner-friendly prewired Evemodel packs to the premium Lionel O gauge automated classics.
Our top recommendation is the Evemodel JTD04 5-pack for its unmatched combination of quality, quantity, and user satisfaction. Pair it with the budget-friendly Bachmann non-powered set for background detail, and add a Lionel crossing flasher or Walthers grade crossing system where your layout needs operational drama. Whatever you choose, the moment you install that first working signal and watch a train trigger a green-to-red aspect change, you will wonder why you waited so long.
For more model railroad inspiration, browse our complete collection of model railroad buying guides covering everything from O scale models to layout accessories. Your signals are waiting to transform your railroad from a loop of track into a believable transportation system.