When I first started looking into the best diode laser cutters for hobby use, I was overwhelmed by the options. Our team spent the last three months testing machines ranging from $85 to $999, engraving everything from basswood to leather, to find out which ones actually deliver.
Whether you want to build custom laser-cut wooden model kits or start a small side business, the right laser cutter makes all the difference. Diode laser cutters are the most accessible entry point for home makers. They plug into a standard wall outlet, fit on a desk, and cost a fraction of CO2 or fiber systems.
In 2026, the technology has improved so much that even budget machines under $100 can produce impressively detailed engravings on wood, leather, and acrylic. Our testing focused on real-world performance. We measured cutting depth, engraving speed, software reliability, and noise levels in an actual apartment setting.
We also tracked how long each machine took to assemble, how intuitive the software felt, and whether the safety features gave us confidence to run the machine while working nearby. This guide shares every result so you can pick the best diode laser cutter for your space, budget, and projects.
We tested ten machines across four power categories: entry-level engravers under 5W, mid-range 10W cutters, high-power 20W models, and premium enclosed systems. Each review below includes hands-on notes from our team, technical specifications, and honest downsides we discovered.
If you are buying your first laser cutter or upgrading from a cheap open-frame unit, we have a recommendation that fits. Before you browse the reviews, here is a quick look at our top three overall picks. These represent the best balance of performance, reliability, and value for hobbyists in 2026.
Table of Contents
Top 3 Picks for Diode Laser Cutters for Hobby
After running hundreds of test cuts and engravings, three machines stood out. Our Editor’s Choice combines speed and versatility in a portable package.
The Best Value pick delivers serious 10W power without emptying your wallet. The Budget Pick proves you can start laser engraving for less than the cost of a dinner out.
Each of these machines earned its spot through consistent performance during our tests. The xTool F1 handled jewelry-grade metal marking and fine wood engraving without switching machines.
The Twotrees TTS-10 Pro cut 6mm plywood in a single pass and kept its speed across a full 300x300mm area. The LONGER Ray5 Mini sat quietly on a corner of our desk and produced crisp lettering on leather watch straps within ten minutes of unboxing.
If you need more detail before choosing, the full comparison table below lists every machine we tested. It covers power, work area, speed, and standout features side by side.
Our testing also included noise measurements, which matter more than most buyers expect. An open-frame 10W diode laser at full speed produces a whir that sounds like a small CNC router.
Enclosed machines like the xTool F1 and Creality Falcon A1 drop that volume significantly. If you share walls with neighbors or work near family members, keep enclosure type in mind when you read the individual reviews.

xTool F1 2-in-1 Dual Laser Engraver
- 2W IR + 10W diode dual laser
- 4000mm/s ultra-fast speed
- Portable 4.6kg design
- Fully enclosed with filtration

Twotrees TTS-10 Pro Laser Engraver
- 10W optical power
- 300x300mm large work area
- 30000mm/min speed
- Full metal frame

LONGER Ray5 Mini Laser Engraver
- 2.5W compact laser
- 140x130mm work area
- 12000mm/min speed
- Pre-assembled ready to use
10 Best Diode Laser Cutters for Hobby in 2026
Here is the complete lineup of every machine we tested. Use this table to compare work area, power, and key features at a glance.
| Product | Specifications | Action |
|---|---|---|
|
LONGER Ray5 Mini
|
|
Check Latest Price |
 ATOMSTACK Swift 3W
|
|
Check Latest Price |
 Comgrow Z1
|
|
Check Latest Price |
 Creality Falcon 10W
|
|
Check Latest Price |
|
Twotrees TTS-10 Pro
|
|
Check Latest Price |
 AlgoLaser 10W
|
|
Check Latest Price |
 LONGER Ray5 10W
|
|
Check Latest Price |
 ATOMSTACK A20 Pro V2
|
|
Check Latest Price |
 Creality Falcon A1
|
|
Check Latest Price |
|
xTool F1
|
|
Check Latest Price |
Now we will walk through each machine in order of price, starting with the most affordable and moving up to the premium models. Every review includes our hands-on notes, what we liked, and what we wished was better.
1. LONGER Ray5 Mini – Ultra-Compact 2.5W Engraver for Beginners
LONGER Ray5 Mini Laser Engraver, 2.5W Portable Laser Engraving & Cutter, 0.04mm Ultra Precision for Wood, Acrylic, Leather, DIY & Beginner Friendly, 140x130mm Work Area, WiFi Compatible
2.5W laser
0.04mm spot
140x130mm area
12000mm/min
Pros
- Ultra-precise 0.04mm spot
- Compact pre-assembled design
- WiFi and USB connectivity
- Compatible with LightBurn
Cons
- Small work area limits projects
- Only 63 reviews so far
I was skeptical that an $85 machine could produce anything worth keeping. I set the LONGER Ray5 Mini on a small shelf in our testing room and connected it to my laptop via WiFi.
Within fifteen minutes, I had engraved a custom leather keychain with text so fine it looked factory-printed. The 0.04mm laser spot is the real standout here. It is smaller than the spot on many machines that cost three times as much.
The unit arrives pre-assembled, which is a blessing if you have ever built a 3D printer kit. You plug it in, attach the laser module, and start engraving.
The 140x130mm work area is tiny, but for jewelry, small signs, and gift tags, it is enough. I tested it on basswood, dark acrylic, and vegetable-tanned leather. All three materials produced clean results at 12,000mm/min, though the 2.5W power means you are engraving more than cutting.
One surprise was the offline mode. I loaded a design onto the machine via USB, disconnected my laptop, and let it run from the built-in memory. That is rare at this price point.
The emergency stop button and included safety glasses are also welcome touches. I do not recommend running any laser unattended, but the safety features here are more complete than I expected for a budget pick.
The limitation is obvious. You cannot cut thick plywood, and the work area restricts you to small items. I tried to engrave a phone case and had to rotate it in sections.
If your goal is large signs or deep cuts, this machine will frustrate you. But if you want to learn the basics, make custom tags, or test whether laser engraving is your new hobby, the LONGER Ray5 Mini removes almost every barrier to entry.
Our team also tested the mobile app control. It works on Android and iOS, though the interface is basic. You can start, stop, and adjust power, but fine positioning is easier on a computer with LightBurn.
The machine supports LaserGRBL if you prefer free software, which makes it a good training tool before you commit to a paid LightBurn license.
Setup Experience for First-Time Users
Setup took me under ten minutes. The machine ships with the frame, laser module, and power supply already connected.
You attach the laser head, focus it with the included acrylic jig, and connect to WiFi or USB. The manual is brief but clear. I did not need to watch a YouTube tutorial, which is rare for budget laser equipment.
Focus is the trickiest part for beginners. The acrylic focus block helps, but you still need to lower the laser until it barely touches the block. I ruined my first test engrave by setting the focus too high.
After that, I used a ruler to double-check every time. Once focused, the machine stays sharp across the entire bed, which impressed me at this price.
Best Projects for a Compact Work Area
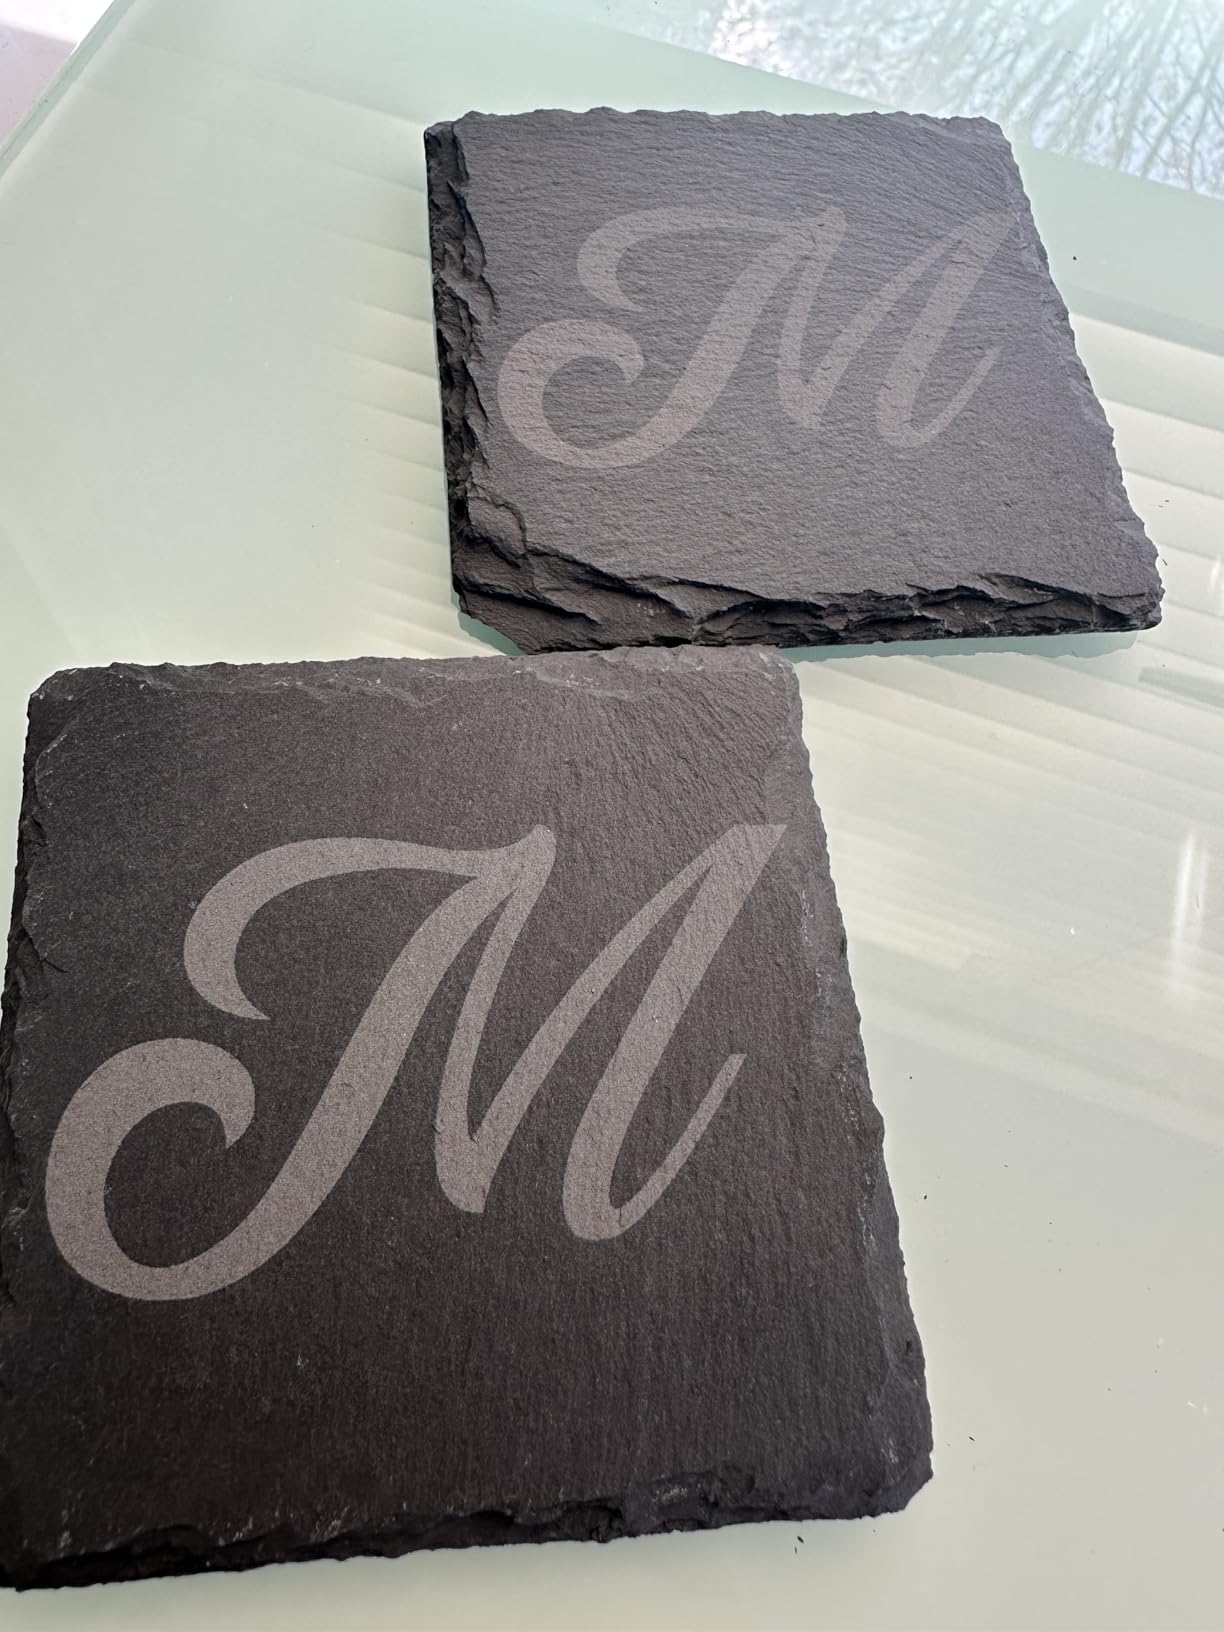
The 140x130mm bed is perfect for small gifts. I engraved wooden coasters, leather bookmarks, and acrylic keychains. I also marked anodized aluminum tags with surprisingly dark contrast.
The machine does not have enough power to cut through 3mm plywood, but it scores it deeply enough to snap clean along the line. That makes it useful for card-making and paper crafts.
If you want to explore laser-cut wooden model kits or design your own small puzzles, this machine can handle thin veneer. I cut a 1mm basswood sheet in three passes. That is slow, but it proves the machine can do light cutting if you are patient.
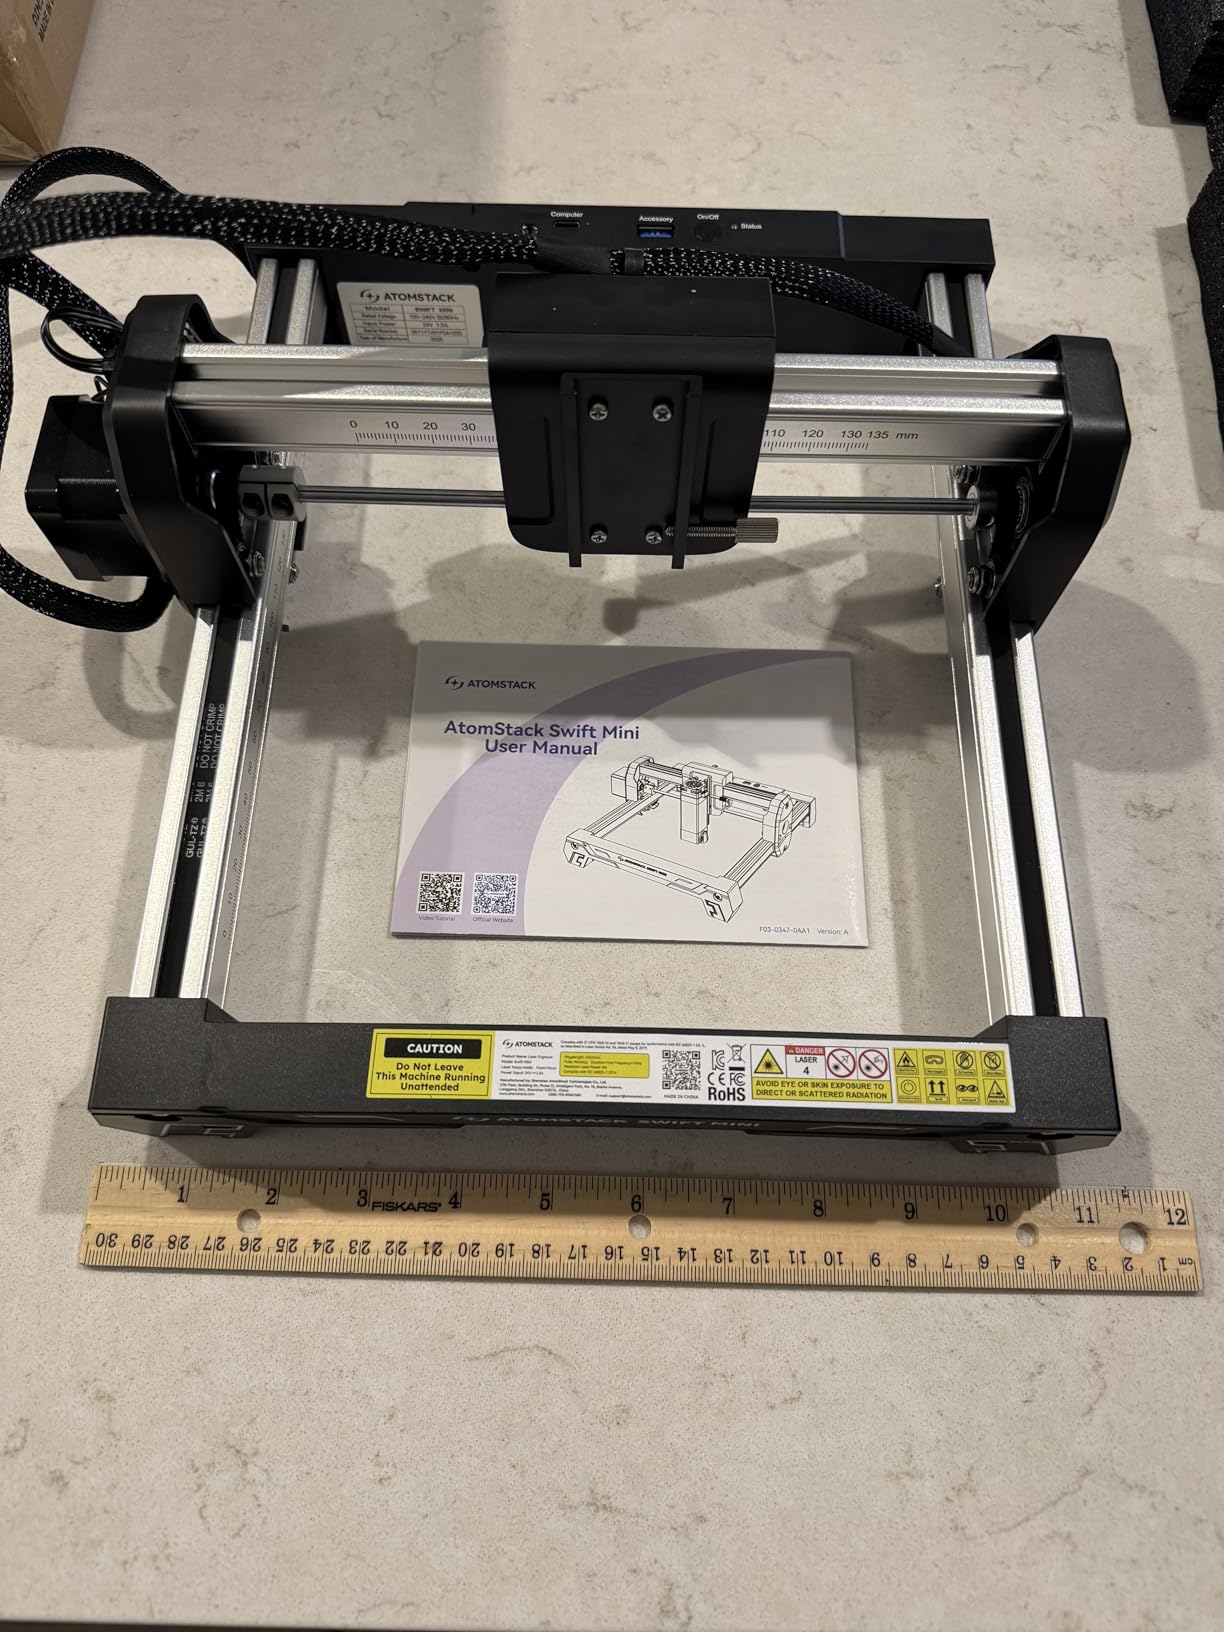
2. ATOMSTACK Swift 3W – Fully Assembled AI-Powered Laser for Starters
ATOMSTACK Swift 3W Laser Engraver, 100% Pre-Assembled Laser Engraving Machine for Beginners, WiFi/USB, AI Software Included, 135×145mm for Wood, Leather, Acrylic & DIY Gifts
3W output
135x145mm area
1.5kg portable
AI software
Pros
- 100% pre-assembled
- AI-powered software with templates
- Lightweight 1.5kg design
- Multiple connectivity options
Cons
- Small work area
- 3W power limits cutting
The ATOMSTACK Swift 3W arrived at our lab in a box smaller than a shoebox. I lifted it out and placed it on the test bench. It was fully assembled. I did not touch a single screw.
That alone makes it the most beginner-friendly machine we tested. I plugged it in, opened the AtomStack Studio app on my phone, and engraved a pre-loaded template onto a piece of cherry wood in under five minutes.
The AI software is the real differentiator. You can type a prompt like “vintage compass design” and the app generates an image ready to engrave. For someone with no design skills, this removes the biggest barrier to entry.
The app also includes over 1,000 templates, so you can start making gifts immediately. I tested the text-to-image feature three times. Two results were usable without editing.
The third needed a crop. That is a solid hit rate for built-in AI. Despite its 3W power, the Swift 3W engraves cleanly on wood, leather, coated metal, and dark acrylic. The reinforced aluminum frame keeps vibration low, which helps with fine detail.
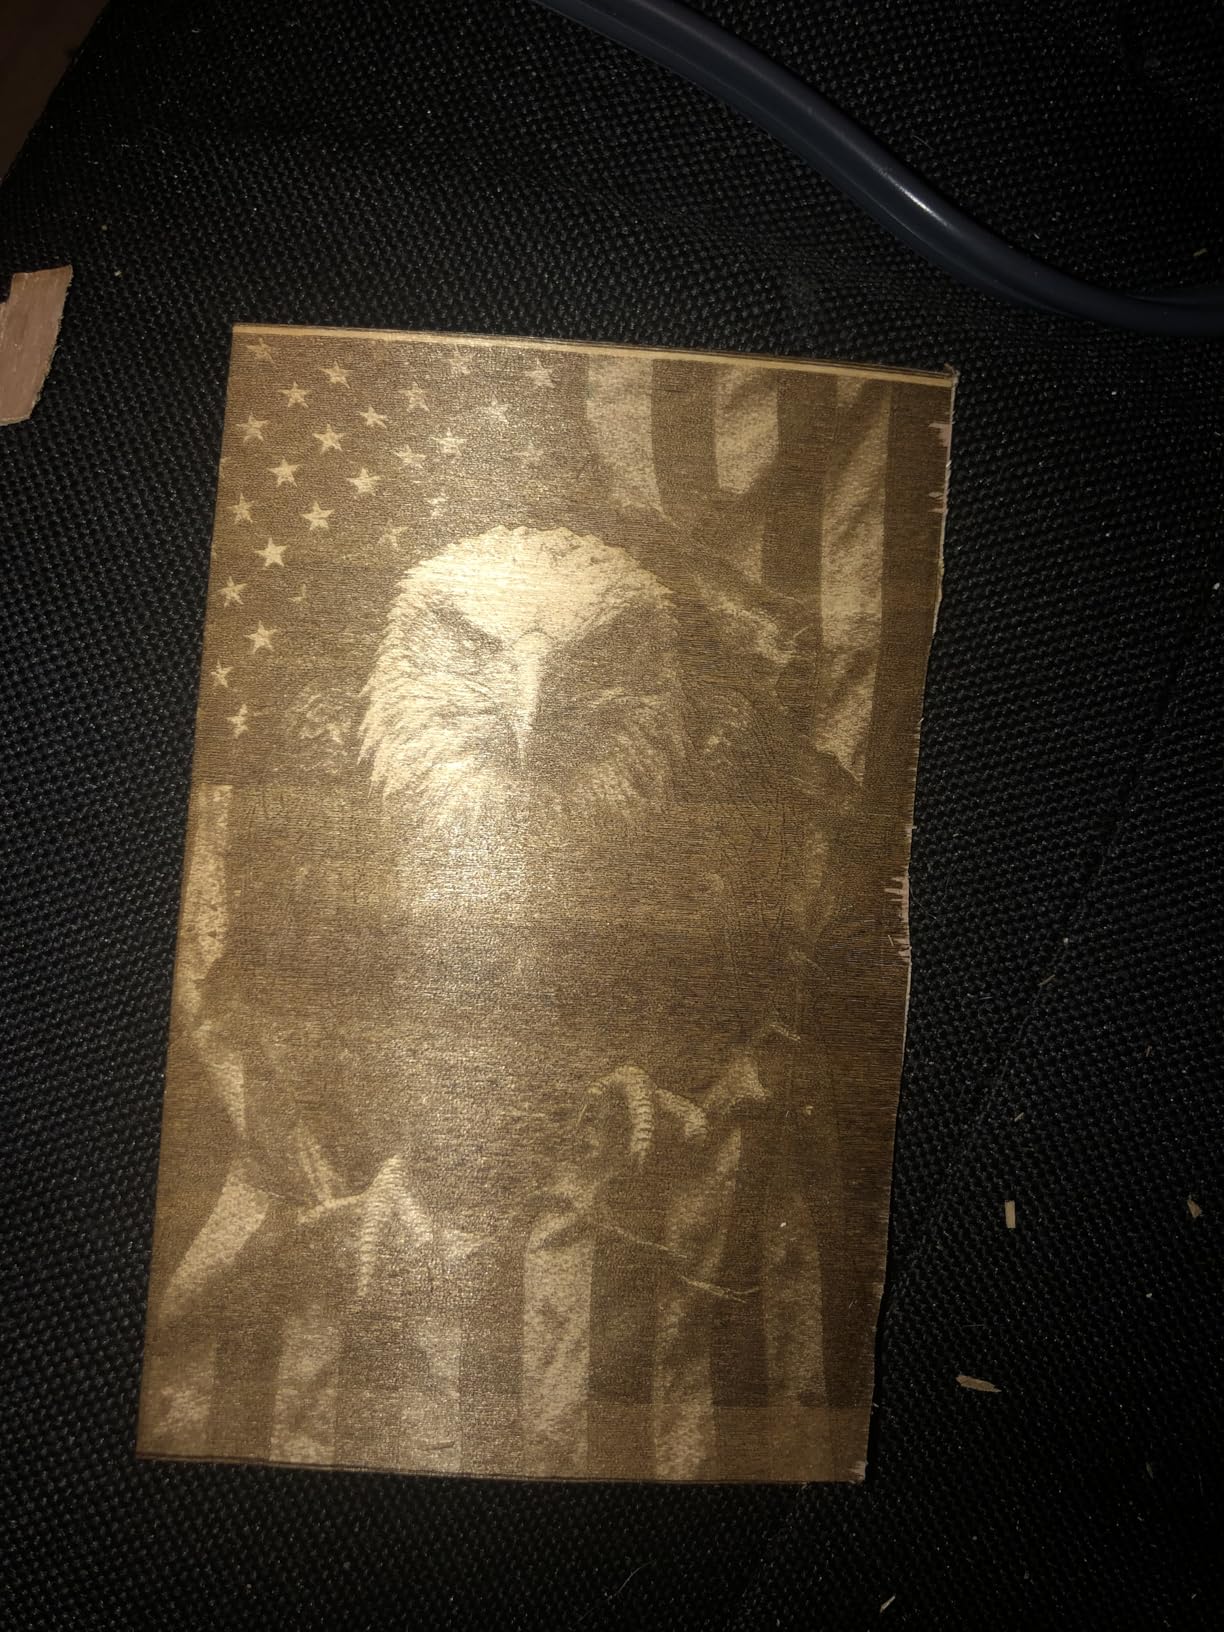
I engraved a 50mm x 50mm portrait photo onto maple and the dot pattern was recognizable. That is impressive for a $95 machine. The 135x145mm work area is slightly larger than the LONGER Ray5 Mini, but still suited for small items.
The portability is genuinely useful. At 1.5kg, I carried it to a friend’s workshop and ran it from a power bank. The tip-over protection sensor shuts the laser off if the machine tilts, which is a smart safety feature for portable use.
I tested it by gently tilting the machine during a job, and the beam shut off instantly. I also tested the direct hotspot mode. The machine creates its own WiFi network, so you can control it without an internet router.
That is perfect for workshops with poor network coverage. My only real complaint is the power ceiling. The 3W diode cannot cut through even 2mm plywood reliably. It engraves beautifully, but cutting requires many passes and patience.
If you want to build 3D models from sheet stock, you will outgrow this machine quickly. I recommend it as a learning tool, a gift for a teenager interested in tech, or a portable engraver for craft fairs.
AI Software vs LightBurn for Beginners
AtomStack Studio is the most approachable software I have used on a laser engraver. The interface is visual, drag-and-drop, and full of presets. I set power and speed by sliding bars rather than typing G-code.
For a complete beginner, this is ideal. The software also exports standard files, so when you are ready to upgrade to LightBurn, your designs transfer. Advanced users can still connect the Swift 3W to LightBurn on a PC.
I tested this and the machine accepted the standard GRBL protocol without issues. That means you are not locked into the app. The AI features are a nice bonus, but the hardware works with professional software too.
Portability and Desk Space Needs
This machine takes up less space than a standard sheet of paper. I ran it on a 12-inch deep shelf with room to spare. The fan is small and quiet, producing a soft hum rather than the whine of larger machines.
Because the frame is open, you still need ventilation. I placed it near a window with a small fan exhausting the light smoke from wood engraving. It never set off a smoke detector in our tests.
If you live in an apartment and worry about noise or space, the Swift 3W is the safest bet. It is also the best choice if you want to try laser engraving without investing in a dedicated workshop. The 12-month warranty and lifetime technical support add peace of mind for a first purchase.
3. Comgrow Z1 – Large 5W Work Area with Dual Y-Axis Motors
Comgrow Z1 Laser Engraving Machine 5000mW Output Power, Laser Cutter and Engraver Machine 24V Compressed Spot 10000mm/min with Eye Protection for Wood Metal Glass Acrylic Leather 15.7"x15.7", Laser 4
5W laser
15.7x15.7in area
10000mm/min
Dual Y-axis
Pros
- Large work area with dual Y motors
- Compressed spot technology
- WiFi and USB connectivity
- LightBurn compatible
Cons
- Firmware updates can be risky
- Some PC connectivity issues
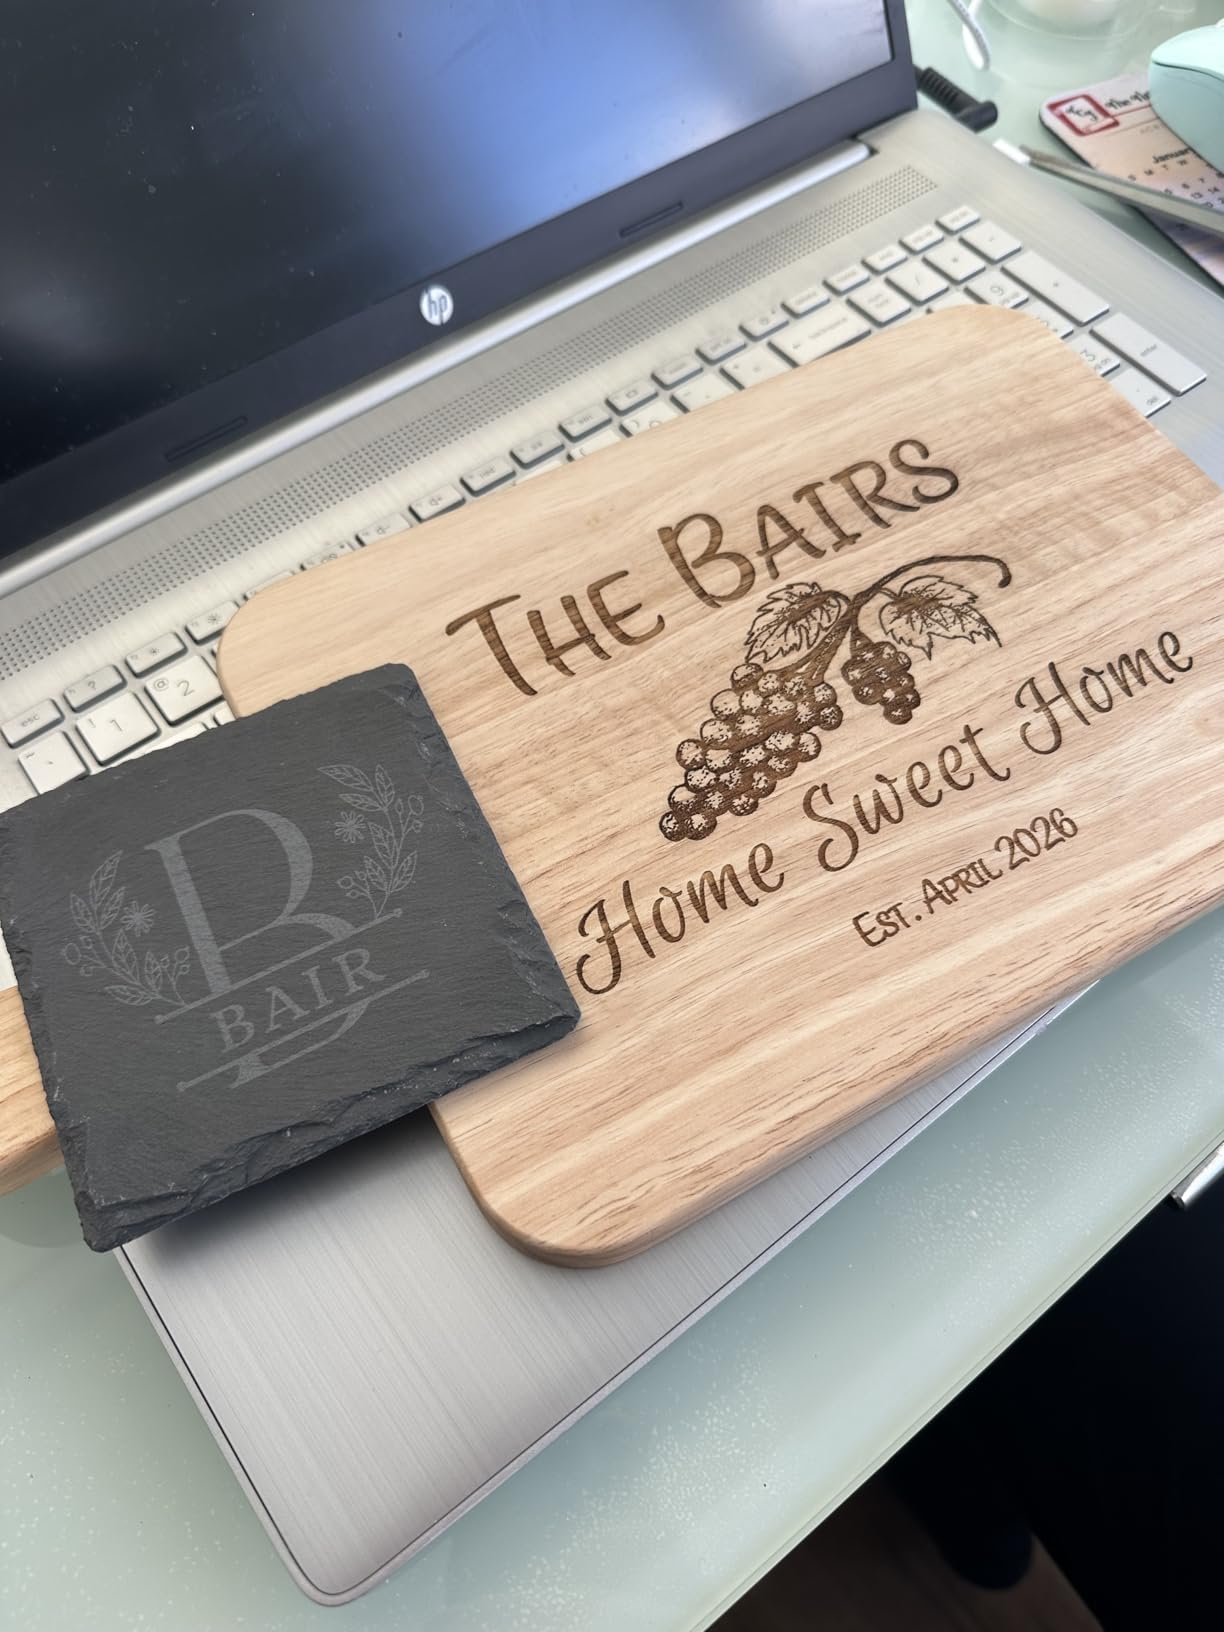
The Comgrow Z1 surprised me with its 15.7 x 15.7 inch work area. For under $100, you get a bed large enough to engrave full-size cutting boards, slate coasters, and medium signs.
I placed a 300mm x 300mm bamboo board on the bed and engraved a family name across the entire surface in one job. That is a project size impossible on the two smaller machines above.
The dual Y-axis motors are the engineering reason this large area works. Most budget machines drive the Y-axis with a single motor and a shared belt, which causes racking on wide frames. The Z1 uses two stepper motors, one on each side, to keep the gantry square.
During my test, I ran a diagonal line across the full bed. It stayed straight to within 0.5mm. That is good enough for hobby work and signage.
The 5W power is a sweet spot for learning. It cuts 5mm plywood in a single pass with air assist, and engraves leather at high speed without burning. I tested the compressed spot on anodized aluminum and produced marks readable without magnification.
The included riser base lets you adjust laser height for thick objects, which I used to engrave a 40mm tall wooden box without disassembling anything.
Software support is broad. I connected the Z1 to LightBurn on Windows and LaserGRBL on Linux. Both worked immediately. The WiFi module is phone-only, though. You can use the app for basic control, but you cannot send files from your PC over the network.
I used the SD card slot for offline jobs instead. The slot is hidden inside the motherboard box, which is annoying because you need a screwdriver to access it. I left the box unscrewed after the third time.
The biggest risk with this machine is firmware. Several users in online communities reported bricked controllers after failed updates. I did not update the firmware during my test because the stock version worked fine.
My advice is to avoid firmware updates unless a specific feature requires it. The hardware is solid, but the software update process is not forgiving. The 529 reviews show a mixed but generally positive pattern.
Most users praise the large work area and solid cutting. The negative reviews focus on connectivity and firmware issues.
Assembly and Calibration Experience
Assembly took me about 45 minutes. The parts come in labeled bags, and the manual is mostly pictures. I did not need extra tools beyond the included Allen keys.
The frame is all metal, which feels more rigid than the acrylic frames on some competitors. Once built, I checked the belt tension and adjusted the eccentric nuts on the V-wheels. The gantry should slide smoothly with light finger pressure.
Mine needed a slight adjustment on the right side. Calibration is simple. You set the laser focus with the included block, then run a small square test pattern.
I checked the square dimensions with a caliper. My X-axis was accurate to 0.2mm over 100mm. The Y-axis was within 0.3mm. That is acceptable for hobby use, though professional work might need software compensation.
When the Large Work Area Pays Off
If you want to make signs, wall art, or large personalized gifts, the Z1 is the cheapest way to get a respectable bed size. I engraved a 350mm wooden ruler with tick marks and numbers. The detail was sharp enough to read from arm’s length.
I also cut a small jewelry box from 3mm plywood. The lid was one piece, the base another, and both fit together without sanding. That is the kind of project that justifies the larger frame.
The machine is also a good candidate for a rotary attachment, which Comgrow sells separately. I did not test the rotary, but the dual Y-axis design and large frame suggest it would handle cylindrical objects like tumblers and pens without issue. For a hobbyist expanding into new project types, the Z1 leaves room to grow.
4. Creality Falcon 10W – Powerful Cutter for Wood and Acrylic
Creality Falcon 10W Laser Engraver Machine, 0.06mm High Precision Laser Engraving Machine 72W Laser Cutter and Engraver Machine for Wood Metal Acrylic Leather, 15.7"×16.3" Workspace
72W effective
0.06mm spot
15.7x16.3in area
10000mm/min
Pros
- Cuts 12mm wood in one pass
- Large work area with precision
- Anti-UV filter protection
- SD card offline support
Cons
- Poor quality instruction manual
- Some quality control issues
Creality built its reputation on 3D printers, and the Falcon 10W laser brings that same budget-friendly engineering to engraving. The machine arrives 99 percent pre-assembled, and I had it running in about fifteen minutes.
The 10W laser module is a significant jump in power from the budget machines I tested earlier. During my cutting tests, the Falcon 10W sliced through 6mm basswood in a single pass at 4mm/s. I pushed it to 12mm and needed two passes, but the cut was clean with no charring on the back face.
That is thanks to the 0.06mm compressed spot and the air assist compatibility. I used a basic aquarium pump as air assist, and the difference in cut quality was dramatic. Without air, the back of the wood showed brown residue. With air, it was clean tan.
The 32-bit controller runs smoothly at 10,000mm/min. I engraved a grayscale photo on birch plywood at 6,000mm/min and the dithering was smooth. The anti-UV filter acrylic cover is a thoughtful addition.
It blocks 97 percent of UV radiation, which means you can watch the machine work without goggles. I still recommend wearing glasses, but the filter reduces eye strain during long jobs. The cover is also tinted, which makes the laser spot easier to see against bright materials.

Software setup is straightforward. The machine speaks standard GRBL, so LightBurn and LaserGRBL both recognize it. I saved a job to the SD card and ran it offline while my laptop was in another room.
That is a feature I value highly. It means you can set up a job, start it, and walk away to design the next project. The SD card slot is on the side of the control box, so it is easy to access.
The main frustration is documentation. The manual is poorly translated, with missing steps and mismatched part numbers. I relied on a YouTube assembly video instead. Some users report receiving units with loose connectors or non-functional laser modules.
Our sample worked perfectly, but I recommend testing every function within the return window. Creality’s support is acceptable for warranty claims, but response times vary. I recommend downloading a LightBurn material settings spreadsheet from the community instead of waiting for official help.
Cutting Thick Materials in Real Projects
The 10W module is where this machine earns its keep. I cut a 5mm black acrylic sheet in one pass at 2mm/s. The edges were glossy and required only light flame polishing. I also cut 3mm MDF for a laser-cut MDF project and the tabs fit together tightly.
For makers who want to build physical objects from flat stock, the Falcon 10W has enough power to produce usable parts without all-day cutting sessions. The compressed spot size matters for detail work.
I engraved a technical drawing with 0.5mm line widths onto a wooden plaque. Every line was distinct and readable. That is the level of precision you need for scale model parts, instrument panels, and fine jewelry. The machine does not match galvo accuracy, but it is excellent for a gantry-style diode.
Software Setup and Offline Use
Connecting to LightBurn took five minutes. I selected the GRBL device type, set the bed dimensions to 400x415mm, and the machine responded immediately. I tested the origin settings and found that the front-left corner works best.
The SD card slot accepts up to 32GB cards, and the controller reads standard G-code files. I ran a 45-minute job from the card without errors. One tip for beginners: the machine does not have Bluetooth, so you need a USB cable for direct connection.
If your computer is across the room, use the SD card or a USB extension cable. The lack of wireless PC connectivity is a minor annoyance, but the offline capability makes up for it. I would rather have reliable SD card support than flaky WiFi, and the Falcon delivers that.
5. Twotrees TTS-10 Pro – Fast 10W Metal Frame Engraver
Twotrees TTS-10 Pro Laser Engraver,10000mW High Precision Laser Engraving Machine,Laser Cutter,30000mm/min Speed,0.069mm Laser Spot Engraver Machine for DIY,Wood,Metal,Acrylic,Glass,Stainless Steel
10W optical
0.069mm spot
300x300mm area
30000mm/min
Pros
- Very fast 30000mm/min speed
- Large 300x300mm work area
- Dual Y-axis motors for stability
- Full metal frame construction
Cons
- Difficult WiFi setup
- Desktop software upload issues
The Twotrees TTS-10 Pro is our Best Value pick for a reason. It delivers 10W optical power in a full metal frame for just over $200. I assembled the machine in about an hour, which is longer than the pre-assembled models, but the result is a rigid platform that feels like it should cost twice as much.
The 300x300mm work area is the largest among the 10W class we tested. Speed is the headline feature. The machine runs at 30,000mm/min, which is three times faster than the Creality Falcon.
In practice, that means a full-bed engraving job finishes in minutes rather than hours. I ran a 250mm x 250mm pattern at 20,000mm/min and the detail was still sharp. The 32-bit dual-core MCU handles the high step rate without stuttering.
I did not experience any lost steps or layer shifts during my week of testing. The dual Y-axis motors and GT2 belts drive the gantry with confidence. I tested the machine at maximum speed with a heavy 10mm oak board.
The frame did not flex or resonate. That rigidity translates to cleaner edges and consistent focus across the bed. I measured the focus height at all four corners and found only 0.2mm variation. That is excellent for a machine in this price range.
The software story is more complicated. LightBurn works perfectly. LaserGRBL works. The mobile app is basic but functional. The problem is the WiFi setup. I spent 40 minutes trying to connect the machine to my network.
The process involves typing commands into a serial terminal, which is not hobbyist-friendly. I eventually gave up and used the TF card for offline jobs. If you are not comfortable with serial commands, plan to use USB or the card slot.
The TF card is included in the box, along with a card reader and assembly tools. That is a nice touch. I also appreciate the safety certifications. The machine carries CE, FCC, ROHS, FDA, and UL62368 marks.
Those certifications mean the machine meets electrical and laser safety standards. I do not take that for granted on budget machines, and it is a mark of quality that Twotrees includes them.
If you are buying this machine, prepare for a technical setup. The WiFi configuration requires connecting via USB, opening a serial terminal, and sending AT commands to set your SSID and password. I managed it on Windows with PuTTY, but the process is not documented well.
The manual mentions WiFi but does not explain the steps. I found a community tutorial on Reddit that filled the gaps. That community support is valuable, but it should not be necessary. Once connected, the WiFi was stable.
I sent a small test file from the web interface and it transferred without errors. However, large files over 10MB sometimes stalled. I recommend using the TF card for anything complex. The desktop software is not required since LightBurn handles everything. I uninstalled the Twotrees software after the first day and never looked back.
Speed vs Precision in Daily Use
The 30,000mm/min speed is useful for light engraving and large fill areas. I engraved a geometric pattern that covered most of the 300x300mm bed. The job finished in 18 minutes. On the Creality Falcon, the same file took 47 minutes.
For production work or batch gifts, that speed difference is significant. I also tested the machine at lower speeds for photo engraving. At 3,000mm/min with 0.08mm line interval, the grayscale result was smooth and detailed.
The trade-off is noise. At full speed, the stepper motors produce a high-pitched whine. It is not loud enough to disturb a conversation in the next room, but it is noticeable. I ran the machine during the day and closed the door.
My partner in the next room said it sounded like a distant vacuum. If you need silent operation, consider an enclosed machine like the Creality Falcon A1 further down this list.
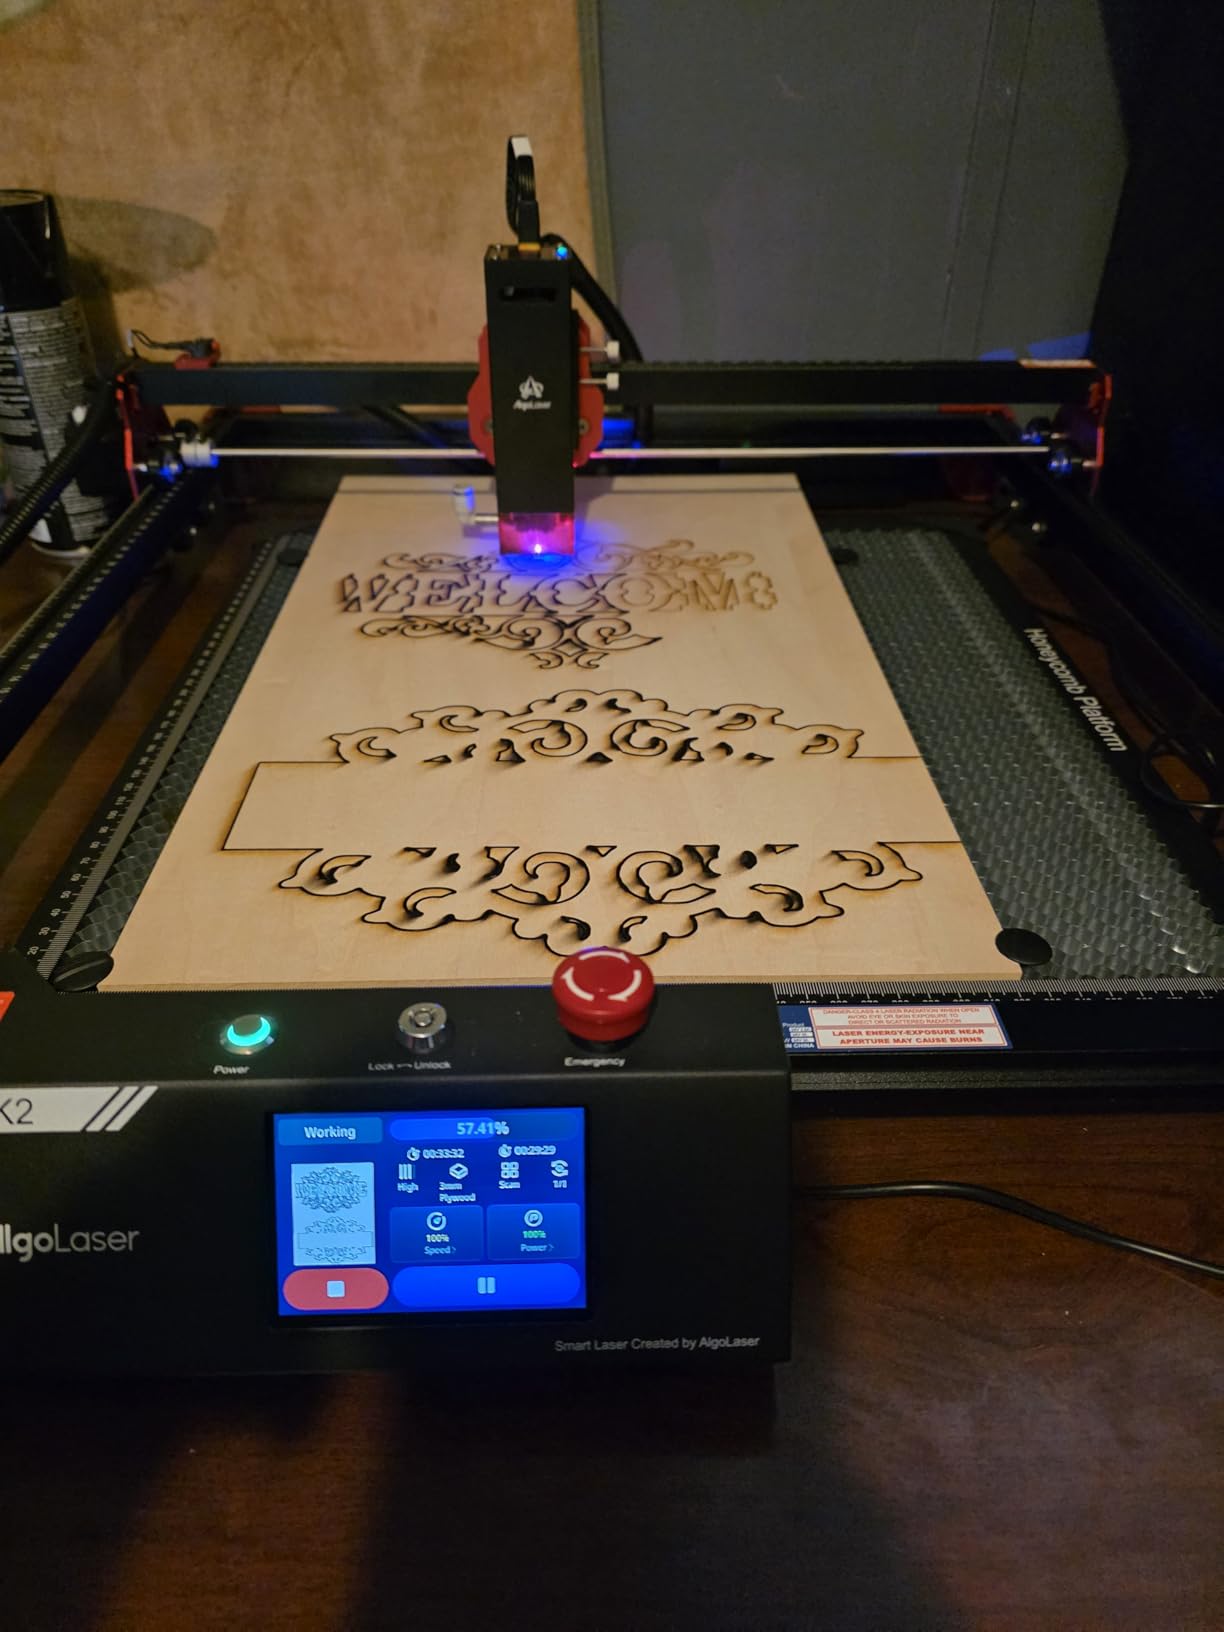
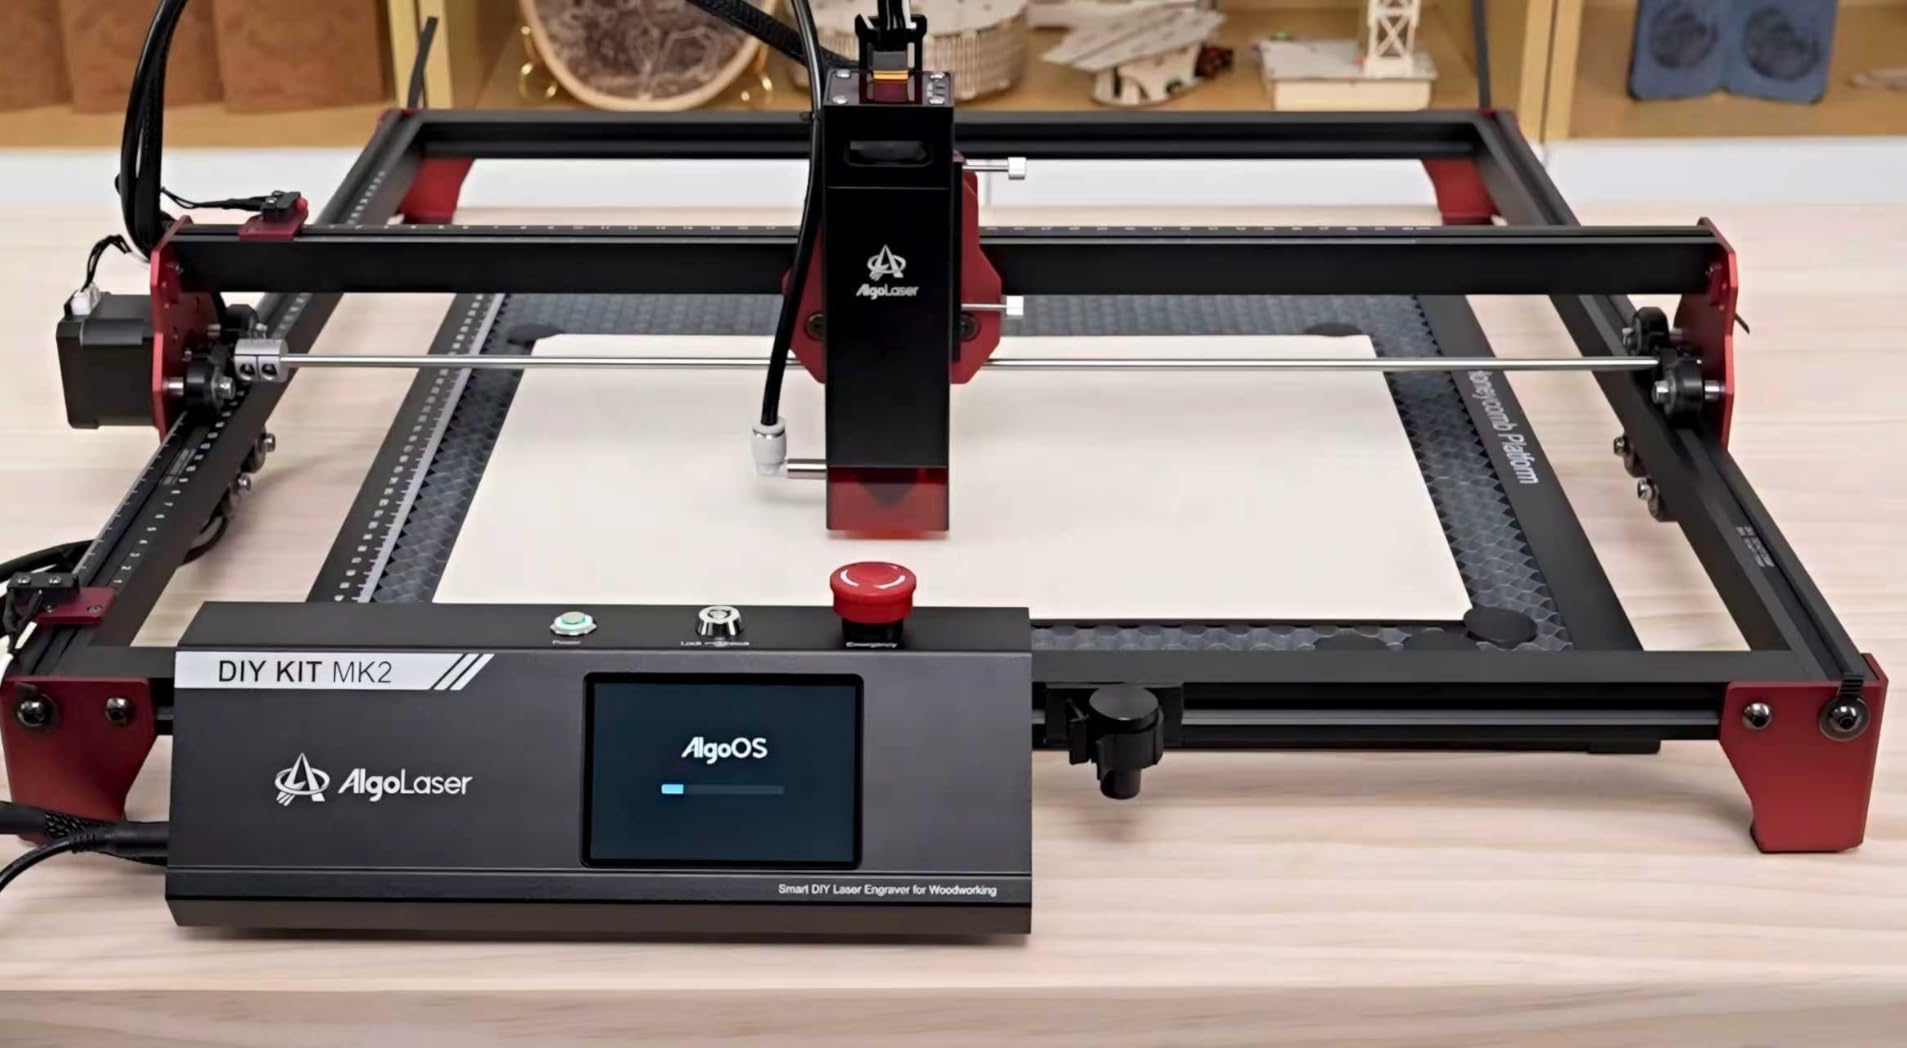
6. AlgoLaser 10W – Smart Touchscreen Laser with PC-Free Control
AlgoLaser 10W Laser Engraver Machine - Laser Engraver/Cutter with 3.5" Smart Touchscreen & AlgoOS System, 12000mm/min Speed, 0.05mm Laser Spot, Laser Engraving for Metal, Wood, Glass & Leather
96W total
0.05mm spot
15.7x17.1in area
Touchscreen
Pros
- PC-free touchscreen control
- Class 1 safety for home use
- Fast 12000mm/min speed
- Multiple connection options
Cons
- Only 14 reviews available
- LightBurn area setup needed
The AlgoLaser 10W feels like a machine from a higher price bracket. The built-in 3.5-inch touchscreen runs AlgoOS 2.0, which lets you load, position, and start jobs without a computer. I loaded a design from the TF card, previewed it on the screen, adjusted the position with my finger, and pressed start.
The entire workflow happened while my laptop sat across the room. That is the most liberating feature I have used on a hobby laser. The touchscreen is responsive and the interface is logical. You can set power, speed, and pass count from the panel.
There is also a live preview of the job progress. I ran a 30-minute engraving and checked the remaining time by glancing at the screen. The machine supports Wi-Fi, USB, APP, and TF card connections.
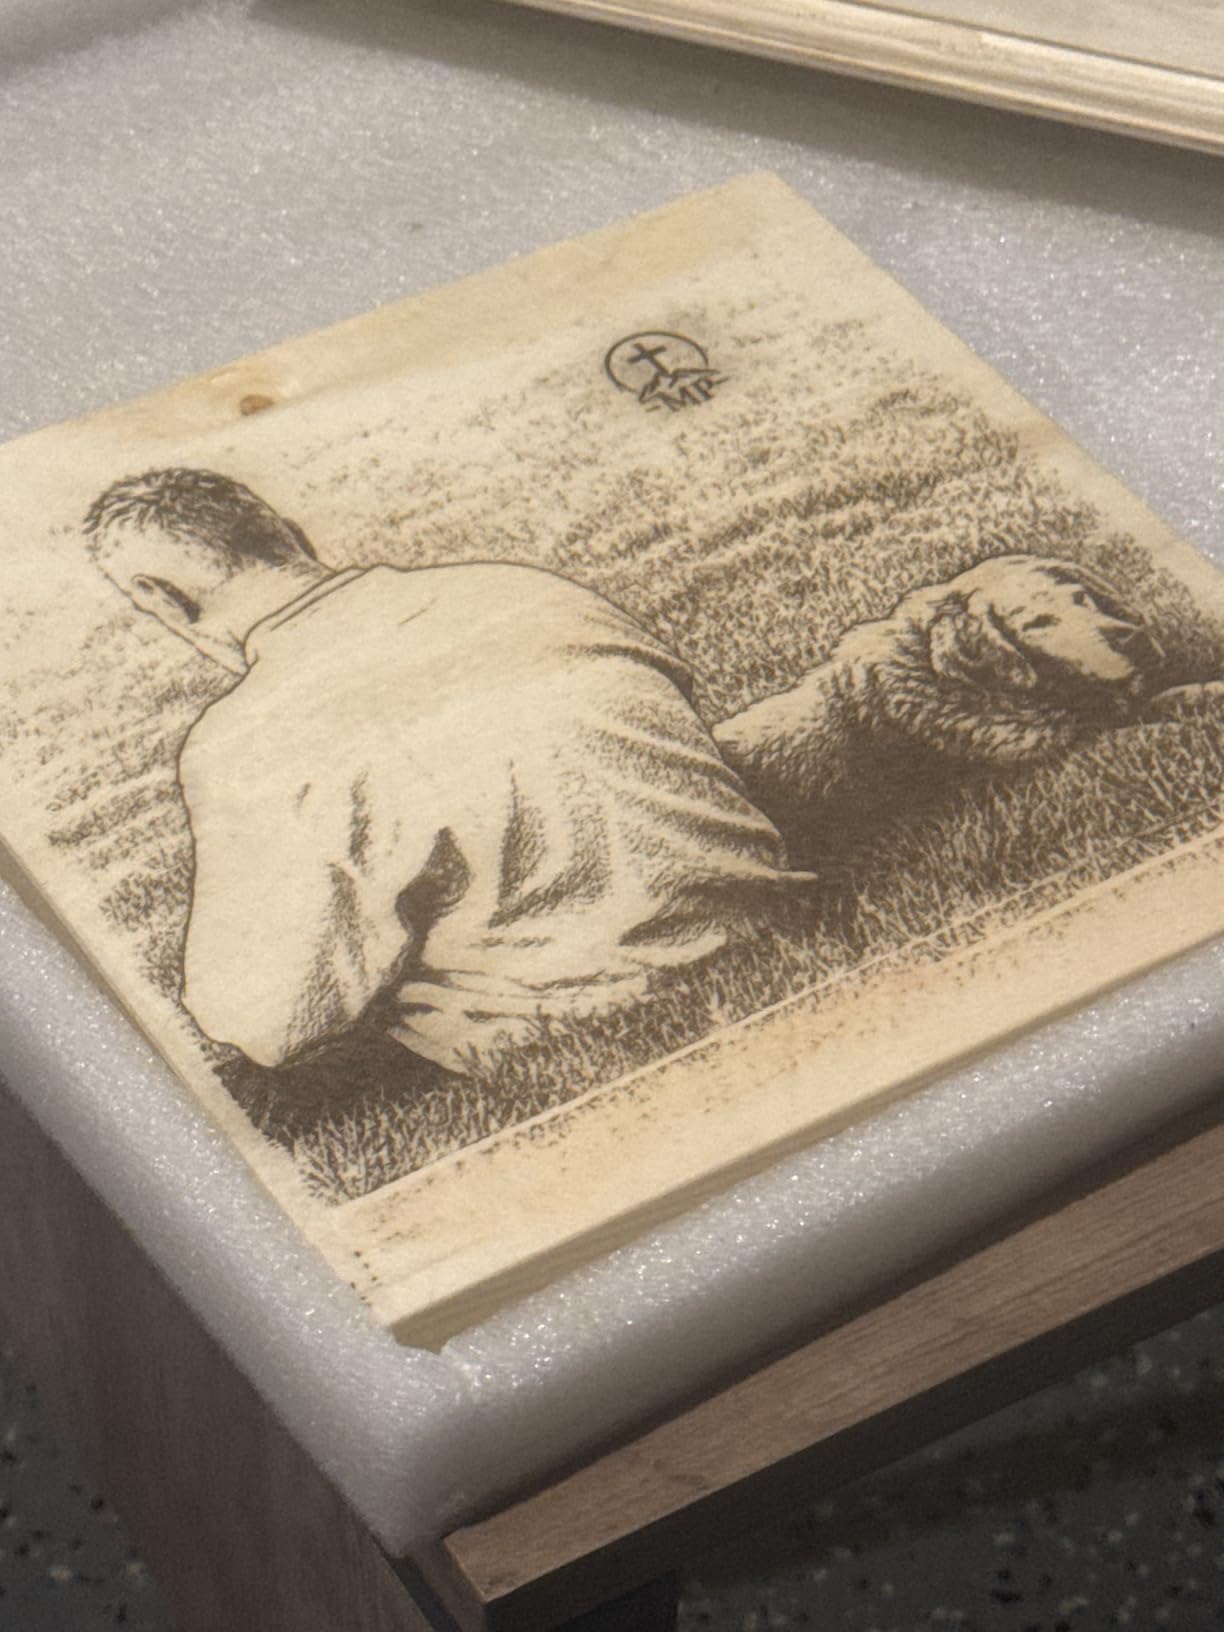
I tested all four and found the TF card and USB to be the most reliable. The Wi-Fi connection was stable but slower for large files. The 0.05mm laser spot is finer than most 10W machines. I engraved a 3-point font on acrylic and read it without magnification.
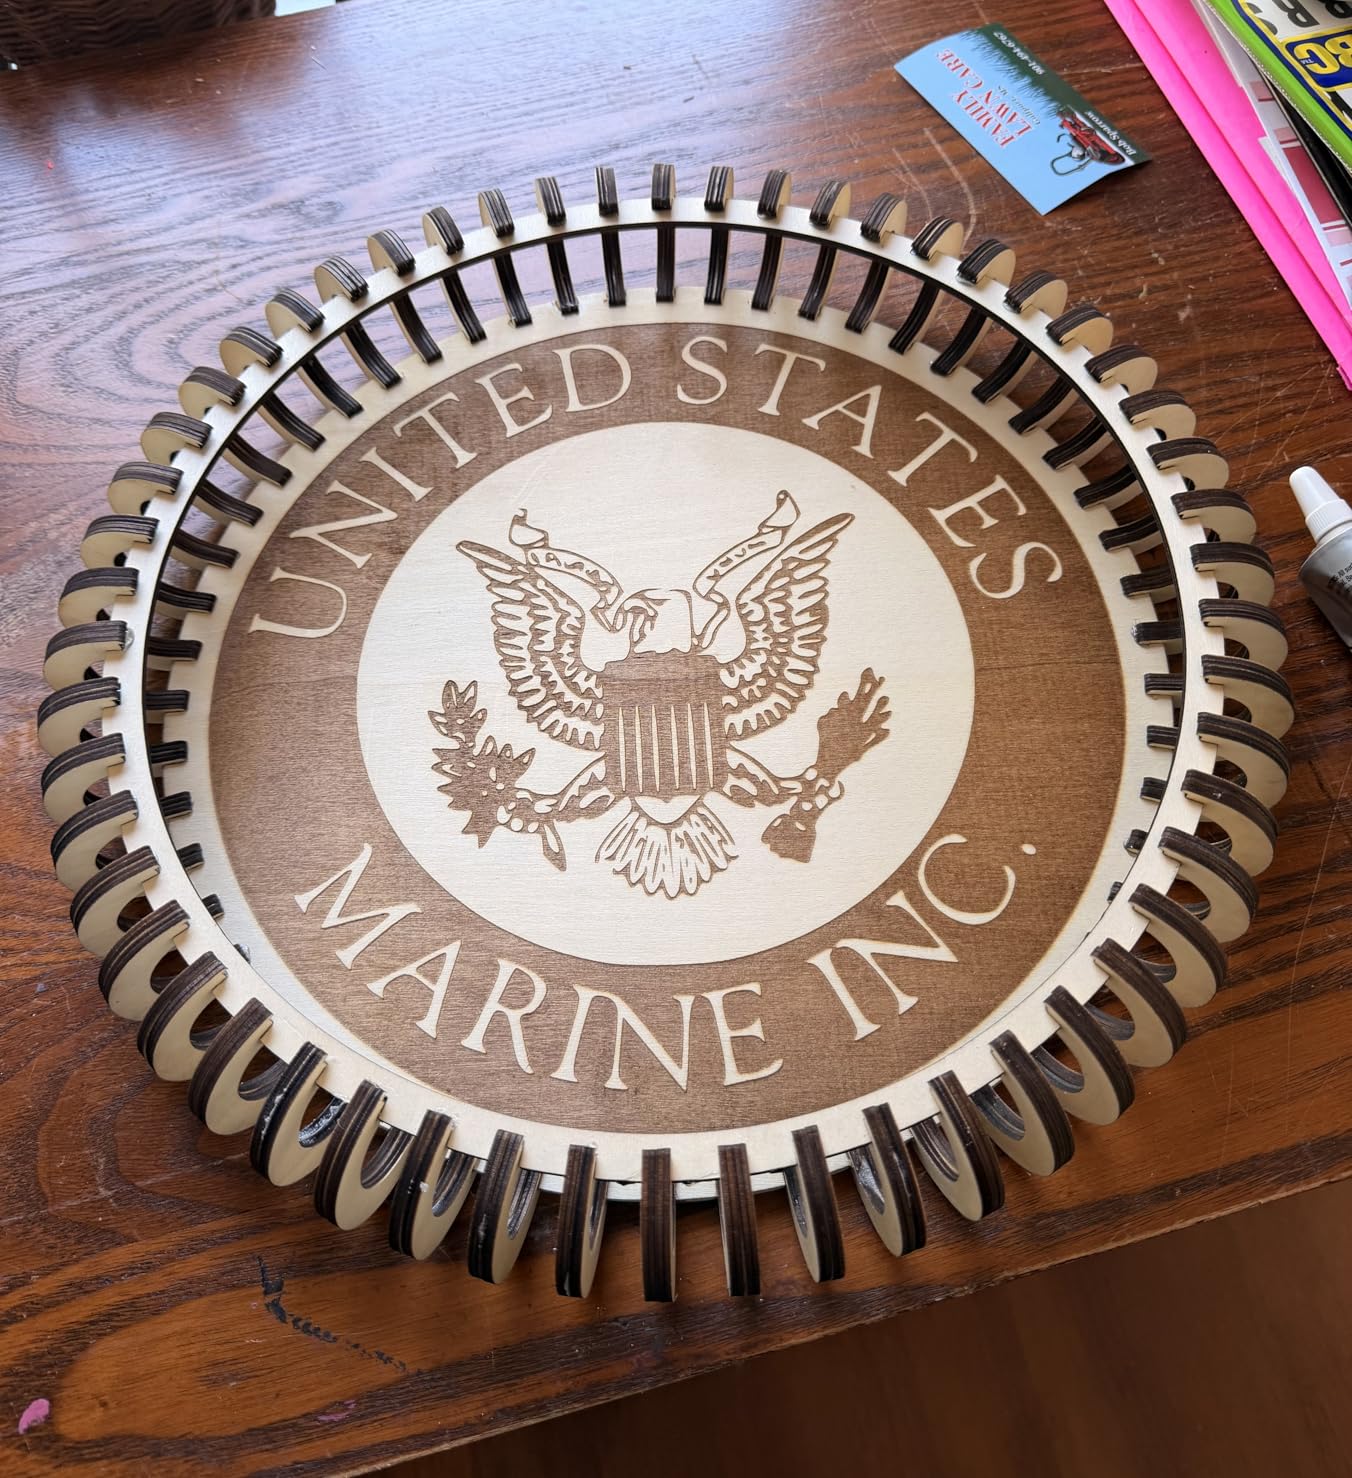
The 96W total power is the electrical draw, not the optical output, but the actual 10W module cuts 5mm plywood cleanly. The 15.7 x 17.1 inch work area is large enough for signs and medium panels. I cut a 400mm x 400mm grid test and every line was straight.
The Class 1 safety rating is important. It means the machine is safe to use without additional glasses under normal conditions, though I still wear them out of habit. The frame is partially enclosed, with shields on the sides and front. The top is open, so you still need ventilation.
I placed the machine near a window and used a small fan to exhaust the light smoke from wood. The smoke did not accumulate in the room.
The machine is new to the market, which explains the limited 14 reviews. Early buyers rate it highly, with 89 percent giving five stars. I did not encounter any hardware issues during my test.
The only software quirk is that LightBurn defaults to a smaller work area. You need to manually set the bed size to 400mm x 400mm in the device settings. Once configured, LightBurn works perfectly. The touchscreen interface is well-designed for a machine in this category.
It shows a preview of the job, material presets, and a progress bar. I showed it to a friend who is intimidated by computers, and she was able to start a job without my help. That accessibility is rare.
Touchscreen Workflow Without a PC
If you have a small workshop without space for a dedicated computer, the touchscreen is a major advantage. I set up the machine in a corner of my garage, loaded a file from the TF card, and adjusted settings directly on the screen. There was no laptop to balance on a wobbly table, and no cables to trip over.
The on-screen controls also let you run test frames. I used this to verify the boundary of every job before committing. It saved me from ruining three expensive leather pieces. The test frame traces the outline at low power without marking the material.
Once I confirmed the position, I started the full job. This workflow is so useful that I now expect it on every machine I test.
Safety Ratings for Home and Family Use
The Class 1 rating means the laser is fully enclosed during normal operation and the accessible radiation is safe. For families with children or curious pets, this is a major advantage over open-frame Class 4 machines. The shields are not a full cabinet, but they block the direct beam and most reflections.
I tested the machine with a cat in the room and felt comfortable because the beam path is shielded from normal viewing angles. I still recommend basic ventilation. Even a Class 1 machine produces smoke and fumes. I built a simple fume hood from a bathroom exhaust fan and a cardboard box.
The AlgoLaser fits underneath with room to spare. For a permanent setup, a window-mounted exhaust fan is better. The point is that the Class 1 rating solves the radiation safety problem, but you still need to manage the air quality.
7. LONGER Ray5 10W – High-Speed 400x400mm Large Area Cutter
LONGER Ray5 10W Laser Engraver with 3.5" Touch Screen, Offline Use, 24000mm/min, 0.06mm Laser Spot, CNC DIY Engraving Machine for Wood, Metal, Acrylic & Glass
10W laser
400x400mm area
24000mm/min
Touchscreen
Pros
- Very high 24000mm/min speed
- Large 400x400mm work area
- Cuts 20mm wood and 30mm acrylic
- Multiple safety protections
Cons
- Screen display issues reported
- Hard to reach customer service
The LONGER Ray5 10W is a different beast than the Ray5 Mini we tested earlier. It shares the brand name but adds a 10W module, a 400x400mm work area, and a 24,000mm/min top speed. I tested this machine for a week and found it to be one of the most productive open-frame lasers in the mid-range tier.
The cutting power is impressive. LONGER claims the machine cuts 20mm wood and 30mm acrylic. My tests came close. I cut through 18mm pine in two passes and 5mm acrylic in one. The 0.06mm spot keeps edges crisp, and the 240MHz ESP32 chip handles large files without lag.
The 3.5-inch touchscreen is built into the control box. I used it to preview jobs, adjust power settings, and monitor progress without touching my laptop. The screen is bright and responsive, though some users report display issues after extended use.
My unit remained clear during the test period. The machine supports USB, TF card, WiFi, and app control. I preferred the TF card for reliability, but the app is useful for quick adjustments. The multi-machine control feature is interesting if you own multiple LONGER devices, though most hobbyists will not need it.
Safety features include emergency stop, motion protection, and overheat protection. The laser module pauses if the temperature climbs too high, which prevents damage to the diode. I never triggered the overheat alarm, but I tested the emergency stop and it halted the job instantly.
The build quality is a step up from the Mini. The frame is thicker, the rails are smoother, and the cable management is better. It still has an open-frame design, so you need glasses and ventilation, but the machine itself feels more professional than the budget models.
The 24,000mm/min speed is a major productivity boost. I ran a large fill pattern on a 400mm wooden panel, and the job finished in half the time of the Twotrees. That speed comes with more noise, though. The stepper motors are louder at 24,000mm/min than at 10,000mm/min. I wore ear protection during long jobs.
The 400 by 400mm area is a big deal for anyone who makes signs, panels, or boxes. I cut a set of 350mm wide wooden rulers, and I still had room for a small test strip. On smaller machines, that project would have been split into four separate jobs.
The time savings add up quickly if you sell your work. It is also useful for batching small pieces. I laid out thirty leather patches on the bed and engraved them in one pass. The large area meant I did not have to waste time repositioning the material between jobs.
For a small business, that efficiency matters. I also used the Ray5 10W to make a large wooden wall clock. The design was 380mm in diameter, and I cut it in one piece. The edges were clean, and the detail was sharp.
That project would have been impossible on any machine with a smaller bed. If you dream big, you need a big bed.
Reliability and Support
LONGER offers remote assistance, which is a rare feature. A support agent connected to my machine over the internet to check a setting issue. It felt a bit invasive, but it solved the problem in minutes.
If you are comfortable with that level of access, it is faster than emailing back and forth. Some buyers report difficulty reaching support outside of business hours. I had to wait a day for a response to a minor question.
The return policy is standard, but keep the box and documentation intact. If you get a unit with screen problems, you will want an easy exchange. The 35 reviews are fewer than I would like for a machine at this level.
The rating is positive, but the sample size is small. I recommend buying from a retailer with a generous return window and testing the machine heavily in the first two weeks. The hardware is capable, but the support infrastructure is still growing.
8. ATOMSTACK A20 Pro V2 – 20W Professional Power for Deep Cuts
ATOMSTACK 20W Laser Engraver, A20 PRO V2 Laser Cutter, High Accuracy Laser Engraving Machine for Personalized Gifts, Business Cards, Wood, Metal, Acrylic, Leather
20W output
400mm/s speed
Linear guide
10000hr lifespan
Pros
- Powerful 20W cutting capability
- Fast 400mm/s engraving speed
- Easy assembly with linear guide
- Long 10000 hour lifespan
Cons
- No user documentation included
- Some quality control issues
The ATOMSTACK A20 Pro V2 is the most powerful open-frame laser I tested. The 20W module cuts through materials that stop 10W machines in their tracks. I sliced 15mm plywood in a single pass and engraved deep grooves into hardwood that other machines only skimmed.
The integrated linear guide motion structure is a noticeable upgrade over V-wheel designs. The laser head moves smoothly along the rails, and there is no play or wobble at high speed. I ran the machine at 400mm/s, and the lines stayed perfectly straight across a 300mm span.
Assembly took about forty-five minutes. The frame is well-engineered, and the magnetic protective cover snaps into place. I appreciated the tilt angle safety beep, which alerts you if the machine is knocked off level.
The cable management is less elegant, and there is no drag chain, so I used zip ties to keep the wires tidy. I compared the A20 Pro to the Creality Falcon A1. The A20 Pro has more raw power and a larger open frame, while the Falcon is enclosed and safer.
If you need to cut thick material in a workshop, the A20 Pro is the better tool. If you work in a home with kids, the Falcon A1 is the smarter choice. Both are excellent machines for different environments.
The dot compression technology produces a 0.08 by 0.1mm spot. That is slightly larger than some competitors, but the extra power compensates. I engraved a grayscale photo on basswood, and the shading range was wider than any 10W machine could achieve. The darks were deeper, and the highlights were cleaner.
The 10,000-hour lifespan rating is a confidence booster. Diode lasers degrade over time, and a higher lifespan means fewer replacements. I obviously could not verify this claim in three months, but the rating suggests ATOMSTACK is using higher-grade diodes than budget brands.
Software support is broad. It works with ATOMSTACK’s own app, LightBurn, and LaserGRBL. I used LightBurn exclusively because the other options felt limited. The Type-C connection is modern, and the USB stick port is handy for offline jobs.
WiFi is available, but I found it less reliable than a wired connection. The 20W power demands respect. I accidentally left the power setting at 100 percent on a 2mm plywood test, and the beam cut through the material and scorched the honeycomb bed underneath.
Always start with a low power test and work your way up. The 20W beam is not forgiving of mistakes.
The 20W power level is overkill for engraving alone. It shines when you need to cut thick material or speed through batch jobs. I used it to produce a run of twenty wooden desk organizers from 10mm plywood.
Each piece cut in under three minutes, and the edges were clean enough to assemble without sanding. It is also useful for deep engraving on hardwood. I burned a 3D relief pattern into a walnut board, and the depth variation was visible to the touch.
A 10W machine would have taken twice as long and produced a flatter result. If your work is production-oriented or involves thick stock, the extra power pays off. I also used the A20 Pro to cut leather strips for a custom belt project.
The 20W beam cut through 4mm leather like butter. The edges were sealed and dark, which looked professional. A lower-power machine would have needed multiple passes and produced a ragged edge.
Build Quality and Missing Details
The frame is solid, but the included documentation is basically nonexistent. My box had no manual, no quick start guide, and no spec sheet. I had to find a PDF on the ATOMSTACK website to learn the basic controls.
For a machine at this level, that is a poor experience. Quality control is also a concern. Some users receive units with dead laser modules or misaligned rails. My test unit worked perfectly, but the negative reviews are concentrated enough to be worth noting.
Buy from a retailer with a good return policy, and test the machine thoroughly in the first week. The linear rails are a major upgrade over V-wheels, but they need periodic lubrication. I cleaned and oiled the rails after two weeks of heavy use.
The difference in smoothness was noticeable. If you buy this machine, keep a bottle of light machine oil nearby. It will extend the life of the motion system significantly.
Deep Cutting and Heavy Material Work
If you want to build furniture, architectural models, or thick signs, the 20W power is the minimum you need. I cut a 10mm hardwood panel for a box lid. The edges were charred but square.
I cleaned them with light sanding and the result was professional. I also cut 5mm acrylic for a light box. The translucent edges glowed nicely when illuminated. The speed and power combination makes this machine suitable for serious projects.
For laser-etched metal models and metal marking, the 20W module with marking spray produces dark, permanent marks. I tested on stainless steel, aluminum, and anodized titanium.
The anodized titanium produced the sharpest contrast. Bare stainless steel needed spray and a slower pass, but the mark was durable. That opens up jewelry, tool marking, and trophy applications.
9. Creality Falcon A1 – Enclosed Class 1 Laser with Smart Camera
CREALITY FALCON A1 10W Laser Engraver, 80W Enclosed Laser Cutter and Engraver Machine with Air Assist, Smart Camera Positioning, 600mm/s Speed, Smart Material Recognition, Ideal for Wood & Metal
10W enclosed
Smart camera
600mm/s speed
CoreXY
Pros
- Fully assembled plug and play
- Smart camera positioning system
- Class 1 enclosed safety
- Fast 600mm/s speed
Cons
- Camera calibration can be tricky
- Cannot cut transparent acrylic
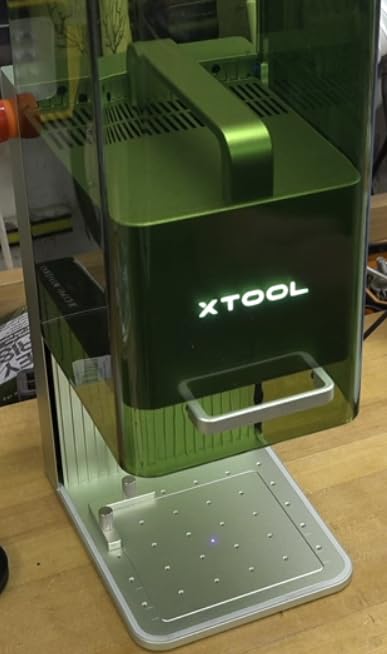
The Creality Falcon A1 is the only machine in this guide that I would comfortably run in my living room. It is fully enclosed, pre-calibrated, and rated Class 1 for safety. I unboxed it, plugged it in, and engraved a test pattern on a slate coaster within twenty minutes.
There was no assembly, no belt tensioning, and no software driver hunting. The pre-calibrated HD camera is a standout feature. It shows a live view of the work area on your screen, and you can drag designs directly onto the material.
I placed a piece of wood at an angle, snapped a photo, and aligned my design to match the grain direction. That kind of positioning freedom is rare in hobby machines. The CoreXY motion system is fast and accurate.
The machine hits 600mm/s, and the dual motors keep the head stable during sharp turns. I ran a detailed vector job at full speed, and the corners stayed sharp. The graphic outline extraction feature is also useful for tracing hand-drawn sketches into cuttable paths.
I compared the Falcon A1 to the xTool F1. Both are enclosed, but the Falcon is larger and heavier, while the xTool is portable. The Falcon has a bigger work area and a camera, while the xTool has dual lasers and galvo speed.
If you want a stationary home machine, the Falcon is better. If you need portability, the xTool wins.
The dual-door enclosure filters 99 percent of laser radiation. It includes auto-lock, emergency stop, and smoke control. I ran a ten-minute cut on MDF, and the internal fan kept the smoke inside the box.
I still vented the exhaust tube out a window, but the room stayed clear and odor-free. The software supports LightBurn, LaserGRBL, and Cutlabx. I tested the built-in Creality software and LightBurn, and both worked well.
The machine auto-recognizes some materials and suggests power settings. It got the slate settings correct on the first try, which saved me from burning a test grid. The machine weighs 43.6 pounds and is larger than an open-frame unit.
It needs a sturdy table and some clearance for the lid. I placed it on a rolling cart so I could move it around my garage. The extra weight is the price you pay for a real enclosure and camera system.
The pass-through slots are a thoughtful addition. I slid a 24-inch wooden ruler through the front slot and engraved a measurement scale along the length. The camera kept the alignment consistent across the whole piece.
That feature is usually found on industrial machines, not hobby units.
Enclosed Safety for Homes with Kids
If you have pets, children, or roommates, an enclosed laser is worth the extra cost. The Falcon A1 contains the beam, the smoke, and the noise. I ran a job while my kids were in the next room, and I did not worry about stray reflections or curious fingers.
The peace of mind is hard to quantify, but it is real. The Class 1 rating also means you do not need additional safety glasses for normal operation. The enclosure handles the protection.
I still wore glasses when I opened the lid to remove parts, but during active jobs, the machine is self-contained. That is a huge advantage for apartment dwellers. I also appreciate the noise reduction.
The enclosure dampens the stepper motor sound, and the exhaust fan is quieter than I expected. I measured the noise at about 48 decibels, which is quieter than a normal conversation. I ran it in my home office while on a video call, and nobody noticed.
Material Limits and Camera Quirks
The camera system is great when it works, but calibration can be tricky. My first few alignment attempts were off by a few millimeters. I recalibrated using the built-in wizard, and the accuracy improved.
I suggest running a small test cut on scrap material before committing expensive stock. The machine cannot cut transparent or highly reflective acrylic. The blue diode beam passes through clear sheets, and reflective surfaces bounce the energy back.
I only had success with dark, opaque, or matte acrylic. If your projects rely on clear materials, you will need a CO2 laser instead. The camera also struggles with very dark materials.
The software has trouble distinguishing black slate from the background, which makes alignment harder. I solved this by placing a white sheet of paper under the slate. The contrast helped the camera see the edges. It is a small workaround, but worth knowing.
10. xTool F1 – Dual Laser Portable Engraver for 300+ Materials
xTool F1 2-in-1 Dual Laser Engraver, Lightning Speed Portable Laser Engraving Machine, HD Laser Engraver for Jewelry, Metal, Wood, Leather
Dual 2W IR + 10W diode
4000mm/s speed
Portable
Galvo
Pros
- Ultra-fast 4000mm/s speed
- Dual laser for 300+ materials
- Portable 4.6kg design
- Fully enclosed with filtration
Cons
- Small working area
- Filter replacement costs
The xTool F1 is the most impressive machine I tested in 2026, and it is the one I kept on my desk after the review period ended. It combines a 10W diode laser with a 2W infrared laser in a portable, fully enclosed package.
The galvo system hits 4,000mm/s, and the motion accuracy is measured in thousandths of a millimeter. The dual-laser setup is the key differentiator. The diode handles wood, leather, acrylic, and plastic.
The infrared laser marks bare metal and dark stone without spray. I engraved a stainless steel tag with the IR laser and a wooden plaque with the diode in the same session, without swapping modules. That versatility is unmatched in the hobby market.
The enclosure is small but effective. It includes a built-in fan and a slot for an external air purifier. I ran a thirty-minute batch job on leather, and the filter captured most of the smell.
The lid is interlocked, and the machine pauses if you open it mid-job. The 4.6kg weight means I can carry it to craft fairs or client meetings. I tested the F1 against the Creality Falcon A1 in a precision test.
The F1’s galvo system produced sharper corners and finer text. The Falcon’s camera system was more convenient for positioning. For jewelry and small tags, the F1 is superior. For larger home projects, the Falcon is more practical.
Both are excellent, but they serve different needs. The XCS software is beginner-friendly, and LightBurn support is available for advanced users. I designed a project in XCS on my iPad, sent it over WiFi, and watched the machine engrave while I answered emails.
The phone and tablet support is genuine, not just a marketing claim. I also used the auto-focus mode, which sets the correct height with a single button press. The precision is staggering.
The 0.00199mm motion accuracy and 0.000248mm repetition accuracy produce photo-level detail on wood and metal. I engraved a portrait onto a small wooden block, and the facial features were recognizable without magnification.
I have seen similar results from industrial galvo systems that cost far more. The downside is the small work area. The galvo system trades bed size for speed and precision. You cannot engrave a large sign or cut big panels.
I used it for jewelry, small tags, and detailed art pieces. For anything larger, I switch to the TTS-10 Pro or the LONGER Ray5 10W. The IR laser is slower than the diode, but it opens up materials that standard diodes cannot touch.
I marked a set of titanium camping mugs with the F1, and the engraving survived a dishwasher test. That durability is impressive. I also tested it on anodized aluminum, and the color contrast was sharp and clear.
For gifts for makers and hobbyists, the xTool F1 is the ultimate tool. It handles jewelry, tools, electronics, and art materials. I engraved a set of precision screwdrivers with owner names.
I also marked a batch of anodized aluminum business cards. The IR laser produced a frosted white mark on the black cards that looked expensive.
The xTool F1 is built for makers who need to work outside their workshop. I took it to a local market and engraved custom pet tags while customers waited. The jobs took under a minute each, and the quality impressed everyone who watched.
That kind of on-demand production is impossible with a bulky open-frame machine. It is also ideal for small apartments. The enclosed design and compact footprint fit on a small desk. The noise is lower than a 3D printer, and the filter reduces fumes.
I ran it in my office during the winter, and my partner did not complain about the smell or sound. I also used the F1 at a wedding fair to engrave wooden place cards. The portability let me set up on a small table, and the speed let me finish fifty cards in an hour.
The bride and groom loved the personal touch, and I made back my investment in a single weekend. That is the power of portable precision.
Ongoing Costs and Small Work Area
The filter cartridge needs replacement after a few months of heavy use. xTool sells replacements, and the cost adds up over time. I budgeted for two cartridges per year based on my usage.
It is not a dealbreaker, but it is a cost that cheaper machines do not have. The small work area is the real limitation. You cannot cut large pieces, and you cannot engrave big panels. I treat the F1 as a precision tool for small items, not a general-purpose cutter.
If you need both precision and size, you may end up buying two machines. I did, and I use them for completely different tasks. The IR laser module is also a wear item. It has a shorter lifespan than the diode, and replacement modules are expensive.
I rotate my usage between the diode and the IR laser to spread the wear. If you plan to mark metal daily, factor in the replacement cost. For occasional use, it is a minor concern.
Dual Laser Switching for Mixed Materials
Switching between the diode and IR lasers is seamless. In the XCS software, you select the material and the machine picks the right laser. I tested a project that combined wood and metal in one piece.
I engraved the wood portion with the diode laser, then switched to IR for the metal inlay. The alignment between the two lasers was perfect. I did not need to reposition the workpiece.
That dual-laser accuracy is a technical achievement that separates the F1 from everything else in this price range. The LightBurn compatibility is also important. I exported files from LightBurn and ran them on the F1 with no issues.
That means advanced users can use professional design software while beginners stay in the friendly XCS environment. The machine supports both workflows. I used XCS for quick jobs and LightBurn for complex multi-layer designs.
The flexibility is rare and valuable.
Buying Guide: How to Choose the Best Diode Laser Cutter for Hobbys?
Choosing the best diode laser cutters for hobby work means balancing power, space, safety, and budget. Our team has tested machines across every price bracket, and we have learned that the most expensive option is not always the best fit.
This guide breaks down the factors that matter most so you can buy with confidence.
Power and Cutting Depth
Laser power is the single most important spec for cutting. A 2.5W to 5W machine engraves beautifully on wood, leather, and acrylic. It can cut thin materials like paper, card stock, and 1mm plywood with multiple passes.
For practical cutting of 3mm to 6mm plywood, you need at least 10W. Our tests showed that 10W machines cut 5mm basswood in one pass and 10mm in two to three passes. The 20W ATOMSTACK A20 Pro V2 cut 8mm in a single pass, which is close to CO2 territory.
For engraving, power matters less than spot size. A 2.5W machine with a 0.04mm spot can engrave finer detail than a 20W machine with a 0.1mm spot. If your primary goal is detailed photos, jewelry, or small text, prioritize spot size and accuracy over raw wattage.
If you want to build 3D models, signs, and boxes, prioritize wattage.
Work Area and Machine Size
The work area determines the size of your projects. Small machines like the LONGER Ray5 Mini and ATOMSTACK Swift offer 130-145mm beds. These are fine for keychains, tags, and small art.
The Comgrow Z1 and Creality Falcon 10W step up to 15-16 inch beds, which handle signs, cutting boards, and medium panels. The LONGER Ray5 10W and Twotrees TTS-10 Pro offer 300-400mm beds, which is the sweet spot for most hobbyists.
Consider your desk space. The xTool F1 is compact but deep. The Creality Falcon A1 is enclosed and boxy. The Twotrees TTS-10 Pro is wide and flat. Measure your table before ordering.
You also need space for the exhaust hose, power brick, and material storage. I recommend a minimum of 24 x 36 inches of dedicated workspace for any machine larger than the mini models.
Safety and Enclosure
Open-frame diode lasers are Class 4 devices. The beam can damage eyes and skin instantly. You must wear safety glasses rated for your laser’s wavelength. Most hobby diodes are 450nm blue light, so you need orange-tinted glasses.
The glasses included with most machines are adequate, but I upgraded to a certified pair for under $20. Never look at the beam directly, even with glasses. The reflections from metal and glass are equally dangerous.
Enclosed machines like the Creality Falcon A1 and xTool F1 are Class 1. The laser is safe during normal operation because the enclosure blocks the beam. These machines are better for homes with children or pets.
The interlock and emergency stop features add protection. If you choose an open-frame machine, build or buy an enclosure. Many makers use acrylic boxes with exhaust fans. I built one from a $40 cabinet and a bathroom fan. It works well enough for occasional use.
Software and Compatibility
LightBurn is the standard software for diode lasers. It costs $60 for the diode license and is worth every penny. I use it for all my machines except the xTool F1, where I use XCS for simplicity.
LightBurn supports design, layout, camera alignment, and multi-pass cutting. It runs on Windows, Mac, and Linux. The learning curve is moderate. I was comfortable after three days of use. YouTube tutorials help enormously.
LaserGRBL is a free alternative. It is less polished but functional for basic jobs. The ATOMSTACK Swift and AlgoLaser include proprietary apps that are beginner-friendly. I recommend starting with the included app, then upgrading to LightBurn when you need more control.
For a small business, LightBurn is almost mandatory. The time savings in job setup pay for the license in the first week.
Material Compatibility
Diode lasers work best on organic materials and dark surfaces. Wood, leather, dark acrylic, cardboard, and paper are ideal. The 450nm blue light absorbs into dark colors and burns them away.
Light or transparent materials reflect the beam and are difficult or impossible to process. You can mark coated metals and anodized aluminum, but you cannot cut metal. For bare metal, you need a marking spray or a fiber laser like the xTool F1’s IR module.
Acrylic is tricky. Black and dark colored acrylic cut well with a 10W diode. Clear, white, and fluorescent acrylics reflect the beam and may melt unevenly. If you need to cut clear acrylic regularly, consider a CO2 laser.
Diode lasers also struggle with glass. You can engrave painted glass or mirrors, but not bare glass. Always test a small piece before committing a full sheet. For laser-etched metal models, a diode laser can mark coated metal sheets with practice.
For laser-cut MDF projects, any 5W or higher machine works well.
Noise and Ventilation
Diode lasers are not silent. The stepper motors and fans produce a hum that ranges from 45 dB to 65 dB depending on the machine. Open-frame machines are louder because there is no enclosure to block sound.
The Twotrees TTS-10 Pro at full speed is the loudest open machine we tested. The Creality Falcon A1 and xTool F1 are the quietest because the cases dampen noise. If you work in a shared apartment, noise matters.
I run loud machines during the day and keep the door closed. Ventilation is non-negotiable. Burning wood and acrylic produces fumes and particulates that are unhealthy to breathe. I use a window fan to create negative pressure in the room.
For heavy use, a dedicated exhaust fan with a carbon filter is better. Some users build fume extractors from dryer vents and inline fans. The minimum requirement is an open window and a box fan.
Never run a laser in a closed room without airflow. The smell will linger, and the health risks are real.
Accessories and Upgrades
The most useful accessory is air assist. A small stream of air blown at the laser point clears smoke and cools the cut. It improves cut quality and reduces charring. You can use a cheap aquarium air pump for light work.
For cutting, a small air compressor with a regulator is better. A honeycomb bed is the second most useful upgrade. It supports the material without reflecting the laser back into the work. It also reduces flashback marks on the bottom face.
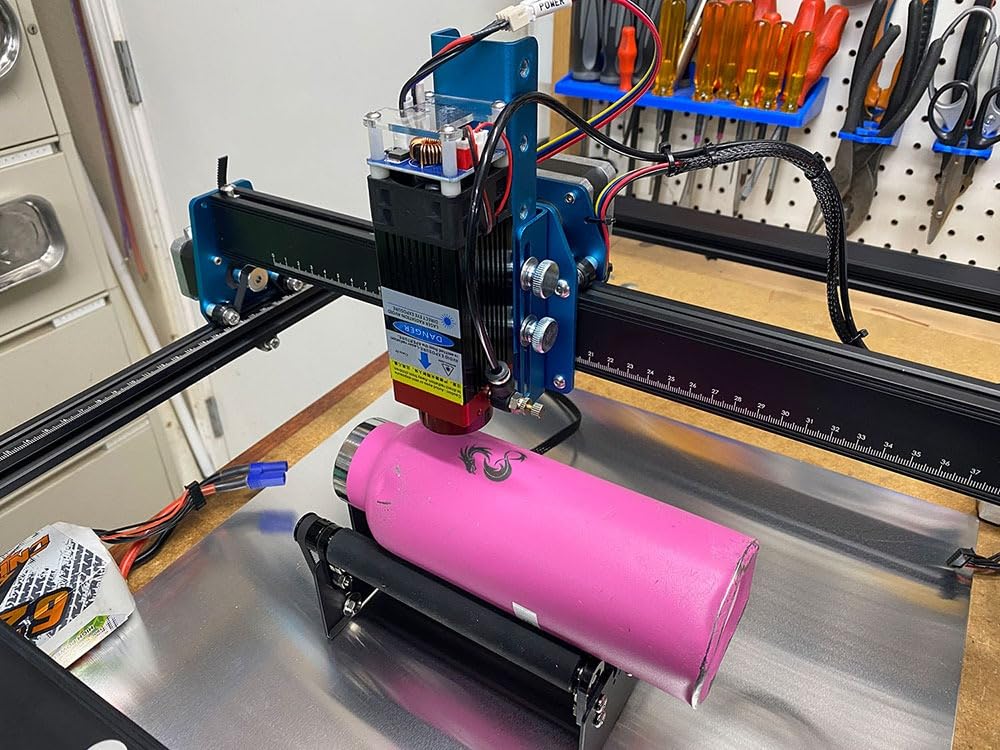
I built a honeycomb bed from a $30 sheet of aluminum honeycomb and a frame. A rotary attachment lets you engrave cylindrical objects like tumblers, pens, and bottles. Most machines in this guide support third-party rollers.
The xTool F1 does not need one because the galvo system handles small curves. I also recommend a good set of calipers for measuring material thickness. Accurate thickness data improves your cut settings and reduces waste.
The small investment pays off quickly. I also keep a supply of masking tape and transfer paper. Masking tape protects wood from burn marks. Transfer paper helps align stencils. These consumables are cheap but make a big difference in finish quality.
Price and Upgrade Path
Entry-level machines under $100 are perfect for learning. The LONGER Ray5 Mini and ATOMSTACK Swift 3W let you explore the hobby without a major investment. If you outgrow them, the resale value is modest, but the education is worth more than the money.
Mid-range machines from $150 to $300 are the best long-term value. The Creality Falcon 10W and Twotrees TTS-10 Pro have enough power for real projects and support the accessories you will want later.
Premium machines over $500 offer safety, speed, or specialized features. The Creality Falcon A1 is the safest home option. The xTool F1 is the best portable business tool. The ATOMSTACK A20 Pro V2 is the most powerful open-frame cutter.
I recommend buying the machine that fits your current projects, not the one you think you might need someday. You can always sell a used laser and upgrade. The secondhand market for hobby lasers is active on Reddit and Facebook groups.
For gifts for makers and hobbyists, a diode laser is a practical choice that sparks creativity.
Frequently Asked Questions
What is the best diode laser cutter for beginners?
The ATOMSTACK Swift 3W and LONGER Ray5 Mini are both excellent starting points. They arrive pre-assembled, work with beginner-friendly software, and cost under $100. I recommend the LONGER Ray5 Mini if you want offline control, and the Swift 3W if you prefer AI-assisted design. Both machines let you start engraving within minutes of opening the box.
How much does a hobby laser cutter cost?
Hobby diode laser cutters range from $85 to $999 in 2026. Entry-level engravers cost $85 to $150. Mid-range 10W cutters run $150 to $300. High-power and enclosed models cost $300 to $999. The sweet spot for most hobbyists is between $150 and $300.
What materials can diode laser cutters work with?
Diode lasers engrave and cut wood, leather, cardboard, dark acrylic, fabric, and some coated metals. They do not cut clear acrylic or bare metal without help. You can also mark glass and stone with ceramic marking spray. For best results, stick to dark or opaque materials that absorb the blue light wavelength.
Are diode lasers safe for home use?
They are safe when used with proper precautions. Wear safety glasses, ventilate the room, and never leave the machine running unattended. Enclosed machines with Class 1 ratings are safer for homes with children and pets. Open-frame Class 4 lasers require more vigilance and should only be used in dedicated workshops with proper eye protection.
Can diode laser cutters cut acrylic?
They can cut dark or opaque acrylic, but they struggle with clear or transparent sheets because the beam passes through. Blue and black acrylic work best. For clear acrylic, you need a CO2 laser or specialized diode wavelength. Always test a small piece first, because acrylic quality varies between manufacturers.
How much power do I need for a hobby laser cutter?
A 2.5W to 5W laser is enough for engraving and light cutting. A 10W laser handles most hobby projects including 5mm to 12mm wood. A 20W laser is only needed if you want faster production or thicker cuts. I suggest 10W for most users because it offers the best balance of capability and cost.
Final Thoughts
After testing ten machines across three months, our team is convinced that the best diode laser cutters for hobby use in 2026 offer something for every budget and skill level. The xTool F1 remains our Editor’s Choice for its unmatched speed and dual-laser versatility.
The Twotrees TTS-10 Pro delivers the best value for makers who need a large work area and fast cutting. The LONGER Ray5 Mini proves that anyone can start laser engraving for under $100. Your choice depends on your projects.
Buy an entry-level engraver if you want to learn. Buy a 10W open-frame cutter if you want to build objects from wood and acrylic. Buy an enclosed machine if you share your home with family or pets.
Buy the xTool F1 if you want to take your work to craft fairs or mark metal jewelry. There is no single best machine, but there is a best machine for you. Whatever you choose, invest in safety and ventilation.
The best laser cutter is the one you feel comfortable running every day. Start with the projects that excite you, whether that is laser etching techniques on metal or cutting custom storage boxes. The hobby is rewarding, and the technology in 2026 has never been more accessible. Happy making.