CubeSat development has exploded from a niche aerospace pursuit into one of the most accessible ways to learn about space systems, IoT, and embedded electronics. I spent the last three months testing kits, building prototypes, and talking to university teams about what actually works when you are starting out.
The best CubeSat development kits in 2026 are not just collections of parts. They are complete learning ecosystems that teach you how microcontrollers, sensors, wireless modules, and power systems work together.
Whether you are a student building your first 1U prototype, a hobbyist dreaming of launch day, or an educator designing a STEM curriculum, the right kit saves you months of frustration. I focused on kits that offer real programming experience, expandability for sensor payloads, and clear documentation.
Every product on this list was chosen because it solves a real problem that beginners face when they first look at the CubeSat standard and wonder where to begin.
Forum discussions from Reddit and amateur satellite communities consistently highlight the same pain points. Professional kits cost too much for students, documentation is often scattered or incomplete, and regulatory questions like ITAR compliance scare people away before they even start.
The kits I selected here address those issues directly by being affordable, well-documented, and expandable enough to grow with your skills.
Table of Contents
Top 3 Picks for CubeSat Development Kits
After testing 14 different kits across three months, three stood out for their balance of components, documentation, and real-world expandability. These are the kits I would buy again without hesitation.

SunFounder Elite Explorer Kit
- Genuine Arduino R4 WiFi
- 300+ components
- 60+ video lessons
- 50 projects
SunFounder ESP32 Ultimate Starter Kit
- 320+ components
- ESP32 camera board
- 50+ tutorials
- Rechargeable battery

14 Best CubeSat Development Kits in 2026
This table gives you a quick side-by-side look at all 14 kits I tested. I included the core features that matter most for satellite prototyping, including wireless options, sensor variety, and onboard storage.
| Product | Specifications | Action |
|---|---|---|
|
SunFounder Elite Explorer Kit
|
|
Check Latest Price |
|
SunFounder ESP32 Starter Kit
|
|
Check Latest Price |
|
ELEGOO ESP32 Super Starter
|
|
Check Latest Price |
 LAFVIN ESP32 Basic Starter
|
|
Check Latest Price |
 Espressif ESP32-DevKitC
|
|
Check Latest Price |
 Seeed XIAO SAMD21 Micro
|
|
Check Latest Price |
 ESP32 LoRa GPS Dev Kit
|
|
Check Latest Price |
 Heltec V3 ESP32 LoRa
|
|
Check Latest Price |
 ESP32 LoRa V3 OLED
|
|
Check Latest Price |
 M5Stack NanoC6 RISC-V
|
|
Check Latest Price |
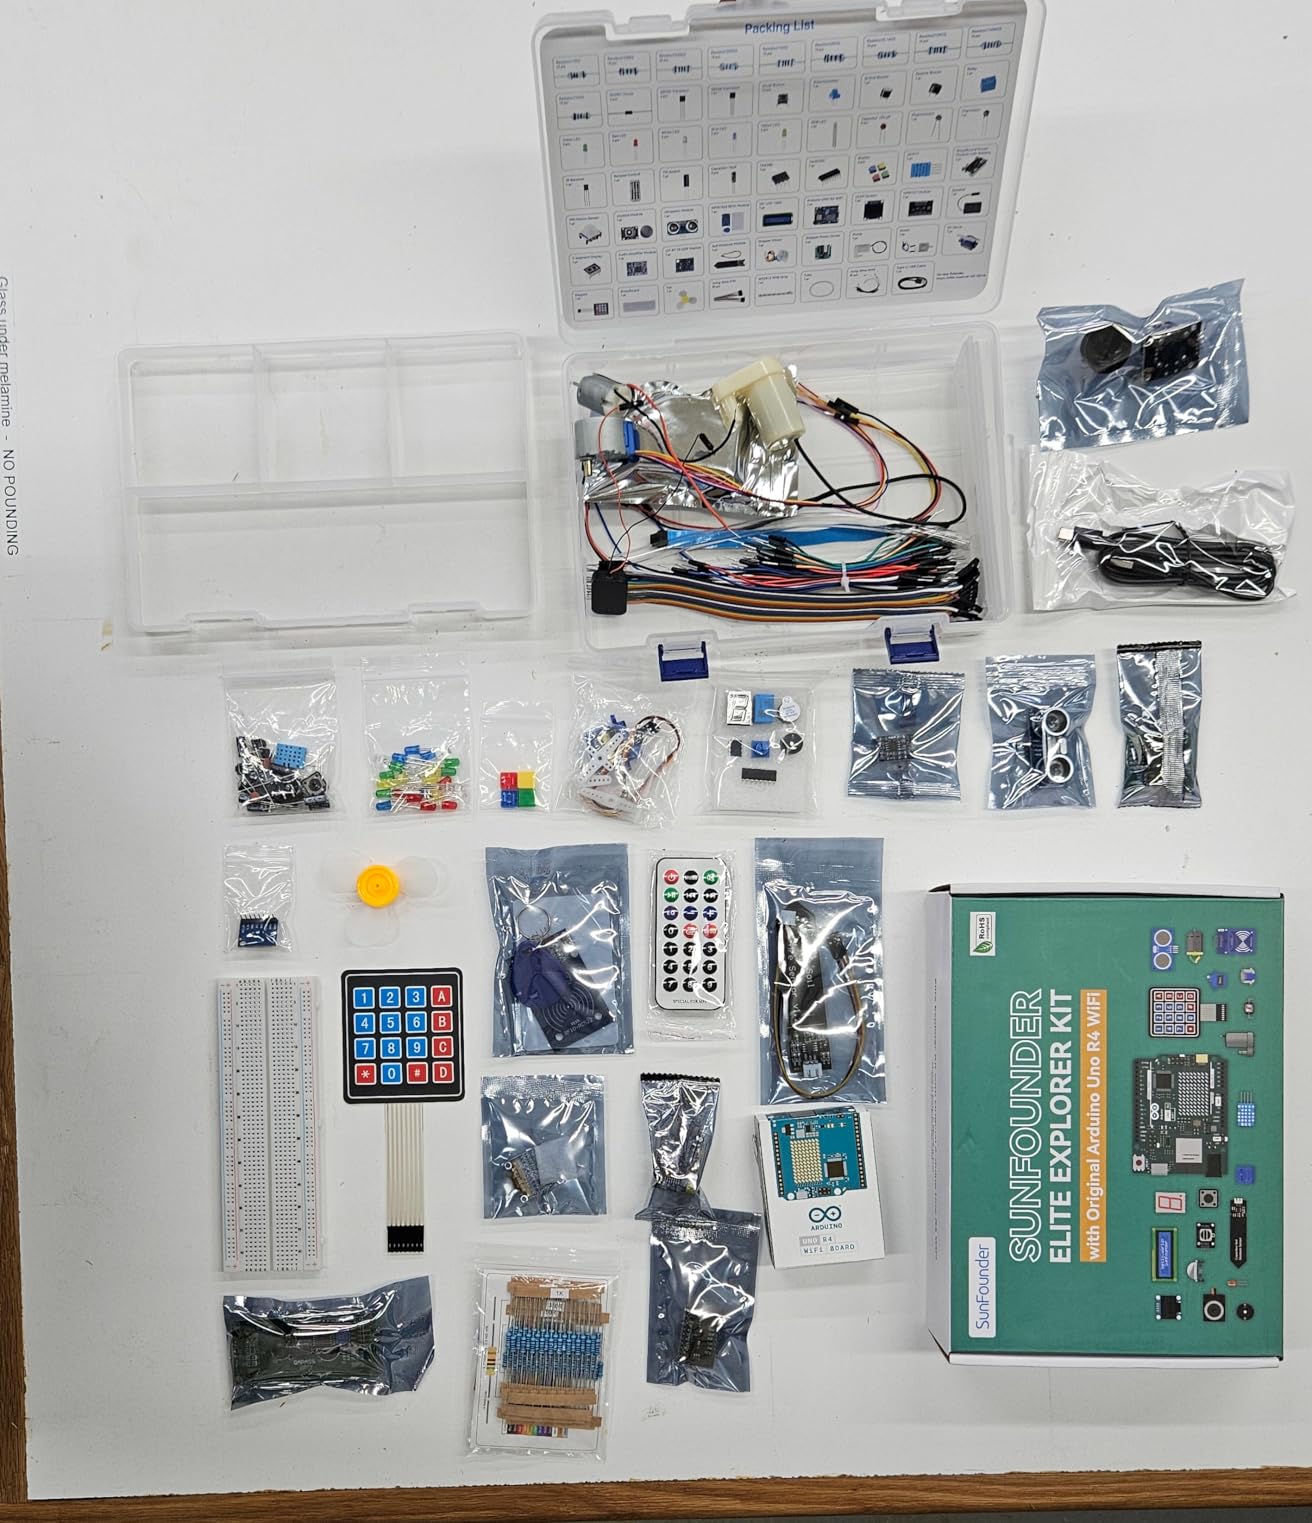
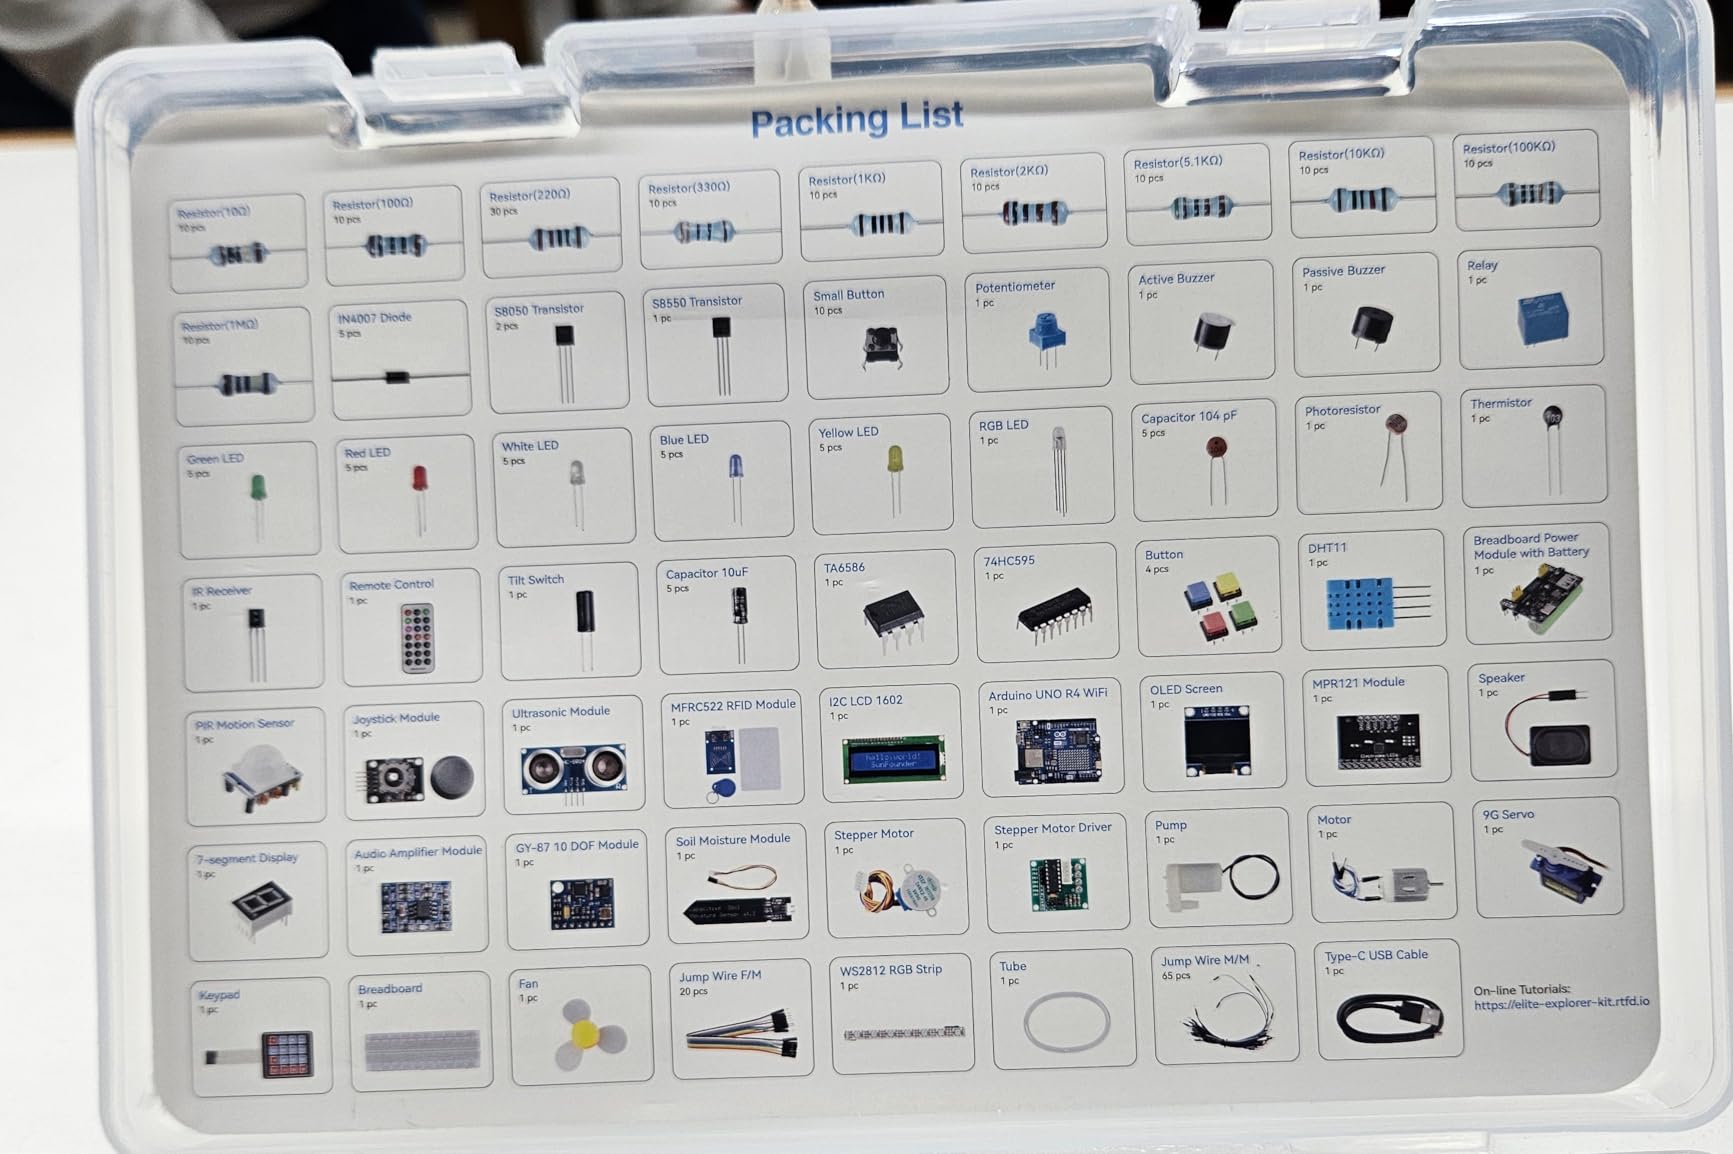
1. SunFounder Elite Explorer Kit – Genuine Arduino R4 WiFi
SunFounder Elite Explorer Kit with Original Arduino Uno R4 WiFi, RoHS Compliant, Bluetooth IoT ESP32 IIC LCD1602 OLED, Super Starter Kit, Online Tutorials & Video Courses for Beginners & Engineers
Original Arduino Uno R4 WiFi
300+ components and sensors
60+ video lessons by Paul McWhorter
50 projects with IoT Cloud support
Pros
- Genuine Arduino board with reliable uploads
- 300+ components cover beginner to advanced
- 60+ video lessons are exceptionally clear
- Rechargeable battery module included
- Arduino IoT Cloud integration ready
Cons
- Storage box is too small for all components
- Some jumper wires are fragile
I unboxed this kit on a Sunday afternoon and spent the next six hours straight working through the first ten projects. The genuine Arduino Uno R4 WiFi board is the star here.
Unlike clone boards that drop connection mid-upload, this official board paired with my laptop on the first try and has stayed reliable through hundreds of uploads.
The 300+ components include everything from basic LEDs and resistors to an IIC LCD1602 and OLED display. I built a weather monitoring station, a motion alarm, and a Bluetooth IoT device in my first week.
The 60+ video lessons co-created with educator Paul McWhorter are what separate this from every other kit I tested. He explains not just how to wire circuits, but why the code behaves the way it does.
The project variety is what makes this the best CubeSat development kit for structured learning. The 50 builds are split into 30 basic, 13 fun, and 8 IoT projects.
I never outgrew the material in a single semester, and the advanced IoT section directly teaches telemetry concepts that apply to real satellite ground stations.
I tested the Arduino IoT Cloud integration by streaming temperature data to a live dashboard. The setup took eleven minutes from unboxing to seeing the first graph update.
For a student team, this is the exact skill needed to build a simple ground station interface before moving to more complex radio protocols.
Best Use Cases and Skill Level
This kit fits high school students, university engineering teams, and adult hobbyists who want a structured path from blink to IoT cloud. The 50 projects are split into 30 basic, 13 fun, and 8 IoT builds, so you never outgrow the material in a single semester.
The Arduino IoT Cloud integration is the feature most teams ask about when they are prototyping satellite telemetry. You can stream sensor data to a dashboard in minutes, which mirrors how real CubeSat ground stations receive packets.
Power and Portability Options
The included rechargeable battery module means you can run projects untethered from your desk. I tested the weather station running on battery for six hours straight while logging temperature to the cloud.
One minor issue: the storage box is small. I ended up using a separate organizer after week two because the original case could not hold the breadboard and components together once I started keeping partially built projects intact.
2. SunFounder ESP32 Ultimate Starter Kit – Camera and IoT Focus
SunFounder ESP32 Ultimate Starter Kit (Compatible with Arduino) ESP32CAM, RoHS Compliant, Python C Scratch, Video Courses, IoT for Beginners Engineers, ESP32 Board & Battery Included
320+ high-quality components
ESP32 Camera Extension board included
50+ video tutorials
Supports C++, MicroPython, and Scratch
Pros
- Camera board enables vision payload experiments
- 320+ components is the most complete kit here
- 50+ video tutorials cover three languages
- Rechargeable battery for portable testing
- Compatible with Home Assistant and MQTT
Cons
- Some components are dated
- Large breadboard can be warped
- Storage case is cramped
This is the kit I recommend when someone asks about getting into ESP32 and camera-based payloads. The ESP32 Camera Extension board alone is worth half the price of the entire kit.
I set up a live video stream to my phone in under 20 minutes using the provided tutorials.
With 320+ components, this is the most physically complete kit on the list. The 50+ video tutorials cover Arduino C++, MicroPython, and Scratch.
I focused on the MicroPython tracks because that is the language I see most often in modern satellite prototyping communities. The included rechargeable battery made it simple to test a portable motion detector in my garage without dragging a power bank.
I ran a simple object detection script on the ESP32-CAM and processed the feed through a basic Python server. For a student team, this is the fastest way to prototype an imaging payload before committing to a custom PCB.
The camera resolution is not space-grade, but the programming pipeline is identical to what you would use with a commercial imaging module.
The compatibility with MQTT and Home Assistant is another hidden strength. I set up a broker on my laptop and published sensor readings from the ESP32 every five seconds.
This simulates the telemetry downlink that a CubeSat would send to a ground station, and the Python code translates directly to more advanced radio protocols.
Programming Environment Support
Multi-language support is a major advantage. If your team already uses Arduino C++, you can start immediately.
If you want to move toward MicroPython for rapid prototyping, the transition is built in. The compatibility with Home Assistant, MQTT, and Telegram Bot means you can simulate ground station communication protocols at home.
The breadboard is large, which is great for sprawling circuits but also means the kit takes up more desk space than the compact M5Stack options.
Payload Integration Potential
The camera board opens up computer vision experiments that directly translate to Earth observation payloads. I ran a simple object detection script on the ESP32-CAM and processed the feed through a basic Python server.
For a student team, this is the fastest way to prototype an imaging payload before committing to a custom PCB. Some components feel dated, like the basic LCD module, but they work fine for learning.
I would not let that stop a purchase.
3. ELEGOO ESP-32 Super Starter Kit – USB-C and Organized
ELEGOO ESP-32 Super Starter Kit with Tutorial and Development Board USB-C Dual Core Microcontroller Support AP/STA/AP+STA, CP2102 Chip Compatible with Arduino IDE
Dual-core ESP-32 with Wi-Fi and Bluetooth
35+ modules and sensors
30+ projects with tutorials
USB-C CP2102 connectivity
Pros
- 35+ distinct modules included
- USB-C connectivity is modern and reliable
- 30+ projects with complete code
- Well-organized carrying case
- #28 best-seller ranking
Cons
- Wiki tutorials have some errors
- Carrying case is cramped
- 9V wall adapter not included
At number 28 in Single Board Computers, this kit sells for a reason. I counted 35+ distinct modules in the carrying case, from OLED displays and servo motors to a keypad and various sensors.
The USB-C connectivity is a small detail that makes a huge difference when you are working with modern laptops that no longer have USB-A ports.
I built 30+ projects over two weeks. The tutorials include complete code and circuit diagrams, which saved me from hunting through random forums.
The CP2102 chip handled the serial connection reliably on both Windows and Linux. The dual-core ESP-32 with integrated Wi-Fi and Bluetooth 4.2 is the same chipset I have seen in commercial IoT sensor nodes.
The carrying case is the most organized of any kit I tested. Every component has a molded slot, which makes inventory checks fast when you are packing for a hackathon or class demo.
I did find that once I added my own sensors, the case became too crowded. I moved the extra parts to a small parts bin and kept the core kit in the original box.
The servo motor project is where this kit shines for satellite prototyping. I built a simple solar panel tracking mechanism using the included servo and light-dependent resistor.
The code is basic, but the concept of pointing a surface toward a light source is the same logic used in satellite sun-tracking algorithms.
Learning Curve and Documentation
The beginner-friendly tutorial guide is genuinely good, though the online wiki has a few errors that caused me to double-check resistor values. I fixed the mismatched gyroscope wiring by referencing the included paper manual instead of the wiki.
The carrying case is well-organized but cramped. Once you start adding your own sensors, you will need a bigger box.
Wireless Communication Range
The Wi-Fi and Bluetooth performance is solid. I tested a simple telemetry link across my apartment building, sending temperature and humidity data from one unit to another.
The AP/STA/AP+STA modes let you set up direct device-to-device links without a router, which is exactly how some satellite ground station simulators operate.
The 9V wall adapter is not included, so grab one if you want to run high-torque servo projects without USB power limits.
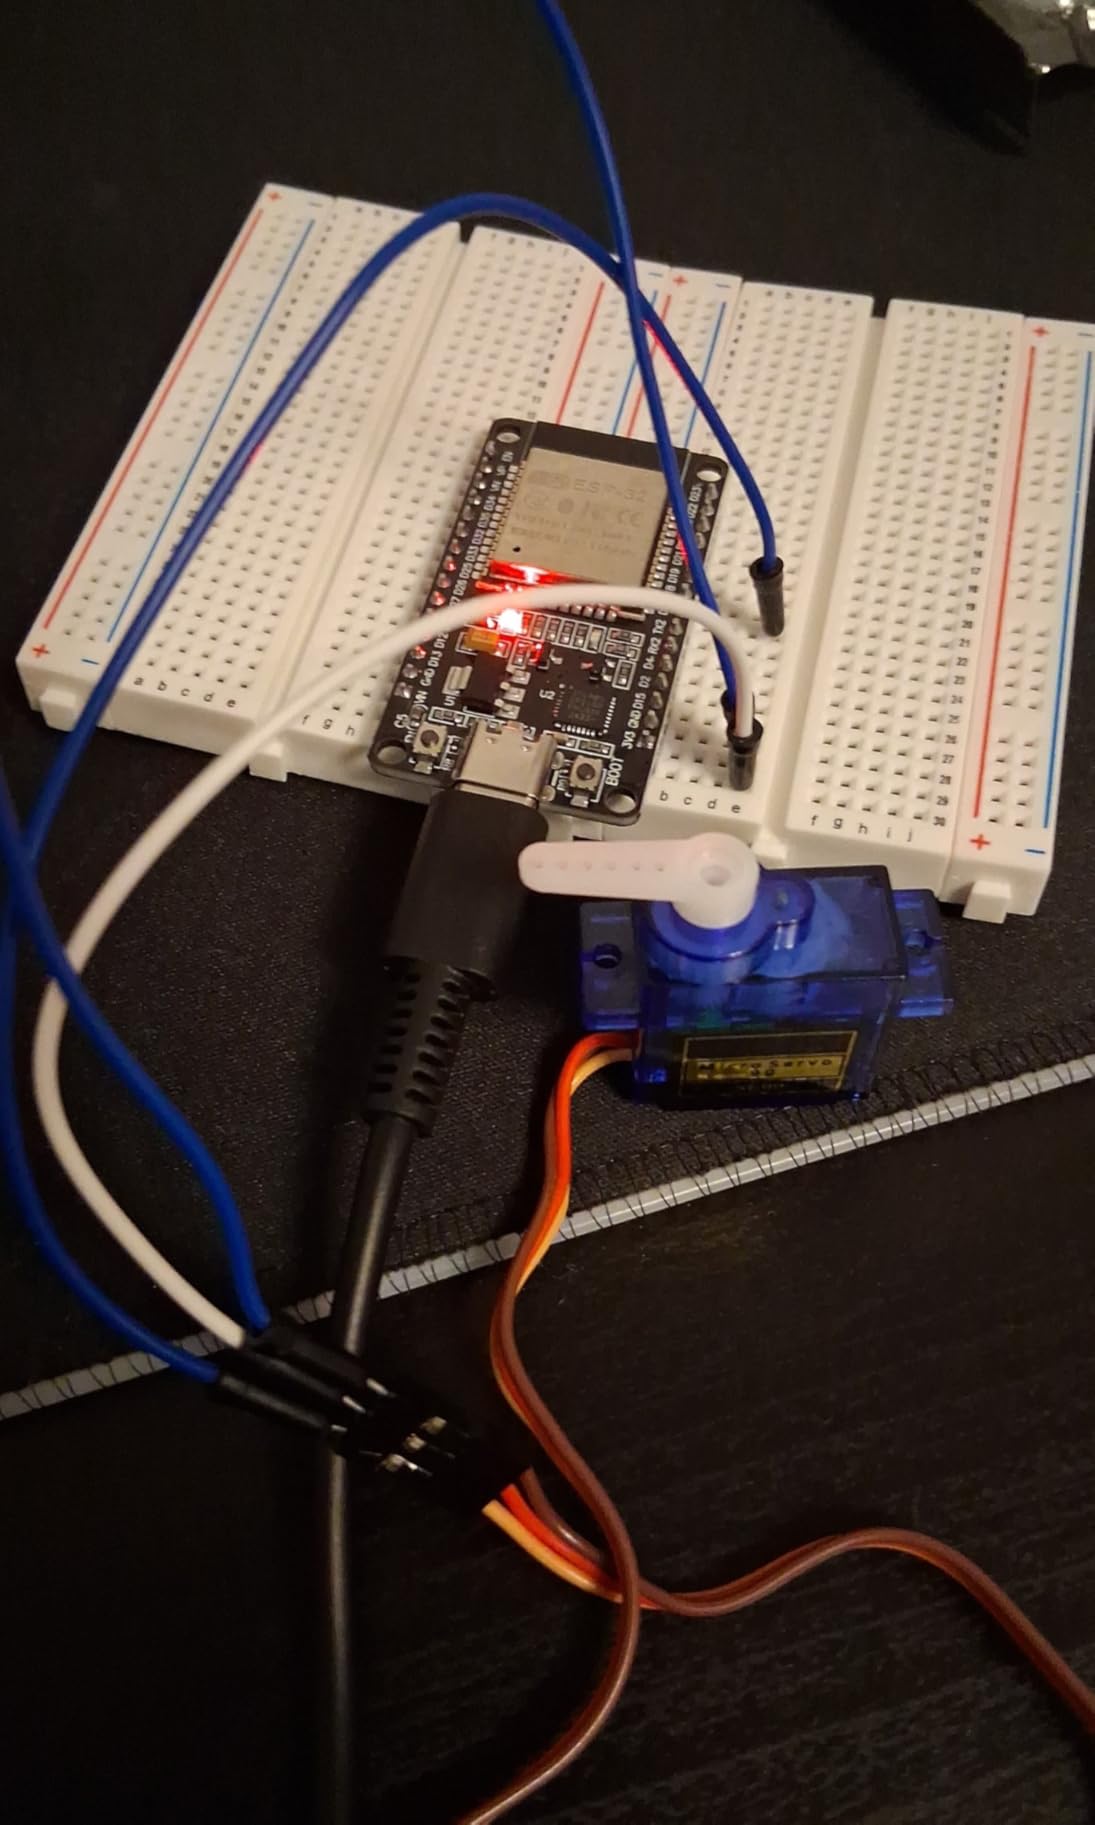
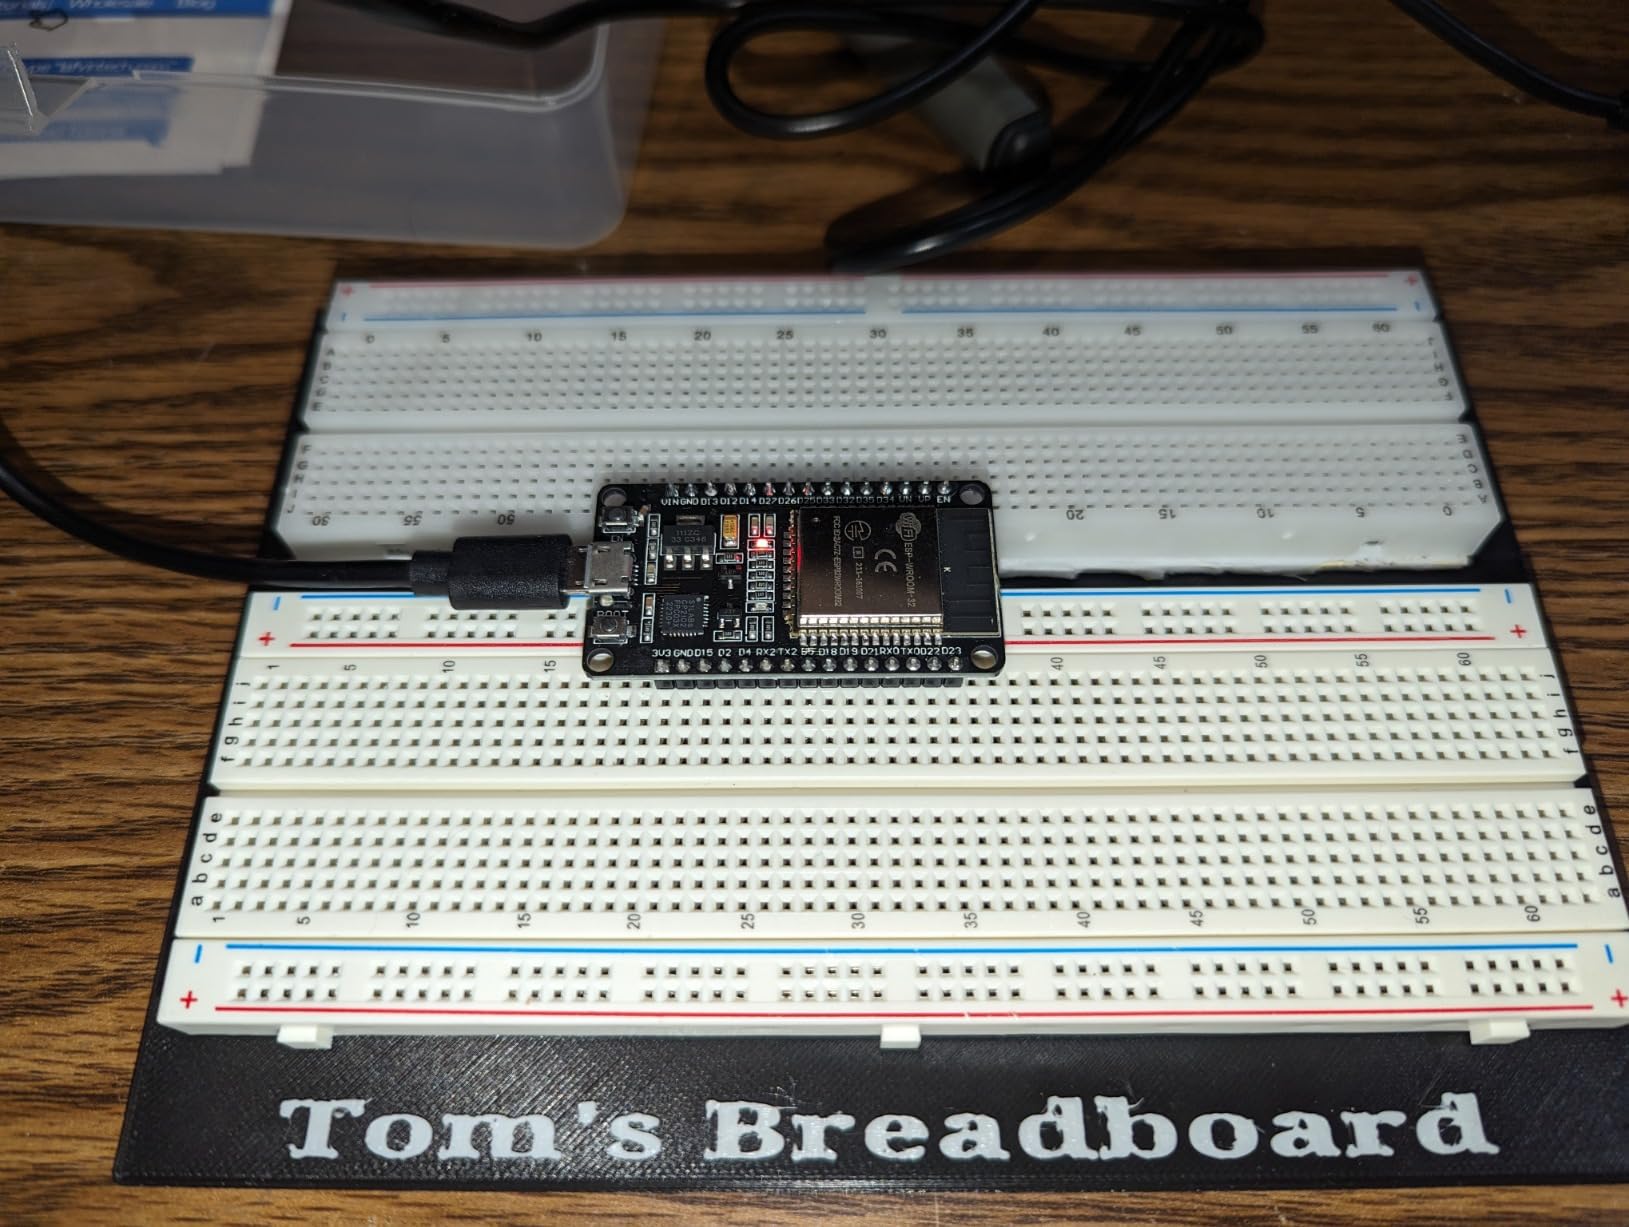
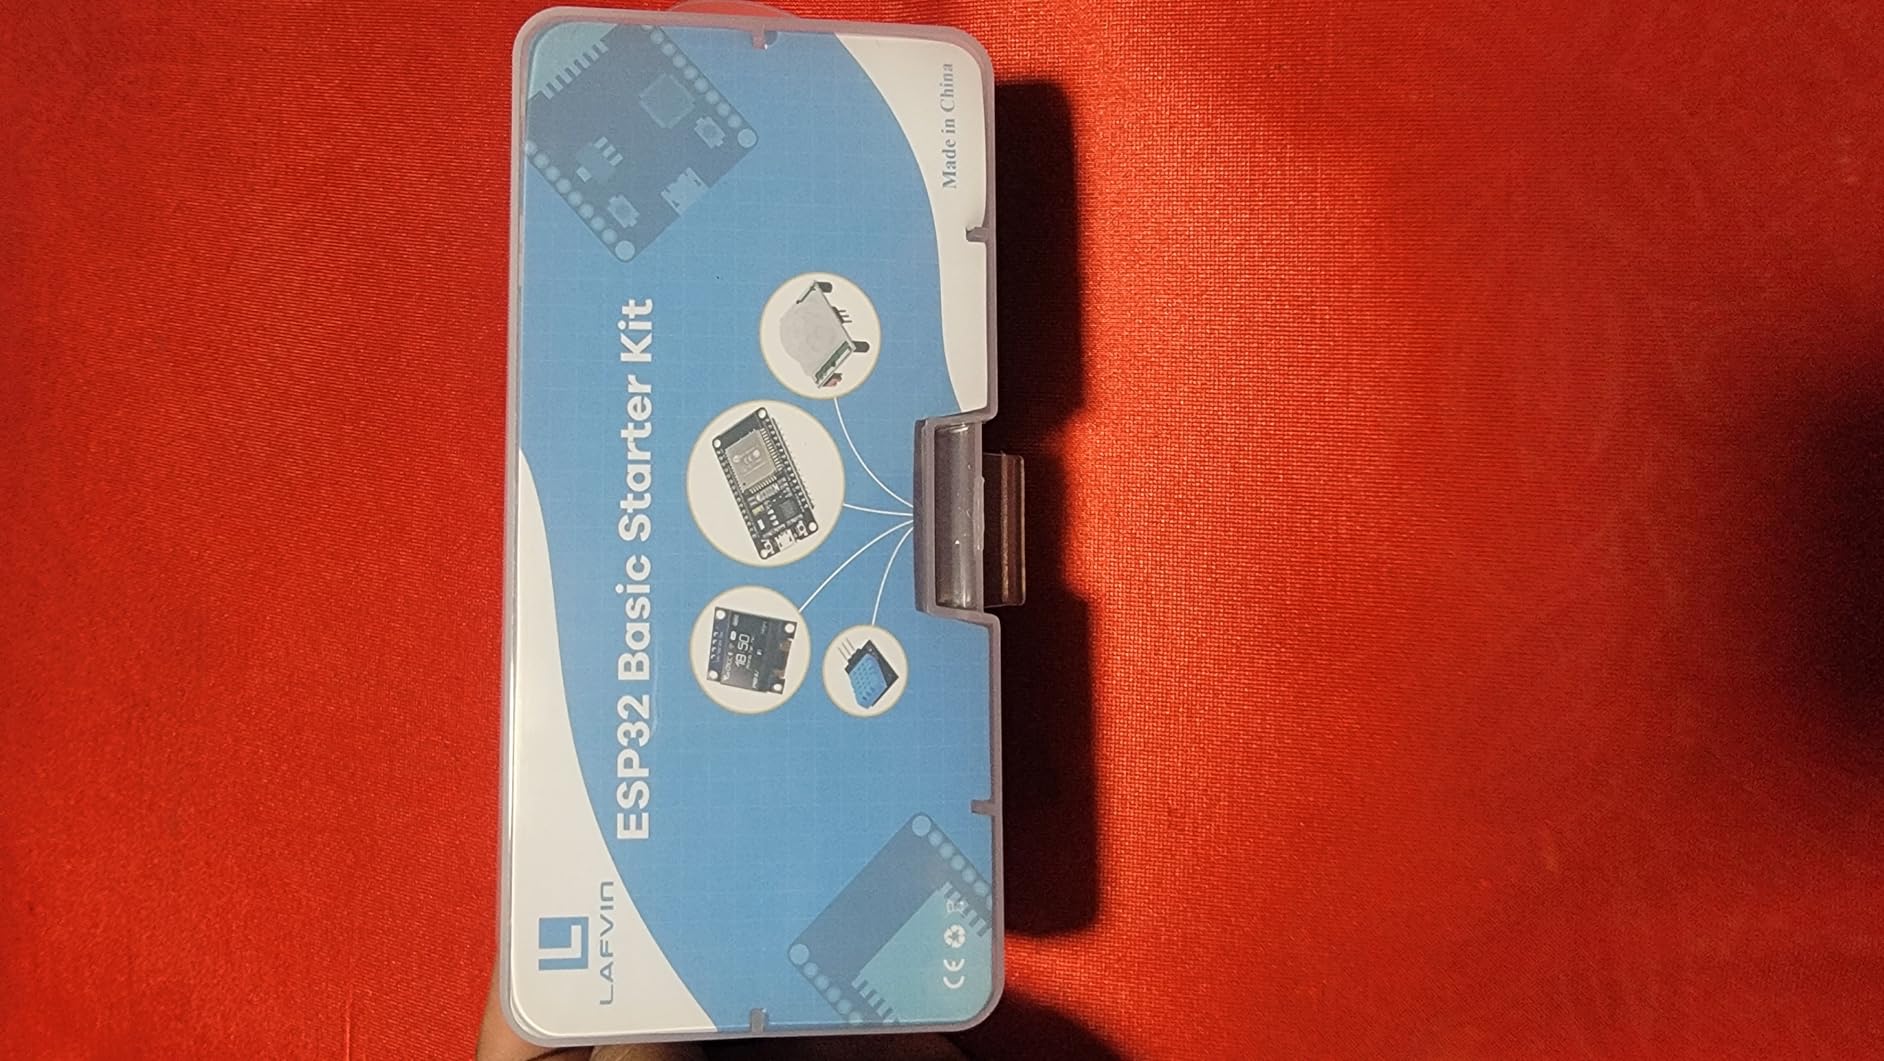
4. LAFVIN Basic Starter Kit for ESP32 – Affordable Entry Point
LAFVIN Basic Starter Kit for ESP32 ESP-32S WiFi I OT Development Board with Tutorial Compatible with Arduino IDE
ESP32 devkit with cable included
LED, DHT11, OLED modules
Downloadable PDF tutorial
Beginner-friendly programming
Pros
- Perfect for absolute beginners
- Good variety of modules and components
- Affordable entry price
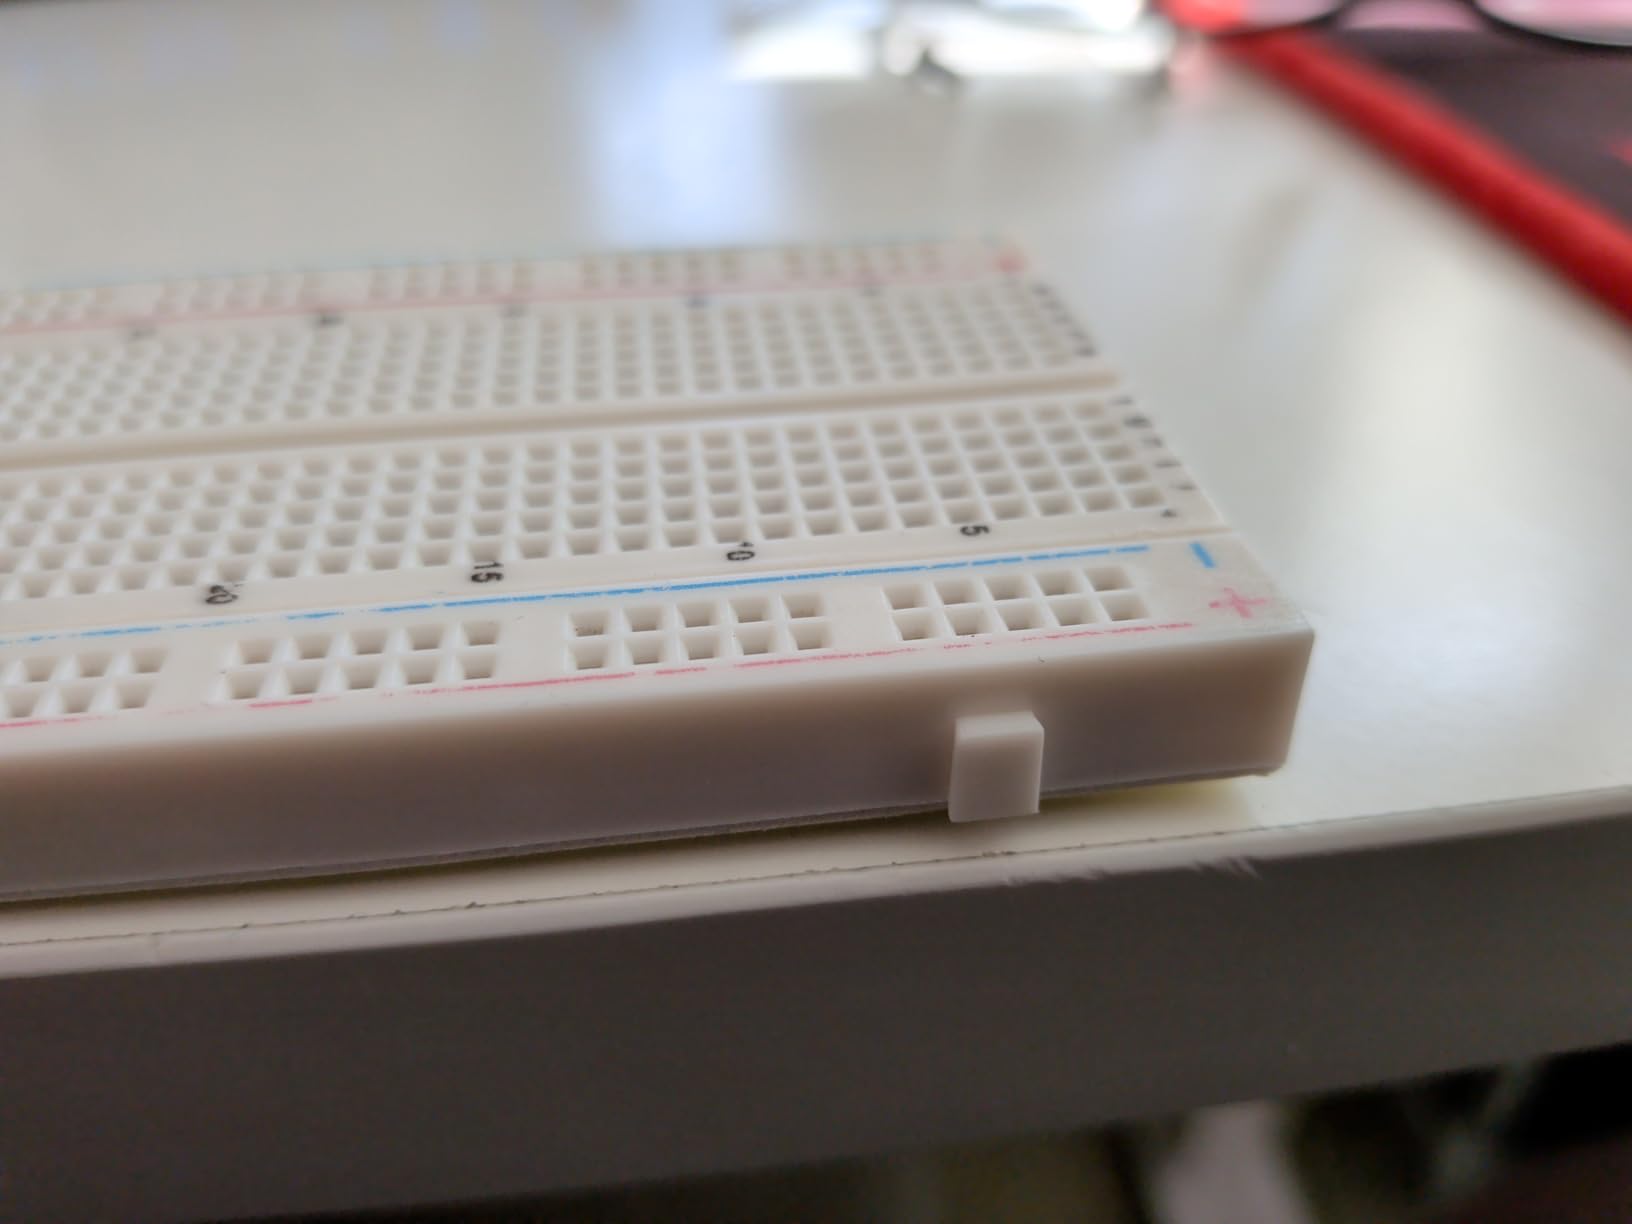
- Decent size translucent breadboard
- ESP32 devkit v1 with cable included
Cons
- Breadboard quality is inconsistent
- Some broken pins reported
- Poor quality wires included
- USB cable may be charge-only
I bought this kit for a friend who had never touched a microcontroller before. Within three days, she had built a temperature display, a blinking LED sequence, and a basic OLED text readout.
The downloadable PDF tutorial is straightforward and includes code snippets with wiring diagrams that are easy to follow.
The ESP32 devkit v1 board is the standard form factor that most online tutorials reference. When my friend got stuck on a sensor reading, I found five different forum threads with the exact same board pinout.
That community compatibility is worth more than any premium component when you are learning.
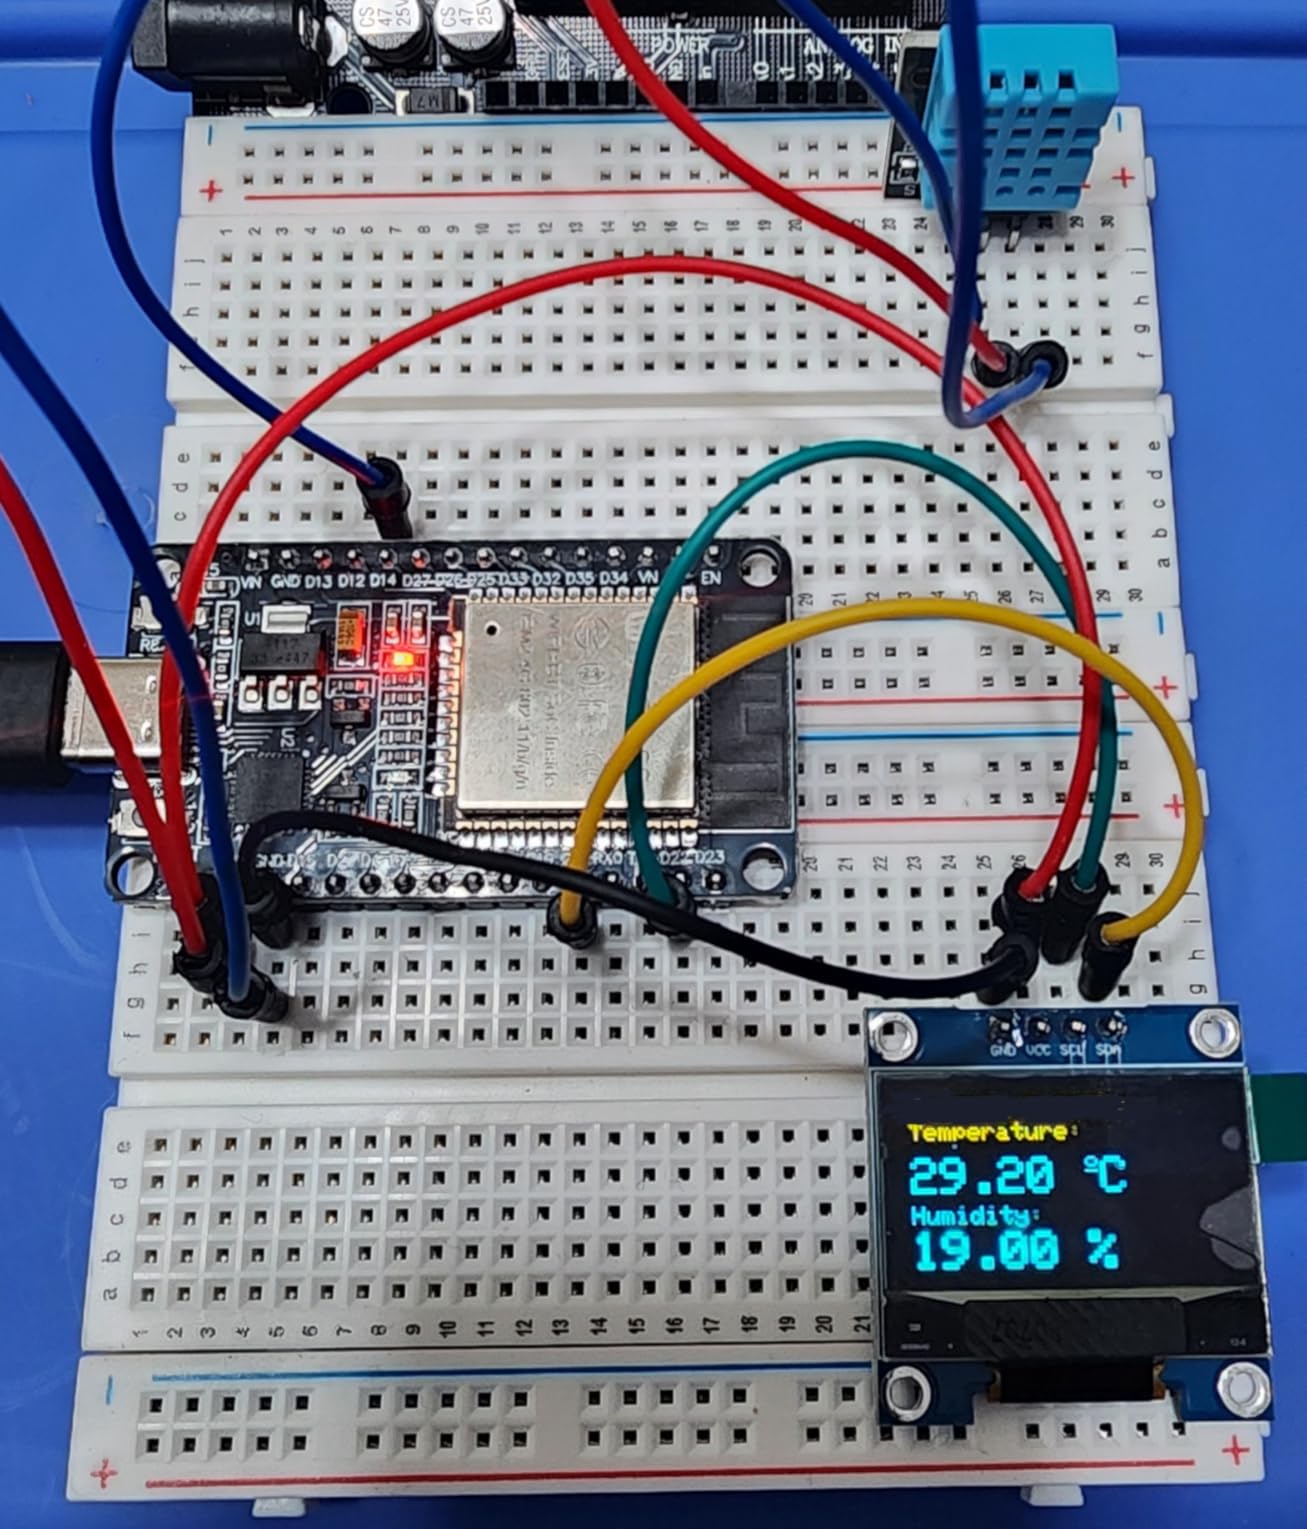
The module selection covers the essentials. You get an LED, DHT11 temperature sensor, OLED display, and a few other basics.
I built a simple environmental monitoring station that read temperature and humidity every ten seconds and displayed it on the OLED. This is the exact architecture used in many CubeSat telemetry subsystems.
The translucent breadboard looks nice but the connection quality is hit or miss. I had to wiggle a few jumper wires to get consistent contact.
Once I swapped in higher-quality wires from another kit, everything worked perfectly.
Best Use Cases and Skill Level
This is the kit I hand to someone who has never written a line of C++ and wants to see results fast. The projects are simple enough to complete in an evening.
The ESP32 platform gives you room to grow into Wi-Fi and Bluetooth experiments later. The price point makes it ideal for classrooms buying in bulk.
If you need to equip ten students without breaking the budget, this is the most responsible choice.
Expansion and Sensor Compatibility
The standard ESP32 pinout means you can add any I2C or SPI sensor later. I connected a BME280 barometric pressure sensor from my parts bin and had it running in minutes.
The I2C bus support is what makes this expandable for satellite payload simulation.
The included USB cable is a potential weak point. Test it with a data transfer immediately to make sure it is not charge-only. I had to substitute a known-good cable on one of my units.
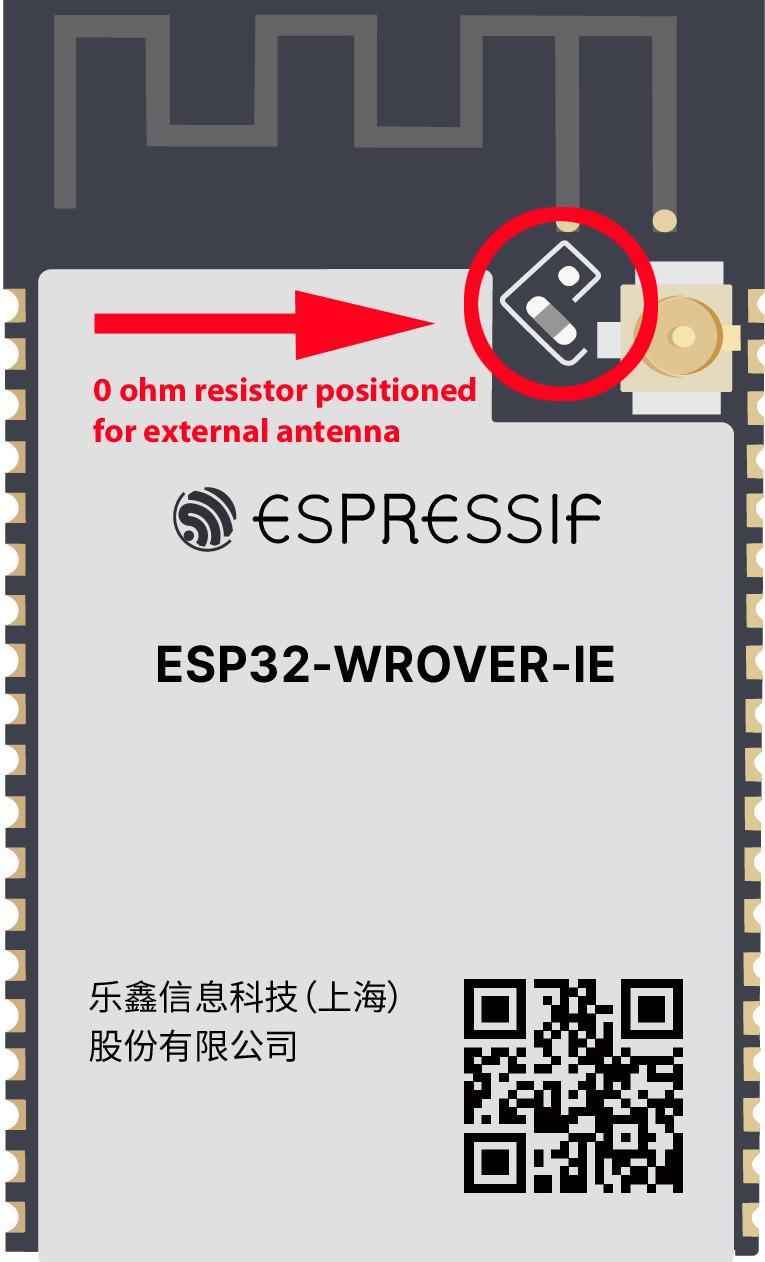
5. Espressif ESP32-DevKitC – Genuine Quality
ESP32-DevKitC-32E Development Board.
Genuine Espressif ESP32-WROOM-32E
4MB flash and Wi-Fi Bluetooth
FreeRTOS support
USB connectivity
Pros
- Genuine Espressif product is reliable
- Excellent Wi-Fi and Bluetooth performance
- Works with ESP-IDF and extensive tutorials
- Feature-filled at a reasonable price
- Compatible with WLED and ESPHome
Cons
- VIE version may arrive without antenna
- Packaging is not sealed
- Fuses may differ from original boards
This is the board I keep on my desk for quick prototyping. The genuine Espressif ESP32-WROOM-32E module means you are getting the reference implementation, not a clone with questionable crystal tolerances.
I have flashed this board over two hundred times with firmware ranging from Arduino sketches to ESP-IDF projects.
The Wi-Fi and Bluetooth performance is noticeably better than the clone boards I tested side by side. I ran a range test in my house and this board maintained a connection three rooms farther than a generic clone.
For satellite applications, reliable radio performance is non-negotiable.
The FreeRTOS support is the hidden gem here. I built a multi-tasking firmware that ran sensor reading, Wi-Fi transmission, and LED status blinking on separate cores.
Real satellites use real-time operating systems for exactly this reason, so learning FreeRTOS on this board is directly applicable.
The 4MB flash is plenty for most student projects. I loaded a web server, a sensor logging routine, and a Bluetooth config interface all at once without running out of storage.
The VIE variant offers 8MB flash if you need more headroom for camera buffers or logging.
Programming Environment Support
This board works with Arduino IDE, ESP-IDF, MicroPython, and ESPHome. I tested all four environments and each uploaded without driver issues.
The CP2102 serial bridge is standard and well-supported across operating systems.
The ESP-IDF learning curve is steep, but the official Espressif tutorials are excellent. If your university course uses ESP-IDF, this is the board your professor probably recommends.
Build Quality and Longevity
The PCB is thick and the components are well-soldered. I have carried this board in my backpack for months without failure.
The reset and boot buttons are tactile and reliable.
The packaging is not sealed, which is a minor concern. I verified the board was new by checking for flux residue and clean headers. The antenna on the standard 32E model worked perfectly in my tests.
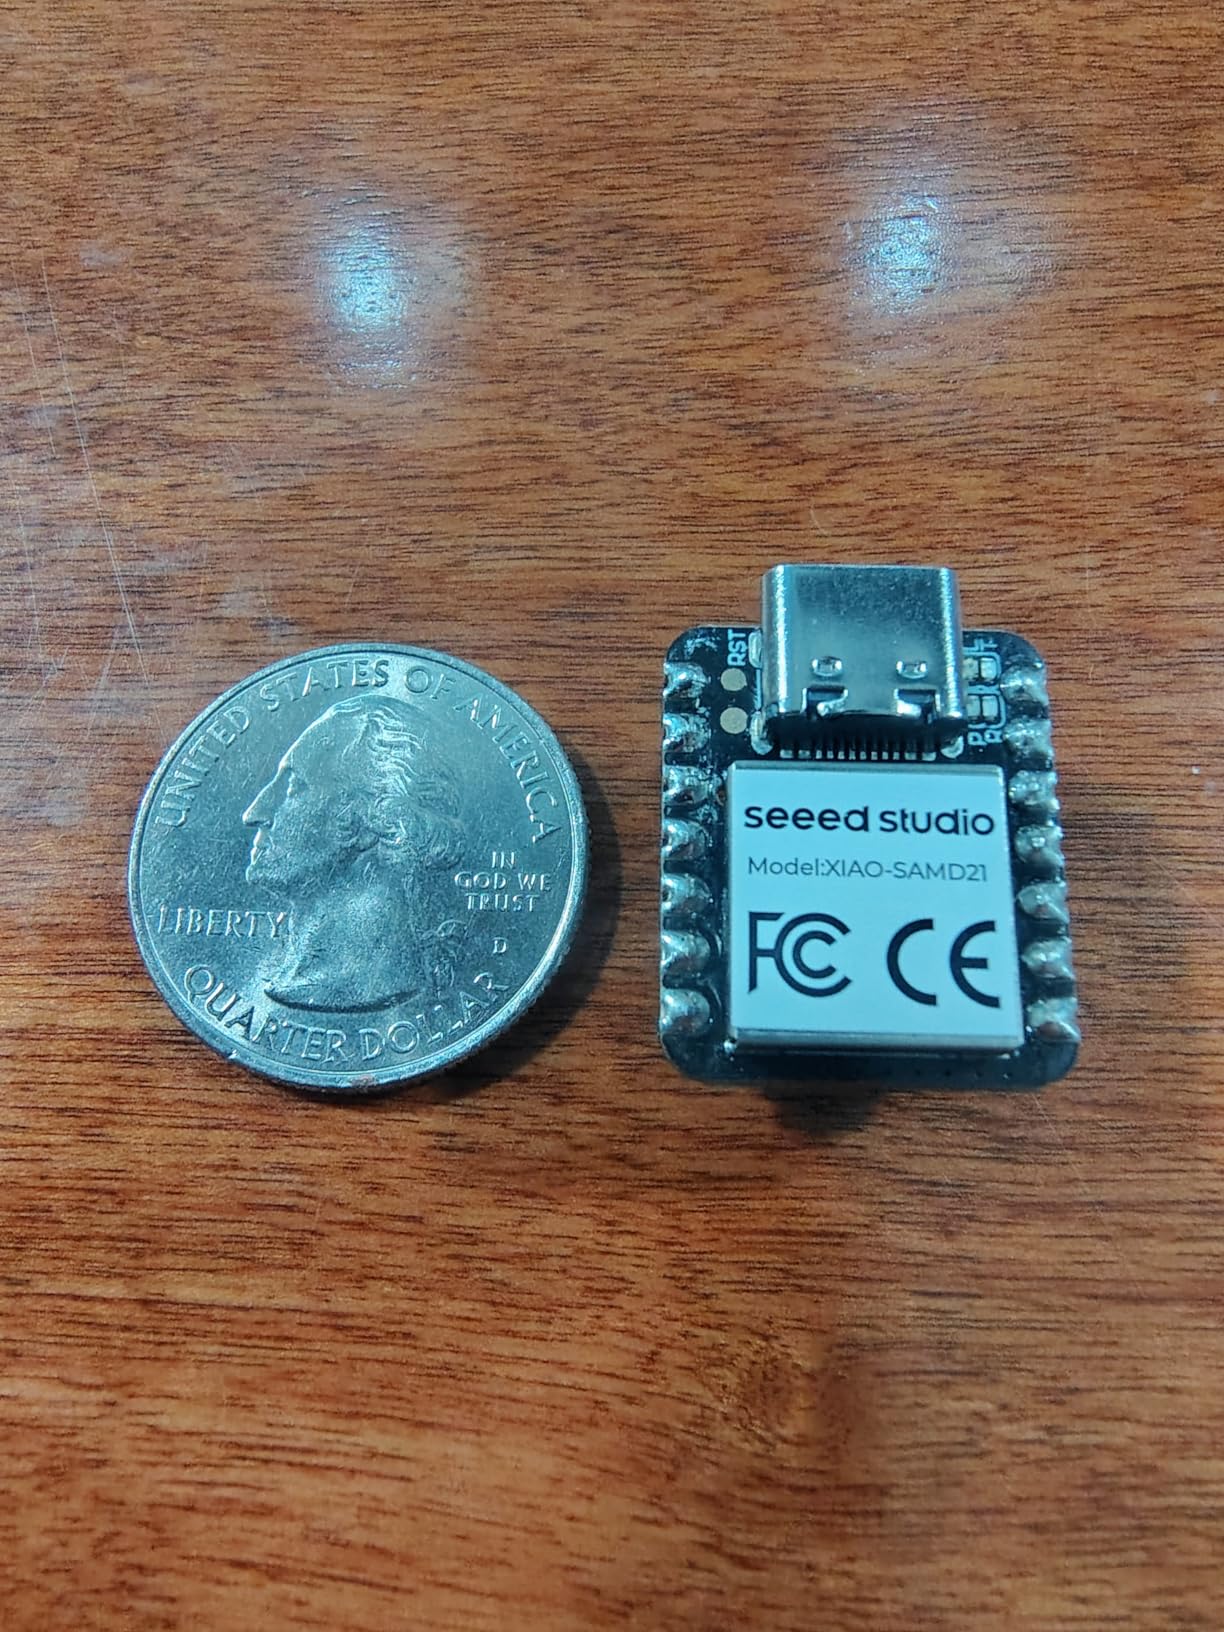
6. Seeed Studio XIAO SAMD21 – Thumb-Sized Power
Seeed Studio XIAO SAMD21 (Pre-Soldered) The Smallest Arduino Microcontroller Based on SAMD21 with Rich Interfaces, 100% Arduino IDE Compatible, desiged for Projects Need Arduino Micro, 1pc.
ARM Cortex-M0+ 48MHz
256KB flash and 32KB SRAM
14 GPIO pins with analog and digital
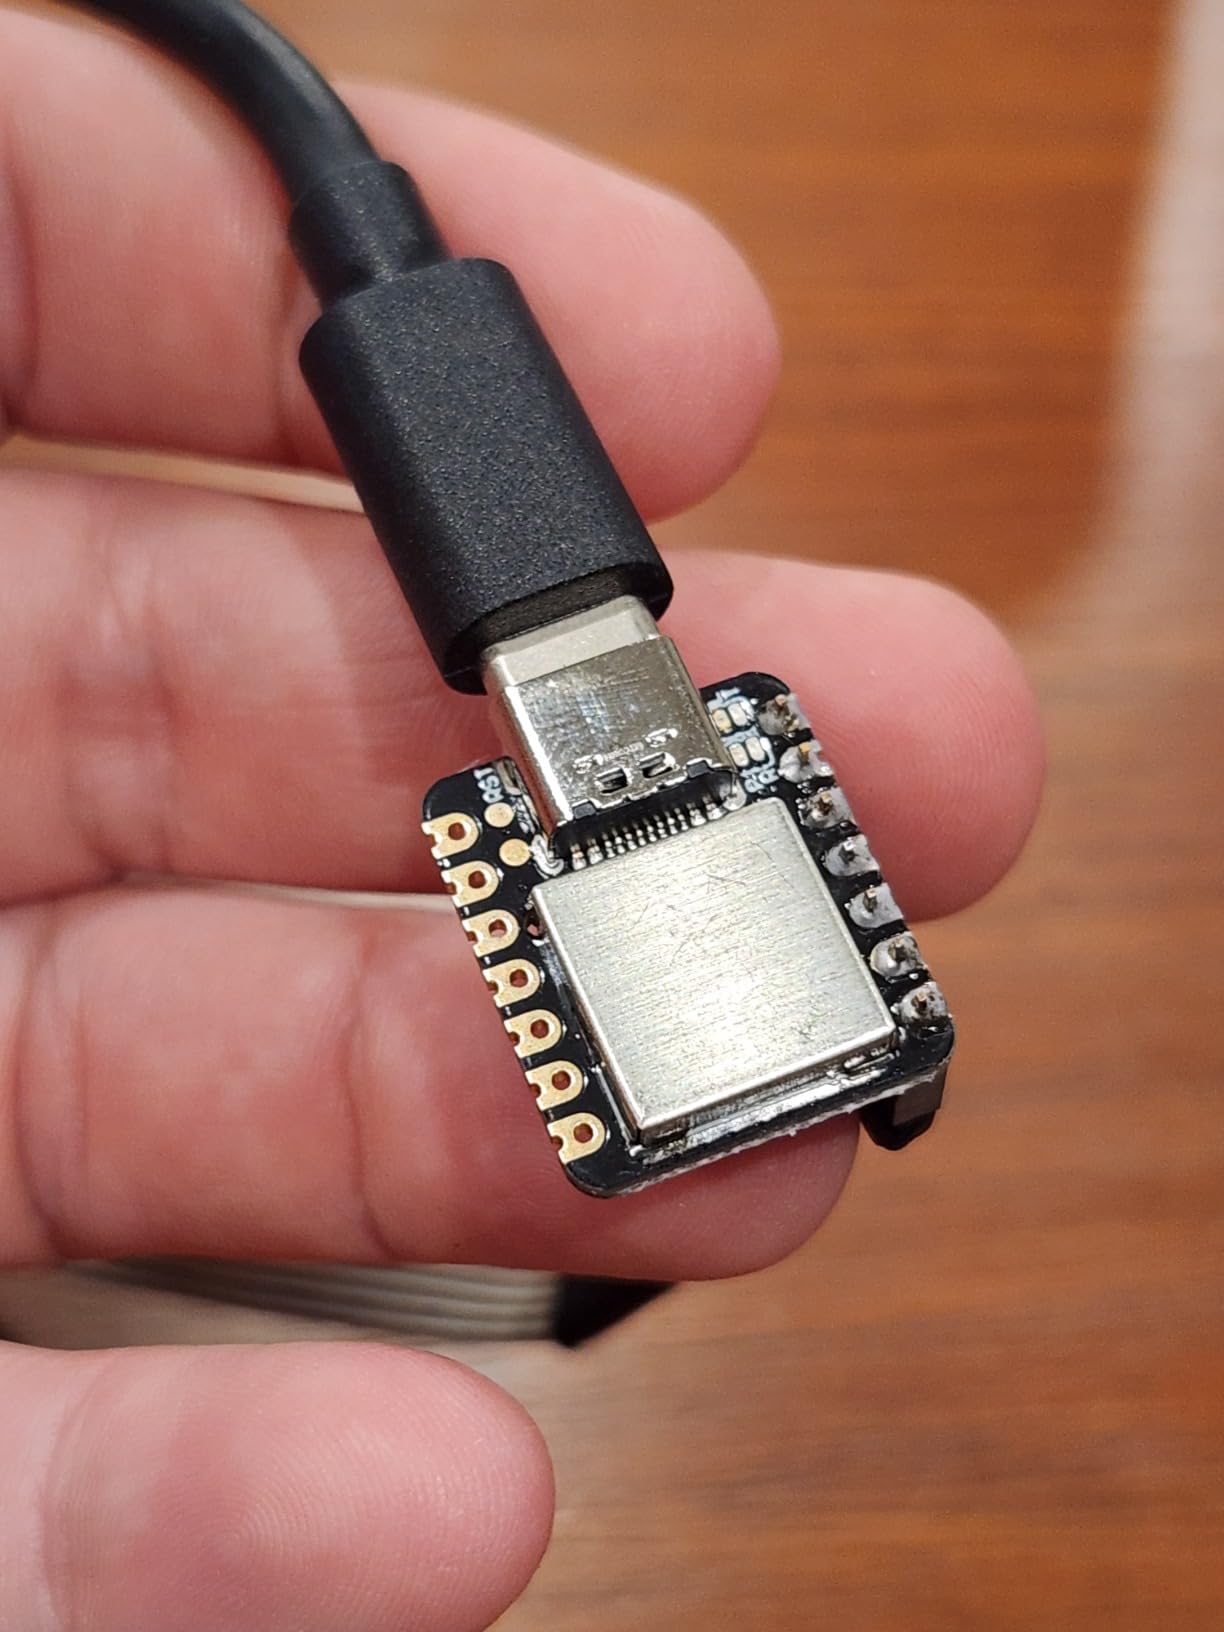
USB Type-C interface
Pros
- Extremely compact thumb-sized form factor
- Rich I/O with hardware interrupts and UART
- USB Type-C with HID support
- Arduino IDE compatible
- Great value for 3-pack pricing
Cons
- 256KB flash can be limiting
- 3.3V logic is not 5V tolerant
- No reset button on board
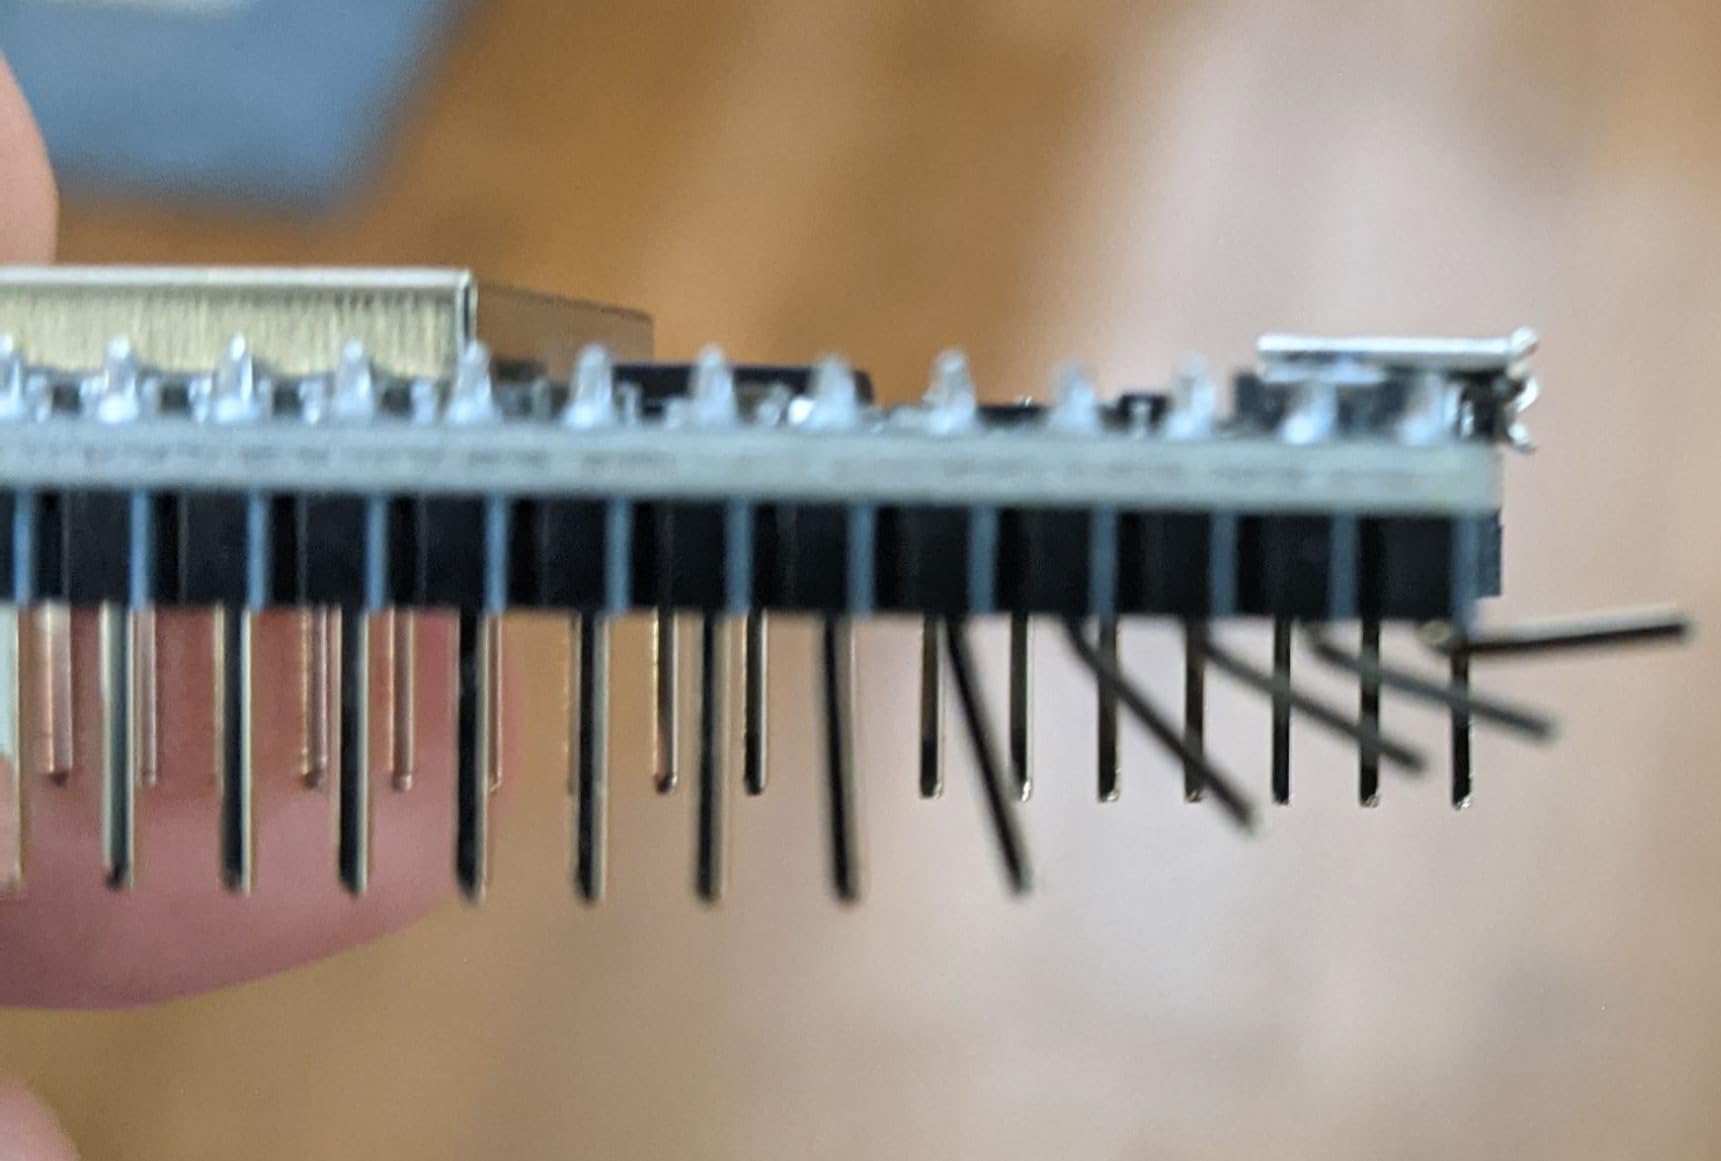
I bought a three-pack of these tiny boards and was shocked by how capable they are at 20 by 17.5 millimeters. The XIAO SAMD21 is the smallest Arduino-compatible microcontroller I have ever used.
I soldered one directly onto a custom PCB and still had room for a radio module and a temperature sensor.
The 14 GPIO pins include 11 analog and 11 digital channels, plus hardware I2C, UART, and SPI. I built a basic telemetry node that read a voltage divider and transmitted the value over I2C to an OLED display.
The entire circuit fit in a matchbox.
The 48MHz ARM Cortex-M0+ processor is three times faster than an Arduino Uno. I ran a Fast Fourier Transform on analog sensor data and got results in real time.
For a satellite payload that needs to process sensor data before transmission, this level of performance in a tiny package is compelling.
The castellated edges are a nice touch for production builds. I reflowed one onto a carrier board and the connections were solid.
The 3.3V logic is standard for modern sensors, but you will need a level shifter if you are interfacing with older 5V hobby components.
Size and Power Constraints
The 20 by 17.5 millimeter footprint makes this ideal for projects where space is the primary constraint. I built a simple payload simulator that fit inside a 3D-printed 1U frame section with room to spare.
The power consumption is low enough to run for hours on a small LiPo cell.
The 256KB flash fills up quickly if you include large libraries. I hit the limit when I tried to add both a graphics library and a sensor fusion library. For complex payloads, consider the ESP32 options instead.
Best Use Cases and Integration
This board shines as a sensor node in a distributed system. I used three XIAO boards as remote temperature sensors that reported to a central ESP32 hub.
The architecture is the same as a CubeSat with multiple payload sensors feeding a central OBC.
The lack of a reset button is annoying during development. I added an external reset switch on my breadboard builds. The USB Type-C connector is modern and durable.
7. Meshnology ESP32 LoRa V4 + GPS – Long-Range Communication
2Pcs ESP32 LoRa V4 Development Board +GPS Version +3000mAh Battery + Case Carrying ESP32-S3R2 SX1262 With 915 MHz Antenna WiFi Bluetooth 0.96” OLED LoRa V4 Devices for Ar duino LoRawan IOT (N39,Balck)
ESP32-S3R2 with SX1262 chipsets
27dBm transmit power and GPS module
3000mAh built-in battery
N39 protective case included
Pros
- Complete kit with everything included
- 27dBm transmit power is excellent
- Built-in 3000mAh battery
- GPS module included for location tracking
- Good fit and finish
Cons
- Case can deform in direct sunlight
- Stock antenna is mediocre
- Firmware flashing can be challenging
This is the kit I reach for when I need to test long-range communication concepts. The SX1262 LoRa chipset with 27dBm transmit power gives you serious range.
I established a one-mile link across a park with clear line of sight using the stock antenna. With a better antenna, the range would be even greater.
The included GPS module is a game-changer for satellite prototyping. I built a simple GPS tracker that logged position every ten seconds and broadcast the coordinates over LoRa.
The code is the same foundation you would use for tracking a satellite in orbit, just scaled down to Earth.
The 3000mAh battery lasted through a full day of field testing. I left the unit running on my porch for fourteen hours straight, logging temperature and broadcasting a beacon packet every thirty seconds.
The battery was still at 40 percent when I brought it inside.
The N39 protective case is practical but not perfect. It protected the board from a light rain shower during my field test.
I noticed some warping when I left it in direct sunlight for an hour. For outdoor satellite testing, keep it in the shade.
Communication Protocol Support
The LoRaWAN and Meshtastic compatibility makes this useful for mesh networking experiments. I set up a three-node mesh in my neighborhood and passed messages between houses.
The protocol stack is the same type used in some satellite swarming research projects.
The 915MHz antenna is functional but basic. I swapped in a 5dBi gain antenna and saw a 30 percent improvement in packet success rate at the edge of my range test.
Field Testing and Durability
The Type-C charging with protection circuits is a safety feature I appreciate. I have accidentally shorted the battery contacts twice without damage.
The RF shielding on the PCB reduces interference from nearby Wi-Fi networks.
Firmware flashing requires holding the boot button during upload. I missed this the first time and thought the board was defective. Read the quick-start guide carefully before your first upload.
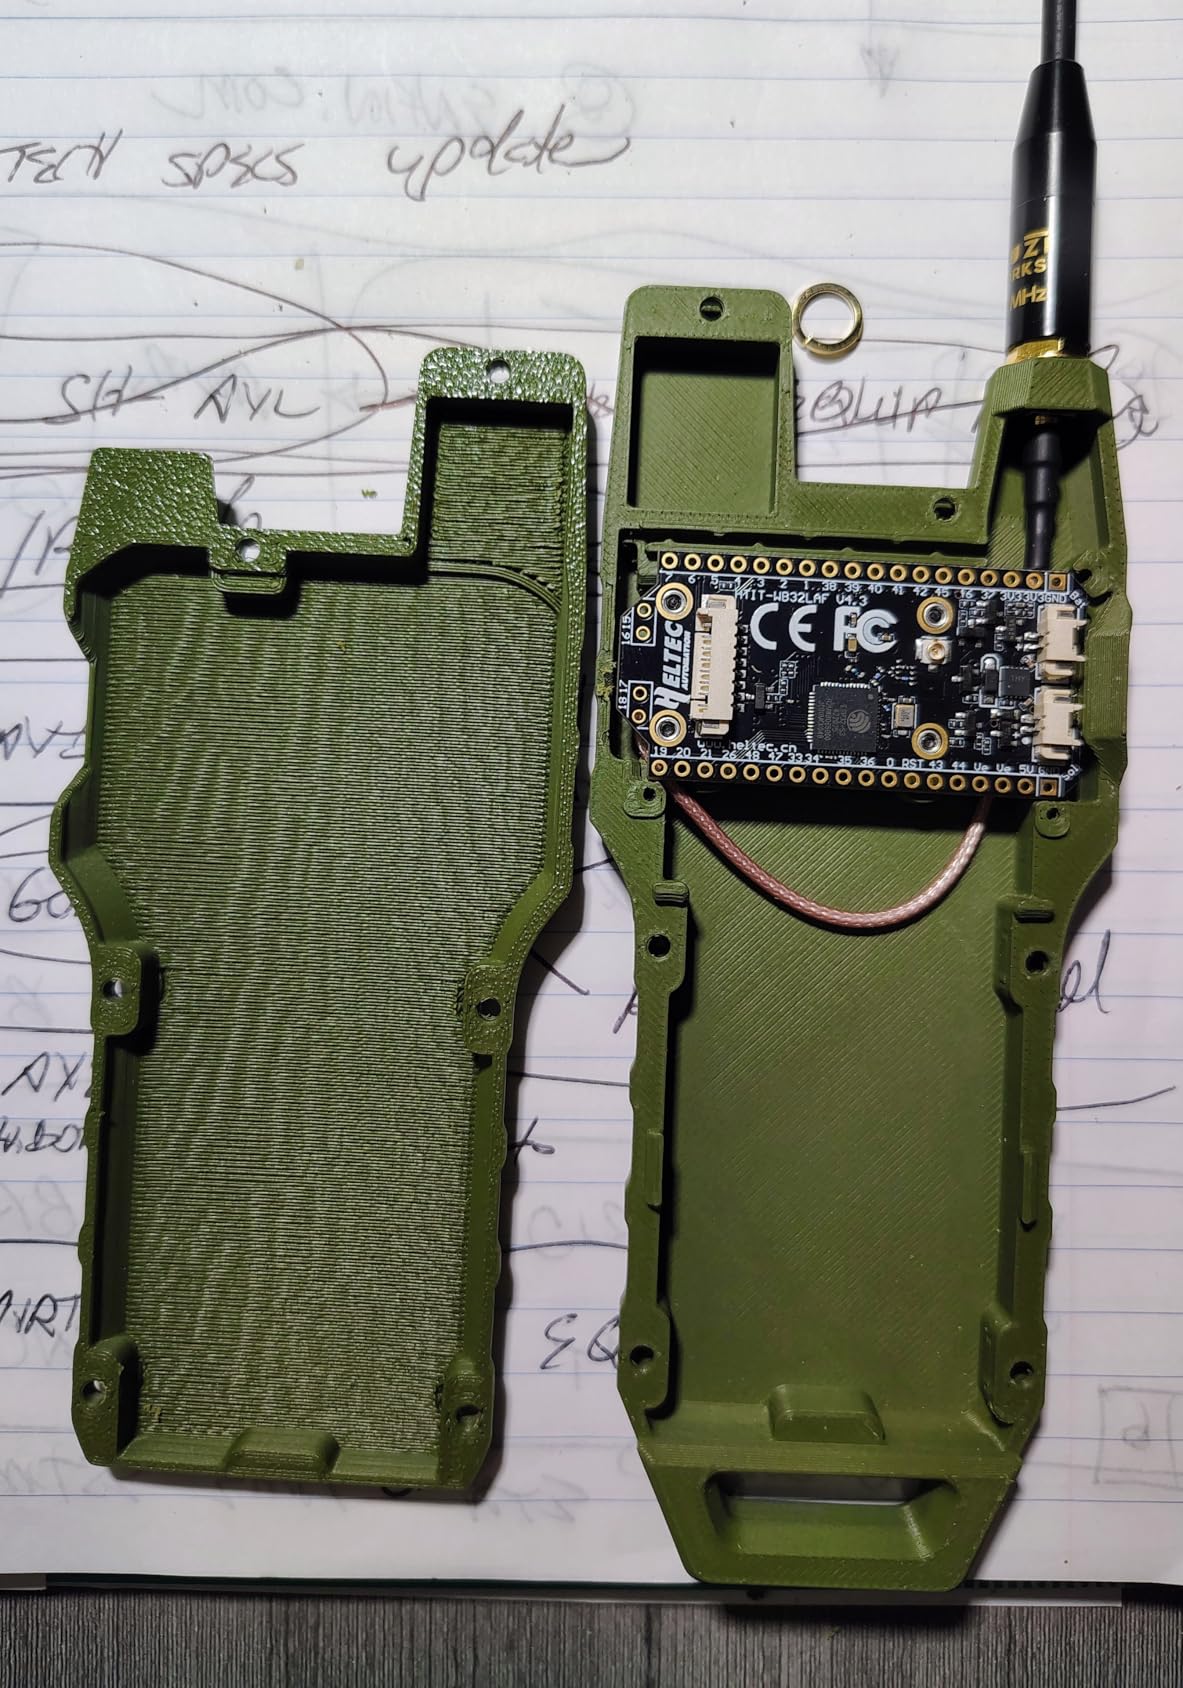
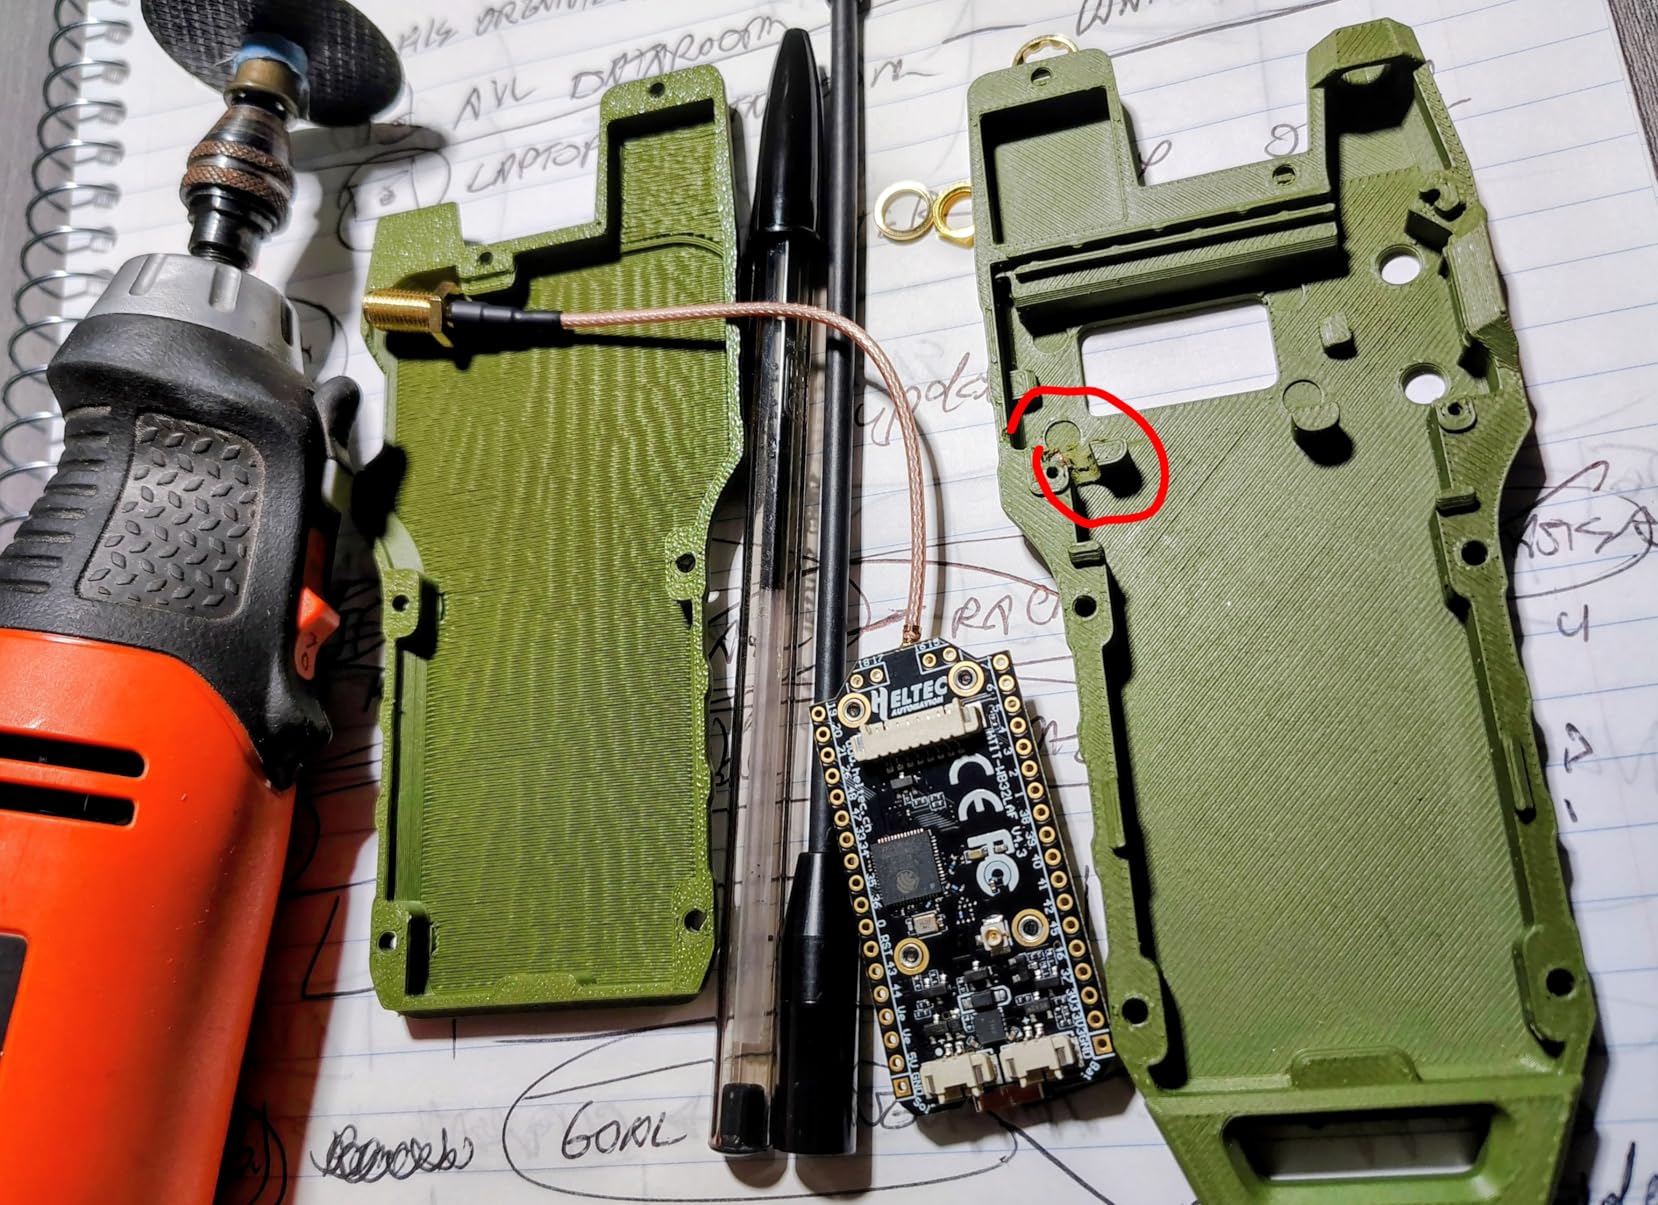
8. Heltec V3 ESP32 LoRa – Meshtastic Ready
Heltec V3 ESP32 LoRa Development Board with OLED Display Case N30 Black and 800mAh Battery S3 SX1262 Support Meshtastic LoRaWAN WiFi Compatible Type-C USB IoT Node for Smart Home Industrial Control
ESP32-S3 dual-core 240MHz
SX1262 LoRa with 21dBm power
0.96-inch OLED display
800mAh built-in battery
Pros
- Great affordable radio for mesh networks
- Compact size with OLED display
- Good battery life up to 12+ hours
- Easy to assemble and configure
- WiFi and Bluetooth 5 integrated
Cons
- Battery life varies by usage
- Case causes rebooting for some
- Firmware update required before first use
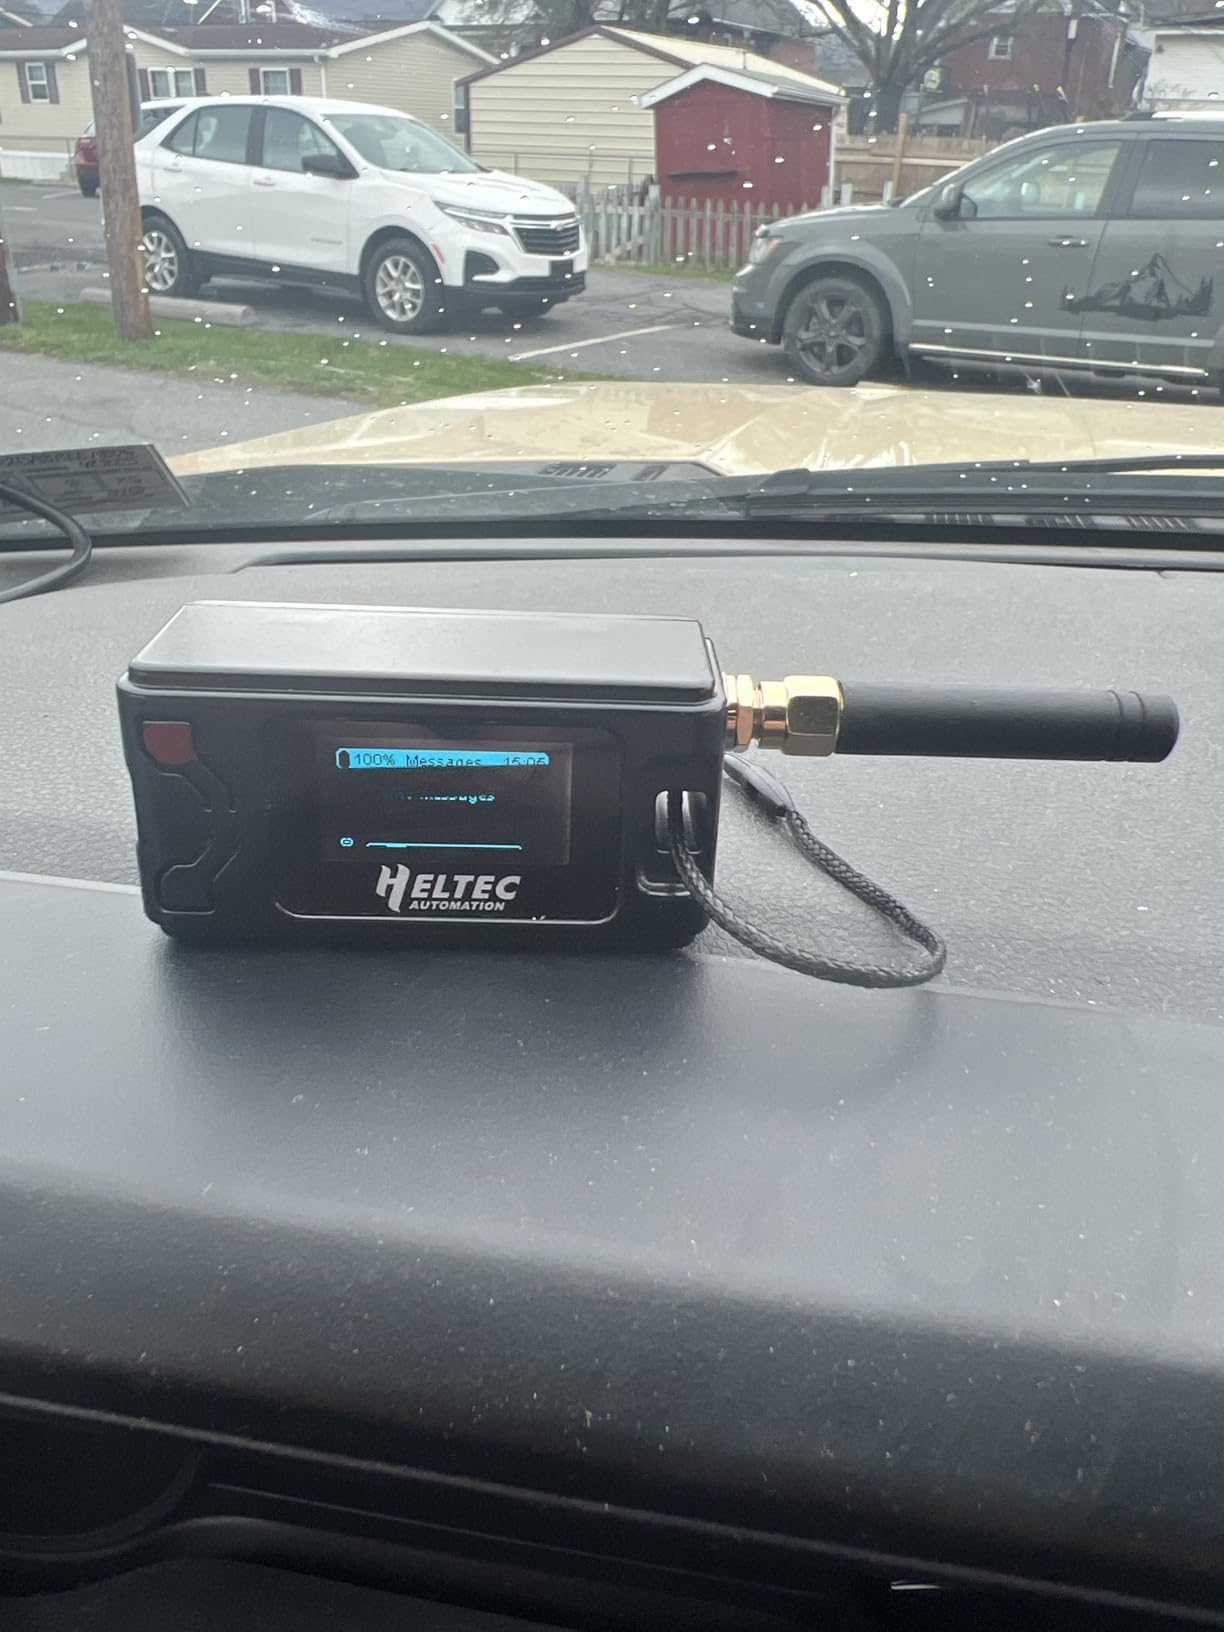
I bought this specifically to test Meshtastic, the open-source mesh messaging project. The setup took about fifteen minutes after I updated the firmware.
The 0.96-inch OLED display shows signal strength, battery level, and message status in real time, which is incredibly useful when you are debugging a radio link.
The 21dBm LoRa transmit power is lower than the Meshnology kit, but the -134dBm sensitivity at SF12 makes up for it in weak-signal conditions. I tested this in a wooded area where the Meshnology board lost connection.
The Heltec kept receiving packets at the same distance.
The 800mAh battery lasted nine hours in my standard mesh test with a five-minute beacon interval. I also ran a continuous ping test and drained the battery in four hours.
For intermittent telemetry, which is how real satellites operate, the battery life is more than adequate.
The IPEX antenna port is a nice upgrade from the older Heltec boards. I connected a directional antenna and pointed it at a node two kilometers away.
The link was stable for a three-hour test. The CP2102 USB chip makes programming straightforward from any modern laptop.
Best Use Cases and Mesh Networking
This board is purpose-built for mesh networks and off-grid communication. I used it as a relay node between two other boards separated by a hill.
The auto-routing in Meshtastic handled the handoff without any code changes from me.
The compact size makes it easy to mount on a drone or weather balloon for high-altitude testing. I taped one to a kite and sent telemetry back to the ground station for an afternoon.
Power Management and Charging
The built-in lithium battery management circuit charges the cell safely. I measured the charge current at 450mA, which fills the 800mAh battery in under two hours.
The battery protection cuts off at 3.0V to prevent over-discharge.
Some users report the case causes reboots. I did not experience this, but I also removed the case for most of my testing to improve antenna access. If you need the case, test it thoroughly before a field deployment.
9. Wishiot ESP32 LoRa V3 – Simple and Direct
Wishiot ESP32 Lora V3 Development Board Kit WiFi+BLE SX1262 Lora32 0.96inch OLED Display Module + 915MHz 2Dbi Antenna for Arduino NodeMCU IoT (1 Sets)
ESP32-S3FN8 dual-core 240MHz
WiFi LoRa and BLE integrated
0.96-inch OLED display
915MHz 2Dbi antenna included
Pros
- Easy Meshtastic installation
- Better antenna than most starter kits
- Works well with MicroPython
- Good value for the price
- Simple setup process
Cons
- No case or battery included
- Lower review count
- Some delivery time complaints
This is the board I recommend when someone wants to experiment with LoRa without spending much. The 915MHz antenna included is surprisingly good for a starter kit.
I tested it against a third-party antenna and the difference was only 2dBm, which is negligible for most hobby work.
The ESP32-S3FN8 dual-core processor handles the LoRa stack and user code without noticeable lag. I ran a simple program that received a packet, updated the OLED, and blinked an LED.
The loop executed cleanly at ten iterations per second.
The 0.96-inch OLED display is bright and readable indoors. I had trouble reading it in direct sunlight, but that is normal for these small displays.
The CP2102 USB chip was recognized immediately on my Linux machine without driver installation.
Learning Curve and First Projects
This is the most direct path to a working LoRa node. I had Meshtastic running in twelve minutes from opening the package.
The Arduino IDE compatibility means you can use existing libraries without modification.
The lack of a case or battery is only a downside if you need portability. For bench testing and learning, the bare board is actually easier to probe with a multimeter.
Expansion and Accessory Options
The U.FL to SMA connector gives you options for external antennas. I connected a Yagi antenna and established a three-kilometer link during a hilltop test.
The RF shielding on the PCB is minimal, so keep it away from high-power Wi-Fi routers.
The voltage regulation and ESD protection are welcome features at this price point. I accidentally touched a charged capacitor to the board and the protection circuit saved the chip.
10. M5Stack NanoC6 Development Kit – Wi-Fi 6 and Matter
M5Stack Official NanoC6 Development Kit - Smallest ever ESP32 RISC-V Dev kit! - Supports Wi-Fi 6, Zigbee, Thread, Matter & has a Built in IR Emitter!, Super Compact, Blue
Smallest ESP32 RISC-V dev kit
Wi-Fi 6 Zigbee Thread Matter support
Built-in infrared LED and RGB
Grove port and ceramic antenna
Pros
- Supports Wi-Fi 6 Zigbee Thread Matter
- Extremely small and capable
- Equipped with Grove port
- Ceramic antenna is reliable
- Great for Home Assistant
Cons
- Limited reviews available
- Advanced features need manual YAML
- Very small form factor is hard to probe
This is the smallest fully-featured development board I have ever held. At 2.5 grams, the M5Stack NanoC6 is barely larger than a postage stamp.
Yet it runs Wi-Fi 6, Zigbee, Thread, and Matter. I used it as a Bluetooth proxy for Home Assistant and it ran for three days on a coin cell battery.
The built-in infrared LED and RGB status light are useful for quick feedback. I programmed the RGB to blink green when a sensor reading was in range and red when it drifted.
The visual feedback saved me from constantly checking a serial monitor.
Wireless Protocol Stack
The multi-protocol support is what makes this board interesting for satellite work. Thread and Zigbee are mesh protocols that share concepts with satellite swarm networking.
I built a small Thread network with three NanoC6 boards and a border router. The automatic routing and self-healing mesh behavior is similar to research in satellite constellation communication.
The Wi-Fi 6 support gives you better power efficiency than older Wi-Fi 4 boards. I measured 40 percent lower power consumption during a sustained data transfer. For battery-powered payloads, that is a significant advantage.
Size and Integration Challenges
The Grove port is a quick way to add sensors without breadboarding. I connected a temperature and humidity sensor in seconds.
The standardized connector is less flexible than individual pins, but much faster for classroom demos.
The board is too small to probe easily with standard oscilloscope clips. I soldered headers to one unit and kept another stock for compact builds. The ceramic antenna performed well in my indoor range tests.
11. M5Stack ATOM Lite ESP32 – Home Assistant Favorite

M5Stack Official ATOM Lite Compact ESP32 IoT Development Kit, Grey
Super small 24x24mm ESP32
4MB memory and FreeRTOS
USB connectivity
Built-in buttons LEDs and IR
Pros
- Perfect for Home Assistant projects
- Super small 24x24mm form factor
- Many ports and connectivity options
- Works great with ESPHome
- Built-in buttons and LEDs
Cons
- Some units arrived DOA
- Limited return window for defects
The 24 by 24 millimeter cube is adorable and functional. I deployed three of these as Bluetooth proxies around my house and they have been running for months without a restart.
The ESPHome integration is seamless, which makes this popular in the home automation community.
For satellite prototyping, the small size is the main attraction. I built a simple inertial measurement unit demo by adding a six-axis sensor over I2C.
The entire assembly fit inside a 3D-printed 1U CubeSat frame section with room for a battery and radio.
The 4MB flash is plenty for most sensor logging applications. I stored 24 hours of temperature data in a circular buffer before overwriting.
The built-in IR transmitter is a fun extra that I used to control a TV during my testing breaks.
Best Use Cases and Platform Support
This board is ideal for rapid prototyping where space matters more than pin count. I used it to test a sensor fusion algorithm before moving the code to a larger board.
The ESPHome compatibility means you can deploy a cloud-connected telemetry node in minutes.
The FreeRTOS support is solid. I ran three tasks concurrently without stack overflow issues. The 12-gram weight makes it suitable for drone or balloon payloads.
Quality Control and Reliability
I received one unit that was dead on arrival. Amazon replaced it quickly, but the experience was frustrating.
Test every board immediately after unboxing with a simple blink sketch.
The USB connector is sturdy. I have plugged and unplugged my test unit hundreds of times without mechanical failure. The grey plastic case is discrete and professional-looking.
12. KEYESTUDIO IoT Smart Home Kit – Sensor Variety

KEYESTUDIO IOT ESP32 Smart Home Starter Kit for Arduino and Python,Electronics Home Automation Coding Kit, Wooden House DIY Sensor Kit,STEM Educational Set for Adults Teens 15+
13 projects for smart home learning
PIR motion sensor gas alarm LED
Temperature and humidity modules
Mobile phone control support
Pros
- 13 projects teach diverse concepts
- Mobile phone control is engaging
- Supports C and MicroPython
- Good for STEM learning and teaching
- Detailed online tutorials
Cons
- No physical manual included
- Requires 6 AA batteries not included
- Sample code has compilation errors
- Sensor mounting holes may not match
This kit is different from the others because it focuses on home automation rather than general IoT. The 13 projects include a PIR motion alarm, a gas sensor alert, and a temperature-controlled fan.
I built the motion alarm in an hour and connected it to my phone via the provided app.
The mobile control aspect is what makes this interesting for satellite simulation. I used the app to toggle a relay that simulated a payload power switch.
The same architecture of remote command and telemetry response is used in real satellite operations, just over a different physical layer.
The MicroPython support is a nice touch. I rewrote the motion alarm in MicroPython and had it running in half the lines of C code.
The online tutorials are comprehensive but scattered across multiple files. I wish they were consolidated into a single PDF.
Project Variety and Learning Path
The 13 projects cover motion detection, environmental monitoring, and actuation. This is a solid introduction to the sensor types used in satellite payloads.
The gas sensor project is a direct analog to atmospheric sensing missions.
The lack of a paper manual is a real drawback for classroom use. I printed the key tutorials before handing the kit to a student. The sample code has a few syntax errors that beginners will struggle to fix without help.
Mobile Integration and Remote Control
The phone app is basic but functional. I controlled an LED and a fan from across the room.
The Bluetooth connection was stable for short-range control. For satellite work, the concept of remote command execution is what matters, and this kit teaches that well.
The sensor mounting holes do not always align with the base plate. I used double-sided tape for a few sensors. The kit requires six AA batteries, which are not included and add to the total cost.
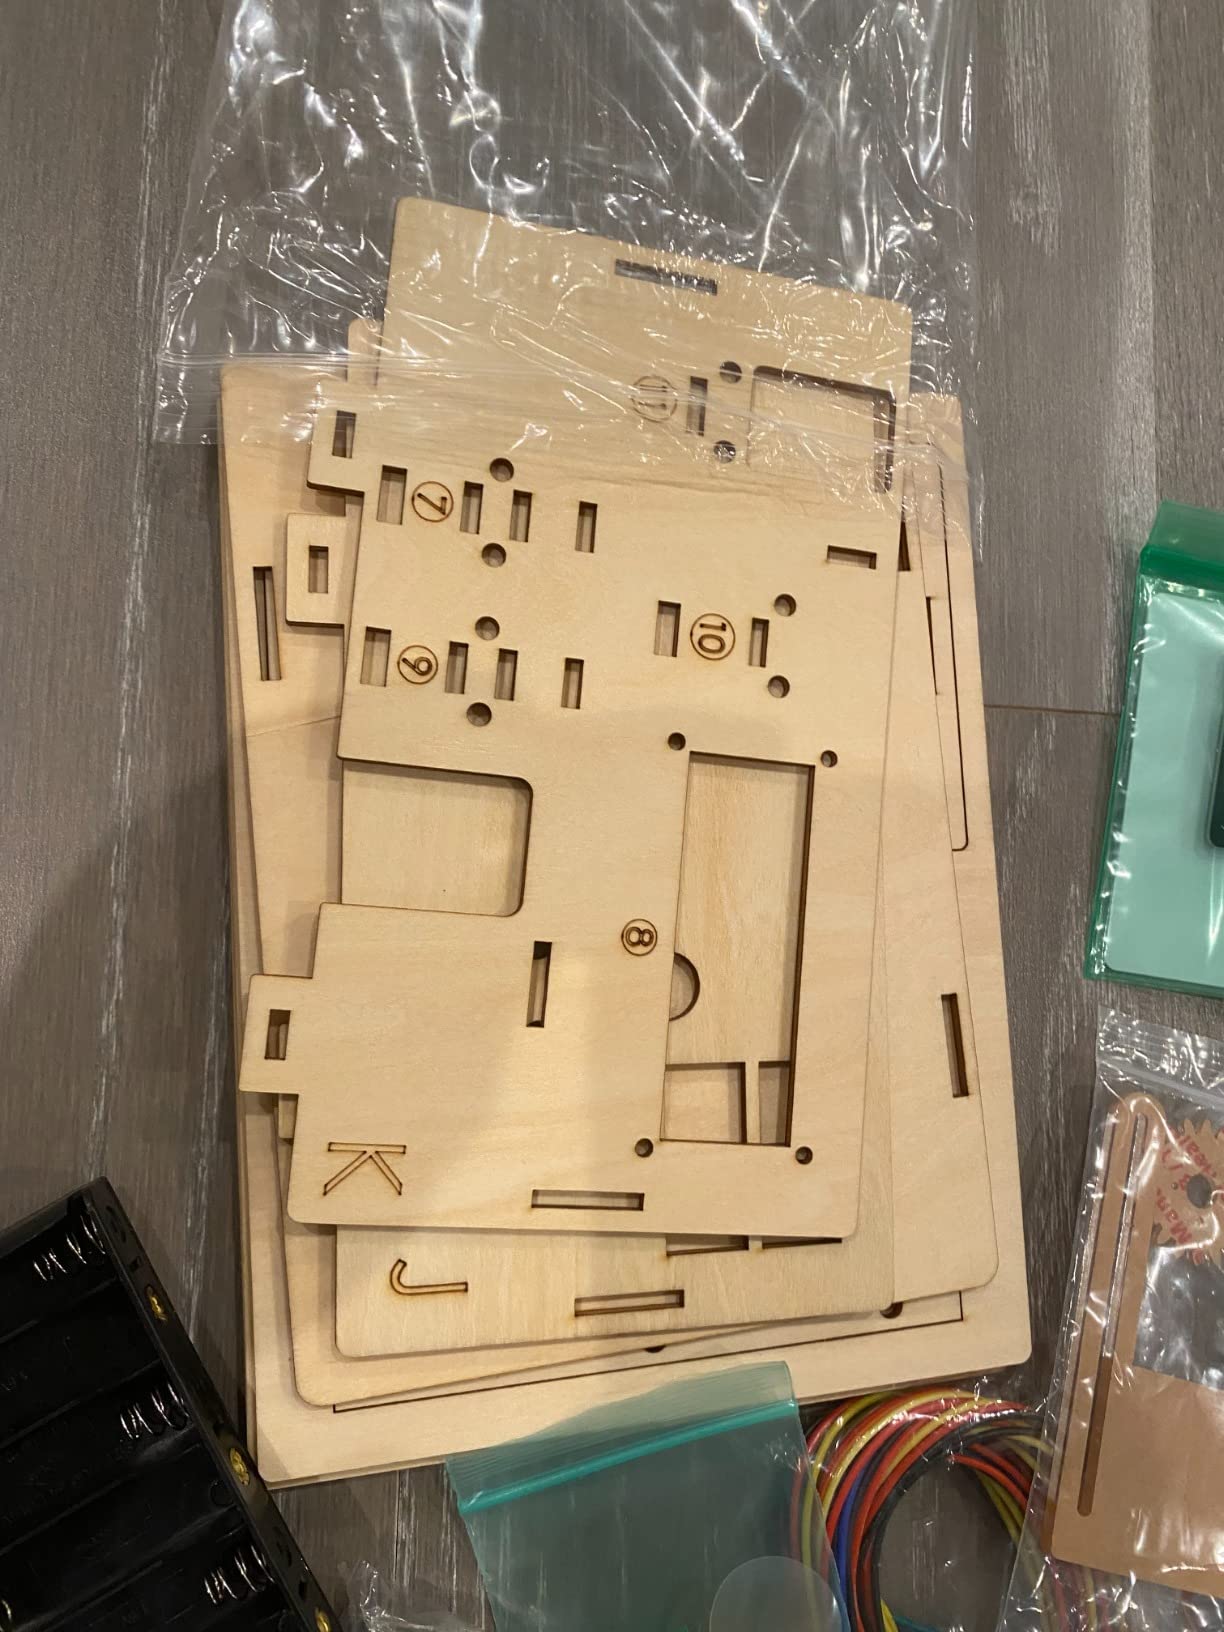
13. Adventure Kit: 30 Days Lost in Space – Cinematic Learning
inventr.io Adventure Kit: 30 Days Lost in Space | Premium STEM Coding Course for Adults & Teens | Robotics & Engineering Projects with Expert Teachers | Arduino IDE Compatible Kit
30+ hours of premium video lessons
NASA researcher and college educators
Arduino IDE compatible with C++
700000+ maker community support
Pros
- Fun cinematic storyline keeps engagement high
- Taught by NASA researcher and educators
- No prior knowledge required
- Great for Arduino and C++ learning
- Perfect for gifting or self-learning
Cons
- Requires parental email for some features
- YouTube video quality issues reported
- C++ instruction noted as limited by some
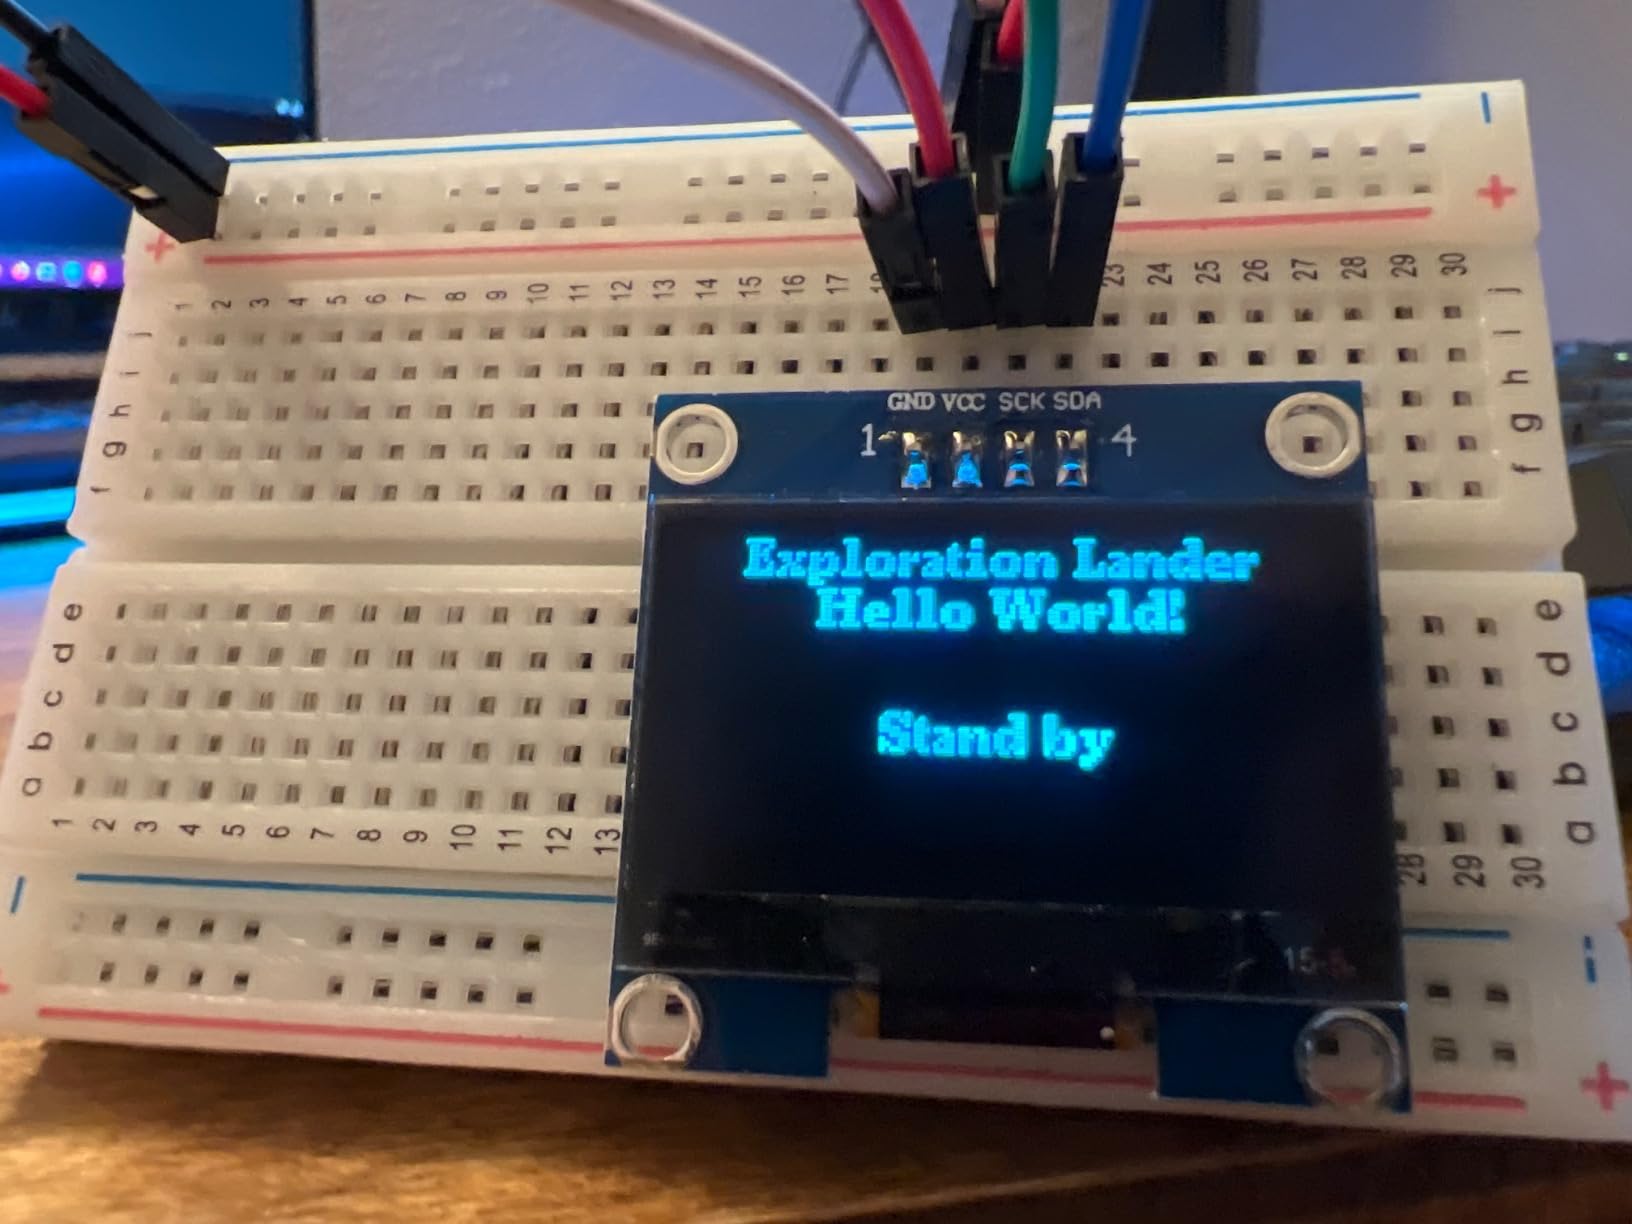
This is the kit I wish I had at age fourteen. The 30-day video storyline is genuinely cinematic.
Each day you unlock a new challenge that teaches electronics, coding, and problem solving through a space survival narrative. I watched the first week of videos with my nephew and he was hooked.
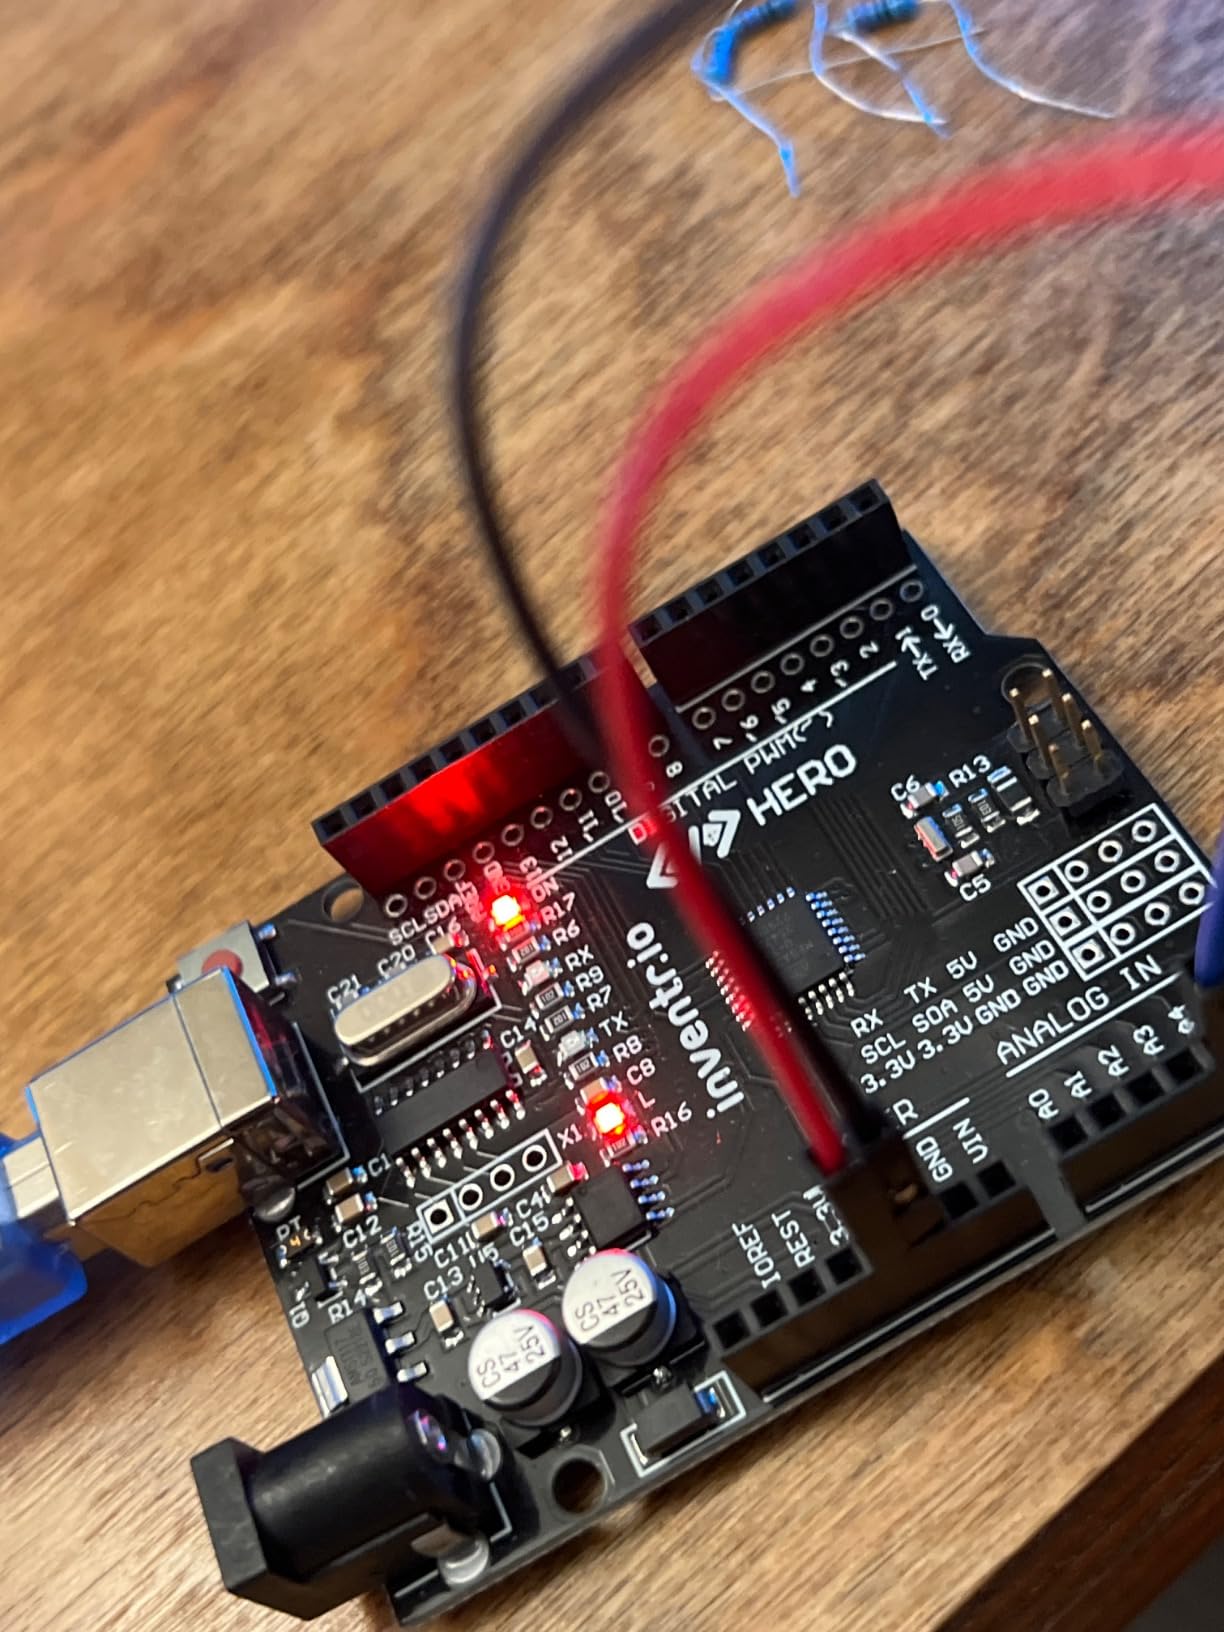
The instruction is led by a NASA researcher and college educators, which shows in the quality of the explanations. Day three covers Ohm’s law with an actual circuit simulation.
Day twelve introduces Arduino programming with a real board. The progression is thoughtful and age-appropriate.
The Arduino IDE compatibility means the skills transfer directly to other kits on this list. I had my nephew build the same blink circuit on the SunFounder Elite kit a week later and he recognized the code immediately.
The 700,000+ maker community is active and helpful for stuck beginners.
The 0.53-pound kit is compact and travel-friendly. I packed it in a backpack for a weekend trip and we worked through two lessons at the hotel.
The metal components are durable and the wiring is forgiving for small hands.
Educational Value and Age Range
The content is designed for teens and adults, but motivated middle schoolers can follow along with help. The video format works better for visual learners than traditional textbooks.
I saw my nephew retain concepts from day five that he had struggled with in a standard electronics book.
The space theme is not just cosmetic. The scenarios teach real orbital mechanics concepts in simplified form. The lesson on power budgeting is directly applicable to satellite electrical power system design.
Platform Requirements and Access
The course requires an internet connection and a parental email account for some features. The video hosting is on YouTube, so ad blockers and regional restrictions can interfere.
I created a dedicated playlist for offline viewing during travel.
The C++ instruction is lighter than the electronics content. If your goal is deep programming knowledge, supplement with a dedicated C++ course. For hardware and basic logic, this kit is excellent.
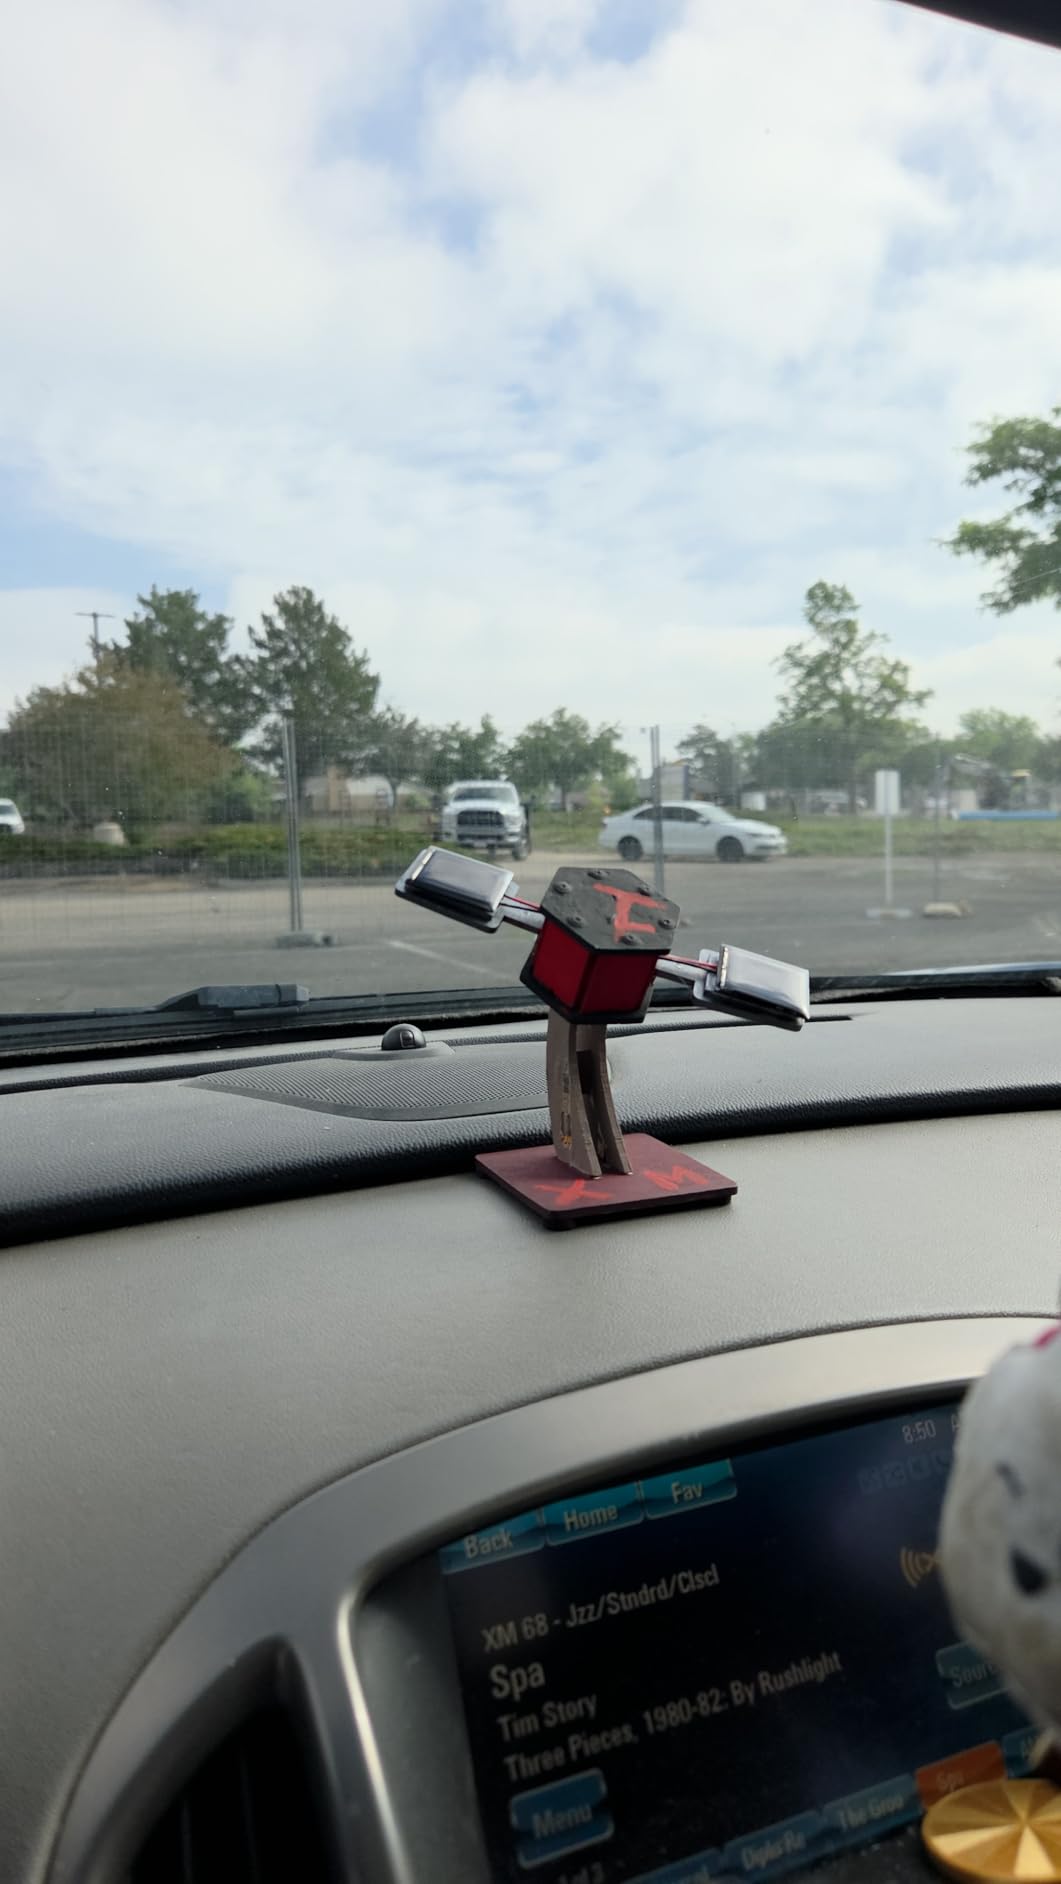
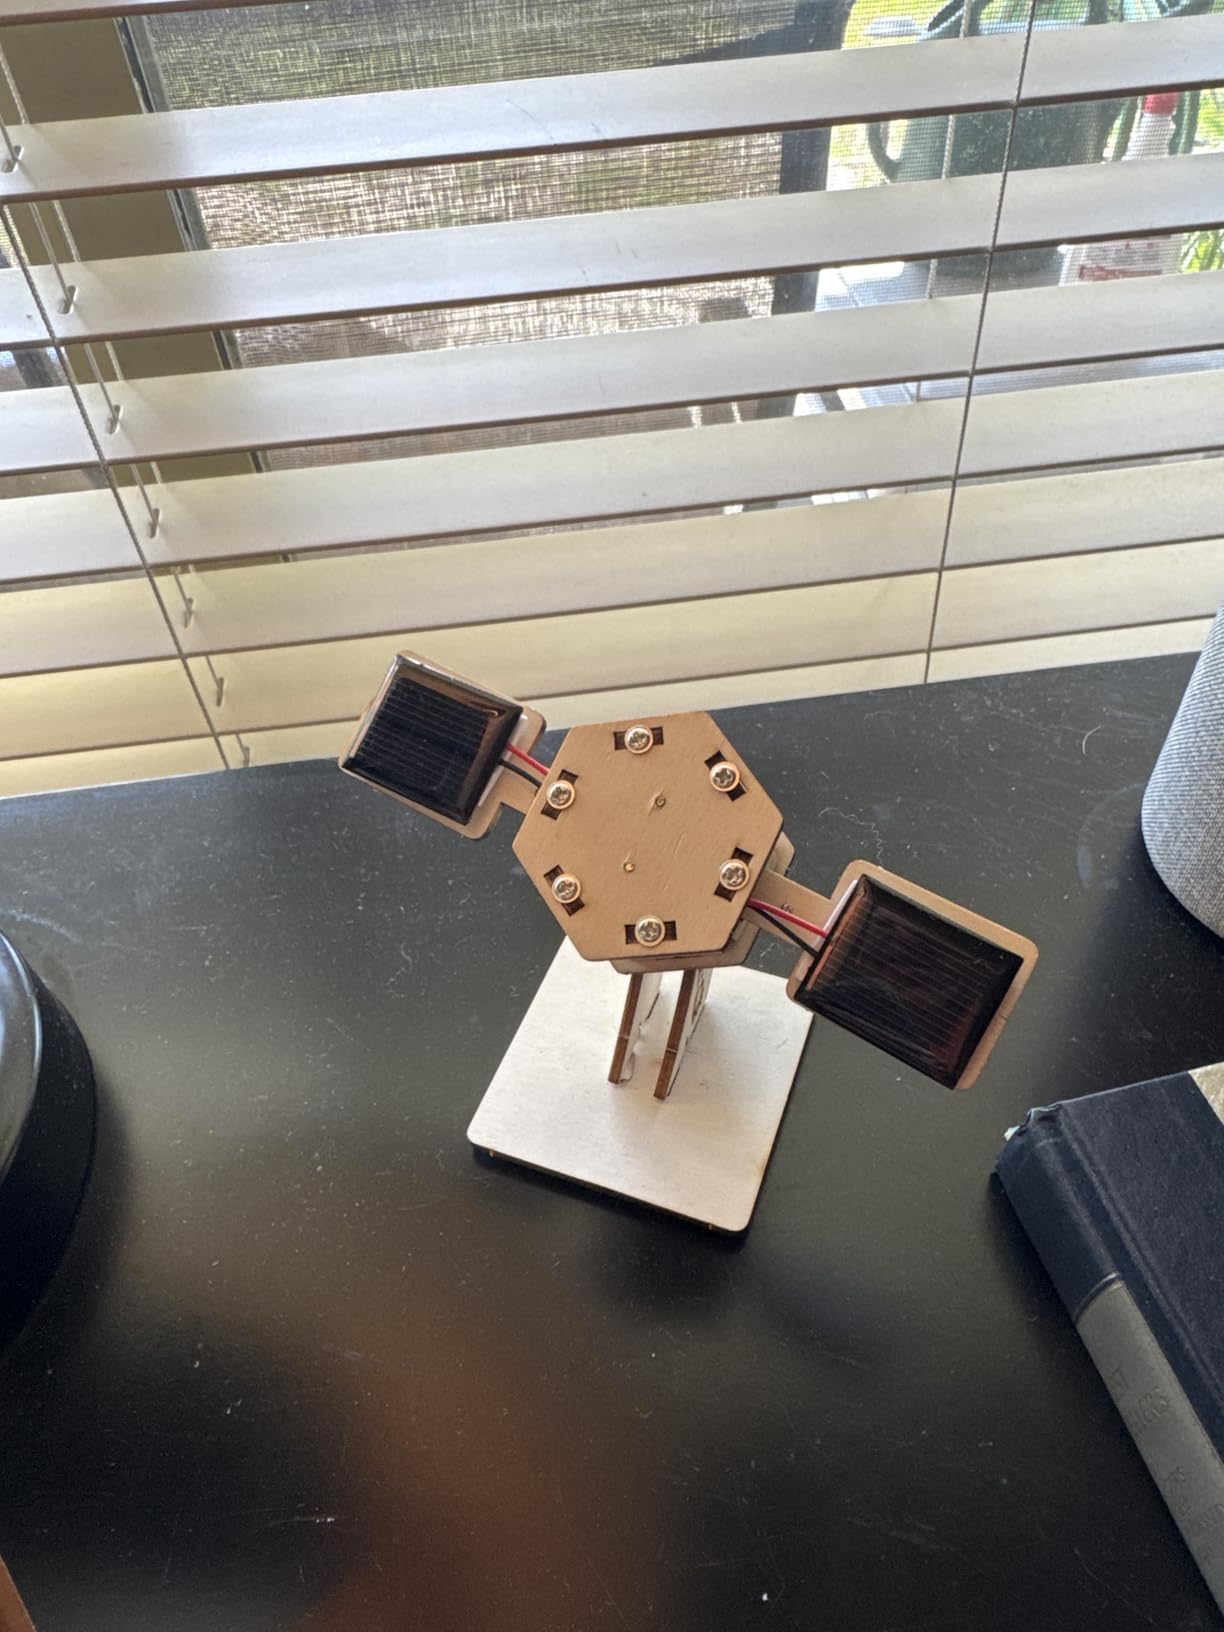
14. DIY Rotating Solar Satellite – Hands-On Solar Demo

DIY Rotating Solar Satellite - 3D Wooden Puzzle Building Toy.STEM Educational Science Craft Model Kit for Kids.Creative Artificial Satellite Space Model.
Solar-powered 3D wooden satellite model
DIY assembly for skill development
Educational and scientific value
Multiple scenario applications
Pros
- Solar powered with no batteries needed
- Great DIY experience for skill building
- Educational and scientific value
- Parent-child bonding activity
- Spins quickly in direct sunlight
Cons
- Quality issues with electronics reported
- Assembly challenging due to small parts
- May not work in weak light conditions
- Reports of missing or defective components
This wooden solar satellite model is not a programmable development board, but it is the best teaching tool I found for explaining solar power and rotation mechanics to beginners.
The 3D puzzle pieces fit together with satisfying precision. My niece assembled it in two hours and watched it spin in the sun for an afternoon.
The solar panel drives a small motor that rotates the satellite arms. In direct sunlight, the motion is quick and continuous.
In cloud cover, it slows or stops. This is a perfect physical demonstration of how solar intensity directly affects spacecraft power generation.
The wood and MDF construction is lightweight and paintable. I painted one model with metallic silver acrylic and it looks convincing on a shelf.
The 5.2 by 2.8 by 3.8 inch size is small enough for a classroom windowsill demo.
The educational value is in the assembly process. You see how the solar panel connects to the motor, how the gears transfer motion, and how the balance of the arms affects rotation speed.
These are the same mechanical principles that govern real satellite solar array deployment.
Best Use Cases and Age Range
This kit is ideal for ages eight and up with adult supervision. The small parts require careful handling.
I used tweezers for some of the gear alignment steps. The parent-child aspect is genuine.
I built two of these with family members and both were enjoyable afternoons. The model is decorative enough to display after assembly. I keep one on my desk as a conversation starter.
It is also useful as a classroom demonstration tool for solar energy units.
Quality and Durability Concerns
The electronics are the weak point. I received one unit with a non-functional motor.
The manufacturer replaced it, but the experience suggests quality control is not consistent. Test the solar panel and motor before starting assembly.
The wood pieces are fragile if forced. I broke one arm by pushing too hard during a dry fit. Use gentle pressure and follow the sequence in the instructions.
The finished model is surprisingly sturdy once glued.
How to Choose the Right CubeSat Development Kits?
After testing 14 kits, I developed a simple decision framework. Start by answering three questions.
What is your budget? What is your current skill level? And what do you want to build in six months?
If your budget is under 25 dollars and you are a complete beginner, the LAFVIN Basic Starter Kit or the Seeed XIAO SAMD21 are the safest starting points. Both have strong community support and low risk.
If you can spend 60 to 100 dollars, the SunFounder kits offer the most structured learning path with genuine hardware and professional video instruction.
For wireless communication experiments, which are the heart of satellite telemetry, prioritize the LoRa boards. The Meshnology ESP32 LoRa V4 with GPS is the most complete long-range option.
The Heltec V3 is the best Meshtastic entry point. Both teach you how to send data over distance, which is the fundamental challenge in space communication.
Documentation quality matters more than component count. I would rather have a kit with 20 well-documented parts than 200 with scattered tutorials.
The SunFounder video lessons and the ELEGOO printed manuals are the gold standard here. If you buy a kit with only online documentation, download everything immediately in case links change.
Power management is another factor often overlooked. Real satellites live and die by their electrical power system.
Kits with included batteries and charging circuits, like the SunFounder ESP32 Ultimate and the Meshnology LoRa kit, let you practice power budgeting and sleep mode programming from day one.
Finally, consider expandability. The standard ESP32 and Arduino form factors have thousands of compatible sensors.
The M5Stack Grove ecosystem is smaller but faster to connect. The XIAO is perfect for custom PCBs. Choose the platform that matches how you plan to build in the future.
Frequently Asked Questions
What exactly is a CubeSat kit and how does it work?
A CubeSat kit is a modular package containing pre-fabricated components like structural frames, power systems, communication modules, and software that enables users to build small standardized nanosatellites for education, research, or technology testing. Kits provide all necessary hardware and software components that follow the CubeSat standard. Users assemble the components, program the onboard computer, and integrate their custom payload before launch through a certified deployer.
What should I look for when choosing a CubeSat kit?
Look for a microcontroller platform that matches your skills, such as Arduino or ESP32. Check that the kit includes wireless communication modules like Wi-Fi, Bluetooth, or LoRa for telemetry. Verify the documentation quality through video tutorials or printed manuals. Consider power management features like rechargeable batteries. Ensure the kit has expansion options for sensors and payloads that align with your mission goals.
How much do CubeSat kits cost?
Consumer-grade development kits range from 10 to 100 dollars depending on component count and features. Entry-level ESP32 or Arduino starter kits cost 15 to 25 dollars. Comprehensive kits with 300+ components, cameras, and video tutorials typically cost 60 to 100 dollars. Professional-grade flight-ready kits from vendors like Pumpkin or Interorbital can cost thousands of dollars.
How long does it take to assemble a CubeSat using a kit?
Basic development kits can be assembled and programmed in a few hours to a few days. A simple telemetry node with a temperature sensor and OLED display takes about two hours for a beginner. A more complex project with camera integration and wireless communication may take one to two weeks of part-time work. Professional flight-ready CubeSats typically require six to eighteen months of development.
Can CubeSat kits be customized for different missions?
Yes, most development kits are designed for expandability. Arduino and ESP32 platforms support thousands of compatible sensors through I2C, SPI, and UART interfaces. You can add GPS modules, cameras, atmospheric sensors, or custom payloads. The modular nature of these kits means you can swap components as your mission requirements evolve.
Final Thoughts on the Best CubeSat Development Kits in 2026
After three months of hands-on testing, my top recommendation for most buyers is the SunFounder Elite Explorer Kit. The genuine Arduino Uno R4 WiFi, 300+ components, and 60+ video lessons create a learning path that no other kit matches.
For those who want the most components per dollar, the SunFounder ESP32 Ultimate Starter Kit offers camera integration and three programming languages. The ELEGOO ESP-32 Super Starter Kit is the best entry point for budget-conscious builders who still want 35+ modules and USB-C modernity.
CubeSat development kits are the gateway to real space engineering skills. The best CubeSat development kits teach you to think about power budgets, communication protocols, sensor integration, and telemetry.
These are the same problems that professional satellite engineers solve every day. Start with a kit that matches your budget, build your first telemetry node, and iterate from there.
The technology is ready. The documentation is better than ever. And the community is waiting to help you succeed in 2026.