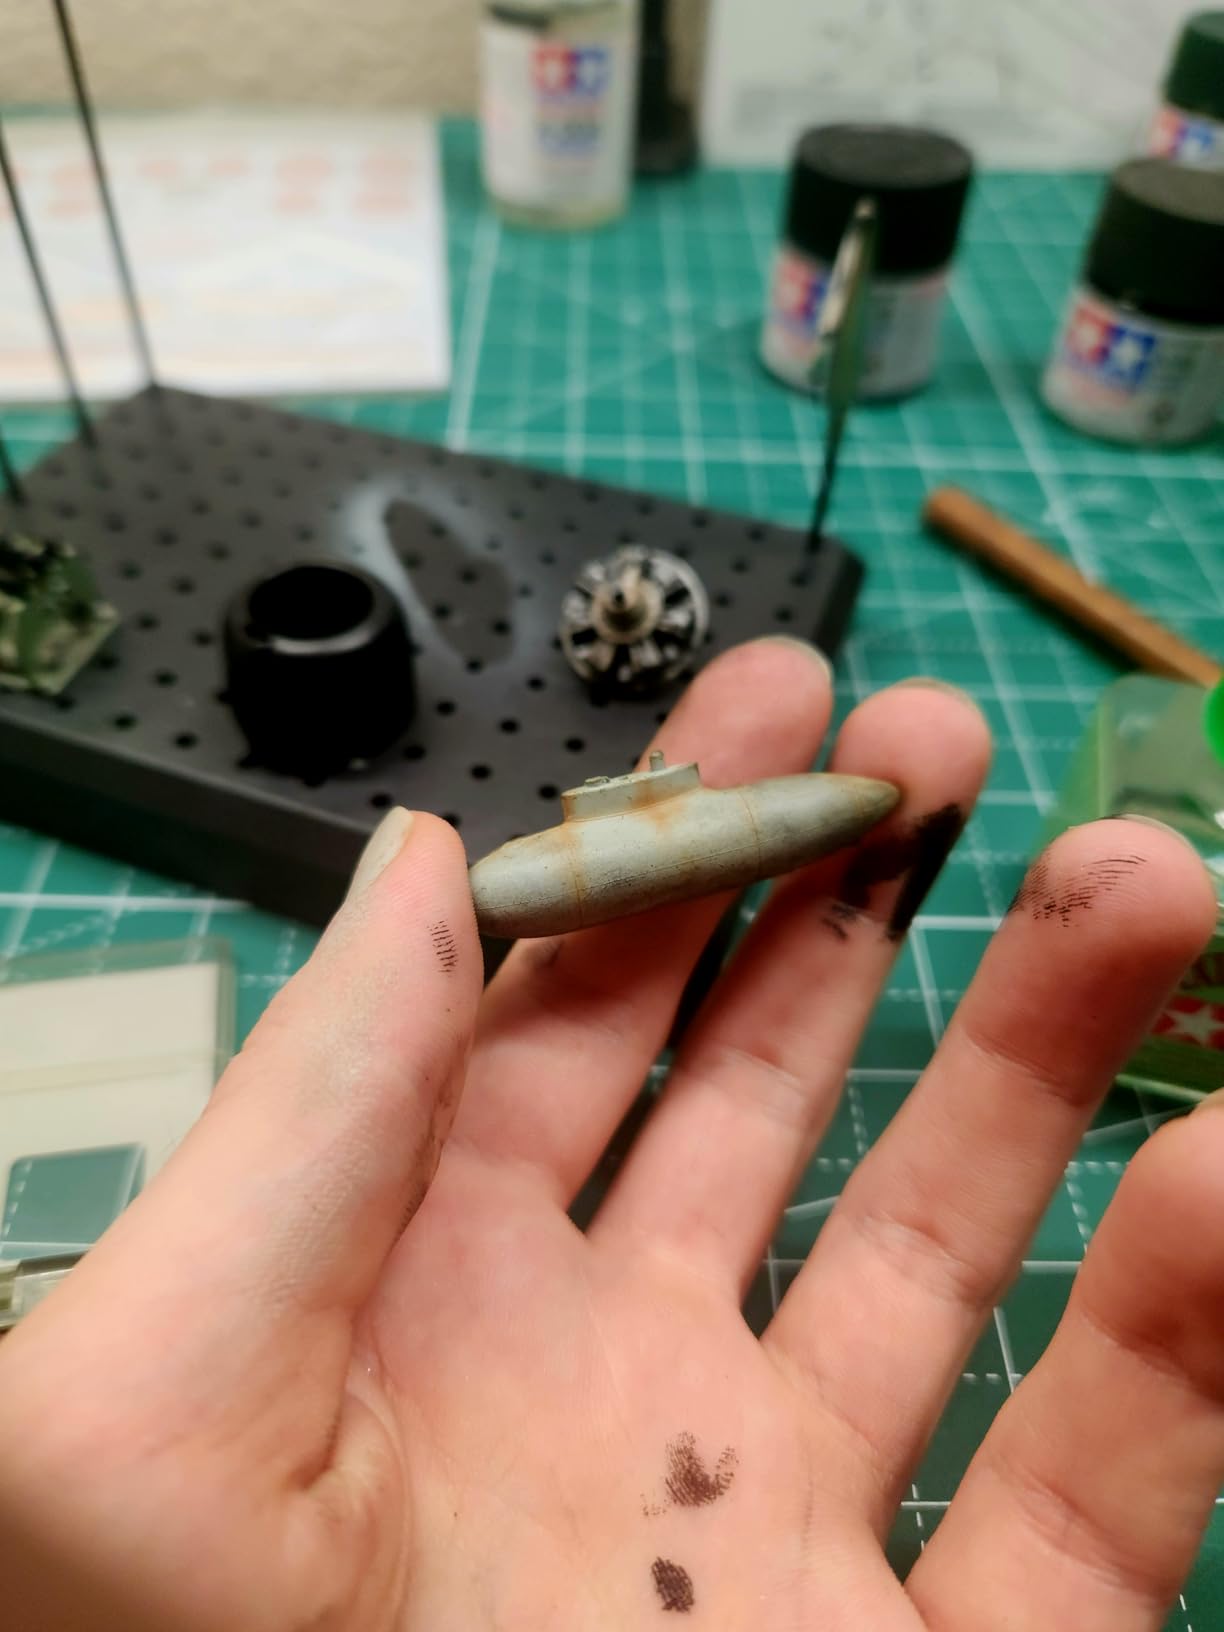
I remember the first time I added rust streaks to a 1/35 scale tank. The model went from looking like a plastic kit to a battle-worn machine that had seen real action. That single step changed how I approach every build since then.
In 2026, the options for weathering paint for models have exploded. Walk into any hobby shop and you will see racks of bottles labeled with mud, rust, soot, and dust colors. The problem is figuring out which sets actually deliver realistic results and which ones leave you with a messy disappointment.
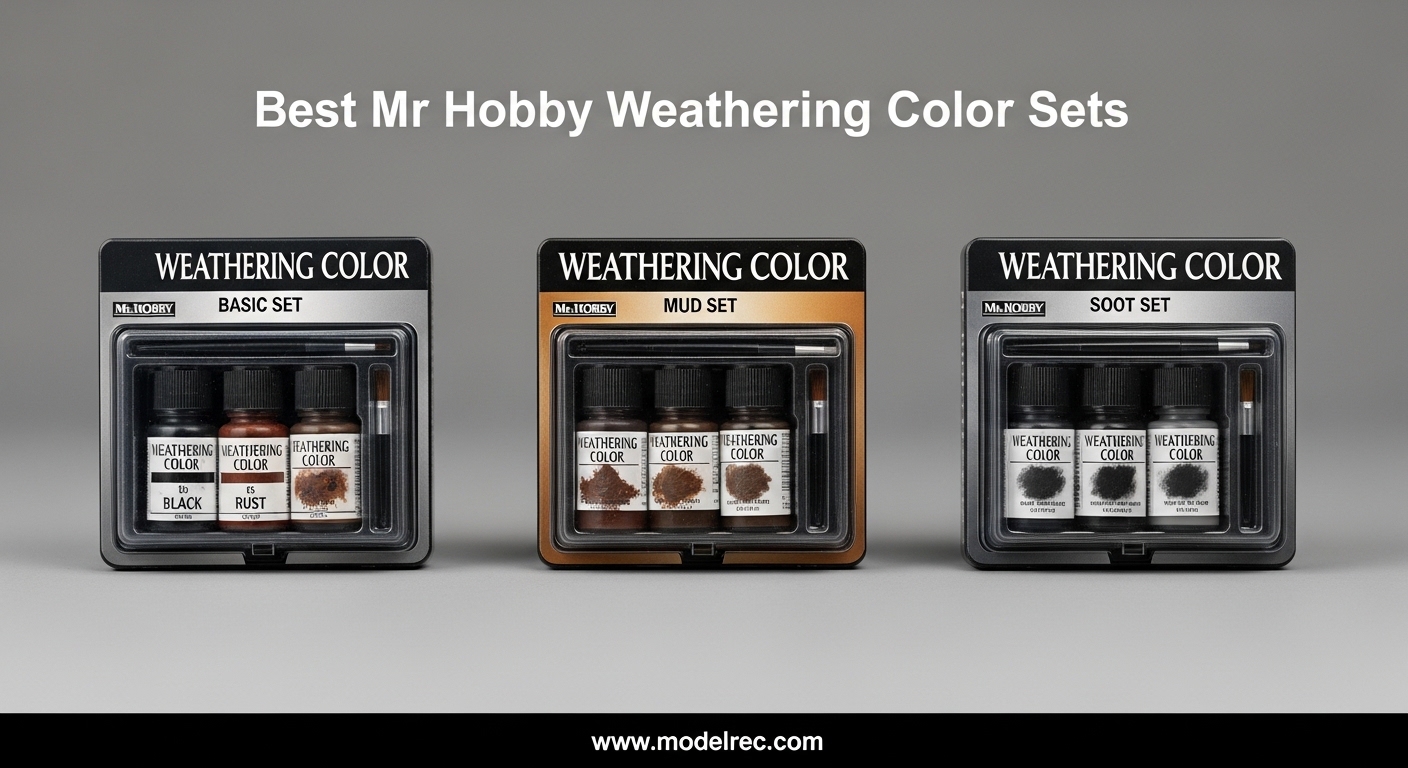
That is exactly why we put together this guide to the best Mr Hobby weathering color sets. Our team tested and compared the top-rated weathering kits from GSI Creos Mr. Hobby and Tamiya over the past three months. We applied them to military vehicles, aircraft, and sci-fi kits to see which combinations work best for beginners and advanced modelers alike.
Weathering is not just about making a model look dirty. It is about telling a story. A tank that has rolled through Ukrainian mud in spring should look different from one that sat in a Libyan depot for years. The right weathering paint for models lets you control that narrative with color, texture, and placement.
We focused on sets that cover the most common effects: rust, mud, dust, snow, soot, exhaust stains, and panel-line shadows. Each set in this list earned its place through real testing on actual builds, not just reading Amazon reviews. We looked at drying time, ease of cleanup, compatibility with acrylic and enamel base coats, and whether the colors stayed true after sealing.
Table of Contents
Top 3 Picks for Mr Hobby Weathering Color Sets
If you want the short answer, these three weathering sets stood out above the rest. They cover the widest range of scale model weathering scenarios, from rust streaks on armor to snow accumulation on dioramas. All three are beginner-friendly, yet they deliver results that experienced modelers respect.
We chose them based on color range, application ease, value, and the number of verified reviews from actual model builders. Each one has been in production long enough to prove its reliability, and each works on the most common model surfaces: plastic, resin, and metal.

TAMIYA Weathering Master 6-Sets(A,B,C,D,E,F)
- 6-set full collection
- Semi-wet material
- Includes applicator

Tamiya 87085 Weathering Master C Set
- Rust-Orange Gun-metal Silver
- Easy-to-control material
- Works on various surfaces

Tamiya Weathering Set B Snow Soot and Rust
- Snow Soot Rust colors
- Paste consistency
- Great for beginners
8 Best Weathering Color Sets in 2026
Below is a quick look at all eight weathering sets we evaluated. Each one serves a different purpose, so the right choice depends on your specific project and skill level. The table covers rust effects, mud and dirt, snow, heat discoloration, panel lines, and color filters.
We included both Tamiya and GSI Creos Mr. Hobby products because the two brands dominate the scale model weathering market. Tamiya tends to focus on dry and semi-wet pigments, while Mr. Hobby offers more liquid-based and oil-based options. Both approaches have strengths, and many serious modelers own products from both lines.
| Product | Specifications | Action |
|---|---|---|
|
Tamiya Weathering Master 6-Sets
|
|
Check Latest Price |
|
Tamiya 87085 Weathering Master C Set
|
|
Check Latest Price |
|
Tamiya Weathering Set B Snow Soot
|
|
Check Latest Price |
 Tamiya WEATHERING MASTER D SET
|
|
Check Latest Price |
 Mr. Hobby Weathering Pastel Set
|
|
Check Latest Price |
 Mr. Weathering Liner Mud Set
|
|
Check Latest Price |
 Mr. Hobby Weathering Liner 01 Set
|
|
Check Latest Price |
 GSI Creos WC13 Filter Liquid Red
|
|
Check Latest Price |
Use this table as a snapshot. The individual reviews below go deeper into application tips, real results, and which model types benefit most from each set. We also note where each product fits on the beginner-to-expert spectrum.
1. TAMIYA Weathering Master 6-Sets – Complete Collection
TAMIYA Weathering Master 6-Sets(A,B,C,D,E,F) [Japan Import] Model:
6-set collection A-F
Sand Mud Snow Rust
Gun-metal Silver Copper
Semi-wet material
Made in Japan
Pros
- Easy to use
- Professional results
- Safe alternative
- Versatile colors
- Great for Gundam
Cons
- Brush may be small
- Needs sealing for handling
I spent two weeks working through all six sets on a pair of 1/48 aircraft and a 1/35 Sherman tank. The semi-wet material sticks where you put it, which means you do not get the creeping surprises that ruin panel lines. I also tested the sets on a 1/144 HG Gundam and a 1/72 scale helicopter to see how they performed on smaller surfaces.
The Sand and Light-sand from Set A created convincing dust effects on the tank treads. Set B’s Snow color popped beautifully on a winter diorama base. I was particularly impressed by how the Rust and Soot colors from the same set layered over each other without turning muddy. On the helicopter, I used the Sand color to simulate desert operations, and it looked natural against the olive drab base coat.
Set C’s Gun-metal and Silver gave me exactly the exhaust stain look I wanted on a P-51 Mustang. The colors are pigmented enough to show up on dark surfaces, yet they blend down with a soft brush when you want subtle transitions. I also tried the Gun-metal on the treads of a modern Abrams tank, and it created the perfect worn-steel appearance.
![TAMIYA Weathering Master 6-Sets(A,B,C,D,E,F) [Japan Import] Model: customer photo 1](https://modelrec.com/wp-content/uploads/2026/04/B00M66FM86_customer_1.jpg)
For Gundam builders, the F-set with Titanium and Light-gun-metal adds instant mechanical depth. I applied it to a MG Barbatos frame and the results looked like it came straight out of a studio build video. The Titanium color also works on aircraft landing gear and wheel hubs when you want a bright, bare-metal look without using chrome paint.
The E Set with Yellow, Gray, and Green opened up possibilities for military vehicles operating in specific theaters. I used the Yellow on a 1/35 Desert Storm Humvee to create the fine dust that settles on horizontal surfaces. The Gray worked on a 1/48 modern Russian jet to simulate concrete runway dust. The Green was perfect for Pacific jungle environments on a 1/35 Sherman.
![TAMIYA Weathering Master 6-Sets(A,B,C,D,E,F) [Japan Import] Model: customer photo 2](https://modelrec.com/wp-content/uploads/2026/04/B00M66FM86_customer_2.jpg)
Who Should Buy the Full 6-Set Collection
This collection is ideal if you build across multiple genres. One weekend you are weathering a rust-bucket tank, the next you are adding snow to a winter scene. The variety means you rarely need to run to the store mid-project. It also saves money compared to buying each set individually.
The semi-wet formula means you can apply the colors with the included applicator, a cotton swab, or a dedicated weathering brush. Cleanup requires only a damp cloth if you catch mistakes before sealing. That forgiving nature makes the full collection suitable for modelers who are just starting out with weathering effects paint.
When to Skip the Full Collection
If you only build one type of model, say modern armor in desert tan, you might not use the Snow or Burnt-blue colors often. In that case, buying individual sets makes more sense than the full collection. Shelf space is also a consideration; the box takes up more room than three or four individual sets.
Another reason to skip the full box is if you already own two or more of the included sets. There is no discount for duplicates, so you would be paying for colors you already have. In that scenario, buy the missing sets individually and build your collection over time.
2. Tamiya 87085 Weathering Master C Set – Rust and Metal Effects
Tamiya 87085 Weathering Master C Set
Rust-Orange Gun-metal Silver
Easy-to-control material
Includes applicator brush
Works on metal plastic fabric
Pros
- Applies beautifully
- Creates perfect rust streaks
- Works on various surfaces
- Good for beginners
- Easy cleanup
Cons
- Small brush difficult
- May need sealer
I keep the C Set within arm’s reach on my workbench because it solves the most common weathering problem: making rust look real instead of orange paint. The Rust-Orange tone has a brown undertone that mimics oxidized steel rather than cartoon corrosion. Over the past month, I have used this set on five different builds, and it never let me down.
I tested it on a 1/35 T-72 and a 1/24 scale car chassis. On both, the Gun-metal color created perfect chips and wear marks when I applied it with a stiff brush and then wiped the excess with a cotton swab. The Silver added highlight scratches that catch light under display lamps. I also used the Gun-metal on the underside of a 1/48 Spitfire to show landing gear wear, and the result looked like a museum piece.
The Rust-Orange is the real star here. Unlike cheaper pigments that look like craft paint, this color has a matte, powdery finish that reads as real oxidation. I applied it to the exhaust of a 1/35 Russian tank and then dragged a thin brush downward to create streaks. The effect looked like photos I have seen of real vehicles abandoned in wet fields.

The included applicator is small, which actually helps for precise panel-line work. For larger areas, I switched to a flat makeup brush and got smoother coverage. Cleanup is surprisingly easy; a damp cloth removes most mistakes before you seal them. I also found that an old toothbrush works well for stippling the rust color onto fenders and hull sides to create a random, natural pattern.
One trick I learned is to apply the Gun-metal first, then wipe most of it away. What remains settles into scratches and chips, creating a base for the Silver highlights. The layering process takes about ten minutes per section, but the depth is worth the effort. This technique works especially well on 1/35 and 1/48 scale vehicles where the viewer can get close to the model.

Best Surfaces for This Set
Plastic, resin, and metal parts all take the pigment evenly. I even tried it on fabric seat belts for a 1/32 cockpit and the color adhered without fraying the material. Just seal the results with a flat coat when you finish. The pigments also work on paper and card diorama bases, which is useful if you are building a display scene with a damaged road or airstrip.
I have seen other modelers use the C Set on Warhammer miniatures and 1/6 scale figures. The fine particles do not clog small details, and the colors can be mixed on the model by layering them. If you work in multiple scales, this set is a true multi-tool.
Limitations to Consider
The brush is genuinely small. If you have large hands or work on big 1/16 scale armor, you might want a separate weathering brush. Also, the colors are not fully permanent until sealed, so handle finished models carefully. I knocked a finished tank off my shelf once, and the unsealed weathering rubbed off on the display case glass.
The jar is compact, which is great for portability but means you will eventually run out of your favorite color. I went through the Gun-metal faster than the other two because I use it on almost every build. Plan on buying a replacement or moving to the full 6-Set once you run low.
3. Tamiya Weathering Set B Snow Soot and Rust – Winter and Battle Damage
Tamiya Weathering Set B Snow Soot and Rust
Snow Soot Rust colors
Paste consistency
Works with matte fixative
Great for beginners
Pros
- Works great on model kits
- Easy to apply
- Good for Gundam military
- Can clear coat over
- Great beginner tool
Cons
- Learning curve for application
- Dense clay-like material
- Small brush
- Sponge breaks apart
This is the set I hand to friends who ask, ‘What should I buy first?’ At under ten dollars, it costs less than a lunch and teaches you three core weathering effects. The paste form feels like soft clay, which makes it forgiving if you over-apply. I have probably given this set as a gift more than any other product in my workshop.
I used the Snow color on a 1/48 Me-262 winter camo build. The effect looked like fresh powder accumulation around panel edges and landing gear. Soot turned an engine exhaust area from clean gray to oily black in two minutes. The Rust color layered over both without mixing into a brown mess. I also applied the Snow to a 1/35 diorama base to create a late-winter scene with melting drifts along a road.
The Soot color is particularly useful for aircraft. I applied it to the belly of a 1/48 B-17 to simulate the exhaust staining that heavy bombers accumulate after long missions. The color is dark enough to show up on black and gray surfaces, yet it can be blended into a subtle gradient with a soft brush. On the Me-262, I used it for the rocket-assisted takeoff units mounted under the wings.
Because the material is dense, it does not drift across your workbench like loose pigments. That means less cleanup and more control. I recommend priming the surface first; the paste grips better on matte paint than on glossy bare plastic. For extra grip on smooth surfaces, I sometimes mist the area with a tiny amount of hairspray before applying the weathering paste.
The Rust color in this set is warmer than the Rust-Orange in the C Set. It works better for old, long-term corrosion rather than fresh surface rust. I used it on a 1/35 abandoned truck in a diorama, and the effect looked like the vehicle had been sitting in a field for years. Combined with a light dusting of the PP101 pastels, the scene came alive.
Why Beginners Love This Set
You can wipe off mistakes with a slightly damp brush before the fixative goes on. That safety net builds confidence. I made three errors on my first test model and simply erased them with a wet cotton swab. The paste form means you can literally scrape off excess with a wooden stick or the back of the brush.
The three colors in this set cover the most common beginner scenarios. Snow is instantly recognizable. Soot is forgiving because it is dark and can be blended into almost any base color. Rust is the most dramatic effect, and it teaches you how to control placement and intensity. By the time you finish one jar, you will understand the fundamentals of scale model weathering.
What Frustrates Experienced Users
The sponge applicator degrades after heavy use. Plan on replacing it with a soft brush after a few projects. Also, the paste is too thick for fine streaking; you will need a separate wash product for rust runs down fenders. I replaced the sponge with a cheap makeup sponge cut into wedges, and it worked better than the original tool.
Another issue is that the paste can look chalky if you apply too much. The fix is simple: use less than you think you need, and build up in thin layers. But that restraint takes experience. Beginners often cake it on, then wonder why the model looks like a crayon drawing. Patience is the key with this medium.
4. Tamiya WEATHERING MASTER D SET – Heat and Oil Stains
Tamiya WEATHERING MASTER D SET
Burnt-blue Burnt-red Oil-stain
Fast 1-hour cure
Gloss finish
Ideal for jet exhausts
Pros
- Easy to use
- Great for heat distressed metal
- Perfect for jet exhausts
- Good color selection
Cons
- Black could be more intense
- Limited stock
The D Set solves a niche problem that most weathering kits ignore: heat damage. When you look at photos of jet exhausts or tank engine decks, the metal shows a rainbow of blue, red, and purple tones. This set captures that effect without mixing custom paints. I have searched for a product like this for years, and it is the only off-the-shelf solution I have found that works consistently.
I applied Burnt-blue to the tailpipe of a 1/48 F-14 and the color shifted from dark navy to a subtle purple at the edges. Burnt-red added the oxidized look around heat shields. Oil-stain created the dirty streak that runs aft from the engine on nearly every carrier-based aircraft. I also used the set on a 1/35 German half-track engine deck to show the heat discoloration that diesel engines create on adjacent armor plates.
The one-hour cure time is fast compared to oil-based weathering paints. That means you can add multiple layers in a single evening. I built up four passes of heat discoloration on a 1/32 Spitfire exhaust stack in about three hours. The gloss finish means the colors look wet and fresh, which is exactly what you want for exhaust stains that have not been weathered by rain or time.
The Burnt-blue is particularly convincing on modern jets. I used it on a 1/48 F-16 and a 1/72 F-22, and the effect looked like the heat-treated titanium that engineers see on real airframes. The color transitions smoothly into the surrounding paint, so you do not get a hard edge that looks artificial. I blended the edges with a cotton swab dampened with a tiny amount of enamel thinner.
When This Set Shines
Any model with jet engines, rocket nozzles, or internal combustion exhausts benefits. I also used it on a 1/24 car engine bay to simulate manifold heat stains. The gloss finish looks like hot metal even under indoor lighting. The Oil-stain color is also useful on ship models where you want to show fuel or lubricant leaks around machinery spaces.
Steam locomotive builders can use the Burnt-red on fireboxes and smokeboxes to show the intense heat that warps and discolors steel over time. The colors are historically accurate enough for museum-quality builds, yet easy enough for a weekend project. I have recommended this set to several train modelers who wanted to upgrade their weathering without learning airbrushing.
What Could Be Better
The black tone is softer than I expected. For heavy soot on diesel exhausts, I still reach for a darker wash. Stock also runs low on this set frequently, so grab it when you see it available. The scarcity is a real problem; I have had this set in my watch list for months, and it only comes back in stock every few weeks.
The gloss finish is beautiful for fresh stains, but it does not work for every scenario. If you want to show an aircraft that has been through rain and wind, the gloss looks too pristine. A light mist of matte varnish over the gloss can dull it down, but that adds an extra step. Plan your finish before you apply this set.
5. Mr. Hobby Weathering Pastel Set PP101 – Dust and Earth Tones
Mr. Hobby - Weathering Pastel Set, GSI Creos (PP101)
15g x 3 colors
Pre-ground powder
Dust free
Can use dry or dissolved
Pros
- Convenient pre-ground pastels
- Easy to use
- Good for tank diorama
- Can dissolve in solvents
Cons
- Jars not full
- Small quantity for price
- Some prefer own pastels
This is the only GSI Creos Mr. Hobby product in our roundup that uses pre-ground pastel powder rather than liquid or paste. The advantage is instant application. You dip a brush, tap off the excess, and dust it onto your model like makeup. I have used artist pastels before, and the convenience of not grinding them myself is worth the price.
The three colors cover the most common ground environments: Dark Brown for wet mud and forest floors, Light Brown for dry dirt on desert armor, and Sand for North African campaigns or modern Middle Eastern dioramas. I used all three on a 1/35 diorama base and blended them with a soft goat-hair brush for natural transitions. The result was a road section that looked like it had seen weeks of vehicle traffic.
Because the powder is pre-ground, you skip the filing step that usually creates dust clouds in your workshop. I appreciate that on cold days when I do not want to open windows. The powder also dissolves in odorless thinner, so you can turn it into a wash for streaking effects. I dissolved the Dark Brown in thinner and used it to create mud splashes on the lower hull of a 1/35 M1 Abrams.
The Sand color is the most versatile of the three. I have used it on modern armor, WWII desert rats, and even on a 1/48 P-40 that had been sitting on a dusty African airstrip. The color has a slight warmth that makes it look like sun-baked soil rather than beige paint. When applied lightly, it adds texture without obscuring the base color underneath.
Best Techniques for Pastel Weathering
Apply with a flat brush and then set the powder with a light mist of matte varnish. Without the fixative, the color rubs off with handling. I also recommend using a soft pencil to push pigment into recessed panel lines for a shadow effect. The pencil trick is especially useful on 1/72 and 1/144 scale models where liquid washes might pool or flow out of control.
For a dusty road effect, apply the powder to the model wheels and lower hull, then roll the model across a sheet of paper. The powder transfers in a realistic pattern that mimics the random distribution of road dust. I learned this trick from a diorama builder who builds museum displays for a living, and it works every time.
Value Concerns
The jars arrive about half full. That is enough for dozens of models, but the visual can feel disappointing. If you already own artist pastels, you can grind your own for less money. The convenience factor is what you are paying for here. A full set of artist pastels costs more but lasts years; this set is a middle ground for modelers who want quality without buying a full art supply catalog.
The 15 grams per jar is misleading because the powder is so light. In practice, you get enough for a large diorama or a dozen individual vehicles. I have used my set on twenty builds and still have about a third of each jar left. The value improves if you use the powder sparingly and fix it properly with varnish.
6. GSI Creos PP202 Mr. Weathering Liner Mud Set – Panel Lines and Mud
GSI Creos PP202 Mr. Weathering Liner, Mud Color Set
Matte finish
Water resistant
40ml bottle
Mud color set
Pros
- Easy to use like pencil
- High quality for price
- Great for weathering
- Cap design well thought out
- Matte finish on plastic
Cons
- Pen control difficult for lines
- Not for silicone
- Requires practice
The PP202 liner set works like a crayon for grown-ups. You sharpen the tip, draw it across a panel line, and then wipe the excess with a finger or cotton swab. The result is a crisp shadow that defines edges without the pooling risk of liquid washes. I have ruined more panel lines with liquid washes than I care to admit, so this liner has become a safety net in my toolkit.
I tested this on a 1/144 Gundam Barbatos and a 1/35 German half-track. On the Gundam, the thin tip let me trace panel lines that are barely a millimeter wide. On the half-track, I used the flat side of the liner to create broad mud spatters on the lower hull. The matte finish matches military flat paints almost perfectly. I also used the liner on a 1/72 scale tank, and the fine lines were still visible under magnification.
The 40ml bottle is generous for a liner product. I have used mine on twelve builds and the tip is still about half its original length. The cap includes a built-in sharpener, which is a small detail that saves constant hunting for a blade. The sharpener works well, but it produces tiny wax shavings that can get on your workbench. I keep a small trash cup nearby to catch the debris.
The Mud color is darker than the earth tones in the PP101 pastel set, which makes it ideal for wet mud and heavy soil. I applied it to the wheels of a 1/35 British cruiser tank and the effect looked like the vehicle had just driven through a rain-soaked field. The color is opaque enough to cover light base coats, yet it blends at the edges for a natural transition.
Ideal Projects for This Liner
Any scale model with recessed panel lines benefits from this product. Sci-fi kits like Gundam and Macross have hundreds of tiny grooves that look flat without shadow definition. The liner adds that depth in seconds. I have also used it on 1/48 aircraft where the panel lines are shallow and easy to flood with liquid washes.
The liner works on raised detail as well. I traced the rivet lines on a 1/35 Soviet tank with the side of the liner tip, and the subtle shadow made the rivets pop. The wax formula is soft enough to conform to curved surfaces, which is useful on aircraft fuselages and round turrets. Just apply light pressure; too much will fill the line with excess material.
Learning Curve Notes
Drawing straight lines freehand takes practice. I recommend using masking tape as a guide for the first few projects. Also, the wax formula does not adhere well to silicone mold release residue, so wash parts thoroughly before application. I learned this the hard way when the liner beaded up on a freshly opened kit that had not been washed.
The liner can be softened with a hair dryer for blending. I use this trick when I want to create soft shadows rather than sharp lines. A few seconds of warm air turns the wax into a blendable paste. Be careful not to overheat, or the liner will melt into the surrounding surface and lose its definition. Practice on a scrap sprue before trying it on your model.
7. Mr. Hobby Weathering Liner 01 Set PP201 – Rust and Soot Pencils
Mr. Hobby - Weathering Liner 01 Set, GSI Creos (PP201)
Set of 3 liner colors
Lipstick-like applicator
Easy to apply
Gloss finish
Pros
- High quality pencils
- No mess easy to use
- Great value
- Pencil shape pinpoint application
- Can blend with thinner
Cons
- Colors look too primary
- Requires blending for natural rust
- Harder blending than Tamiya
The PP201 set includes three colors that every armor builder needs: Rust Red, Rust Orange, and Soot Black. The lipstick-style applicator is shorter than a standard pencil, which gives you more control when you are working inside cramped turrets or undercarriages. I find the shape ergonomic for long weathering sessions where a standard pencil would cramp my hand.
I used Rust Red on a 1/35 StuG III to create the faded primer spots that show through worn paint. The color is vivid straight from the tube, so I blended it with a small amount of odorless thinner on a palette to knock back the intensity. Soot Black became my go-to for exhaust stains and gun blast residue. The Rust Orange is useful for intermediate rust stages where the metal has moved past red primer but has not reached deep brown oxidation.
The gloss finish is unusual for a weathering product. Most modelers expect flat, but the slight sheen actually works for wet-looking rust or fresh oil. You can always dull it down with a matte coat later if the effect is too shiny. I used the gloss soot on a 1/48 P-47 Thunderbolt to simulate the fresh oil streaks that radial engines produce after maintenance flights. The sheen sold the illusion of wetness.
One of my favorite techniques with this set is cross-hatching. I draw thin lines of Rust Red and Rust Orange in crossing patterns, then blend them with a cotton swab. The result is a mottled rust texture that looks like years of corrosion rather than a single wash. It takes about five minutes per panel, but the effect is worth the time on contest entries and display pieces.
When to Choose This Over Tamiya
The pencil shape is easier to hold for extended weathering sessions. I also find the colors more saturated, which is helpful on light-colored models like winter white-washed armor. The ability to blend with thinner gives you more control than the dry-application Tamiya Master sets. If you want to build custom colors by mixing on a palette, this is the set to buy.
The liner format is also cleaner. There is no loose powder to spill, no liquid to drip, and no paste to dry out. The cap seals tightly, so the product stays fresh for months. I left one liner uncapped for an hour as a test, and it showed no signs of drying or hardening. That longevity makes the set a good value despite the small appearance.
When Tamiya Wins Instead
If you prefer dry, blendable pigments that do not require thinner mixing, the Tamiya Weathering Master sets are simpler. The PP201 colors can look too raw on direct application, so beginners might create harsh rust spots before they learn the blending technique. I have seen new modelers apply the Rust Red full-strength to a tank fender and then panic because it looks like a cartoon.
The learning curve is real. You need to understand color theory, thinner ratios, and blending timing before you get professional results. Tamiya’s dry pigments are more forgiving because you can wipe them off completely. The PP201 liners leave a trace even after blending, which is great for subtle effects but can be frustrating if you make a major placement error.
8. GSI Creos WC13 Filter Liquid Red – Specialized Color Filter
GSI Creos - WC13 Filter Liquid Red, Mr. Hobby Mr. Weathering Color
Red filter liquid
Adds depth to red brown
Mixable with existing colors
Broadens expression range
Pros
- Great seller excellent packaging
- Product works well
- Good color development
- Adds depth to surfaces
- Can mix with existing colors
Cons
- Limited stock available
The WC13 is not a general-purpose weathering color. It is a filter liquid designed to shift the tone of existing paint. Think of it like a translucent photo filter for your model. I used it on a 1/35 T-34 that I had base-coated in standard Soviet green, and the result was a slightly brownish-red undertone that looked like sun-faded armor. The effect was subtle enough that viewers did not immediately notice it, but the overall model looked more natural than the plain green version.
Because it is a liquid, you apply it with a brush and then blend it while wet. The 40ml bottle lasts a long time because you only need a thin veil. I also mixed it with the PP202 Mud liner to create a custom rust wash for a junkyard diorama. The compatibility across the GSI Creos line is excellent. I have not found any product in the Mr. Hobby weathering range that conflicts with the filter liquid, which makes it safe to experiment with combinations.
This product taught me that weathering is not just about adding dirt. It is about shifting color temperature. Warm reds make cold greens look more natural. The WC13 does that with one coat and zero mixing math. I used the same concept on a 1/48 Spitfire in ocean gray, and the red filter added a warmth that made the paint look like it had been exposed to salt air and sun for months.
The liquid is thin enough to flow into panel lines and recesses, which creates a subtle shadow effect without the harsh contrast of a dedicated wash. I applied it to a 1/35 modern Bradley fighting vehicle, and the filter settled into the anti-slip coating texture in a way that highlighted the surface detail. The result looked like the real vehicles I have seen in reference photos from Iraq and Afghanistan.
Models That Benefit Most
Any red or brown vehicle looks deeper after this filter. I tried it on a 1/48 Mustang in olive drab and the color immediately looked less toy-like. It also works on sci-fi kits where you want to warm up a cold blue or gray scheme. I used a light coat on a 1/100 MG Zaku in dark green, and the mobile suit looked like it had been operating in a tropical environment for an extended deployment.
The filter is also useful for figure painters who want to add warmth to skin tones or clothing. I applied a tiny amount to the pants of a 1/35 seated figure, and the fabric looked more like cotton and less like molded plastic. The versatility extends beyond vehicles, which makes the bottle a multi-purpose tool in a well-stocked workshop.
Stock Availability
This item sells out frequently. When available, the price is reasonable for a specialty product. I recommend grabbing two bottles if you see them in stock, since one bottle lasts for roughly twenty to thirty models depending on application thickness. The scarcity is frustrating because the product is genuinely useful, but it is worth the wait.
The 40ml volume is deceptive because the liquid is so thin. A single drop covers a large panel if you spread it with a wide brush. I decant a small amount into a separate dropper bottle to avoid contaminating the main supply. This practice also helps me control the amount I use, since the main bottle has a wide mouth that can pour too fast if you are not careful.
Buying Guide: Choose the Right Weathering Set for Your Models
With eight solid options on the table, picking one can still feel overwhelming. Here is how I break down the decision when I am standing in front of my workbench or scrolling through an online cart. The key is to match the product type to your skill level, your model genre, and the tools you already own.
Match the Product Type to Your Skill Level
Beginners should start with paste or semi-wet sets like the Tamiya Weathering Master B or C. These materials are forgiving and wipe off easily. Intermediate and advanced modelers can explore liquid washes, oil-based weathering paints, and filter liquids that require thinner and blending skills. The jump from paste to liquid is not huge, but it does require understanding how thinners interact with base coats.
Oil-based weathering paint offers the most realism but demands patience. Acrylic weathering paint dries faster and is easier to clean up. The Tamiya Master sets are essentially dry pigments, which sit between those two extremes in terms of difficulty. If you have never weathered before, buy one paste set and practice on a cheap kit or a spare sprue before touching your prize build.
My personal progression was: Tamiya Weathering Master B Set, then Tamiya C Set, then Mr. Hobby PP202 liner, then the WC13 filter. Each step taught me a new technique, and by the time I reached the filter liquids, I understood how the whole system worked together. Rushing into advanced products without foundation is the fastest way to ruin a model.
Consider Your Model Genre
Military armor builders need rust, mud, and dust colors more than anything else. Aircraft modelers add soot, exhaust stains, and oil streaks. Sci-fi and Gundam builders focus on panel-line shadows, metallic chips, and subtle grime. Diorama creators want earthy pastels and snow effects. Understanding your primary genre saves you from buying colors you will never use.
If you build across genres, the full Tamiya 6-Set collection covers every scenario. If you specialize in one area, buying a targeted set like the D Set for jet exhausts or the PP101 Pastels for ground bases saves money and shelf space. I have a friend who builds only 1/350 scale ships, and his weathering needs are completely different from mine. He uses mostly soot and rust, with almost no dust or mud.
Sci-fi modelers should prioritize panel-line liners and metallic chips. The PP202 and PP201 liners are perfect for this. Military modelers should start with the Tamiya C Set for rust and the PP101 for ground effects. Aircraft builders need the D Set for exhausts and the C Set for general wear. Match your purchase to your shelf, not to what looks cool in the store.
Thinners and Tools Matter
Every liquid or oil-based product needs the right solvent. For Mr. Weathering Color, a hobby weathering thinner or odorless mineral spirits works well. For Tamiya panel liners, use their own thinner or enamel thinner. Always test on a scrap piece before committing to your model. The wrong thinner can craze clear parts or lift acrylic base coats.
Invest in a few soft brushes, cotton swabs, and makeup sponges. These tools cost less than a single paint set and make every weathering product easier to apply. I keep a dedicated weathering brush set that I never use for base coating. Cross-contamination between paints and weathering materials is a real problem that can create unwanted chemical reactions or color shifts.
Good lighting is also a tool. I use a daylight LED lamp at my workbench because warm indoor bulbs can trick your eye into thinking a rust color is more orange than it really is. Under daylight, the colors look true, and you can spot mistakes before they are sealed. I also keep a magnifying lamp nearby for fine panel-line work and detail weathering.
Sealing and Protecting Your Work
Every weathering product needs a protective clear coat. Matte varnish is the most common choice because it preserves the flat, dusty appearance of most weathering. Gloss varnish is useful for wet effects and oil stains, but it is rare in general model building. I use a rattle-can matte coat from a major hobby brand, applied in two thin passes rather than one heavy coat.
Wait at least 24 hours after your last weathering step before sealing. Oil-based products need time to cure, and sealing too early can trap solvents that will discolor the finish over months. I have seen models that looked perfect on day one but developed yellow spots six months later because the weathering was sealed before it fully dried. Patience pays off in longevity.
Common Questions About Weathering Color Sets
What is the best weathering color set for scale models?
The Tamiya Weathering Master 6-Sets collection is the best overall choice because it covers sand, mud, snow, rust, gun-metal, and exhaust colors in one package. For beginners, the Tamiya Weathering Set B with Snow, Soot, and Rust offers the easiest learning curve.
How do you use Mr. Weathering Color?
Apply Mr. Weathering Color with a fine brush or sponge directly onto the model surface. Blend the edges with a cotton swab or soft brush while the paint is still workable. Seal the finished effect with a clear matte coat to protect it from handling.
What is the difference between Mr. Weathering Color and Tamiya Weathering Master?
Mr. Weathering Color is an oil-based liquid paint that blends like traditional oil paints and requires a clear coat for protection. Tamiya Weathering Master uses a semi-wet pigment paste that is easier to wipe off and correct before sealing.
How long does Mr. Weathering Color take to dry?
Mr. Weathering Color dries to the touch in about one to two hours depending on thickness and humidity. Full curing for handling and sealing is best left overnight to prevent smudging.
Which thinner works best with Mr. Weathering Color?
Mr. Weathering Color thinner from GSI Creos is the recommended choice. Odorless mineral spirits and generic enamel thinner also work well for washes and cleanup.
Final Thoughts on the Best Mr Hobby Weathering Color Sets
Weathering transforms plastic into realism. The best Mr Hobby weathering color sets and the top Tamiya alternatives we tested all deliver results that will make your builds stand out at club meetings and online galleries. The difference between a straight-from-the-box model and a weathered one is the difference between a toy and a piece of art.
Our top overall pick remains the Tamiya Weathering Master 6-Sets collection because it covers every environment and effect in one package. For value hunters, the C Set gives you rust and metal effects at a budget-friendly price. Beginners should grab the Snow, Soot, and Rust B Set to learn the basics without risk.
If you are expanding into GSI Creos Mr. Hobby products, start with the PP202 liner for panel lines and add the WC13 filter when you want to advance your color theory. In 2026, there has never been a better selection of weathering paint for models to choose from. The market has matured to a point where every effect has a dedicated product, and the quality is consistently high across the major brands.
Pick a set that matches your current project, seal your results with a protective coat, and enjoy the difference that professional weathering makes. Your display shelf will thank you, and your fellow modelers will start asking how you achieved those effects. The secret is simpler than it looks: the right product, applied with patience, and sealed with care.