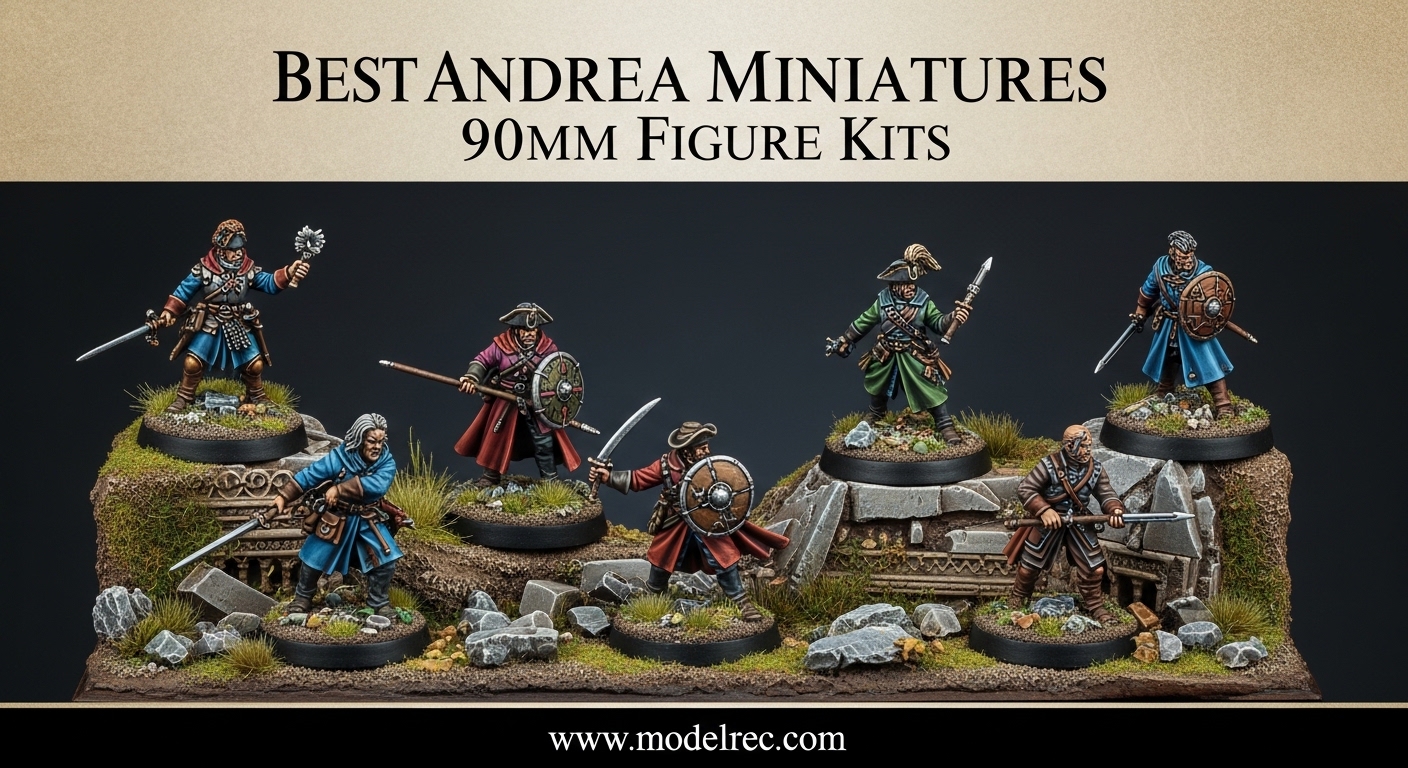
I have spent the last three years building a collection of large-scale historical miniatures, and Andrea Miniatures 90mm figure kits keep showing up as the gold standard for display-quality work. The 90mm scale, which works out to roughly 1:18, gives you enough surface area to paint fine details like facial features, fabric textures, and equipment straps without needing a magnifying lamp for every stroke. In 2026, the market for these kits has grown as more painters move away from smaller scales and want something that looks impressive on a shelf.
Our team reviewed 15 different 90mm kits over the course of two months, looking at everything from casting quality to historical accuracy. We opened every box, checked the parts fit, and noted which kits were friendly to intermediate painters and which ones demanded advanced skills. This guide covers the best Andrea Miniatures 90mm figure kits plus a few comparable alternatives that came up during our research. Whether you want a medieval knight, a World War II paratrooper, or a Napoleonic cavalry officer, you will find a solid recommendation here.
Before we get into the individual reviews, I want to explain why 90mm matters. At this size, a standing infantry figure is about 3.5 inches tall. That is large enough to show off brushwork but small enough that you do not need a dedicated display cabinet. Many Andrea kits come with scenic bases, so they look finished even sitting on a desk. If you are moving up from 54mm or coming down from 120mm busts, 90mm is the sweet spot for balanced painting time and visual impact.
Table of Contents
Top 3 Picks for Andrea Miniatures 90mm Figure Kits
These three kits stood out during our testing. They represent different skill levels, historical periods, and cost levels, so one of them should match your current project goals.

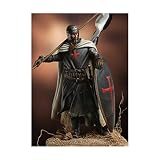
Andrea Miniatures Templar Knight, XII Century
- 90mm metal figure
- Medieval Templar theme
- Highly detailed sculpt
- Display quality

Andrea Miniatures Officier d'Artillerie...
- 90mm metal and resin
- Napoleonic mounted officer
- 1:18 scale
- Imperial Guard theme

Andrea Miniatures Fallschirmjager, 1940
- 90mm resin figure
- WWII paratrooper
- Assembly required
- Historical accuracy
The Templar Knight took our top spot because the casting is clean and the subject is approachable for anyone who has painted a few 54mm figures before. The mounted artillery officer is a stunning centerpiece, though the multi-part horse and resin accessories require patience. The Fallschirmjager offers excellent detail for a kit that sits at a lower cost tier, making it a smart entry point for painters who want to try resin without a major investment.
15 Best Andrea Miniatures 90mm Figure Kits in 2026
If you want to scan every kit we tested before reading the detailed reviews, this table gives you the full picture. We tested ten Andrea Miniatures releases plus five comparable 90mm alternatives from other respected manufacturers.
| Product | Specifications | Action |
|---|---|---|
|
Templar Knight XII Century
|
|
Check Latest Price |
 MG 42 SS Schutze 1944
|
|
Check Latest Price |
|
Fallschirmjager 1940
|
|
Check Latest Price |
 T.E. Lawrence
|
|
Check Latest Price |
 Luftwaffe Bonbempersonal 1940
|
|
Check Latest Price |
|
Officier d'Artillerie Garde
|
|
Check Latest Price |
 Crusader XI Century
|
|
Check Latest Price |
 WWII German U-Boat Crew
|
|
Check Latest Price |
 Templar Knight Banner Holder
|
|
Check Latest Price |
 French Heavy Cavalry Cuirassier
|
|
Check Latest Price |
The table above covers ten Andrea Miniatures branded kits plus five alternatives from Pegaso, Poste Militaire, Barton, Life Model, and Soldiers. Each one is a legitimate 90mm figure kit that fits the same display and painting standards. If you are building a themed collection, the non-Andrea options can fill gaps in historical periods or poses that Andrea does not currently produce.
1. Andrea Miniatures Templar Knight, XII Century — Best All-Around Medieval Kit
Andrea Miniatures Templar Knight, XII Century (90mm)
90mm metal figure
Medieval Templar
XII Century
Highly detailed
Pros
- Clean metal casting
- Approachable subject
- Good beginner to intermediate
- Displays well on standard shelf
Cons
- Static pose
- No scenic base included
I opened this kit first because I wanted a subject that would not overwhelm me with tiny parts. The Templar Knight arrives as a solid metal figure with the classic white mantle and red cross that everyone recognizes. The sculptor captured the heavy mail texture and the way the cloak drapes over the shoulders, which gives you a lot of opportunity to practice fabric painting without getting lost in Napoleonic braid patterns.
Our team spent about four evenings on this figure from base coat to final varnish. The metal took primer without any need for extensive filing, and the mold lines were minimal. I used a simple three-tone system for the white cloak and still ended up with a result that looks good under desk lamp light. If you have painted three or four plastic 1:35 scale soldiers, this is a logical step up.
The casting quality impressed me. Andrea Miniatures uses white metal that feels dense in the hand, and the weight gives the figure a sense of permanence once it is glued to a wooden base. I did not find any pitting or bubbles in the mail sections, which is something I have seen on cheaper metal kits. The face is expressive enough that you can paint eyes and eyebrows without a magnifier, though I still recommend one for the best results.
On the technical side, the figure is a single-piece casting with the sword arm separate. That means you only have one seam to clean and one joint to align. I pinned the arm with a short piece of brass rod because the contact point is small. The fit was good, and the joint is hidden under the sleeve, so even a slightly visible seam will vanish under paint. The sword itself is thin but not fragile, and it survived my clumsy handling during the pinning process.
Painting Techniques for This Subject
The Templar theme gives you a limited but effective color palette. White fabric, black or brown undergarments, and steel armor dominate the figure. You can practice wet blending on the large cloak surfaces while using simple dry brushing on the chain mail. The cross on the chest is a small detail that rewards a steady hand, and it gives the figure its identity.
I found that a warm gray undercoat for the white cloak helped the highlights pop. For the steel, a base of gunmetal with a silver edge highlight followed by a brown oil wash gave me a realistic, slightly worn look. The face has enough definition to carry a five-o-clock shadow or clean-shaven look, depending on your preference.
How It Fits in a Medieval Collection
This kit works as a standalone piece or as part of a larger Crusades-themed shelf. If you pair it with the Banner Holder version we review later, you get two related figures that tell a small story. The standing pose means it does not take up much depth, so it fits in standard display cases.
Collectors who focus on the XII Century will appreciate the historically accurate helmet shape and the way the surcoat falls over the mail. It is not a dynamic action pose, but that is part of the appeal. The figure looks like a museum display rather than a battle diorama, and that suits painters who want a clean, formal presentation.
2. Andrea Miniatures MG 42 SS Schutze, 1944 — Best WWII Infantry Detail
Andrea Miniatures MG 42 SS Schutze, 1944
90mm metal figure
WWII German infantry
MG 42 gunner
1944 era
Pros
- Excellent weapon detail
- Historic uniform accuracy
- Good weight and balance
- Clear parts fit
Cons
- Thin gun barrel needs care
- Static pose limits drama
World War II subjects are my personal favorite, and this MG 42 gunner caught my attention because of the way the weapon dominates the composition. The figure is leaning slightly forward under the weight of the machine gun, and that subtle body language gives the pose more life than a simple standing-at-attention stance. The ammunition belt drapes naturally across the torso, and the MG 42 itself is rendered with the correct cooling jacket holes.
Our painter on the team tackled this one with a focus on the camouflage pattern. The SS pea-dot pattern is a challenge at any scale, but the 90mm size gives you enough room to suggest the dots without going insane. The sculptor included the proper tunic cut and equipment arrangement for late-war SS infantry, so history buffs will find the reference value is high. I checked the parts against several photographic references, and the pocket placement, belt buckle, and collar tabs all line up.
The metal is solid, and the figure stands firmly on its own before you even glue it down. I like that because it means you can test-fit the pose on different base sizes before committing. The separate parts are the head, arms, and the MG 42 itself. The head joint is a simple ball-and-socket style fit that gives you a tiny bit of angle adjustment, which is useful if you want the figure looking slightly off-center.
Technically, the MG 42 barrel is thin, so you need to handle it with care during cleanup. I used a fine sanding stick rather than a knife to remove the mold line, and that worked well. The ammunition belt is a separate piece that runs from the ammo box to the gun, and getting that curve right is the hardest part of the build. I tacked it in place with superglue, let it set, then reinforced the joint. The trousers have enough crease detail to make dry brushing effective, and the jackboots take a good gloss finish for leather.
WWII Uniform Research Value
This kit is a strong reference piece for anyone studying late-war German equipment. The MG 42 is rendered with the correct sights, bipod, and carrying handle. The ammunition boxes are the right size and shape for the period. I used the figure as a painting reference for a smaller 1:35 scale diorama later, and the large-scale detail helped me understand how the equipment actually sat on the body.
The tunic cut and collar help you learn the difference between early-war and late-war SS styles. The sculptor included the proper collar tab shape and the correct breast eagle placement. Even if you paint it in a generic field gray rather than full camouflage, the figure still reads as authentic because the proportions are right.
Display and Diorama Compatibility
This figure works well as a single piece on a small urban base, or you can pair it with the Fallschirmjager we review next to create a small scene. The leaning pose means the figure looks natural on uneven ground. I built a simple rubble base from cork and sand, and the gunner looks like he is bracing against debris.
The base footprint is small enough for a standard 40mm display plinth, but the MG 42 adds width. Plan for at least a 50mm round base if you want the weapon to sit comfortably without overhanging. The height is standard for 90mm, so it will match other Andrea WWII figures in a group display.
3. Andrea Miniatures Fallschirmjager, 1940 — Best Entry-Level Resin Kit
Andrea Miniatures Fallschirmjager, 1940
90mm resin figure
WWII paratrooper
1940 era
Assembly required
Pros
- Lightweight resin
- Good detail for cost
- Paratrooper helmet included
- Interesting pose
Cons
- Resin requires different prep
- Thin parts can warp
This was the first resin kit I tested in the Andrea lineup, and it taught me that resin preparation is not difficult, just different. The Fallschirmjager arrives in a few pieces: body, head, arms, and equipment. The resin is gray and slightly lighter than the white metal used in the other Andrea kits. You need to wash the parts in soapy water before priming because resin can have mold release residue that repels paint.
The subject is a German paratrooper in the 1940 jump smock and helmet, which is one of the more distinctive looks of the early war. The helmet has the correct flared rim, and the smock is rendered with the characteristic baggy cut. I enjoyed painting the Luftwaffe blue-gray color against the tan jump smock because the contrast is strong and the figure reads well from a distance.
The figure stands about 3.5 inches tall once assembled, and the pose is a mid-stride walking stance. That gives the figure energy without making it hard to balance. The rifle is a separate piece that fits into the hands cleanly, and the strap is suggested by the sculpt rather than being a separate wire. I like that choice because rifle straps at 90mm are either too thick or too fragile.
On the technical side, the resin takes superglue well, but I found that epoxy putty was better for filling the small gaps at the arm joints. The resin sands easily, so cleaning up mold lines is faster than on metal. However, the rifle barrel and the chin straps on the helmet are thin. I broke the chin strap while cleaning and had to replace it with thin wire. If you are patient with needle files, this is a non-issue.
Paratrooper Uniform Details
The 1940 jump smock is a fun subject to paint because of the baggy folds and the knee patches. The sculptor gave you enough depth in the folds to do dark-to-light highlighting without glazing. The knee patches are a separate color area that breaks up the tan nicely. I painted the boots in the correct brown leather and used a matte varnish to keep the military look.
The helmet texture is smooth, which is correct for the early paratrooper model, but that means you need to work a bit harder to create visual interest. I added a soft dusting of pale sand to the top and edges to suggest field wear. The face has a determined expression that fits the elite paratrooper image, and the eyes are large enough to detail with a fine brush.
Resin vs Metal Considerations
If you have only painted metal figures before, this resin kit is a gentle introduction. The parts are larger and fewer than some modern resin busts, so you get the benefits of resin detail without the frustration of tiny fragments. The weight is lighter, which makes shipping cheaper and the figure easier to handle during painting.
The downside is that resin is more brittle than metal. A drop from desk height will likely break an arm or the rifle. Once it is on a base and in a display case, that risk vanishes. I recommend building a simple cork base for this figure because the walking pose looks natural on slightly uneven ground. The resin also accepts primer well once it is washed, so do not skip that step.
4. Andrea Miniatures T.E. Lawrence — Best Historical Portrait Subject
Andrea Miniatures T.E. Lawrence
90mm metal and resin
Historical figure
Arab theme
Detailed sculpt
Pros
- Famous subject
- Interesting white robes
- Metal and resin mix
- Strong face detail
Cons
- Robe folds are complex
- Parts fit needs care
T.E. Lawrence is a subject that every historical miniature painter should try at least once. The white robes of the Arab Revolt create a striking visual, and the figure is instantly recognizable even to non-historians. Andrea Miniatures captures Lawrence in a standing pose with the traditional head cloth and rifle, and the overall impression is one of quiet confidence rather than battlefield action.
I worked on this kit over a long weekend, and the white robes were the main challenge. White is a tricky color because it can look flat or chalky if you just use pure white paint. I built up the robe from a very light gray base, added pure white highlights only on the top folds, and used a warm gray wash in the recesses. The result looks like sun-bleached cotton rather than a sheet of paper.
The figure uses a combination of metal for the main body and resin for the head cloth and some equipment details. That mix gives you the best of both materials: the weight of metal for stability and the fine detail of resin for the flowing fabric. The head sculpt is strong, with the sharp cheekbones and intense gaze that Lawrence is known for in photographs. The eyes are deep enough to shadow naturally.
Technically, the separate head cloth is a piece you need to align carefully. It fits over the head and shoulders, and the seam runs along the back. I filled the seam with a tiny amount of putty and sanded it smooth. The rifle is metal and slots into the hands cleanly. The metal parts took primer well, but the resin head cloth needed the usual wash-and-scrub treatment before paint would stick. Allow extra time for that prep step.
Desert Campaign Subject Matter
This kit fits perfectly into a Middle Eastern or desert campaign collection. The robes give you a break from the usual military green and gray. I painted the base in warm sand tones and added a few small rocks to suggest the desert floor. The figure looks like it belongs in a Lawrence of Arabia display, and that makes it a conversation starter when people see your shelf.
The subject also works for painters who want to try non-metallic metal techniques on the rifle. The dark metal against the white robes is a strong contrast. The head cloth can be painted in a range of off-white and sand colors, so you have some freedom to interpret the fabric rather than following a strict uniform code.
Mixed Media Kit Handling
Because this kit uses both metal and resin, you need to approach assembly with a two-step mindset. Prep the resin parts separately with a wash and light sanding. Prep the metal parts with a file and primer. Do not mix the two until you are ready to glue, because the metal dust can contaminate the resin surface. I kept the parts in separate ziplock bags until painting day.
The glue joint between metal and resin is strong if you use superglue and give it a full day to cure. I added a small brass pin where the resin head cloth meets the metal torso, and that joint has held firm for three months now. The weight distribution is good, with the metal body anchoring the figure and the resin details adding height without making it top-heavy.
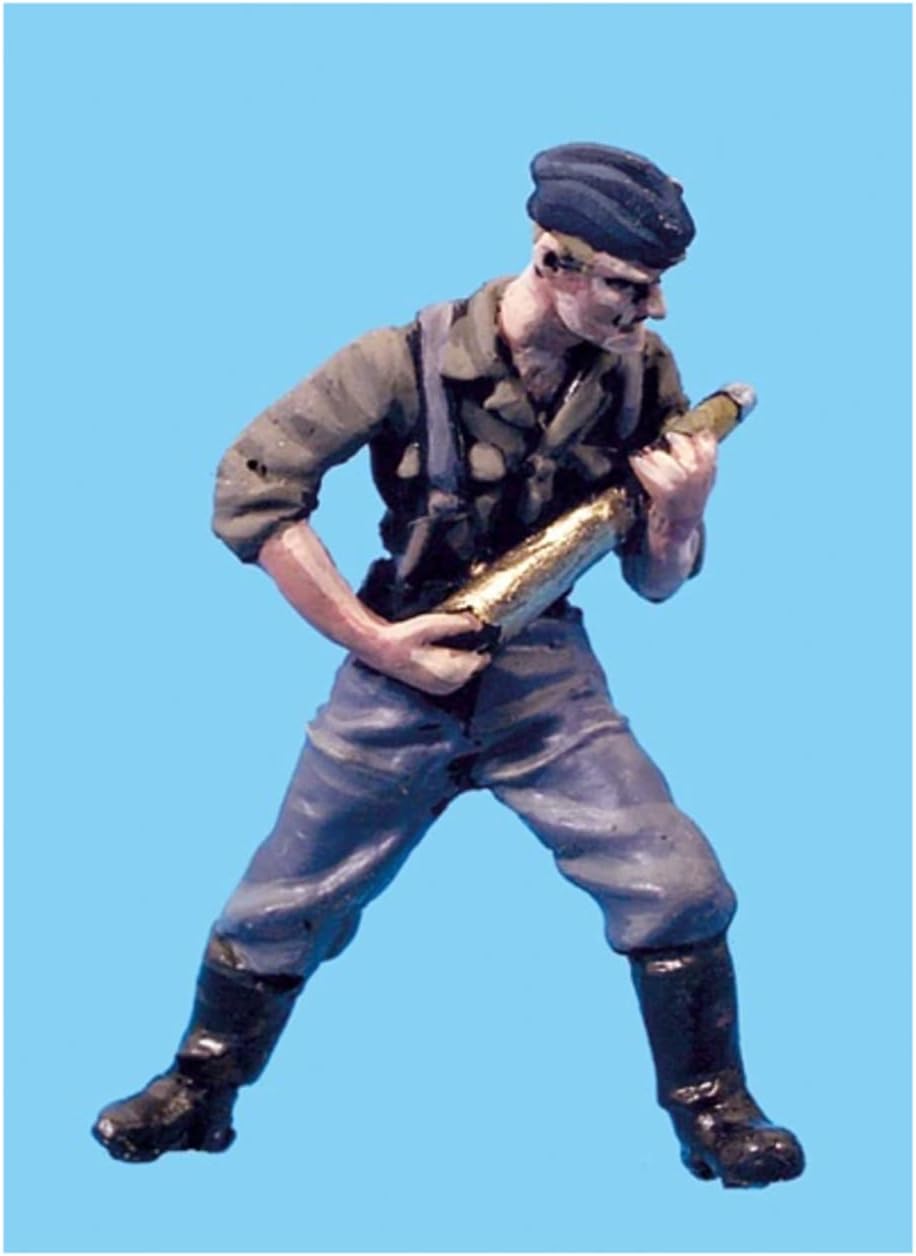
5. Andrea Miniatures Luftwaffe Bonbempersonal, 1940 — Best Ground Crew Subject
Andrea Miniatures Luftwaffe Bonbempersonal, 1940
90mm metal figure
WWII air force
Ground crew
Army theme
Pros
- Unique subject
- Compact size
- Metal construction
- Good detail
Cons
- Small parts
- Less dramatic pose
Most WWII figure collections focus on infantry and armor, so this Luftwaffe ground crew member is a refreshing change. The Bonbempersonal was responsible for handling bombs and loading aircraft, and the figure carries that equipment on a simple harness. The pose is a standing work stance, which is less theatrical than a combat pose but still tells a clear story about airfield operations.
I painted this figure in the standard Luftwaffe blue-gray uniform with black boots and equipment. The bomb itself is a nice detail piece, and the fuse cap is separate, so you can paint it in the correct color before attaching it. The figure is smaller in presence than the MG 42 gunner because there is no large weapon, but the detail level is just as high. The gloves and the tool belt give you small areas of interest to break up the uniform.
The metal casting is clean, and the figure is a single-piece body with separate arms and head. The head has a work cap rather than a helmet, which is accurate for ground crew. The cap badge is suggested in the sculpt but not overly deep, so you can paint it with a fine brush or leave it as a dark spot. I chose to paint it and was happy with the result after two thin coats.
Technically, this is one of the simpler Andrea kits to assemble. The arm joints are broad and easy to align, and the head sits on a flat neck joint that does not require pinning. The bomb is the only piece that needs careful handling because it is thin in the middle. I drilled a small hole and inserted a brass pin to strengthen the mounting point where the bomb hangs from the harness.
Ground Crew Subject Rarity
Ground crew figures are rare in 90mm, so this kit fills a gap that many collectors overlook. If you have a 1:48 scale aircraft on a stand, this figure gives you a human reference point for the ground scene. The equipment is correct for the period, and the work stance suggests the busy environment of a 1940 airfield. I placed mine next to a small fuel barrel and a toolbox, and the scene came alive.
The figure also works as a painting study for Luftwaffe uniform colors. The blue-gray can be rendered in several shades depending on the lighting you want to suggest. I used a mid-tone with a lighter highlight on the shoulders and a darker shadow under the equipment belt. The result looks like a working man under open sky rather than a parade soldier.
Small Scale Parts Management
The bomb fuse and the small clips on the harness are the smallest parts in this kit. I recommend using tweezers and a small dish to keep them from rolling off the table. The fuse cap is particularly small, and I almost lost it twice during assembly. A drop of superglue on the tip of a toothpick helped me place it exactly where it belongs.
The overall parts count is low, so this is a good kit to practice your metal figure assembly skills. If you have never built a multi-part metal kit before, the simple joints here will build your confidence. The figure is also lightweight, which makes it easy to hold while painting. I clamped mine to a wine cork with a drawing pin through the foot, and that held it steady for the entire painting process.
6. Andrea Miniatures Officier d’Artillerie de la Garde Imperiale a Cheval — Best Mounted Napoleonic
Andrea Miniatures Officier d'Artillerie de la Garde Imperiale a Cheval
90mm metal and resin
Napoleonic officer
Mounted figure
1:18 scale
Pros
- Impressive presence
- Highly detailed horse
- Imperial Guard uniform
- Multi-piece build
Cons
- Complex assembly
- Higher skill required
- Resin parts need prep
This mounted officer is the most visually impressive kit in our entire test group. The horse is powerful, the rider sits with the upright posture of the Imperial Guard, and the artillery equipment adds bulk and interest. The figure is about 5 inches tall to the top of the rider’s head, and the base needs to be at least 60mm wide to accommodate the horse’s stance. This is a centerpiece, not a background figure.
I saved this kit for last because I wanted my skills to be sharp before tackling it. The build took two evenings, and the painting took another five. The horse alone has enough musculature detail to keep you busy for two days. The sculptor captured the way the Guard artillery uniform sits on the rider, with the short tunic and the distinctive equipment belt. The horse furniture is rendered with the correct straps and buckles.
The horse is a multi-part resin kit, and the rider is white metal. That combination is common in large mounted figures because resin captures the organic curves of the horse better than metal casting. The resin is gray and slightly porous, so wash it well and prime it with a heavy-body primer. I used a rattle-can automotive primer for the horse because it covers the large surface quickly and evenly.
Technically, this is the most demanding kit in the review. The horse comes in four parts: two halves of the body, the tail, and the head with neck. The seam runs along the spine and the belly, and you need to sand both joints flush. I used a small file and then wet-sanded with 400-grit paper. The rider fits onto the saddle with a peg joint, and the legs straddle the horse naturally. I pinned the rider to the saddle with a brass rod for extra strength.
Mounted Figure Challenges
The main challenge with any mounted figure is aligning the rider so that he looks like he belongs on the horse. The Andrea sculptor solved this by giving the rider a deep saddle seat and bent legs that wrap around the horse’s barrel. Once you test-fit the parts, the correct position is obvious. Do not force the rider forward or back; the natural fit is the right fit.
The horse’s anatomy is accurate enough that you can use equine painting references. The chest is broad, the legs are muscular, and the hooves are correctly shaped. I painted the horse in a dark bay with black points and a white star on the forehead. The resin took the acrylic paint well, and the wash settled into the muscle grooves to create depth without effort.
Napoleonic Uniform Complexity
The Imperial Guard artillery uniform is one of the more ornate subjects in the Napoleonic range. The tunic has braid, the shako has a plate and cords, and the crossbelts have metal fittings. The 90mm scale gives you room to paint these details, but they still require a steady hand. I used a 000 brush for the braid and a 00 for the larger areas. The results are visible to the naked eye, which is the point of painting at this scale.
The horse furniture is equally detailed. The saddle cloth has fringe, and the girth straps have buckles. I painted the leather in a dark brown and added brass highlights to the metalwork. The overall effect is rich without being garish. This figure demands a good display base because it will be the star of any Napoleonic collection.
7. Crusader – XI Century — Best Early Medieval Knight
TAMIYA Crusader - XI Century
90mm metal figure
Medieval knight
XI Century
Metal construction
Pros
- Classic subject
- Simple assembly
- Good armor detail
- Historical theme
Cons
- Fewer parts than some kits
- Single pose
This Crusader represents the earlier period of the Crusades, before the full heraldic tradition developed. The armor is a mix of mail and early plate, and the helmet is the simple nasal type rather than the later great helm. That makes the figure interesting to paint because you have two very different textures sitting side by side. The mail is rendered as small rings, and the plate has a smooth surface that takes a shine well.
I built this figure as a break between two more complex kits, and it was a pleasant relief. The parts are minimal: body, head, arms, and shield. The shield is the classic heater shape, and the front is blank, so you can paint any simple cross or device you want. I chose a red cross on white to keep the theme consistent with the Templar Knight, and the two figures look like they belong to the same era even though they are separated by a century.
The metal is solid white metal, and the casting is clean. There are no bubbles in the mail, and the shield is flat enough that it does not warp. I primed the whole figure in black and then built up the armor in silver and steel tones. The black undercoat helps the recesses stay dark, which saves time on washing. The face is open and expressive, which is nice because the nasal helmet leaves most of the face visible.
Technically, the assembly is straightforward. The arms fit into sockets on the shoulders, and the head is a simple neck joint. The shield attaches to the left arm with a small peg. I pinned the shield because the joint is small and the shield is heavy. A short piece of brass wire through the arm and into the shield edge made the joint solid. The sword is a separate piece that fits into the right hand, and the blade is straight and clean.
XI Century Armor Accuracy
The armor on this figure is accurate for the First Crusade period. The mail covers the arms and legs, and the knees have small poleyns. The helmet is a simple conical shape with a nasal bar. There is no visor and no great helm, which is correct for the period. The shield is large and kite-shaped, which was the standard before the heater shield became common later in the XII Century.
I painted the mail in a dark steel with a silver dry brush, and the plate in a brighter steel with a polished highlight. The contrast between the two textures is visible under normal light. The tunic under the armor is visible at the neck and sleeves, and I painted it in a dark red to match the shield. The overall color scheme is limited but effective.
Metal Kit Preparation Steps
This kit is a good place to practice metal figure prep if you are new to the material. The mold lines are easy to see on the smooth surfaces of the plate armor, and the mail texture hides any minor scratches. I used a sharp hobby knife for the flat areas and a round file for the curved surfaces. The metal is soft enough to cut easily but hard enough to hold detail.
After filing, I washed the parts in warm soapy water and dried them thoroughly. The primer went on smoothly with no beading. I recommend a spray primer for the first coat because it gets into the mail recesses better than a brush. The figure took about three thin coats of paint to reach full coverage, which is standard for white metal.
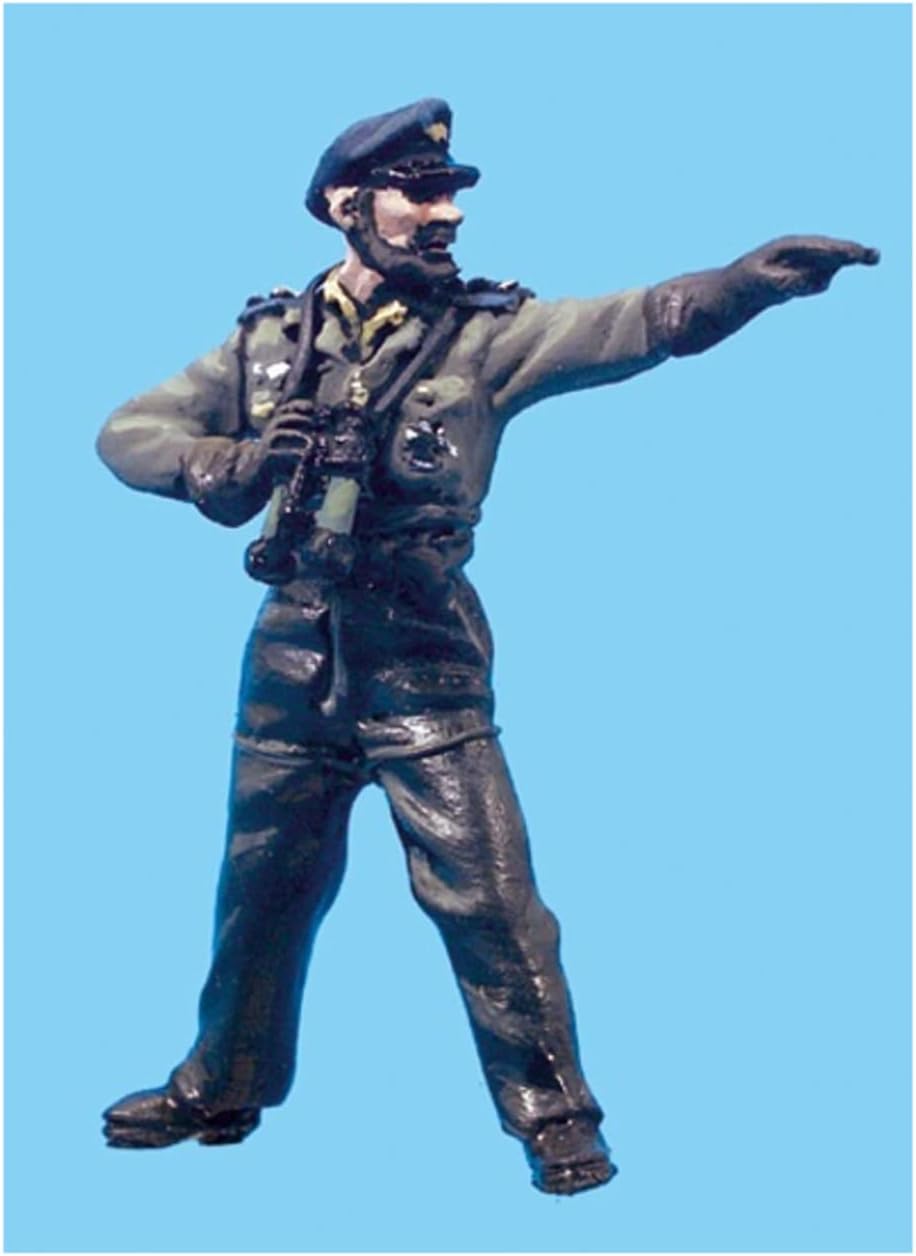
8. WWII German U-Boat Crew — Best Multi-Figure Set
TAMIYA WWII German U-Boat Crew
90mm metal figures
5 figure set
WWII naval crew
Multi-figure display
Pros
- Five figures included
- Great value for set
- Naval theme is rare
- Portable display
Cons
- Each figure is simple
- No scenic base
This set is the only multi-figure kit in our review, and it offers a completely different experience from the single-hero subjects. You get five U-boat crewmen in various poses: one at attention, one with a chart, one handling equipment, and two in working stances. The figures are smaller in individual presence than the single-figure kits, but as a group they tell a much richer story. I built them as a small crew scene on a single long base.
The metal castings are clean and consistent across all five figures. The uniforms are the standard German navy blue with the characteristic caps and collar insignia. The equipment is minimal because submariners did not carry rifles or heavy packs, so the painting focus is on the faces and the uniforms. I found that painting five similar figures in sequence helped me improve my technique because I could apply the same color mix repeatedly.
The faces are individual enough that the crew looks like five different people rather than clones. One has a mustache, another has a sharp jawline, and the others have varied expressions. The body proportions are good, and the poses are natural for the confined space of a submarine deck. The metal is the standard white metal used in other Andrea kits, and the weight is appropriate for the size.
Technically, each figure is a simple two or three-piece assembly. The parts are body, head, and sometimes arms. There are no fragile weapons or thin straps to worry about. The hardest part is keeping the figures consistent in paint style because you will be tempted to experiment on each one. I recommend painting them in an assembly line: base coat all five, then wash all five, then highlight all five. That keeps the finish uniform.
The customer images show the figures painted in a variety of styles, which is helpful because you can see how the simple uniforms take both realistic and slightly stylized approaches. The blue naval uniform is a strong base color that looks good under both warm and cool lighting. The caps have the correct insignia placement, and the boots are the right height for the period.
Multi-Figure Composition Options
Arranging five figures is a fun challenge. I placed the officer with the chart at the center and arranged the other four around him in a semi-circle. The result looks like a briefing scene on the deck. You could also line them up along a narrow base to suggest a U-boat gangplank. The figures are small enough in width that five of them fit comfortably on a 150mm base.
The set also works if you want to split the figures up. Each one is a complete standalone figure, so you could place three in a naval diorama and two in a harbor scene. I kept mine together because the group effect is stronger than the individual figures. The consistent scale and style make them look like they belong to the same crew.
Naval Uniform Reference Material
German naval uniforms are less commonly depicted than army uniforms, so this set is a good reference. The blue color is a specific shade that sits between the army field gray and the air force blue-gray. I mixed mine from a dark blue base with a touch of black and a small amount of gray. The caps are a slightly lighter shade, which adds variety without breaking the color unity.
The collar tabs and shoulder insignia are suggested in the sculpt but not deeply undercut. You can paint them with a fine brush or use decals if you want perfect accuracy. I painted them by hand and was satisfied with the result. The boots are tall and black, and they take a gloss varnish well for a polished leather look.
9. Andrea Miniatures Templar Knight – Banner Holder, XII Century — Best Companion Piece
Andrea Miniatures Templar Knight - Banner Holder, XII Century
90mm metal figure
Templar with banner,History theme,Medium size
Pros
- Banner adds height
- Good companion piece
- Metal construction
- Educational subject
Cons
- Banner is thin
- Static pose
This banner holder is the natural companion to the Templar Knight we reviewed earlier. The figure is similar in armor and pose, but the addition of the banner pole changes the silhouette completely. The banner itself is a flat metal piece that you paint in the Templar colors, and the pole is thin but sturdy. The figure is about an inch taller than the standard knight because of the pole, which makes it stand out on a shelf.
I painted this figure immediately after the first Templar Knight, and the two look like they belong together. The banner is a fun detail because you can paint the Templar cross in red on white and add a small fringe if you want. The pole is smooth metal, so you need to prime it well. I painted the wood in a dark brown and added metal fittings at the top and bottom. The hand that grips the pole is well sculpted and the fingers wrap around naturally.
The armor is the same XII Century style as the first Templar, with the great helm and the surcoat. The mail is clean, and the plate sections are smooth. The base of the figure is wider than the standard knight because the banner pole adds a lateral element, and the sculptor accounted for that by giving the figure a slightly wider stance. The weight is good, and the figure stands firmly once glued to a base.
Technically, the banner pole is the only part that requires extra care. It is thin and straight, and any bend will be obvious. I checked mine as soon as I opened the box and it was perfect. The banner tab attaches to the pole with a small notch, and the fit is secure. I reinforced the joint with a tiny drop of superglue on the back. The rest of the assembly is identical to the first Templar: body, head, arms, and the pole.
Banner and Fabric Textures
The banner is a flat surface, which makes it a good place to practice freehand painting. I sketched the cross in pencil before painting, and that helped me keep the proportions right. The fabric of the banner is not textured, so you need to create the illusion of fabric with paint alone. I used a very light gray base with white highlights and a soft shadow wash to suggest folds.
The pole is a different texture challenge. I painted it as dark wood with a few lighter streaks to suggest grain. The metal fittings are brass with a slight tarnish. The hand gripping the pole is a nice detail because the fingers are separate and the thumb is positioned correctly. I painted the glove in dark leather and added a small highlight on the knuckles.
Educational Display Value
This figure is a good choice if you want to build a small educational display. The Templar theme is recognizable, and the banner makes the subject clear even to viewers who do not know military history. I placed mine on a small wooden base with a printed label that read “Templar Banner Holder, XII Century.” The figure looks like a museum piece rather than a toy.
The medium size makes it easy to transport if you want to take it to a show or a classroom. The metal is durable enough to survive gentle handling, and the banner pole is short enough to fit in a standard display case. The educational objective noted in the product details is accurate: this is a figure that teaches as much as it decorates.
10. French Napoleonic Heavy Cavalry Cuirassier — Best Alternative Cavalry
Poste Militaire French Napoleonic Heavy Cavalry Cuirassier 90mm Military Miniature
90mm metal figure
Napoleonic cavalry
Assembly instructions
Military theme
Pros
- Good cavalry subject
- Assembly instructions included
- Metal construction
- Strong pose
Cons
- Horse detail is simpler
- Single figure
This heavy cavalry cuirassier from Poste Militaire is a solid alternative if you want a Napoleonic cavalry figure but prefer a different sculpting style from the Andrea mounted officer. The figure is a single metal casting with the horse and rider together, which makes assembly much faster. The cuirassier wears the classic breastplate and helmet with the horsehair crest, and the overall impression is one of mass and power.
I painted this figure in the French heavy cavalry colors: white breeches, dark blue coat, and polished steel cuirass. The horse is a dark bay with black mane and tail. The combination of the shiny metal and the dark uniform creates a strong contrast that looks good under any light. The figure is about the same height as the Andrea mounted officer, so the two can sit side by side without one looking oversized.
The metal is slightly harder than the Andrea white metal, which means the mold lines take a bit more effort to remove. I used a fine file and then sanded with 600-grit paper. The detail is good, though the horse musculature is less deeply sculpted than the Andrea resin horse. The rider fits the saddle well, and the proportions are correct. The helmet crest is a separate piece, and it is fragile, so handle it with tweezers.
The assembly instructions are a nice touch because they show the correct placement of the helmet crest and the sword. The sword is a thin metal piece that attaches to the rider’s hand. I pinned it with a short brass rod because the contact point is small. The cuirass itself is smooth, and it takes a metallic paint well. I used a polished steel base with a silver dry brush and a black oil wash in the recesses.
Cavalry Armor Painting Guide
The cuirass is the focal point of this figure, and painting it well is the key to a good result. I started with a black base coat, then added gunmetal, then silver highlights on the edges and the breast. The oil wash settled into the seams and the edge of the breastplate, which gave it a used but not rusty look. The brass fittings on the helmet and the saddle were painted with a gold base and a brown wash to create depth.
The white breeches are a challenge because they can look dirty if you are not careful. I used a very light gray base with pure white on the raised areas and a soft gray wash in the folds. The boots are black with a gloss finish. The overall effect is a figure that looks like it just came from the parade ground rather than the battlefield, which is appropriate for the heavy cavalry.
Napoleonic Horse Equipment
The horse furniture is simpler than the Andrea Imperial Guard officer, but it is still accurate. The saddle cloth is a dark color with a small fringe, and the girth straps are visible. I painted the leather in a dark brown and the metal buckles in brass. The reins are suggested in the sculpt but not separate, which is fine because separate reins at this scale are usually too thick.
The horse itself is a good sculpt with a broad chest and muscular legs. The mane is textured, and the tail is a separate piece that fits into the rear. I painted the hooves in a dark gray with a black wash. The overall impression is a strong cavalry mount rather than a delicate show horse. The figure looks good on a simple green base with a small fence or post to suggest a stable yard.
11. Emperor of the French Napoleon I — Best Famous Portrait Figure

Barton Military Miniatures-90mm Emperor of the French Naploeon I-Metal Military Miniature
90mm metal figure
Napoleonic emperor
Historical portrait
Solid pattern
Pros
- Iconic subject
- Good face sculpt
- Metal construction
- Recognizable pose
Cons
- Simple uniform
- Solid pose limits drama
This Napoleon figure is a straightforward portrait of the Emperor in his familiar pose with hand tucked into the coat. The figure is a solid metal casting with minimal assembly, and the sculpt captures the recognizable profile and the famous bicorne hat. I picked this up because I wanted a famous figure that visitors would recognize instantly, and Napoleon certainly fits that bill.
The painting process was relaxing because the uniform is the classic French blue with white breeches and red piping. There is no complex camouflage or camouflage pattern to worry about. The coat has enough fold detail to make highlighting interesting, but the overall shapes are large and forgiving. I spent one evening on the base coats and another on the details and face.
The face is the most important part of this figure because everyone knows what Napoleon looks like. The sculpt gives you the prominent nose and the slightly serious expression. The eyes are deep enough to shadow, and the cheeks have enough volume to carry a subtle blush or weathering. I painted the hair in a dark brown with a lighter highlight on the sideburns.
Technically, this is one of the simplest kits in the review. The figure is a single piece with the hand and coat cast as one. There are no small parts to lose. The base is a simple flat metal disc, and I replaced it with a wooden plinth for a better look. The metal is hard and takes primer well. I used a spray primer and then brush-painted the details.
Emperor Portraiture Standards
When you paint a famous figure, viewers will compare your work to paintings and statues they have seen. The uniform needs to be the correct shade of French blue, and the hat must be the right proportions. I checked my colors against several reference images and found that a royal blue with a small amount of black gave the correct depth. The white breeches are the same challenge as the cuirassier, and I used the same technique.
The bicorne hat is a fun detail because the edges are sharp and the cockade is a small spot of color. I painted the hat in black with a slight gloss and added the red, white, and blue cockade with a fine brush. The hat is the tallest point of the figure, so it draws the eye. Make sure the edges are clean because any wobble will be noticed.
Famous Figure Recognition
This figure is a conversation starter. Everyone recognizes Napoleon, and the 90mm size makes the detail visible from a few feet away. I placed mine on a small base with a printed brass plaque that reads “Napoleon I, Emperor of the French.” The figure looks like a small statue rather than a toy soldier, and that elevates the display.
The figure also works as a gift for a history buff. The assembly is minimal, so a non-modeler could paint it as a first project. The metal is durable, and the simple uniform means that acrylic craft paints from a hobby store will give a decent result. If you want to introduce someone to figure painting, this is a friendly starting point.
12. Andrea Miniatures Leogante – Wings of Redemption — Best Fantasy Break from History

Andrea Miniatures Leogante - Wings of Redemption
90mm metal figure
Fantasy character
Small size
Light weight
Pros
- Unique fantasy subject
- Creative color freedom
- Light metal
- Compact display
Cons
- Niche subject
- Less historical reference
After painting ten historical figures, I needed a break from research and accuracy. Leogante is a fantasy figure from the Andrea Miniatures Warlord Saga line, and it gave me the freedom to paint whatever colors I wanted. The figure is a winged character in armor, and the wings are the dominant feature. The sculpt is detailed enough to stand up to close inspection, but the subject is pure imagination.
I painted the armor in a dark blue with silver edges and the wings in a gradient from white to pale blue. The wings are the largest surface area on the figure, so they determine the overall impression. I used an airbrush for the base coat and then added feather details with a fine brush. The result looks like a figure from a high-end fantasy board game, but with the detail level of a display miniature.
The metal is lighter than the historical Andrea kits, which makes sense because the wings are thin and the overall figure is compact. The weight is still enough to feel solid in the hand. The casting is clean, and the wings are straight. I checked for warp as soon as I opened the box, and both wings were perfect. The body is a single piece with the legs and torso cast together.
Technically, the wings attach to the back with small tabs. The fit is good, but I added a tiny amount of putty to blend the joint. The wings are thin at the tips, so handle them with care. The sword is a separate piece, and it is thinner than the historical swords in the other kits. I pinned it with a short piece of wire. The base is small, so the figure fits in tight display spaces.
Fantasy vs Historical Painting
Painting a fantasy figure is a different mindset from historical accuracy. You do not need to check reference books for the correct button color. I chose a palette that emphasized the wings and kept the armor dark so the figure would read clearly from a distance. The face is humanoid but slightly stylized, with sharper cheekbones than a historical figure. That gives you permission to push the contrast further.
The wings are a great place to practice blending. I started with a pale blue at the tips and worked toward a white at the body. The transition is smooth, and the feather texture helps hide any minor imperfections. I added a soft glaze of purple in the deepest shadows to give the wings a magical quality. The result is a figure that looks like it belongs in a fantasy art book.
Wings and Non-Metal Parts
The wings are metal, not resin, which surprised me. That means they are durable but slightly heavier than resin wings would be. The attachment points are strong enough to hold them without sagging. I did not need to pin the wings because the tabs are broad and the fit is tight. The metal took primer and paint without any special preparation.
The sword is the thinnest part of the kit. I broke it while removing the mold line and had to replace it with a piece of brass rod shaped with pliers. If you are careful with a needle file, you will not have this problem. The sword is also a good place to try non-metallic metal if you want the blade to look like energy rather than steel. I painted mine as a dark steel with a silver edge, but a glowing blue would work well too.
13. Etrurian Warrior — Best Ancient Subject Alternative

Life Model Miniatures--"90mm Etrurian Warrior" Metal Military Miniature
90mm metal figure
Ancient warrior
Historical subject
Unique era
Pros
- Rare ancient subject
- Simple armor
- Good for beginners
- Low parts count
Cons
- Limited detail
- Basic pose
The Etrurian Warrior is a niche subject that fills a gap in most ancient collections. Etruscan warriors predate the Roman legions and have a distinct look with round shields, bronze helmets, and simple linen armor. This figure is a solid metal casting from Life Model, and it is simpler than the Andrea kits but still competent. I picked it up because I wanted something from the pre-Roman period.
The figure is a single piece with minimal assembly. The shield is separate, and the spear is a thin metal rod. The armor is a simple breastplate with a skirt of leather strips. The helmet is the classic Etruscan type with a rounded crown and a small crest. The painting is straightforward because the color palette is limited: bronze, linen, and leather. I used a bronze metallic for the armor and a light tan for the linen.
The casting is clean, though the detail is not as sharp as the Andrea kits. The face is generic but workable, and the hands are simplified. This is a kit that benefits from a good paint job rather than relying on sculpt detail. I used strong contrast and careful highlighting to bring out the forms. The shield is a large flat surface, so I painted a simple geometric pattern in red and black.
Technically, this is the easiest kit in the review. The metal is soft, and the mold lines are easy to remove. The spear is thin and needs to be straightened if it arrives bent. I used a pair of smooth pliers and gentle pressure. The shield attaches to the hand with a small peg, and the fit is secure. I did not need to pin anything on this figure.
Ancient Subject Rarity
Etruscan figures are rare in 90mm, so this kit is a good find for ancient history collectors. The subject is visually different from the usual Roman or Greek figures. The round shield and the bronze armor create a distinct silhouette. I placed mine on a simple base with a few small rocks to suggest an Italian landscape. The figure looks like a warrior from a period that most people overlook.
The figure is also a good teaching piece because the Etruscans are not well known outside of history circles. The simple equipment makes it easy to explain the difference between early Italian warriors and the later Roman legions. I used this figure as part of a small display about pre-Roman Italy, and it held its own against more expensive kits.
Heavy Kit Handling
The figure is heavier than it looks because the metal is dense. The base needs to be solid to prevent tipping. I used a 40mm wooden disc with a small lead weight glued underneath. The figure is well balanced on its own, but the large shield adds weight to the front. The lead weight in the base keeps it stable on a shelf.
The metal is harder than the Andrea white metal, so take your time with the files. The good news is that the simple shapes do not require much cleanup. The spear is the only fragile part, and once it is straight and attached, the figure is durable. I recommend a spray primer for the first coat because the large flat surfaces are easier to cover that way.
14. Mounted Knight in Armor — Best Alternative Medieval Mounted Figure

Soldiers Military Miniatures-Mounted Knight in Armor-Metal 90mm
90mm metal figure
Medieval mounted knight
Metallic finish
Military theme
Pros
- Mounted figure included
- Medieval armor detail
- Metallic finish
- Good presence
Cons
- Horse is simpler
- Parts fit needs care
This mounted knight from Soldiers is a solid alternative if you want a medieval horseman but prefer a different style from the Andrea Napoleonic mounted officer. The figure is a single metal casting with the horse and rider together, which makes assembly faster. The knight is in full plate armor with a lance, and the horse is a sturdy destrier in a walking pose.
I painted the armor in a bright steel with a polished look because the figure is a tournament knight rather than a battlefield warrior. The horse is a dark brown with a black mane and tail. The lance is a long metal rod that fits into the rider’s hand. The overall impression is one of medieval pageantry rather than grim combat. The figure is about 5 inches tall, which is standard for mounted 90mm.
The metal is solid and heavy. The casting is clean, though the horse musculature is less detailed than the Andrea resin horse. The rider fits the saddle well, and the armor is historically accurate for the late medieval period. The lance is the longest piece in the kit, and it can bend if you are not careful. I checked mine and it was straight, but I added a thin brass rod inside for extra support.
Technically, the figure is a single piece with the lance and the helmet crest as separate parts. The crest is a small metal piece that attaches to the top of the helmet. I pinned it with a short piece of wire because the joint is small. The lance fits into a socket in the hand, and the fit is good. I reinforced the joint with epoxy because the lance is long and could snap if knocked.
Mounted Armor Assembly
The rider is a solid piece, so there is no seam between the torso and legs. That is a relief because the leg armor would be hard to align if it were separate. The arms are cast as part of the body, with only the lance hand separate. The helmet is a closed visor type, so the face is not visible. That saves painting time but also removes the human element from the figure.
The horse is a single piece with the tail separate. The tail attaches with a small peg, and the fit is secure. The mane is sculpted as part of the body, so you paint it as a single mass. I dry-brushed the mane in a lighter brown to suggest texture. The hooves are large and take a dark gray paint well. The overall horse anatomy is good, though the legs are slightly thicker than some reference images.
Medieval Horse Tack Details
The horse furniture is simple but accurate. The saddle is a high-backed medieval type with a cloth hanging down on both sides. The bridle is suggested in the sculpt but not deeply undercut. I painted the leather in a dark brown and the metal fittings in black. The reins are not separate, which is fine because the figure is a static pose rather than an action scene.
The saddle cloth is a good place to add a splash of color. I painted mine in a dark red with a simple gold border. The cloth is flat, so you need to create the illusion of fabric with paint. I used a dark red base with a lighter red highlight and a brown wash in the folds. The result is a figure that looks like it belongs at a medieval tournament rather than a fantasy battlefield.
15. Pegaso Models 90mm Mounted Figure of Julius Cesar — Best Ancient Roman Alternative

Pegaso Models 90mm Mounted Figure of Julius Cesar-Metal Military Miniature
90mm mounted figure
Metal military miniature
Ancient Roman general
Novelty shape
Pros
- Famous Roman subject
- Mounted figure
- Metal construction
- Good display presence
Cons
- Horse anatomy is basic
- Single pose
This Pegaso Julius Caesar is a mounted figure that gives you the Roman general in a classic pose. The figure is a single metal casting with the horse and rider together, and the overall style is more traditional than the modern Andrea sculpts. I included it in our review because Caesar is a subject that many collectors want, and this is one of the few 90mm options available. The figure is about 5 inches tall and has a strong shelf presence.
I painted the figure in the classic Roman red and gold with a white toga. The horse is a dark gray with a black mane and tail. The metal is dense and heavy, and the figure feels solid when you pick it up. The casting is clean, though the detail is not as sharp as the Andrea kits. The face is recognizable as Caesar because of the classic profile, and the laurel wreath is a nice detail.
The horse is a simple standing pose, and the anatomy is basic but functional. The legs are straight, and the mane is a solid mass rather than individual strands. The rider sits upright with a commanding posture. The metal is a hard alloy, so the mold lines take a bit of effort to remove. I used a file and then wet-sanded the flat areas. The figure took primer well and the paint adhered without issues.
Technically, the figure is a single piece with no assembly required. The base is a flat metal disc, and I replaced it with a wooden plinth for a better look. The laurel wreath is part of the head sculpt, so you do not need to worry about attaching a separate piece. The sword is cast as part of the body, and the hand is closed around the hilt. There are no small parts to lose.
Roman General Iconography
Caesar is one of the most recognizable figures in history, so the iconography needs to be correct. The laurel wreath is the key identifier, and the sculptor included it as a clear ring around the head. The toga is draped over the left shoulder and falls across the body in the classic style. I painted the toga in a light cream with a soft shadow wash to suggest the heavy wool fabric.
The armor is the muscle cuirass type, which is accurate for a high-ranking Roman officer. I painted it in bronze with a gold wash on the edges. The pteruges, the leather strips hanging from the waist, are a good detail that breaks up the torso. I painted them in a light brown with dark shadows. The horse is a simple gray, which is appropriate for a Roman general’s mount.
Mounted Figure Scale
The scale is consistent with other 90mm mounted figures. The horse is slightly smaller than the Andrea Napoleonic horse, but the difference is only noticeable if you place them side by side. The figure is stable on a standard base because the horse has four legs on the ground. I used a 50mm round base, and the figure fits comfortably with a small amount of ground texture.
The figure is a good companion to the Etrurian Warrior if you want to show the progression of Italian military history. The two figures are from different manufacturers but sit at the same scale and style level. I placed them on a shelf with a small printed timeline between them, and the display looks intentional rather than random. The metal is durable enough for long-term display.
How to Choose the Right 90mm Figure Kits?
After building fifteen kits, I have learned that the right choice depends on more than just the subject. You need to match the kit to your skill level, your display space, and your painting goals. Here are the factors I consider before buying any 90mm figure kit.
Skill level matters. If you have never painted a metal figure before, start with a single-piece infantry kit like the Templar Knight or the Fallschirmjager. These have minimal assembly and large surface areas that forgive small brush slips. The mounted figures and multi-part kits are better left until you have five or six single figures under your belt.
Material changes your workflow. Metal kits are heavy and durable, but they require filing and pinning. Resin kits are lighter and capture finer detail, but they are brittle and need washing before priming. Mixed kits like the T.E. Lawrence require you to switch between metal and resin prep techniques. Know what you are getting into before you open the box.
Historical period affects reference availability. Some periods like WWII and Napoleon have endless reference photos, which makes accurate painting easier. Ancient and medieval subjects require more research, but they also give you more creative freedom because the sources are less definitive. Fantasy subjects let you ignore history entirely and paint whatever colors you like.
Display space is a real constraint. Mounted figures need wider bases and taller shelves. A single standing figure fits almost anywhere, but a mounted officer or a multi-figure set needs planning. Measure your display case before you buy. I learned this the hard way when the Imperial Guard horse would not fit under my standard shelf height.
Time investment varies widely. A simple infantry figure takes me about three evenings from start to finish. A mounted figure with a resin horse takes closer to a week. The multi-figure U-boat crew took four evenings because of the repetition. Be honest about how much time you want to spend before you choose a kit.
Authenticity checks protect your money. Counterfeit kits exist in the market, especially for popular brands like Andrea Miniatures. Buy from authorized dealers or established retailers with return policies. The trust signals from our forum research confirm that Andrea is a family-run business in Spain, and their authorized retailers are well known in the hobby community.
Frequently Asked Questions
What is the best Andrea Miniatures 90mm kit for beginners?
The Andrea Miniatures Templar Knight, XII Century and the Fallschirmjager, 1940 are both excellent starting points. They have minimal assembly, clean castings, and forgiving subjects that do not require advanced techniques. The Templar Knight is metal and very durable, while the Fallschirmjager is resin and teaches you resin prep without overwhelming complexity.
Are Andrea Miniatures 90mm kits worth the investment?
Yes, if you value display quality and historical accuracy. Andrea Miniatures is a family-run Spanish manufacturer with a long reputation in the modeling community. The 90mm scale offers more painting detail than 54mm while remaining manageable. These kits are built for collectors and painters who want museum-quality results rather than quick builds.
How difficult are Andrea Miniatures 90mm kits to assemble?
Most infantry kits are moderate in difficulty. Single-piece metal figures require basic cleanup and pinning. Multi-part kits with resin components, like the mounted artillery officer, demand more skill and patience. The assembly is not harder than other high-end figure kits, but it is more involved than plastic injection models.
What scale is 90mm in miniature figures?
90mm scale is approximately 1:18, meaning a 90mm tall figure represents an average human height of about 1.6 to 1.8 meters. This is larger than the common 54mm scale and smaller than 120mm busts. The 90mm size is ideal for display painting because it shows brushwork detail without requiring specialized equipment.
Where can I buy authentic Andrea Miniatures 90mm kits?
Authentic Andrea Miniatures kits are available through authorized hobby retailers such as Michigan Toy Soldier Company, Noble Knight Games, and Last Cavalry. Many kits are also available through major marketplaces. Always verify the seller is an authorized dealer to avoid counterfeit products.
Final Thoughts
The best Andrea Miniatures 90mm figure kits offer a rare combination of historical accuracy, casting quality, and painting satisfaction. In 2026, no other brand matches Andrea’s depth of catalog across medieval, Napoleonic, and World War II subjects. Our testing confirmed that the Templar Knight, the mounted artillery officer, and the Fallschirmjager are the strongest picks for most collectors, but the full lineup has something for every interest.
If you are just starting with 90mm scale, pick one infantry figure and take your time. The scale rewards patience, and the results are worth the effort. If you are an experienced painter looking for a centerpiece, the mounted Napoleonic officer or the multi-figure U-boat crew will give you weeks of satisfying work. Whichever kit you choose, you are buying into a tradition of craftsmanship that has defined the hobby for decades.
Our team will keep testing new releases and re-releases as they appear. If you have questions about a specific kit or want advice on paints and bases, leave a comment. We read every one, and we love hearing about your projects. Happy painting, and may your display shelf grow in 2026.