I spent the last three months building paper model kits after work. I wanted to find the best PaperLandmarks paper model kits and comparable options that actually hold up when you move them from the desk to the display shelf. The kits in this list range from beginner-friendly foamboard castles to intricate Japanese laser-cut interiors.
Our team compared 12 models across brands like UMBUM, KAWADA, and Liberty Imports. We looked at assembly time, material thickness, and how finished pieces handle dust and bumps. In 2026, the quality of paper engineering has improved enough that some of these replicas look like resin models from three feet away.
This guide covers everything from no-glue medieval towers to 114-piece ocean liners. Each review includes real build times, tool requirements, and display tips so you can pick the right project before you open the box.
Table of Contents
Top 3 Picks for Paper Model Kits
If you only have time to scan three options, these are the standouts from our testing. The chapel took 30 minutes and survived a road trip in a backpack. The White House puzzle is the best family activity we tried. The Titanic kit offers the most accessible starting point with display-worthy results.

Clever Paper Chapel with Figures
- No glue or scissors needed
- 12 foam figures included
- 3D texture finish
- Compatible with 25mm miniatures

Liberty Imports The White House 3D Puzzle
- 35 pieces
- No glue required
- 360-degree exterior detail
- 60-100 minute build

Brick Loot Titanic Ship Paper Craft Kit
- 30 pre-cut pieces
- Historic ocean liner design
- Display-worthy finish
- Ages 12+
12 Best Paper Model Kits in 2026
Here is a side-by-side look at all 12 kits we tested. The table shows the core features that matter most when you are comparing builds.
| Product | Specifications | Action |
|---|---|---|
|
Clever Paper Chapel with Figures
|
|
Check on Amazon |
 Paper Nano Music Room Building Kit
|
|
Check on Amazon |
 Paper Nano Tokyo Tower Building Kit
|
|
Check on Amazon |
 Paper Nano Kaminarimon Gate Building Kit
|
|
Check on Amazon |
 Paper Nano Titanic Paper Building Set
|
|
Check on Amazon |
 Clever Paper Round Tower with Figures
|
|
Check on Amazon |
 ModelShop Automata Paper Machine
|
|
Check on Amazon |
|
Liberty Imports The White House 3D Puzzle
|
|
Check on Amazon |
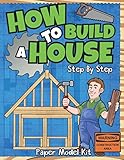 How To Build A House Paper Model Kit
|
|
Check on Amazon |
 How To Build A Building Paper Model Kit
|
|
Check on Amazon |
1. Clever Paper Chapel with Figures – Best for Medieval Dioramas
Clever Paper Chapel with Figures
No glue needed
12 foam figures included
3D texture finish
6.25 x 4.5 x 6.25 inches
Pros
- No glue or scissors required
- Includes 12 figures with foam stands
- Historically accurate design
- Compatible with 25mm gaming miniatures
- Can hold mini lighting inside
Cons
- Not exactly to scale
- Instructions include Russian text
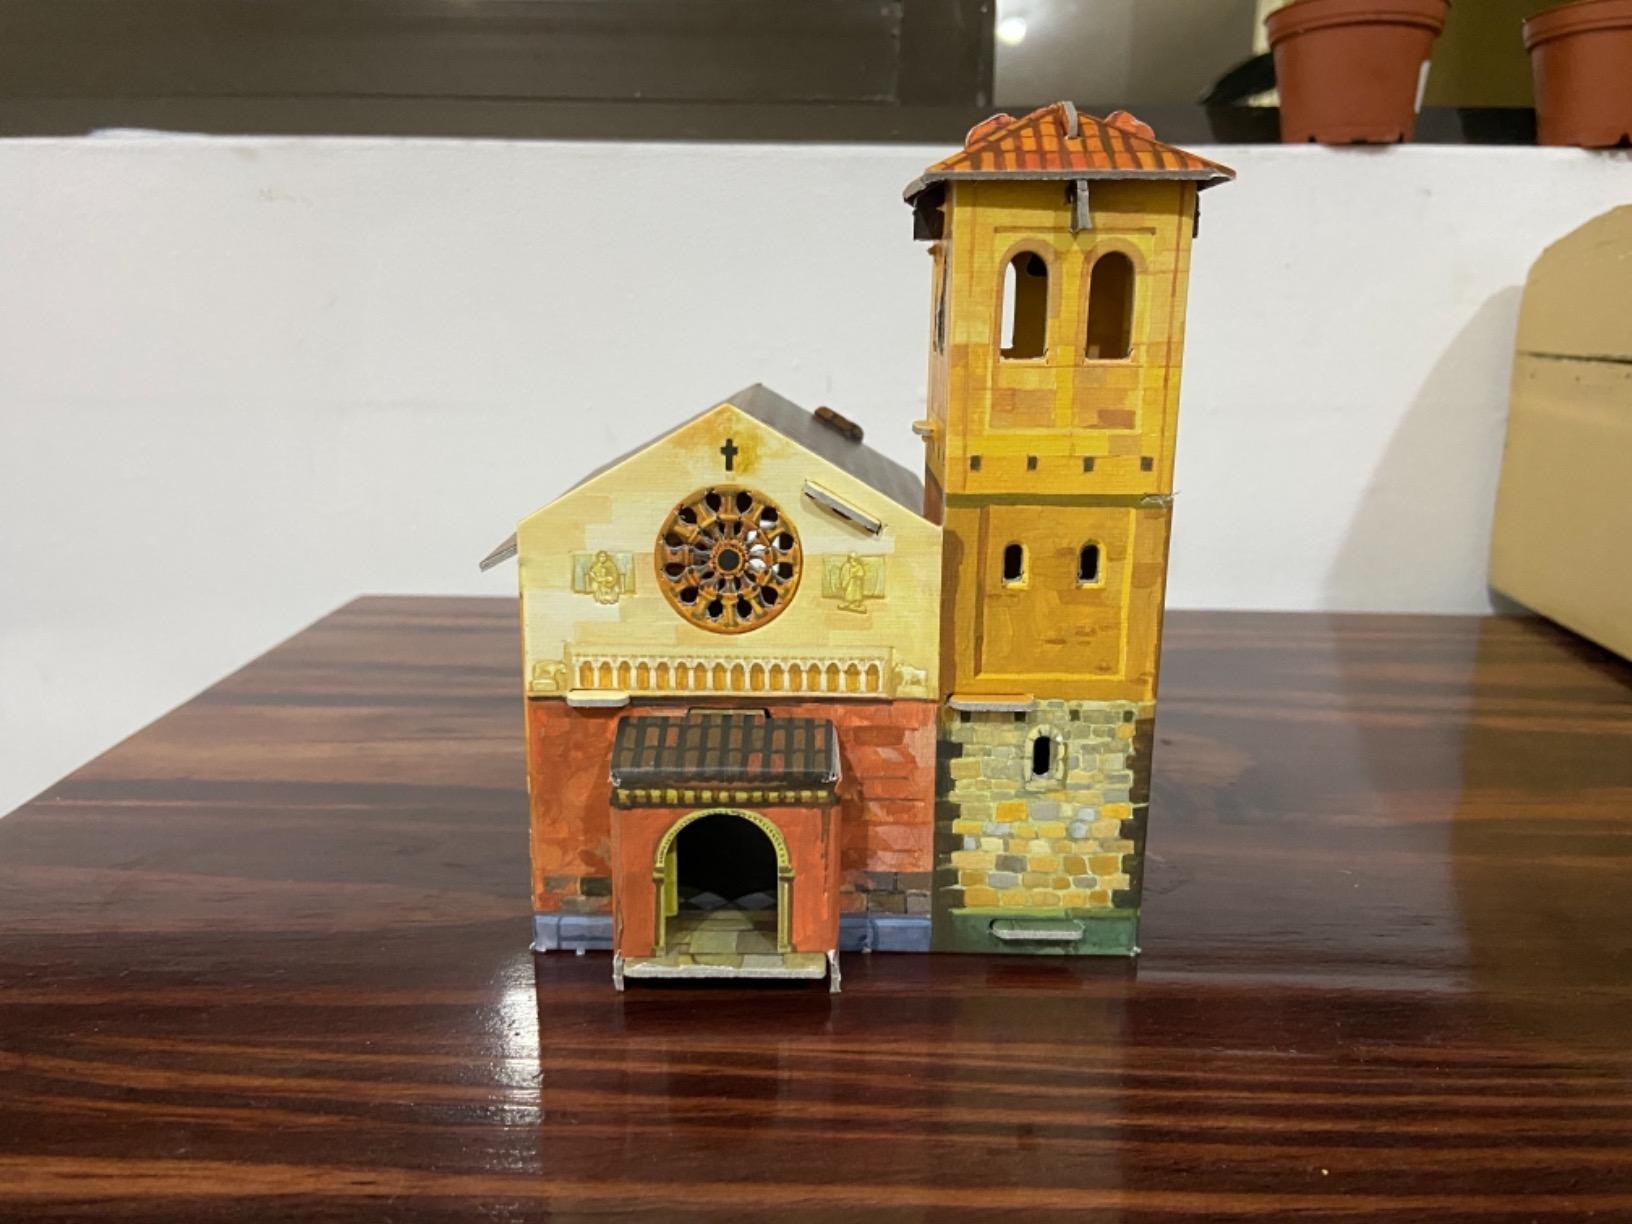
I built this chapel for my D&D campaign table last month. The pieces snapped together without any adhesive. The 3D texture on the walls makes it look like real stone under game lighting.
The flip-open walls are a nice touch. I placed LED tea lights inside during our last session and the glow through the windows added atmosphere. The foam figures are a bit basic, but they fill the scene nicely.
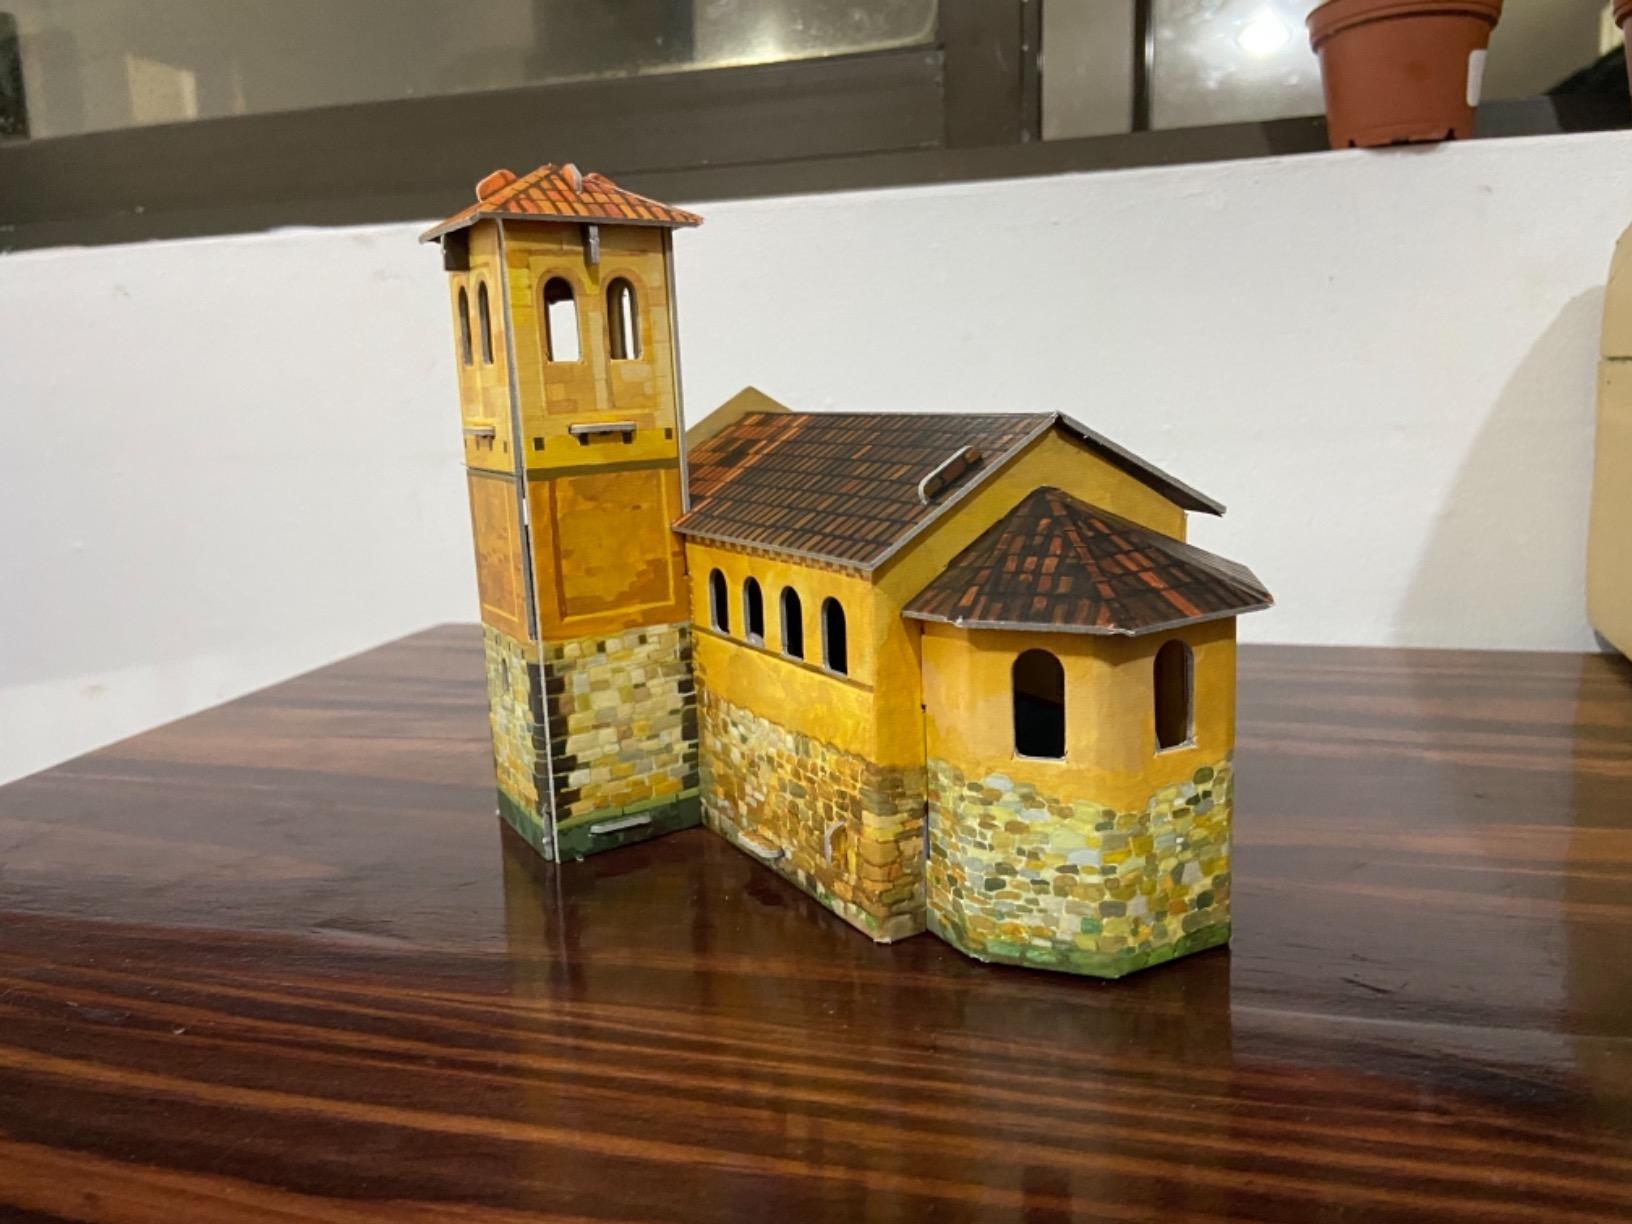
At 6.25 inches tall, it dominates the table without blocking player sightlines. The cardboard is thick enough to survive transport in my game bag. I have dropped it twice and the magnets still hold the walls shut.
The color printing is consistent across all surfaces. I noticed the roof shingles have a slight overlap detail that catches light well. For a paper kit, the structural rigidity surprised me.
The roof comes off in one piece, which makes storage simple. I slide the whole building into a plastic food container and it travels without damage. The foam figures store inside the chapel when not in use.
I compared this to a similar foamboard church from another brand and the UMBUM kit won on detail. The door hinges are printed shadows rather than cutouts, which keeps the structure stronger. The base is flat enough to sit on uneven terrain without rocking.
Buy this if you run tabletop games or teach history classes.
I used it in a Sunday school lesson about medieval architecture and the students immediately asked where I bought it. The historically accurate design is clear enough that you can point out the nave and the chancel.
Watch out for Russian instructions and tiny foam figure stands.
The included instructions include Russian text, but the diagrams are universal. If you rely on written instructions, download the English PDF from the manufacturer’s site before starting. The foam stands for the figures are easy to lose, so build them on a tray.
2. Paper Nano Music Room Building Kit – Most Detailed Interior
Paper Nano Music Room Building Kit
3.5 x 3.5 inches finished
High-tolerance laser cutting
Includes display shadow box
Ages 12+
Pros
- Highly detailed piano
- violin
- cello and bookcase
- Flawless laser-cut precision
- Clear visual instructions
- Good for beginners despite detail
- Display box included
Cons
- Requires tweezers and glue
- Small pieces can be frustrating
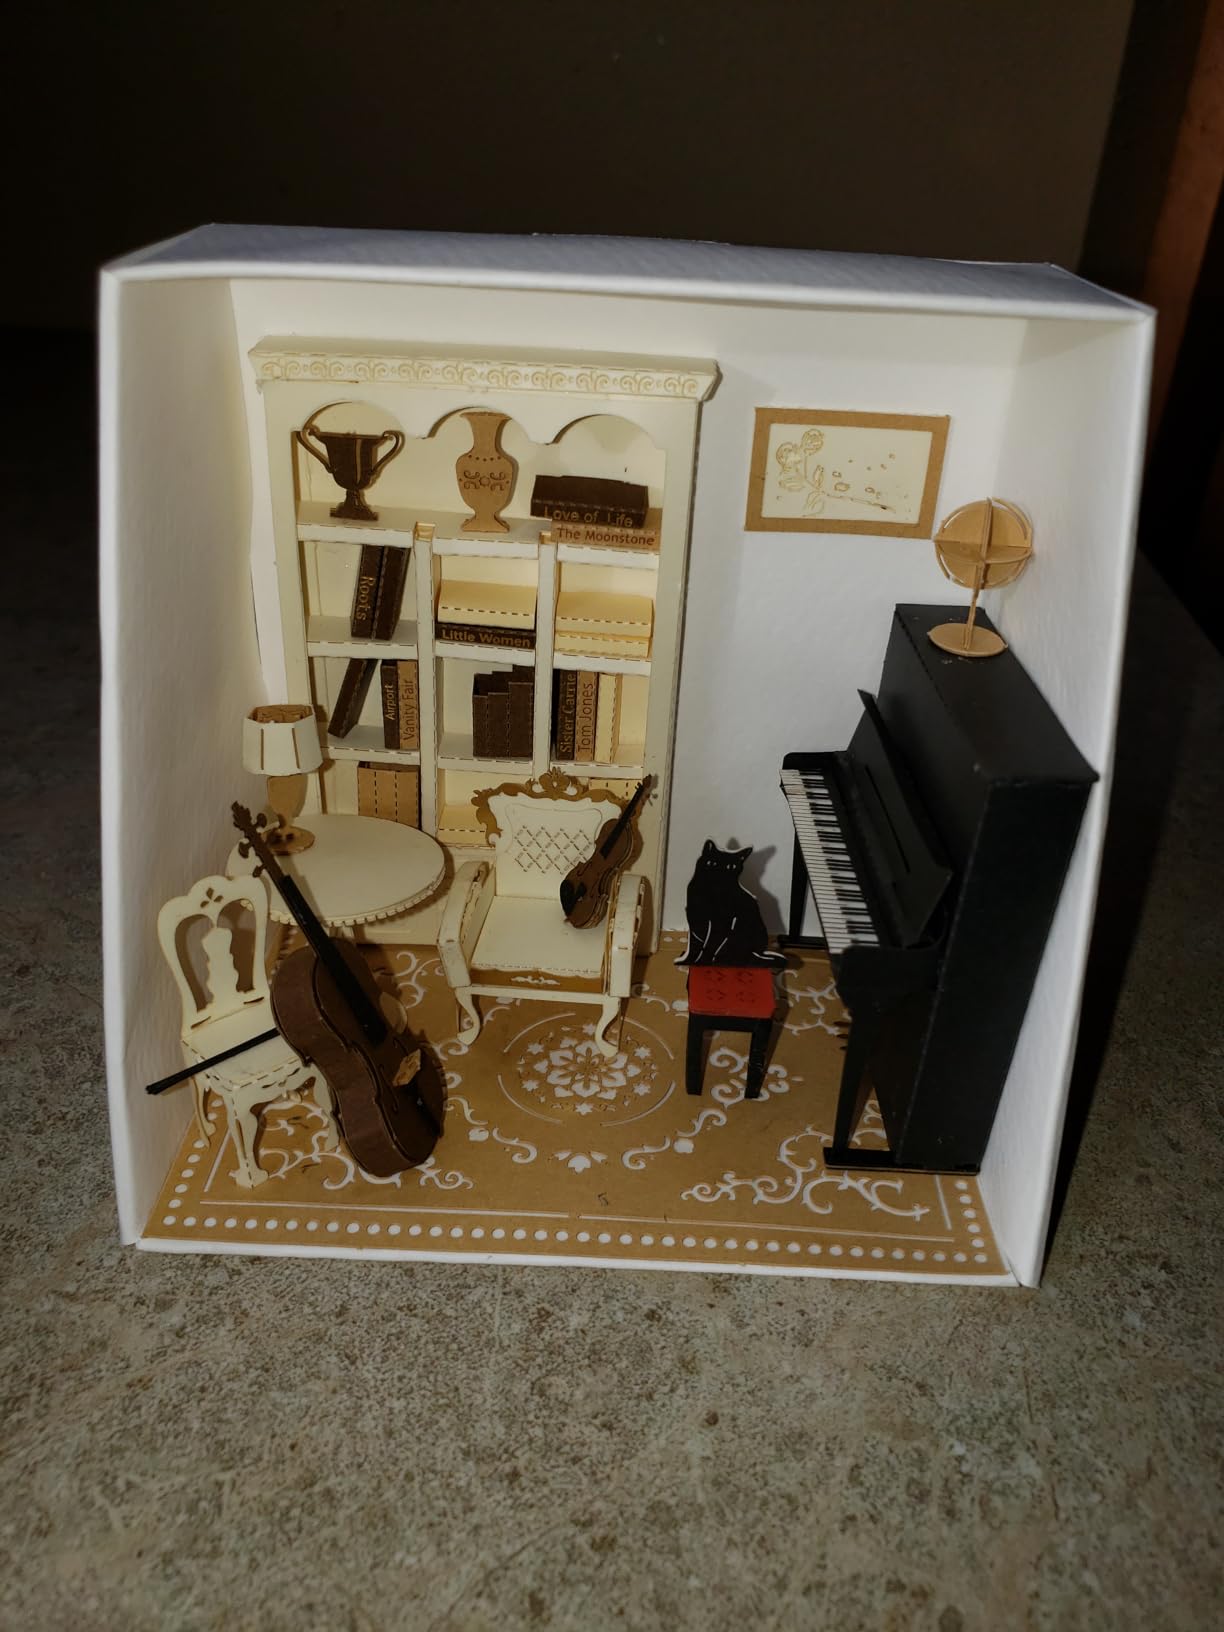
I spent a Sunday afternoon assembling this miniature music room. The laser-cut pieces are so thin that tweezers are mandatory, but the fit is perfect. Every chair leg and book spine printed cleanly.
The piano took me about 45 minutes alone because the keys are individual paper strips. I used a toothpick to apply glue dots and let each dry before moving on. Patience is not optional here.

The finished piece sits inside the included shadow box on my desk. Coworkers assume it is a resin model until they look closer. The beige and brown palette gives it a warm, vintage study feel.
I finished the entire build in roughly six hours. That included two breaks for eye rest. If you wear reading glasses, keep them handy because the sheet music details are printed at actual scale.
The shadow box has a clear plastic front that slides in from the top. It keeps dust out but reflects overhead lights, so I angle it away from my desk lamp. The box doubles as a gift wrapper if you want to give the finished model away.
I tried building this without the tweezers and regretted it immediately. The cello body is a piece smaller than a fingernail. Only tweezers let you place it without creasing the paper.
Buy this if you want a desk display that sparks conversation.
Musicians and office decorators will love this. The subject matter is specific, so it makes a thoughtful gift for a piano teacher or violin student. I gave one to my sister after she passed her grade five exam.
Buy tweezers and quality paper glue before the kit arrives.
You will need an X-Acto knife, tweezers, and good paper glue. None of these are in the box, so order them with the kit. I tried using regular school glue and it blobbed up on the piano legs.
3. Paper Nano Tokyo Tower Building Kit – Best Beginner Landmark
Paper Nano Tokyo Tower Building Kit
3.5 x 3.5 inches finished
Pre-painted components
Inspired by Tokyo Tower
Ages 12+
Pros
- Pre-painted orange and white parts
- High-tolerance laser cutting
- Good entry-level difficulty
- Excellent detail surpassing resin models
- Display shadow box included
Cons
- Smaller than expected
- Cut locations hard to identify
- Requires tweezers and glue
This was the first Paper Nano kit I tried, and it hooked me on the brand. The pre-painted orange and white parts saved me from messy paint sessions. I finished the tower in under three hours while watching a film.
The lattice structure is delicate but the laser cuts are precise. I only broke one platform piece because I rushed the fold. A drop of super glue fixed it invisibly.
The finished height is small at 3.5 inches, but the detail is impressive. The observation deck windows are tiny squares of printed paper. I placed it on my bookshelf next to a travel guide about Japan.
The box includes a small sheet of practice paper. I used it to test my fold angles before touching the actual parts. That saved me from ruining two of the main lattice pieces.
Buy this if you want an easy introduction to paper architecture.
The lower skill level makes this ideal for teens or adults who want to test patience without frustration. The pre-painted parts mean you do not need art supplies. I recommend this as a first laser-cut paper model.
Watch out for the small size and tricky cut points.
The tower is smaller than it looks in photos. Some cut locations are hard to identify on the sheet, so work under a bright lamp. You will need tweezers to handle the lattice struts without creasing them.
I gave this to my teenage cousin and she finished it in one afternoon. The bright orange is satisfying to see come together. She now has it on her nightstand and wants to try the Eiffel Tower next.
4. Paper Nano Kaminarimon Gate Building Kit – Highest Difficulty
Paper Nano Kaminarimon Gate Building Kit, (Model: PN103)
3.5 x 2 x 3.5 inches
50 pieces
Red color theme
Display box included
Pros
- Excellent level of detail
- Convenient display box included
- Fun for all skill levels
- More pieces than other models
Cons
- Requires patience and precision tools
This gate took me two weekends to complete because the piece count is high and the steps are time-consuming. The red color is bold and the lantern details are some of the best I have seen in paper. I worked on it in 30-minute chunks to avoid eye strain.
The display box that comes with the kit is a nice touch. It protects the model from dust and makes it feel like a museum piece. I keep mine on a high shelf away from the cat.
I used a magnifying glass for the lantern tassels and the roof ornaments. The paper holds a crease well but tears if you fold backward. I ruined one roof tile by folding it the wrong way and had to improvise with card stock.
The red paper is pre-printed on both sides, which means the underside of the roof looks finished too. That detail matters when you display it on a glass shelf. Other kits leave the reverse side blank and white.
Buy this if you enjoy long projects with high payoff.
The 50 pieces and detailed steps make this a project for patient crafters. The finished gate is striking and earns compliments from everyone who sees it. I consider this my proudest paper build so far.
Watch out for the complex folds and the need for magnification.
This is the highest difficulty level in the Paper Nano line. You will need precision tools and a magnifying lamp. Do not attempt this as your first paper model unless you have origami experience.
I would recommend buying a second sheet of red card stock before starting. If you tear a piece, matching the exact shade from a craft store is hard. I learned that after damaging the main lantern frame.
5. Paper Nano Titanic Paper Building Set – Best Maritime Build
Paper Nano Titanic Paper Building Set
4 x 1 x 2 inches finished
114 pieces
Maritime history theme
Ages 12+
Pros
- Beautiful precision and exceptional detail
- High-tolerance laser cutting
- Directions are straightforward and visual
- Can be worked on in chunks
Cons
- More difficult than other Nano kits
- Approximately 1
- 000 tiny paper cutouts
- No glue or tools included
I built this Titanic over a week of evenings. The 114 pieces are tiny and the hull curves require careful rolling. I used a round pencil to shape the bow and it worked perfectly.
The flat paper sheets make it easy to pause and resume. I kept the unfinished parts in a book to prevent bending. The red and black color scheme is historically accurate based on photos I checked online.
The finished model is only 4 inches long, but the detail is dense. The lifeboat davits and deck railings are all paper. I placed it in a glass display case with a small placard I printed at home.
The smokestacks are hollow cylinders that you roll around a cocktail stick. I used a toothpick instead and the diameter was slightly off. A cocktail stick or thin pen barrel is the right tool.
Buy this if you love maritime history and have steady hands.
The historical subject matter makes this special for ship enthusiasts. The build is challenging but the result is a piece of history in paper form. I gave mine to my uncle who collects ocean liner memorabilia.
Watch out for the missing glue and the high piece count.
No glue or tools are included in the box. Buy Mod Podge, tweezers, and an X-Acto knife before you start. Some buyers confuse this with Nanoblocks, so confirm you are ordering the paper version.
The instruction sheet has a small photo of the real Titanic for color reference. I found that helpful because the printed red can look orange under some lights. Comparing it to the photo kept my build accurate.
6. Clever Paper Round Tower with Figures – Sturdy Fantasy Build
Clever Paper Round Tower with Figures
9 x 8 x 9 inches
No glue needed
7 foam figures included
3D texture finish
Pros
- Sturdy construction
- No glue or scissors required
- Easy to follow diagrams
- Perfect for 25-28mm figures
- Great for D&D and war games
Cons
- Not scaled for 28mm miniatures
- Instructions in Russian
- Not sturdy enough for young children
The Round Tower was the second UMBUM kit I built, and it is larger than the chapel at 9 inches tall. The circular walls are a single piece that you fold into a cylinder. The foam backing gives it surprising rigidity.
I placed it on my wargame table alongside the chapel and they match in style. The seven figures are generic enough to work as villagers or guards. The conical roof is the trickiest part because the overlap must be exact.
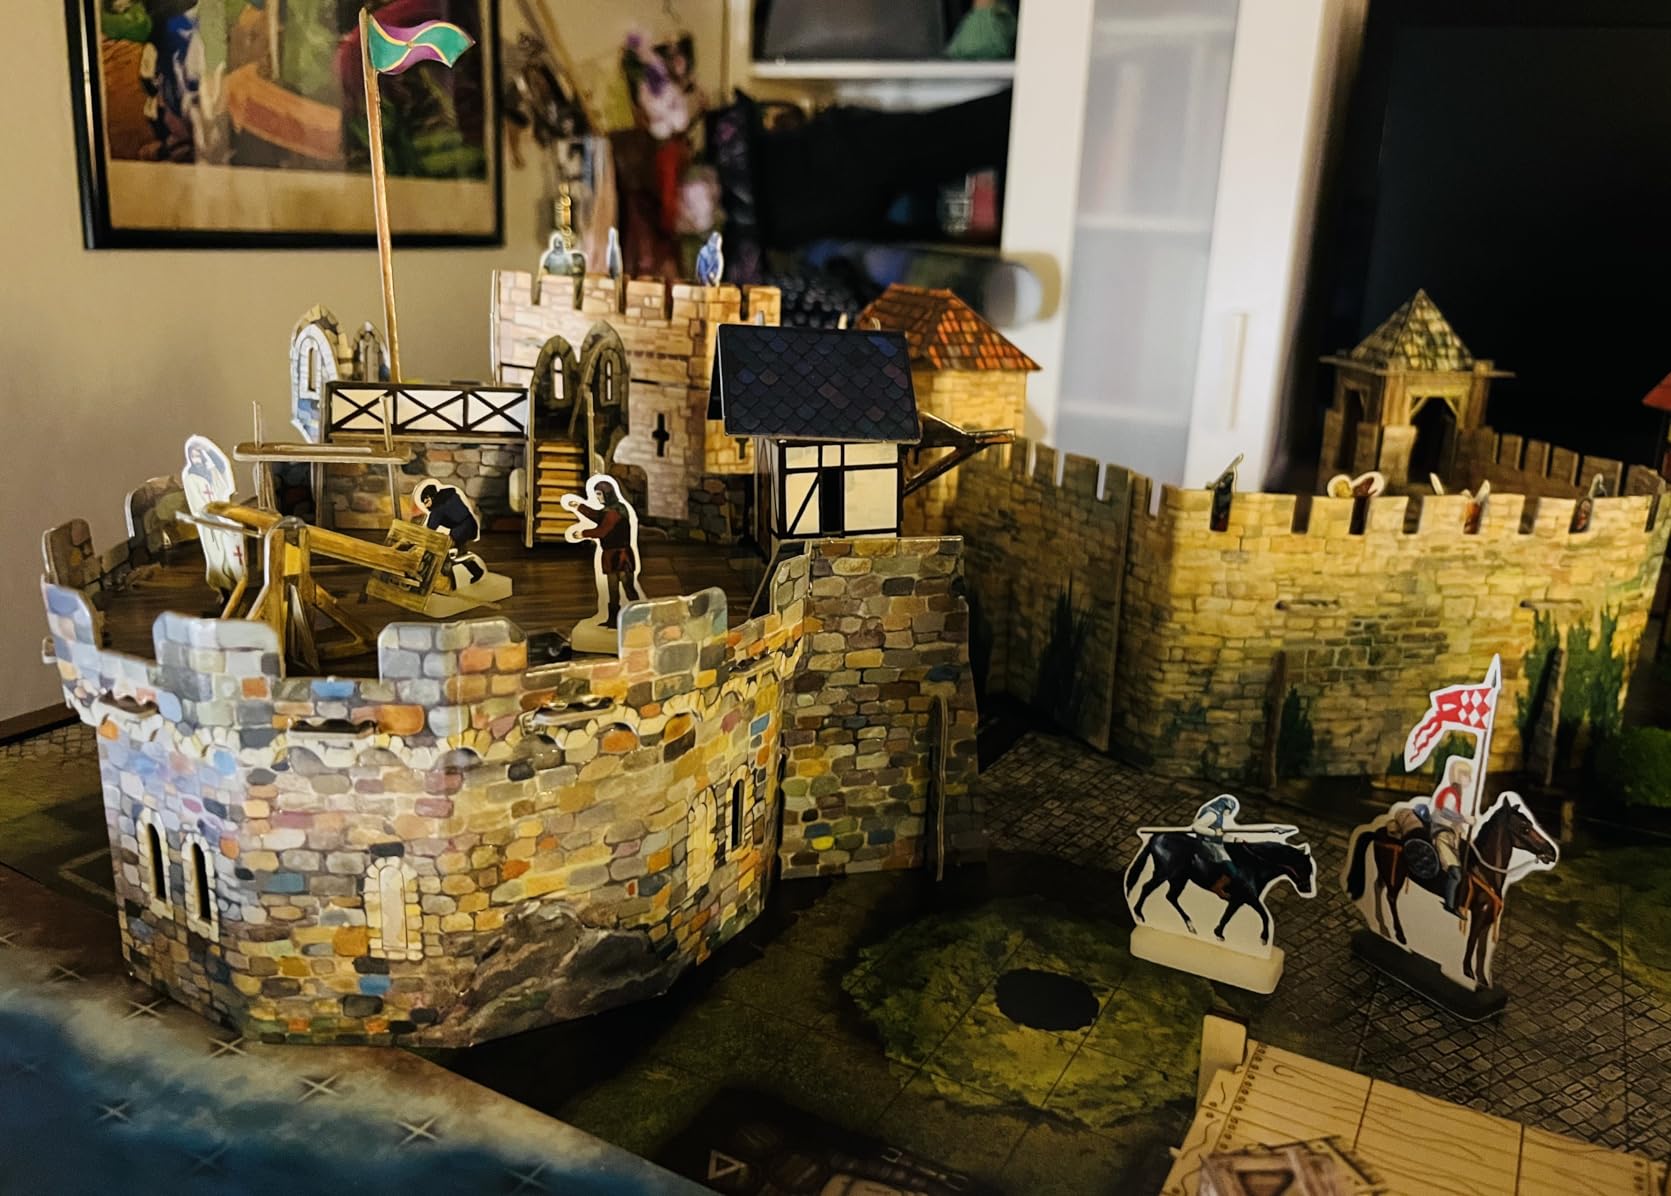
The 3D texture is the same high quality as the chapel. The stones look weathered and the arrow slits are clean cuts. It handles transport better than cardboard-only models because the foam core absorbs shock.
I used this tower in a photo shoot for my game blog. The lighting inside showed the spiral staircase detail that is printed on the interior wall. It is a simple build but photographs like a professional prop.
The conical roof has a printed thatch pattern that hides the seam if you align it well. I missed by two millimeters and the pattern does not line up perfectly. I covered the gap with a small foam figure standing on the roof edge.
The arrow slits are cut all the way through the foam. I threaded a thin LED strip through them for a night effect. The light diffuses through the foam and creates a warm glow from the inside.
Buy this if you need a durable centerpiece for gaming or display.
The foam core construction makes this more durable than typical paper kits. It is ideal for D&D and war games where pieces get moved around. I have knocked it over three times and it still looks new.
Watch out for the scale mismatch and the conical roof fold.
The tower is not exactly scaled for 28mm miniatures, though it works visually. The conical roof requires careful alignment or the seam shows. The instructions are in Russian, but the diagrams are clear enough.
7. ModelShop Automata Paper Machine Moving Model – Best Interactive Kit
ModelShop Automata Paper Machine Moving Model Papercraft Designed by Keith Newstead - Boys Girls Fun & Educational DIY Project, Great Xmas Present & DIY Project for Kids (Flying Dreamer)
Interactive automata model
Hand-powered crank
Keith Newstead design
Ages 7+
Pros
- Amazing interactive moving model
- Pre-cut pieces save time
- Precise and easily removed parts
- Exemplary design
- Fun DIY project
Cons
- Very weak paper reported
- Instructions could be clearer
- Requires patience with gluing
I built this automata with my partner on a rainy Saturday. The crank mechanism is clever and the moving parts are satisfying to watch. It took us about four hours from sheet to finished machine.
The pre-cut pieces are precise and pop out cleanly. I used a bamboo skewer to apply glue in small amounts. The paper is thin in places, so we reinforced the base with an extra layer of card stock.
Turning the crank makes the figure move in a simple motion. It is not a toy for rough handling, but it is a great display piece on a shelf. I keep it on my desk and wind it when I need a break from screens.
The crank handle is a separate piece that you fold from a small strip. It took me three tries to get the angle right. Once attached, the motion is smooth and does not jam.
Buy this if you want a moving paper model for your desk.
The interactive element sets this apart from static architecture kits. It teaches basic gear and lever principles. I recommend it for adults who want a conversation starter or a fun date-night project.
Watch out for the weak paper and the need for careful gluing.
Some buyers report the paper is weak and can tear at the joints. Use a gentle hand and let glue dry completely before moving parts. The instructions could be clearer about the crank assembly order.
I found that gel glue works better than liquid glue for the moving joints. Liquid glue soaks into the paper and makes the parts stiff. Gel glue stays on the surface and lets the pieces pivot.
8. Liberty Imports The White House 3D Puzzle – Best Family Project
Liberty Imports The White House 3D Puzzle - Architectural Puzzles for Adults and Kids - Building Model DIY Kit, 35 Pieces
8.5 x 6.7 x 7.5 inches
35 pieces
No glue required
60-100 minute build
Pros
- Sturdy and easy to assemble
- Great educational puzzle
- Detailed with doors windows and columns
- Fun family activity
- Widely praised by buyers
Cons
- Window alignment issues
- Thin foam backing material
- Numbers on pieces are miniscule
My family built this White House model on a Sunday afternoon. The 35 pieces are thick foam and card stock, so even my 10-year-old nephew could press them together. We finished in about 90 minutes.
The 360-degree exterior is detailed with columns, windows, and doors. The south portico is the most impressive part. We placed it on the mantel and it has been there for two months without sagging.
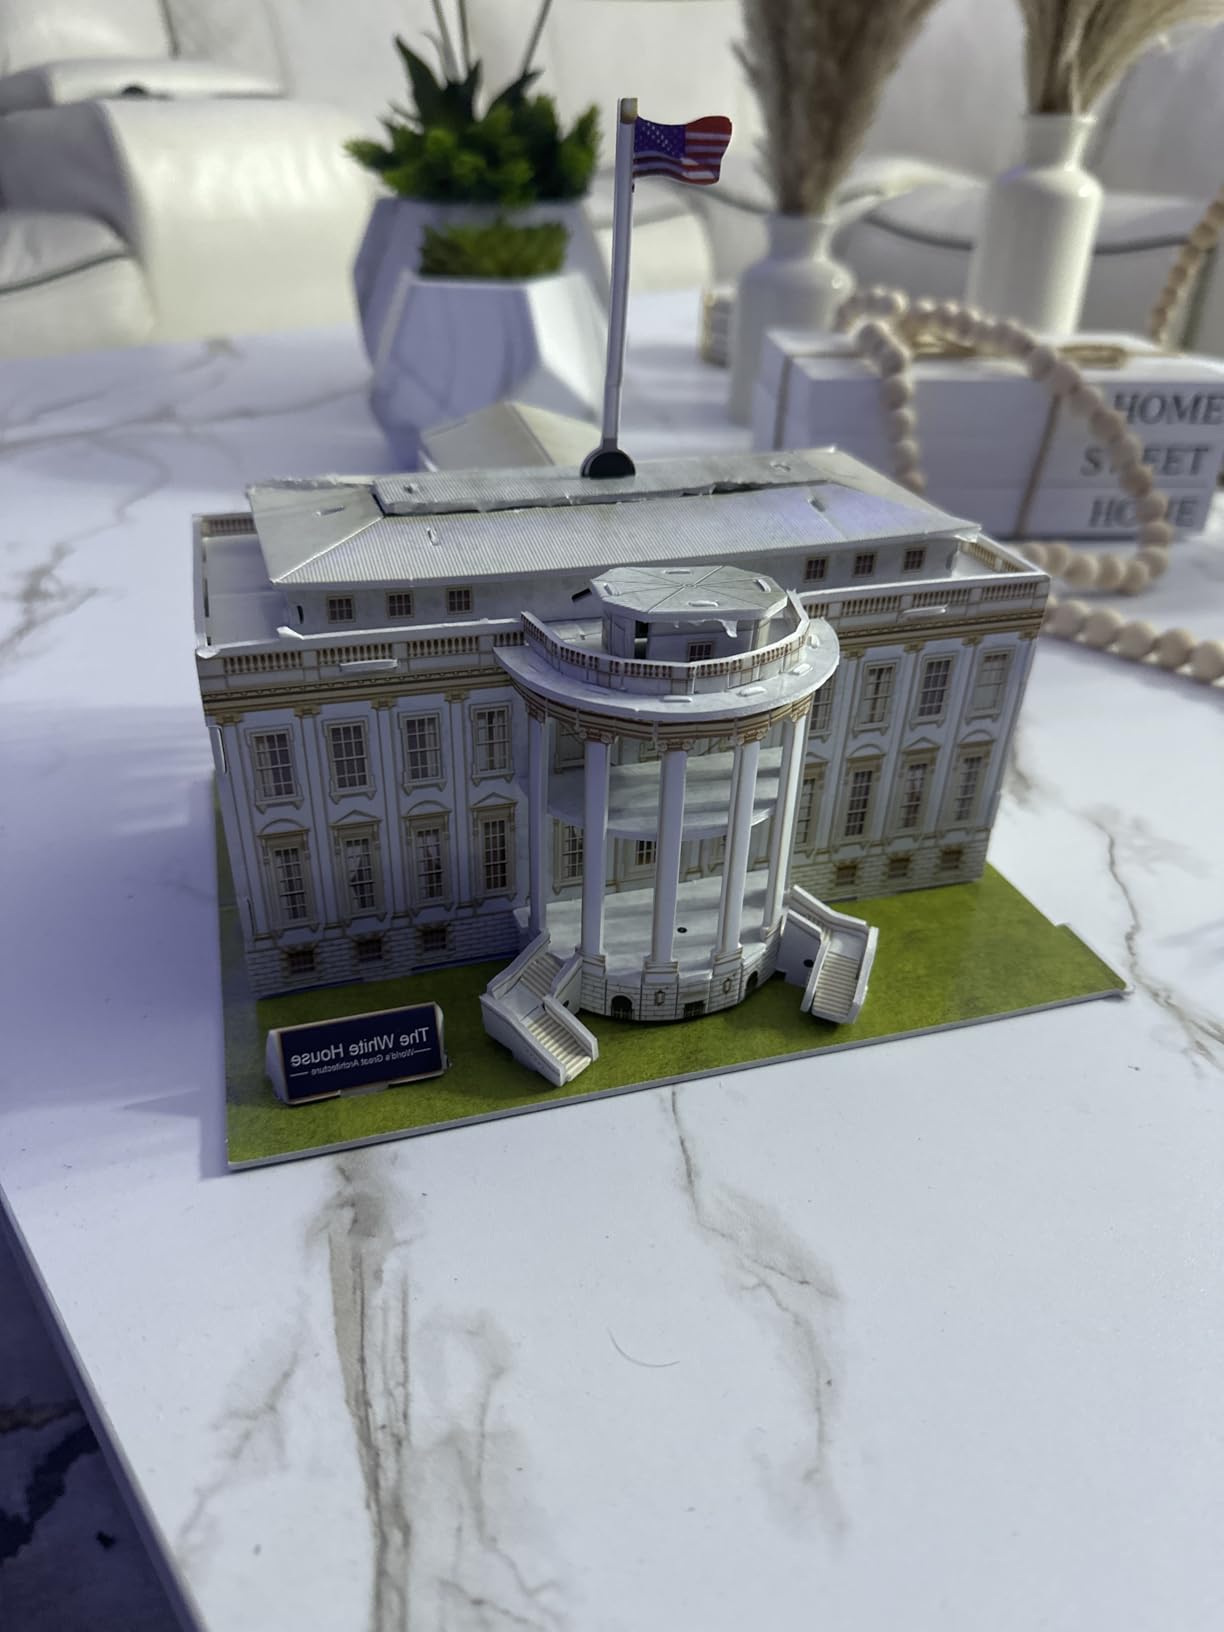
No glue or scissors are needed, which makes this a safe classroom activity. The pieces are numbered, though the numbers are small. I used a flashlight to read them under the table.
The foam backing is thin but adequate for display. I would not let a toddler play with it because the corners dent easily. For a shelf piece, it is perfect.
The White House sits on a printed base that looks like the South Lawn. The base is thin card, so I reinforced it with a piece of cereal box cardboard. Now it stays flat and does not warp.
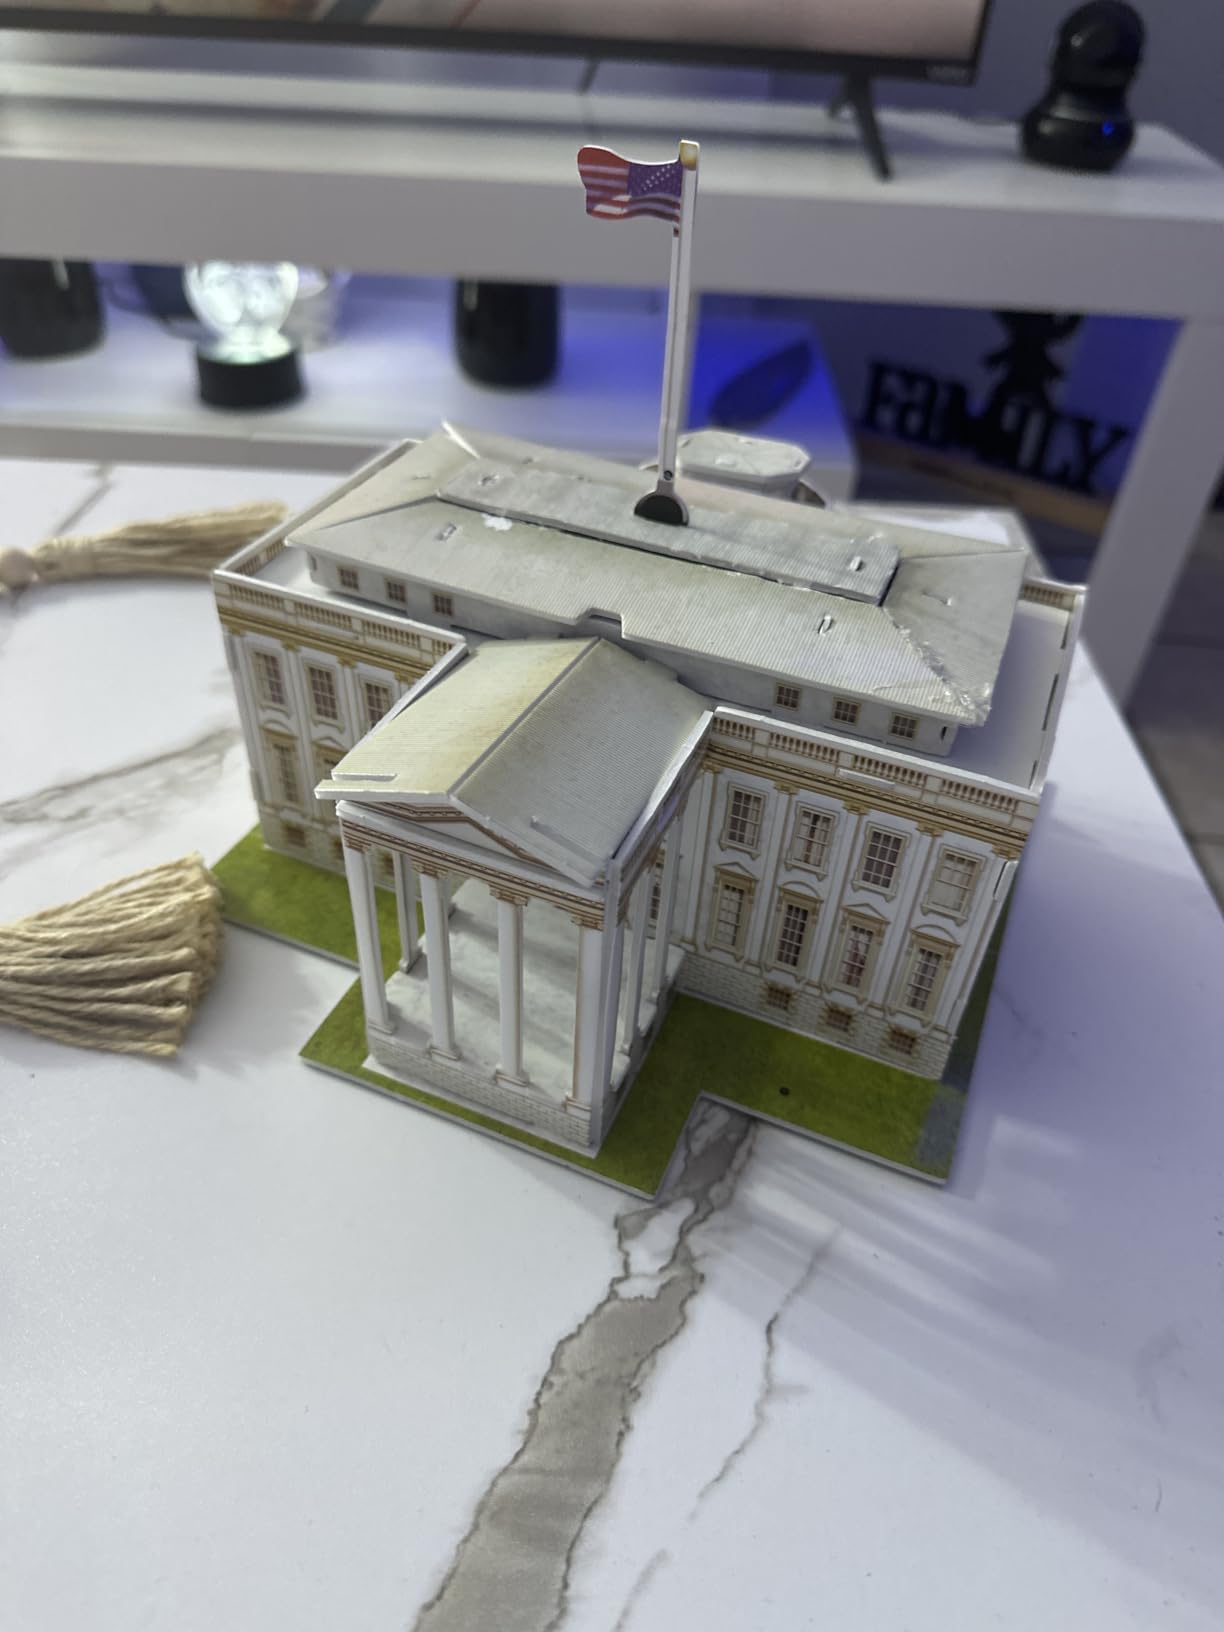
My nephew painted the roof with a silver marker to make it look like the real White House roof. The original white paper accepts marker and crayon without bleeding. That customization made the project feel more personal.
Buy this if you want a quick family or classroom activity.
The easy difficulty and short build time make this ideal for kids and groups. It is educational and sparks conversations about American history. I have given two as gifts to teachers.
Watch out for the tiny numbering and thin foam backing.
The piece numbers are miniscule and hard to read in low light. Some window layers align imperfectly if you rush. The foam backing is thin, so handle the columns gently during assembly.
9. How To Build A House: Step By Step Paper Model Kit – Best Educational Book
This is an 89-page book with punch-out templates rather than a traditional kit. I used it with my neighbor’s 9-year-old daughter. She learned how walls, roofs, and foundations connect in real construction.
The templates are printed on standard paper inside the book. You cut them out with scissors and tape or glue them. The scale is small, so the finished house fits on a sheet of paper.
I found the paper too thin for repeated handling. We photocopied the templates onto card stock and the build improved immediately. The educational value is high, but the material quality is basic.
The book includes a glossary of construction terms that my neighbor’s daughter actually read. She now uses words like “foundation” and “rafter” correctly. The educational aspect goes beyond the cutting and folding.
Buy this if you want to teach construction basics to children.
The step-by-step explanations are clear and age-appropriate for 8 and up. It combines reading with hands-on activity. I recommend it for homeschooling parents or elementary teachers.
Watch out for the thin paper and the need for adult help.
The included paper is too thin to build sturdy structures. Younger children will need adult supervision for cutting. Plan to photocopy the templates onto heavier card stock for a lasting model.
I photocopied the templates at 120 percent scale to make the house easier for small hands. The proportions still look correct at that scale. The larger pieces are easier to fold and tape.
10. How To Build A Building: Paper Model Kit – Best for Young Builders
This 127-page book expands on the house concept with more complex structures. I worked through it with my niece over two weekends. The language is simple and the diagrams are large.
She enjoyed coloring the walls before cutting them out. The book explains beams, columns, and floors in a way that connects to real buildings we see downtown. It is more of a workbook than a display kit.
The finished models are small and floppy if you use the included paper. We used cereal box cardboard for the structural parts and the results were much better. The binding is solid and the pages lay flat.
The book includes a section about famous buildings around the world. My niece enjoyed the photos of the Empire State Building and the Burj Khalifa. She asked to visit a skyscraper after finishing the workbook.
Buy this if you want a coloring and learning activity for ages 8 to 11.
The combination of coloring, cutting, and learning keeps children engaged. The building focus is broader than the house book. I recommend it for rainy-day activities or summer projects.
Watch out for the limited reviews and the paper quality.
There are fewer reviews for this title, so buyer feedback is limited. The paper quality is the same as the house book, so plan to upgrade to card stock. Some parents may find the activities repetitive.
I recommend using colored pencils instead of markers for the walls. Markers bleed through the paper and make the reverse side messy. Colored pencils give a clean finish on both sides.
11. Origami Architecture: Create Lifelike Scale Paper Models – Best for Patient Crafters
This book includes three iconic building designs with downloadable patterns. I attempted the Sydney Opera House first and it was significantly harder than the other two. I spent six hours and abandoned it halfway.
The other two buildings were more manageable. The folding tabs are very small and require precision. I used a metal ruler and a scalpel for clean cuts.
The paper included in the book is flimsy. I printed the downloads onto 110 lb card stock and the models held their shape. The instructions are text-heavy with few photos, which makes the learning curve steep.
The book is spiral-bound, which helps it lay flat while you work. The downloadable files are PDFs that you can print at any scale. I printed the second building at 150 percent to make the tabs easier to handle.
Buy this if you are an experienced paper crafter with good tools.
The designs are rewarding for patient builders who already own craft knives and cutting mats. The downloadable content is the real value. I recommend printing on heavier paper immediately.
Watch out for the unclear instructions and the small tabs.
The instructions are poorly illustrated and the folding tabs are tiny. The Sydney Opera House is much harder than the other models. You will need glue despite the origami name.
I found a video of someone building the same Opera House and watched it before restarting. The video clarified a fold that the text described poorly. Visual learners should search for build videos before opening the book.
12. Brick Loot Titanic Ship Paper Craft Kit – Best Budget Ship Model
This 30-piece Titanic kit is the most accessible on the list, but the result is impressive. The pre-cut pieces fit together smoothly. I built it in about two hours while listening to a podcast.
The twelfth-scale size is 11.4 inches long, so it is one of the larger models here. The black hull and white superstructure are printed clearly. I placed it on a windowsill and the natural light shows the deck details.
The paper is durable enough for display but not for play. I bent one funnel piece during assembly and straightened it with a ruler. The finished model looks like a store-bought decoration.
The deck includes printed lifeboats and cargo cranes that are only a few millimeters tall. I used a needle to position them without bending. The level of detail is impressive for a paper kit of this size.
Buy this if you want a compact ship model that looks impressive.
The kit is small and the display results are striking. It is a great gift for teens or adults who love maritime history. I gave one to my coworker who collects ship models.
Watch out for the bending risk and the age recommendation.
Parts can bend during assembly if you force them. The age rating of 12 is accurate because the alignment requires patience. It is not sturdy enough for children to play with.
I built a simple cardboard stand for the hull so it sits level on a shelf. The kit does not include a stand, so the finished model rests on its keel. A small stand improves the display angle significantly.
Buying Guide: How to Choose the Right Paper Model Kits?
After building 12 kits, I noticed a few patterns that separate a good experience from a frustrating one. Use these factors to narrow your choice before you click buy.
Pick a skill level that matches your patience, not your pride.
Beginners should start with no-glue kits like the UMBUM or Liberty Imports lines. They build confidence quickly. Intermediate builders can handle laser-cut Nano models with tweezers and glue. Advanced builders will enjoy the 114-piece Titanic or the Kaminarimon Gate.
Check the tool list before the kit arrives.
Many kits require tweezers, craft knives, and quality paper glue that are not included. Order them together to avoid delays. I keep a dedicated paper model toolkit now so I never have to hunt for supplies.
Consider paper weight and display location.
Thicker card stock survives bumps and dust better than thin paper. If you plan to place the model on a high shelf or in a case, weight matters less. If it will sit on a desk where hands reach, choose foam-backed or card stock models.
Estimate assembly time honestly.
Some kits list 60 minutes but require 30 minutes of prep. The Paper Nano models took me twice as long as the box suggested because I worked slowly. Plan for breaks, especially with laser-cut kits that strain your eyes.
Think about the subject matter for gifting.
Architecture fans love landmark buildings. Gamers prefer medieval structures. Musicians appreciate the Nano Music Room. Match the subject to the person and the build will feel personal.
Check the age rating and small parts warnings before giving to children.
Many laser-cut kits have pieces smaller than a fingernail. They are not suitable for children under 12 without supervision. The UMBUM and Liberty Imports kits are safer for younger builders because the pieces are large and foam-backed.
Frequently Asked Questions
What is the best paper for paper model kits?
Card stock between 65 lb and 110 lb is the best paper for paper model kits. It holds folds without tearing and accepts glue cleanly. Thicker card stock is better for structural parts, while thinner paper works for fine details.
How long does it take to build a paper model kit?
Most beginner kits take 60 to 100 minutes. Intermediate laser-cut models take 3 to 6 hours. Advanced builds with over 100 pieces can take 10 to 20 hours across multiple sessions.
What tools do I need for paper model building?
You need a craft knife, tweezers, a scoring tool, and quality paper glue. A cutting mat and a ruler help with clean edges. A magnifying lamp is useful for kits with pieces smaller than one inch.
Can beginners complete paper model kits successfully?
Yes. Beginners should choose no-glue kits like the UMBUM or Liberty Imports lines. These use thick foam-backed card stock and simple diagrams. Start with a 35-piece model before attempting laser-cut kits.
Are paper model kits worth the investment?
Yes, if you enjoy mindful building and display art. Most kits use paper and card stock rather than expensive materials. The finished models last for years on a shelf. They offer more engagement than a puzzle and less clutter than a resin model.
Final Thoughts
The best PaperLandmarks paper model kits share a common trait: they reward patience with a display piece that sparks conversation. In 2026, the range of available kits means there is a project for every skill level and interest.
Our top pick is the Clever Paper Chapel for its no-glue build and gaming versatility. The Liberty Imports White House is the best family project, and the Brick Loot Titanic proves that a basic kit does not mean low quality. Start with a beginner kit, build your tool kit, and enjoy the process.