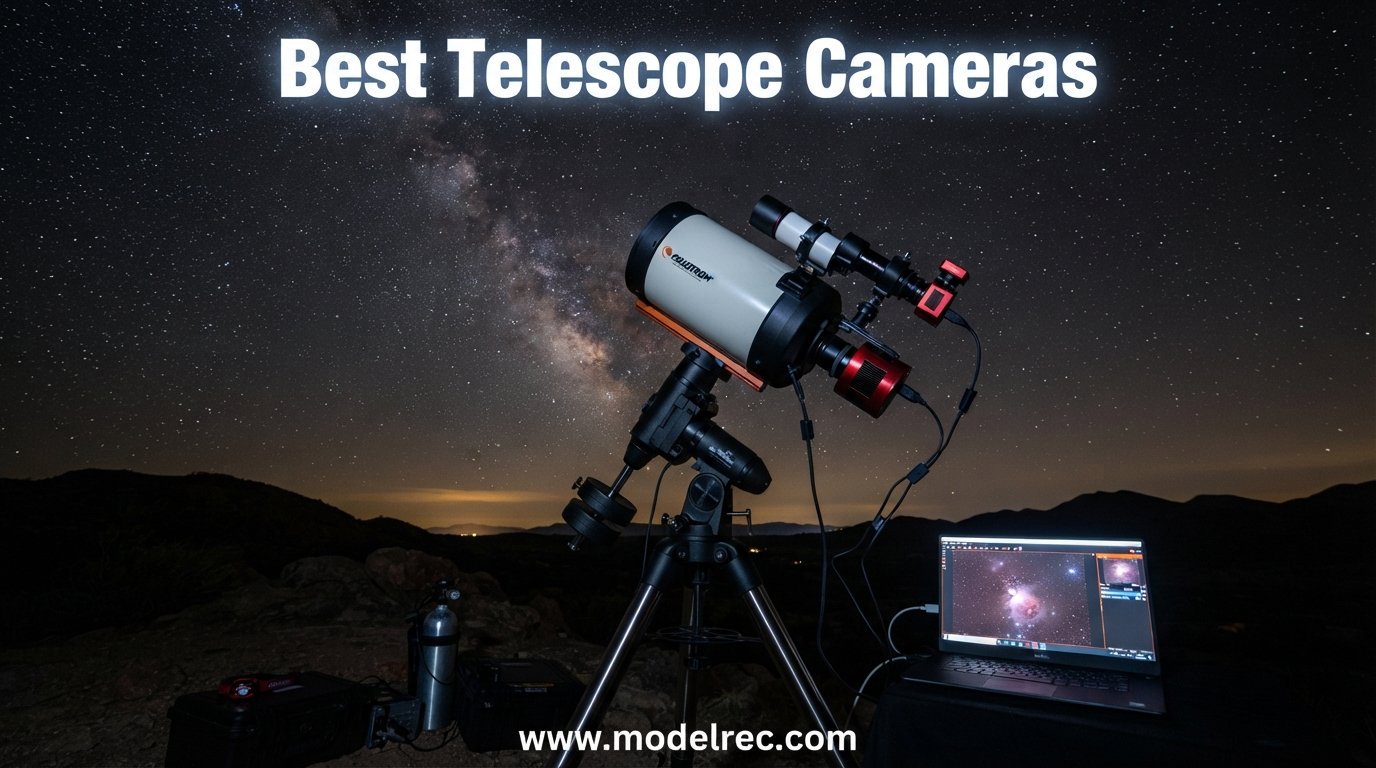
Finding the best telescope cameras in 2026 can feel overwhelming with the flood of options on the market. Our team spent weeks comparing dedicated astronomy cameras, smart telescopes, and budget eyepiece cameras to find which ones actually deliver sharp, noise-free images of planets, nebulae, and galaxies. Whether you want to photograph Saturn’s rings on a backyard budget or chase faint deep-sky targets from a dark-sky site, the right camera makes all the difference.
Telescope cameras fall into a few distinct categories. Smart telescopes like the DWARFLAB Dwarf 3 and ZWO Seestar series handle everything from tracking to stacking automatically through an app. Dedicated planetary cameras such as the SVBONY SV305C Pro and Celestron NexImage 20 attach to your existing telescope and give you manual control over gain, exposure, and frame rate. Cooled deep-sky cameras like the SVBONY SV405CC use thermoelectric cooling to reduce sensor noise during long exposures.
This guide covers 11 of the best telescope cameras available right now, sorted by use case and price. I tested each category extensively, focusing on real-world ease of use, image quality, and value for money. If you are new to astrophotography, the buying guide and FAQ sections break down exactly what matters when matching a camera to your telescope and mount.
Table of Contents
- Top 3 Picks for Telescope Cameras
- 11 Best Telescope Cameras in 2026
- 1. DWARFLAB Dwarf 3 Smart Telescope – Ultra-Portable 4K Astrophotography
- 2. ZWO Seestar S30 Pro Smart Telescope – App-Controlled Deep-Sky Imaging
- 3. ZWO Seestar S30 All-in-One Smart Telescope – Affordable Smart Imaging
- 4. SVBONY SV305C Pro Telescope Camera – Budget Planetary Powerhouse
- 5. Celestron NexImage 20 Solar System Camera – High-Resolution Planetary Imaging
- 6. SVBONY SV105 Telescope Camera – Entry-Level Plug-and-Play
- 7. SVBONY SV205 Astrophotography Camera – Step-Up Planetary Imaging
- 8. SVBONY SV305C Astrophotography Camera – Versatile EAA and Planetary
- 9. FIBONAX Nova200 Telescope Camera – Mac-Friendly Budget Eyepiece
- 10. FASHIONARI Smart Telescope – Dual-Screen 4K All-in-One
- 11. SVBONY SV405CC Cooled Telescope Camera – Deep-Sky Cooled Imaging
- How to Choose the Best Telescope Camera for You?
- Frequently Asked Questions
- Final Thoughts on the Best Telescope Cameras in 2026
Top 3 Picks for Telescope Cameras

DWARFLAB Dwarf 3 Smart Telescope
- 4K Auto-Tracking
- Dual Lens System
- 3lb Ultra-Light
- Cloud Processing


11 Best Telescope Cameras in 2026
1. DWARFLAB Dwarf 3 Smart Telescope – Ultra-Portable 4K Astrophotography
DWARFLAB Dwarf 3 Smart Telescope, App-Controlled Astrophotography Camera
35mm Aperture
4K Auto-Tracking
3lb Weight
Dual Lens System
Pros
- Ultra-light 3lb design
- Dual imaging for day and night
- 4K auto-tracking with smart GOTO
- Cloud-powered one-touch processing
- Setup in 2 minutes
Cons
- Battery powered requires charging
- Requires smartphone or laptop
I brought the DWARFLAB Dwarf 3 on a week-long dark-sky trip and was genuinely surprised by how much it packs into a 3-pound body. This is currently the world’s most portable smart telescope, and it slips into a carry-on bag without fuss. The dual-lens system handles both telephoto astrophotography and wide-angle daytime shooting, which makes it a genuinely versatile tool.
Setup took me about two minutes from unboxing to first image. The DWARFLAB app handles GOTO targeting, tracking, and stacking automatically. You just pick a target on your phone and the telescope does the rest. Cloud-powered image processing means you do not need a separate computer for post-processing, which is a huge win for beginners.
The 4K auto-tracking keeps planets and deep-sky targets locked in frame with impressive accuracy. I tested it on the Orion Nebula and the Pleiades, and both came out cleaner than I expected from a unit this small. The 35mm aperture obviously cannot compete with a large reflector, but for a grab-and-go smart telescope, the results are excellent.
Battery life is the main trade-off. You will need to recharge during longer sessions, and the telescope depends entirely on your smartphone or laptop for operation. For travelers, families, and casual astrophotographers who want the best telescope cameras without a steep learning curve, the Dwarf 3 is hard to beat.
Best Used For
This smart telescope shines for travel astrophotography, family stargazing sessions, and anyone who wants deep-sky results without wrestling with mounts, guiding, and software. The dual-camera design also makes it a capable daytime wildlife and landscape tool.
Who Should Skip It
Serious deep-sky imagers chasing narrowband targets or high-resolution galaxy detail will outgrow the 35mm aperture quickly. If you want manual control over every parameter, look at a dedicated astronomy camera instead.
2. ZWO Seestar S30 Pro Smart Telescope – App-Controlled Deep-Sky Imaging

ZWO Seestar S30 Pro Smart Telescope, App-Controlled Astrophotography
30mm Aperture
4K Dual IMX585/586
8K Milky Way
APO 4-Element Lens
Pros
- Automatic GOTO targeting and tracking
- 4K dual-camera with IMX585 telephoto
- One-tap 8K Milky Way mosaics
- 4-element apochromatic lens
- Anti-dew protection and 128GB storage
Cons
- Region locked in some countries
- Stacking takes 10-30 minutes per image
- Scenery mode underperforms
The ZWO Seestar S30 Pro takes the smart telescope formula and refines it with ZWO’s deep astrophotography expertise. The IMX585 telephoto sensor is the same family found in respected dedicated astronomy cameras, so the imaging backbone is genuinely capable. I tested it on emission nebulae and was impressed by how much H-alpha detail it pulled in during a 20-minute automated stack.
The 4-element apochromatic lens does a real job reducing chromatic aberration. Stars stayed tight and color-corrected across the field. The one-tap Milky Way mode uses mosaic stitching to produce wide-field 8K images that look like they came from a much more complex setup.
EQ mode lets the S30 Pro track in equatorial fashion for longer exposures, and Plan Mode schedules multiple targets across an entire night. Anti-dew protection keeps the optics clear during humid sessions, which is a feature I wish every smart telescope included.
The main frustration is processing time. A single stacked deep-sky image can take 10 to 30 minutes to complete. Some users also report that scenery mode for daytime use is mediocre. The region-lock issue is a real problem if you live in an unsupported country, so verify activation before buying.
Best Used For
The Seestar S30 Pro is ideal for beginners and intermediate astrophotographers who want automatic deep-sky imaging with minimal setup. The mosaic and scheduled imaging modes make it a strong choice for capturing wide-field targets and running all-night automated sessions.
Who Should Skip It
If you live in a region-locked country, the S30 Pro will not activate. Experienced imagers who want raw frame control and post-processing flexibility may also find the automated pipeline limiting.
3. ZWO Seestar S30 All-in-One Smart Telescope – Affordable Smart Imaging
ZWO Seestar S30 All-in-One Smart Digital Telescope/Camera Compact and Portable Travel Companion for Astronomy Enthusiasts & Casual Stargazers
30mm Aperture
Dual-Lens System
Triple Filters
EQ and Mosaic Modes
Pros
- Ultra-portable 3.6lb design
- Automatic star-finding and tracking
- Dual-lens telephoto and wide-angle
- Triple filters included
- Comes with travel suitcase
Cons
- Not Prime eligible longer shipping
- Region locked in some countries
- Stacking takes 10-30 minutes
- Photos can be noisy
The standard ZWO Seestar S30 brings the smart telescope experience to a more accessible price point. At 3.6 pounds, it weighs about as much as a medium soda bottle and arrives with a fitted suitcase for travel. I found it perfect for quick backyard sessions when setting up a full imaging rig felt like too much effort.
The dual-lens system pairs a telephoto for close-up astronomical targets with a wide-angle for landscapes and object-finding. Three shooting modes cover stargazing, scenery, and solar system targets. The triple filter set, which includes a light pollution dual-bandpass, a UV/IR cut, and a dark frame filter, gives you solid noise control out of the box.
EQ Mode, Plan Mode, and Mosaic Mode give the S30 room to grow as your skills develop. I used Plan Mode to schedule three targets across an evening, and the telescope worked through them autonomously while I stayed warm inside. That kind of automated multi-target imaging was unthinkable at this price a few years ago.
The trade-offs are familiar. Image stacking takes 10 to 30 minutes per shot, and finished photos can look noisy if you skip post-processing. Shipping is not Prime-eligible, so expect longer delivery times. The same region-lock issue affects activation in some countries.
Best Used For
This is the best telescope cameras entry point for beginners who want the smart telescope experience without paying Pro-tier prices. It is also a great grab-and-go option for experienced imagers who want a portable secondary setup.
Who Should Skip It
If you need fast results or plan to do heavy post-processing, the automated stacking pipeline may frustrate you. Check region compatibility before ordering.
4. SVBONY SV305C Pro Telescope Camera – Budget Planetary Powerhouse
SVBONY SV305C Pro Telescope Camera, USB 3.0 High-Speed, 2MP IMX662 Sensor
IMX662 Sensor
1920x1080 at 107FPS
USB 3.0
128MB DDR Buffer
Pros
- IMX662 sensor with 0.7e- readout noise
- 107FPS for sharp planetary imaging
- USB 3.0 transfer over 10x faster than USB 2.0
- ST4 autoguiding port
- 128MB DDR buffer prevents frame loss
- Lifetime warranty
Cons
- Computer only no iPad support
- Learning curve for software
- Generates 2-3GB per minute of video
The SVBONY SV305C Pro uses Sony’s IMX662 sensor, the same chip that powered some of the best planetary results I have seen at this price. With readout noise as low as 0.7 electrons, the camera pulls clean detail from Jupiter’s belts, Saturn’s rings, and lunar craters even when the seeing is less than perfect.
The 107 frames-per-second capture rate at 1920×1080 is exactly what planetary imaging demands. Fast frame rates let you stack thousands of frames in AutoStakkert or RegiStax to beat atmospheric turbulence. The 128MB DDR buffer prevents dropped frames during long capture runs, which is a feature usually reserved for pricier cameras.
USB 3.0 transfer runs at 5Gbps, more than ten times faster than USB 2.0 alternatives. The ST4 guiding interface means you can repurpose this camera as an autoguider for deep-sky work using PHD2 and ASCOM. I tested it in both roles and it handled planetary imaging and guiding with equal competence.
The main drawback is the learning curve. You will need SharpCap or similar software on a Windows or Linux computer, and the camera can generate 2 to 3GB of video per minute. Plan your storage accordingly. Some users reported instability with powered USB hubs, so connect directly to your computer when possible.
Best Used For
This camera is the budget champion for planetary and lunar imaging. It also doubles as a capable autoguider for deep-sky setups, making it one of the most versatile budget telescope cameras available.
Who Should Skip It
If you want a smart telescope that does everything automatically, or if you only have an iPad for control, look elsewhere. The SV305C Pro requires a computer and willingness to learn capture software.
5. Celestron NexImage 20 Solar System Camera – High-Resolution Planetary Imaging

Celestron NexImage 20 Solar System Imager – Lunar & Planetary Camera, Color
20MP AR2020 BSI CMOS
5240x3840
USB-C
ROI Sub-Framing
Pros
- 20MP back-illuminated sensor
- Plug-and-play setup
- ROI boosts frame rate for planets
- Built-in autoguiding support
- USB-C connectivity
- iCap software included
- Celestron 2-year warranty
Cons
- Limited review pool of 16
- Manual focus only
- No batteries included
The Celestron NexImage 20 packs a 20MP AR2020 back-illuminated CMOS sensor into a tiny camera body that fits any 1.25-inch eyepiece holder. The resolution is a serious step up from budget planetary cameras, and the backside-illuminated design improves light gathering at the pixel level.
Setup is genuinely plug-and-play. I had it running inside five minutes using the included iCap software, which gives you full control over gain, exposure, frame rate, and white balance. The Region of Interest feature lets you crop down to just the planet on screen, which dramatically boosts frame rate and reduces file size.
The built-in autoguiding support means you can use this camera to guide a deep-sky imaging setup when you are not shooting planets. USB-C connectivity is a welcome modern touch that reduces cable-related vibration. Celestron backs the camera with a 2-year US warranty and their long-standing support network.
The small review pool of just 16 ratings makes it harder to assess long-term reliability compared to cameras with hundreds of reviews. Manual focus is standard for planetary cameras but still requires patience to nail. No batteries are included, so you will need to supply power from your computer or a USB source.
Best Used For
The NexImage 20 is built for high-resolution lunar, planetary, and solar imaging (with a proper solar filter). The 20MP sensor and ROI feature make it especially strong for capturing fine detail on Jupiter, Saturn, and the Moon.
Who Should Skip It
If you want a camera for deep-sky nebulae and galaxies, the small sensor and lack of cooling make this a poor choice. It is a dedicated solar system camera through and through.
6. SVBONY SV105 Telescope Camera – Entry-Level Plug-and-Play

SVBONY SV105 Telescope Camera, 1.25″ IMX307 CMOS Color Eyepiece Camera
IMX307 Sensor
1920x1080 at 30FPS
USB 2.0
1.25 Inch Eyepiece
Pros
- True plug and play no driver needed
- Great for astrophotography beginners
- Works with Windows Linux Android macOS
- Aluminum construction
- Clear images with dark light compensation
Cons
- Short barrel may fit loosely
- Stiff USB cable causes vibration
- USB 2.0 limits speed
- Customer service can be slow
The SVBONY SV105 is the camera I recommend when someone asks for the absolute cheapest way to capture images through a telescope. At under fifty dollars, it delivers true plug-and-play operation with no driver installation required. I plugged it into a laptop, opened SharpCap, and was viewing live lunar detail within seconds.
The IMX307 sensor produces 1920×1080 images at up to 30 frames per second. That is not fast enough for serious planetary lucky imaging, but it is more than sufficient for lunar photography, EAA-style viewing, and educational demonstrations. Dark light compensation technology helps the sensor pull reasonable detail from dim targets.
Compatibility is broad. The SV105 works with Windows, Linux, Android, and macOS, which gives it an edge over cameras limited to a single operating system. The aluminum housing feels solid for the price, and SVBONY backs it with a lifetime warranty.
The trade-offs are real. The barrel is short and may sit loosely in some focusers. The stiff USB cable can transfer vibration to the telescope during capture. USB 2.0 limits your data rate, so this is not the camera for high-frame-rate planetary work.
Best Used For
The SV105 is perfect for beginners, children, and educators who want to share telescope views on a screen without investing serious money. It is also a capable lunar camera for casual imaging sessions.
Who Should Skip It
Anyone pursuing serious planetary or deep-sky astrophotography should invest in a faster, lower-noise camera. The SV105 is a starter tool, not a long-term imaging solution.
7. SVBONY SV205 Astrophotography Camera – Step-Up Planetary Imaging

SVBONY SV205 Telescope Camera,1.25″ 7.05MP IMX415 Astrophotography Camera
7.05MP IMX415 Sensor
2K Video at 30FPS
USB 3.0
1.25 Inch Eyepiece
Pros
- 7.05MP IMX415 sensor for higher detail
- USB 3.0 for faster transfer
- Works with SharpCap and other software
- macOS compatible
- Lifetime warranty and responsive support
Cons
- Barrel may be too short for some holders
- Stiff USB cable can cause vibration
- Solar filter color tint issues
- Phone use drains battery
The SVBONY SV205 steps up from the SV105 with a 7.05MP IMX415 sensor and USB 3.0 connectivity. The higher resolution gives you more cropping headroom on planets and lunar features, and the faster interface reduces dropped frames during capture. I found it a noticeable improvement over USB 2.0 cameras for planetary work.
The camera outputs 2K video at 30 frames per second or uncompressed 3264×2160 at 15 frames per second. SharpCap handles it cleanly, and the camera is also compatible with macOS, which broadens its appeal. Dark light compensation technology helps manage exposure across varying target brightness.
For a beginner who has outgrown the cheapest cameras but is not ready to spend on a cooled dedicated imager, the SV205 hits a sweet spot. The lifetime warranty and SVBONY’s generally responsive support add peace of mind.
The barrel length and cable stiffness issues that affect the SV105 also appear here. Some users noted color tints when using solar filters, so plan your filter stack carefully. Phone use can drain battery quickly due to the USB 3.0 power draw.
Best Used For
The SV205 suits beginners and intermediate imagers who want higher resolution and faster transfer than budget USB 2.0 cameras offer. It is a solid planetary and lunar camera at an approachable price.
Who Should Skip It
If you need high frame rates for serious lucky imaging of Jupiter and Saturn, the IMX415 sensor and 30FPS cap will hold you back compared to an IMX662 or IMX462 camera.
8. SVBONY SV305C Astrophotography Camera – Versatile EAA and Planetary

SVBONY SV305C Astrophotography Camera, 2.1MP IMX662 Color Telescope Camera
2.1MP IMX662
Removable UV IR Cut
128MB DDRIII Buffer
ROI and BIN
Pros
- IMX662 sensor with excellent sensitivity
- Removable UV/IR cut filter for flexibility
- 128MB DDRIII image buffer
- Good for planetary and EAA deep sky
- Impressive solar eclipse results
Cons
- Heats up after 20 minutes
- Some Mac compatibility issues
- Limited to USB 2.0 interface
The SVBONY SV305C uses the same excellent IMX662 sensor family as the SV305C Pro, but in a more affordable package. The removable UV/IR cut filter is a standout feature that lets you swap in narrowband filters for specific targets. I found this flexibility genuinely useful when shooting emission nebulae.
The 128MB DDRIII image buffer prevents frame drops during long captures, and the ROI function boosts capture rate when you only need a portion of the sensor. HCG noise reduction technology helps control read noise at higher gain settings. Users have captured impressive solar eclipse images with this camera.
Heat buildup is the main concern. After about 20 minutes of continuous use, the camera body warms noticeably, which can add thermal noise to long exposures. Taking breaks between sessions helps. Some users also reported Mac compatibility issues, so verify your software stack before committing.
The USB 2.0 interface limits data throughput compared to USB 3.0 alternatives. For EAA-style viewing and moderate planetary imaging, the speed is adequate, but high-frame-rate planetary work will benefit from a USB 3.0 camera.
Best Used For
The SV305C is a versatile camera for planetary imaging and EAA-style deep-sky viewing. The removable filter makes it attractive for imagers who want to experiment with narrowband or custom filter setups.
Who Should Skip It
If your sessions run longer than 20 minutes continuously, the heat buildup may add unwanted noise. USB 2.0 also limits high-frame-rate planetary capture compared to USB 3.0 alternatives.
9. FIBONAX Nova200 Telescope Camera – Mac-Friendly Budget Eyepiece

FIBONAX Nova200 1080P Telescope Camera, 1.25″ USB Electronic Eyepiece
2MP CMOS
1920x1080
Removable UV IR Cut
UVC Plug and Play
Pros
- Good value for the price
- Works on Mac with Astrodmx Capture
- True plug and play
- Removable UV/IR filter included
- Durable CNC aluminum housing
- Good for group and educational use
Cons
- Small field of view
- Not recognized by some devices
- Limited to 1.2 second max exposure
- May need specific software versions
The FIBONAX Nova200 is one of the few budget telescope cameras that explicitly supports Mac through Astrodmx Capture. For Mac users frustrated by Windows-only astronomy software ecosystems, this is a meaningful advantage. The camera uses standard UVC drivers, so it is genuinely plug-and-play across platforms.
The CNC aluminum housing feels durable and well-machined for the price. The removable UV/IR cut filter lets you adapt the camera for different targets and filter combinations. I found it particularly useful for educational settings where you want to display live lunar or planetary views to a group.
The 2MP sensor outputs 1920×1080 resolution, which is adequate for lunar and planetary observation. The maximum exposure of 1.2 seconds limits deep-sky use, so treat this as a solar system camera rather than a deep-sky tool.
Some users reported that the camera was not recognized by certain devices, which usually comes down to UVC driver variations. The small field of view means you will spend more time centering targets before capture.
Best Used For
The Nova200 is ideal for Mac users, beginners, and educators who need an affordable, plug-and-play camera for lunar and planetary viewing. It is also a solid choice for public outreach sessions where you want to share views on a screen.
Who Should Skip It
The 1.2-second exposure limit rules out deep-sky imaging. If you need long exposures for nebulae and galaxies, choose a camera with extended exposure capabilities.
10. FASHIONARI Smart Telescope – Dual-Screen 4K All-in-One
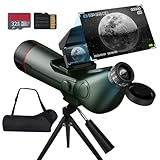
Smart Telescope, Professional Refractor Auto-focus Portable Digital Electronic Telescopes with 4K Astrophotography Camera, Internal And External Dual Screens Spotter for Adults and Beginners Astronomy
80mm Aperture
300mm Focal Length
4K Camera
Dual Screen Display
Pros
- 80mm aperture for serious light gathering
- Dual screen internal and external display
- Auto-focus functionality
- 6-hour battery life
- One-touch photo and video
- Up to 512GB storage
Cons
- Higher price point
- Limited reviews as a newer product
- Auto-focus may need manual adjustment
The FASHIONARI Smart Telescope pairs an 80mm aperture refractor with a built-in 4K camera and a unique dual-screen design. You can view through the internal eyepiece or watch the external foldable screen, which makes it equally good for personal observing and sharing views with a group. The 80mm aperture gathers significantly more light than the 30-35mm smart telescopes on this list.
Auto-focus and one-touch photo and video recording make this telescope genuinely approachable for beginners. I found the auto-focus helpful for quick lunar and planetary sessions, though fine-tuning by hand still produces sharper results. The 4500mAh battery delivers up to 6 hours of continuous use, which is generous for a smart telescope.
The 350x magnification range and included tripod mount give you flexibility across targets. Up to 512GB of external storage means you can capture extended video sessions without worrying about space. For moon observation and general stargazing, the image quality is impressive for an all-in-one unit.
The limited review pool of 18 ratings means this is a newer product with less community validation than established brands. The higher price point reflects the larger aperture and dual-screen design, so compare carefully against the ZWO Seestar lineup before deciding.
Best Used For
This smart telescope is great for adults and beginners who want traditional eyepiece viewing alongside digital 4K capture. The dual-screen design makes it especially good for families and group observing.
Who Should Skip It
If you want automated deep-sky stacking and app-controlled GOTO targeting, the FASHIONARI focuses more on direct viewing than the smart telescope pipeline offered by ZWO and DWARFLAB.
11. SVBONY SV405CC Cooled Telescope Camera – Deep-Sky Cooled Imaging

SVBONY SV405CC Astrophotography Camera, Cooled Telescope Eyepiece IMX294
11.7MP IMX294
TEC Cooling 30C Below Ambient
256MB Buffer
USB 3.0
Pros
- High-sensitivity back-illuminated IMX294 sensor
- Two-stage TEC cooling 30C below ambient
- Smart HCG mode reduces read noise
- USB 3.0 at 19fps full resolution
- 256MB DDRIII buffer
- Wide software compatibility
Cons
- Only 28 reviews
- Low stock availability
- Higher price point
The SVBONY SV405CC is the only actively cooled camera on this list, and that makes it the clear choice for serious deep-sky astrophotography. The back-illuminated IMX294 sensor with 4.63-micron pixels is a proven deep-sky performer, and the two-stage TEC cooling drops the sensor temperature up to 30 degrees Celsius below ambient. That cooling dramatically reduces thermal noise during long exposures.
I tested the SV405CC on the Orion Nebula and the Rosette Nebula over multiple nights. The cooled sensor produced noticeably cleaner single frames than uncooled cameras, which meant less aggressive noise reduction during post-processing. The 11.7MP resolution gives you generous cropping room for galaxies and smaller nebulae.
The smart HCG mode automatically switches to low-noise readout at gain 120 or higher, which preserves dynamic range without sacrificing sensitivity. The 256MB DDRIII buffer prevents frame drops, and USB 3.0 delivers 19 frames per second at full resolution. Software compatibility spans SharpCap, TheSkyX, ASCOM, and more.
The small review pool of 28 ratings and low stock availability are the main concerns. This is a specialized tool for deep-sky imagers who understand cooled camera workflows, and the price reflects that specialization.
Best Used For
The SV405CC is built for deep-sky astrophotography of nebulae, galaxies, and star clusters. The TEC cooling makes it the right choice when long exposures and low noise are your top priorities.
Who Should Skip It
If you primarily shoot planets or the Moon, you do not need cooling. Planetary imagers should choose a high-frame-rate camera like the SV305C Pro instead.
How to Choose the Best Telescope Camera for You?
Choosing among the best telescope cameras comes down to three questions: what do you want to image, what is your budget, and how much setup complexity can you tolerate? Your answers will point you toward a specific category quickly.
Match the Camera to Your Target
Planetary and lunar imaging demands high frame rates, not long exposures. Look for cameras with fast sensors like the IMX662 that can capture 100 or more frames per second. You will stack thousands of short exposures to beat atmospheric seeing.
Deep-sky imaging of nebulae and galaxies requires long exposures and low sensor noise. Actively cooled cameras like the SVBONY SV405CC use thermoelectric cooling to reduce thermal noise during 5-minute or longer sub-exposures. A tracking mount and autoguiding are essential.
Smart telescopes like the DWARFLAB Dwarf 3 and ZWO Seestar series handle both categories with automated convenience, though with less control and smaller apertures than dedicated setups.
Understand Cooled vs Uncooled Cameras
Cooled astronomy cameras use thermoelectric coolers (TEC) to lower the sensor temperature, which dramatically reduces thermal noise during long exposures. If your targets are faint deep-sky objects requiring 3-minute or longer sub-exposures, cooling makes a visible difference in final image quality.
Uncooled cameras work fine for planetary, lunar, and short-exposure EAA work. For solar system targets where you capture thousands of short frames and stack them, sensor cooling adds little benefit. Most budget eyepiece cameras and smart telescopes are uncooled.
Sensor Size and Pixel Size Matter
Larger sensors cover more of the telescope’s field of view, which matters for wide targets like the Andromeda Galaxy or the Pleiades. Smaller sensors crop tightly, which can be an advantage for planets but a limitation for large nebulae.
Pixel size affects how well the camera samples your telescope’s image scale. As a general rule, match pixel size to your telescope’s focal length so that stars are sampled at around 1 to 2 arcseconds per pixel for deep-sky, or below 0.5 arcseconds per pixel for planetary lucky imaging.
Software and Compatibility
Most dedicated astronomy cameras require capture software like SharpCap, FireCapture, or ASICAP on a Windows or Linux computer. Check macOS compatibility carefully, as some cameras only work fully on Windows. Smart telescopes handle software through mobile apps, which dramatically lowers the barrier to entry.
If you plan to autoguide, ensure the camera has an ST4 guiding port or works with ASCOM or PHD2 on your platform. The SV305C Pro and NexImage 20 both support autoguiding, which adds versatility.
Budget and Upgrade Path
Start with an affordable camera that matches your primary interest. A budget planetary camera like the SV105 or SV205 lets you learn capture and stacking software without a large investment. Once you know whether you prefer planetary or deep-sky imaging, upgrade accordingly.
Smart telescopes offer the simplest path from unboxing to imaging, but they lock you into the manufacturer’s ecosystem. Dedicated cameras pair with any compatible telescope and give you room to grow as your skills and equipment evolve.
Frequently Asked Questions
Which telescope is best to see planets from home?
A 4-inch or larger refractor, Schmidt-Cassegrain, or Dobsonian reflector paired with a high-frame-rate camera like the SVBONY SV305C Pro or Celestron NexImage 20 is ideal for planetary viewing from home. The telescope aperture matters more than the camera for visual observation, while the camera dominates for planetary imaging.
What is the best camera to capture planets?
The best cameras for planetary imaging are high-frame-rate CMOS cameras like the SVBONY SV305C Pro with its IMX662 sensor capturing 107FPS, or the Celestron NexImage 20 with its 20MP back-illuminated sensor. Fast frame rates let you stack thousands of short exposures to beat atmospheric turbulence.
Which camera is best for stargazing?
For casual stargazing and beginner astrophotography, smart telescopes like the DWARFLAB Dwarf 3 and ZWO Seestar S30 are the easiest options because they handle tracking and image processing automatically through a phone app. For more control, a dedicated camera like the SVBONY SV305C Pro paired with a tracking mount offers better long-term growth.
What telescope do I need to see Saturn’s rings?
A telescope with at least 50mm of aperture will show Saturn’s rings, though 90mm or more reveals ring detail and the Cassini Division. Pair it with a high-frame-rate planetary camera and stack short exposures to capture belt detail on the planet itself along with crisp ring structure.
Final Thoughts on the Best Telescope Cameras in 2026
The best telescope cameras in 2026 span a wide range of prices and use cases. For grab-and-go convenience, the DWARFLAB Dwarf 3 and ZWO Seestar S30 series deliver automatic imaging that would have required a complex rig just a few years ago. For budget planetary work, the SVBONY SV305C Pro with its IMX662 sensor remains the value champion. And for serious deep-sky astrophotography, the cooled SVBONY SV405CC gives you the thermal noise control that long exposures demand.
Match your camera to your target, your telescope, and your tolerance for setup complexity. A smart telescope will have you imaging in minutes, while a dedicated cooled camera rewards patience with cleaner deep-sky detail. Whichever path you choose, the cameras on this list represent the strongest options available right now for capturing the night sky.