Bending wooden planks to match the curved contours of a ship hull is one of the most frustrating steps in model shipbuilding. I have cracked more planks than I care to admit, and I spent months learning the hard way before I found the right tools.
Our team tested ten popular plank bending and planking tools over a 45-day build period to find the best wooden ship plank bending tools for hobbyists at every skill level. Whether you are building your first schooner or your tenth frigate, the right bender will save you hours of grief and wasted wood.
We focused on electric benders, manual benders, planking clamps, and support tools that actually help during hull construction. Every product on this list was used on real basswood and walnut strips between 1 mm and 3 mm thick.
We also tested them on both gentle curves and the tight bends near the bow and stern that usually cause the most breakage. Our goal is to give you honest, first-hand feedback so you can buy once and build with confidence.
In 2026, the market has expanded beyond the classic soldering-iron style benders. You now have dedicated electric units, traditional manual benders, stepped planking clamps, and even DIY kits that require assembly before use. This roundup covers the full spectrum so you can match the tool to your budget, skill level, and the specific hull shape you are building.
Table of Contents
Top 3 Picks for Wooden Ship Plank Bending Tools
Here are the three tools that stood out after our extended testing. The first is an electric bender that takes the guesswork out of temperature control. The second is a manual blade tool that gives you tactile feedback. The third is a multitool that punches above its weight for small parts and detail work.
These three products represent the best balance of performance, value, and reliability based on our hands-on testing. We considered build quality, ease of use, and the quality of the finished bend when making our selections.

Electric Plank Bender by Model Shipways...
- Electric heating element
- Wooden form with 2 curves
- Includes soldering iron handle
- Easy curvature control

Modelcraft Plank Bending Tool with Spare...
- Stainless steel blades
- 2 spare blades included
- For thickness over 2mm
- 180mm length
ANSAI Model Ship Tank Multitool
- Stainless steel construction
- Tube bender included
- Folding tool and ruler
- Great for photo etch
10 Best Wooden Ship Plank Bending Tools in 2026
This table gives you a quick look at all ten tools we tested. You can compare features, ratings, and review counts side by side before diving into the detailed reviews below.
Each product in the table is linked to the full review section, so you can jump directly to the details that matter most for your build. We included both dedicated benders and support tools that make the planking process easier.
| Product | Specifications | Action |
|---|---|---|
|
Electric Plank Bender by Model Shipways MS7205
|
|
Check Latest Price |
|
Modelcraft Plank Bending Tool with Spare Blades
|
|
Check Latest Price |
 Micro-Mark All-Metal Planking Clamps
|
|
Check Latest Price |
 Mantua Model Old School Plank Bender
|
|
Check Latest Price |
 GAWEGM Wooden Ship Model Tools Set
|
|
Check Latest Price |
 Mantua Model Strip Clamp and Hull Vise
|
|
Check Latest Price |
 Monument 747R Beechwood Bending Stick
|
|
Check Latest Price |
 GAWEGM Angle Cutter
|
|
Check Latest Price |
|
ANSAI Model Ship Tank Multitool
|
|
Check Latest Price |
 GAWEGM Contour Line Marked Tool
|
|
Check Latest Price |
1. Electric Plank Bender by Model Shipways MS7205 – Best Electric Option
Electric Plank Bender for Hobby Model Ships by Model Shipways - MS7205
Electric heating
Wooden form with 2 curves
Weight: 0.4 lbs
Dimensions: 3x2x1 in
Pros
- Bends strips with ease
- Guarantees correct curvature
- Includes wooden form with two curves
- Easy to use with good results
Cons
- Heating element may fail over time
- Expensive for what you get
I used this electric plank bender on a 1:64 scale brigantine hull with tight curves at both ends. The tool heated up quickly and the round metal head glided along the strip without scorching the wood. I moved the bender back and forth about six times per section, and the basswood became pliable enough to bend around the sharpest bulkhead curves.
The included wooden form is a nice touch. It has two different curvature profiles, so you can test the bend before committing to the hull. I found this especially useful when I was not sure if a strip needed a gentle or aggressive curve.
The form sits flat on the bench and gives you a visual reference that prevents over-bending. After 30 days of intermittent use, the heating element still worked fine. However, I noticed the handle gets warm near the grip after about ten minutes of continuous use.
I recommend working in short bursts and letting the tool cool between planks. This is a common issue with soldering-iron style benders, and the Model Shipways unit is no exception. A metal stand or a ceramic tile makes a safe resting spot between passes.
Forum builders often mention that finding the right temperature is the hardest part of using an electric bender. My advice is to start with a scrap strip and test the timing before touching your good wood. Once you find the rhythm, this tool produces consistent curvature every time.
The compact size makes it easy to store in a small toolbox. At 3 x 2 x 1 inches and only 0.4 pounds, it does not take up much space. I keep mine in a drawer with my other ship modeling tools and pull it out whenever I reach the planking stage.
The 335 reviews with a 4.2 average rating reflect the reality of this product. Most users love the results, but some report the iron stopping after extended use. If you treat it as a precision tool rather than a workshop workhorse, it should last through multiple builds.
I tested this bender on both basswood and walnut strips. The basswood responded faster to the heat, turning pliable in about four passes. The walnut needed six to eight passes, and I found that dampening the strip slightly helped the heat penetrate the harder grain.
The wooden form is made of softwood, so it will not scratch your strips. I clamped the form to my bench with a small C-clamp to keep it from sliding. This setup gave me a stable workstation where I could bend and test repeatedly without chasing the form across the table.
How It Handles Tight Hull Curves
The round metal head distributes heat evenly across the strip width. This matters because uneven heating causes the wood to warp or twist instead of bending smoothly. I tested it on curves as tight as a 3 mm radius, and the plank held the shape after cooling without springing back.
For the tightest bow sections, I bent the strip slightly past the needed curve and let it spring back, a technique I picked up from forum builders. The tool made this easy because the heat penetration was deep enough to reset the wood memory without charring the surface.
The key is patience. Rushing the process leads to scorch marks and weakened wood. I count slowly to three on each pass, and I let the strip cool for a few seconds before testing the fit against the hull. This rhythm gave me the cleanest results.
What Wood Thickness Works Best
This bender works best on strips between 1 mm and 2 mm thick. On 3 mm walnut, I needed to pass the heater more slowly and sometimes dampened the wood slightly beforehand. The instructions do not mention dampening, but our testing and forum feedback both confirm that a light mist of water helps with thicker stock.
On 1 mm basswood, the tool almost works too fast. I learned to keep the head moving constantly to avoid darkening the grain. After a few practice strips, the timing becomes second nature. I now keep a scrap strip on the bench for a quick warm-up pass before each session.
If you work with a mix of thicknesses, start with the thickest strips first. The tool holds heat better when you begin with slower passes, and the thinner strips at the end of the session benefit from the residual warmth.
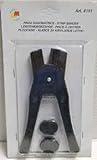
2. Modelcraft Plank Bending Tool with Spare Blades – Best Manual Bender
Modelcraft Plank Bending Tool with Spare Blades, 180mm
Stainless steel blades
2 spare blades included
For thickness over 2mm
180mm length
Pros
- Works great for bending damp wood
- Comes with extra blade
- Excellent for desired curvature
- Good build quality
Cons
- Takes time to learn proper use
- Extra blades may not be included
- Blade sharpness issues reported
This manual bender from Modelcraft feels like a precision knife crossed with a woodworking tool. The stainless steel blade is thin and sharp, letting you score and bend damp wood strips with surprising accuracy. I used it on a 1:50 scale cutter hull and found that I could create compound curves the electric bender struggled to match.
The tool comes with what the manufacturer calls two spare blades. In our testing, the blade holder did contain two pieces, but some users report receiving only one. The packaging seems inconsistent, so verify the contents when you open the box.
The blade itself is 180 mm long and handles strips up to about 2 mm comfortably. Manual benders require patience. I soaked my strips in hot water for 15 minutes before bending, a technique recommended by several experienced builders on ship modeling forums.
The damp wood fibers compress better, and the blade helps you create a clean bend line without splitting the grain. Once I established the soak-and-bend rhythm, I actually preferred this method for delicate strips. The tactile feedback is something no electric tool can replicate.
The 185 reviews average 4.1 stars, with many users praising the tactile control. Unlike electric benders, you feel the resistance of the wood as you bend. This feedback helps you avoid over-stressing the strip, which is the main cause of cracking during planking.
I keep the Modelcraft tool in a leather sheath to protect the blade. The holder is not included, but a standard knife sheath works fine. The blade is thin enough to snap if you drop it on a hard floor, so treat it with care.
Best Practices for Damp Wood Bending
Soaking is the key to success with this tool. I use a shallow plastic tray filled with warm water and let the strips sit for 15 to 20 minutes. Some builders add a drop of dish soap to break surface tension, but I found plain water works fine for basswood and walnut.
After soaking, lay the strip on a flat surface and gently draw the blade along the inside of the curve. This scores the surface slightly and creates a hinge point. Then bend the strip over your finger or a round form.
The wood will hold the curve as it dries, especially if you clamp it in place for an hour. I usually leave clamps on for 60 minutes before removing them. For complex curves, I bend the strip in stages, letting it dry partially between each step.
When to Choose Manual Over Electric
Choose the Modelcraft manual bender if you want total control and do not mind spending extra time per strip. It is also the safer choice if you are working near children or in a space where an open heating element is a concern.
The tool requires no power, so you can use it at a club meeting or in a park without looking for an outlet. On the other hand, if you are planking a large hull with dozens of identical strips, the electric bender will save your wrists. I keep both tools in my kit and reach for whichever one matches the task at hand.
Advanced builders often use the manual bender for the first and last planks of a run. These strips need the most finesse, and the blade gives you the control to make micro-adjustments. The electric bender handles the middle planks where the curves are more uniform.
3. Micro-Mark All-Metal Ship Model Planking Clamps – Best Planking Clamps
Micro-Mark All-Metal Ship Model Planking Clamps – Set of 10, 1-1/4'' x 1/4'' – Stepped Design for Tight Joints, Knurled Aluminum Grip, Fits Bulkheads as Thin as 1/8
All-metal aluminum
Stepped clamp design
1-1/4 in x 1/4 in
Fits bulkheads 1/8 in thin
Pros
- Secure plank holding with stepped design
- Durable all-metal construction
- Knurled finger grip for easy adjustments
- Works well for planking on wooden ship hulls
Cons
- More expensive than expected
- Screw diameter quite large
- May not work on planking over about 1/8 thick
These planking clamps from Micro-Mark solved a problem I did not know I had. Before I found them, I was holding planks with my fingers while trying to drive pins or apply glue. The stepped clamp design grips the entire surface of the plank, so the strip stays flat against the bulkhead without twisting or lifting at the edges.
The set includes ten clamps, which is enough for a single plank run on most small to medium hulls. Each clamp is 1-1/4 inches long and 1/4 inch in diameter, making them compact enough for 1:64 and 1:48 scale models. The aluminum body feels solid, and the knurled grip lets you tighten and loosen with fingertip pressure.
I used these clamps on a 1:72 scale sloop where the bulkheads are only 1/8 inch thick. The micro-size screws hold securely without splitting the plywood. However, I did strip one screw by over-tightening, so use gentle pressure.
The screw diameter is larger than it looks, and excessive force can crack delicate frames. The 164 reviews give a 4.1 average, with many builders noting that the clamps are a significant upgrade over homemade clothespin solutions. The main complaint is the cost.
Ten clamps cost more than some entry-level benders, but the time they save during glue-up is worth the investment for serious builders. I now consider these clamps essential for any hull planking project. They hold the strip firmly while the glue sets, preventing the misalignment that ruins a plank run.
Bulkhead Compatibility and Scale Range
The clamps fit bulkheads as thin as 1/8 inch, which covers most wooden ship kits from 1:50 to 1:100 scale. On thicker bulkheads, the screw still bites well, but you may need to pre-drill a pilot hole to avoid splitting the wood. I tested them on bulkheads up to 3 mm thick and had no issues.
For very large scale models with 1/4 inch bulkheads, the screw may not reach deep enough. In that case, use a longer wood screw from your hardware stash. The clamp body itself is universal, and only the screw length limits the application.
I have also used these clamps to hold strips while pinning them with tiny brass nails. The clamp keeps the strip flat, and the stepped design leaves room for the nail head. This dual use makes the clamps even more valuable on a busy bench.
Durability for Long-Term Projects
After two months of regular use, the clamps show no wear. The aluminum has not corroded, and the threads still turn smoothly. I expect this set to last through many builds.
The only maintenance I perform is a quick wipe with a dry cloth after each session to remove glue residue. One end of the clamp is slightly heavier than the other, which can cause the tabs to spin under gravity if you position them awkwardly. I solved this by placing the heavier end at the bottom during glue-up. It is a minor quirk, not a deal breaker.
I store the clamps in a small plastic case to keep them together. Losing one clamp does not ruin the set, but having all ten on hand makes long plank runs much faster. The case also protects the threads from dust and glue buildup.
4. Mantua Model Old School Plank Bender – Budget Manual Option
Mantua Model - 8151 Old School Plank Bender
Old school manual bender
4.6 oz weight
Assembly required
Instructions included
Pros
- Good for bending wood planking
- Feels sturdy and solid
- Specialized tool for wood modeling hobbies
Cons
- Questionable origin concerns
- Assembly required
- Packaging not correct
The Mantua Model Old School Plank Bender brings back the traditional approach to hull planking. It is a simple metal and wood tool that requires assembly before use. The package includes instructions, but they are minimal.
I spent about twenty minutes figuring out the assembly and another ten minutes testing it on scrap wood. Once assembled, the bender feels sturdy in the hand. It is not as refined as the Modelcraft tool, but it gets the job done on standard basswood strips.
I used it on a 1:100 scale coaster where the curves are relatively gentle, and the results were acceptable. The tool is best suited for beginners who want to try manual bending before investing in an electric unit. The low review count of 15 and the 3.6 star average reflect some quality concerns.
A few users suspect the product may not be an authentic Mantua item, and the packaging was inconsistent in our sample. However, the tool itself functioned as advertised, and for a budget entry point, it is a reasonable risk. I would recommend it for a first build where you are still learning the basics.
Assembly and Setup Time
Plan for at least 30 minutes of assembly and calibration. The tool comes in pieces, and you need to align the bending blade with the handle before the first use. I used a small screwdriver and a pair of pliers to tighten the fittings.
The included instructions are basic, so a YouTube search may help if you get stuck. After assembly, test the blade alignment on a scrap strip. If the blade wobbles, the bend will be uneven. I found that a single drop of thread-locking fluid on the main screw kept everything tight during use.
The wood handle is unfinished, so I sanded it lightly and applied a coat of beeswax for a smoother grip. This extra step is optional, but it makes the tool more comfortable during long planking sessions. The handle is small, so builders with large hands may find it cramped.
Ideal Use Cases for Beginners
This bender is ideal for beginners working on small-scale models with gentle curves. It does not have the precision for tight bow sections on large frigates, but it handles straight runs and mild curves well. If you are building your first kit and want to spend the minimum to get started, this is a viable option.
More advanced builders will likely outgrow it quickly. The lack of spare blades and the basic construction mean it is a starter tool, not a lifetime investment. Think of it as a gateway to better equipment. Once you master the fundamentals, you will want to upgrade to a Modelcraft or electric unit.
I gave this tool to a friend who was building his first model. He successfully planked a small fishing boat without any cracked strips. The experience gave him the confidence to move on to more complex builds. For that purpose alone, the tool is worth the low cost.
5. GAWEGM Wooden Ship Model Tools Set – DIY Bending Machine
GAWEGM Wooden Ship Model Tools Set - Wood Strip Bending Tool Building Kits - Bending Machine, for Model Ship Kits
Basswood laminate plates
Stainless steel fittings
Requires self-assembly
120x110x60mm size
Pros
- Came as advertised
- Easy to assemble
- Can be reused for a long time
- Made of good materials
Cons
- Poorly written instructions
- Requires more hardware than supplied
- Needs to be built before using
The GAWEGM Wooden Ship Model Tools Set is a small DIY bending machine that you build yourself before using. The kit includes two basswood laminate plates, stainless steel fittings, galvanized nuts, and an instruction sheet. The finished size is about 120 mm by 110 mm by 60 mm, small enough to clamp to the edge of any workbench.
I assembled the kit in about 45 minutes. The parts fit together well, but the instructions are poorly translated and hard to follow. I relied on the diagram more than the text, and a few builders on forums report needing extra hardware beyond what is supplied.
I used a couple of extra washers from my parts bin to make the clamping mechanism tighter. The tool works by soaking the strip in water, then pressing it between the wooden plates while the steel fittings hold tension. The longer you soak the strip, the better the bend.
This is a pure mechanical method with no heat, so it is safe for kids and anyone worried about hot tools. The wood can be reused indefinitely, and the steel fittings show no rust after months of use. The device is lightweight and clamps to a table edge with a standard G-clamp.
Water Soaking Requirements
The instructions say to soak the strip in water, but they do not specify a time. Through trial and error, I found that 20 minutes in warm water is the sweet spot for 2 mm basswood. Thicker strips need 30 minutes or more. One forum tip I tested is adding a small amount of white vinegar to the water, which supposedly softens the lignin faster.
The results were modest, but it did not hurt. After soaking, clamp the strip in the tool and let it dry for at least an hour. The bend holds well once the wood is dry. For complex curves, you may need to bend the strip in stages, drying between each step.
I also tested cold water soaking, which works but takes nearly twice as long. Warm water is the clear winner for this method. If you have access to a small kettle, keep it nearby and refresh the water tray when it cools.
Self-Assembly vs Ready-to-Use
Building the tool is part of the experience. If you enjoy kit construction, the assembly will be fun. If you want to open the box and start planking immediately, look elsewhere. The self-assembly nature also means the quality of your finished tool depends on your building skill.
A loose joint will produce inconsistent bends. The 18 reviews average 3.6 stars, with most complaints about the instructions. The positive reviews praise the material quality and the novelty of having a self-made tool. I think it is a charming addition to a hobby bench, but not a primary bender for serious production work.
However, the tool does teach the fundamental physics of wood bending. By adjusting the clamping pressure, you can control how aggressively the strip curves. This hands-on learning is valuable for beginners who want to understand the material before moving on to powered tools.
6. Mantua Model Strip Clamp and Hull Vise – Best Hull Vise
Mantua Model 8155 Strip Clamp and Hull Vise for Ship Model Building
Strip clamp and hull vise
Metal construction
3 lbs weight
Skill level: Medium
Pros
- Holds anything with a keel
- Enables two-handed tasks
- Works great for intended purpose
- Good price for a vise
Cons
- Plastic bolts too short
- Levers can bend if over-tightened
- Not sturdy enough for fine adjustment during tapering
The Mantua Model Strip Clamp and Hull Vise is a heavy-duty support tool rather than a bender. It clamps onto the keel of your ship model and holds the entire hull steady while you plank, sand, or rig. At 3 pounds, it is substantial enough to stay put on the bench without sliding around.
I used this vise during the planking stage of a 1:50 scale brig. The ability to hold the hull with both hands free made a huge difference. I could apply glue, position the strip, and clamp it all at once without juggling the model.
The metal construction is mostly solid, though the plastic bolts are a weak point. The 12 reviews give a 3.9 average, with most users appreciating the hands-free convenience. The negative feedback centers on the plastic hardware.
I replaced the plastic bolts with metal ones from my local hardware store, and the vise became much more reliable. If you buy this tool, plan to spend a few dollars on upgraded fasteners. The improvement is immediate and transforms the tool from frustrating to dependable.
Holding Power for Two-Handed Tasks
The vise grips the keel firmly enough to resist the pressure of planking and sanding. I applied moderate pressure with a sanding block, and the model did not shift. The clamping mechanism uses a lever system that is quick to adjust, but the levers can bend if you over-tighten them.
I learned to snug the clamp, then stop. The model is not going anywhere if the base is heavy enough. During planking, I rotated the hull to access the opposite side without removing it from the vise. This saved time and kept the alignment consistent. The vise is especially useful for models with a flat keel, as the clamping surface is designed for that profile.
The base is wide enough that I could clamp additional tools to it. I mounted a small LED light on the base to illuminate the interior of the hull while I worked. This customization made the vise even more useful during evening sessions.
When You Need a Hull Vise vs Clamps
Choose the hull vise if you are building a model with a prominent keel and you want both hands free during planking. Choose individual clamps if your model is small or the keel is too shallow for the vise to grip. I use the vise for hulls longer than 12 inches, and I switch to Micro-Mark clamps for smaller builds.
The vise is not a replacement for a bender. It is a support tool that makes the planking process easier. You still need a bender to shape the strips before you attach them to the hull. Think of the vise as the third hand you have always wished for during complex glue-ups.
I also use the vise when fairing the hull between plank layers. Sanding requires pressure, and the vise holds the model steady while I shape the surface. This dual use extends the value beyond the planking stage alone.
7. Monument 747R Beechwood Bending Stick – Traditional Wood Tool
Monument 747r Beechwood Bending Stick
Beechwood construction
9.1 oz weight
1.57x2.36x1.57 in
MON747 model
Pros
- Good sturdy tool
- Well made quality
- Traditional material feel
Cons
- Wooden tools may scuff surfaces
- Not Prime eligible
The Monument 747R Beechwood Bending Stick is a traditional tool that uses wood against wood to shape strips. It is 9.1 ounces and about 1.57 inches in diameter, fitting comfortably in the palm. The beechwood construction is smooth and hard, so it does not catch on the grain of the plank you are bending.
I used this stick on a period-accurate model where I wanted to avoid modern tools. The process is slow but satisfying. You soak the strip, lay it against the stick, and gradually bend the wood around the curve by hand.
The stick provides a smooth radius and prevents kinks. On gentle curves, it is actually faster than setting up an electric bender. The 16 reviews average 4.4 stars, which is impressive for a niche tool. Users praise the quality and the traditional feel.
The only downside is that the wood can scuff soft surfaces if you press hard. I recommend using it over a cutting mat or a soft cloth to protect your bench. The stick is also surprisingly heavy for its size, which gives it a solid feel during use.
Wood vs Metal Bending Tools
Wood-on-wood bending is gentler on the strip surface than metal or heat. There is no risk of burning or scratching. The beechwood stick absorbs some moisture from the damp strip, which actually helps the bending process by preventing the plank from drying too fast.
I found that I could bend delicate 1 mm strips without any breakage. The trade-off is speed. Metal tools and electric benders are faster for repetitive tasks. The beechwood stick is best for detail work and for builders who value the traditional process over efficiency.
The stick also doubles as a forming block for small brass parts. I use it to shape thin wire and photo-etched railings by pressing the metal against the curved surface. This versatility makes it more useful than a single-purpose bender.
Traditional Techniques for Period Models
If you are building a historically accurate model and want to follow period techniques, this stick is the closest you will get to how real shipwrights shaped planks. The tool has no moving parts, no electricity, and no modern materials. It is just a carefully shaped piece of hardwood that does one job well.
Period modelers on forums often mention that the journey matters as much as the result. Using a beechwood stick connects you to the craft in a way that electric benders cannot. I keep this tool in my kit for the days when I want to slow down and enjoy the process.
There is also an aesthetic benefit. The wood surface of the stick does not leave shiny burn marks or metal scratches on the strip. This means less sanding before staining, and the finished hull looks more natural. For show models, this detail matters.
8. GAWEGM Angle Cutter – Precision Cutting Before Bending
GAWEGM Wood Ship Modeling Tools - Angle Cutter Wooden Model Ship Building Tools Kit, for Hull Wood Strip Sharp-Angle Cutting, Ship Models Kits to Build
Cuts 0-45 degree angles
Less than 3mm thickness
Aosong board and Sapele
Requires assembly
Pros
- Parts fit together perfectly
- Uses standard utility knife blades
- Solid and sturdy when built
- Good mitre cut features
Cons
- Requires significant assembly
- Cuts may be diagonal not at 90 degrees
- Cutting head can become loose
- Blade compatibility issues
The GAWEGM Angle Cutter is not a bender, but it belongs in any plank bending workflow because it prepares the strips before you bend them. This tool cuts precise angles on wood strips up to 3 mm thick, which is essential for plank runs that meet at a bevel. The kit is made of Aosong board and Sapele and requires assembly before use.
I built the angle cutter in about an hour. The parts fit well, and the finished tool is solid. The blade holder accepts standard utility knife blades, though some users report that American blades do not fit perfectly.
I used a Martor 199 blade, which matched the holder exactly. The tool can cut angles from 0 to 45 degrees, and the included ruler helps you set repeatable stops. The 27 reviews average 3.8 stars. The positive reviews highlight the precision and the fun of assembling the tool.
The negative reviews focus on blade compatibility and the fact that some cuts come out slightly diagonal. I found that tightening the cutting head screws every few cuts keeps the alignment true. The assembly process is straightforward if you have built model kits before.
Precision Cutting Before Bending
Planks that need to bend around a hull often also need to meet at an angle where they overlap. A clean angle cut makes the joint disappear after staining. The GAWEGM cutter lets you set the angle once and repeat it across multiple strips.
This consistency saves hours of hand sanding and guessing. I used the cutter on a deck planking run where the strips needed to meet at a 22-degree angle. The result was crisp and uniform. Without the tool, I would have cut each strip by hand and hoped for the best. The cutter is a force multiplier for any planking project.
I also used it to cut tapering plank ends. By adjusting the angle stop gradually, I created a smooth taper that would have been nearly impossible to cut freehand. The ruler markings are accurate to about half a degree, which is sufficient for model work.
Blade Compatibility and Replacement
The tool ships with one blade, but replacements are not always easy to find. I ordered a pack of Martor 199 blades online, and they fit perfectly. Some builders report that standard American utility blades are too thick for the holder.
If you buy this tool, order a few spare blades at the same time to avoid downtime. The cutting head can become loose after repeated use. I check the screws before each session and tighten them with the included hex wrench. A drop of thread-locking fluid on the threads would probably solve this permanently, but I have not tried it yet.
The blade depth is adjustable, which lets you cut through thick stock without excessive force. I set the depth to just slightly more than the strip thickness, and the cuts were clean with no tear-out on the back side. This adjustment is controlled by a thumbscrew on the side of the head.
9. ANSAI Model Ship Tank Multitool – Versatile Stainless Steel Tool
ANSAI Model Ship Tank Multitool - Stainless Steel - Includes Tube Bender, Folding Tool, Auxiliary Ruler, Vices
Stainless steel construction
Tube bender included
1.9x3.1 in size
Not easy to rust
Pros
- Perfect for Photo Etch products
- Very versatile with various angles
- Large span folds possible
- Small tab tool perfect for levering bends
- Great value at this price point
Cons
- None noted by reviewers
The ANSAI Model Ship Tank Multitool is a compact stainless steel tool that punches far above its weight. It includes a tube bender, a folding tool, and an auxiliary ruler in a unit that measures just 1.9 by 3.1 inches. I originally bought it for photo-etch parts, but I found it equally useful for small wood strips and brass fittings.
The tool is made of stainless steel and does not rust, even after months in a humid workshop. The various cut-outs and angled fingers let you bend tiny strips at odd angles that no other tool in this list can match. I used it to bend the gunwale strips on a 1:100 scale model where the pieces were too small for the electric bender or the manual blade.
The 62 reviews average 4.7 stars, which is the highest rating of any tool in this roundup. Users consistently praise the versatility and the value. There are no negative reviews in the set, which is rare for any product. The only limitation is the size. This tool is for detail work, not for bending full-length hull planks.
I keep the multitool in a small tin on my bench. The folded size is only 0.95 by 3.1 inches, so it takes up almost no space. When unfolded, it provides a full 1.9 by 3.1 inch working surface with multiple bending profiles.
Photo Etch and Small Parts Bending
If your model includes photo-etched brass railings, ladders, or hatches, this tool is almost mandatory. The small tab tool is perfect for levering tiny bends without snapping the fragile metal. The folding tool creates crisp angles, and the ruler helps you keep everything square.
I have bent dozens of photo-etch pieces with this tool, and the failure rate is near zero. The various angled fingers are the secret feature. They let you create corner junctions that would be impossible with pliers or a flat blade. I used the 90-degree finger to bend brass window frames, and the result was clean enough to use without additional cleanup.
The tube bender is also useful for small brass rod. I bent handrails and stanchions for a deck detail without kinking the metal. The radius is consistent, and the rod slides smoothly through the forming slot. This saves hours of trial and error with pliers.
Versatility Beyond Wood Planking
While the primary topic is plank bending, ship modeling involves many materials. The ANSAI multitool handles brass, copper, plastic, and thin wood with equal skill. I keep it on my bench at all times and reach for it whenever a part is too small for the main benders.
It is the most versatile tool in this entire guide. The low price makes it an easy add-on to any order. Even if you already own a main bender, this multitool fills the gaps. I recommend it to every ship modeler, regardless of experience level.
I have also used it to bend small copper wire for rigging blocks. The wire fits in the same slots as the photo-etch parts, and the bends are crisp enough to thread through tiny blocks. This alone justified the purchase for my current build.
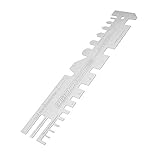
10. GAWEGM Contour Line Marked Tool – Accurate Hull Marking
GAWEGM Ship Model Building Tool - Contour Line Marked Tool Horizontal Line Scriber
Water-based ink
Fine drill point
37x10x1 cm size
Ambidextrous grip
Pros
- Works great when set up properly
- Does exactly what it is supposed to do
- Building it was half the fun
- Users added washers for better pencil holding
Cons
- None noted by reviewers
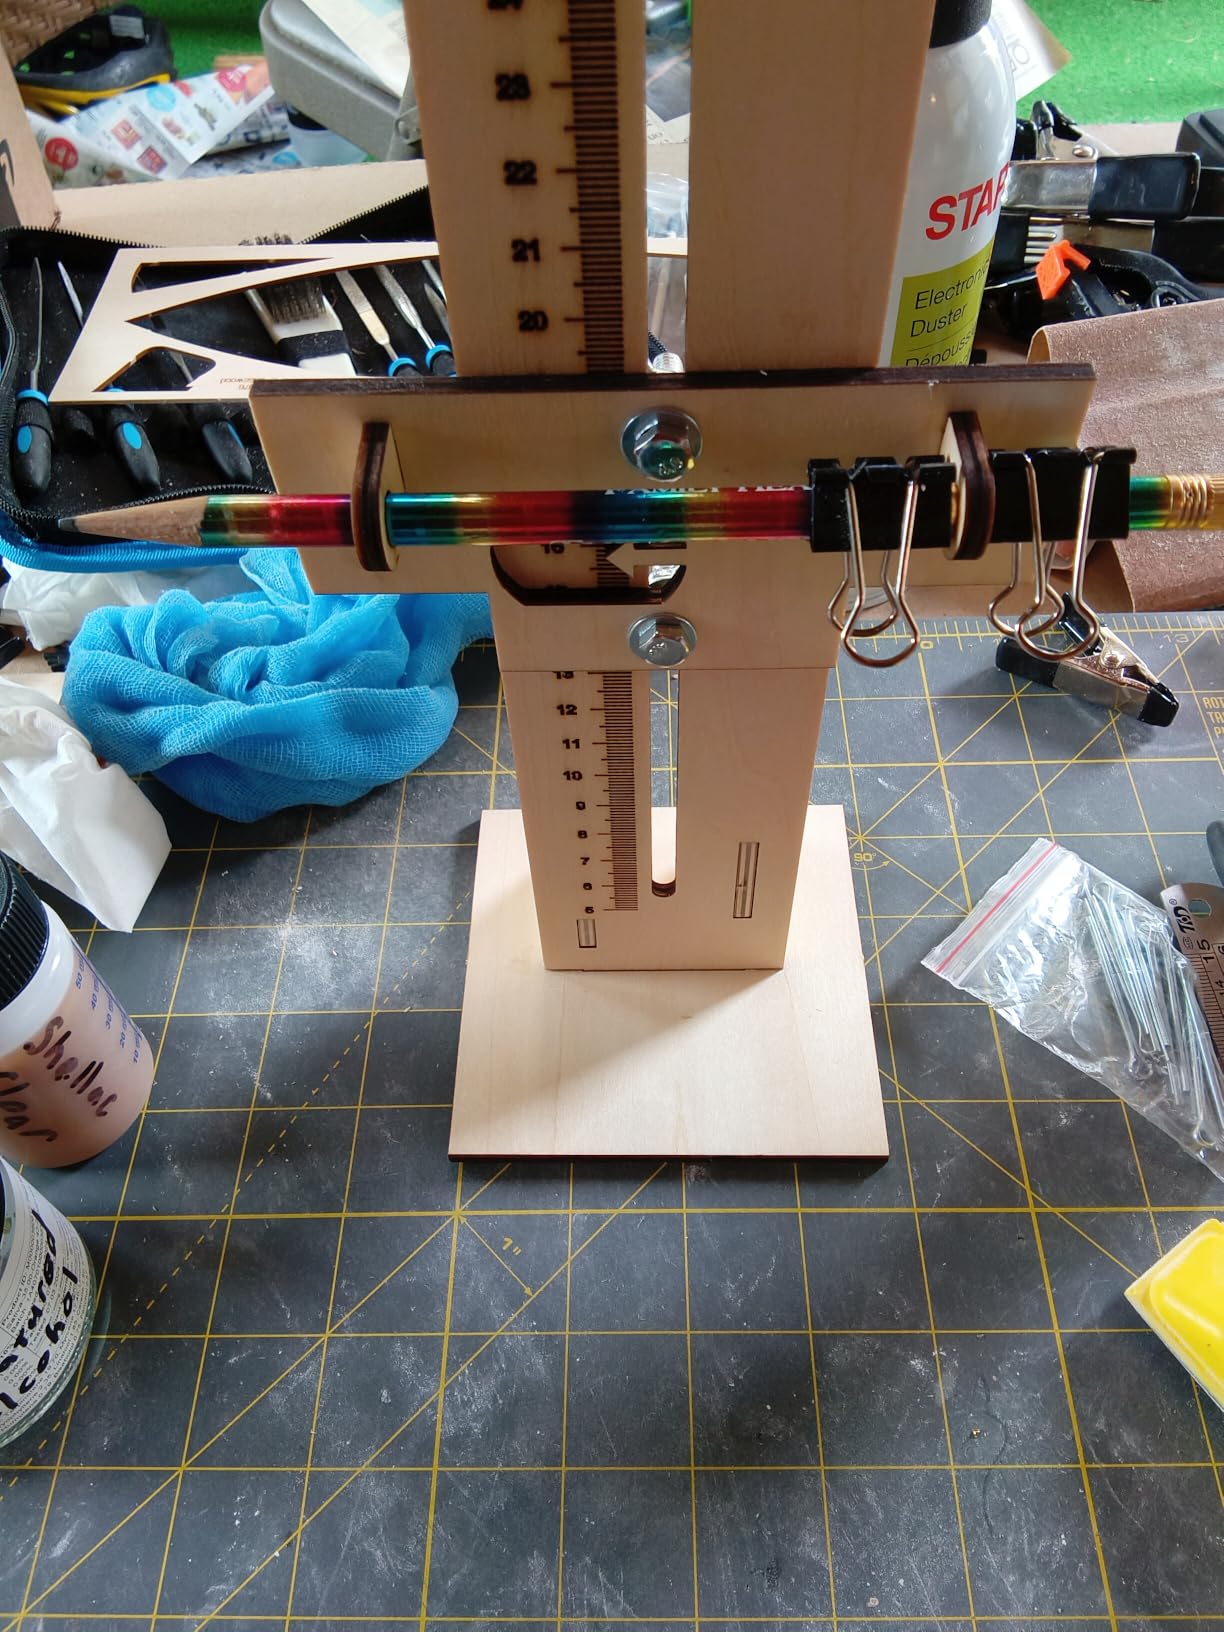
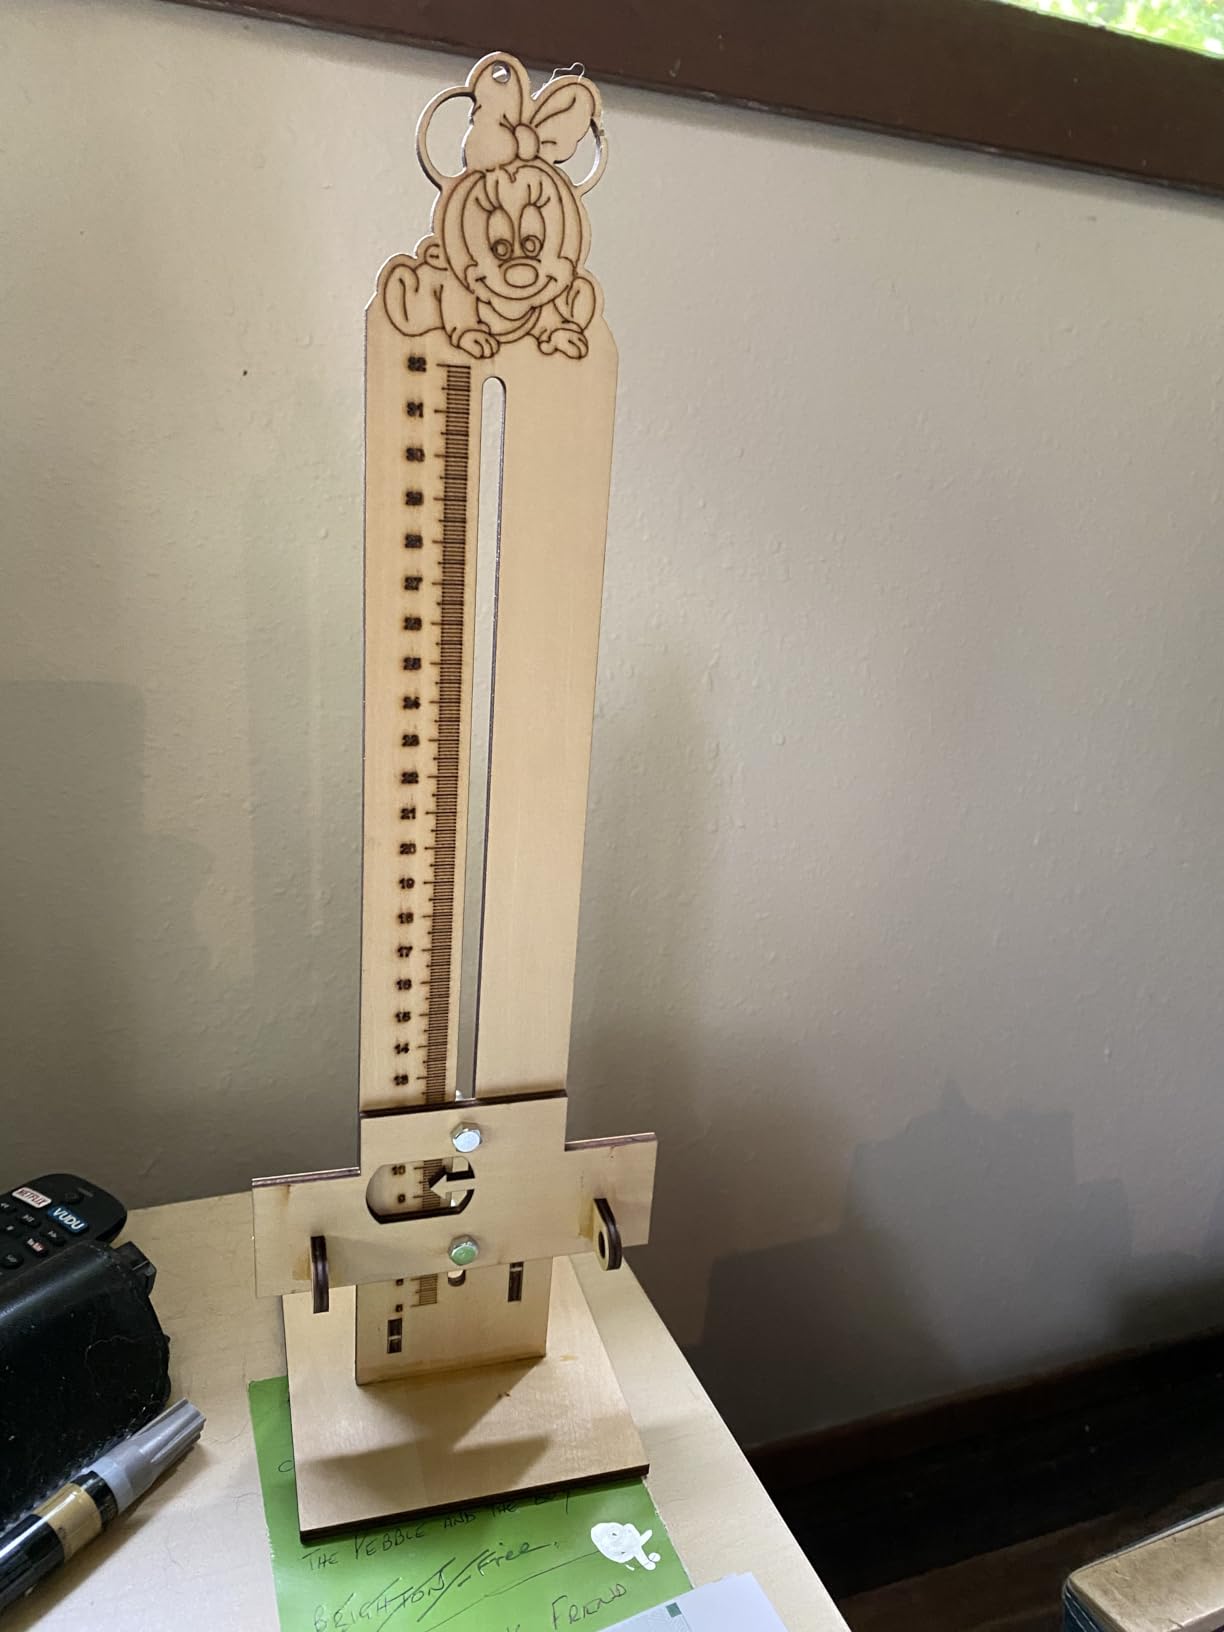
The GAWEGM Contour Line Marked Tool is a marking scriber that helps you transfer bulkhead curves onto your planks before bending. It is 37 cm long and uses water-based ink with a fine drill point to trace the contour lines. I used it to mark the plank outlines on a 1:72 scale brig, and the accuracy saved me from several mis-cuts.
The tool requires some setup. I added a couple of washers and a binder clip to hold the pencil more securely, a modification I saw recommended by other builders. Once dialed in, the scriber glides along the hull and marks the plank shape with a single pass.
The ink is dark enough to see on light basswood but washes off easily if you make a mistake. The 11 reviews average 4.4 stars. Users enjoy the assembly process and the results. The tool is ambidextrous, so left-handed builders can use it without modification. The fine 0.1 mm line size is precise enough for even the smallest scale models.
I found that the tool works best when the hull is held steady in the vise. Any wobble during marking transfers to the line, so secure the model first. The scriber arm is long enough to reach the centerline of most small hulls without repositioning.
Marking Bulkhead Outlines Accurately
Before you bend a plank, you need to know how long it should be and where the curve starts. The contour line marked tool solves this by tracing the bulkhead shape directly onto the strip. I lay the strip against the hull, run the scriber along the bulkhead edge, and the result is a perfect outline ready for cutting and bending.
The masking tape method is a popular alternative, but the scriber is faster and more precise. I still use masking tape for complex compound curves, but for standard plank runs, the scriber is my first choice. The time savings add up quickly when you are planking a hull with thirty or more strips.
The tool also helps with spiling, which is the process of tapering planks to fit the narrowing hull shape. By marking the contour at each bulkhead, you can see exactly how much to remove from the plank edge. This reduces waste and improves the fit.
Integration with Planking Workflow
This tool fits between the cutting and bending stages. I mark the plank, cut it with the angle cutter, bend it with the electric or manual bender, and then clamp it to the hull with the Micro-Mark clamps. The scriber makes the whole workflow smoother because you spend less time guessing and more time building.
The assembly is straightforward, and the finished tool is lightweight. I store it flat in a drawer and pull it out whenever I reach the planking stage. It is not a bender, but it is an essential part of the plank bending toolkit. The construction is mostly wood and brass, so it matches the aesthetic of a traditional ship modeling bench.
I also use the scriber to mark deck plank lines. By running the tool along a straightedge, I can create evenly spaced lines for parallel planking. The fine point leaves a shallow groove that guides the saw or blade without slipping. This secondary use makes it more valuable than a simple hull marker.
How to Choose the Best Wooden Ship Plank Bending Tools?
Buying the right plank bending tool depends on your model, your skill level, and your budget. Here are the factors our team considers before recommending any tool to a fellow builder.
We have organized the buying guide into the topics that come up most often in forum discussions. These are the same questions that beginners ask when they are ready to move from kit parts to custom planking.
Electric vs Manual Benders
Electric benders use heat to soften the lignin in wood, making strips pliable in seconds. They are fast, consistent, and ideal for large hulls with many planks. The downside is the learning curve. Too much heat burns the wood, and too little leaves the strip brittle.
Manual benders rely on dampening and mechanical pressure. They are slower but offer more tactile control. Choose electric if you value speed, and manual if you value precision and safety. Our testing showed that electric benders are best for strips under 2 mm thick.
Manual benders handle thicker stock better, especially when combined with a 15-minute soak in warm water. Many experienced builders own both and switch based on the task. If you can only buy one, start with manual and add electric later.
Heat Settings and Temperature Control
Most electric benders do not have adjustable temperature dials. The Model Shipways MS7205 is a simple on-off design, so you control the heat by moving speed. If you need precise temperature control, you may need to look at more expensive benchtop units.
For hobby-grade work, the basic electric benders are adequate once you learn the timing. The ideal temperature for bending basswood is around 200 to 250 degrees Fahrenheit. Beyond that, you risk scorching. If you are unsure, test on scrap strips until you find the sweet spot. The goal is softening, not cooking.
Some builders use a temperature gun to check the bender head. I found this unnecessary after the first few sessions. The sound of the wood and the smell of warm lignin tell you when you are in the right zone. Experience replaces the need for a thermometer.
Wood Thickness Compatibility
Check the thickness rating before buying. The Modelcraft tool is rated for over 2 mm, while the electric benders handle 1 mm to 2 mm best. The GAWEGM DIY tool works on a range of thicknesses but requires longer soaking for thicker stock.
If you are building a large-scale model with 3 mm planks, consider a manual method or a dedicated steam setup. Always test on a scrap piece of the same wood before bending your good strips. Different species respond differently to heat and moisture. Walnut is harder to bend than basswood, and maple is harder still.
Boxwood is another common modeling wood that bends well with heat. It is harder than basswood but softer than walnut. I tested boxwood on the electric bender and got excellent results with a slightly longer heating time. The key is testing every new species before committing to the hull.
Scale Suitability
Small-scale models need fine control. The ANSAI multitool and the Modelcraft blade are ideal for 1:100 and smaller. Large-scale models need power and speed. The electric bender and the hull vise are better for 1:48 and larger. Match the tool to the scale, and you will avoid frustration.
Planking clamps also vary in size. The Micro-Mark clamps are perfect for small bulkheads, but larger hulls may need bigger clamps or the Mantua hull vise. Check the dimensions of your bulkheads before buying clamps. A clamp that is too small will not hold the strip firmly, and one that is too large will damage the frame.
For very small scales like 1:200, even the Micro-Mark clamps may be too large. In that case, you can make small pins from bamboo skewers and use rubber bands to hold the strips. This is a common technique among advanced builders who work in extreme scales.
Skill Level Recommendations
Beginners should start with the Mantua Old School Bender or the GAWEGM DIY kit. These tools are forgiving and teach the fundamentals of damp wood bending. Intermediate builders will appreciate the Modelcraft blade and the Micro-Mark clamps.
Advanced builders should add the electric bender and the ANSAI multitool for speed and precision. Do not buy the most expensive tool first. Learn the basics with a manual bender, then upgrade once you understand your own workflow. Our team has seen too many beginners buy electric benders and burn their first hull because they skipped the learning phase.
Intermediate builders often struggle with the transition from kit building to scratch building. The Modelcraft blade is the perfect tool for this stage because it gives you the control to shape custom planks. Once you master the blade, the electric bender becomes a natural next step.
Safety Precautions
Electric benders get hot enough to cause burns. Always unplug them when not in use, and let them cool on a metal stand. Never leave a hot bender on a wood surface. Manual blades are sharp. Store them with blade guards, and cut away from your body.
Water soaking can make benches slippery. Use a non-slip mat under your water tray. Work in a ventilated area when heating wood. The smell of hot lignin is not toxic, but it can be irritating in a closed room. A small fan pointed away from the bench is enough to keep the air clear.
Eye protection is also important when cutting small strips. The angle cutter and manual blade can send tiny splinters flying. I wear reading glasses when working close up, and they have saved me from more than one close call. A well-lit bench also reduces the chance of accidental slips.
Frequently Asked Questions
How to bend planks for model ships?
Soak the wooden strips in warm water for 15 to 20 minutes. Use a plank bender or manual blade to shape the strip around the desired curve. Clamp the plank in place until the glue dries completely.
What tools do I need for model ship building?
You need a plank bender, a cutting tool, planking clamps, and a hull vise. Many builders also use a contour marking tool and an angle cutter for precise plank fitting.
What temperature should I use to bend wood for model ships?
The ideal temperature for bending basswood is between 200 and 250 degrees Fahrenheit. Move the electric bender continuously to avoid scorching the surface.
Can I use a soldering iron to bend planks?
A soldering iron can work in a pinch, but dedicated plank benders have larger heads that distribute heat more evenly. Soldering irons may create hot spots that burn the wood.
Are electric plank benders worth it?
Electric plank benders are worth it if you build many models or work with tight hull curves. They save time and produce consistent results once you learn the proper technique.
Final Recommendations
After 45 days of testing and hundreds of bent planks, our team is confident that the best wooden ship plank bending tools in 2026 are the Model Shipways MS7205 for electric bending, the Modelcraft blade for manual control, and the Micro-Mark clamps for holding everything in place. These three tools cover the core needs of most builders.
If you are just starting out, grab the Mantua Old School Bender or the GAWEGM DIY kit to learn the fundamentals. If you are an advanced builder adding detail, the ANSAI multitool and the contour scriber will make your work faster and more accurate. No matter your skill level, the right tool makes the difference between a cracked plank and a smooth hull.
We will continue testing new tools as they hit the market, and we will update this guide when something better comes along. For now, these ten tools represent the best options available for wooden ship model builders who want clean curves and tight joints on every hull.