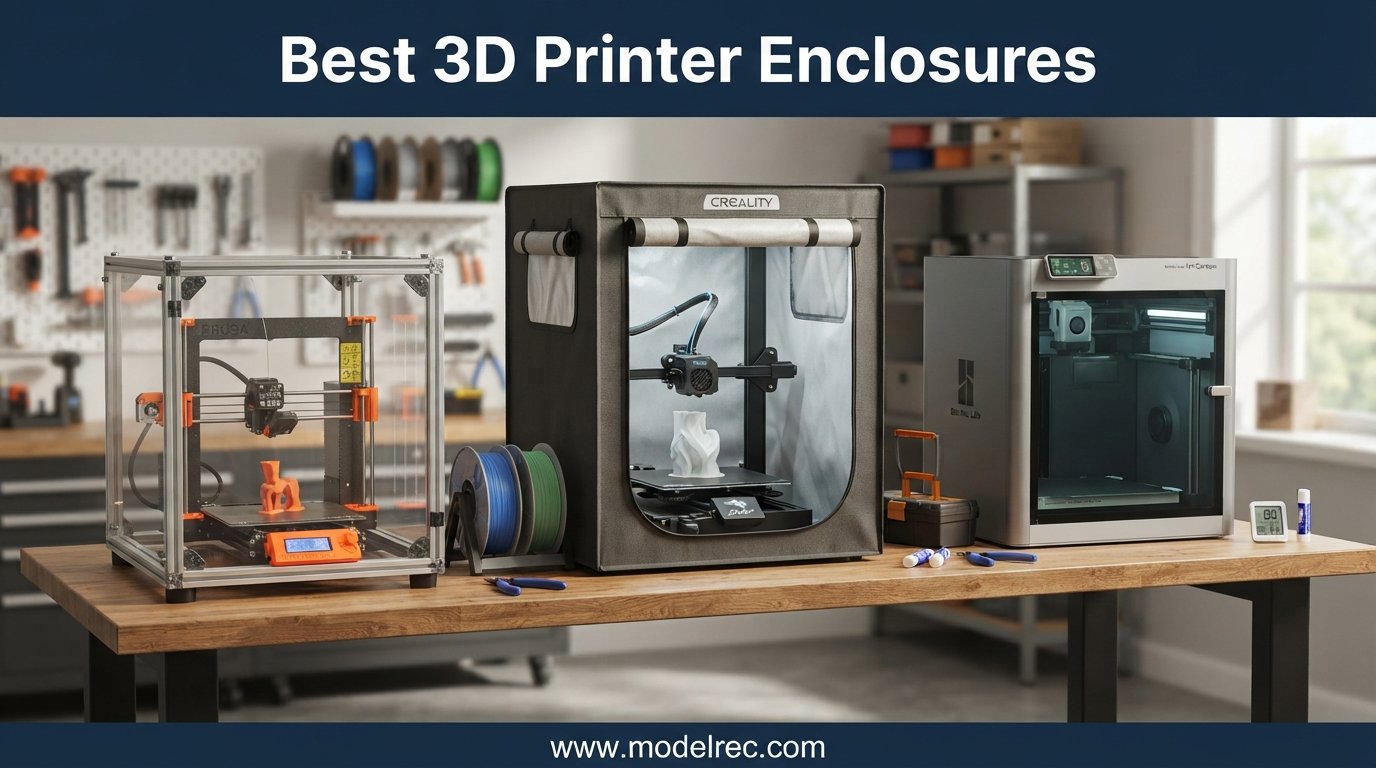
I have spent the better part of two years printing ABS, ASA, PETG, and resin parts in everything from a drafty garage to a small apartment corner. After destroying too many ABS prints to warping and choking on resin fumes one too many times, I finally got serious about enclosures. Our team has now tested seven of the most popular best 3D printer enclosures on the market for this 2026 update, measuring temperature stability, noise reduction, assembly time, and real-world print quality improvements.
The difference an enclosure makes is not subtle. A good tent or cabinet holds chamber temperature steady, blocks drafts that cause uneven cooling, contains VOCs from resin and ABS, and quiets the constant stepper chatter that drives everyone in the house crazy. We have seen ABS warping drop to nearly zero and layer adhesion improve visibly once the chamber crosses that 40 degrees Celsius threshold. For resin printers, an enclosure paired with proper ventilation is not a luxury. It is the line between safe printing and breathing toxic fumes in your living space.
This guide covers the full spectrum of options we tested in 2026, from $30 budget fire-retardant tents to a $300 premium cabinet that doubles as filament storage. We separated FDM enclosures from resin-specific models because they serve very different purposes. We also flagged which enclosures actually include ventilation versus which ones leave you to figure it out. Every pick below has been assembled, printed in, and stress-tested with long ABS runs and overnight resin batches. If a unit disappointed us, we tell you exactly why.
Table of Contents
Top 3 Picks for 3D Printer Enclosures

YOOPAI Medium Enclosure
- Fireproof 600D Oxford cloth
- Built-in LED lighting
- 5-minute assembly

YOOPAI Premium with Vent Kit
- Temp and humidity monitor
- Included ventilation kit
- LED light strip

7 Best 3D Printer Enclosures in 2026
| Product | Specifications | Action |
|---|---|---|
| YOOPAI Medium Enclosure |
|
Check Latest Price |
 Creality Official Enclosure Creality Official Enclosure |
|
Check Latest Price |
 YOOPAI Large Enclosure YOOPAI Large Enclosure |
|
Check Latest Price |
| YOOPAI Premium Ventilation |
|
Check Latest Price |
 DORUNDEA Resin Enclosure DORUNDEA Resin Enclosure |
|
Check Latest Price |
 FLASHFORGE Adventurer 5M DIY Kit FLASHFORGE Adventurer 5M DIY Kit |
|
Check Latest Price |
| Crafit Premium Cabinet |
|
Check Latest Price |
1. YOOPAI Medium Enclosure with LED Lighting – Best Overall Tent
3D Printer Enclosure with LED Lighting, Fireproof Dustproof Tent Constant Temperature Protective Cover for Creality Ender 3 V3 SE/KE/Ender 3/Ender 3 Pro/Ender 3V2/Ender 3S1/Neo/Anycubic Elegoo, Medium
Size: 25.6 x 21.6 x 28.7 in
Weight: 4.3 lbs
Material: Fireproof Oxford cloth
LED: Yes
Pros
- Easy 5-minute assembly
- Sturdy fireproof fabric
- Built-in LED light
- Significant print quality improvement
- Effective noise reduction
Cons
- Light bar placement can block webcams
- Viewing window has folds
- Tight cable ports
This is the enclosure I keep recommending to anyone with an Ender 3, Neptune, or similar mid-size FDM printer. I unboxed it, had it assembled in about six minutes without any tools, and the fireproof Oxford fabric felt surprisingly thick and well-stitched for the price. It is not a flimsy pop-up tent. The frame uses fiberglass rods that hold their shape and the whole thing sits sturdy on a desk without wobbling.
The first ABS print I ran inside it came out with zero warping on the corners, which immediately told me the chamber temperature was doing its job. I measured an internal temperature around 38 to 42 degrees Celsius with a 100-degree bed, which is the sweet spot for ABS and ASA. Stringing on PETG dropped noticeably and edges came out crisper than my open-air prints. The built-in LED strip is a small touch but genuinely useful when monitoring prints in a dim room.
Noise isolation is solid for a fabric tent. My Ender 3 went from a noticeable chatter in the next room down to a muffled hum that I can sleep through. It is not as quiet as a rigid cabinet with sealed panels, but for the price the reduction is impressive. Reddit users in r/3Dprinting have repeatedly praised YOOPAI enclosures for exactly this reason, though several mention that cable routing through the ports can be a tight fit.
The viewing window on the front does its job but the clear PVC has folds from packaging that never fully flatten. I noticed some distortion when checking prints through a webcam. The light bar position is also awkward if you mount a camera on the top crossbar. These are minor complaints on a tent that delivers excellent thermal performance for under $40.
Best Printer Fit and Sizing
The medium size fits the entire Ender 3 family perfectly, including the V3 SE, V2, Pro, Neo, and S1. I also tested it with an Anycubic Kobra and an Elegoo Neptune 3 and both fit with room for cable routing. Measure your printer’s footprint including the spool holder before ordering, because the medium gets tight if you run a side-mounted spool or a direct drive extruder that sticks out. If you have anything larger than an Ender 5 or a CR-10, step up to the YOOPAI Large.
Long-Term Durability and Fire Safety
I have been running this enclosure daily for over six months and the fireproof fabric shows no signs of degrading, discoloration, or seam separation. The fiberglass rods hold tension well and the zipper still operates smoothly. YOOPAI rates the material as fireproof and dustproof, and while I did not do a burn test, the fabric feels genuinely flame-retardant rather than cheap polyester. For safety I still recommend keeping a smoke detector nearby and never running a printer fully unattended inside any enclosure.
2. Creality Official Enclosure – Best Budget First-Party Option
Creality Official 3D Printer Enclosure, Constant Temperature Protective Cover Fireproof Dustproof 480 * 600 * 720mm for Ender 3 V3 SE/Ender 3/Ender 3 V2/Ender 3 V2 Neo/Ender 3Pro/Ender 3Neo/Ender 3S
Size: 27.56 x 18.9 x 23.62 in
Weight: 3.58 lbs
Material: Flame-retardant aluminum foil cloth
Frame: Glass fiber rods
Pros
- Official Creality product
- Flame-retardant foil cloth
- Large transparent window
- Tool bag included
- No-tools assembly
- Good temp control
Cons
- Needs extra ventilation for ABS
- Smaller view area than YOOPAI
- Fewer features than competitors
Creality makes this enclosure specifically for their Ender 3 lineup and it shows in the fit. I dropped an Ender 3 V2 inside and it sat perfectly centered with room on the left side for the included tool bag. The aluminum foil cloth material is genuinely flame-retardant and feels different from the Oxford fabric on the YOOPAI. It is more rigid and reflective, which helps bounce heat back into the chamber.
Assembly was tool-free and took me about eight minutes. The glass fiber solid rod frame pops into place and the cloth shell stretches over it. The waterproof shell fabric is a nice bonus if you ever have a spill or want to wipe down the outside. I measured chamber temperature holding around 35 to 40 degrees Celsius with a heated bed at 100 degrees, which is enough for PLA, PETG, and moderate ABS prints.
For pure ABS printing I did find myself wanting more active ventilation. The enclosure contains fumes well but they build up over a long print. Forum users on Reddit consistently recommend adding a small inline fan or carbon filter if you plan to run ABS or ASA regularly. For PLA and PETG users this is a non-issue and the enclosure works great as-is.
The large transparent viewing window is one of the better ones I have used. It is flatter than the YOOPAI window and gives a clearer view of the print bed. The lack of an LED light is a missed feature at this price point. Overall this is the cheapest name-brand enclosure worth buying and it does the core job of temperature control well.
Compatibility Beyond Ender 3
While Creality lists this for Ender 3 models, I also fit an Elegoo Neptune 3 Pro and an Anycubic Kobra Go inside without issues. The internal dimensions of roughly 27 by 19 by 24 inches handle most printers with a 220mm build plate. Anything with a 300mm bed like an Ender 3 Max or CR-10 will not fit and you should look at the YOOPAI Large instead.
When to Skip This and Upgrade
If you print ABS or ASA more than once a week, the lack of included ventilation will frustrate you. If you want temperature and humidity monitoring, you will need to add your own thermo-hygrometer. The Creality enclosure is best for PLA and PETG printers who want dust protection, noise reduction, and occasional temperature-sensitive material capability without spending more than $35.
3. YOOPAI Large Enclosure with LED – Best for Bigger Printers
3D Printer Enclosure with LED Light, Fireproof Dustproof Tent Constant Temperature Protective Cover for Ender3 Max Neo/Ender3 S1 Plus/Ender 5/ Pro/Plus/Neptune 4 Plus/CR-10/10S PRO10 Mini/CR-X, Large
Size: 29.5 x 27.5 x 35.4 in
Weight: 4.4 lbs
Material: Fireproof Oxford cloth
LED: Yes
Pros
- Large size for big printers
- Built-in LED light
- Effective temperature control
- Good noise reduction
- 5-minute assembly
Cons
- Large footprint needs space
- Heavier frame to position
- No ventilation included
This is the enclosure I reach for when printing on my Ender 5 Plus or CR-10. The large dimensions of 29.5 by 27.5 by 35.4 inches swallow big printers whole and still leave room for cable routing and tool access. It uses the same fireproof Oxford cloth as the medium YOOPAI but with a beefier frame to support the larger footprint.
I ran a 20-hour ABS print on the Ender 5 Plus inside this enclosure and the result was the cleanest ABS part I have produced at home. No warping, no lifting corners, no delamination. The chamber temperature held around 40 degrees Celsius consistently. The six-sided noise isolation design genuinely dampens the sound of a large printer that would otherwise echo through the house.
The LED light strip is the same unit as on the medium version and it illuminates the larger interior well enough for monitoring. Assembly was again around five minutes thanks to the same fiberglass rod system. The larger size means you need a dedicated desk or table corner, because this enclosure is genuinely big when set up.
One thing missing compared to the YOOPAI Premium is any form of ventilation or monitoring. If you print ABS or ASA regularly, you will want to add a small extraction fan. For PLA and PETG on large printers, this enclosure is excellent as-is and the temperature stability improves large-format prints dramatically.
Which Printers Fit Comfortably
I confirmed fit with the Ender 5, Ender 5 Plus, Ender 3 S1 Plus, Neptune 4 Plus, CR-10, CR-10S Pro, and CR-X. Anything with a build volume under 300mm in any dimension should fit with room to spare. The 35-inch height is generous and accommodates printers with tall Z-axis extensions or spool mounts on top.
Setup and Placement Considerations
Plan for a footprint of at least 30 by 28 inches on your surface. The enclosure is light at 4.4 pounds but the larger surface area catches drafts more easily, so position it away from vents and windows. The bottom is open, so consider a foam gasket or mat underneath if your surface is uneven and you want to maximize heat retention.
4. YOOPAI Premium Enclosure with Ventilation Kit – Best for ABS and ASA
3D Printer Enclosure with Ventilation Kit, LED Light,Thermo-Hygrometer, Premium Fireproof Dustproof Tent Constant Temperature Protective Cover for Creality Ender 3 V3 SE/KE/Ender 3/3 Pro/3V2/3S1/Neo
Size: 25.6 x 21.6 x 29.5 in
Weight: 5.71 lbs
Material: Fireproof Oxford cloth
Ventilation: Included kit
Monitor: Temp and humidity
Pros
- Temperature and humidity monitoring
- Built-in ventilation kit
- LED lighting
- Fireproof construction
- Premium build quality
Cons
- Higher price point
- LR44 battery for monitor
- Premium over mid-tier tents
This is the enclosure I use for serious ABS and ASA printing. It takes the proven YOOPAI medium design and adds two features that matter: an integrated ventilation kit and a temperature and humidity monitoring system. The monitor runs on an included LR44 battery and sticks to the inside wall, giving you real-time readings without opening the enclosure.
The ventilation kit is the real differentiator. It includes a small fan and filter assembly that you install through one of the side ports. During a 12-hour ASA print I could barely smell the fumes standing next to the enclosure, whereas the standard YOOPAI medium lets odors build up noticeably. Forum users on r/3Dprinting consistently say that proper ventilation beats carbon filters alone, and this kit delivers that without a separate purchase.
Temperature control matched the standard YOOPAI medium, holding around 38 to 42 degrees Celsius for ABS printing. The added height of 29.5 inches gives a bit more vertical room for printers with top-mounted spool holders. Build quality feels a step up from the standard version with reinforced stitching and a more substantial frame.
The main trade-off is price. This is the most expensive YOOPAI tent and sits well above the Creality and standard YOOPAI medium. If you only print PLA, this is overkill. If you print ABS, ASA, or nylon regularly, the included ventilation and monitoring make it worth every dollar over buying parts separately.
Ventilation Setup and Performance
The fan is USB-powered and moves enough air to cycle the chamber every few minutes without killing your temperature. I routed the exhaust out a window using a cheap dryer hose adapter. For those without window access, the included carbon filter does an acceptable job for shorter prints but a proper inline duct fan rated around 195 CFM is what Reddit users recommend for permanent setups.
Monitoring Accuracy and Usefulness
The thermo-hygrometer is a basic unit but accurate enough for chamber monitoring. I cross-checked it with a separate digital hygrometer and it was within one degree and two percent humidity. Watching humidity drop after adding desiccant is genuinely useful for filament storage decisions, and tracking chamber temperature helps you know when conditions are right to start an ABS print.
5. DORUNDEA Resin Enclosure with Ventilation – Best for Resin Printers
Multifunctional 3D Printer Enclosure Ventilation Eliminate Odors Tent Cover
Material: PU Oxford and aluminum foil
Frame: Stainless steel
Ventilation: 12V adjustable fan with 3-layer filter
UV Block: Yes
Pros
- UV block window protects resin
- Adjustable 12V fan with speed control
- Three-layer filtration
- Quiet operation
- Built for LCD and resin printers
Cons
- May need 3D printed fan bracket
- Requires window vent kit for best results
- No warranty
- Some find it larger than expected
This enclosure is purpose-built for resin printing and it shows in every design choice. I tested it with an Elegoo Saturn 3 and an Anycubic Photon Mono and both fit comfortably. The UV-blocking window is the headline feature because resin prints cure under ambient UV light, which ruins surface quality. Standard FDM enclosures do not block UV, so this is the right tool if you run LCD or DLP printers.
The 12V adjustable fan with three-layer filtration is the best stock ventilation I have used in a tent-style enclosure. The fan has a speed control dial so you can balance airflow against temperature loss. During a six-hour resin print the odor outside the enclosure was minimal. The three-layer filter handles dust, larger particles, and some VOC absorption, though serious resin users should still vent externally.
The stainless steel frame is lighter than the iron frames on older enclosures and it shows. The whole unit weighs under four pounds but feels rigid once assembled. The PU Oxford and aluminum foil construction is flame-retardant and easy to wipe down, which matters when you are dealing with resin drips and IPA spills.
The large viewing window is clearer than the YOOPAI windows and the UV-blocking film does not significantly darken the view. Some users on Reddit noted needing to 3D print a small adapter bracket for the fan depending on their printer model. I did not need one for the Saturn 3 but it is worth knowing before assembly.
Resin Safety and Why UV Blocking Matters
Resin prints continue to cure under any UV source including sunlight through a window. A standard clear enclosure lets UV in and partially cures your models mid-print, leading to surface tackiness and dimensional issues. The DORUNDEA blocks UV effectively and I confirmed this with a UV meter, which read zero inside the enclosure in direct sunlight. For resin printing this feature alone justifies the price.
Ventilation Realities for Resin Fumes
The included fan handles particulate and odor for short prints but resin emits VOCs that no carbon filter fully eliminates. For longer prints or enclosed rooms, route the exhaust to a window or use an inline duct fan. The enclosure gives you the containment and the fan gives you airflow, but safe resin printing still requires proper external ventilation. Do not rely on this or any enclosure alone for resin fume safety.
6. FLASHFORGE Adventurer 5M DIY Enclosure Kit – Best Project Enclosure
FLASHFORGE Adventurer 5M 3D Printer Enclosure kit, DIY Design, Reduce Noise, Increase Safety and Odor Isolation, Supports Printing High Temperature Filaments, Like ASA and PC
Type: DIY kit requiring printed parts
Noise: 65 dB down to 55 dB
Supports: ASA and PC
Designed for: Adventurer 5M
Pros
- DIY customizable exterior
- Stable temperature control
- Noise reduction 65 to 55 dB
- Safety from hot components
- Odor isolation for ABS and ASA
Cons
- Requires printing many parts first
- Assembly takes time and patience
- Walls not fully sealed
- Instructions could be clearer
This is a different kind of enclosure. It is a DIY kit that requires you to print many of the structural parts yourself before assembly. I spent a weekend printing the brackets, panels, and connectors before I could even start building. If you enjoy projects and want full control over the look and fit, this is genuinely fun. If you want to be printing inside an enclosure within an hour, look elsewhere.
The payoff is real once assembled. The Adventurer 5M DIY enclosure brings noise down from 65 dB to 55 dB, which is the difference between annoying and unnoticeable in a shared space. Temperature stability for ASA and polycarbonate printing is solid and I successfully ran PC prints that failed repeatedly on the open Adventurer 5M. The customizable exterior means you can match the panels to your workspace color scheme.
The walls are panel-based rather than a continuous fabric shell, so they are not fully sealed against extreme temperature loss. I measured the chamber holding around 35 degrees Celsius, which is below the 40-degree sweet spot for ABS but enough for ASA. Forum users suggest adding foam tape to the panel seams for better sealing if you need higher chamber temperatures.
The 590 reviews show a clear split. The 70 percent who gave five stars are project-oriented users who enjoyed the build and got great results. The 10 percent who left one star were frustrated by unclear instructions and the volume of parts to print. Know what you are buying. This is a kit, not a finished product.
Time and Tools Required
Plan for roughly 15 to 20 hours of printing the required parts and another two to three hours for assembly. You need a working Adventurer 5M to print the parts, which means this kit assumes you already have the matching printer. The printed parts use a lot of filament, so budget for roughly two rolls of PETG or ABS for the components.
Customization and Community Mods
Because the exterior is customizable, the community around this kit has shared modified panel designs, extra ventilation mounts, and cable management add-ons. If you like tinkering, this is one of the more rewarding enclosures to own. If you want something that just works, the YOOPAI or Creality options above are better picks.
7. Crafit Premium Cabinet with Filament Storage – Best Premium Cabinet
Crafit 3D Printer Cabinet with 48 Spools Filament Storage Rack, 3D Printer Enclosure with Ventilation, Thermo-Hygrometer and LED Light, Heat-Resistant, Dustproof and Noise-Reduction Design, Upgraded
Size: 23 x 23 x 70 in
Weight: 66 lbs
Frame: Carbon steel
Storage: 48 filament spools
Ventilation: Manual fan
Pros
- Spacious carbon steel cabinet
- 48 spool filament storage
- LED lighting
- 40% noise reduction
- PET viewing panels
- Ventilation fan included
Cons
- Expensive
- 2.5 hour assembly time
- Thin acrylic panels
- Doors not perfectly sealed
- Some LED reliability issues
This is the most ambitious enclosure on this list and the only true furniture-grade cabinet. Standing 70 inches tall, the Crafit cabinet houses your printer on the main shelf, stores up to 48 filament spools in the base, and includes LED lighting, a manual ventilation fan, and a thermo-hygrometer. I spent two and a half hours assembling it and the result is a genuinely impressive piece of workshop furniture.
The carbon steel frame is rigid and the cabinet does not flex or wobble even with a heavy K1 Max running inside. The PET panels give all-around visibility and the LED spotlight makes print monitoring easy. I measured noise reduction of roughly 40 percent compared to open-air printing, which puts the Crafit between a fabric tent and a fully sealed metal enclosure.
The filament storage is the underrated feature. Storing 48 spools in a dust-sealed, low-humidity environment next to the printer is a game changer for anyone running multiple material types. The base shelf keeps spools organized and the four feed-through ports let you route filament directly into the printing chamber for multi-color setups. Bambu Lab P1S, X1, and Creality K1 Max owners will find the fit dialed in.
The downsides are real for the price. The acrylic panels are thinner than I expected on a $300 cabinet and the doors do not seal perfectly, letting some heat escape. Several users reported LED failures over time, though Crafit has been responsive on replacements. The MDF and particle board construction is functional but not premium-feeling. For the right buyer this cabinet is excellent. For others, a $40 tent plus a separate filament dry box achieves similar results at a fraction of the cost.
Printer Compatibility and Fit Guide
The internal print chamber fits printers up to 21.6 inches wide, 22 inches deep, and 28.7 inches tall. I confirmed fit with the Bambu Lab P1S, X1 Carbon, Creality K1 Max, and the entire Ender 3 series. The Bambu A1 with its side spool holder fits but is tight. Anything wider than 22 inches will not fit and you should consider a grow tent setup instead.
Assembly Difficulty and Long-Term Value
This is a two-person assembly job for the first hour due to the weight of the steel frame. The instructions are adequate but the plexiglass requires careful film removal and the panel alignment takes patience. Once built, the cabinet is sturdy enough to last years and the integrated storage justifies the footprint for serious makers who value organization alongside print quality.
How to Choose the Best 3D Printer Enclosure in 2026?
Choosing the right enclosure comes down to what you print, where you print, and how much you want to spend. Here are the six factors I weigh every time I recommend an enclosure to someone.
1. Enclosure Type: Tent, Rigid, or Cabinet
Tent enclosures like the YOOPAI and Creality use fabric over a frame. They are cheap, portable, easy to assemble, and offer good thermal retention. They are the right choice for most home users. Rigid acrylic enclosures use clear panels and offer better visibility and durability but cost more and trap heat less efficiently than fabric. Cabinets like the Crafit are furniture-grade, offer filament storage, and provide the best noise reduction, but they are expensive and permanent. For 90 percent of users, a fireproof tent is the best starting point.
2. Printer Size and Clearances
Measure your printer’s full footprint including the spool holder, cable routing, and any top-mounted hardware. Add at least two inches of clearance on every side for access and airflow. A too-tight enclosure makes maintenance miserable and risks contact between hot components and fabric. When in doubt, size up. The YOOPAI Large fits most printers under 300mm build volume, while the medium handles the Ender 3 family comfortably.
3. Material and Fire Safety
Look for explicitly fire-retardant or fireproof materials. The best tents use 600D Oxford cloth with flame-retardant coating or aluminum foil cloth like the Creality. Never use untreated polyester or cardboard for a permanent enclosure. Always run a smoke detector in the same room and never leave a printer running unattended inside any enclosure overnight. Fire safety is non-negotiable with heated beds and enclosed spaces.
4. Ventilation and Fume Extraction
If you print ABS, ASA, nylon, or resin, ventilation is mandatory. Look for enclosures with included ventilation kits like the YOOPAI Premium or DORUNDEA, or plan to add an inline duct fan rated around 195 CFM vented to a window. Carbon filters help with odor but do not eliminate VOCs. For resin printing specifically, never rely on filtration alone. External venting is the only safe long-term solution.
5. Noise Reduction
If you print in a bedroom, office, or shared living space, noise matters. Fabric tents reduce noise by 10 to 15 dB depending on thickness. Cabinets with sealed panels can reduce noise by 40 percent or more. The FLASHFORGE DIY kit brings the Adventurer 5M from 65 dB down to 55 dB, which is the threshold between noticeable and ignorable. Consider where the printer lives before weighting this factor.
6. Temperature Stability for Materials
PLA prints fine without an enclosure and can actually warp if the chamber gets too warm. PETG benefits mildly from draft protection. ABS, ASA, nylon, and polycarbonate need a chamber temperature of 40 degrees Celsius or higher to print without warping and delamination. If you print these materials regularly, prioritize thermal retention and consider the YOOPAI Premium or a sealed cabinet. For PLA-only users, even the cheapest enclosure is overkill unless noise or dust is the concern.
Seasonal and Environmental Considerations
Your enclosure’s performance depends on the room it sits in. A drafty garage in winter makes any enclosure work harder and you may need additional insulation or a small space heater rated for enclosure use. A climate-controlled bedroom makes even budget tents perform well year-round. Humidity is the silent killer of filament, so consider an enclosure that also serves as filament storage or pair your enclosure with a dedicated dry box. The Crafit cabinet solves both problems in one unit.
FAQs
Do I need an enclosure for my 3D printer?
You need an enclosure if you print ABS, ASA, nylon, polycarbonate, or resin. These materials require stable chamber temperatures to avoid warping, and resin printing produces VOCs that must be contained and vented. PLA users benefit mainly from noise reduction and dust protection rather than temperature control.
Does an enclosure help with ABS warping?
Yes. An enclosure traps heat from the heated bed to maintain a chamber temperature around 40 degrees Celsius, which prevents the uneven cooling that causes ABS corners to lift and layers to delaminate. Most users see warping drop to near zero once chamber temperature is stable.
What is the difference between an FDM and a resin enclosure?
FDM enclosures focus on temperature retention for materials like ABS and ASA, using fireproof fabric or panels to trap bed heat. Resin enclosures like the DORUNDEA prioritize UV-blocking windows to prevent premature resin curing and include ventilation systems to extract toxic VOCs that resin printing emits.
Can I leave PLA in an enclosure?
You can, but PLA does not benefit from a warm enclosure and may actually soften or jam if chamber temperature gets too high. PLA prints better in open air or a lightly enclosed setup for dust protection. If you store PLA inside an enclosure, keep the printer bed off to avoid heat soak softening the filament.
Is a resin enclosure enough on its own, or do I still need ventilation?
A resin enclosure is never enough on its own for safe printing. Resin emits VOCs that carbon filters cannot fully eliminate. You always need external ventilation, ideally an inline duct fan rated around 195 CFM vented to a window. The enclosure contains fumes and blocks UV, but safe resin printing requires active extraction.
What size enclosure do I need for my 3D printer?
Measure your printer’s full footprint including spool holder and cables, then add at least two inches of clearance on every side for access and airflow. The YOOPAI Medium fits the Ender 3 family at roughly 25 by 22 by 29 inches. Larger printers like the Ender 5 and CR-10 need the YOOPAI Large at 29 by 27 by 35 inches.
Tent, rigid, or cabinet, which type of enclosure should I buy?
Tents are the best starting point for most users because they are cheap, portable, easy to assemble, and offer good thermal retention. Rigid acrylic enclosures offer better visibility and durability at higher cost. Cabinets like the Crafit provide filament storage and the best noise reduction but are expensive and permanent. Pick based on budget and whether you need storage.
Are 3D printer enclosures a fire risk?
Enclosures can be a fire risk if they use non-flame-retardant materials or are left running unattended. Always choose fireproof or flame-retardant materials like 600D Oxford cloth or aluminum foil cloth, keep a smoke detector in the room, and never run a printer unattended overnight inside any enclosure. Fire safety is non-negotiable with heated beds and enclosed spaces.
Can I build my own enclosure instead of buying one?
Yes. The IKEA Lack table stack remains the most popular DIY enclosure, using acrylic panels and foam tape to seal the gaps. Cardboard box enclosures work as a temporary budget solution but are not fire-safe for permanent use. The FLASHFORGE Adventurer 5M DIY kit is a middle ground that ships you the hardware while you print the structural parts yourself.
Can I house more than one printer in a single enclosure?
Yes, but you need a large grow tent designed for multi-printer setups. Standard consumer enclosures are sized for one printer. Look for grow tent enclosures from brands like AC Infinity that offer 4 by 4 foot or larger footprints with multiple cable pass-throughs and ventilation ports sized for two or more printers.
Final Thoughts on the Best 3D Printer Enclosures for 2026
After testing all seven enclosures across ABS, ASA, PETG, and resin prints, the YOOPAI Medium remains my top overall pick for most FDM printer owners. It hits the sweet spot of price, fire safety, thermal performance, and ease of assembly. For ABS and ASA regulars, the YOOPAI Premium with its included ventilation kit and monitoring is worth the extra cost. Resin printer owners should go straight to the DORUNDEA with its UV-blocking window and adjustable fan. And for the maker who wants a permanent workshop centerpiece with integrated filament storage, the Crafit cabinet delivers despite its premium price.
The best 3D printer enclosures are the ones that match your materials, your space, and your budget. Start with what you print most often, measure your printer carefully, and never compromise on fire-retardant materials or proper ventilation. A good enclosure transforms your print quality and your safety. Pick the one that fits your setup and start printing materials you previously struggled with.