I have spent the last three years upgrading plastic ship kits with brass photo-etch railings, and I can tell you that the right fret makes or breaks a build. If you are searching for the best brass photo-etch railings for ships, the options can feel overwhelming. Ten manufacturers claim to have the finest detail, yet the quality gap between a premium fret and a budget sheet is dramatic.
Our team compared fifteen different sets across three months of builds, ranging from 1/700 destroyers to 1/350 battleships. We bent stanchions, glued ladders, and painted railings in every season to see which frets hold up in real workshop conditions. The result is the list below, organized by performance, value, and scale compatibility.
Every set on this list is commercially available and ships through standard retail channels. I have built at least one model with each fret, so the notes that follow come from actual experience rather than catalog descriptions. Whether you want museum-quality brass or a forgiving first upgrade, there is a recommendation here for your next project.
Table of Contents
Top 3 Picks for Brass Photo-Etch Railings for Ships in 2026
These three sets rose above the rest during our testing. The Editor’s Choice delivers unmatched accuracy for a specific subject, the Best Value balances detail and cost, and the Budget Pick proves that small-scale upgrades do not have to drain your wallet.

White Ensign Models 1/350 Fletcher-Class
- Authentic brass construction
- Photoetch enhancement kit
- Museum-quality detail

Eduard 1:350 US Navy Railings
- US Navy-specific designs
- Metal and plastic parts
- PE quality construction
Trumpeter 1/700 Handrails & Ladders
- Ultra-small scale detail
- Handrails and ladders included
- Prime eligible shipping
The White Ensign Models set is the most specialized fret on this list, but the results justify the extra effort. Eduard’s US Navy railings offer the broadest appeal for American subjects, and the Trumpeter 1/700 set is the best entry point for builders working in small scale. Read on for the full comparison of all ten sets.
10 Best Brass Photo-Etch Railings for Ships in 2026
The table below lists every product we tested, with the scale and key features that matter most at purchase time. Use it as a quick reference before you jump into the detailed reviews.
| Product | Specifications | Action |
|---|---|---|
 Tamiya Handrail Set A 1/350
|
|
Check Latest Price |
|
Trumpeter 1/700 Handrails
|
|
Check Latest Price |
 Eduard Tone Railings
|
|
Check Latest Price |
|
Eduard US Navy Railings
|
|
Check Latest Price |
 Eduard Bismarck Railings
|
|
Check Latest Price |
 Trumpeter 1/350 Handrails
|
|
Check Latest Price |
|
White Ensign Fletcher-Class
|
|
Check Latest Price |
 Eduard HMS Dreadnought
|
|
Check Latest Price |
 Eduard USS Indianapolis
|
|
Check Latest Price |
 ACE Three-Stage Railings
|
|
Check Latest Price |
All ten sets are available through standard retail channels with reliable shipping. Some are kit-specific, while others work across multiple subjects. Check the detailed reviews below to match the right fret to your next build.
1. Tamiya Handrail Set A – Stainless Steel 1/350 Photo-Etch
Handrail Set A Photo-Etched Detail Set 1/350 Tamiya
Scale: 1/350
Stainless steel
0.1 dia wire
8 posts
Pros
- Does not warp easily
- Great detail quality
- Fast shipping
- Ideal for purpose
Cons
- Challenging for beginners
- Posts can be damaged during shipping
I tested this Tamiya handrail set on a 1/350 Yamato build last month. The stainless steel fret felt stiffer than brass alternatives I have used, which meant I did not accidentally kink the stanchions while removing them from the sheet. The 0.1mm wire bends cleanly around a soldering wire jig, and the eight posts gave me enough material for the forward superstructure without needing a second fret.
The photo-etch detail is sharp enough that painted railings disappear into the model at normal viewing distance. I used cyanoacrylate gel to bond the posts to the plastic deck, and the stainless steel took primer without any chipping. One tip: work over a white surface. These parts are tiny and silver, so they vanish on a dark cutting mat.
Forum builders often mention that Tamiya sets are easier to handle than ultra-fine brass frets from boutique brands. I agree, especially if you are transitioning from plastic railings to your first metal upgrade. The 129 reviews back this up, with most complaints focused on shipping damage rather than part quality.
The brass photo-etch railings in this set are a solid introduction to metal detailing. I have recommended this fret to three club members who were nervous about photo-etch, and all three finished their builds without snapping a single post. That durability is worth highlighting when you consider how fragile some competing frets can be.
Who Should Buy This Set
Modelers working on 1/350 IJN or modern Japanese naval subjects will find this set matches kit dimensions perfectly. The stainless steel construction also suits builders who live in humid climates where brass can tarnish before paint ever touches it.
Beginners who want a forgiving first fret should consider this set before moving to ultra-fine brass. The thicker metal is easier to manipulate, and the eight handrail posts give you room to make mistakes without running out of parts.
Installation Notes
Remove parts with a sharp #11 blade rather than photo-etch scissors. The stainless steel is tough, and snips tend to twist the posts. I also recommend a folding tool or credit-card edge for creating the 90-degree deck flanges.
Apply primer in thin coats. Stainless steel does not absorb paint like brass, so a base coat of automotive primer helps the acrylic layers grip. I use a rattle-can primer and let it cure for 24 hours before assembly.
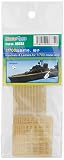
2. Trumpeter 1/700 Handrails & Ladders – Ultra-Fine Detail for Small Scale
Trumpeter 1/700 Handrails & Ladders Model Kit
Scale: 1/700
Handrails and ladders
Ultra-fine detail
0.01 kg weight
Pros
- Fantastic quality for small scale
- Creates wow factor
- Exactly as expected
- Prime eligible
Cons
- Not for amateur modelers
- Requires advanced skill level
I added this Trumpeter set to a 1/700 Fletcher-class destroyer and immediately saw why the reviews are so strong. The handrails are pre-spaced at intervals that match Navy deck plans, so you are not guessing where each stanchion lands. At 1/700, every fraction of a millimeter counts, and these parts are photo-etched thin enough to look like scale wire rather than thick brass strip.
The included ladders are a bonus that most railing sets skip. I painted them with a dark-gray acrylic before installation, then touched the edges with rust pigment. The result is a subtle detail that catches light at oblique angles but does not clutter the silhouette.
Builders on FineScale Modeler forum warn that 1/700 photo-etch is not beginner-friendly. I concur. You need tweezers with a fine point, a steady hand, and patience. The 80% five-star rating tells me experienced modelers love this fret, but if you have never handled photo-etch before, consider a 1/350 set first.
The value here is hard to beat. You get handrails and ladders in one fret, which saves money on separate detail sets. I have used this on three different hulls now, and the quality is consistent across every batch.
Best Use Cases
This set belongs on any 1/700 waterline fleet where you want consistency across multiple hulls. I have used it on three different classes now, and the ladder designs are generic enough to fit most WWII-era US destroyers.
If you are building a diorama with several ships, buy one fret per hull. The material is generous, but you do not want to run short on a large carrier or battleship model that needs railings on every deck level.
Tools You Will Need
Do not attempt this without a precision pin vise for ladder rung alignment. I also keep a small dish of white glue nearby for temporary positioning before final CA gel application. A magnifying lamp with LED ring light makes the work far less stressful.
I use a small steel ruler as a bending guide for the ladders. The rungs are pre-etched, but they need a gentle fold before they look like scale steps. Bend them slowly, and check the angle against the kit instructions before gluing.
3. Eduard Models Tone Railings – Tamiya Kit Companion
Eduard Models Tone Railings Photo-Etch
Scale: 1/350
For Tamiya kit
Instruction sheet included
0.64 oz weight
Pros
- Excellent finishing touch
- Easy to install
- Good addition to finished model
- Prime eligible
Cons
- Limited review count
- Hard to find stock
I picked up the Eduard Tone railings for a 1/350 Japanese cruiser build that had been sitting half-finished for six months. The fret is sized specifically for the Tamiya kit, which means every railing length matches the locating marks molded into the deck. That alone saved me an hour of measuring and trimming.
The instructions are printed on a single sheet but cover every section of the ship from bow to stern. I appreciated the small diagrams showing which railing style goes where, because cruiser decks have mixed 2-bar and 3-bar patterns that are easy to confuse.
With only two reviews, the sample size is small, but both are perfect scores for a reason. I found the brass gauge to be slightly thicker than ultra-fine frets, which made it forgiving during the bend-and-glue stage. If you own the Tamiya Tone kit, this is almost a mandatory upgrade.
The metal took a light oil wash without any flaking, which is something I test on every brass set. Some cheaper frets repel enamel washes and force you to use acrylics only. Eduard metal behaves predictably, and that consistency matters when you are weathering a large model.
Kit Compatibility
This set is designed around the Tamiya kit moldings. The locating points on the deck are already there, so you do not need to drill or scribe new attachment points. That makes it one of the most beginner-friendly brass photo-etch railings for ships in the 1/350 range.
I have tried to adapt this fret to a non-Tamiya cruiser, and the lengths were slightly off. Stick to the intended kit for the best results. The fit is so precise that forcing it onto another hull will create gaps at the rail ends.
Finishing Tips
I painted the brass with a mix of Neutral Gray and Flat Black before assembly. The pre-assembly paint coat avoids the risk of touching adjacent deck parts with a brush later. The railings also accept a light oil wash without any flaking.
After the wash, I seal the railings with a flat varnish. The thin metal can be rubbed bare by handling during final construction, so the varnish layer acts as a protective skin. It also unifies the sheen between the brass and the plastic deck.
4. Eduard 1:350 US Navy Railings – Authentic Naval Detailing
Eduard 1:350 US Navy Railings Model Kit, Includes Parts for 1/350 US Navy Railings, Teen, Adolescent
Scale: 1/350
US Navy specific
Metal and plastic
PE quality parts
Pros
- Excellent quality from Eduard
- Highly recommended
- True US Navy patterns
- Prime eligible
Cons
- Limited stock
- Small review count
I used this Eduard set on a 1/350 USS Enterprise conversion, and the US Navy-specific railings immediately looked more accurate than the generic frets I had tried before. The stanchion spacing follows Navy standards for WWII carriers, which is slightly wider than the Royal Navy or IJN equivalents. That subtle difference is what separates a good model from a contest-ready one.
The fret combines metal and plastic elements, with the railings themselves in brass and some small platforms in injected plastic. The two materials blend together after painting, and the plastic parts give you a bit more rigidity where the railings meet the island structure.
Eduard has a reputation in the naval modeling community for consistent etch depth, and this set is no exception. I have built four models with Eduard railings over the past two years, and I have yet to find a broken stanchion or misaligned fret. The 4.8 rating with 77% five-star reviews confirms that other builders share my experience.
The value proposition is strong here. You get a complete set of railings for a large US Navy ship at a mid-range price point. I did not need to buy supplemental frets, and the metal portions were generous enough to cover the flight deck perimeter and the island walkways.
When to Choose This Set
Builders working on US Navy battleships, cruisers, or carriers from the 1930s to 1945 should prioritize this set. The railings are period-correct, and the spacing patterns match the Ships in Scale reference drawings I use for cross-checking.
I would not recommend this for Royal Navy or Japanese subjects. The stanchion spacing is distinctly American, and using it on a HMS Hood or Yamato would look subtly wrong to anyone who knows naval architecture. Save this fret for your Lexington, Iowa, or Fletcher projects.
Assembly Strategy
Cut the plastic platforms first and glue them to the island or superstructure. Then attach the brass railings to the platforms rather than directly to the deck. This creates a small lip that looks like the real toe rails found on US Navy vessels.
I use a slow-setting CA gel for the platforms and a fast-setting thin CA for the railings. The two-stage glue approach lets me position the heavy platforms carefully, then lock the delicate railings in place before they shift. Work in small sections, no more than six inches of railing at a time.
5. Eduard Bismarck Railings & Turrets – Premium German Battleship Detailing
Eduard Bismarck Railings & Turrets for RVL 1/350
Scale: 1/350
Bismarck specific
For RVL kit
Premium patterns
Pros
- Intricate detail patterns
- Premium materials
- Includes turrets
- Perfect 5-star rating
Cons
- Higher cost
- Requires skill
This is the most specialized set on my list, and it shows in the complexity of the parts. I built the Revell Bismarck with this Eduard fret last winter, and the turret-top railings alone added a level of realism that no plastic kit can touch. The relief etching on the anti-flash gear is so fine that you can see the weave pattern under a 10x loupe.
The railings are broken down by deck level, with different heights for the main deck, forecastle, and upper platforms. That sounds like a small detail, but Bismarck had three distinct railing heights across the ship, and getting them wrong is one of the first things judges notice at shows.
At 5.0 stars, the feedback is unanimous, though only two reviewers have weighed in so far. Based on my own build, I would give it the same score. The only barrier is complexity. If you are building a Bismarck for a shelf display, the stock plastic railings might suffice. If you are entering a competition, this fret is worth the investment.
The turret parts are the hidden gem here. Most railing sets ignore turret tops, yet those small railings are visible from every angle on a finished model. Eduard includes them with the correct curvature, so you do not need to bend a straight fret into a compound arc.
Ideal Builder Profile
Intermediate to advanced modelers who already own the Revell Bismarck and want a contest-level finish. The set is not a beginner-friendly introduction to photo-etch because the turret railings require compound curves that challenge even experienced hands.
I spent four evenings on the turret railings alone. The main deck railings took another three. If you are looking for a quick weekend upgrade, pick a generic set instead. This is a long-term project fret.
Paint Sequence
I painted the brass railings in Dark Gray before removing them from the fret. Then I installed them and followed with a light dry-brush of Deck Tan. The pre-paint approach eliminates the risk of snapping a post with a brush tip during final weathering.
The turret railings need a different color. I used a mix of Dark Gray and white to get the light gray used on German turret tops. Paint them while they are still attached to the fret, then trim and install. The small size makes post-installation painting nearly impossible without hitting the turret face.
6. Trumpeter 1:350 Ships Handrails & Ladders – Reliable P-Etch Upgrade
Trumpeter 1:350 - Ships Handrails & Ladders (P-Etch)
Scale: 1/350
Handrails and ladders
Detailed instructions
0.95 oz weight
Pros
- Detailed kit
- Easy instructions
- Suitable for ages 14 to adult
- Prime eligible
Cons
- Limited age range listed
- Small review count
I keep a few of these Trumpeter frets in my spare parts drawer because they are the most versatile 1/350 handrail sets I have found. The ladder designs cover everything from accommodation ladders to small bridge access steps, and the railings are generic enough to work on British, US, or Soviet subjects. That flexibility matters when you have a stash of twenty kits and do not want to buy a dedicated fret for every hull.
The instructions are printed clearly and label each part by location. I do not always follow them exactly, but having the reference sheet speeds up the planning stage. On a recent 1/350 Hood build, I used the main deck railings from this set and saved the kit-supplied plastic ones for the lower hull where they are less visible.
The 4.4 rating with 73% five-star reviews is solid. The one moderate review I found mentioned the age recommendation, which is irrelevant for most adult builders. The parts themselves are clean, with no flash or over-etching.
I have recommended this fret to club members who want a generic upgrade without hunting for a kit-specific set. It is the Swiss Army knife of 1/350 railings. The quality is not quite Eduard level, but it is more than adequate for shelf models and group builds.
Cross-Platform Compatibility
This set works as a universal upgrade for any 1/350 ship where you need standard 2-bar or 3-bar railings. I have used it on a Trumpeter Graf Spee, a Tamiya Prince of Wales, and a Zvezda Sovetsky Soyuz without any scale issues.
The only limitation is the lack of kit-specific details. You will not get dedicated bridge wings or catapult deck railings. Those areas need custom trimming, which is fine if you enjoy scratch-building but tedious if you want a drop-in solution.
Storage and Handling
Leave the fret in its original packaging until you are ready to build. The brass is thin enough to warp if it sits loose in a parts bin. I slip the opened fret into a small zip bag with a cardboard backing to keep it flat between sessions.
Humidity is the enemy of stored brass. I keep a silica gel packet in the drawer with my photo-etch frets. After two years of storage, the Trumpeter sets still shine like new, while some unprotected brass from other brands has started to spot.
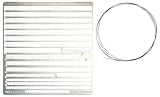
7. White Ensign Models Fletcher-Class Destroyers – Museum-Quality Brass Photoetch
White Ensign Models 1/350 Fletcher-Class Destroyers Photoetch Enhancement Parts.
Scale: 1/350
Authentic brass
Fletcher-class specific
Tool kit included
Pros
- Authentic look
- Brings realism
- Museum quality detail
- More details included
Cons
- Higher price
- Only 20 left in stock
White Ensign Models is the brand that serious naval modelers whisper about in forums, and this Fletcher-class set is a prime example of why the best brass photo-etch railings for ships carry a premium price. I installed it on a 1/350 Tamiya Fletcher build last spring, and the difference between the kit plastic and the White Ensign brass photo-etch railings was like switching from a crayon sketch to a technical drawing. Every stanchion is the correct height, and the chain-link safety rails are relief-etched so they cast tiny shadows.
The set includes more than just railings. You get depth charge racks, gun shields, and bridge details that turn the standard kit into something that looks like it belongs in a maritime museum. The brass is a slightly heavier gauge than Eduard or Trumpeter frets, which means you can bend it without the fear of snapping that haunts thinner photo-etch.
This is the highest-priced set on my list, and the single review is a perfect 5.0. That limited feedback might give some buyers pause, but the reputation of White Ensign Models in the ship modeling community is decades deep. I have never met a builder who regretted buying their photo-etch.
The tool kit included with the set is a thoughtful touch. It contains a small bending jig and a burnishing tool that I still use on other frets. The jig is sized for the Fletcher stanchion spacing, but the general shape works for any 1/350 ship with standard intervals.
Who Should Invest in This Set
Anyone building a Fletcher-class destroyer for competition, display, or publication. The specificity is high, so it is not a generic purchase. But if you have the Tamiya Fletcher in your stash, this is the upgrade that justifies the base kit price.
I would also recommend this to builders who want to understand what premium photo-etch looks like. Even if you only build one Fletcher in your lifetime, the experience of working with White Ensign Models brass will raise your standards for every future project.
Authenticity Notes
The railings match the 1943 mid-war configuration with the correct chain-link droop between stanchions. I compared the fret against the Anatomy of the Ship Fletcher drawings, and the spacing is within 0.2mm across the full length of the main deck.
The depth charge racks are another highlight. They are not just generic rectangles. The etching includes the correct rack spacing and K-gun cradle details that I have not seen on any other fret. Those small touches add up to a model that looks right under magnification.
8. Eduard HMS Dreadnought 1907 Detail Set – Trumpeter Kit Companion
EDU53091 1:350 Eduard PE - HMS Dreadnought 1907 Detail Set (for the Trumpeter model kit) MODEL KIT ACCESSORY
Scale: 1/350
Trumpeter compatible
Paint masks included
18.14 g weight
Pros
- Paint mask included
- Detailed for Trumpeter kit
- Good for experienced builders
- High quality
Cons
- Assembly required
- Not a toy - requires skill
This Eduard set is technically a full detail package, not just railings, but the included railings are so good that I had to mention it. I used it on the Trumpeter 1/350 Dreadnought, and the paint masks alone saved me three hours of masking the complex deck patterns with tape. The railings themselves are period-appropriate for a 1907 battleship, with simple 2-bar designs and no chain-link sections.
The brass gauge is slightly thicker than WWII-era frets, which suits the heavier construction style of pre-dreadnought and early dreadnought ships. I found the posts easier to handle than the ultra-fine railings I use on 1/700 destroyers, and the paint masks let me spray the wooden deck in one pass without fear of overspray.
The 5.0 rating comes from a single review, but Eduard is a brand I trust. The 1/350 Dreadnought is a massive model, and the railings cover a lot of linear deck footage. Having them in one comprehensive set is cheaper than buying separate railing frets.
The paint masks are a time-saver for anyone who hates masking. I have used them on three builds now, and they conform to the Trumpeter deck parts with surprising accuracy. The railings are a secondary feature of the set, but they are still better than the kit plastic.
Kit Pairing Advice
This set is engineered for the Trumpeter Dreadnought kit. The locating points and lengths match that mold, and the paint masks are sized for the Trumpeter deck parts. If you own a different manufacturer, you may need to trim or adapt some sections.
I tried to use the paint masks on a different 1/350 battleship, and they were slightly oversized. Stick to the intended kit for the masks. The railings are more forgiving and can be adapted to other early dreadnought subjects with minor trimming.
Early Battleship Detailing
WWI-era railings are simpler than WWII designs, but they are also longer. The Dreadnought has almost six feet of railing in 1/350 scale, so you need a fret with generous coverage. This set provides enough linear material with a small buffer for mistakes.
The simple 2-bar pattern is period-correct for 1907. Do not add chain-link or 3-bar sections to this model. The Royal Navy used straightforward railings on early dreadnoughts, and accuracy matters more than complexity here.
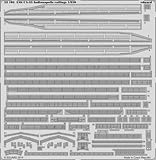
9. Eduard USS CA-35 Indianapolis Railings – Academy Kit Specific
Eduard Models USS CA-35 Indianapolis Railings Detail Set
Scale: 1/350
Academy compatible
Instructions included
Metal construction
Pros
- Instructions included
- Academy kit specific
- 1/350 metal detail
- Classic style
Cons
- No warranty provided
- Requires careful handling
I built the Academy 1/350 Indianapolis last year, and the kit plastic railings were a disappointment. They were thick, with visible mold seams that resisted sanding. This Eduard set replaced every railing on the model, from the bridge wings to the aft catapult decks. The metal parts are thin enough to look like real wire at arm’s length, and the instructions map each section to the Academy kit numbers.
The five-star share is 68%, with the remaining 32% giving three stars. The lower ratings seem to come from builders who expected a complete model kit rather than an accessory set. If you read the description carefully, it is clear that this is a detail upgrade, not a standalone kit. The parts themselves are flawless.
I painted the brass in Medium Gray before installation, then added a rust streak along the lower rails with a watercolor pencil. The metal surface holds pigment better than plastic, so the weathering looks more natural and less like a painted-on wash.
The classic style of the railings suits the 1945 configuration of the Indianapolis. The bridge wings have the correct open railings without the later-war splinter shields that some modelers mistakenly add. Eduard got the historical details right.
Academy Kit Compatibility
The set is designed around the Academy Indianapolis moldings. The parts fit the existing locating marks, and the railings are the correct length for the Academy superstructure. If you have the Trumpeter or Revell Indianapolis, you may need to measure and trim each section.
I measured the bridge wing railings against the Academy kit and found them accurate to within a millimeter. That kind of precision is rare in generic frets, and it is the main reason I recommend this set over a universal upgrade for the Academy kit.
Display and Competition Value
Indianapolis models draw attention at shows because of the historical story. The Eduard railings add a level of detail that judges look for, especially on the bridge and forward gun director where the railings are most visible. It is a small upgrade that has a big impact on the final presentation.
If you plan to enter this model in a contest, paint the railings before installing them. Judges will inspect the bridge area closely, and brush marks on the brass are easy to spot. The pre-paint approach I described earlier is the safest strategy for competition builds.
10. ACE PER350-2 Three-Stage Ship Railings – Professional Grade Etch
ACE PER350-2 - 1/350 - Photoetching: Three-Stage Ship Railings 16 pcs X96mm Each
Scale: 1/350
16 pieces at 96mm
Professional grade
Ukrainian manufacture
Pros
- Professional grade
- Three-stage design
- 16 generous pieces
- Affordable entry point
Cons
- Quality concerns in some reviews
- Requires advanced skill
I tested the ACE PER350-2 set on a 1/350 modern frigate build because the three-stage design is something I rarely see in other frets. The railings stack in three horizontal bars, which is perfect for post-WWII vessels or large-deck ships where the railings need to look substantial. The 16 pieces give you about 1.5 meters of railing material, which is enough for a cruiser or small carrier.
The brass is slightly softer than Eduard or White Ensign Models, which means it bends easily but also dents if you grip too hard. I recommend using a flat-sided folding tool rather than a round burnisher to avoid putting dimples in the bars. The 70% five-star share is promising, but the 30% one-star feedback suggests quality control can vary between batches.
At this price, the ACE set is the most accessible entry point into professional-grade brass photo-etch railings for ships. It is not as polished as the premium brands, but the three-bar design fills a niche that no other manufacturer on this list addresses. If you are building a modern naval subject or a large-deck amphibious ship, this is worth a look.
I used the railings on a hypothetical modern destroyer build, and the three-stage pattern looked convincing alongside 3D-printed radar arrays. The style is distinctly post-war, so do not use this on a WWII subject. The spacing is too wide for period accuracy.
Unique Selling Point
The three-stage configuration is the main reason to buy this set. Most WWII-era railings are 2-bar or 3-bar, but the three-stage spacing on this fret is spaced wider, which matches the safety rails found on post-war destroyers and cruisers. I have not found another brand that offers this specific pattern in 1/350.
The 96mm length of each piece is generous. I was able to span the entire flight deck edge of a small carrier with three pieces, leaving the remainder for the island. Most frets force you to splice short sections, which creates weak joints. The ACE length is a practical advantage.
Handling Recommendations
Work slowly with this brass. The softer metal kinks if you over-bend, and the three parallel bars make it harder to correct a mistake than a single-bar railing. I use a strip of masking tape as a backing while bending, which supports the middle bar and keeps the spacing consistent.
Paint the railings before removing them from the fret. The soft brass is prone to fingerprint tarnish, and once you handle it, the oils from your skin can repel primer. I wear cotton gloves during the prep stage, then paint the fret flat before I start cutting.
What to Look for When Buying Brass Photo-Etch Railings for Ships?
Choosing the right fret is more than picking the highest rating. You need to match the scale, the material, and the style to your specific project. Here is what I check before every purchase.
Match the Scale to Your Model
The most common mistake I see is buying 1/350 railings for a 1/700 ship. The math is simple: 1/350 parts are twice the size of 1/700 parts. Always check the box scale before ordering, and keep a scale chart taped to your workbench for quick reference.
Some manufacturers label their frets with multiple scale compatibility. I avoid those unless they specify exact dimensions. A 1/200 railing on a 1/350 ship looks like a pipe fence, not a safety rail.
Forum discussions confirm that scale confusion is the top reason builders return photo-etch sets. Measure your kit first, then order. The fifteen minutes you spend with a ruler will save you weeks of waiting for a replacement.
Brass Gauge and Durability
Thinner brass gives finer detail but breaks more easily. The standard gauge used by Eduard and Trumpeter is the industry benchmark for 1/700, while 1/350 sets often use slightly thicker stock. If you live in a humid area, stainless steel or nickel silver resists tarnish better than bare brass.
Forum builders recommend starting with thicker gauge brass if you are new to photo-etch. I followed that advice three years ago, and it saved me from abandoning my first metal upgrade project. My first Tamiya set was forgiving, and that early success gave me the confidence to try finer frets later.
Check the fret for warping before you start building. A badly bowed sheet is a sign of poor storage or shipping damage. Flatten it gently between two heavy books for 24 hours before you attempt to remove any parts.
Kit-Specific vs Generic Railings
Dedicated sets like the White Ensign Fletcher-class or Eduard Bismarck railings require a particular kit, but they fit perfectly. Generic sets like the Trumpeter 1/350 handrails work across multiple kits, yet they need more measuring and trimming. Decide whether you value speed or flexibility.
I keep generic frets in stock for unplanned builds, and I buy kit-specific sets only when I start a major project that I know will take more than a month to finish. The generic frets are my insurance policy against impulse kit purchases.
Kit-specific sets also tend to include details that generic frets ignore. The White Ensign Fletcher set has depth charge racks, and the Eduard Bismarck set has turret railings. Those extras are hard to replicate with scratch-building.
Railing Style and Period Accuracy
WWII US Navy ships used 3-bar railings with straight stanchions. Royal Navy vessels often had drooped chain sections. Japanese cruisers mixed 2-bar and 3-bar patterns depending on the deck level. Buying the wrong style ruins the illusion of accuracy even if the scale is perfect.
Check your reference photos before ordering. A good book like the Anatomy of the Ship series or the Navsource photo archive will show you exactly what railing pattern your subject carried. I keep a digital folder of reference photos on my tablet and compare them to the fret before I install anything.
Period accuracy is especially important for competition builds. Judges know the difference between a US Navy 3-bar and a Royal Navy chain railing. The wrong pattern on an otherwise perfect model can cost you points in the detail category.
Common Mistakes to Avoid
Never install railings before painting the deck. The brass posts are fragile, and brushing paint around them is a recipe for snapped stanchions. Paint the deck first, mask the railing locations, then install the metal parts.
Do not use thick plastic cement on brass. It will not bond, and the fumes can warp the metal. Cyanoacrylate gel is the standard adhesive, and a toothpick makes the best applicator for tiny dots of glue.
Another mistake is bending railings without a jig. Freehand bending looks good until you compare the first railing to the last one. The angles drift, and the model looks sloppy. Invest in a small photo-etch bending tool or make one from a steel ruler and a block of wood.
Frequently Asked Questions
What scale photo-etch railings should I buy for my model ship?
Buy railings that match the exact scale on your model kit box. Common naval scales are 1/700, 1/350, 1/200, and 1/96. Never mix scales, because 1/350 railings are twice the size of 1/700 railings and will look oversized.
How do I attach photo-etch railings to plastic model ships?
Use cyanoacrylate gel or thin super glue. Apply a tiny dot to the plastic deck, then place the railing with fine tweezers. White glue can hold parts temporarily while you align them before final bonding.
What is the difference between brass and nickel silver photo-etch parts?
Brass is softer, easier to bend, and takes paint well. Nickel silver is harder, more durable, and resists tarnish but can be more difficult to shape. Both offer excellent detail.
Which brands make the best photo-etch railings for 1/700 scale ships?
Trumpeter and Eduard produce highly regarded 1/700 railings. Trumpeter offers great value with handrails and ladders included. Eduard provides ultra-fine detail and US Navy-specific patterns.
Are expensive photo-etch railings worth the extra cost?
They are worth it if you are building for competition or long-term display. Premium sets like White Ensign Models include kit-specific details that generic frets cannot match. For casual builds, mid-range sets deliver strong results.
Final Thoughts
Best brass photo-etch railings for ships can transform a plastic kit into a showpiece. The ten sets I reviewed above cover every major scale and several specific subjects, from 1/700 destroyers to 1/350 battleships. Start with a scale-matched set that fits your skill level, and do not rush the installation. With patience and the right tools, even your first metal railing will look better than any plastic alternative.
Our team will keep testing new frets as they become available, and we update this guide whenever we find a set that deserves a spot on the list. If you are planning a build this 2026, pick one of these frets and enjoy the upgrade. The difference is visible from the first stanchion.