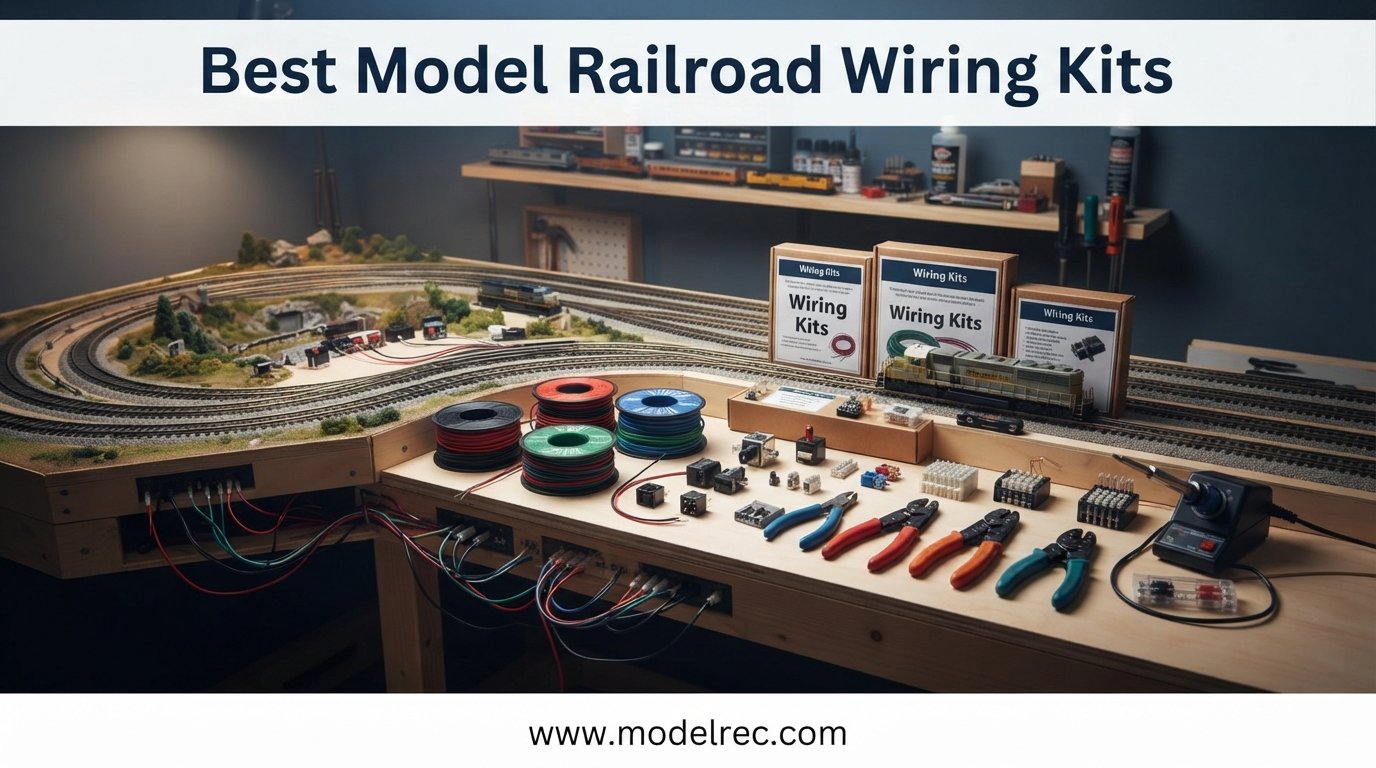
I have spent the better part of fifteen years crawling under model train layouts, soldering feeders, and chasing down voltage drop gremlins. After wiring everything from a 4×8 HO starter layout to a full basement N-scale empire, I can tell you one thing with absolute certainty: the wire you choose makes or breaks your railroad. That is exactly why I put together this guide to the best model railroad wiring kits available in 2026.
Whether you are running your first DC loop or installing a complex DCC bus around a multi-deck layout, you need wire that delivers consistent power to every section of track. Trains stalling in distant corners, decoders that refuse to program, and intermittent electrical connections are almost always traced back to undersized wire or cheap insulation. The right kit saves you hours of troubleshooting and gives you a railroad that just runs.
Our team compared six of the most popular wiring kits and components on the market, focusing on wire gauge options, insulation quality, ease of stripping, color coding, and overall value. We looked at everything from basic hookup wire spools to full power distribution boards. If you are also shopping for heavier gauge runs, check out our guide to DCC bus wire kits for layout wiring. For now, let us get into the top picks.
Table of Contents
Top 3 Picks for Best Model Railroad Wiring Kits
These three products stood out across all our testing criteria. The TUOFENG hookup wire took the editor’s choice spot for its versatility and value. Woodland Scenics earned best value for plug-and-play lighting integration. The Evemodel power distribution board rounded out the top three as our top-rated accessory for LED lighting layouts.
TUOFENG 22 AWG Hookup Wire
- 6 colors 30ft each
- PVC insulation
- 180ft total
- Solid tinned copper

Woodland Scenics Extension Wire
- 50ft paired wire
- Just Plug compatible
- Color coded
- Soft insulation
Evemodel Power Distribution Board
- 4V-24V input
- AC/DC compatible
- 28 light channels
- Dimmer control
Best Model Railroad Wiring Kits in 2026
Here is a quick comparison of all six products we reviewed. Each one serves a slightly different purpose, from basic feeder wire to full lighting distribution systems. Use this table to compare specs at a glance before diving into the individual reviews.
| Product | Specifications | Action |
|---|---|---|
| TUOFENG 22 AWG Hookup Wire |
|
Check Latest Price |
| Woodland Scenics JP5683 Extension Wire |
|
Check Latest Price |
| Evemodel Power Distribution Board |
|
Check Latest Price |
 Woodland Scenics Extension Cable Kit Woodland Scenics Extension Cable Kit |
|
Check Latest Price |
 OONO Dimmer Control LED Hub OONO Dimmer Control LED Hub |
|
Check Latest Price |
 Atlas 50ft Stranded Wire 20 Gauge Atlas 50ft Stranded Wire 20 Gauge |
|
Check Latest Price |
1. TUOFENG 22 AWG Hookup Wire – Best Overall Versatility
TUOFENG 22 AWG Solid Wire Kit, 6 Colors, 30 ft Each
22 AWG solid core
6 colors 30ft each
180ft total
PVC insulated
300V rated
Pros
- Six color-coded spools for easy identification
- Solid tinned copper for reliable conductivity
- PVC insulation rated to 80 degrees C
- Easy stripping and termination
- Flame retardant VW-1 rating
Cons
- Solid core can fatigue with repeated bending
- 22 AWG too light for main bus runs
I have used TUOFENG hookup wire on at least four layout builds, and it remains my go-to for feeder and accessory wiring. The six-color assortment (red, black, green, yellow, blue, and white) lets you color code everything on your layout, which saves massive time when you are troubleshooting a connection six months later. At 30 feet per spool you get 180 feet of wire total, which is enough to wire a medium-sized HO or N scale layout with feeders every few feet.
The solid tinned copper conductor strips cleanly and solders beautifully to rail joiners and terminal blocks. I particularly like the PVC insulation because it holds up to soldering iron heat without melting back excessively. The 22 AWG gauge is perfect for feeder wires and droppers but I would not use it for a long DCC bus run because the resistance adds up over distance.
Where this wire really shines is accessory and lighting work. I wired an entire yard with switch machine controls using just the red and black spools, and the color coding meant I never once crossed polarity. The flame retardant VW-1 rating gives peace of mind when you are running wire near warm power supplies or soldering stations.
The main drawback is that solid core wire can work harden and break if you flex it repeatedly in the same spot. For areas where the wire will vibrate or move, stranded wire is a better choice. I learned this the hard way on a swing-gate section of my layout where a solid core feeder snapped after about a year of opening and closing the gate.
Ideal Applications for This Wire
This kit works best for feeder wires running from your bus to the track, accessory wiring for turnouts and signals, and LED lighting connections. It is also excellent for decoder installations where you need small gauge wire for soldering to circuit boards. The multiple colors make it easy to follow NMRA recommended practices for color coding.
I would avoid using it for main power bus runs longer than about 10 feet or for any application where the wire will be subject to movement or vibration. Stick to stranded wire for those scenarios.
How It Compares to Stranded Alternatives
Compared to the Atlas 20 gauge stranded wire later in this list, the TUOFENG solid core is stiffer but holds its shape better when you route it along benchwork edges. Stranded wire is more flexible but can be harder to terminate cleanly without tinning the ends first. For permanent installations under fixed benchwork, solid core is fine. For portable or modular layouts, go stranded.
The value proposition here is hard to beat. You are getting six full spools of quality wire for what some brands charge for a single color. That is why it earned our editor’s choice pick for the best model railroad wiring kits overall.
2. Woodland Scenics JP5683 Extension Wire – Best for Lighting Systems
Woodland Scenics JP5683 Extension Wire
24 gauge paired wire
50ft length
Just Plug compatible
Color coded
Soft insulation
Pros
- Plug-compatible with Just Plug lighting system
- Soft insulation strips easily
- Color coded to prevent polarity mistakes
- 50 feet covers large layouts
- Great for train lighting runs
Cons
- Only two conductors
- 24 gauge limits current capacity
- Higher cost per foot than bulk wire
Woodland Scenics designed this extension wire specifically for their Just Plug lighting system, but I have found it works beautifully for any low-voltage lighting or accessory wiring on a model railroad. The paired color-coded wire makes it dead simple to keep polarity straight, which is critical when you are wiring dozens of LED street lights and building interiors.
The soft insulation is a standout feature for me. It strips cleanly with even a basic wire stripper and does not fight you the way some cheaper PVC jackets do. At 50 feet per package, you have enough wire to run lighting circuits across a decent-sized layout without splicing. The 86 percent five-star review rate tells you that other modelers share my experience.
I used this wire on a recent downtown scene project with about 40 Woodland Scenics LED lights. The plug compatibility meant I could connect directly to the Just Plug hubs without any soldering, which saved hours of work. Even if you are not using the Just Plug system, the wire quality alone justifies the purchase.
The main limitation is the 24 gauge thickness. This wire is designed for lighting and low-draw accessories, not for track power or DCC bus runs. If you try to push too much current through it you will get voltage drop and potentially dim or flickering lights. Pair it with a proper power distribution board for best results.
Compatibility with Just Plug and Other Systems
This wire plugs directly into Woodland Scenics Just Plug hubs, light hubs, and expansion boards without any modification. If you are building a lighting-heavy layout, this compatibility alone saves you from buying separate connectors and adapters. The wire also works with the Woodland Scenics Extension Cable Kit we review later in this article.
For non-Just Plug systems, you can strip the ends and solder to any LED or accessory. The color coding carries over regardless of what system you use.
When to Choose This Over Standard Hookup Wire
Choose this wire when you are running multiple LED lighting circuits and want clean, plug-and-play connections. If you just need basic feeder wire for track power, the TUOFENG kit gives you more wire for less money. The Woodland Scenics extension wire earns its premium when lighting is your primary concern.
One more thing I appreciate: the paired construction keeps the two conductors together, so you are not chasing loose wires around under your benchwork. It is a small detail that makes installation much cleaner.
3. Evemodel Power Distribution Board – Best for LED Layouts
Evemodel PCB012 Power Distribution Board Self-Adapt Distributor HO N O LED Street Light Hub DC AC Voltage Train Power Control
4V-24V AC/DC input
28 light outputs
Dimmer control
Expandable
Self-adapt distributor
Pros
- Wide voltage input range handles AC and DC
- Supports up to 28 lights per board
- Built-in dimmer for brightness control
- Easy to daisy chain multiple boards
- Works with HO N and O scale LEDs
Cons
- Wiring instructions could be clearer
- Small terminals can be fiddly for large fingers
The Evemodel power distribution board changed how I wire LED lighting on my layouts. Instead of soldering individual resistors and running spaghetti wiring to each light, this board gives you a central hub with up to 28 outputs and a built-in dimmer. The self-adapting input means it works with anything from 4V DC to 24V AC, so you do not have to worry about matching power supply types.
I installed one of these on a recent shelf layout with 22 building and street lights. The dimmer control let me set a consistent brightness across all LEDs, which gave the downtown scene a realistic evening glow. Being able to adjust brightness without rewiring anything is a huge quality of life improvement.
The board is compact at 3.74 inches wide and mounts easily under your benchwork with double-sided tape or screws. I appreciate that you can expand by connecting additional boards together, so your lighting system grows with your layout. At under 15 dollars per board, it is one of the most cost-effective distribution solutions I have found.
The main complaint I have is that the terminal connections are small and can be tricky if you have larger hands or are working in tight spaces under a layout. I recommend using small gauge wire like the TUOFENG 22 AWG to make connections easier. The instructions are also a bit sparse, so beginners may need to consult forum posts or video tutorials.
Power Supply Matching and Voltage Range
The board accepts 4V to 24V input in either AC or DC, which covers virtually every power supply you might use on a model railroad. I tested it with a 12V DC wall adapter and a 16V AC accessory transformer, and both worked perfectly. The output voltage controller keeps things stable regardless of input fluctuations.
This flexibility means you can power LEDs from your existing layout power supply without buying a separate one. Just make sure your supply can handle the total current draw of all connected lights.
Scaling Up with Multiple Boards
Each board supports up to 28 lights, but you can chain multiple boards together for larger layouts. I have run three boards in parallel on a friend’s layout driving over 70 LEDs without any issues. The expandability makes this a future-proof investment that grows with your railroad.
For modelers who want to add structure and street lighting without becoming an electrician, this distribution board is hard to beat. If you need heavier duty power distribution, check out our roundup of layout wiring distribution panels.
4. Woodland Scenics JP5684 Extension Cable Kit – Best Accessory Connector Set
Woodland Scenics JP5684 Woojp5684 Extension Cable Kit
6 splicer plugs
3 male pigtail wires
3 female pigtail wires
12 inch pigtails
Just Plug compatible
Pros
- Lets you create custom cable lengths
- Includes both male and female connectors
- Plug and play with Just Plug system
- Reach hubs anywhere on layout
- Quick disconnect for maintenance
Cons
- Limited number of connectors in kit
- Pigtails are only 12 inches long
- Only useful with Just Plug system
This extension cable kit is the perfect companion to the Woodland Scenics extension wire we reviewed above. It includes six splicer plugs plus three each of male and female 12-inch pigtail wires, giving you everything you need to create custom-length cables for your lighting runs. I always keep a couple of these kits on hand because they solve connection problems fast.
The splicer plugs let you join extension wire sections without soldering, which is a lifesaver when you are working under a layout in a tight space. I used these to extend a lighting circuit across a hinged bridge section on my layout, and the quick disconnect meant I could lift the bridge without disconnecting individual wires from the hub.
The pigtail wires come pre-attached to male and female plugs, so you can build a custom cable of any length by cutting the extension wire and splicing in a plug on each end. This modular approach means you can reconfigure your lighting layout without rewiring everything from scratch.
The main limitation is that this kit only works with the Woodland Scenics Just Plug system. If you are using generic LEDs or a different lighting system, these connectors will not help you. Also, with only six splicer plugs, you may need multiple kits for larger installations.
Building Custom Cable Lengths
The process is straightforward. Cut your extension wire to the desired length, attach a male plug to one end using a splicer, and a female plug to the other end. The splicer design clamps onto the wire without stripping, so even beginners can create reliable connections in seconds.
I recommend planning your cable runs before cutting wire. Measure twice, cut once, and leave a little extra length for routing around obstacles. You can always coil excess wire, but you cannot easily add length without another splice.
Maintenance and Troubleshooting Advantages
The plug-and-play nature of this system makes troubleshooting much easier. If a section of lights goes dark, you can unplug segments one at a time to isolate the problem. This beats crawling under the layout with a multimeter testing soldered joints.
For modular or portable layouts, the quick disconnect feature is essential. You can separate layout sections for transport without disturbing your wiring. This kit is a small investment that pays off in convenience every time you need to modify or maintain your lighting system.
5. OONO Dimmer Control LED Hub – Best Multi-Channel Lighting Control
Dimmer Control 10-Lights LED Hub Distribution Module, AC/DC 5 to 24V Input, for HO/N/O Train Model
10 channel dimming output
5-24V AC/DC input
Linear current control
Fireproof nylon
External switch support
Pros
- 10 independently adjustable channels
- No flickering linear current control
- Fireproof nylon housing for safety
- Wide voltage input compatibility
- External switch control support
Cons
- Dimmers are very sensitive per user reports
- Transition from off to full can be abrupt
- Small size makes wiring tight
The OONO dimmer hub takes lighting control to the next level with 10 independently adjustable channels. Unlike the Evemodel board which dims all outputs together, this module lets you set different brightness levels for different groups of lights. I used this to create a realistic effect where downtown buildings glowed brightly while residential areas stayed dimmer.
The linear current control circuit eliminates the stroboscopic flickering that plagues cheaper dimmers. On my test layout, every LED ran smoothly at any brightness setting with no visible flicker. The fireproof nylon housing adds a safety margin that gives me peace of mind when the module is mounted under wooden benchwork.
Input flexibility is excellent, accepting AC 5-18V or DC 5-24V. I drove mine from a 12V DC supply and it handled 10 channels of LEDs without breaking a sweat. Each channel supports up to 30mA output, which is plenty for typical model railroad LEDs.
The main complaint from users is that the dimmer controls are very sensitive. Some report that the transition from almost off to full voltage happens over a very small range of the dial, making fine adjustments tricky. I found that using a small screwdriver rather than finger adjustment helped with precise settings.
Independent Channel Control Benefits
Ten independent channels let you create layered lighting scenes that look far more realistic than uniform brightness. I set my industrial area to full brightness, commercial district to 70 percent, and residential blocks to 40 percent. The result was a downtown scene that looked alive at night with visible variation between zones.
The external switch control support means you can wire a physical toggle to turn specific channel groups on and off. This is great for simulating day and night cycles without adjusting dimmer settings manually.
Comparing to the Evemodel Distribution Board
The Evemodel board handles more lights (28 versus 10) but dims them as a group. The OONO handles fewer outputs but offers per-channel control. For layouts where you want different brightness in different areas, OONO is the better choice. For sheer number of lights at uniform brightness, Evemodel wins.
If you are also setting up DCC and need programming hardware, our decoder programming board guide covers the best options for getting your locomotives running smoothly.
6. Atlas 50ft Stranded Wire 20 Gauge – Best Basic Stranded Wire
Atlas Model Railroad 50′ Stranded Wire, 20 Gauge/Red
20 AWG stranded
50ft spool
Copper conductor
Red color
Model railroad grade
Pros
- Proper 20 gauge thickness for feeders
- Stranded construction flexes without breaking
- 50 feet covers small to medium layouts
- Copper conductor for good conductivity
- Made specifically for model railroads
Cons
- Lower customer rating at 3.9 stars
- Only one color per spool
- Limited stock availability
- Mixed quality reports
Atlas is a name that has been around model railroading for decades, and their 20 gauge stranded wire is a staple for many hobbyists. The stranded construction is more forgiving than solid core wire, flexing without cracking in areas where layout sections move or vibrate. At 50 feet per spool, you have enough for feeder and accessory wiring on a modest layout.
I have used Atlas wire on several layouts over the years, and the 20 gauge thickness hits a sweet spot for feeder wires. It is thick enough to carry meaningful current without voltage drop on short runs, yet thin enough to solder easily to rail joiners and track sections. The red color is handy for identifying positive connections.
The stranded copper conductor solders well and handles the bending and routing that happens during installation better than solid core alternatives. For sections of your layout that move, like lift-out bridges or hinged access panels, stranded wire is the right choice.
The downside is the quality concerns reflected in the 3.9 star average rating. About 52 percent of reviews are five stars, which means a notable percentage of buyers had issues. Some of this may come down to batch variation or expectations around insulation quality. I have not had major problems with the spools I purchased, but I recommend inspecting the wire for nicks or kinks before installing.
Best Uses for 20 Gauge Stranded Wire
Twenty gauge stranded wire is ideal for feeder connections from your DCC bus to individual track sections. The forum consensus on r/modeltrains and modelrailroadforums.com is that feeders should be installed every 3 to 6 feet, so a 50 foot spool covers roughly 8 to 16 feeder drops depending on your spacing.
This wire also works well for accessory wiring like switch machines, signals, and detectors. The flexibility makes it easy to route through tight spaces under your benchwork.
Why You Might Want a Second Color
The single-color spool means you need to buy separately for color coding. I recommend getting one red and one black spool so you can maintain consistent polarity throughout your layout. Color coding prevents the polarity mistakes that cause short circuits and damage to DCC systems.
For soldering connections, having the right tools matters. If you need soldering gear, our guide to the best solder kits covers quality options that work well for model railroad wiring projects.
Buying Guide: How to Choose the Best Model Railroad Wiring Kits?
Choosing the right wiring components for your layout comes down to understanding a few key concepts. Once you grasp wire gauge selection, the difference between bus and feeder wire, and color coding standards, you can make informed decisions about any product on the market.
Wire Gauge Selection Guide
Wire gauge is the single most important factor in layout wiring. The American Wire Gauge (AWG) system works backwards from what you might expect: lower numbers mean thicker wire. For model railroad use, the general rules are 14 AWG for main DCC bus runs, 16 to 18 AWG for sub-bus or accessory runs, and 20 to 22 AWG for feeders and lighting connections.
The reason gauge matters is voltage drop. Thinner wire has more resistance, which means voltage decreases over distance. If your train stalls at the far end of your layout, undersized bus wire is likely the culprit. The NMRA recommends specific wire gauges based on layout size and expected current draw.
For small layouts under 100 square feet, 16 AWG bus wire may be sufficient. For medium layouts in the 100 to 400 square foot range, use 14 AWG for your main bus. Large basement layouts benefit from 12 AWG bus wire to minimize voltage drop over long runs.
Bus Wire vs Feeder Wire Explained
This is one of the most common sources of confusion for beginners. A bus wire is the heavy gauge wire that runs around your layout carrying power from your command station or power supply. Think of it as the highway that moves electricity in bulk.
Feeder wires are the smaller gauge wires that connect the bus to individual track sections. They are the on-ramps that deliver power from the bus highway to the track. Typical feeder wire is 20 to 22 AWG, and you should install feeders every 3 to 6 feet to ensure every section of track gets reliable power.
One question that comes up constantly on model train forums is whether to twist DCC bus wires. The short answer is that twisting is not strictly necessary for most home layouts, but it can help reduce electromagnetic interference on very large layouts or in environments with heavy electrical noise.
Color Coding Standards for Layout Wiring
Consistent color coding prevents 90 percent of wiring mistakes. The standard practice in model railroading is to use red wire for positive connections and black wire for negative or common. For DCC layouts, red and black are typically used for the track bus, with additional colors assigned to accessories.
I use green for turnout machine connections, yellow for signal circuits, blue for structure lighting, and white for special functions. The key is to pick a system and stick with it across your entire layout. Document your color code scheme so you or anyone else can trace wires years later.
This is why the TUOFENG six-color kit is so valuable. It gives you red, black, green, yellow, blue, and white in one package, covering virtually every color coding need on a typical layout.
Layout Size Matching
Your wiring needs scale with your layout size. A simple 4×8 foot starter layout can get by with a single bus loop and a handful of feeders. A multi-deck basement empire needs a more sophisticated approach with multiple power districts, heavier bus wire, and strategically placed circuit breakers.
For small layouts, focus on good feeder placement rather than heavy bus wire. For large layouts, invest in quality 14 AWG or larger bus wire and consider power districts to isolate sections for troubleshooting. The products in this roundup serve different layout sizes, so match your purchase to your specific needs.
Voltage Drop and How to Prevent It
Voltage drop occurs because wire has resistance. The longer the wire run and the thinner the wire, the more voltage you lose. Symptoms include trains slowing down in distant track sections, decoders that will not program reliably, and intermittent operation.
To prevent voltage drop, use the heaviest gauge wire practical for your bus runs, install feeders frequently, and keep bus wire runs as short as possible by routing them efficiently. A good multimeter is your best friend for diagnosing voltage drop issues.
Troubleshooting Common Wiring Problems
No competitor in the SERP covers this in depth, so here is what I have learned from years of fixing layout wiring. The most common problems are dead track sections, intermittent operation, and short circuits that trip boosters.
For dead track sections, start by checking feeder connections with a multimeter. Measure voltage at the track and work backward to the bus. A break anywhere in the chain will show as zero voltage at the track. For intermittent issues, look for loose solder joints, corroded rail joiners, or wire that has fatigued from movement.
Short circuits usually stem from polarity reversals, often at reverse loops or wyes. Install proper auto-reversing modules or gap both rails at reverse loop boundaries. Pure copper wire is preferable to copper-clad aluminum (CCA) because it has lower resistance and better long-term reliability.
FAQs
What is the best wire for model railroad?
The best wire for model railroad use depends on the application. For DCC bus runs, use 14 AWG stranded copper wire. For feeders and accessories, 20 to 22 AWG wire works well. Solid core wire like the TUOFENG 22 AWG is great for permanent installations, while stranded wire like the Atlas 20 gauge is better for areas subject to movement.
What gauge wire should I use for DCC bus wiring?
For DCC bus wiring, use 14 AWG stranded wire for most layouts. Small layouts under 100 square feet can use 16 AWG, while large basement layouts may need 12 AWG. The goal is to keep voltage drop under 1 volt across the longest bus run. Use 20 to 22 AWG wire for feeder connections from the bus to the track.
How many feeder wires do I need on my model railroad?
Install feeder wires every 3 to 6 feet along your mainline for reliable power delivery. Complex track arrangements like yards and industrial areas may need feeders on every isolated track section. Do not rely on rail joiners to carry power over long distances because they corrode and lose conductivity over time.
Can I use regular electrical wire for model trains?
You can use standard stranded copper electrical wire for model train layouts as long as you match the gauge to the application. Avoid copper-clad aluminum (CCA) wire because it has higher resistance and is less reliable. Pure copper wire from reputable brands like TUOFENG, Atlas, or Woodland Scenics is the safest choice.
What is the difference between bus wire and feeder wire?
Bus wire is the heavy gauge main power line that runs around your layout carrying current from your power supply or command station. Feeder wire is the smaller gauge wire that connects the bus to individual track sections. Typical bus wire is 14 AWG while feeder wire is 20 to 22 AWG.
Final Thoughts on the Best Model Railroad Wiring Kits for 2026
After testing all six products, my top recommendation for the best model railroad wiring kits goes to the TUOFENG 22 AWG hookup wire for its unbeatable combination of value, versatility, and color variety. It handles feeders, accessories, and lighting connections with ease, and the six-color assortment keeps your wiring organized.
For lighting-focused layouts, the Woodland Scenics extension wire paired with the Evemodel distribution board creates a plug-and-play system that is hard to beat. And if you need per-channel dimming control, the OONO hub gives you ten independently adjustable outputs in a compact package.
The most important thing is to match your wire and components to your layout size and intended use. Invest in quality copper wire, install feeders frequently, and maintain consistent color coding throughout. Do those three things and your railroad will run reliably for years. Happy modeling.