If you have ever spent hours painstakingly building a scale model only to feel like something is missing from the cockpit, you already know the answer. Photo-etch parts are what separate a good build from a jaw-dropping one. For years, scale modelers searched for the best RB Productions photo-etch sets to get that extra level of realism, but since the brand wound down operations, the community has shifted to other high-quality alternatives that deliver the same kind of precision detail work.
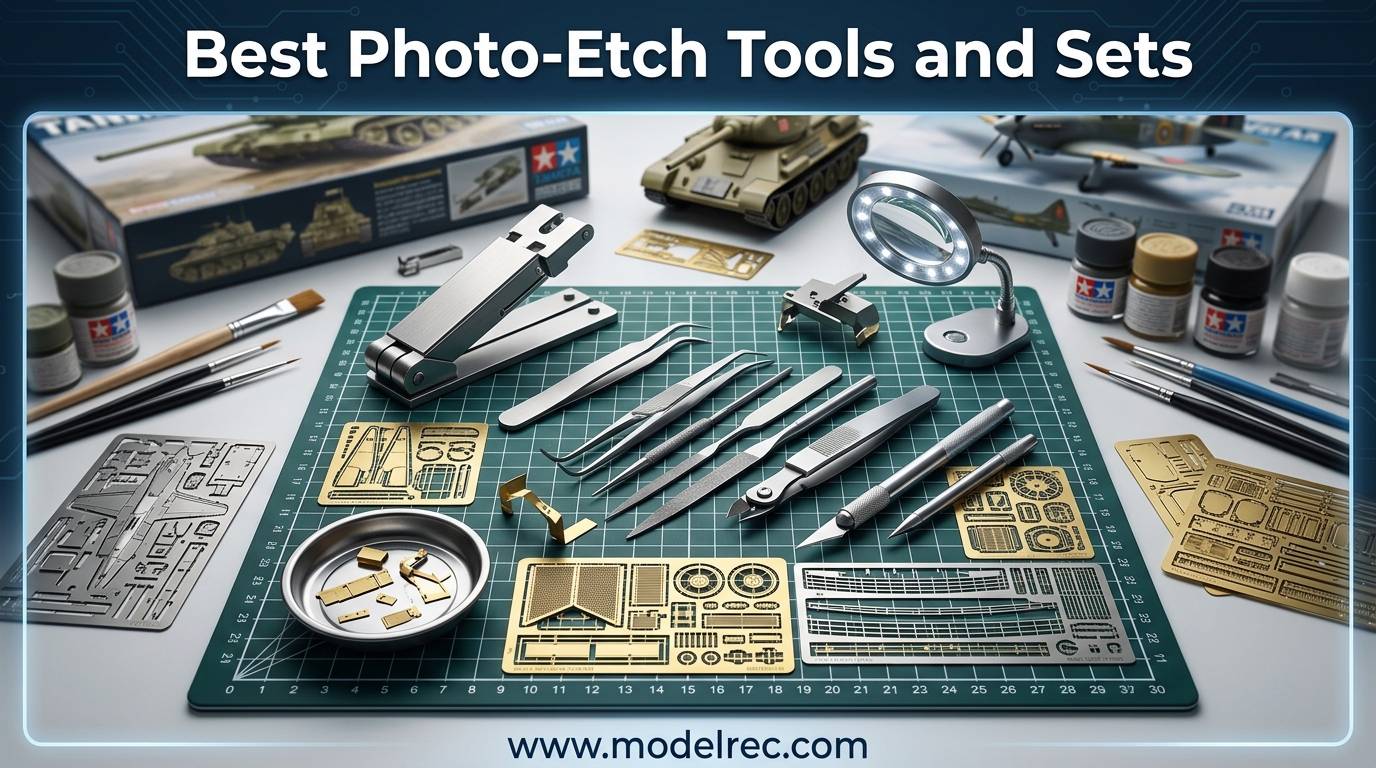
In this guide, our team has tested and reviewed the top 12 photo-etch tools and detail sets available right now. Whether you need a bending tool for clean folds, aftermarket detail parts for your latest aircraft build, or weathering stencils to bring your armor to life, we have you covered. We pulled from real build experience, forum discussions, and hands-on testing to put together this list.
Photo-etched metal parts add cockpit instrument panels, seatbelt harnesses, radiator mesh, handrails, and surface detail that plastic molding simply cannot reproduce at small scales. If you have worked with photo-etched detail sets before, you know the difference they make. If you are new to PE work, this guide will walk you through the tools and sets that make the process manageable and rewarding.
Table of Contents
Top 3 Picks for Photo-Etch Tools and Sets in 2026

DSPIAE Mini Photo Etched Parts Bender
- Aluminum base
- Anodized finish
- 12 bending teeth
- Auto fixture board
Trumpeter Photo Etched Parts Bender
- Compact design
- Manual operation
- Ideal for 1/35 scale
- No batteries needed

Paragrafix 1:350 Enterprise Refit Photoetch
- For Polar Lights kits
- Metallic inks included
- Professional detail
- 1/350 scale
12 Best Photo-Etch Tools and Sets in 2026
| Product | Specifications | Action |
|---|---|---|
|
Trumpeter Photo Etched Parts Bender
|
|
Check Latest Price |
|
DSPIAE Mini Photo Etched Parts Bender
|
|
Check Latest Price |
|
Paragrafix 1:350 Enterprise Refit PE
|
|
Check Latest Price |
 ANSAI Photo Etched Parts Bender
|
|
Check Latest Price |
 AONTOKY Stainless Steel Spray Stencil
|
|
Check Latest Price |
 Acxico Weathering Airbrush Stencils
|
|
Check Latest Price |
 Eduard 1:48 WWII Seatbelts
|
|
Check Latest Price |
 JOYABEST 360 Degree PE Bender
|
|
Check Latest Price |
 Paragrafix Revell 2009 Enterprise PE
|
|
Check Latest Price |
 ANSAI 172PCS Detail Up Parts
|
|
Check Latest Price |
1. Trumpeter Photo Etched Parts Bender – Best Compact PE Tool
Trumpeter Photo Etched Parts Bender, Small
Compact manual bender
For 1/35 scale and small PE
Weight: 0.11 kg
Size: Small
Pros
- Convenient for bending PE parts
- Ideal for interior and small exterior details
- Great quality tool
- Must-have for Photo Etch work
Cons
- Small size may not suit larger PE kits
- May require larger jig for 1/144 to 1/32 scale
I picked up the Trumpeter Photo Etched Parts Bender about two years into my modeling journey, and it genuinely changed how I approach photo-etch work. Before this tool, I was bending parts with tweezers and flat-nose pliers, which produced inconsistent angles and a lot of frustration. This little bender sits comfortably on my workbench and gives me repeatable, clean folds every single time.
The compact size is actually its biggest strength if you primarily work with smaller parts. It handles 1/35 scale armor PE beautifully. Interior details like dashboard overlays, bracket mounts, and small deflector shields fold cleanly against the guide surfaces. I found the learning curve to be almost nonexistent. Set your part, press down, and the fold happens where you expect it to.
Where this tool shows its limits is when you move to larger photo-etch pieces. If you build 1/32 scale aircraft with large instrument panels or extensive exterior detail sets, the 2.38-inch working surface can feel cramped. I still reach for a larger bender when working with oversized PE frets. For the majority of my armor and small-scale aircraft builds, though, this Trumpeter bender handles 90 percent of what I throw at it.
At just 0.11 kilograms, it is light enough to move around your bench but has enough heft to stay put during use. The gray plastic body is basic, but it does the job without wobble or flex. For the price point, it delivers more value than many premium alternatives I have tried.
Who Should Buy This Tool
Armor modelers working in 1/35 scale will get the most from this bender. It handles the small Z-folds and U-bends common in tank interior detail sets without any trouble. If you mostly build smaller PE parts and want a reliable, no-frills bending solution that does not eat up bench space, this is the one.
Beginners who are just getting into photo-etch work should also consider this as their first bender. It is affordable, straightforward, and forgiving enough that early mistakes do not ruin parts. Pair it with a good magnifier and a sharp blade, and you have everything you need to start producing clean PE folds.
Who Should Look Elsewhere
Ship builders working in 1/350 or 1/700 scale with long continuous PE railings may find the small working surface too limiting. Similarly, 1/32 scale aircraft builders dealing with large instrument panels or full cockpit side-wall sets will benefit more from a full-size bender like the DSPIAE AT-PB or the JOYABEST adjustable model covered later in this list.
2. DSPIAE Mini Photo Etched Parts Bender – Precision German Engineering
DSPIAE Mini Photo Etched Parts Bender
Aluminum base with anodized finish
12 small bending teeth
Auto fixture board
3.5 x 2.4 inches
Pros
- Extremely high quality finely machined
- Excellent value for money
- Compact version of full-size AT-PB
- Fantastic for small photo etch bending
- Scratch-resistant anodized finish
Cons
- Bender blade could be better quality
- May seem pricey for a small tool
The DSPIAE Mini Photo Etched Parts Bender is the tool I reach for most often, and for good reason. The aluminum base has a sandblasted, anodized finish that feels premium in the hand and resists scratches during daily use. After months of regular use, mine still looks almost new. The 12 small bending teeth give you multiple folding options in a single compact platform.
What really sets this apart from other benders is the automatic fixture board. When you release the rotary knob, the board opens upward on its own, making it easy to retrieve your folded part without prying at it with tweezers. That sounds like a small detail, but when you are working with tiny, delicate PE pieces that cost real money, not having to wrestle them out of a clamp is a huge relief. I cannot count how many parts I mangled on cheaper tools before getting this one.
The precision machining is evident in every interaction. Parts align cleanly against the bending teeth, and folds come out crisp with minimal spring-back. I have used this for everything from 1/144 scale Gundam detail parts to 1/32 aircraft cockpit brackets, and the results are consistently clean. The included bending blade works adequately, though I did eventually swap it for a sharper hobby blade for cleaner initial cuts on the fret.
Best Use Cases for This Bender
Modelers who work across multiple scales will appreciate the versatility this tool offers. The 12 bending teeth accommodate different fold widths without needing to swap accessories. If you build a mix of aircraft, armor, and sci-fi kits, this single tool covers nearly every PE bending scenario you will encounter.
The build quality also makes this a great long-term investment. The aluminum body will outlast plastic alternatives by years. If you model regularly and want one bender that does almost everything well, this is the best choice in our lineup.
Potential Drawbacks
The included blade is the weakest component. Several users on modeling forums have noted the same thing. It works, but a sharper replacement from your existing hobby knife collection will improve the experience immediately. At 3.5 by 2.4 inches, it is slightly larger than the Trumpeter bender but still compact enough for organized workbenches.
3. Paragrafix 1:350 Enterprise Refit Photoetch Set – Ultimate Sci-Fi Detail
BIBNY Paragrafix -ST REFIT Enterprise ENHANCEMENTS 1:350 PHOTOETCHED - PGX111
For Polar Lights 4204 and PL808
Includes metallic inks
1/350 scale
Professional detail enhancement
Pros
- Adds huge difference in realism
- Very finely detailed
- Adds detail where there was none
- Professional look when added to model
Cons
- Very fragile pieces
- Tiny O-rings around docking collars are delicate
- Removing pieces from sprue can be tricky
I built the Polar Lights 1/350 Enterprise Refit a couple of years ago, and adding the Paragrafix PGX111 set was the single biggest upgrade to that build. The difference between the stock kit and the photo-etched version is dramatic. Where the plastic kit has smooth, featureless surfaces on the engine nacelles and shuttle bay, this PE set adds grilles, panel lines, docking collars, and mechanical detail that transforms the model into a display centerpiece.
The included metallic inks deserve special mention. They allow you to paint certain PE parts with a realistic metal sheen that regular paint cannot match. The combination of the photo-etched metal parts and the metallic ink detailing creates a level of realism that surprises even experienced modelers. My build went from looking like a plastic toy to something that photographs like a studio miniature.
The set even includes tiny 1/350 scale cutout figures of people, which is a wonderful touch for the shuttle bay and bridge areas. Seeing those miniature crew members through the windows adds a sense of scale that makes the whole model feel alive. It is these small design decisions that show Paragrafix understood what Star Trek modelers actually want.
Is This Set Right for Your Build
This set is specifically designed for the Polar Lights 4204 and PL808 Enterprise Refit kits. If you are building either of those, this is a must-have upgrade. The parts are tailored to fit precisely, and the instructions walk you through placement clearly. Experienced modelers will appreciate the engineering that went into matching every PE piece to its corresponding plastic component.
If you are displaying your Enterprise in a glass case or entering it in a competition, the Paragrafix set is what separates a good build from a winning one. The extra detail is visible from normal viewing distances and really shines under display lighting.
Handling and Care Tips
The fragility of some parts cannot be overstated. The tiny O-rings that wrap around the docking collars are among the most delicate PE pieces I have ever worked with. I lost one to the carpet monster and had to carefully fabricate a replacement. Work over a light-colored surface, use a magnifier, and keep tweezers with fine tips handy. Take your time removing parts from the fret, as the connection points can be tricky to snip cleanly without bending adjacent pieces.
4. ANSAI Photo Etched Parts Bender – Budget-Friendly PE Folding
ANSAI Hobby Tools photo etched parts bender Precise Vise For Scale Model Tank Vehicle Model
59mm x 59mm x 30mm
Alloy construction
Z type and U type bends
118 grams
Pros
- Works perfectly
- Well made
- Nice and easy to use
- Solid and durable construction
- Perfect size for hobby work
Cons
- Base may not be flat across full width
- Locator pin has too much play
- Some quality control issues reported
- Smaller than expected
The ANSAI Photo Etched Parts Bender is the entry point I often recommend to modelers who want to try photo-etch bending without committing to a premium tool. At 59mm square, it is compact enough to stash in a modeling toolbox and pull out when needed. The alloy body has a decent weight to it, and the overall construction feels solid for the price.
I tested this bender with a set of 1/35 scale armor PE parts and got acceptable results. The Z-fold and U-fold capabilities cover the two most common bend types in scale modeling. For standard detail parts like brackets, tie-downs, and small dash overlays, this tool does the job. It is not going to produce the same razor-sharp, consistent folds as the DSPIAE, but for occasional PE work, it gets you there.
The main issue I ran into was the locator pin having a bit too much play. When you are trying to align a tiny PE part precisely against the bending edge, even a small amount of wobble in the pin means your fold line shifts. I worked around it by holding the part steady with fine tweezers while pressing down, but that extra step adds time and reduces consistency.
Ideal Users for This Bender
Beginners who are just testing whether photo-etch work is for them should start here. The low cost means you are not out much if you decide PE is not your thing. It is also a reasonable backup tool to keep in a secondary workspace or take to modeling club meetings.
Armor builders who work primarily with simpler PE sets will find this adequate. If your photo-etch usage is limited to seatbelts, simple brackets, and occasional dash panels, the ANSAI covers those tasks without issue.
When to Upgrade From This Tool
If you find yourself doing more than a few PE folds per build, or if you start working with delicate multi-fold parts that require precise alignment, the quality control inconsistencies will start to frustrate you. At that point, moving up to the DSPIAE or Trumpeter bender will noticeably improve your results and save time on every build.
5. AONTOKY Stainless Steel Spray Stencil – Military Marking Mastery
AONTOKY Spray Board Hobby Model Tool Kits Stainless Steel Spray Stencil for 1/35 Scale Military Model Vehicle
32 stencil patterns
Stainless steel
1/35 scale compatible
3.14 x 3.14 inches
Pros
- Great for airbrushing US insignia and tank markings
- Adds character to models
- Easy to clean and reuse
- Well made and durable
- Good price
Cons
- Not big enough for some larger designs
- Small parts require supervision
The AONTOKY spray stencil set is one of those tools I did not know I needed until I tried it. The 32 stainless steel stencil patterns cover a wide range of military markings, including US insignia, tactical numbers, warning labels, and panel markings that appear on armor, aircraft, and vehicle models. The stainless steel construction means they hold up to repeated airbrush use without degrading.
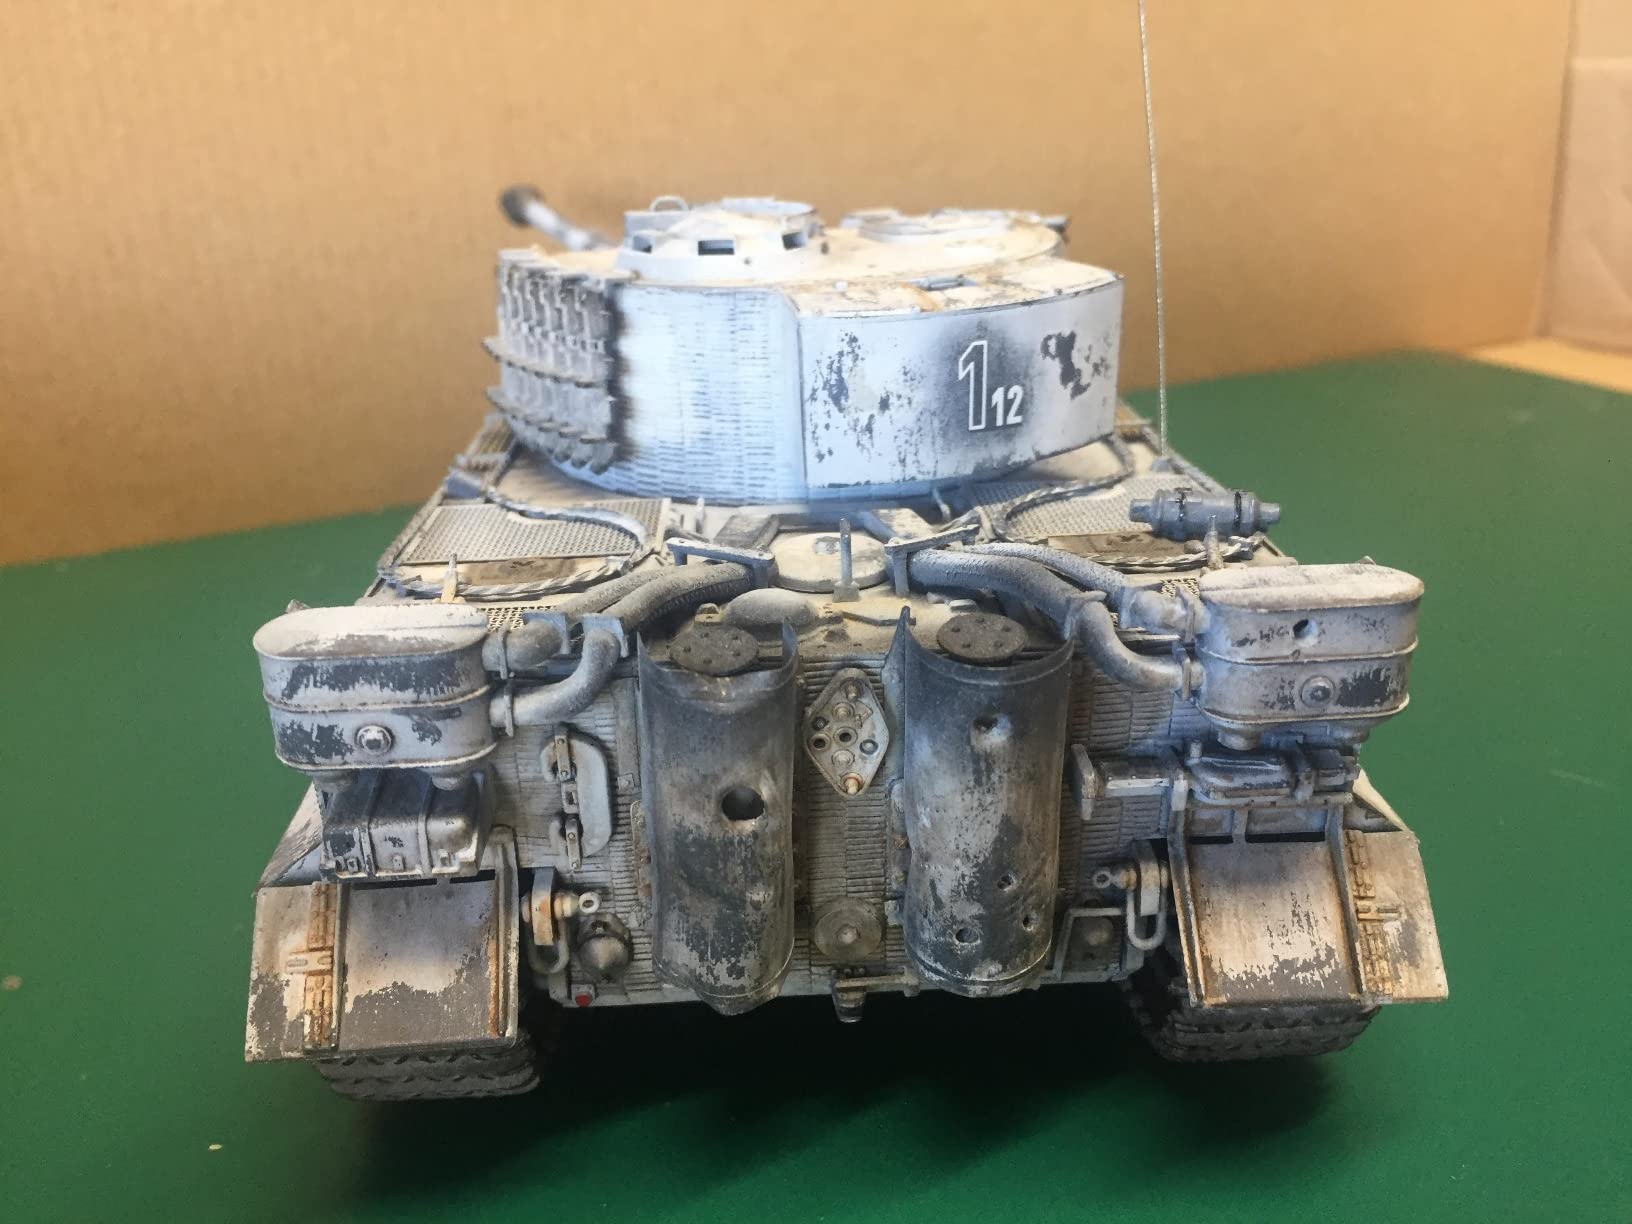
I used these stencils on a 1/35 scale M1 Abrams build, and the difference between hand-painted markings and airbrushed stencil work is immediately visible. The edges come out crisp and clean, the patterns are consistent, and the metallic stencil material sits flat against the model surface to prevent paint bleed. After each use, I rinse them with thinner and they are ready for the next project.
The 3.14-inch square size works well for 1/35 scale vehicles. I have also used them successfully on 1/48 aircraft for fuselage markings and on some 1/24 automotive projects for sponsor logos and decorative details. The variety of 32 patterns means you will almost always find something that fits your current build.
Scale Compatibility and Limitations
These stencils shine at 1/35 and 1/48 scales. The pattern sizes align well with standard military vehicle and aircraft marking dimensions at those scales. For 1/72 or smaller scales, the patterns may be too large for some applications, so plan your usage accordingly.
Automotive modelers building in 1/24 or 1/25 should note that some designs will not cover an entire hood or door panel in one pass. You can position and reposition the stencil to cover larger areas, but the results may show seam lines between passes.
Care and Maintenance
Clean your stencils immediately after each airbrush session. Acrylic paint washes off with water, while enamel and lacquer paints require appropriate thinners. Stainless steel handles solvents without warping or degrading, which is a major advantage over paper or plastic stencil alternatives that break down after a few uses.
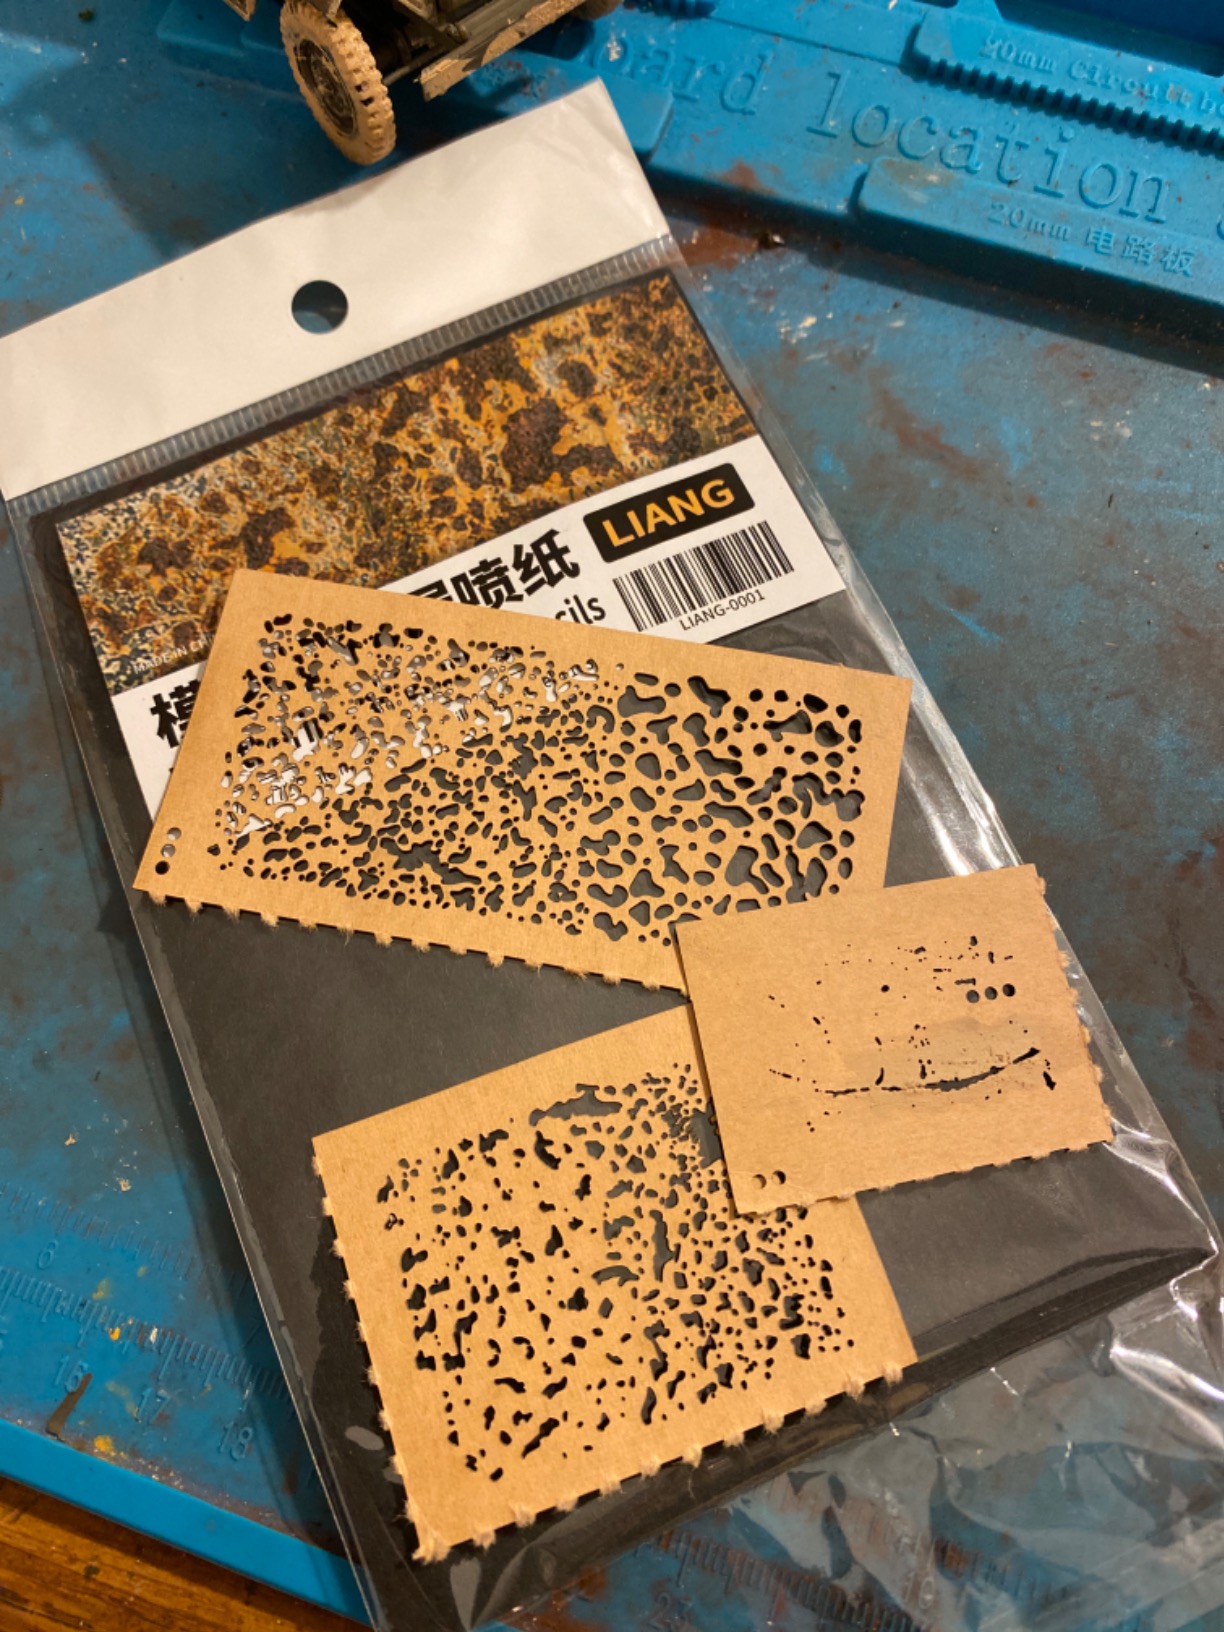
6. Acxico Weathering Airbrush Stencils – Weathering Effects Made Easy
Acxico 1Set DIY Decoration Weathering Airbrush Stencils Tools for 1/35 1/48 1/72 Scale Model
Multi-scale: 1/35, 1/48, 1/72
Weathering stencil set
7.56 x 5.08 inches
Card stock material
Pros
- Finely printed and cut
- Well-priced
- Very effective for weathering effects
- Suitable for multiple scales
Cons
- Made of card stock not acrylic
- Cannot be cleaned or reused effectively
- Difficult on curved surfaces
- One-time use item
I grabbed the Acxico weathering stencil set for a batch of 1/35 armor builds, and the effects it produces are genuinely impressive. The stencil patterns include exhaust stains, mud splatter, chipping patterns, and streaking effects that would take hours to replicate freehand. With an airbrush and these stencils, you can lay down realistic weathering in minutes.
The pattern variety covers most common weathering scenarios. I have used the exhaust stain patterns on WWII aircraft engine cowlings, the mud splatter on tank hulls and running gear, and the streaking patterns on ship superstructures. Each pattern is finely cut with clean edges that translate well to the model surface. The results look natural and add a layer of realism that separates average builds from standout ones.
The biggest drawback is the material. Despite being listed as acrylic, these stencils are card stock. They work well for the first few applications, but paint saturates the material quickly. After three or four uses with acrylic paint, the stencil begins to soften and lose its crisp edges. Enamel and lacquer paints degrade them even faster. I consider these single-use for best results.
Getting the Best Results
Use light airbrush pressure and build up the weathering effect in thin layers. Heavy paint application saturates the card stock immediately and causes bleeding under the stencil. I set my airbrush to about 10-12 PSI and make multiple light passes. This approach extends the life of the stencil and produces more realistic, layered weathering.
Flat surfaces are your friend with these stencils. On curved areas like aircraft fuselages or tank turrets, the stiff card stock does not conform well to the surface, creating gaps where paint bleeds underneath. Use masking tape to hold the stencil tight against curves.
Value Assessment
At this price point, even single-use performance represents solid value. If you are working on a competition build where realistic weathering will be judged closely, these stencils give you professional-looking effects without requiring years of freehand airbrush experience. Just plan to buy multiple sets if you have several builds queued up.
7. Eduard 1:48 WWII Seatbelts – Cockpit Detail Essential
Eduard Photoetch 1:48 - Seatbelts USAF & USN WWII
USAF and USN WWII seatbelts
1/48 scale
Photo etch and resin
Kit number 49001
Pros
- Essential detail part for cockpit seatbelts
- Highly recommended for kits lacking detail
- Great scaled seatbelts and harnesses
- Well worth the effort to install
Cons
- Requires assembly and painting skill
The Eduard 1:48 WWII seatbelt set is one of those detail items that punches way above its weight in terms of visual impact. At 1/48 scale, the cockpit is the most visible part of any aircraft model, and the pilot seat is front and center. Adding realistic seatbelts and harnesses to that seat transforms the cockpit from a bare plastic shell into something that looks like a real aircraft interior.
I have installed these seatbelts on P-51 Mustangs, F4U Corsairs, and P-47 Thunderbolts, and the results are consistent across all of them. The photo-etched metal provides the right thickness and detail at this scale. The buckles, straps, and attachment points are all represented with fine etching that responds well to painting. A base coat of dark leather or canvas color followed by a light wash brings out the molded detail beautifully.
The set covers both USAF and USN configurations, which means you can use it for a wide range of American WWII aircraft. Having both styles in one package is convenient if you build multiple subjects from that era. At this price, it is one of the cheapest upgrades that produces a genuinely noticeable improvement in your finished model.
Installation Tips for Best Results
Paint the seatbelts while they are still on the fret. Trying to paint individual tiny straps after cutting them free is an exercise in frustration. Apply your base color to the entire fret, then carefully cut and install each belt. Use CA glue sparingly to attach the belts to the seat and cockpit sidewalls, positioning them to look like they are draped naturally over the seat.
For added realism, gently bend the belts at the buckle points before installing them. A slight curve at each buckle makes them look like real webbing rather than flat metal. This small extra step makes a big difference in the final appearance.
Compatibility Note
This set is designed for 1/48 scale WWII US aircraft. While you could theoretically adapt it to other scales or nationalities, the proportions and buckle styles are specific to American WWII pilot harness configurations. Eduard makes separate sets for other air forces and scales, so check their catalog if you are building Luftwaffe, RAF, or Japanese subjects.
8. JOYABEST 360 Degree PE Bender – Adjustable Bending Solution
JOYABEST Photo Etch Bender for Model Tools – Metal Etching Sheet Bending Tool with 360° Adjustable Plate, DIY Hobby Accessory for Precise Z/U-Shaped Bends
360 degree adjustable plate
Alloy construction
5.31 x 4.13 x 1.89 inches
Includes razor blade
Pros
- Comes with razor blade for shaping folds
- Durable alloy construction
- Saves frustration on small parts
- Works well for PE bending
Cons
- Tolerances too great for tight clamping
- Cannot clamp parts down properly
- Clamp edges have large chamfer
The JOYABEST 360 Degree PE Bender caught my attention because of the adjustable swivel plate. Unlike fixed-angle benders, this one lets you rotate the clamping surface a full 360 degrees, which is genuinely useful when you need to make multiple bends at different angles on the same part. I tested it on a complex aircraft cockpit detail set that required several sequential folds, and the adjustable plate saved me from constantly repositioning the part.
The alloy construction gives it a solid, durable feel. It weighs enough to stay put on the bench during use, and the 5.31 by 4.13-inch footprint provides more working area than the compact benders in our lineup. The included single-edge razor blade is a thoughtful inclusion that saves you from having to source one separately for scoring fold lines.
However, the tolerance issue is real and worth understanding before you buy. The clamping mechanism does not close tightly enough against the base plate to hold very thin PE parts completely flat. The chamfered edges on the clamp create a tiny gap that allows small parts to shift during bending. For larger parts and less critical folds, this is manageable. For tiny, precise components where a fraction of a millimeter matters, the play becomes frustrating.
Scale and Project Suitability
This bender works best with medium to large PE parts in 1/48 to 1/24 scale. The adjustable plate and larger working surface accommodate bigger pieces that compact benders cannot handle. Ship modelers working with railings and large deck detail will appreciate the extra space. The 360-degree rotation also benefits builders who need compound bends at various angles.
For very small 1/72 or 1/144 scale parts, the clamping tolerance issue becomes more problematic. At those scales, even slight movement during a fold ruins the part. If you primarily build at smaller scales, the DSPIAE or Trumpeter benders are better options.
Real-World Performance
After adjusting my technique to compensate for the tolerance issue, I got decent results from this bender. Using a piece of tape to hold the part steady while clamping solved most of the shifting problem. It is an extra step, but it makes the tool usable for a wider range of parts. Given the price point, it remains a reasonable option for modelers who need the adjustable plate feature.
9. Paragrafix Revell 2009 Enterprise Photoetch – Star Trek Builder Must-Have
Paragrafix - Revell 2009 Enterprise Photoetch Set - PGX174
For Revell GMBH 08442
Photoetch enhancement set
PGX174
Perfect 5.0 rating
Pros
- Perfect for JJ Enterprise model
- Makes shuttle bay look really good
- Beautiful detail
- Exactly what was expected
Cons
- Limited stock available
A perfect 5.0 rating across all reviews tells you something important about the Paragrafix PGX174. This photo-etch set was designed specifically for the Revell 2009 Enterprise kit, and it fits that application flawlessly. I used it on the Revell GMBH 08442 and every part aligned perfectly with the kit surfaces. No trimming, no filing, no creative problem-solving required. It simply works.
The shuttle bay is where this set really shines. The stock Revell kit has a blank, undetailed shuttle bay opening that looks flat and lifeless. The Paragrafix PE set adds interior bulkheads, deck plating, shuttle rack details, and doorway framing that completely transforms that area. When you peer into the shuttle bay after installation, you see depth and mechanical detail instead of a dark plastic void.
The exterior surface detail upgrades are equally impressive. Panel line overlays, sensor array grilles, and deflector dish components all add definition that the stock kit lacks. Painted and weathered properly, these PE additions make the model look like it belongs in a museum display rather than a hobby shop shelf.
Availability Warning
Stock on this set is limited, with typically fewer than 20 units available at any given time. If you are planning a Revell Enterprise build and want this detail set, order it before you start the kit. Waiting until you are mid-build increases the risk of it selling out. The limited production run reflects the niche market for this specific application, but it also means the set could become harder to find over time.
Skill Level Recommendation
While the parts fit perfectly, the small size and fragility of some components means this set is best suited for intermediate to advanced modelers. You need comfortable PE handling skills, a good bender, and steady hands with fine tweezers. Beginners should practice on simpler sets before tackling this one. The results are absolutely worth the effort once you have the basics down.
10. ANSAI 172PCS Detail Up Parts – Gundam Detail King
172PCS Detail up Parts Photo Etch Parts Set for MG 1/100 1/144 Scale Model Rivets Varieties Size(2 Sheets)
172 pieces total
Stainless steel
For MG 1/100 and 1/144
3.54 x 2.28 inch sheets
Pros
- Amazing amount of detail to kits
- Really good mix of detail parts
- Perfect for 1/144 scale
- Can be used all over kits
Cons
- May not work well for 1/100 scale per one review
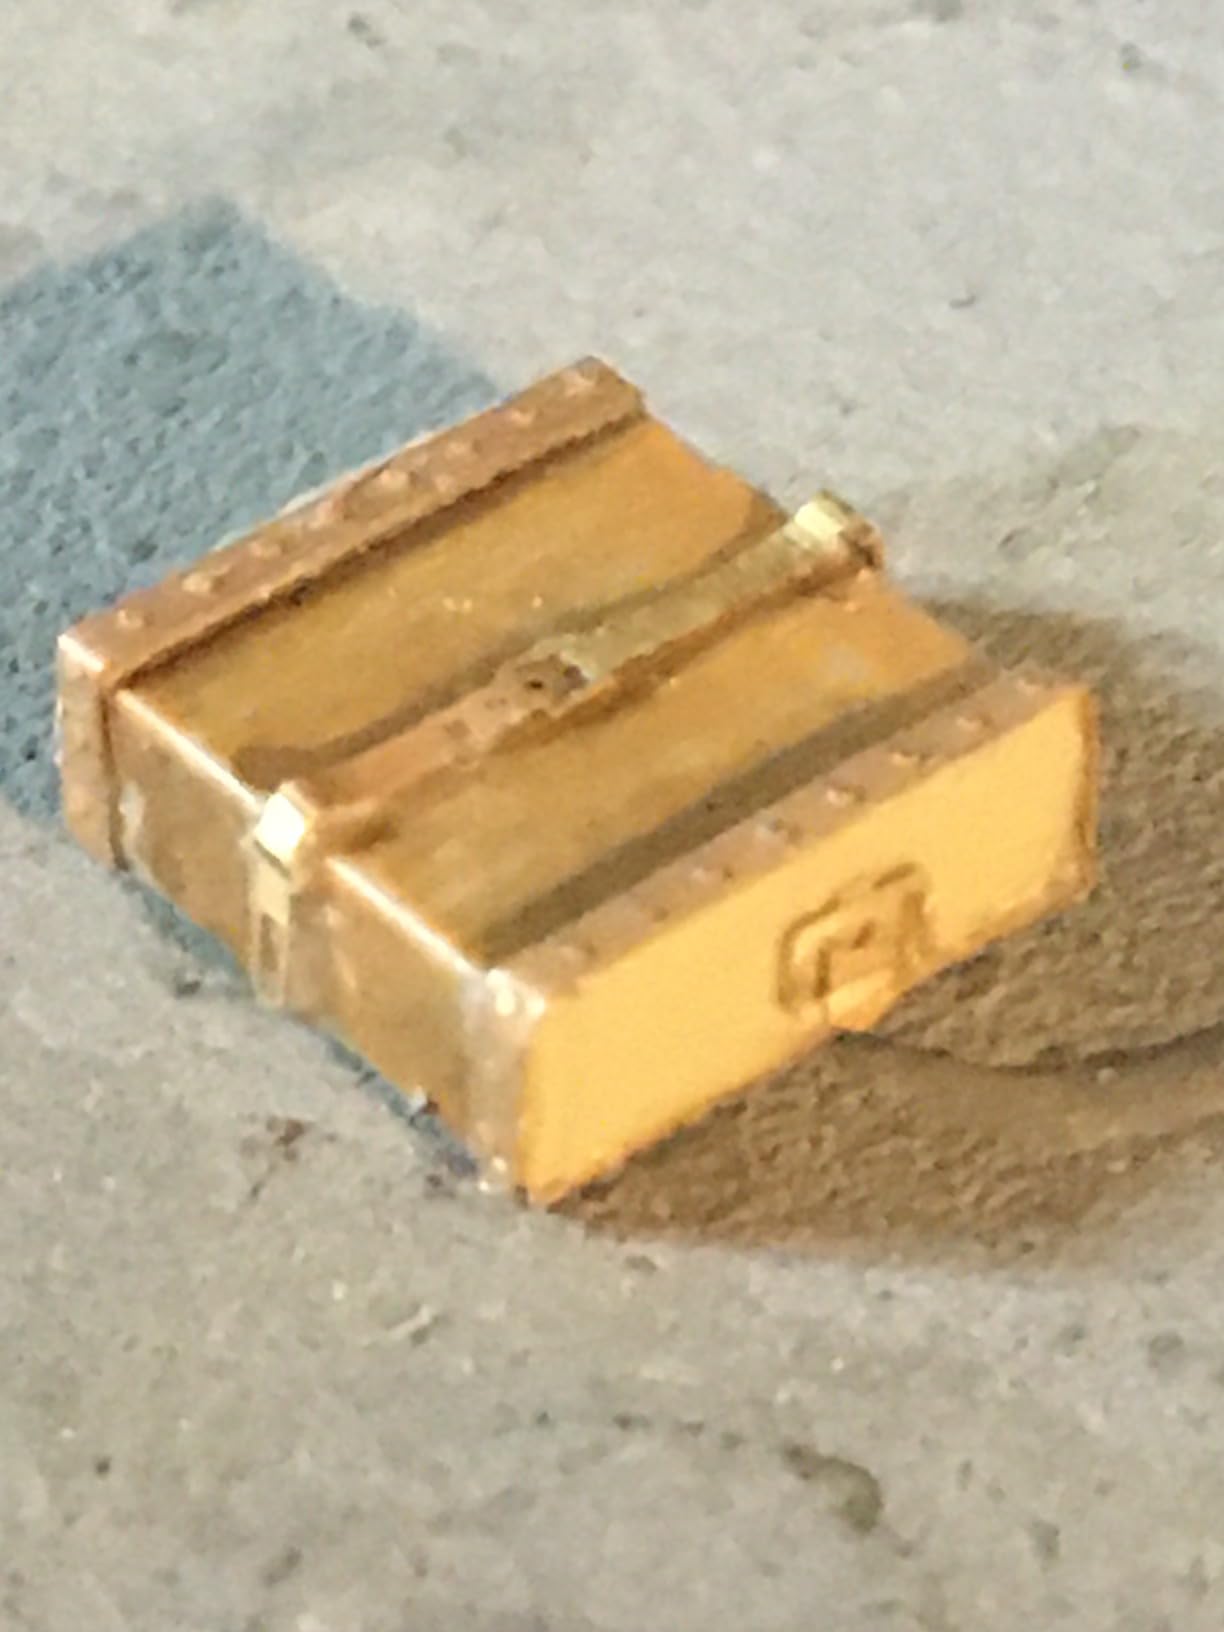
The ANSAI 172-piece detail set is a treasure chest for mecha and Gundam builders. Two sheets of stainless steel photo-etch parts packed with rivets, thruster nozzles, radiator grilles, vents, and mechanical detail overlays. At 172 pieces total, you get an enormous variety of shapes and sizes to work with across multiple builds. This is the kind of set that stays in your toolbox for years.
I used parts from this set on three different High Grade 1/144 Gundam builds, and each one benefited from the added detail. The thruster nozzles are especially effective. Replacing the plain plastic thruster bells with these stainless steel PE versions adds a metallic sheen and precision detail that paint alone cannot replicate. The rivets and fastener heads work great on armor panels and joint covers.
The stainless steel material is both a strength and a consideration. It holds up well during handling and bending, and the natural metal finish looks fantastic when left unpainted or given a light wash. However, stainless steel is harder to bend than brass or nickel silver, so you need a good bender and firm, deliberate pressure for clean folds.
Best Applications for These Parts
1/144 scale models are the sweet spot for this set. The part sizes align well with High Grade and Real Grade Gundam kits, and the level of detail is appropriate for that scale. I have used the rivets on armor panel edges, the grilles on chest vent areas, and the thruster bells on backpack units. Every application improved the finished look of the model.
The set also works for military vehicle models, aircraft, and automotive kits where small mechanical detail is needed. Think of it as a universal detail enhancement library rather than a product limited to one genre.
Planning Your Usage
With 172 pieces across two sheets, you have plenty of parts for multiple builds. I recommend planning which parts you want to use before cutting them from the fret. Once removed, these tiny pieces are easy to lose. Keep a parts organizer handy, and cut only what you need for each build session. The remaining fret stores flat and keeps unused parts safe for future projects.
11. Trumpeter 1/700 Handrails and Ladders – Ship Detail Perfection
Trumpeter 1/700 Handrails & Ladders Model Kit
1/700 scale
Photo-etched handrails and ladders
For ship kit upgrades
Ship kit not included
Pros
- Fantastic detail for 1/700 scale
- Creates realistic handrails and ladders
- Professional-grade quality
- Brings wow factor to models
Cons
- Not suitable for amateur modelers
- 1/700 scale is very fine and delicate
At 1/700 scale, handrails and ladders are the kind of detail that separates a basic ship build from something that stops people in their tracks. The Trumpeter 1/700 photo-etched handrail and ladder set provides the delicate, uniform railings and access ladders that plastic molding cannot produce at this tiny scale. Each railing section has evenly spaced vertical posts and horizontal rails that look absolutely correct when installed along deck edges and superstructure platforms.
I installed these on a 1/700 Japanese destroyer build, and the transformation was remarkable. The bare plastic deck edges looked flat and incomplete without railings. Once the PE handrails were in place, the deck suddenly had depth and dimension. Crew members would have something to hold onto, and the superstructure levels felt connected by the tiny ladders bridging between them. The visual impact per dollar spent is enormous.
The parts come on a standard photo-etch fret with multiple railing lengths and ladder sections. You cut what you need, bend any angles required for deck contours, and attach with CA glue or white glue depending on whether you need a flexible bond. The brass material bends easily and holds its shape well once positioned.
Working at 1/700 Scale
Let me be direct: 1/700 scale photo-etch work is not for beginners. The parts are incredibly small. A single railing post is thinner than a human hair. You need a magnifier with good lighting, fine-tip tweezers, and steady hands. I work over a light-colored mat so dropped parts are visible, and I keep a magnetic parts retriever nearby for the inevitable losses.
Take your time and work in short sessions. Fatigue leads to mistakes at this scale. I typically limit myself to 45-minute sessions when doing fine PE work, then take a break before continuing.
Model Compatibility
These railings are designed as a generic upgrade set for 1/700 ship models from any manufacturer. They are not tailored to a specific kit, which means they work across Trumpeter, Tamiya, Fujimi, and other brands. Measure your deck edges and cut the railing sections to fit. You may need to trim some sections shorter or combine pieces for longer runs along the hull.
12. Hasegawa Modeling Mesh 42 – Duct and Vent Detail Essential
Hasegawa Photo Etch Modeling Mesh 42 Square Shape Large Size for Duct Improvements
Square mesh shape
0.42mm precision holes
4.4 x 8.5 cm sheet
Photo-etched metal mesh
Pros
- Beautiful detail with precise mesh holes
- Ample sheet size for multiple projects
- Durable photo-etched metal construction
- Quality packaging
Cons
- Anime-themed branding may not suit all projects
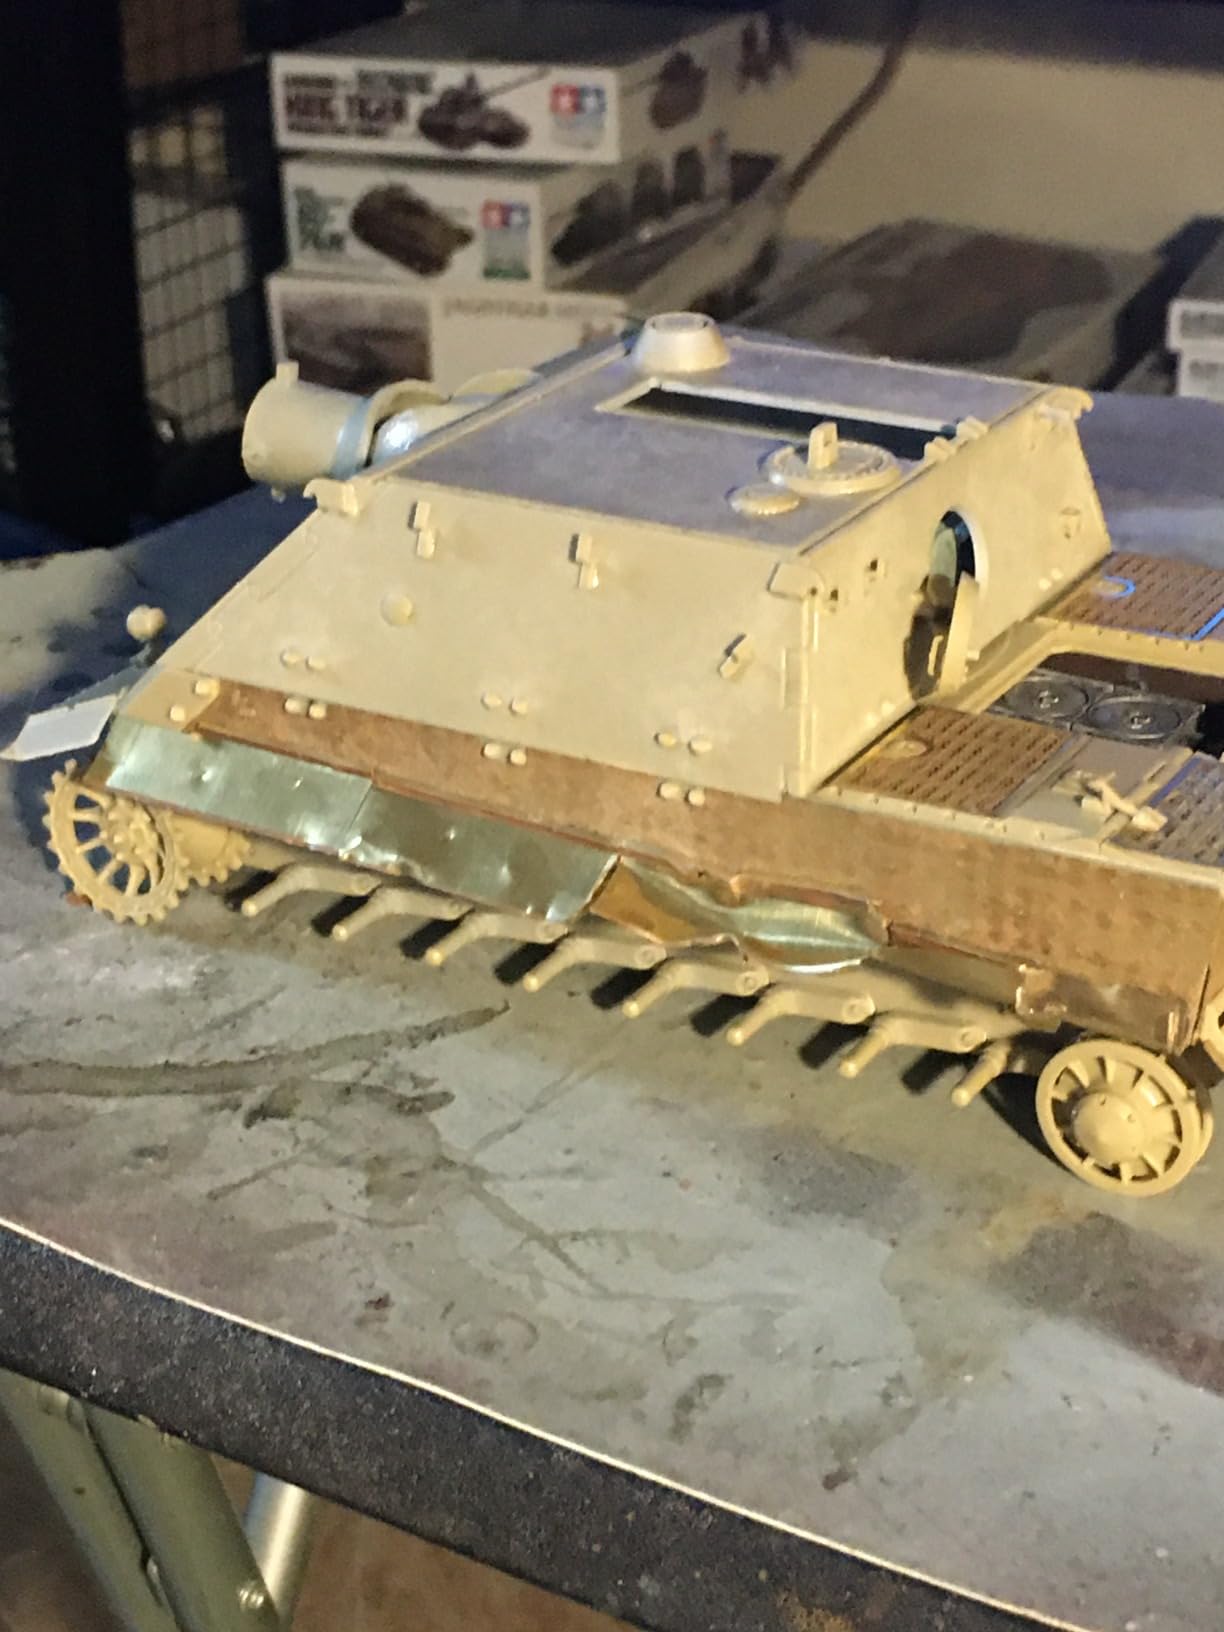
The Hasegawa Modeling Mesh 42 is one of those specialty products that solves a very specific problem extremely well. When you need to represent intake grilles, exhaust vents, radiator openings, or any kind of mesh screen on a scale model, nothing looks as convincing as actual metal mesh with precision-drilled holes. This sheet provides exactly that, with 0.42mm square holes on a photo-etched metal sheet measuring 4.4 by 8.5 centimeters.
I have used this mesh on aircraft radiator intakes, tank engine deck grilles, and automotive brake duct openings. In every case, the result is noticeably better than trying to simulate mesh with paint or decals. The real metal catches light differently than the surrounding plastic, creating a visual contrast that reads as an actual screen or grille at modeling distances. You can see through the holes, which adds another layer of realism that solid alternatives cannot provide.
The generous sheet size means you get multiple uses from a single purchase. I have completed four different projects with one sheet and still have material left. For armor builders who regularly need engine deck grilles and intake screens, this product represents excellent long-term value.
Cutting and Installing the Mesh
Use a sharp hobby knife and a metal ruler to score and snap the mesh to size. The photo-etched metal cuts cleanly with a few passes of a fresh blade. For curved installations, gently bend the mesh over a cylindrical object like a paint brush handle to avoid kinking. CA glue works well for attachment, but apply it sparingly through the mesh holes to avoid visible glue pools on the finished surface.
Prime and paint the mesh before installation for best results. A self-etching primer helps paint adhere to the metal surface. After your color coat, a dark wash brings out the individual mesh holes and adds depth to the finished appearance.
Project Ideas Beyond the Obvious
Beyond radiator and vent grilles, this mesh works for speaker grilles on 1/24 automotive models, fence sections on diorama bases, and anti-slip deck surfaces on ship models. I even used a small section to create a garbage can screen on a modern urban diorama. Keep a sheet in your supplies and you will find uses for it across many different projects.
How to Choose the Right Photo-Etch Tools and Sets?
Choosing the right photo-etch tools and detail sets depends on what you build, what scale you work in, and your current skill level. After years of testing PE products and talking with fellow modelers on forums, here is how I break down the decision process.
Match Your Tools to Your Scale
The scale you build in determines which PE bender will serve you best. For 1/35 armor and 1/48 aircraft, compact benders like the Trumpeter or DSPIAE Mini handle the majority of parts you will encounter. If you build 1/32 aircraft or 1/350 ships with large continuous PE sections, a full-size bender with a wider working surface is worth the investment. The JOYABEST adjustable bender is a good middle-ground option for modelers who build across multiple scales.
Understand Material Differences
Photo-etch parts come in three main materials, and each behaves differently. Brass is the most common and easiest to bend, making it ideal for beginners. Nickel silver is harder and holds sharper bends, which is preferred for parts that need to maintain precise angles. Stainless steel is the hardest of the three and holds detail well, but requires more force during bending. The Hasegawa mesh and ANSAI detail sets use stainless steel, while most Eduard and Trumpeter PE sets use brass or nickel silver.
Essential Tools for PE Work
Beyond a bender, you need a few basic tools to work with photo-etch effectively. A sharp hobby knife with new blades is essential for cutting parts from the fret. Fine-tip tweezers, preferably two pairs, allow you to handle and position small parts. A glass or ceramic cutting mat provides a flat surface that will not dull your blade. CA glue in thin and medium viscosity handles most attachment needs. A magnifier with built-in lighting reduces eye strain during extended sessions.
If you want to explore related metal modeling techniques, check out our guide to photo-etched steel model kits for a different approach to metal-based model building.
Skill Level Recommendations
Start with simple PE sets like seatbelts or small stencil markings before tackling complex multi-part cockpit or engine detail sets. The Eduard seatbelt set in this roundup is an excellent first PE project. It has relatively few parts, the installation is straightforward, and the visual impact is immediate. As your skills develop, move to sets with more components and smaller parts.
Bending Technique Tips
Score the fold line lightly with a blade before bending. This creates a clean hinge point and reduces the chance of the part bending in the wrong place. Use consistent, firm pressure rather than quick forceful movements. Bend slightly past your target angle to compensate for spring-back in brass and nickel silver. Always test your technique on a scrap PE piece from the edge of the fret before working on the actual part you need.
Where RB Productions Fits in the Landscape
RB Productions, founded by Radu Brinzan, was known throughout the modeling community for producing some of the finest aftermarket photo-etch available, particularly for 1/32 and 1/48 scale aircraft. Their seatbelt sets, instrument panel overlays, and surface detail sets were regarded as industry benchmarks. The RB Flip-R5 bending tool was praised on forums as an excellent quality instrument that many modelers still use today. While RB Productions products have become increasingly difficult to find, the tools and sets in this roundup carry forward the same commitment to detail and quality that the modeling community valued in RB’s work.
FAQs
How do you bend photo etch parts correctly?
Score the fold line lightly with a sharp blade first to create a clean hinge point. Place the part in your PE bender with the fold line aligned to the bending edge. Apply firm, steady pressure to fold the part to your desired angle. Bend slightly past the target angle to compensate for spring-back in brass or nickel silver parts. Always practice on scrap pieces from the edge of the fret before working on the parts you need.
What is the best photo etch brand for scale models?
Eduard is widely considered the best overall photo-etch brand due to their extensive catalog, consistent quality, and availability across multiple scales and subjects. DSPIAE produces excellent PE bending tools. For specific subjects like Star Trek models, Paragrafix offers outstanding dedicated sets. RB Productions was highly regarded for aircraft detail sets but has limited current availability.
Is RB Productions still in business?
RB Productions, founded by Radu Brinzan, appears to have ceased active operations around 2020 based on community forum discussions. Products are increasingly difficult to find through retailers. Some remaining stock may be available from specialty hobby shops and online marketplaces, but new production has not been confirmed. Modelers seeking similar quality should look to Eduard, Paragrafix, and other active manufacturers.
What tools do I need to work with photo-etch sets?
You need a PE bender (the DSPIAE Mini or Trumpeter bender are great starting points), sharp hobby knife with fresh blades, two pairs of fine-tip tweezers, CA glue in thin and medium viscosity, a glass cutting mat, and a magnifier with good lighting. Optional but helpful tools include a metal ruler, cutting jig, and paint for priming metal parts before installation.
Are photo-etch detail sets worth the effort?
Yes, especially for cockpit areas, open engine bays, and visible interior spaces where the added detail is most apparent. A single seatbelt set can transform a 1/48 cockpit for very little cost. At competition level, PE detail often separates winning builds from the rest. For casual builders displaying models on a shelf, PE adds visible realism that improves with every viewing angle.
Final Thoughts on the Best Photo-Etch for 2026
The right photo-etch tools and detail sets can elevate any scale model build from good to exceptional. Our Editor’s Choice, the DSPIAE Mini Photo Etched Parts Bender, earns its top spot with precision machining, an automatic fixture board, and versatile bending teeth that handle nearly any PE part you throw at it. For modelers wanting the best value, the Trumpeter bender delivers reliable performance at a lower price point.
If you are chasing maximum visual impact, the Paragrafix Enterprise Refit set and Eduard WWII seatbelts demonstrate exactly why photo-etch detail work matters. These small additions produce outsized improvements in realism. Whether you are building aircraft, armor, ships, or sci-fi subjects, the products in this roundup represent the best available alternatives to fill the space that RB Productions photo-etch once occupied in the modeling community.
Pick the tools and sets that match your current projects and skill level, and start adding detail that makes your builds stand out. Your next model will thank you.