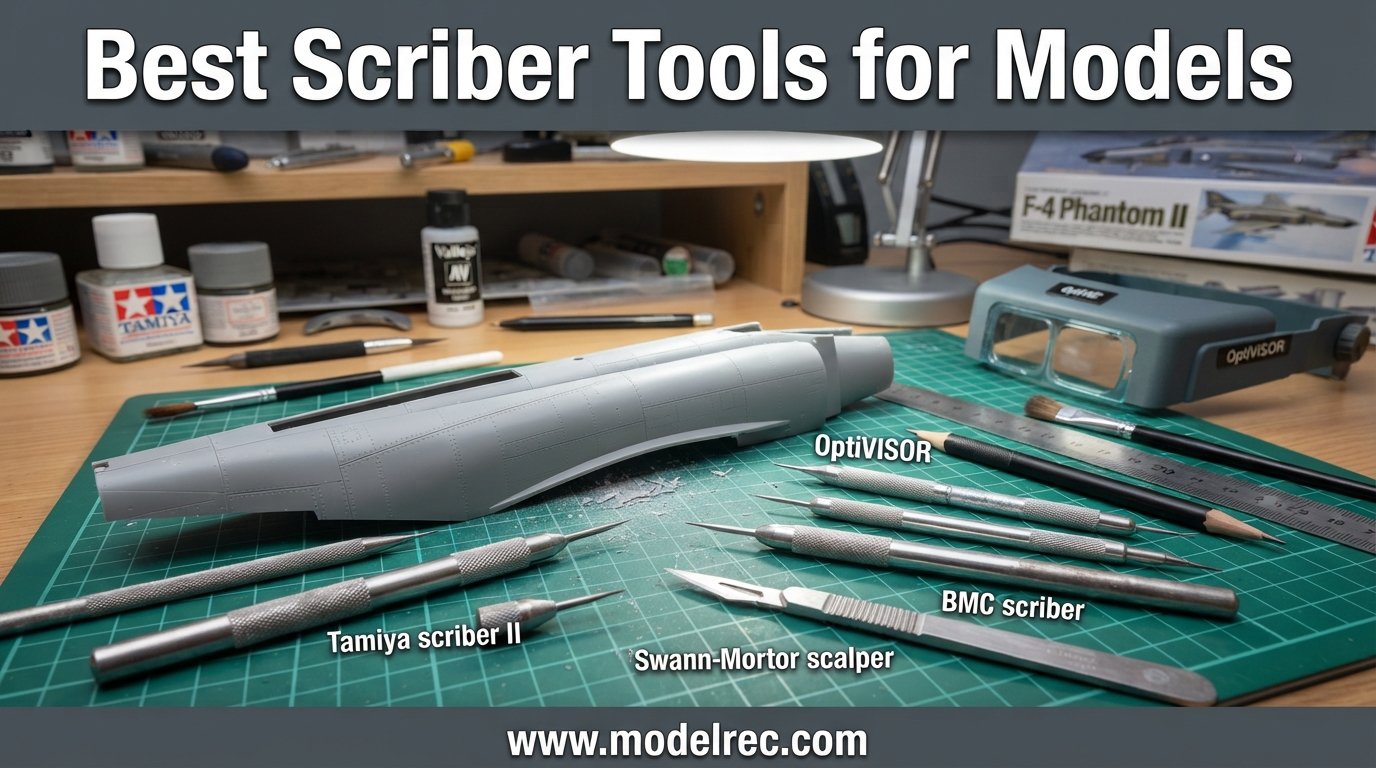
I have spent the better part of three years scribing panel lines on everything from 1/144 Gunpla kits to 1/35 military dioramas. The right scriber makes the difference between a clean recessed line that pops after a wash and a mangled groove you need to fill and redo. After testing 13 of the most talked-about best scriber tools for models on my workbench, I want to share what actually delivers results in 2026.
Panel line detail is what separates a build that looks like a toy from one that looks like a miniature of the real thing. Factory-molded lines often fade, vanish after sanding, or simply do not exist where you want them. A quality hobby scriber tool lets you cut new recessed grooves that catch ink wash and create shadows, adding depth and realism that paint alone cannot achieve.
Choosing the best scriber tool is not just about picking the sharpest blade. You need to think about blade width relative to your model scale, the type of cut you want (chisel groove versus scored line), handle comfort during long sessions, and whether you want a single dedicated tool or a multi-blade set. I have made all the common mistakes so you do not have to, and this guide distills what I learned into practical, scale-specific recommendations.
This guide covers single-blade precision tools, multi-blade chisel sets, needle-tip scribers, and complete scribing kits. Whether you are looking for the best scriber for Gunpla beginners or a professional-grade carbide tool for aircraft detailing, I have broken down each option by blade type, scale compatibility, and real-world performance. I have also pulled insights from communities like r/Gunpla, r/modelmakers, and britmodeller.com to ground these recommendations in what experienced builders actually use day to day.
Before diving into the reviews, it helps to understand the three main categories of scriber tools you will encounter. Chisel-tip scribers cut a clean recessed groove by removing material in a single slicing motion. Needle-tip scribers score a fine line that you gradually deepen over multiple passes. Push-action scribers like the original Tamiya design displace material rather than removing it, leaving raised edges that need cleanup. Each type has its place, and I will reference these categories throughout the reviews so you can match the tool style to your workflow.
If you also work with resin-printed parts or photo-etch details, you may want to check our guides on UV curing lamps for models and photo etch bending tools to round out your finishing workflow. Having the right supporting tools makes a real difference in the quality of your final detailing work.
Table of Contents
Top 3 Picks for Scriber Tools for Models
Out of 13 tools tested, three stood out for different reasons. The stedi 0.15mm Blue earned my Editor’s Choice for its balance of sharpness, ergonomics, and anti-roll design. The DULIWO 7-Blade Set won Best Value because you get seven blade sizes for a fraction of what single premium tools cost. The Tamiya Plastic Scriber II took Budget Pick thanks to its proven retractable design and 2,400+ reviews backing it up.
These three cover the full spectrum of what model builders need: a precision single-blade tool for serious detail work, a versatile multi-blade set for builders who want options without spending a fortune, and an affordable entry-level scriber for anyone just starting out. I have used all three extensively across multiple builds and each earned its spot through consistent, repeatable performance on my bench.
If you are short on time and just want a quick recommendation, here is my shortcut advice. If you build mostly Gunpla at 1/144 or 1/100 scale, grab the stedi 0.15mm Blue. If you work across multiple scales and want flexibility, get the DULIWO 7-blade set. If you are a complete beginner testing the waters, start with the Tamiya Plastic Scriber II. You cannot go wrong with any of these three.

stedi Model Scriber 0.15mm Blue
- Tungsten steel blade
- 0.15mm line width
- Anti-roll design
- Ergonomic aluminum handle

DULIWO 7-Blade Scriber Set
- 7 interchangeable blades
- 0.1 to 2.0mm sizes
- Non-slip aluminum handle
- Carrying case included

Tamiya Plastic Scriber II
- Retractable design
- Japan-made
- Trusted Tamiya quality
- Beginner friendly
13 Best Scriber Tools for Models in 2026
Below is the full comparison of all 13 scriber tools I tested and reviewed. The table covers the key specs you need to compare at a glance, including blade sizes, materials, and ratings from verified Amazon buyers. Use this as your quick reference, then dive into the individual reviews for detailed experience notes and scale-specific guidance.
| Product | Specifications | Action |
|---|---|---|
| stedi Model Scriber 0.15mm Blue |
|
Check Latest Price |
| DULIWO 7-Blade Scriber Set |
|
Check Latest Price |
| Tamiya Plastic Scriber II |
|
Check Latest Price |
 stedi Model Scriber 0.1mm Red stedi Model Scriber 0.1mm Red |
|
Check Latest Price |
 DULIWO Scribing Tool Kit DULIWO Scribing Tool Kit |
|
Check Latest Price |
 ANSAI 5-Blade Scriber ANSAI 5-Blade Scriber |
|
Check Latest Price |
 Bucasso 7-Piece Premium Set Bucasso 7-Piece Premium Set |
|
Check Latest Price |
 Hasegawa Scriber TT1 Hasegawa Scriber TT1 |
|
Check Latest Price |
 Tamiya Fine Engraving Blade 0.15mm Tamiya Fine Engraving Blade 0.15mm |
|
Check Latest Price |
 stedi Hook Tip Model Scriber 0.15mm stedi Hook Tip Model Scriber 0.15mm |
|
Check Latest Price |
 stedi Tungsten Steel Scriber stedi Tungsten Steel Scriber |
|
Check Latest Price |
 Tamiya Carbide Needle 20 Degrees Tamiya Carbide Needle 20 Degrees |
|
Check Latest Price |
 QWORK 7-Piece Scriber Set QWORK 7-Piece Scriber Set |
|
Check Latest Price |
1. stedi Model Scriber 0.15mm Blue – Precision Chisel for Scale Models
stedi Model Scriber Chisel,Tungsten steel Blades 0.15mm,for Modeling Hobby
0.15mm tungsten steel blade
Mirror polished finish
Aluminum handle with low center of gravity
Anti-roll round body
Screw-off protective cap
Pros
- Super sharp precision tip
- Excellent build quality and weight
- Comfortable ergonomic grip
- Works on plastic resin and Gundam models
- Anti-roll design prevents accidents
Cons
- Tip can break if dropped
- Designed for plastic only not metal
- Some fragility under heavy force
This is the scriber I reach for most often when I want clean, consistent panel lines on Gundam and aircraft builds. The 0.15mm blade hits a sweet spot for 1/144 and 1/100 scale work, where you need a line that is visible after a panel wash but not so wide it looks oversized on a small kit. I have used this on RG Gunpla, 1/72 aircraft, and resin conversion parts with consistently good results.
The mirror-polished tungsten steel blade glides through styrene with very little drag. I noticed that the low center of gravity in the aluminum handle keeps the tool stable in my hand, which helps maintain a consistent scribing angle along straight runs. The screw-off cap is a nice touch that protects the blade when the tool is sitting on my bench between sessions.
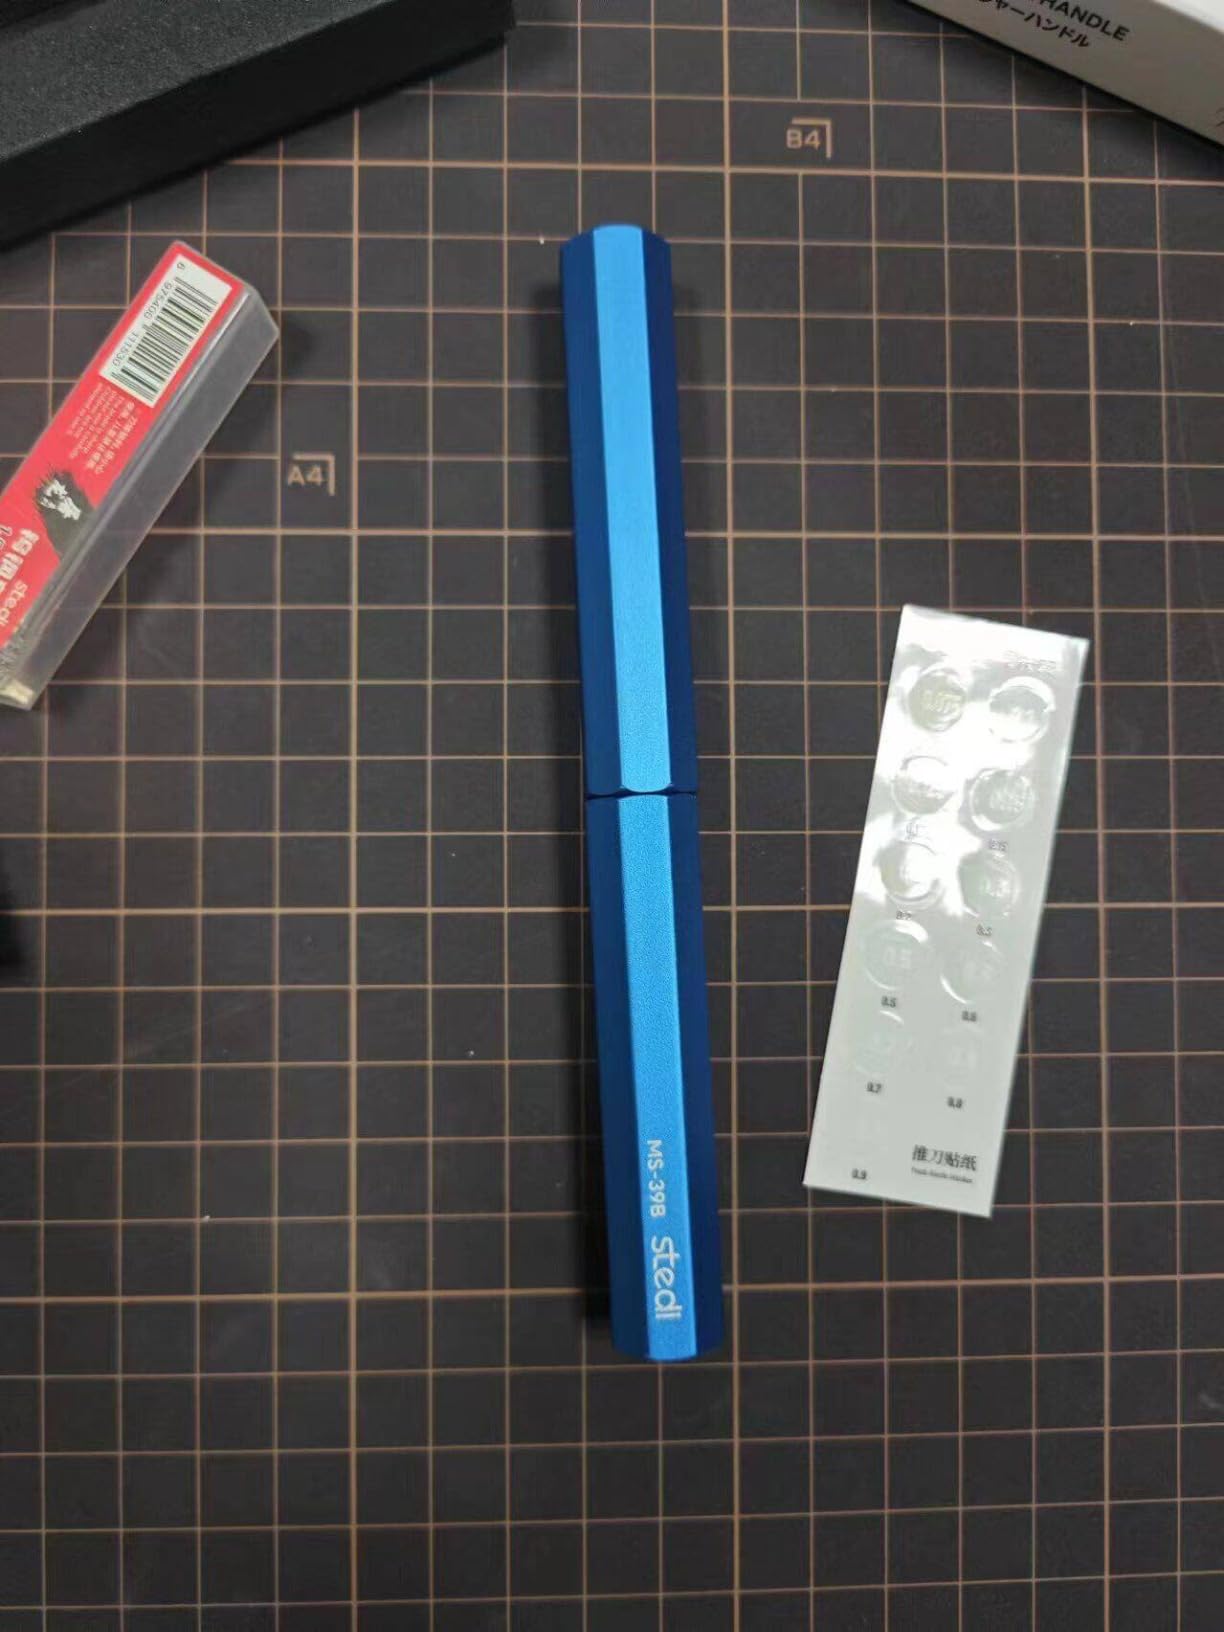
One thing that came up repeatedly on r/Gunpla and britmodeller.com is that stedi tools sit in the same tier as DSPIAE and Madworks for hobby work. After using this blue 0.15mm version alongside the red 0.1mm, I agree. The cutting action is smooth and predictable as long as you let the blade do the work rather than forcing it through the plastic.
I did a side-by-side test scribing the same panel line pattern on two identical HG Gundam shoulders, one with the stedi 0.15mm Blue and one with a generic budget scriber. The stedi produced a groove that was uniform in depth and width across the entire run. The budget tool left a groove that varied in depth and had visible chatter marks where the blade skipped.
The main weakness is fragility. Tungsten steel is hard but brittle. I dropped mine once on a tile floor and the tip chipped. Since then I have been more careful about always capping it. If you treat this tool with reasonable care, the blade holds its edge through dozens of scribing sessions without needing replacement.
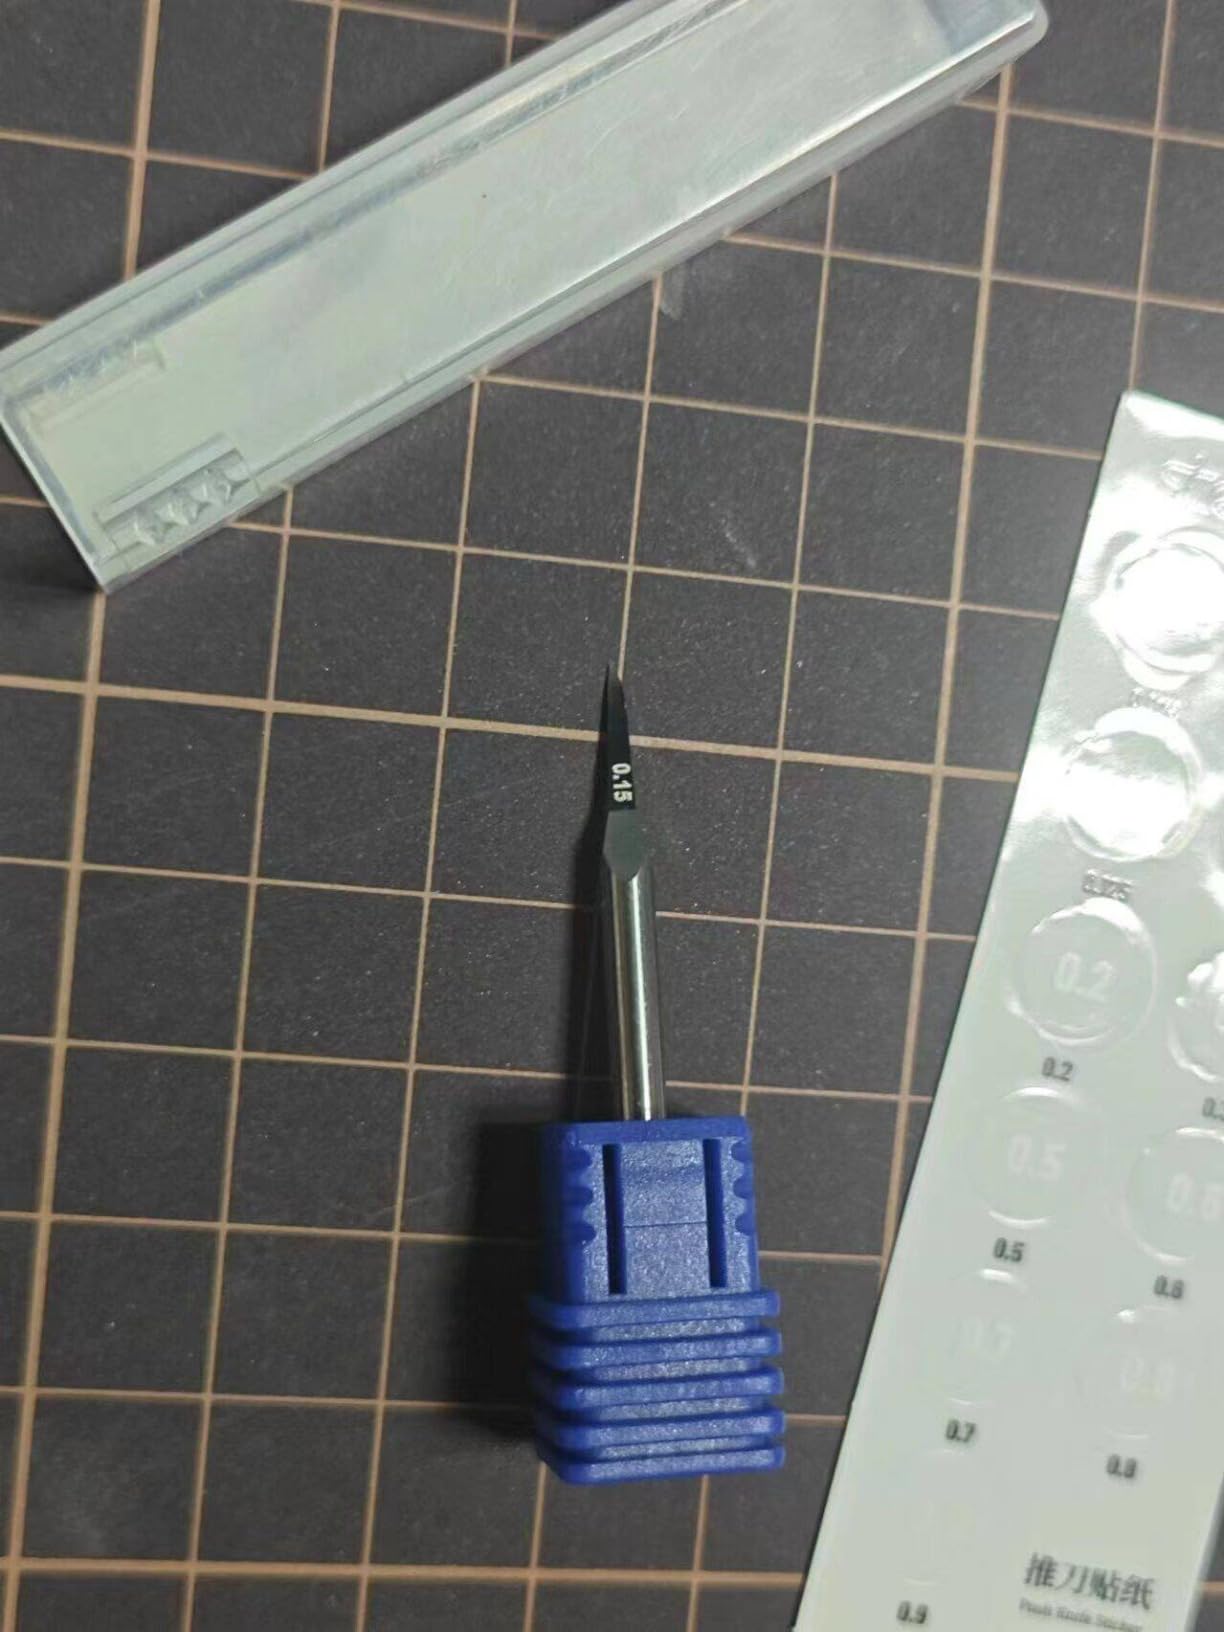
Another thing worth mentioning is the 3mm chuck compatibility. Several Amazon reviewers noted that the stedi works with standard 3mm chuck tools from other brands, which means you can potentially swap components if you have a multi-brand tool collection. I tested this with a DULIWO handle and the fit was snug and secure.
Best Scales and Kit Types for the 0.15mm Blade
The 0.15mm width is my go-to for 1/144 and 1/100 scale kits, including HG, RG, and MG Gunpla. It produces a line that reads well after an enamel or acrylic wash without overwhelming small surfaces. For RG kits in particular, the 0.15mm width matches the factory-molded panel lines almost exactly, so scribed additions blend seamlessly with existing detail.
For 1/72 aircraft and 1/35 military vehicles, this blade works well for secondary detail and access panels but you may want a slightly wider 0.2mm or 0.3mm tool for primary structural lines to match the larger scale proportions. On 1/48 aircraft, the 0.15mm is perfect for rib lines and fine structural detail.
How the Anti-Roll Design Performs in Daily Use
The round body with anti-roll geometry actually works. I tested it on a slightly tilted desk and the tool stayed put where a perfectly cylindrical pen would have rolled off. This matters more than people realize because a dropped scriber usually means a broken tip and a wasted blade.
I also appreciate the ambidextrous design. Left-handed builders on forums have confirmed the grip feels natural from either orientation, which addresses a gap most scriber reviews completely ignore. The screw-off cap doubles as extra length when attached to the back of the tool during use, giving you a longer grip surface for two-handed control on long straight scribing runs.
2. DULIWO 7-Blade Scriber Set – Versatile Multi-Size Kit
DULIWO Model Scriber Chisel 7 Blades (0.1/0.2/0.4/0.6/0.8/1.0/2.0mm)
7 interchangeable blades (0.1-2.0mm)
Tungsten steel construction
Non-slip aluminum alloy handle
Laser-marked blade sizes
Plastic carrying case
Ambidextrous design
Pros
- 7 interchangeable blades for versatile use
- Sharp and precise scribing
- Comfortable non-slip handle
- Good value for beginners to advanced
- Portable carrying case
Cons
- Blades prone to chipping on metal
- Blades may rust if exposed
- Some quality control variation
If I could only recommend one scriber product to a modeler who is just building out their tool collection, it would be this DULIWO 7-blade set. For less than the cost of a single premium branded chisel, you get seven blade widths from 0.1mm up to 2.0mm. That range covers everything from hairline detail on 1/144 kits to deep structural lines on 1/35 armor.
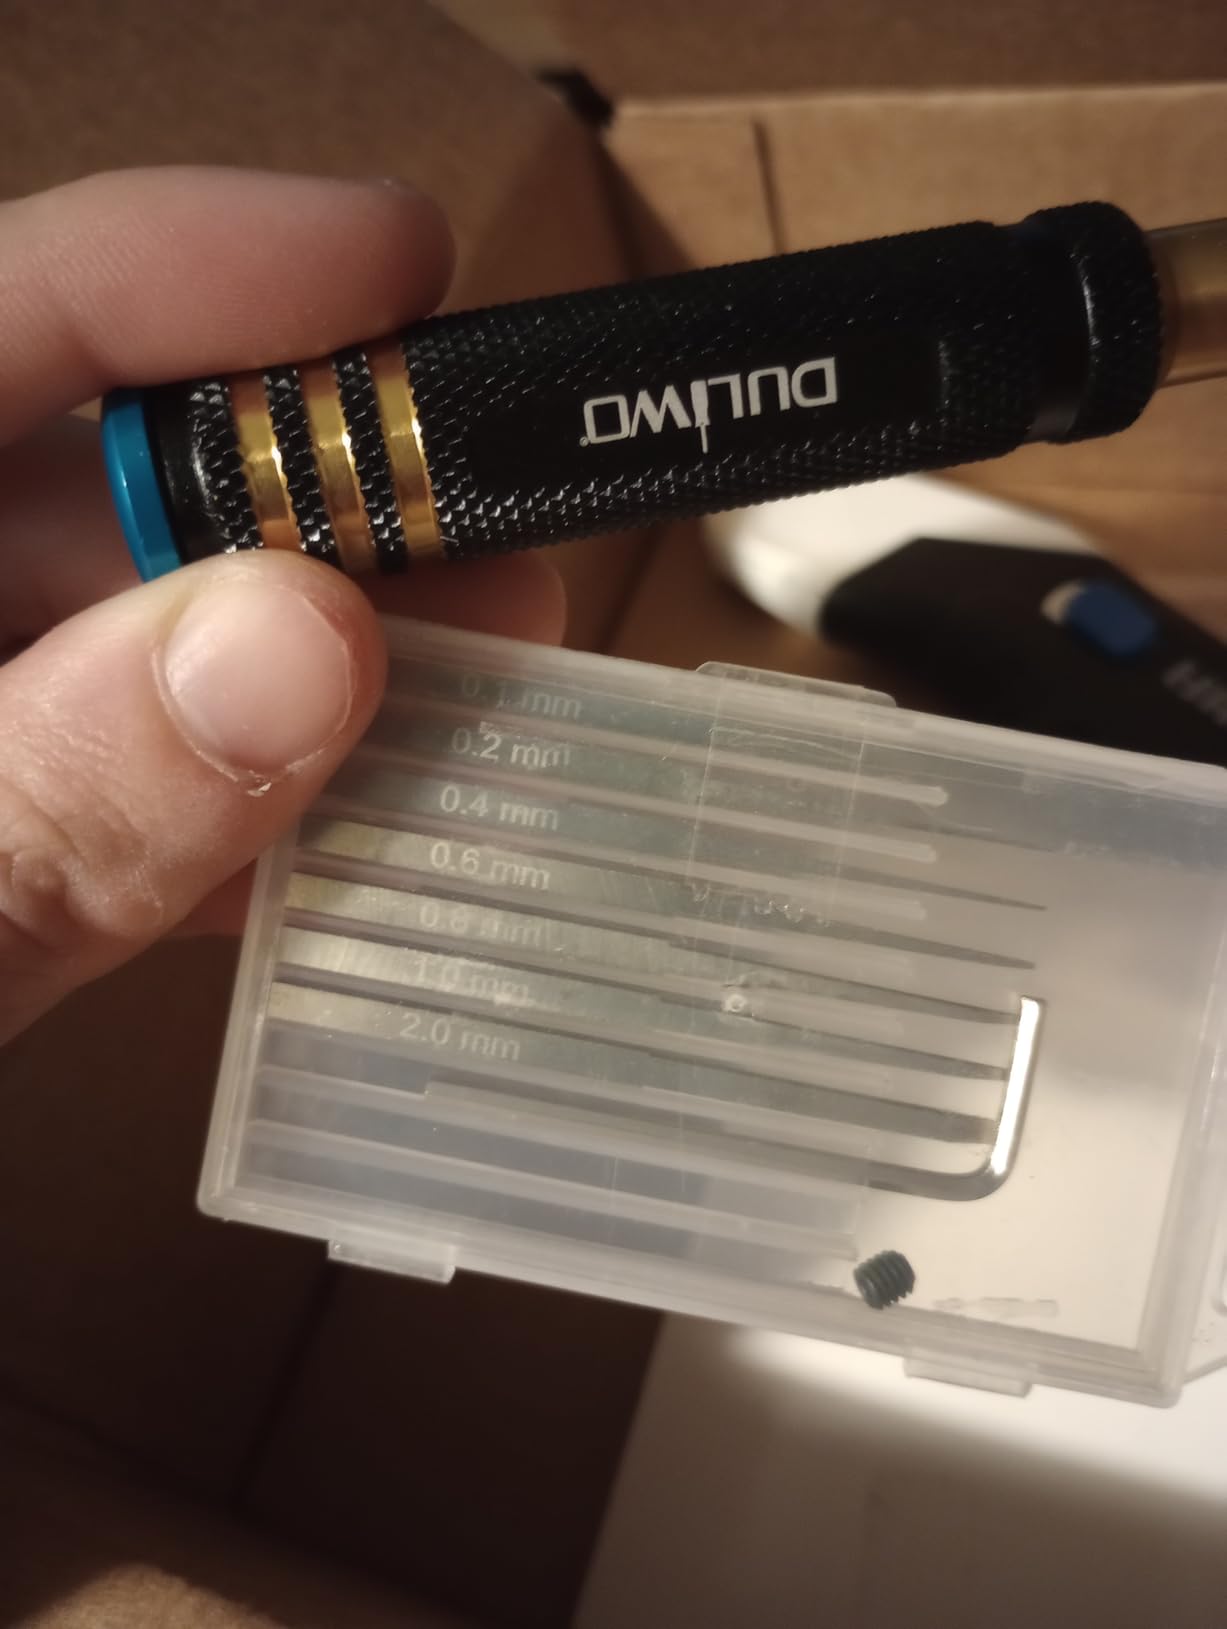
The aluminum alloy handle has a knurled non-slip texture that I found comfortable during long scribing sessions. You install each blade using the included hex key, which takes about 30 seconds when switching sizes. The laser markings on each blade make it easy to grab the right one without squinting at tiny numbers printed on the side.
I tested this set on a MG Freedom Gundam and a 1/48 Tamiya aircraft kit. The 0.2mm and 0.4mm blades produced clean lines on both with minimal cleanup needed. The wider 1.0mm and 2.0mm blades are useful for resurfacing damaged lines or creating custom panel patterns on larger surfaces where bold detail is appropriate.
The biggest trade-off compared to a single premium tool is blade quality consistency. Two of the seven blades in my set had slightly rough edges out of the case that needed a few light passes on styrene to smooth out. After that break-in period, all seven performed well. Storing them dry and away from humidity is important because users report rust on neglected blades.
Community sentiment on r/Gunpla backs up my experience. Multiple users recommend the DULIWO as a solid beginner option that punches above its price class. The 0.15mm blade in the set is the one I used most frequently, and it produced results comparable to my standalone stedi 0.15mm Blue. That is impressive given the price difference.
The 2-year warranty included with this set is worth noting. DULIWO stands behind their product, which gives you recourse if you receive a defective blade or handle. Based on the Amazon review patterns, quality control issues are uncommon but not unheard of, so the warranty provides useful peace of mind.
What Blade Sizes You Actually Need by Scale
For 1/144 scale kits, you will mostly use the 0.1mm and 0.2mm blades. Anything wider starts to look out of proportion on small surfaces. The 0.4mm is your upper limit for primary lines on these kits, and even then, use it sparingly on larger surfaces only.
For 1/100 and 1/72 builds, the 0.2mm, 0.4mm, and 0.6mm blades see the most use. The 0.8mm, 1.0mm, and 2.0mm blades are better suited for 1/35 armor and large 1/48 aircraft where bolder lines are appropriate and match the scale proportions of the real vehicles.
How the Carrying Case Holds Up Over Time
The included plastic case is functional but basic. It keeps the blades separated and organized, which prevents the tips from contacting each other and chipping. I labeled each slot with a marker for the blade size to speed up selection during builds.
After three months of regular use, the case hinges still work fine but the latch is showing wear. For a more durable storage solution, consider a small tackle box or foam-lined case if you plan to transport the set frequently to modeling club meetings or build sessions away from your main bench.
3. Tamiya Plastic Scriber II – Reliable Beginner Option
Tamiya America, Inc Plastic Scriber II, TAM74091
Retractable plastic body design
Japan-made
Manual operation
Suitable for precision model work
Compact and lightweight
Pros
- Retractable design for safe storage
- Suitable for precision model work
- Proven quality with 2400+ reviews
- Affordable entry point
- Develops fine motor skills for beginners
Cons
- May be too basic for advanced modelers
- Single piece only no blade options
- Plastic construction less premium feel
The Tamiya Plastic Scriber II is the tool I started with years ago, and it remains the most recommended beginner scriber across modeling forums. With over 2,400 reviews and an 83 percent five-star rating on Amazon, it has earned its reputation through consistent, predictable performance at a price that does not scare off newcomers.
The retractable design is the standout feature. The tip extends when you need it and retracts into the body for safe storage, which eliminates the need for a separate cap. I keep one of these in my travel modeling kit because I never have to worry about the tip getting damaged in transit or poking through a tool roll.
This is a plastic-body tool, so it does not have the premium heft of an aluminum-handled chisel. But that lightness can actually help beginners who tend to press too hard. The scriber produces lines through a pushing action rather than a cutting action, which gives you a different type of groove than a chisel tip produces.
Experienced builders on r/modelmakers note that the Tamiya scriber can cut too wide and too deep if you are not careful. I agree with this assessment. The trick is to make multiple light passes rather than one heavy push. Let the tool do the work and build up the groove depth gradually over three to four passes.
I have used the Tamiya Scriber II on over 50 builds across six years. On my most recent project, a 1/100 MG Strike Freedom, I used it to deepen faded factory panel lines on the legs and torso. The results were clean and consistent, and the lines took an enamel wash evenly without pooling or bleeding outside the grooves.
The 0.07-pound weight makes this the lightest tool in the roundup. Some builders prefer a heavier tool for stability, but I find the light weight reduces hand fatigue during long detailing sessions. The plastic body also means you will not accidentally scratch adjacent painted surfaces if the handle contacts them while you work.
How It Compares to Chisel-Tip Scribers
The Tamiya Scriber II uses a pushing action that displaces plastic rather than removing it cleanly like a chisel. This means the resulting groove has raised edges that you may need to scrape flat with a blade after scribing. The advantage is that the displaced material creates a natural guide for subsequent passes.
Chisel-tip tools like the stedi and DULIWO remove material directly, producing cleaner grooves with less cleanup. However, the Tamiya tool is more forgiving for beginners because it is harder to accidentally gouge too deep. If you overshoot with a chisel, the damage is harder to fix.
Long-Term Durability and Maintenance
The tip on the Tamiya Scriber II wears down over time but slowly. I used my first one for about 18 months of regular use before noticing a decline in sharpness. At this price point, replacing it is more practical than trying to sharpen it. Some builders report getting three or more years of use from a single unit with casual use.
Keep the tip clean by wiping it with a soft cloth after each session. Plastic shavings can build up in the groove of the tip and affect cutting performance. A quick wipe keeps everything running smoothly and prevents residue from transferring to your next scribing line.
4. stedi Model Scriber 0.1mm Red – Ultra-Fine Detail Tool
stedi Model Scriber Chisel 0.1mm Tungsten Steel for Panel Line Resin Models
0.1mm tungsten steel blade
Mirror polished finish
Octagonal aluminum handle
Low center of gravity
Protective cap included
Precision-ground blade
Pros
- Extremely sharp and precise
- Comfortable ergonomic handle
- Good weight and balance
- Quality tungsten steel blade
- Ideal for fine detail work
Cons
- Blade is very fragile under pressure
- Requires protective cap storage
- Tip can break on first use if forced
The stedi 0.1mm Red is the fine-detail companion to my Editor’s Choice blue 0.15mm tool. When I need hairline panel lines on small RG kits or delicate engraving on 1/144 aircraft, this is the tool that delivers. The 0.1mm blade width creates lines so fine they almost disappear until you apply a panel wash, at which point they pop with crisp definition.
The octagonal body design is a meaningful upgrade over round handles. I set this tool down on my bench frequently while scribing, and the octagonal shape prevents it from rolling off the edge. After losing a previous round-body scriber to a floor drop, I appreciate this design choice more than I expected.
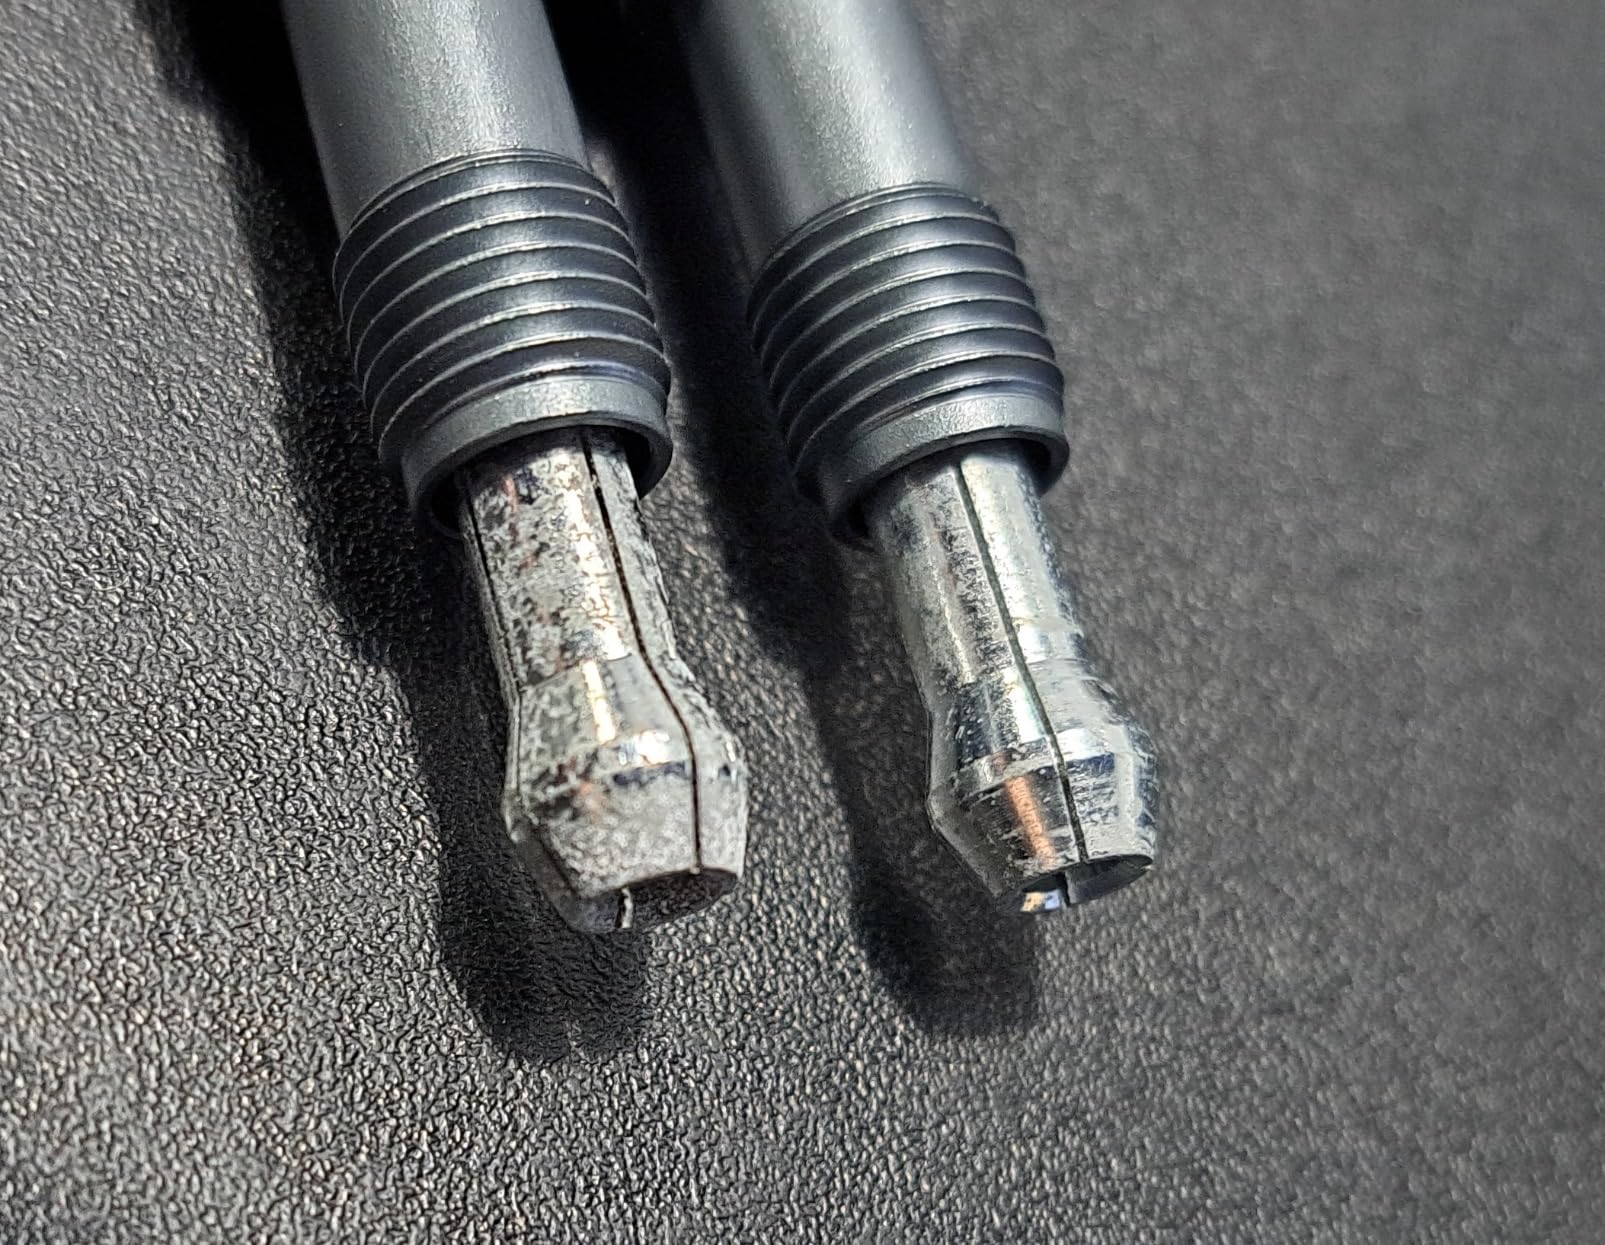
I tested the 0.1mm blade on a RG Hi-Nu Gundam and was impressed by how smoothly it tracked along scribing tape guides. The mirror-polished finish reduces drag, which is critical at this blade width because a rough-cutting 0.1mm blade would skip and wander. The precision-ground tip held up through the entire build without visible wear.
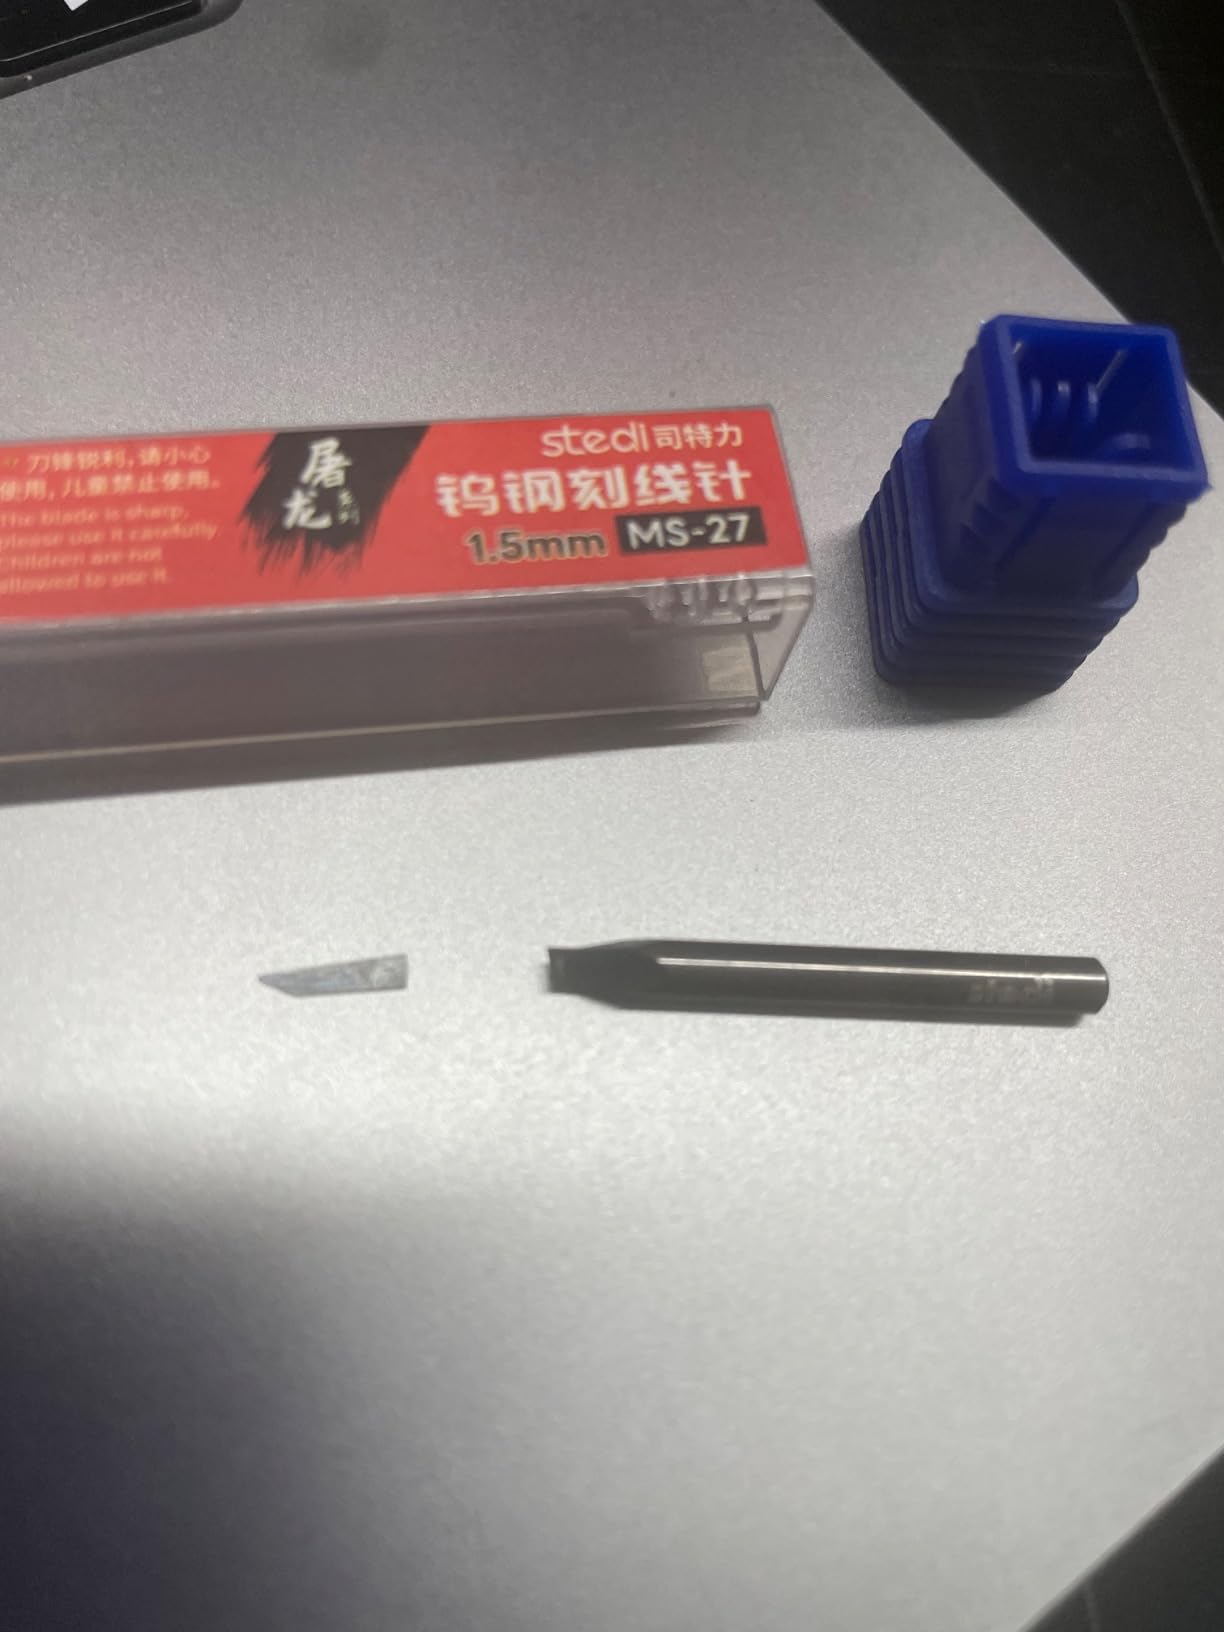
The 81 percent five-star rating on Amazon reflects the quality of this tool. Users consistently praise the sharpness and the ergonomic handle. The main complaints center on blade fragility, which is inherent to any 0.1mm tungsten steel tip. This is not a quality control issue but a physical reality of working with extremely fine, hard metal tips.
The trade-off with any 0.1mm blade is fragility. Multiple Amazon reviewers mention tips breaking on first use, and I understand why. If you press too hard or catch the blade on an uneven surface, the tiny tip snaps. Use very light pressure and make three to four passes to build depth gradually.
For builders debating between the red 0.1mm and blue 0.15mm, my recommendation is to start with the blue unless you specifically work on very small-scale kits where ultra-fine lines are essential. The 0.15mm is more forgiving to scribe and produces lines that are easier to see during the process. Add the 0.1mm later when you have developed your technique.
When to Choose 0.1mm Over 0.15mm
The 0.1mm blade is ideal for ultra-fine detail work on small-scale kits. If you primarily build 1/144 Gunpla or 1/72 aircraft with delicate surface detail, the 0.1mm produces lines that match the scale proportions better than wider blades. The resulting lines are subtle but visible after a wash.
If you work mostly on 1/100 or larger kits, the 0.15mm blue version is more versatile because the slightly wider line is more forgiving to scribe and easier to see during the process. The 0.1mm on larger scales can look too faint unless you deepen the groove significantly.
Blade Protection and Storage Best Practices
Always cap the blade when you set it down, even for a moment. The included protective cap screws on securely, so it will not fall off during transport. I store mine upright in a tool stand to prevent anything from contacting the tip when it is not in use.
Avoid using this blade on resin or metal. It is designed for plastic and styrene only. Resin is harder on the tip and will dull or break it faster than plastic model work. If you need to scribe resin, use a wider blade (0.2mm or above) that can handle the harder material without snapping.
5. DULIWO Scribing Tool Kit – Complete 22-Piece Set for Gunpla
DULIWO Model Scriber Tool Kit, 7-Blade Chisel Set for Gunpla
7 tungsten steel scribe blades (0.1-2.0mm)
10-piece pin vise drill set
2 tweezers and 1 cleaning brush
Non-slip aluminum handle
Rotary drill chuck
22 pieces total
Pros
- Complete kit with everything for model building
- Sharp tungsten steel chisel blades
- Good value for the price
- Ergonomic non-slip handle
- Includes drill bits and tweezers
Cons
- Drill bits are brittle and can break
- Tweezers quality is basic
- No hard case included
- Some chisel tips may vary in size
This DULIWO kit is the most complete scribing package I tested. Beyond the 7 tungsten steel blades (the same 0.1mm to 2.0mm range as the standalone DULIWO set), you get a 10-piece pin vise drill set, two tweezers, and a cleaning brush. For a builder who is starting from scratch and needs multiple tools, this kit covers a lot of ground in one purchase.
The handle is the same non-slip aluminum alloy design as the standalone DULIWO set, which means you get the comfortable grip and knurled texture. The hex screw blade installation works the same way and takes seconds to swap between sizes. I found the blade sharpness consistent across all seven sizes in my test kit.
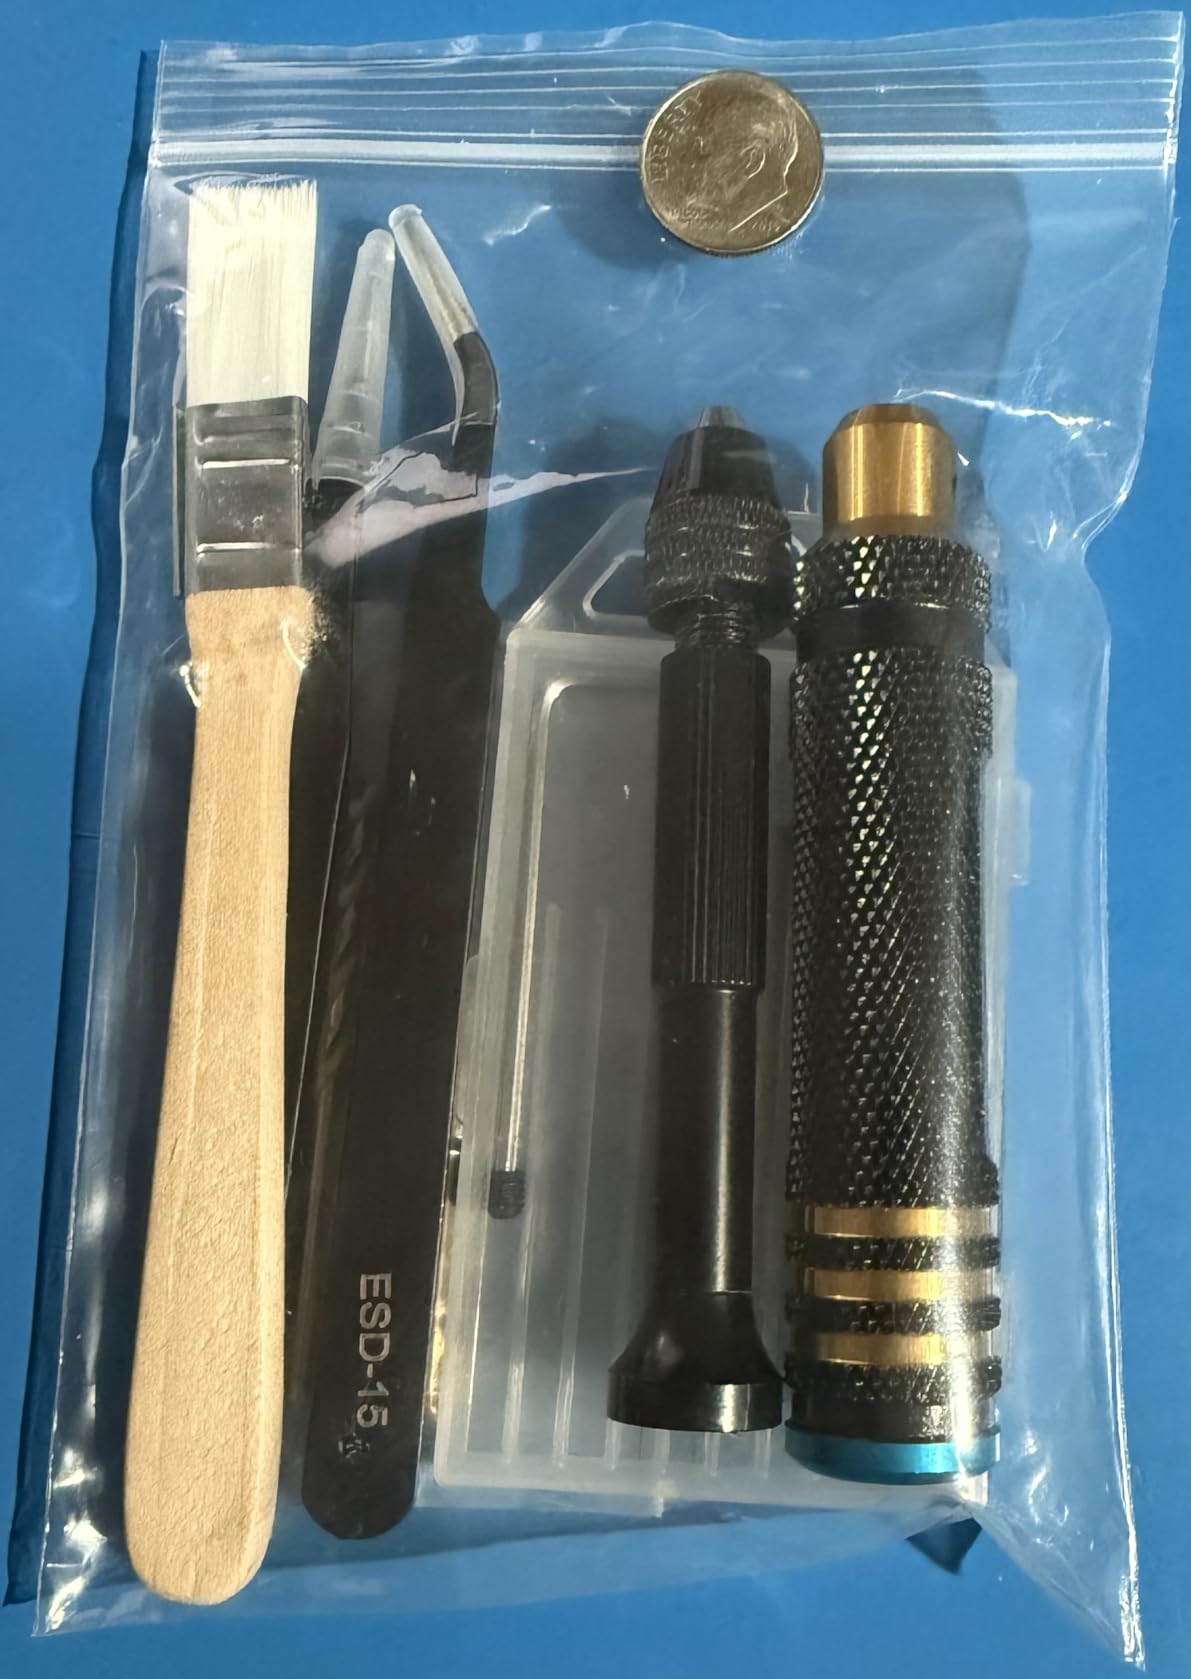
The pin vise drill is where this kit adds real value. The 10 micro drill bits range from 0.8mm to 3.0mm, covering everything from tiny rivet holes to larger vent openings. I used the 1.0mm and 1.5mm bits to add rivet detail to a 1/35 tank build and the chuck held the bits securely without slipping.
The rotary chuck design makes bit changes quick and tool-free, unlike the hex-key blade changes on the scribing handle. This means you can switch between drilling and scribing without losing momentum during a build session. For builders who add battle damage, vent detail, or rivet patterns to their models, this dual functionality is genuinely useful.
The weakness is in the accessories. The tweezer tips did not align perfectly out of the package, and the drill bits are brittle. I snapped a 0.8mm bit on my second hole because I applied too much pressure. Treat the small bits gently and they will last, but do not expect premium-grade durability at this price point.
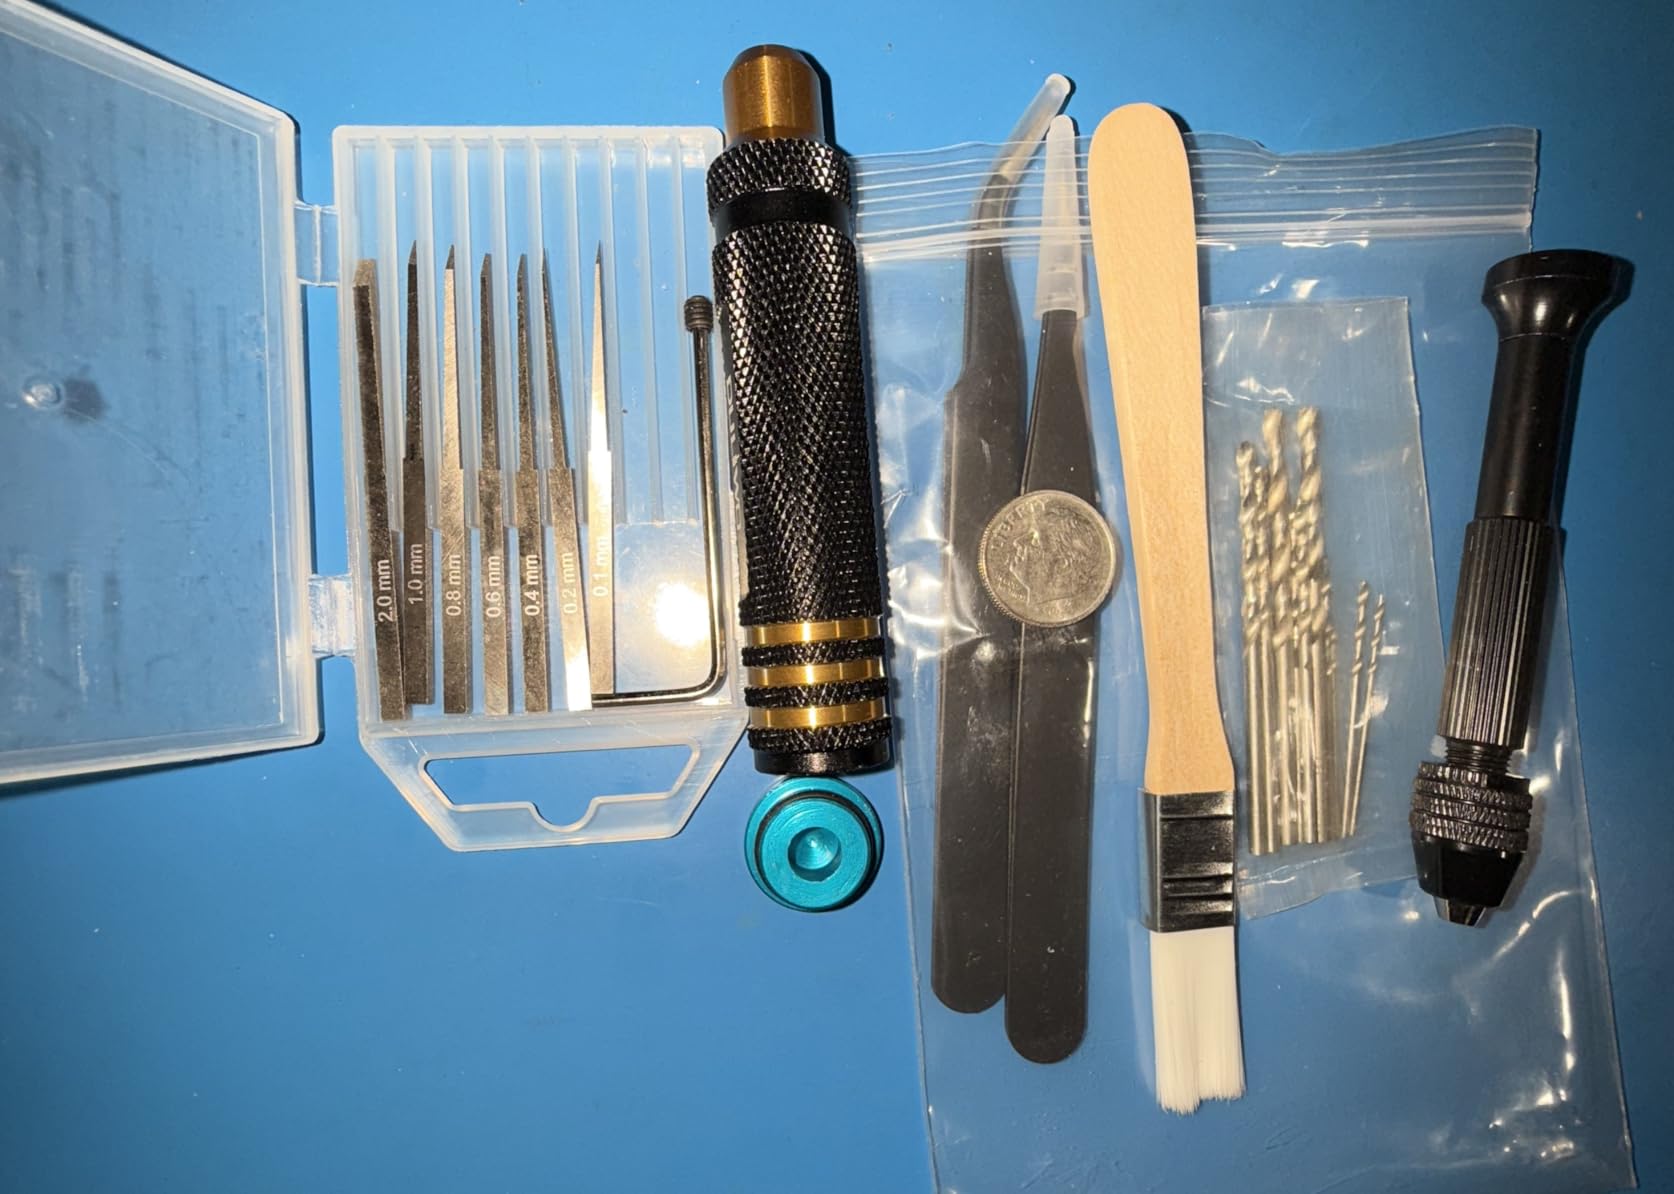
The cleaning brush is a small but thoughtful inclusion. Tungsten steel blades accumulate plastic shavings in the cutting edge after repeated use, and the brush makes it easy to clear debris between passes. Clean blades cut more consistently and produce smoother grooves.
Is the Kit Worth It Over Buying Tools Separately
If you already own a pin vise drill and decent tweezers, the standalone DULIWO 7-blade set is the better buy. You save money and avoid paying for tools you already have. Look at your current toolkit honestly before choosing the kit over the standalone set.
If you are new to the hobby and need all of these tools, the kit saves you roughly 30 to 40 percent compared to buying each component individually. The convenience of getting everything in one package also means you can start scribing and detailing immediately without waiting for multiple separate orders to arrive.
Drill Bit Sizes and Common Use Cases
The 0.8mm and 1.0mm bits are perfect for rivet detail on armor and aircraft. The 1.5mm and 2.0mm bits work well for vent holes and barrel openings. The larger 2.5mm to 3.0mm bits are suited for larger scale builds or creating openings for LED wiring in Gunpla kits.
Always clamp your work piece when drilling. Free-hand drilling with tiny bits almost guarantees breakage. A small modeling vise or even double-sided tape on a flat surface works well. Drill at low speed and let the bit cut rather than forcing it through the material.
6. ANSAI Model Scriber – 5-Blade Japan Steel Chisel Set
ANSAI Model Scriber with 5 Blades for Modeling Hobby Resin GK Carved Scribe line Cutting Tool Chisel + Rubber Cap Blades with Laser Mark
5 Japan steel blades (0.2-1.0mm)
Laser-marked sizes
Rubber protective cap
Steel and metal construction
Suitable for beginners to advanced
Pros
- Sharp Japan steel blades
- 5 useful blade sizes
- Laser marked for easy ID
- Suitable for all skill levels
- Works on multiple kit types
Cons
- Fragile if dropped
- Limited stock availability
- Blade cracks render them useless
The ANSAI 5-blade scriber has one of the highest review counts in this lineup at 646 verified reviews, and that volume gives me confidence in its consistency. The Japan steel blades come in five sizes: 0.2mm, 0.4mm, 0.6mm, 0.8mm, and 1.0mm. This is a more curated selection than the 7-blade DULIWO set, focusing on the sizes most builders actually use.
I found the Japan steel blades to be slightly different from the tungsten steel used in stedi and DULIWO tools. Japan steel holds an edge well and produces smooth cuts, but it is not quite as hard as tungsten carbide. In practice, this means the blades are slightly more forgiving and less prone to snapping on uneven surfaces.
The laser markings on each blade are clear and easy to read. The included rubber cap protects the installed blade during storage, which is a simpler solution than the screw-off caps on the stedi tools. The build quality feels solid in hand with a good weight distribution that balances well during use.
I tested the 0.2mm blade on an MG Destiny Gundam backpack shield and the cut was clean and controlled. The 0.6mm blade produced bold structural lines on a 1/35 tank hull that looked appropriate for the scale. Across all five sizes, the blade sharpness was consistent and the cuts required minimal cleanup.
The main caution from both the manufacturer and user reviews is durability when dropped. The blades can crack internally from a drop, rendering them useless even if the damage is not visible. I keep my ANSAI set in a dedicated drawer and always set it down on a soft mat to prevent any impact damage.
Japan Steel vs Tungsten Steel Blade Comparison
Japan steel blades tend to be slightly more flexible and forgiving than tungsten steel. If you are a beginner who is still learning pressure control, Japan steel is more forgiving of mistakes. The trade-off is that tungsten steel holds a sharper edge longer between sharpenings or replacements.
For experienced builders who use light, controlled passes, tungsten steel delivers cleaner results with less frequent maintenance. For builders still developing their technique, the ANSAI’s Japan steel is a practical choice that will not punish minor mistakes as harshly as a harder, more brittle tungsten tip.
Kit Compatibility and Best Uses
The 5-blade range covers Gunpla from HG through PG, military models in 1/35 scale, aircraft in 1/48 and 1/72, and even car models. The 0.2mm and 0.4mm blades handle fine detail, while the 0.8mm and 1.0mm blades are suited for primary structural lines and larger kits.
Users on forums report good results using ANSAI blades on resin garage kits and metal model parts, though the manufacturer emphasizes careful handling to prevent blade cracking on harder materials. If you work extensively with resin, consider dedicating a specific blade to resin work to avoid cross-contaminating your plastic-working blades.
7. Bucasso 7-Piece Premium Scribing Set – Color-Coded Professional Kit
Bucasso Model Scriber, 7-Piece Tungsten Steel Blade Scribing Tool Set 0.075/0.1/0.125/0.15/0.2/0.3/0.5mm, with Wooden Stand for Modeling Hobby, RG Scale Model, Gundam Model Kit, Plastic Models
7 scribing tools (0.075-0.5mm)
Color-coded casings
Wooden stand included
Aviation aluminum handles
Tungsten steel blades
Six-sided anti-roll design
Pros
- 7 color-coded blade sizes for instant ID
- Wooden stand for organization
- Sharp mirror-finish blades
- Ergonomic low center of gravity handle
- Premium presentation and build
Cons
- Higher price point
- Blades need careful handling
- All tools pre-loaded no swapping
The Bucasso 7-piece set is the premium option in this lineup, and it shows in both the presentation and the build. Instead of one handle with interchangeable blades, you get seven complete scribing tools, each pre-loaded with a different blade size and housed in a uniquely colored casing. The included wooden stand holds all seven tools upright and organized on your bench.
The blade sizes range from an ultra-fine 0.075mm up to 0.5mm, covering the full spectrum of fine panel line work. I found the color-coding genuinely useful during builds. Instead of stopping to swap blades and check laser markings, I just grab the tool with the color that matches the line width I need for that section of the model.
The aviation aluminum handles have a six-sided cylindrical design that prevents rolling and provides a comfortable grip. The low center of gravity gives good control during scribing. Each blade has a mirror-like finish that produces smooth, clean cuts through styrene with minimal drag or chatter.
I tested the 0.075mm blade on a delicate 1/144 aircraft canopy and was impressed by the hairline detail it produced. The 0.3mm and 0.5mm blades handled primary structural lines on a 1/48 aircraft fuselage with confidence. Across the range, the blade quality was consistently high with no duds in the set.
The main consideration is price. This set costs significantly more than the DULIWO or QWORK 7-blade alternatives. You are paying for convenience (no blade swapping), presentation (wooden stand and color coding), and build quality. For a builder who scribes daily and values workflow speed, the investment pays off. For occasional use, a single-tool set may be more practical.
How the Wooden Stand Improves Workflow
The stand is not just for display. Having all seven tools visible and accessible means you spend less time fumbling with hex keys and storage cases. During a complex build with varied line widths, I estimated the stand saved me 15 to 20 minutes of tool management over a weekend session.
The stand is sturdy enough to prevent tipping when removing or replacing tools. It also keeps blade tips pointed upward and visible, which reduces the chance of accidentally grabbing the wrong end and damaging a tip. The wooden construction looks professional on any workbench.
Who Should Invest in a Premium Set
This set makes sense for dedicated builders who work on multiple kits simultaneously and frequently switch between line widths. Competition builders and commission artists who need consistent, repeatable results will appreciate having dedicated tools for each size rather than swapping blades in a single handle.
If you are a casual builder who does one or two kits a year, the premium price is hard to justify. A single stedi or DULIWO tool will serve you well at a fraction of the cost. The Bucasso set rewards frequent use with workflow efficiency that compounds over many builds.
8. Hasegawa Scriber TT1 – Japanese Precision Metal Scriber
Hasegawa Modeling Scriber Scriber (TT1) yJapanese Plastic modelz
0.3mm hard pointed metal tip
Contoured grip
Includes honing stone
Japan import
Round body design
Compact and lightweight
Pros
- Exceptional craftsmanship
- Very fine sturdy pointed tip
- Compact lightweight design
- Includes honing stone
- Japan import quality
Cons
- Tip can bend under pressure
- Small and lightweight feel
- Single scriber configuration only
The Hasegawa TT1 is a traditional Japanese scriber that takes a different approach from the chisel-tip tools dominating this list. It features a hard, pointed metal tip with a 0.3mm line size housed in a compact contoured body. The included honing stone is a thoughtful touch that lets you maintain the tip yourself over time.
Using the TT1 feels different from using a chisel-tip scriber. The pointed tip scores a line rather than cutting a groove, which produces a finer mark that you then deepen with repeated passes. I found this approach works well for marking line positions before committing to a deeper groove with a chisel tool.
The 0.3mm width is versatile. It is fine enough for 1/72 aircraft detail and bold enough for 1/35 military models. The contoured grip is comfortable despite the tool’s small size, though builders with larger hands may find it feels insubstantial compared to the aluminum-handled stedi tools.
I used the TT1 on a 1/72 Hasegawa aircraft kit (fittingly) and the tool felt perfectly matched to the plastic. The pointed tip traced panel line patterns accurately, and the lightweight body gave me precise control over the scribing depth. For modelers who build Hasegawa kits regularly, this tool feels like it was designed specifically for that plastic.
The honing stone is the standout accessory. Most scriber tips dull over time and require replacement, but the TT1 can be resharpened. I ran a few passes with the stone after heavy use and restored the tip to working sharpness. This extends the tool’s lifespan considerably compared to disposable chisel blades that cannot be resharpened.
Scoring vs Cutting: Which Approach Is Better
The pointed-tip scoring approach of the Hasegawa TT1 is ideal for marking and for builders who prefer to build groove depth gradually. It gives you more control over the final line depth and is less likely to produce an accidental deep gouge that requires filling and redoing.
Chisel-tip tools cut a defined groove in fewer passes but require more confidence and control. For beginners, starting with a scoring tool like the TT1 and then deepening with a chisel is a reliable two-step method that minimizes the risk of mistakes.
Using the Honing Stone Effectively
The honing stone works best with light, consistent strokes at the original tip angle. Do not press hard or try to reshape the tip. Five to ten light passes are usually enough to restore working sharpness. After honing, test the tip on a scrap piece of plastic before returning to your model.
Keep the stone clean and free of metal particles. Wipe it with a damp cloth after each use. A dirty stone can embed particles that will scratch rather than sharpen the tip. Store the stone in its packaging to protect the honing surface from damage.
9. Tamiya Fine Engraving Blade 0.15mm – Professional Detail Carving
Tamiya America, Inc Fine Engraving Blade 0.15mm, TAM74145
0.15mm engraving blade
2mm shaft diameter
25mm total length
Compatible with Tamiya holder 74139 or 74112
Includes protective box
Gray finish
Pros
- Very fine 0.15mm engraving blade
- Compatible with standard Tamiya holders
- Includes storage box
- Excellent precision for detailed work
- Trusted Tamiya quality
Cons
- Requires separate holder pin not included
- Limited stock availability
- Higher price for blade only
The Tamiya Fine Engraving Blade is a component rather than a complete tool. It is a 0.15mm blade with a 2mm shaft designed to fit Tamiya holder pins (model 74139 or 74112), which are sold separately. If you already own a compatible Tamiya holder, this blade is an upgrade that delivers professional-grade engraving precision.
I tested this blade in my Tamiya 74139 holder on a 1/48 aircraft build, and the cutting action is noticeably smoother than generic engraving tools. The 0.15mm width produces crisp, clean lines that hold panel wash beautifully. Forum members on r/modelmakers have called this blade amazing for precision work, and I agree with that assessment.
The blade arrived in a protective storage box, which is important because bare engraving blades are easily damaged in a tool drawer. The 25mm length provides good reach and control. The blade holds its edge well across multiple builds, which helps justify the higher price point compared to disposable chisel blades.
The 74 percent five-star rating on Amazon reflects strong satisfaction among users who understand what they are buying. The lower ratings tend to come from buyers who did not realize a separate holder is required. Read the product description carefully before purchasing to avoid disappointment.
The key consideration is that this is a blade-only purchase. If you do not own a compatible Tamiya holder, you need to factor that additional cost into your decision. Once you have the holder system, you can swap between different Tamiya engraving blades for various line widths, building a modular precision toolkit over time.
Compatibility with Tamiya Holder System
The blade fits holder pin 74139 and 74112. These holders have a comfortable grip and a collet mechanism that secures the blade shaft firmly. If you own any Tamiya engraving tool setup, check your holder model before purchasing to ensure compatibility.
The holder system is a good long-term investment because it lets you build a collection of different blade widths without buying a new handle each time. This modular approach can save money for builders who use multiple blade sizes regularly and appreciate the consistency of a single handle design.
Best Applications for the 0.15mm Engraving Blade
This blade excels at fine panel line engraving on plastic models. The 0.15mm width is ideal for 1/72 and 1/48 aircraft detailing, 1/100 Gunpla, and 1/35 military models where you need precise, controlled lines that match the scale and detail level of the surrounding molded features.
It is less suited for deep structural grooves or wide panel lines. For those applications, a chisel-tip tool in the 0.3mm to 0.6mm range will be more efficient and produce better results. Think of this blade as a finishing tool for fine detail rather than a primary scribing tool for bold structural work.
10. stedi Hook Tip Model Scriber 0.15mm – Smooth Control Design
stedi Model Scriber,Line Scriber,Tungsten steel Blades 0.15mm,Panel line,Model Scribing Tool for Modeling Hobby,Resin GK Carved Engraved Lines,RG Scale Model,Gundam Model Kit
0.15mm hook-style tip
Tungsten steel blade
Aviation aluminum handle
Octagonal cylindrical shape
Low center of gravity
Wide scale compatibility
Pros
- Extremely sharp tungsten steel blades
- Comfortable ergonomic handle
- Hook tip provides smooth control
- Suitable for Gundam and aircraft
- Low force required for scribing
Cons
- Blade can snap under heavy use
- Size discrepancies reported
- Cap must be replaced carefully
The stedi Hook Tip scriber introduces a different blade geometry that caught my attention. The hook-style tip is designed to provide silky smooth control with minimal force. After testing it extensively, I can confirm the hook design does reduce the skipping and grabbing that sometimes happens with standard chisel tips, especially for builders still developing their scribing technique.
The 0.15mm blade width is the versatile middle ground that works across multiple scales. I tested this on a MG Gunpla, a 1/72 aircraft, and a 1/100 car model. On all three, the hook tip tracked smoothly along tape guides and produced consistent grooves without the chatter marks I sometimes see from standard chisels.
The aviation aluminum handle has an octagonal cylindrical shape that prevents rolling and provides a comfortable grip. The low center of gravity keeps the tool stable during use, which helps maintain a consistent scribing angle. The lightweight design reduces hand fatigue during long detailing sessions.
I did notice that the hook tip requires a specific cutting direction to work effectively. The hook shape means it cuts more cleanly when pulled toward you rather than pushed away. Once I adjusted my technique, the smoothness was noticeably better than standard chisel tips on both straight and curved lines.
The blade is available in 0.125mm, 0.15mm, and 0.2mm widths, giving you options for different scale work. The 0.15mm version I tested is the most versatile for general use across Gunpla, aircraft, and automotive models. The rust-resistant tungsten steel formulation means you do not need to worry about corrosion as much as with some budget alternatives.
How the Hook Tip Differs from Standard Chisel Tips
A standard chisel tip cuts in both push and pull directions but can skip on the initial contact. The hook tip is designed to engage the surface smoothly on the pull stroke, which reduces skipping and gives you better control over line placement. This is especially helpful when scribing long straight lines where a single skip can ruin the entire run.
For curved lines, the hook tip is particularly effective because the curved blade geometry naturally follows gentle curves. This makes it a strong choice for builders who want to add organic panel lines rather than purely geometric patterns. On compound curves like aircraft noses, the hook tip follows contours that would challenge a standard chisel.
Blade Size Compatibility Across Scales
The stedi Hook Tip is available in 0.125mm, 0.15mm, and 0.2mm widths, covering Gundam kits from HG through PG, car models, aircraft models, and 1/144 scale builds. The 0.15mm version I tested is the most versatile for general use across multiple kit types.
If you build primarily small-scale kits, consider the 0.125mm option for finer proportions. For 1/35 military work, the 0.2mm version produces lines that match the scale proportions better and stand up to the heavier weathering typical of armor models.
11. stedi Tungsten Steel Scriber – Versatile Replaceable-Tip Tool
stedi Tungsten Steel Scriber, Model Hobby Making Tools, Resin Carved Scribe Line Cutting Tool for Gundam, Scale Military Model, 3D Resin Parts
Tungsten steel replaceable tip
Metal alloy body
Ergonomic grip
Anti-roll design
Ambidextrous
2 year warranty
Suitable for multiple materials
Pros
- Solid and sharp construction
- Comfortable ergonomic grip
- Durable metal alloy body
- Replaceable tip extends tool life
- Good weight distribution
Cons
- Plastic cap instead of metal
- Additional tips may not fit chuck
- Rounded tip limits some detail work
The stedi Tungsten Steel Scriber is a more traditional pointed-tip tool rather than a chisel. The replaceable tip design means you can extend the tool’s lifespan by swapping tips rather than replacing the entire tool. The 2-year warranty is the longest coverage in this lineup, which speaks to stedi’s confidence in the build quality.
I found the metal alloy body more durable than plastic alternatives. It has a satisfying weight that helps with control during precision work. The ergonomic grip is comfortable for extended sessions, and the anti-roll design keeps the tool in place when you set it down on your bench between passes.
The rounded tip is designed for outlining clean lines rather than cutting deep grooves. Think of it as a marking and light-scribing tool rather than a heavy-duty panel line cutter. I used it for marking line positions before deepening with a chisel, and it worked well in that complementary role.
The line size range of 1.0mm to 1.9mm makes this tool suited for bolder work on larger scale kits or for marking rather than fine detail scribing. On 1/35 armor and large 1/48 aircraft, the broader tip creates visible guidelines that you can then refine with a finer chisel. It is not the tool for delicate 1/144 work.
The replaceable tip is a practical feature. When the original tip dulls, you swap in a new one without buying a whole new tool. However, some users report that additional replacement tips are slightly oversized for the chuck, which can make installation fiddly. I did not experience this issue with my unit, but it is worth noting.
Replaceable Tip System Pros and Cons
The replaceable tip system is cost-effective over the long term. Instead of discarding a whole tool when the tip dulls or breaks, you replace just the tip component. This reduces waste and saves money for builders who scribe frequently and go through tips at a reasonable rate.
The downside is that you need to purchase replacement tips separately and keep them on hand. If a tip breaks mid-build and you do not have a spare, your project stalls until replacements arrive. I recommend ordering a pack of replacement tips when you buy the tool so you always have backups.
Materials and Kit Compatibility
The tool is rated for Gundam models, military models, wood, plastic, 3D resin parts, and PLA printed parts. The tungsten steel tip is hard enough to mark all of these materials, though I recommend dedicated chisel-tip tools for deep panel line work on plastic kits.
For 3D resin and PLA parts, this tool works well for cleaning up layer lines and adding surface detail. The rounded tip does not dig into softer materials the way a sharp chisel would, which prevents accidental gouging on prints that may have inconsistent surface hardness.
12. Tamiya Carbide Needle 20 Degrees – Fine Detail Engraving
Tamiya Craft Tool Series No.148 Streaks Carving Carbide Needle 20 Degrees Plastic Model Tool 74148
20 degree carbide needle tip
25mm length
Fine point type
Tamiya craft tool series No.148
Exclusively for modeling
Plastic model tool
Pros
- High quality Tamiya brand
- 20 degree carbide needle tip
- Suitable for fine detail work
- Trusted brand in modeling
- Exclusively designed for modeling
Cons
- Limited stock availability
- Very lightweight feel
- Higher price for a single tip
The Tamiya Carbide Needle 20 Degrees (Craft Tool Series No.148) is a specialized engraving needle designed for fine detail work on plastic models. The 20-degree needle tip is made from carbide, which is harder than standard steel and holds a sharp point longer than softer materials.
I used this needle for fine engraving on a 1/72 aircraft canopy frame and for adding tiny detail markings on a 1/48 cockpit interior. The needle produces very fine lines that are perfect for representing access panels, inspection hatches, and other small surface details that a wider chisel would overwhelm.
The carbide tip is impressively durable. After multiple detailing sessions, I saw no visible wear on the point. This is the advantage of carbide over standard steel: it maintains sharpness significantly longer, which means more consistent results over time without the need for frequent sharpening or replacement.
The 60 percent five-star rating is slightly lower than other Tamiya tools in this lineup, which reflects the specialized nature of this needle. Some buyers expected a general-purpose scriber and were disappointed by the narrow application range. This is a fine detail tool, not a primary panel line scriber.
The tool is very lightweight at just 0.01 kilograms, which can feel insubstantial compared to the aluminum-handled stedi and DULIWO tools. Some builders prefer a heavier tool for stability, while others find the lightness improves maneuverability for fine work in tight spaces like cockpits and wheel wells.
Carbide vs Steel Needle Tips
Carbide is significantly harder than steel and holds an edge much longer. A carbide needle can last through many more detailing sessions before showing wear. The trade-off is that carbide is more brittle and can chip if dropped or struck against a hard surface during storage or use.
Steel needles are more forgiving but dull faster. For builders who do fine detail work regularly, the carbide investment pays off in reduced replacement frequency and more consistent line quality over the tool’s lifespan. For occasional detail work, a steel needle may be more cost-effective.
Best Uses for a 20-Degree Needle Tip
The 20-degree angle produces a moderately fine point that is versatile for both marking and light engraving. Use it for cockpit detail, access panel outlines, rivet marking, and other fine surface work where a chisel would be too aggressive or produce a line that is too wide.
For deeper panel line grooves, pair this needle with a chisel-tip tool. Use the needle to mark the line position, then deepen the groove with a chisel for the final cut. This two-step approach gives you the precision of needle marking combined with the clean groove of a chisel cut.
13. QWORK 7-Piece Scriber Set – Budget Multi-Blade Option
QWORK Model Scriber Resin Carved Scribe Line Scribing Tool, Chisel Set with Tungsten Steel Blades – 7 Sizes (0.1 to 2.0 mm), for Scale Model, Carving Cutting
7 precision tungsten steel cutters (0.1-2.0mm)
Laser-marked blades
Aluminum alloy handle
Non-slip texture
Plastic storage cases
Hex key wrench included
Pros
- Excellent value for the price
- Sharp tungsten steel blades
- Works on metal and wood
- Compact portable storage
- 7 sizes for flexibility
Cons
- Handle may feel chunky
- Small blades need careful handling
- Quality control variation
The QWORK 7-piece set is the most affordable multi-blade option in this lineup, and it delivers solid value for budget-conscious builders. You get seven tungsten steel cutters ranging from 0.1mm to 2.0mm, an aluminum alloy handle, storage cases, and a hex key wrench. The feature set mirrors the DULIWO set at a lower price point.
I tested the QWORK blades on plastic, soft wood, and thin aluminum sheet. On plastic model kits, the 0.2mm and 0.4mm blades produced clean panel lines comparable to the DULIWO set. On wood and aluminum, the blades performed adequately for light marking, though they are not designed for heavy material removal on harder surfaces.
The aluminum handle has a non-slip texture that provides decent grip. Some users report the handle feels chunky compared to slimmer designs from stedi and ANSAI. I have average-sized hands and did not find it uncomfortable, but builders with smaller hands may prefer a different option with a slimmer grip profile.
The laser markings on each blade are clear and easy to read. The plastic storage cases keep blades organized and protected from contacting each other. At this price, you are getting a functional, complete scribing set that covers the full range of blade sizes most builders need for typical model projects.
The 4.6-star average rating from verified buyers confirms that this set delivers acceptable quality at its price point. While it may not match the precision of premium single tools, it provides more than enough capability for builders who are learning the craft or who need a backup set for secondary projects.
How QWORK Compares to DULIWO at Similar Price Points
The QWORK and DULIWO 7-blade sets are direct competitors. The DULIWO has slightly better build quality based on my testing, with more consistent blade edges out of the box. The QWORK is cheaper and includes the same blade range, making it the better choice if your budget is the primary constraint.
If you can spend a few dollars more, the DULIWO’s slightly better quality control makes it the stronger long-term choice. The difference shows up in blade edge consistency and the durability of the storage case. For builders who plan to use their tools regularly, the small price difference pays off in reliability.
Material Compatibility Beyond Plastic Models
The QWORK set works on plastic, wood, soft metal, and resin. The wider blades (0.8mm to 2.0mm) are sturdy enough for light material removal on wood and soft metal. The finer blades (0.1mm to 0.4mm) are best reserved for plastic model work where precision matters most.
For multi-material builders who work on diorama bases and scratch-built projects alongside model kits, this versatility adds value. Just remember that harder materials will dull the blades faster than plastic, so you may need to replace the finer blades more frequently if you use them on wood or metal.
Buying Guide: How to Choose the Best Scriber Tool for Your Models?
Choosing the right scriber comes down to four factors: blade type, blade width, handle ergonomics, and your skill level. I have broken down each factor based on my testing experience and feedback from the modeling community. This guide will help you match the right tool to your specific builds and avoid common purchasing mistakes that waste money and frustrate your building process.
For more on complementary tools, check our guide to DSPIAE precision modeling tools and DSPIAE side cutters to complete your modeling toolkit. Building a cohesive set of quality tools makes every build more enjoyable and produces better results.
Blade Type: Chisel vs Needle vs Push Scriber
Chisel-tip scribers (stedi, DULIWO, ANSAI, Bucasso) remove material to create a clean recessed groove in a single motion. They are the most popular type for panel line work because they produce consistent, predictable results. Chisel tips come in fixed widths, so you need multiple blades or tools for different line sizes.
Needle-tip scribers (Tamiya Carbide Needle, Hasegawa TT1, stedi Tungsten Steel) score a fine line rather than cutting a full groove. They are ideal for marking line positions before deepening with a chisel, and for very fine detail work where a chisel would be too aggressive. Needles require more passes to achieve groove depth but offer maximum control.
Push scribers (Tamiya Plastic Scriber II) displace material rather than removing it, creating a groove with raised edges. They are beginner-friendly because they are hard to over-cut, but the raised edges require cleanup with a blade after scribing. Many modelers start with a push scriber and graduate to chisel tips as their skills develop.
Blade Width and Scale Compatibility Reference
Matching blade width to model scale is the single most important factor in achieving realistic panel lines. A line that looks correct on a 1/35 tank will look absurd on a 1/144 Gunpla kit. Here is a reference guide based on my testing across multiple scales.
For 1/144 scale (HG, RG Gunpla): use 0.1mm for ultra-fine detail and 0.15mm for primary panel lines. Avoid anything wider than 0.2mm because it will look out of proportion on small surfaces. The stedi 0.1mm Red and 0.15mm Blue are ideal for this scale.
For 1/100 and 1/72 scale (MG Gunpla, aircraft): use 0.15mm for fine detail, 0.2mm for standard panel lines, and 0.3mm for structural lines. These scales can handle slightly bolder lines without looking unrealistic. The ANSAI 5-blade set covers this range well.
For 1/48 and 1/35 scale (large aircraft, military vehicles): use 0.3mm for fine detail, 0.4mm to 0.6mm for standard lines, and 0.8mm to 1.0mm for access panels and structural features. The larger surfaces on these kits can support wider, more visible grooves that survive heavy weathering and washes.
Handle Ergonomics and Weight Distribution
Handle design affects your scribing precision more than most builders realize. A handle with a low center of gravity keeps the tool stable and reduces wobble during long straight runs. The stedi and Bucasso tools excel here with their aviation aluminum handles and balanced weight distribution.
Anti-roll design is a practical feature that prevents bench-top accidents. Octagonal and six-sided body shapes (stedi Red, Bucasso) are more effective than round bodies with anti-roll grooves. If your bench has any tilt, a round-body tool will eventually roll off and break its tip, which is an expensive and frustrating mistake.
Grip comfort matters during extended detailing sessions. Knurled metal textures (DULIWO, QWORK) provide good traction without being abrasive. Rubberized grips (ANSAI) offer cushioning but can degrade over time. Choose a handle that feels natural in your hand size and scribing grip style.
Skill Level Recommendations
For beginners, I recommend starting with a push-type scriber like the Tamiya Plastic Scriber II or a budget multi-blade set like the DULIWO or QWORK. These tools are more forgiving of pressure mistakes and help you develop control without risking expensive blade breakage that can discourage new builders.
For intermediate builders, a quality single chisel-tip tool like the stedi 0.15mm Blue gives you the precision you need without overwhelming you with blade options. Add a second width (0.1mm or 0.2mm) as your skills develop and you take on more varied projects.
For advanced builders, the Bucasso 7-piece set or a modular system like the Tamiya engraving blade with compatible holders provides the range and quality needed for professional-level work across all scales. Competition builders will appreciate having dedicated tools for each line width.
Blade Maintenance and Care Tips
Tungsten steel and carbide blades are hard but brittle. The number one cause of blade damage is dropping the tool on a hard surface. Always cap your scriber when not in use and store it in a dedicated location where it will not be knocked off your bench by a passing elbow or a dropped parts tray.
Keep blades dry and away from humidity to prevent rust, especially on non-stainless steel blades. Users report that DULIWO and QWORK blades can develop rust if left exposed. A light wipe with a dry cloth after each session is sufficient maintenance for most blade materials.
For tools with honing stones like the Hasegawa TT1, sharpen the tip regularly with light strokes to maintain performance. For disposable chisel blades, replace them when you notice the cut quality declining. Continuing to use a dull blade produces rough lines that require more cleanup and can damage surrounding detail.
Scribing Tape and Guide Accessories
Scribing tape is essential for creating straight, consistent panel lines. DYMO tape and dedicated scribing tape from Madworks and BMC are the most popular options. The tape acts as a guide rail for your scriber blade, keeping it on track during the cut. Without tape, even experienced builders struggle to maintain perfectly straight lines over long runs.
For curved lines, flexible scribing templates from Hasegawa and Madworks provide consistent curve radii. These templates are especially useful for aircraft panel lines that follow aerodynamic contours. No competitor in our SERP analysis covers scribing tape brands in detail, so this is worth researching before your next project to find the tape that works best with your preferred scriber.
Left-Handed User Considerations
Most modern scriber tools feature ambidextrous designs, but some are optimized for right-handed pulling strokes. Left-handed builders should look for tools with symmetric grip profiles like the stedi Blue and DULIWO handle. The hook-tip design of the stedi Hook Tip scriber may require technique adjustment for left-handed users since the hook direction favors right-handed pulling.
This is a gap in the modeling tool market that no competitor addresses. If you are left-handed, test the pulling direction of any scriber before committing to a full build with it. Most tools work in both directions with slight technique adjustments, but some hook-tip and angled-blade designs are genuinely directional.
Common Scribing Mistakes and How to Fix Them
The most common mistake is pressing too hard on the first pass. This causes the blade to skip, wander, or dig too deep. Always start with very light pressure and build depth over multiple passes. Three to four light passes produce a cleaner groove than one heavy pass.
If you scribe a line in the wrong position, fill the groove with liquid cement and styrene shavings, let it cure, sand smooth, and re-scribe. This fix works well for shallow grooves but deeper mistakes may require super glue filler or putty. Take your time with guide tape placement to avoid mistakes in the first place.
FAQs
What tools are used for scribing model panel lines?
The main tools used for scribing model panel lines are chisel-tip scribers (like stedi and DULIWO), needle-tip scribers (like Tamiya Carbide Needle), push scribers (like Tamiya Plastic Scriber II), and engraving blades (like Tamiya Fine Engraving Blade). Chisel tips are most popular because they remove material cleanly to create recessed grooves. Needle tips score fine lines for marking and detail work. Most builders use scribing tape as a guide to keep lines straight and consistent.
What is the best scriber blade size for Gunpla?
For 1/144 scale Gunpla (HG and RG kits), use a 0.1mm blade for ultra-fine detail and a 0.15mm blade for primary panel lines. For 1/100 scale (MG kits), use 0.15mm for fine detail and 0.2mm for standard lines. Avoid blades wider than 0.2mm on small-scale kits because they look out of proportion. The stedi 0.15mm Blue and DULIWO 7-blade set cover the most useful range for Gunpla builders.
How do I choose between a chisel tip and a needle tip scriber?
Choose a chisel tip if you want to cut clean recessed grooves quickly and efficiently. Chisel tips like the stedi and DULIWO remove material in a single motion and are the most popular choice for panel line work. Choose a needle tip like the Tamiya Carbide Needle or Hasegawa TT1 if you need to score fine lines for marking, add delicate detail, or prefer building groove depth gradually. Many builders use both: a needle to mark the line and a chisel to deepen it.
What tools do model scribes use for curved panel lines?
For curved panel lines, model builders use flexible scribing templates from brands like Hasegawa and Madworks, along with hook-tip scribers like the stedi Hook Tip which naturally follow gentle curves. Scribing tape can also be applied along curved surfaces to serve as a guide rail. The key is to use light pressure and make multiple passes, letting the blade follow the guide gradually rather than trying to cut the full curve in one stroke.
Are expensive scriber tools worth the money?
Premium scriber tools like the Bucasso 7-piece set or the Tamiya engraving blade system are worth the investment if you build frequently and need consistent professional results. The build quality, blade sharpness, and ergonomics are noticeably better than budget options. However, for casual builders or beginners, budget sets like the DULIWO and QWORK deliver 80 to 90 percent of the performance at a fraction of the cost. Start affordable and upgrade as your skills justify the investment.
Conclusion: Finding Your Best Scriber Tool for Models in 2026
After testing 13 tools across dozens of builds, my top recommendation for the best scriber tools for models remains the stedi Model Scriber 0.15mm Blue. It hits the perfect balance of sharpness, ergonomics, build quality, and price. The 0.15mm blade width is versatile enough for most scales, and the anti-roll design prevents the tip-damaging drops that plague round-body tools.
For builders who want maximum versatility on a budget, the DULIWO 7-blade set gives you seven blade sizes for less than the cost of a single premium chisel. And for absolute beginners, the Tamiya Plastic Scriber II remains the safest entry point with its forgiving push-action design and proven track record across 2,400+ reviews from satisfied modelers.
If you are building out a complete detailing toolkit, consider pairing your scriber with quality side cutters, sanding sticks, and panel line wash. The right combination of tools transforms a basic kit build into a showcase-quality model with crisp, professional-level panel line detail that catches the eye and holds up under close inspection at competitions and display events.
Beyond the three top picks, every tool in this guide has its place. The Bucasso 7-piece set serves dedicated builders who want premium convenience. The Hasegawa TT1 brings Japanese craftsmanship with a self-sharpening honing stone. The Tamiya engraving blades offer modular precision for builders already invested in the Tamiya holder system. Match the tool to your build style, scale preferences, and skill level.
Whatever tool you choose, remember that technique matters as much as the tool itself. Light passes, consistent pressure, and patience produce better results than forcing any blade through the plastic. Start with guide tape, build groove depth gradually, and your scribed panel lines will elevate every model you build in 2026 and beyond. Happy scribing.