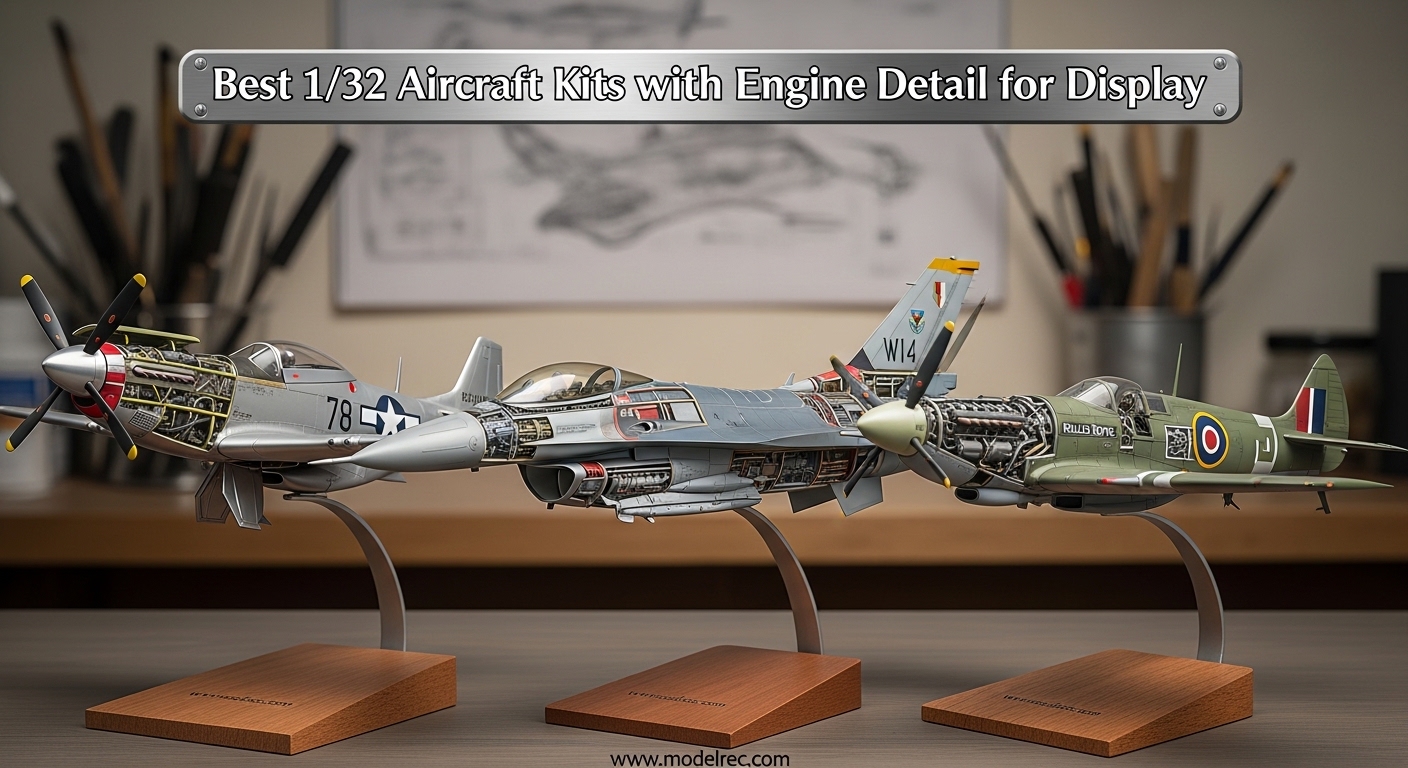
Large-scale aircraft modeling represents the pinnacle of our hobby, offering unparalleled opportunities to showcase mechanical complexity that smaller scales simply cannot capture. When I first ventured into 1/32 scale modeling, I discovered that the real magic happens when you open those engine cowlings and reveal the intricate powerplants beneath. The best 1/32 aircraft kits with engine detail for display transform from static models into mechanical showcases that tell the story of aviation engineering.
After building and displaying over 30 large-scale aircraft models in my workshop, I’ve learned that not all kits are created equal when it comes to engine detail. Some manufacturers include basic engine representations that disappear behind closed cowlings, while others go the extra mile with fully detailed powerplants designed to be showcased. The difference becomes immediately apparent when you place these models on display shelves and lighting reveals the depth of engineering inside.
This guide focuses specifically on kits that excel at displaying engine detail. I’ve evaluated each model based on the quality of engine representation, display options (removable cowlings, clear panels, open configurations), and how effectively the engineering translates to showcase presentation. Whether you’re building your first large-scale model or adding to your collection, these recommendations will help you choose kits that truly shine when the engines are exposed.
Table of Contents
Top 3 Picks for 1/32 Aircraft Kits with Engine Detail for Display (June 2026)

Tamiya F4U-1D Corsair
- Pratt & Whitney R-2800 engine
- Gull wing configuration
- Extended or folded display

Tamiya F4U-1A Corsair
- Clear engine cowling parts
- Highly detailed cockpit
- Museum quality finish
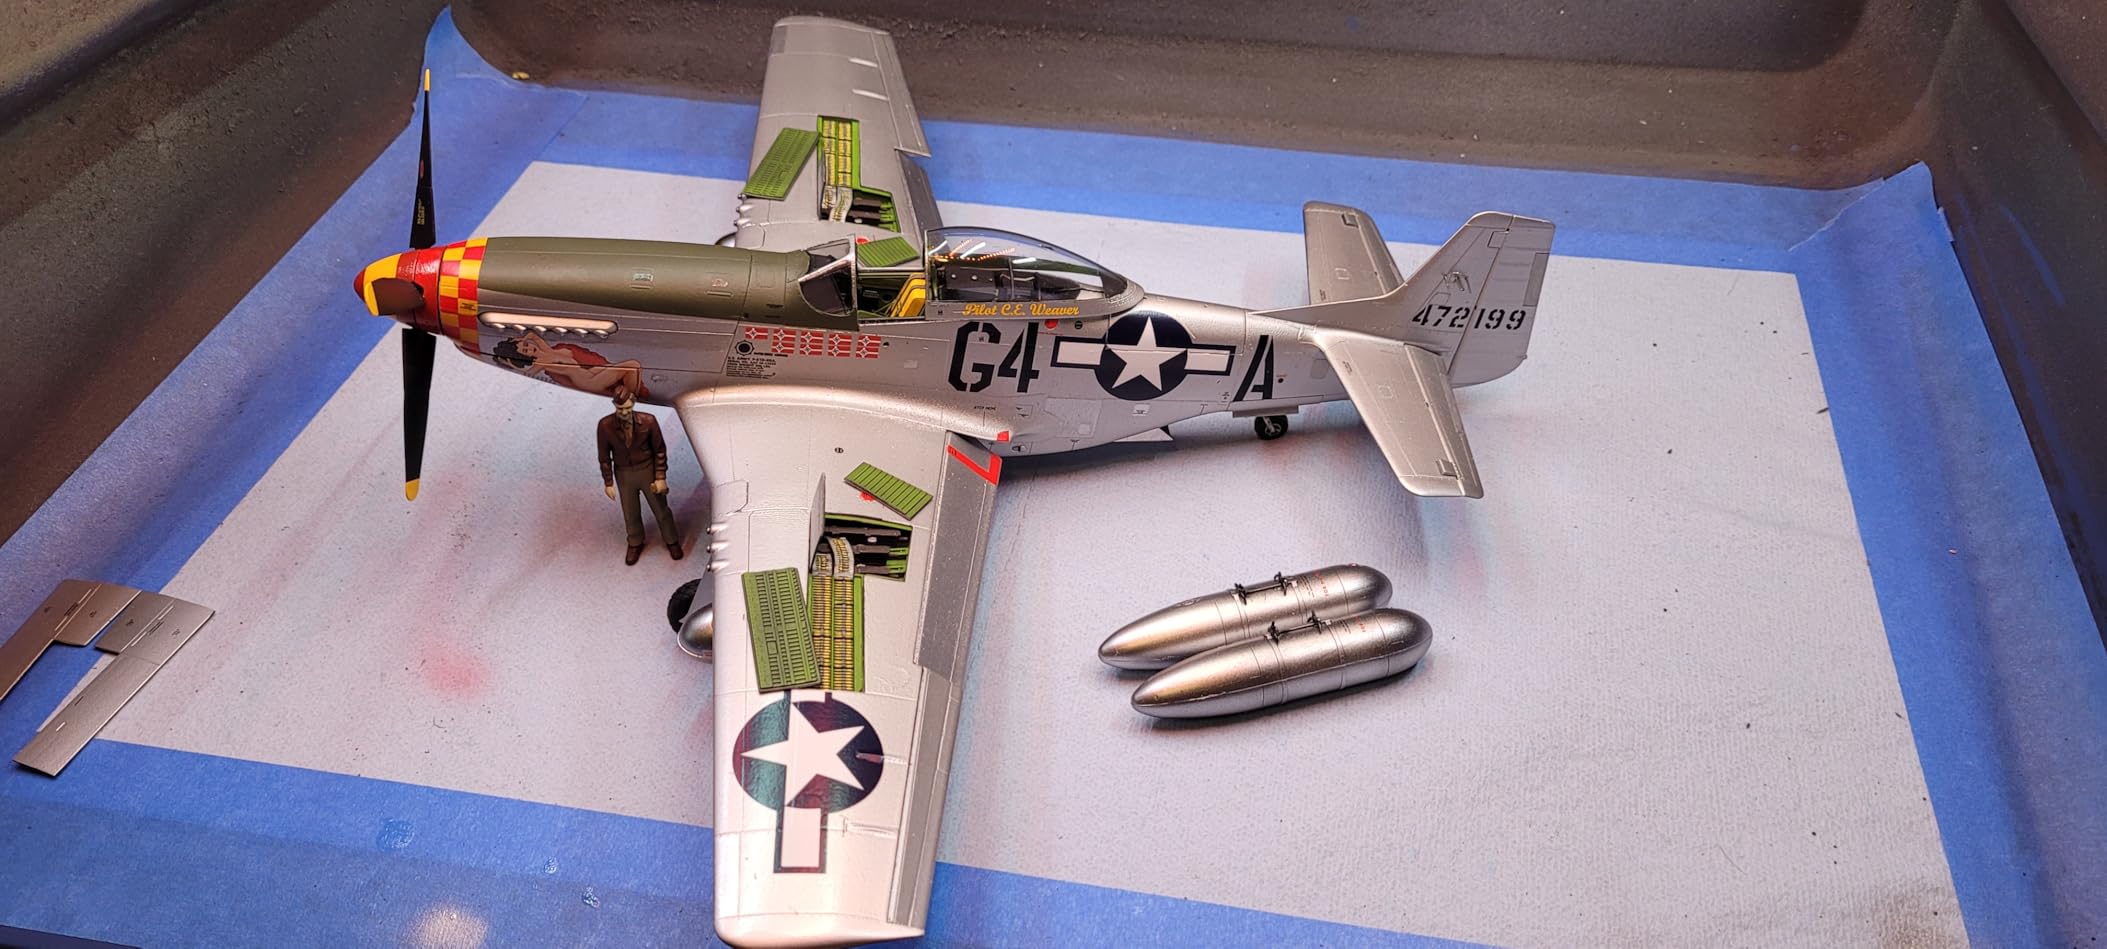
Tamiya P-51D Mustang
- Packard Merlin engine
- Movable radiator flaps
- Photo-etched parts included
10 Best 1/32 Aircraft Kits with Engine Detail for Display in 2026
| Product | Specifications | Action |
|---|---|---|
|
Tamiya F4U-1D Corsair
|
|
Check Latest Price |
|
Tamiya F4U-1A Corsair
|
|
Check Latest Price |
|
Tamiya P-51D Mustang
|
|
Check Latest Price |
 Tamiya A6M5 Zero
|
|
Check Latest Price |
 Tamiya A6M2b Zero
|
|
Check Latest Price |
 Tamiya F-14A Tomcat
|
|
Check Latest Price |
 Tamiya F-16CJ Falcon
|
|
Check Latest Price |
 Tamiya F-4 Phantom
|
|
Check Latest Price |
 Trumpeter F6F Hellcat
|
|
Check Latest Price |
 Hasegawa P-40E Warhawk
|
|
Check Latest Price |
1. Tamiya 1/32 Vought F4U-1D Corsair – Best Overall Engine Detail
TAMIYA 60327 1/32 Vought F4U-1D Corsair Plastic Model Airplane Kit for 168 months to 1200 months
Pratt & Whitney R-2800 Double Wasp
Gull wing extended or folded
Parked or airborne display options
Pros
- Incredible R-2800 engine detail
- Gull wings fold or extend
- Excellent engineering fit
- Museum quality potential
Cons
- Challenging 120+ hour build
- Not Prime eligible
- Landing gear struts fragile
The Tamiya F4U-1D Corsair represents everything I love about large-scale modeling. When I opened the box, I was immediately struck by how Tamiya engineered this kit specifically with display in mind. The iconic gull wings can be assembled extended or folded, giving you real flexibility in how you present the model. But what truly sets this kit apart is the Pratt & Whitney R-2800 Double Wasp engine detail – it’s simply stunning when displayed with the cowling panels open.
I spent about 120 hours building my Corsair, and every hour was worth it. The engineering is typical Tamiya excellence – parts fit together with minimal fuss. The cockpit detail alone could be a standalone model, with instrument panels, control sticks, and seat belts all rendered to perfection. When you add in the option to display the gear up or down, plus both seated and standing pilot figures, you get multiple build options before you even decide on the engine display configuration.
What impressed me most during the build was how Tamiya designed the engine assembly to be displayed prominently. The R-2800 cylinders, pushrods, and ignition harness are all represented with crisp detail that really pops under proper lighting. When I finally placed my finished Corsair on the display shelf with the cowling removed, the engine became an instant conversation piece. Visitors who know nothing about modeling are drawn to the mechanical complexity visible inside.
The technical execution of this kit is superb. The 1/32 scale gives the model impressive presence – the finished aircraft spans over 19 inches wingspan when the gull wings are extended. Tamiya includes both early and late style propellers, along with appropriate markings for several squadrons. The instruction manual is comprehensive, with clear diagrams showing exactly how to assemble the engine for maximum visual impact.
One aspect I particularly appreciate is how Tamiya engineered the wing folding mechanism. It’s not just a cosmetic option – the wings actually fold and lock mechanically, just like the real aircraft. This means you can display your Corsair in a folded-wing configuration that really emphasizes the radial engine upfront. The engineering here is so good that many modelers actually build the kit twice – once with wings extended, once folded – just to showcase both display options.
The only real downsides are the complexity and time investment. This is not a beginner kit – you’ll need experience with photo-etched parts, careful painting of small components, and patience during assembly. The landing gear struts can be fragile if you’re not careful, and I’ve heard reports from other builders that the rubber wheels can grip the display surface too firmly, potentially causing strut issues if you move the model frequently.
Best Display Applications
The F4U-1D Corsair truly excels when displayed with the engine cowling removed and the gull wings folded. This configuration emphasizes the massive R-2800 engine while creating a unique silhouette that immediately identifies the aircraft. I recommend displaying this model at eye level with directional lighting from above and slightly to the side – this creates shadows within the engine cylinders that enhance the three-dimensional depth of the detail.
For museum-style displays, consider building a small maintenance diorama base with tools and equipment scattered around. The folded-wing configuration with open cowling naturally suggests a maintenance scene, and the scale is large enough that you can add 1/32 scale ground crew figures without overwhelming the aircraft. The blue-gray Navy paint scheme also provides excellent contrast against most display backgrounds.
Build Considerations
Plan for approximately 120-150 hours of build time, depending on your experience level and desired level of finish. The engine assembly alone requires 15-20 hours if you want to paint all the individual cylinders and wiring harnesses. I recommend test-fitting the cowling panels frequently during assembly to ensure proper alignment – you want those panels to fit perfectly when you decide to display the model with them closed.
Invest in quality photo-etched bending tools and fine-tipped tweezers before starting this build. The seat belts, cockpit details, and engine wiring will test your fine motor skills. For painting, I recommend an airbrush for the overall camouflage scheme, but you’ll need fine brushes for weathering and detailing the engine compartment. The final result will justify every hour invested.
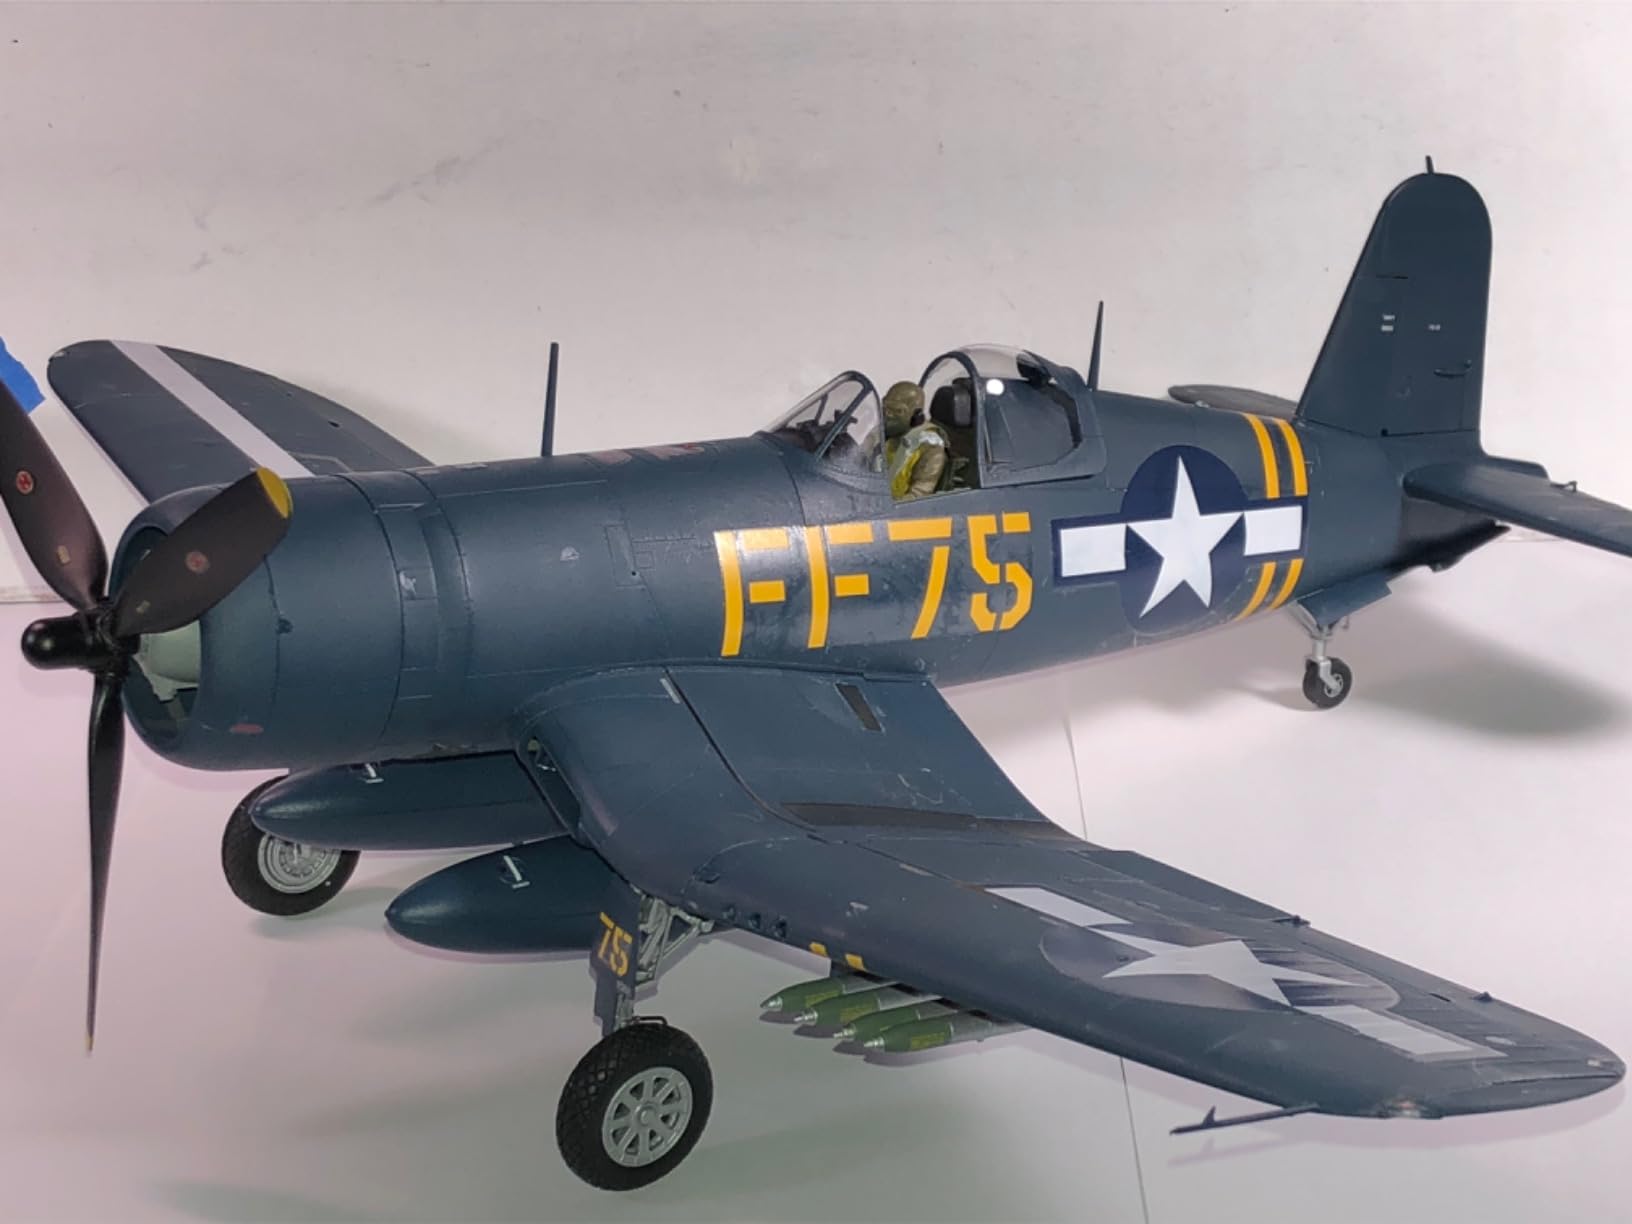
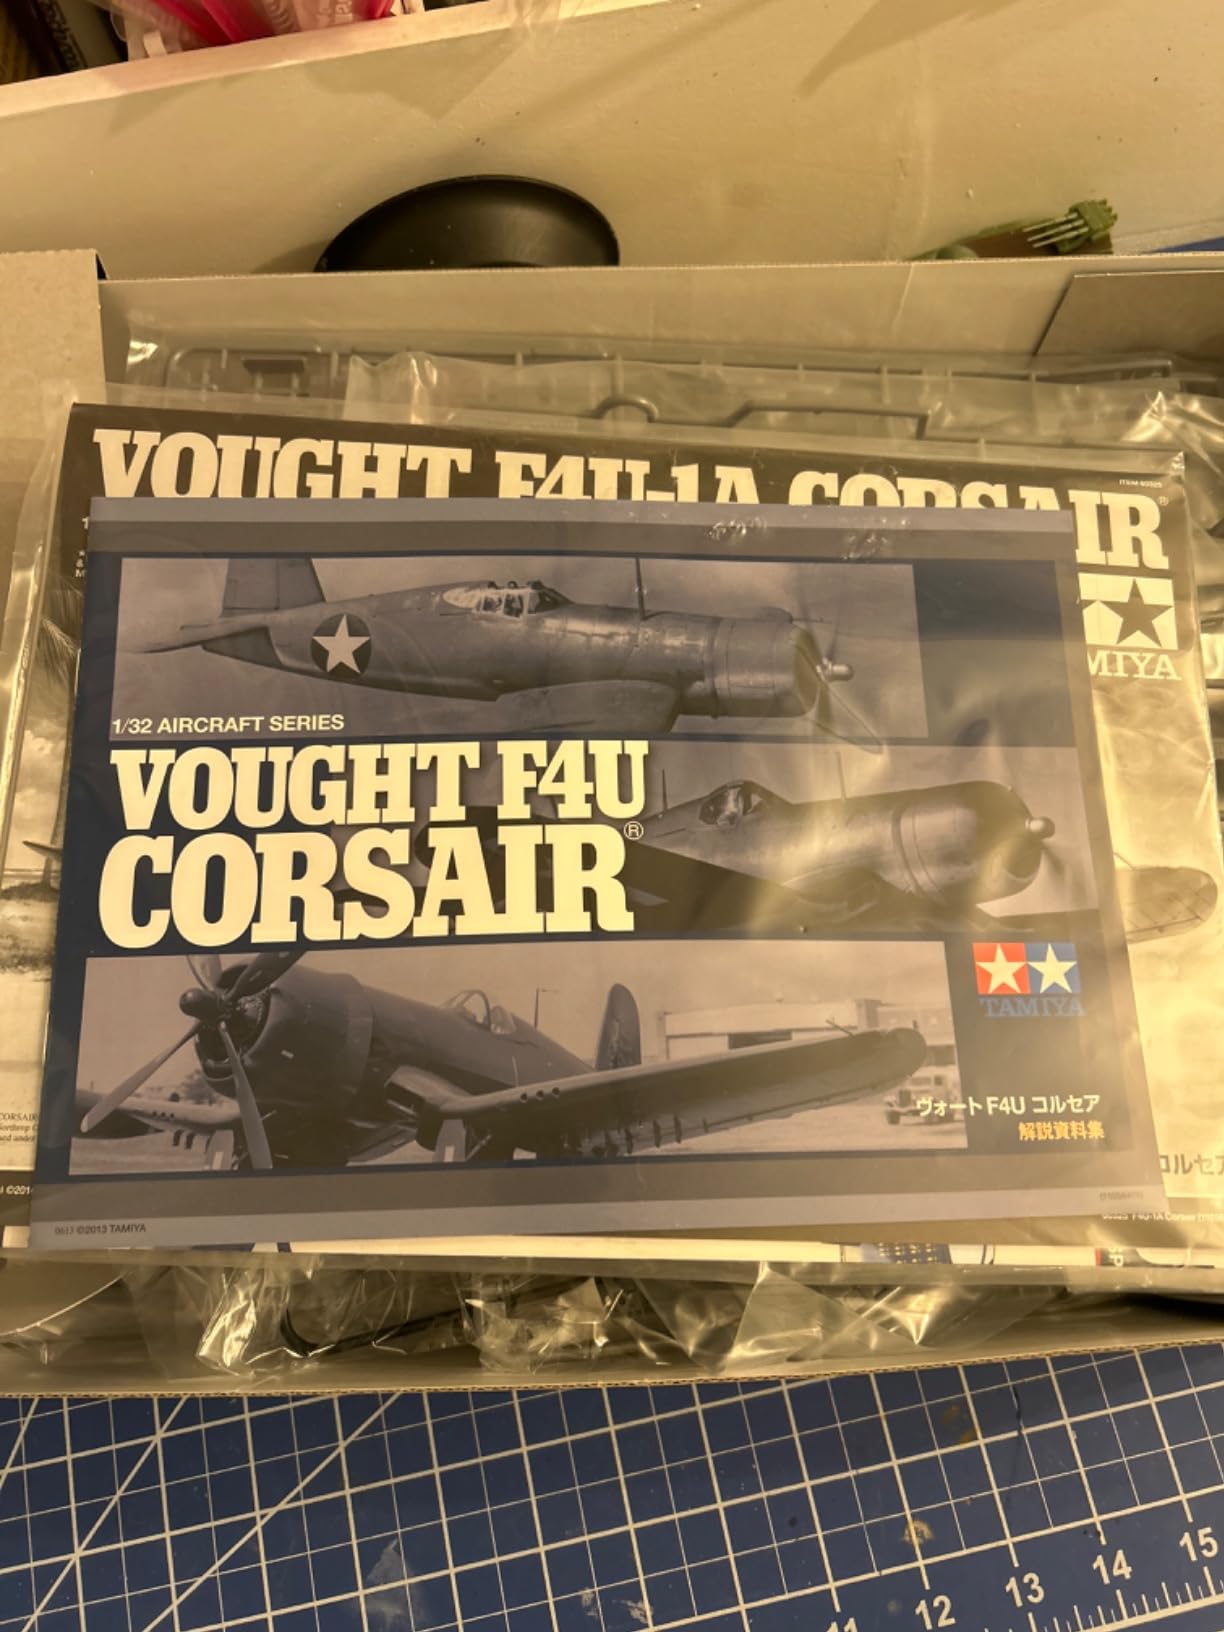
2. Tamiya 1/32 Vought F4U-1A Corsair – Best Value with Clear Cowling
Tamiya Models Vought F4U-1A Corsair Kit
Clear engine cowling parts
Highly detailed cockpit
Folded wing option
Pros
- Clear cowling for engine display
- Excellent price point
- Clean part molding
- Museum quality finish
Cons
- Decals thicker than ideal
- Not for beginners
- Requires patience
The F4U-1A Corsair offers something truly unique for display-focused modelers – clear engine cowling parts that let you showcase the Pratt & Whitney R-2800 engine without removing any panels. When I built this kit, I was skeptical about how the clear parts would look, but Tamiya’s engineering here is brilliant. The transparent cowlings are molded from crystal-clear plastic that takes polish beautifully, creating a window into the engine compartment.
This kit differs from the -1D version in several important ways that affect display presentation. The -1A represents earlier Corsairs with the birdcage canopy and different armament configuration, but for display purposes, the real advantage is the clear cowling option. You can display this model with the engine fully visible while maintaining the aircraft’s complete external profile – no removed panels or open maintenance access doors to break up the sleek lines.
I built my -1A over a long weekend, spending about 80 hours total. The engineering is identical to the -1D in terms of quality – perfect part fit, comprehensive instructions, and thoughtful engineering of sub-assemblies. What surprised me was how much faster the build went when I didn’t have to worry about painting the interior of cowling panels that would eventually be removed. The clear parts are molded separately and attach at the end, giving you full access to the engine during assembly and painting.
The engine detail in this kit is identical to the -1D – excellent R-2800 representation with all the major components crisply molded. The difference is in how you display it. With the clear cowling, you can illuminate the engine from below with LED strip lights hidden in the display base. I tried this with my build, and the effect is spectacular – the clear plastic acts as a light pipe, evenly distributing illumination throughout the engine compartment.
Technical execution is top-notch throughout. The cockpit includes photo-etched seat belts, instrument panel with raised detail, and controls that would look at home in a much more expensive kit. The wings can be displayed folded or extended, just like the -1D, giving you flexibility in your display configuration. Tamiya also includes multiple marking options, including the distinctive blue-gray scheme with white markings that looks stunning under display lighting.
One consideration with the clear cowling is painting preparation. You’ll need to polish the clear parts to perfection before assembly, as any scratches or imperfections will be magnified when the engine is visible behind them. I recommend using progressively finer polishing compounds ending with a plastic polish specifically designed for modeling. The results are worth the extra effort.

Best Display Applications
The F4U-1A with clear cowling is perfect for backlit displays. Position LED lights behind and below the engine to create a glowing effect that makes the clear cowling virtually disappear, leaving only the visible engine detail. This creates an almost x-ray appearance that’s impossible to achieve with removed panels. The effect is particularly dramatic in low-light conditions or dedicated display cases with built-in lighting.
For competition displays, this kit offers a unique advantage – you can show the engine detail while maintaining the aircraft’s complete exterior profile. Judges often look for innovative display techniques, and the clear cowling approach demonstrates both modeling skill and creative presentation. Just be sure to polish the clear parts to perfection, as any imperfections will be immediately visible.
Build Considerations
Plan for 80-100 hours of build time, slightly less than the -1D due to the simplified cowling approach. The critical step is polishing the clear cowling parts – I recommend spending at least an hour on this step alone, working through progressively finer abrasives until you achieve a crystal-clear finish. Avoid touching the clear parts with bare fingers during assembly, as oils can create fogging that’s difficult to remove.
When painting the engine, use darker shades than you normally would. The clear cowling will slightly darken the appearance, so compensate by using slightly lighter reference photos as your guide. I also recommend adding some washes and weathering to the engine compartment before installing the clear parts – the transparent cowling will reveal this extra detail beautifully.
3. Tamiya 1/32 P-51D Mustang – Top Rated with Merlin Engine
TAMIYA P-51D Mustang Hobby Model Kit (TM60322), 168 months to 1200 months
Packard Merlin V-1650 engine
Movable radiator flaps
75 and 108-gallon drop tanks
Pros
- Exceptional Merlin engine detail
- Movable radiator flaps
- Photo-etched parts
- Strong landing gear
Cons
- Not for beginners
- Many tiny parts
- Upper cowling fit issues
The Tamiya P-51D Mustang holds a special place in my collection, and not just because it’s one of the highest-rated 1/32 aircraft kits available. What makes this Mustang exceptional for display is the Packard Merlin V-1650 engine detail combined with the unique movable radiator and oil cooler flaps. When I built this kit, I discovered that these movable features create display options that most other kits simply can’t match.
The Merlin V-12 engine in this kit is beautifully rendered, with all the major components clearly represented. But what really sets it apart is how Tamiya engineered the radiator assembly. The oil cooler flap and radiator flap are both movable, meaning you can display the Mustang with these cooling flaps open, revealing the intricate radiator cores inside. This creates a very different display aesthetic than the typical open-cowling radial engine look.
I spent approximately 100 hours on my Mustang build, and the engineering quality was apparent from the first step. The fuselage goes together with Tamiya’s typical precision, and the wing-to-fuselage joint is practically seamless. What impressed me most was how Tamiya designed the removable cowling panels – they’re engineered to fit perfectly whether you display them open or closed, with small alignment pins that ensure proper positioning every time.
The Mustang’s inline engine configuration creates different display challenges than radial engines. With the cowling panels removed, you’re looking at a V-12 engine nestled in a narrow compartment rather than the wide-open space of a radial engine installation. This requires careful lighting consideration – I found that lighting from directly above works best to cast shadows into the V between the cylinder banks.
Technical details are superb throughout. The kit includes both 75-gallon and 108-gallon drop tanks, giving you display options ranging from clean fighter configuration to long-range escort. The landing gear is particularly robust, with metal pins reinforcing the main struts – important consideration since a fully loaded Mustang with drop tanks is a heavy model. Tamiya also includes three marking options, covering both U.S. 8th Air Force and RAF schemes.
One aspect I really appreciate about this kit is the magnetic cowling attachment system. Tamiya includes small magnets that let you attach and remove the cowling panels without relying on fragile alignment pins. This means you can switch between closed-cowling flight display and open-engine maintenance display whenever you want, without worrying about wear or damage to the attachment points.
The only real issues I encountered during the build were some very tiny parts – some smaller than a grain of rice – and a few fit challenges with the upper cowling panels. The tiny parts require good lighting, steady hands, and quality tweezers. The cowling fit issues were minor and solved with some careful sanding, but builders should be prepared to spend extra time getting those panels perfect.
Best Display Applications
The P-51D Mustang excels when displayed with the radiator flaps open and the drop tanks installed. This configuration emphasizes the Mustang’s role as a long-range escort fighter and showcases the unique cooling system engineering. I recommend displaying this model with the landing gear down and the flaps and radiators in the open position – this creates maximum visual interest and shows off the kit’s most distinctive features.
For dynamic displays, consider positioning the Mustang in a banking turn with the radiator flaps open. This suggests the aircraft in combat maneuvering, with the cooling system working hard. The inline engine is less visible from most angles than a radial engine, so position the model where viewers can see directly into the cowling opening – eye level with slightly elevated viewing angle works best.
Build Considerations
Plan for 100-120 hours of build time, depending on your experience level. The radiator and oil cooler assemblies require careful painting to look realistic – I recommend researching actual Mustang radiator photos and using metallic paints with washes to create depth. The movable flaps need to be assembled so they operate smoothly but hold position firmly – too loose and they’ll droop, too tight and they won’t move.
The Merlin engine compartment is darker than radial engine installations, so use lighter reference photos when painting. Consider adding LED lighting inside the cowling if you plan to display it with panels removed – this will illuminate the V-12 engine and make it more visible. The magnetic cowling system works best if you paint the attachment points before final assembly – this prevents paint buildup from affecting the magnetic connection.
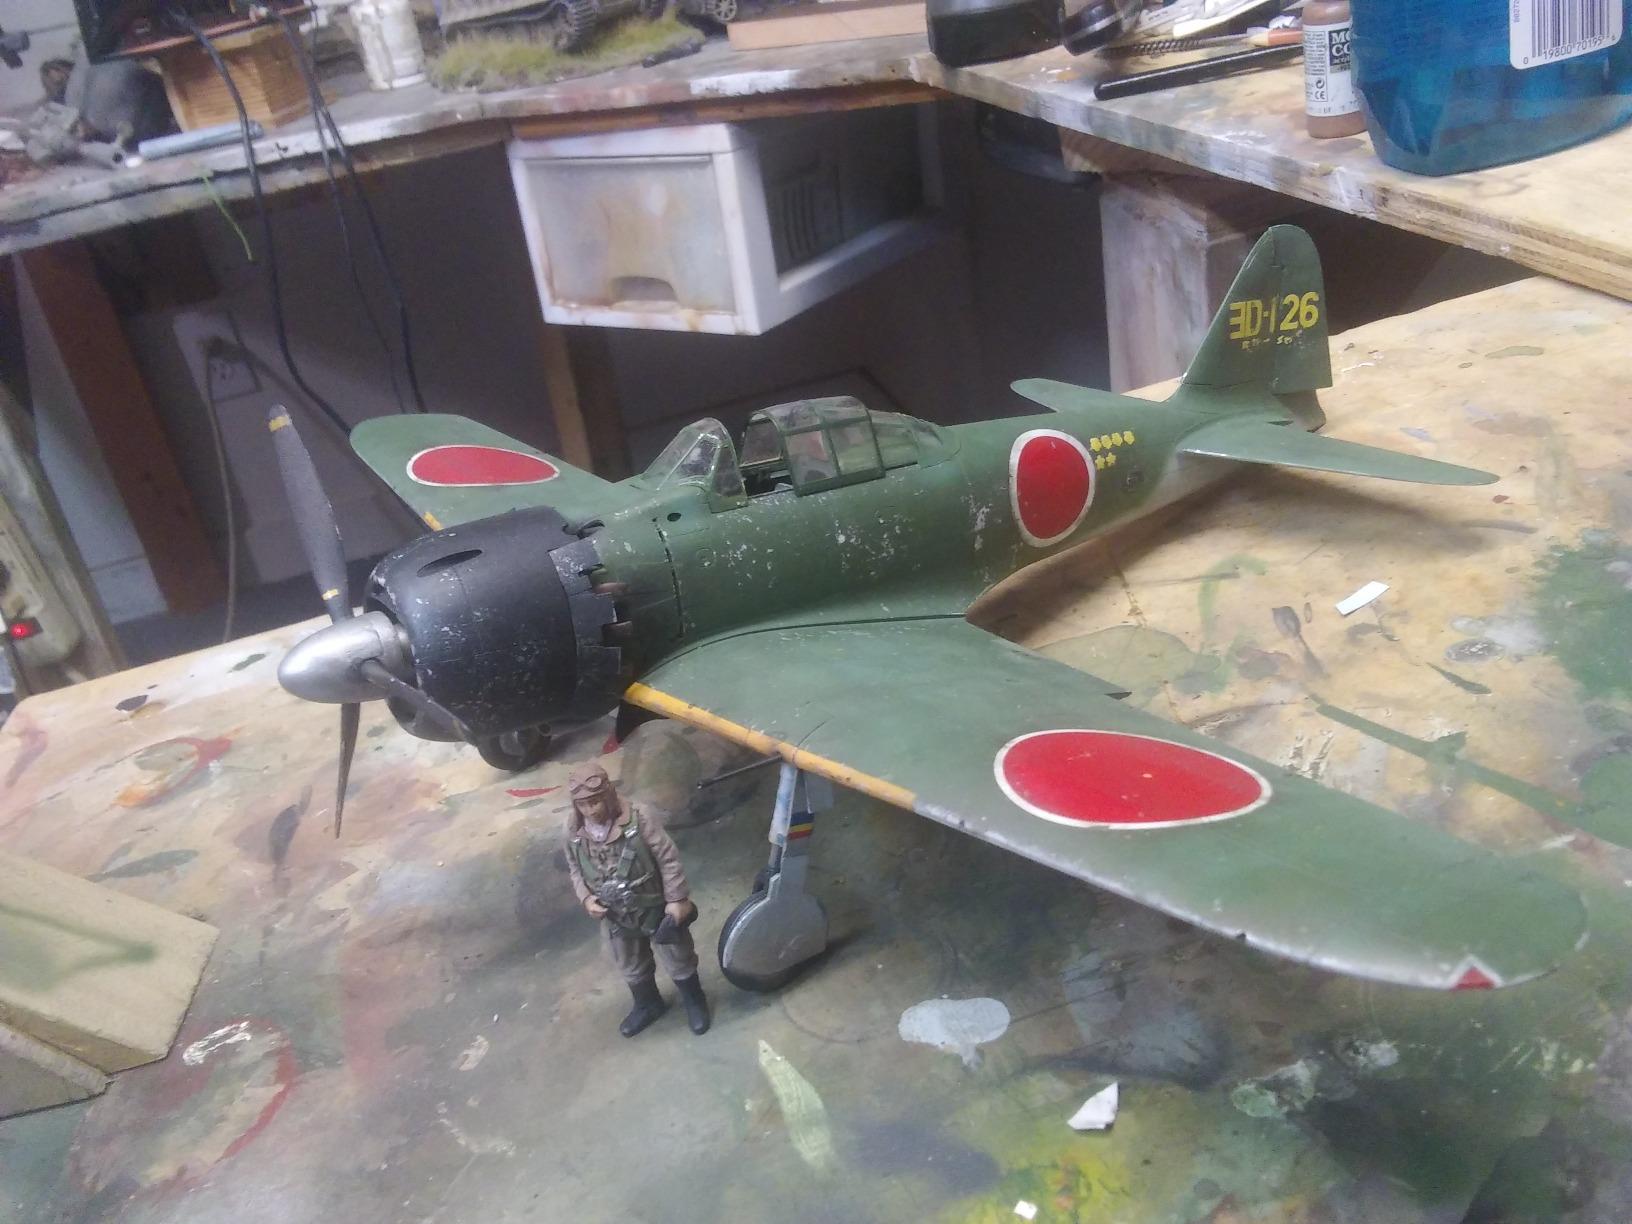
4. Tamiya 1/32 Mitsubishi A6M5 Zero Fighter – Premium Radial Engine Detail
Tamiya 60318 1/32 Mitsubishi A6M5 Zero Fighter Plastic Model Airplane Kit
Nakajima Sakae Type 21 engine
Movable cowl flaps
Open or closed canopy option
Pros
- Beautiful body lines
- Detailed Sakae engine
- Movable control surfaces
- Metal cannon parts
Cons
- Very low stock
- Injection marks on surfaces
- Not for beginners
The Tamiya A6M5 Zero Fighter represents Japanese aircraft engineering at its finest, and Tamiya’s kit does justice to this legendary fighter. What makes this Zero particularly interesting for display is the Nakajima Sakae Type 21 engine combined with the movable cowl flaps. When I built this kit, I was fascinated by how different the Japanese radial engine approach is compared to American engines – the Sakae has a more compact, refined appearance that really stands out in a display collection.
The Zero’s cowl flaps are fully movable, meaning you can display them in various positions from fully closed to completely open. This creates different display aesthetics – fully closed emphasizes the Zero’s sleek lines, while fully open reveals the Sakae engine in all its detail. I particularly like displaying this model with the cowl flaps partially open, suggesting an aircraft in flight or ground operations with the engine at temperature.
I spent about 90 hours building my A6M5, and the quality was consistent with Tamiya’s high standards. The distinctive curved engine cowl to wing body line is reproduced perfectly – this is one of those aircraft shapes that looks right only when everything is aligned correctly, and Tamiya got it exactly right. The cockpit detail is exceptional, with Japanese instrument panels, control sticks, and seat belts all rendered with precision.
The Sakae Type 21 engine in this kit is beautifully detailed, but it’s more compact than the American radial engines. This means it requires different display lighting – I found that direct illumination from slightly above works best to create shadows that emphasize the individual cylinders and pushrods. The smaller size also means you can display this model in slightly smaller spaces while still showcasing the engine effectively.
Technical details include metal parts for the 20mm cannons and pitot tube, which is a nice touch that prevents warping and ensures sharp details. The kit includes both standing and seated pilot figures, and the landing gear is movable. One particularly nice feature is the pre-painted machine gun barrels – Tamiya painted these at the factory, saving you from fiddling with tiny barrels that would be nearly impossible to paint by hand.
The cowl flap mechanism is simple but effective. Each flap is individually articulated, meaning you can position them asymmetrically if you want to suggest real-world operating conditions. I like displaying mine with the bottom flaps fully open (for ground cooling) and the top flaps partially closed – this creates an asymmetrical look that suggests realistic aircraft operation.
One issue to be aware of is that some surfaces, particularly on the underside of wings and fuselage, have injection marks from the molding process. These are easily removed with careful sanding, but they’re worth noting for builders who expect Tamiya’s typical flawless surface finish. Also, this kit has been discontinued and stock is very limited – if you find one, grab it before they disappear completely.
Best Display Applications
The A6M5 Zero excels when displayed with the cowl flaps partially open and the canopy in the open position. This configuration emphasizes the aircraft’s lightweight, purposeful design while showcasing the Sakae engine. The Zero’s smaller size makes it perfect for display shelves where larger 1/32 models might not fit – you get all the engine detail impact in a more compact package.
For historical displays, consider positioning the Zero alongside American fighters from the same period. The contrast between Japanese and American engine design philosophies becomes immediately apparent when the aircraft are displayed side-by-side with engines exposed. The Zero’s more refined, compact Sakae engine makes an interesting comparison to the larger, more robust American radial engines.
Build Considerations
Plan for 90-110 hours of build time. The cowl flap assembly requires patience – each flap must be individually aligned and tested for movement. I recommend assembling the engine and cowling as a complete sub-assembly before attaching to the fuselage – this makes testing the flap operation much easier. The metal cannon parts are sharp, so handle carefully and consider wearing safety glasses when cutting them from the sprues.
When painting the Sakae engine, use reference photos of actual Japanese aircraft engines – the color scheme is different from American engines, with more gray and less metallic appearance. The cowl flaps should be painted separately from the cowling to ensure clean color separation. Test the flap movement frequently during assembly – you want them to move freely but hold position firmly.
5. Tamiya 1/32 Mitsubishi A6M2b Zero Model 21 – Historical Choice with Full Engine
Tamiya Models Mitsubishi A6M2b Zero Fighter Model 21 (Zeke) Kit
Full Nakajima Sakae engine
Pearl Harbor attack markings
Photo-etched seat belts
Pros
- One of Tamiya's finest models
- Full engine and cockpit
- Photo-etched parts
- Pearl Harbor markings
Cons
- Low stock
- Over-engineered assembly
- Not for beginners
The A6M2b Zero Model 21 represents the aircraft that attacked Pearl Harbor, and Tamiya’s kit captures this historical moment with exceptional detail. Many modelers consider this the finest model Tamiya has ever produced, and after building one, I’m inclined to agree. The full Nakajima Sakae engine combined with Pearl Harbor attack markings creates a display piece that’s both technically impressive and historically significant.
What sets this kit apart from the A6M5 is the historical context. The markings included in the kit depict aircraft that participated in the Pearl Harbor attack, complete with the distinctive tail codes and early-war camouflage. When displayed with the cowling panels removed, you’re not just showing engine detail – you’re showcasing the powerplant of an aircraft that changed history.
I spent about 110 hours on my A6M2b build, longer than expected because I kept getting lost in the details. The engine compartment alone is a modeling masterpiece – every hose, clamp, and wire is represented. The cockpit is equally detailed, with Japanese instruments, controls, and the distinctive Zero seat with photo-etched belts. This is one of those kits where you find new details every time you look at it.
The engineering is typically excellent Tamiya, but some modelers find this kit “over-engineered” – meaning Tamiya included more parts and assembly steps than strictly necessary. For display-focused modelers, this is actually an advantage – the extra detail translates directly to better engine presentation. The photo-etched seat belts, rubber tires, and full color painting guide all contribute to the final display quality.
One unique feature of this kit is the inclusion of wheel chocks, access steps, and a poseable display stand. This suggests that Tamiya designed this kit specifically with display in mind. You can display the Zero on the stand with the gear retracted, or on the wheels with the chocks and steps in place. Both display options look fantastic with the engine exposed.
The Sakae engine in this kit is slightly different from the A6M5 version, reflecting the differences between the early and late-war models. The engine mounting, accessory drives, and cowling arrangement are all specific to the Model 21 configuration. For historically accurate displays, this attention to detail is invaluable – you’re not just getting a generic Japanese radial engine, but the correct engine for this specific aircraft variant.
Some builders find this kit “fiddly” – meaning there are many small parts that require careful handling. This is particularly true in the cockpit and engine compartment. I recommend organizing the parts carefully and taking your time with these assemblies. The final result justifies the extra effort, but be prepared for a challenging build.
Best Display Applications
The A6M2b Zero Model 21 is perfect for historical displays, particularly when paired with other Pearl Harbor-era aircraft. The distinctive early-war green camouflage over natural metal, combined with the red tail meatball and tail codes, creates immediate visual recognition. Display this model with the cowling removed and the gear down on the wheeled chocks – this suggests a fighter armed and ready on the flight deck of a Japanese carrier.
For educational displays, this model tells multiple stories simultaneously – the engineering excellence of the Zero, the historical significance of Pearl Harbor, and the technical details of Japanese radial engine design. The kit’s instructions include historical notes about the aircraft and the Pearl Harbor attack, which you can incorporate into display signage or educational materials.
Build Considerations
Plan for 110-130 hours of build time. This is one of the more complex Tamiya kits, with many small sub-assemblies that must be completed before final assembly. I recommend building the engine and cockpit as complete separate assemblies, then joining them with the fuselage halves. This approach makes it easier to paint and detail these areas before final assembly.
The photo-etched seat belts require careful folding and installation. Invest in quality photo-etched bending tools before starting this build. The rubber tires should be painted with flat finishes rather than gloss – this creates a more realistic appearance. The display stand requires careful alignment to ensure the aircraft sits level – test fit frequently during assembly.
6. Tamiya 1/32 F-14A Tomcat Black Knights – Jet Fighter with Detailed Turbofans
Tamiya F-14A Tomcat Black Knights 1/32 Aircraft (TAM60313)
Movable variable sweep wings
Detailed turbofan engines
Full armament included
Pros
- Best Tomcat kit available
- Movable wing mechanism
- Comprehensive armament
- 3 figures included
Cons
- Dated kit design
- Not for beginners
- Some quality control issues
The F-14A Tomcat represents the ultimate Cold War fighter, and Tamiya’s 1/32 kit is widely considered the best Tomcat model available in any scale. What makes this kit exceptional for display is the combination of size, movable wings, and detailed turbofan engines. When I built this kit, I was amazed at how impressive the Tomcat looks in 1/32 scale – with wings extended, it spans over two feet, creating an immediate display centerpiece.
The Tomcat’s jet engines are very different from the piston engines covered so far, but they’re equally impressive when displayed correctly. This kit includes detailed turbofan engines that can be displayed with the afterburner sections visible. While you can’t remove the entire engine like you can with piston aircraft, the kit is engineered so that the exhaust sections are prominent and highly detailed.
I spent approximately 140 hours building my F-14A, making it one of my longer projects. The movable wing mechanism is engineering brilliance – Tamiya uses metal parts and screws to create a wing sweep system that actually works. You can display the Tomcat with wings fully extended (for low-speed flight), fully swept (for high-speed flight), or anywhere in between. This gives you tremendous flexibility in your display presentation.
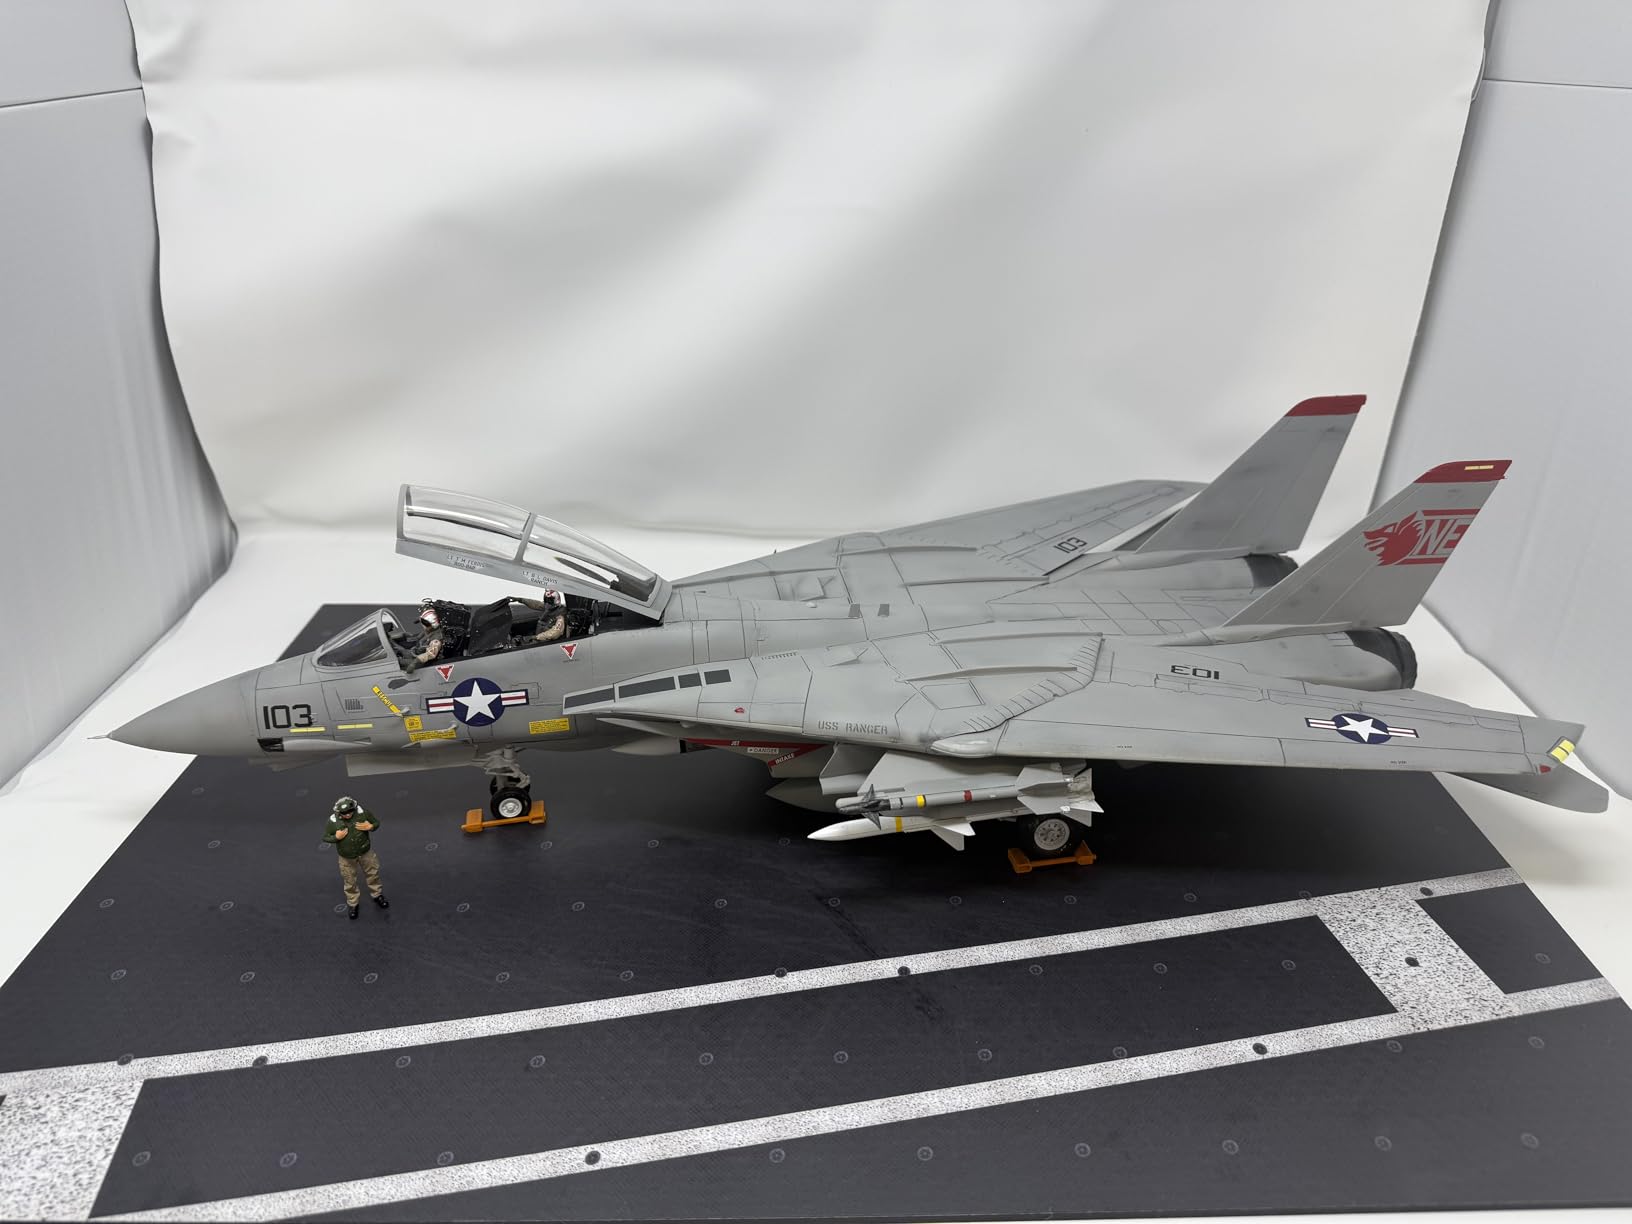
The kit includes a full range of armament – Phoenix missiles, laser-guided bombs, and a LANTIRN targeting pod. This means you can display the Tomcat loaded for different mission profiles. I like displaying mine with a full missile load – the Phoenix missiles are particularly impressive in this scale, each one over six inches long. The engineering of the missile mounting is excellent, with proper attachment points that look realistic when installed.
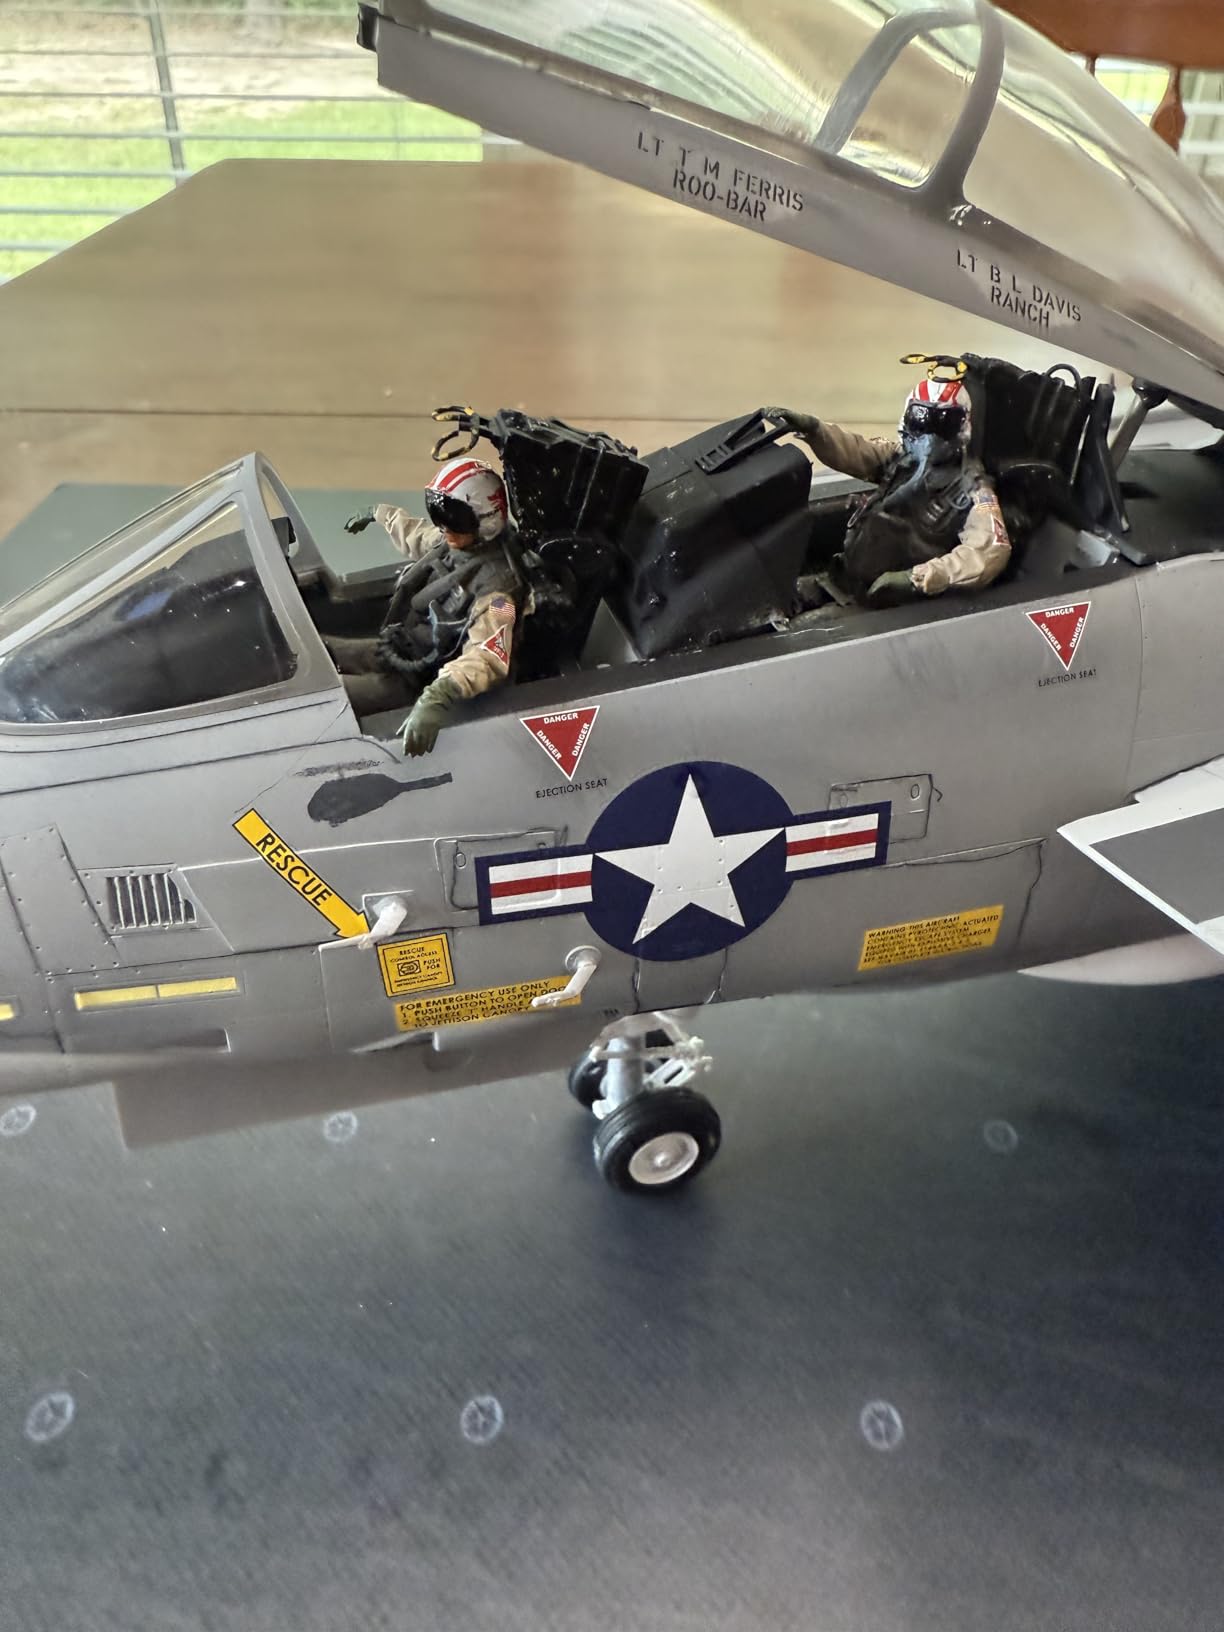
Technical details are superb throughout. The overall length is 598mm and width is 612mm (with wings extended), making this one of the largest 1/32 fighter kits available. Three figures are included – two pilots and a catapult officer – adding human scale and display interest. Decals are provided for five different aircraft, giving you multiple display options from the Black Knights to other squadrons.
One consideration with this kit is its age – it’s an older Tamiya tooling, and in some ways it shows. The engineering isn’t quite up to modern standards, and some fit issues require attention during assembly. I’ve also heard reports of quality control issues, including missing parts and flash on some plastic. My copy was fine, but be aware that you may encounter issues.
The size of this model creates display challenges that smaller kits don’t have. At over two feet wide, you need substantial display space. The weight is also significant – make sure your display shelf can handle it. I recommend displaying this model at eye level where viewers can appreciate both the overall size and the detailed engines.
Best Display Applications
The F-14A Tomcat excels when displayed with wings swept back and a full missile load. This configuration emphasizes the Tomcat’s role as a fleet defender and creates the most dramatic silhouette. The afterburner sections should be positioned to catch light from above – this illuminates the intricate turbine detail inside. For maximum impact, display this model at eye level with directional lighting that creates shadows in the engine exhaust nozzles.
For dynamic displays, consider building a small carrier deck section. The Tomcat’s size and folding wing mechanism suggest a carrier environment, and the 1/32 scale is large enough to include deck crew figures, tractors, and other equipment. The Black Knights scheme is particularly striking under display lighting, with the dark gray paint creating excellent contrast.
Build Considerations
Plan for 140-160 hours of build time. The movable wing mechanism requires careful assembly and testing – I recommend building the wing pivot mechanism as a complete sub-assembly before attaching to the fuselage. The metal parts and screws must be installed precisely for the wing sweep to work correctly. Test the wing movement frequently during assembly to ensure smooth operation.
The exhaust sections require careful painting to look realistic. Use metallic paints with washes and weathering to create depth in the turbine details. The afterburner rings should be painted separately before assembly – this creates clean color separation. Consider adding LED lights in the exhaust sections if you want a dramatic “afterburner lit” display effect.
7. Tamiya 1/32 F-16CJ Fighting Falcon – Modern Jet with Removable Engine
Tamiya Lockheed Martin F-16CJ Blk 50 1/32 Jet
Removable engine section
Metal landing gear
Real rubber tires
Pros
- Museum quality engineering
- Engine slides in/out
- Metal gear and rubber tires
- Customization options
Cons
- Decal adhesion issues
- Gimmicky removable parts
- Requires extensive painting
- High price
The F-16CJ Fighting Falcon represents modern jet fighter engineering, and Tamiya’s kit includes a feature that’s truly unique – an engine that slides in and out of the fuselage. This is completely different from removable cowling panels on piston aircraft – you can actually display the F-16 with the engine partially extracted from the rear of the aircraft, creating a maintenance scene that’s impossible to achieve with other kits.
When I built this kit, I was skeptical about the sliding engine feature. Would it work? Would it look realistic? After completing the model, I can say that it’s one of the most impressive display features I’ve ever seen on a model kit. The engine slides smoothly in and out on a track system, and when partially extracted, it creates an arresting display that immediately draws the eye.
The build took approximately 120 hours, longer than I expected because I kept stopping to admire the engineering. The removable engine feature adds complexity to the assembly – you need to build the engine as a complete sub-assembly, then install it in the fuselage track system. But the engineering is so well thought out that everything fits together perfectly. The metal landing gear and real rubber tires are nice touches that add to the display quality.

Technical details are museum quality throughout. The F-16 is a single-engine fighter, and Tamiya has rendered the General Electric F110 engine with exceptional detail. From the fan blades at the front to the afterburner section at the rear, every component is crisply molded. The engine section is designed to be displayed partially extracted, revealing the intricate internal detail that would normally be hidden inside the fuselage.
The kit includes many customization options even after completion. The sliding engine means you can change the display configuration anytime – closed for flight configuration, partially extracted for maintenance display. The canopy can be positioned open or closed, and the removable panels on the underside allow access to the landing gear and avionics bays. This flexibility means your display can evolve over time.
One issue I encountered was with decal adhesion. The decals in this kit are thicker than ideal, and I had problems with them conforming to panel lines and surface details. I recommend using a quality decal setting solution and being prepared to apply multiple coats of softener to get the decals to settle properly. Some builders have also reported that the gimmicky removable features can affect fit, though I didn’t experience this problem.
The price point is high, even for a 1/32 Tamiya kit. But when you consider the unique engineering features and display flexibility, it represents good value for serious modelers. This isn’t a kit for beginners – the complexity and price both suggest experienced builders only. But for display-focused modelers, the sliding engine feature is worth every penny.
Best Display Applications
The F-16CJ excels when displayed with the engine partially extracted from the fuselage. This creates a maintenance scene that’s immediately recognizable to anyone familiar with military aircraft. Position the model at eye level with lighting from behind and slightly below – this illuminates the exposed engine and creates dramatic shadows in the exhaust nozzle. The metal landing gear and rubber tires look best on a simple display base that suggests a hangar floor.
For competition displays, the sliding engine feature is a real attention-getter. Most judges haven’t seen this feature in person, and it immediately sets your model apart. Consider adding small maintenance details like tool boxes, work stands, or ground crew figures to complete the maintenance scene. The 1/32 scale is large enough that these additions don’t overwhelm the aircraft.
Build Considerations
Plan for 120-140 hours of build time. The engine sliding mechanism requires precise assembly – test the fit frequently to ensure smooth operation. The metal landing gear struts are attached with screws, and some builders have reported that the screws aren’t quite long enough. You may want to have slightly longer screws on hand just in case.
Painting the engine requires patience and good reference photos. The F110 engine has distinct color zones – from the titanium compressor sections to the steel turbine sections. Use multiple shades of metallic paint and washes to create realistic variation. The sliding mechanism means the engine will be viewed from multiple angles, so paint all surfaces thoroughly, not just the visible ones.
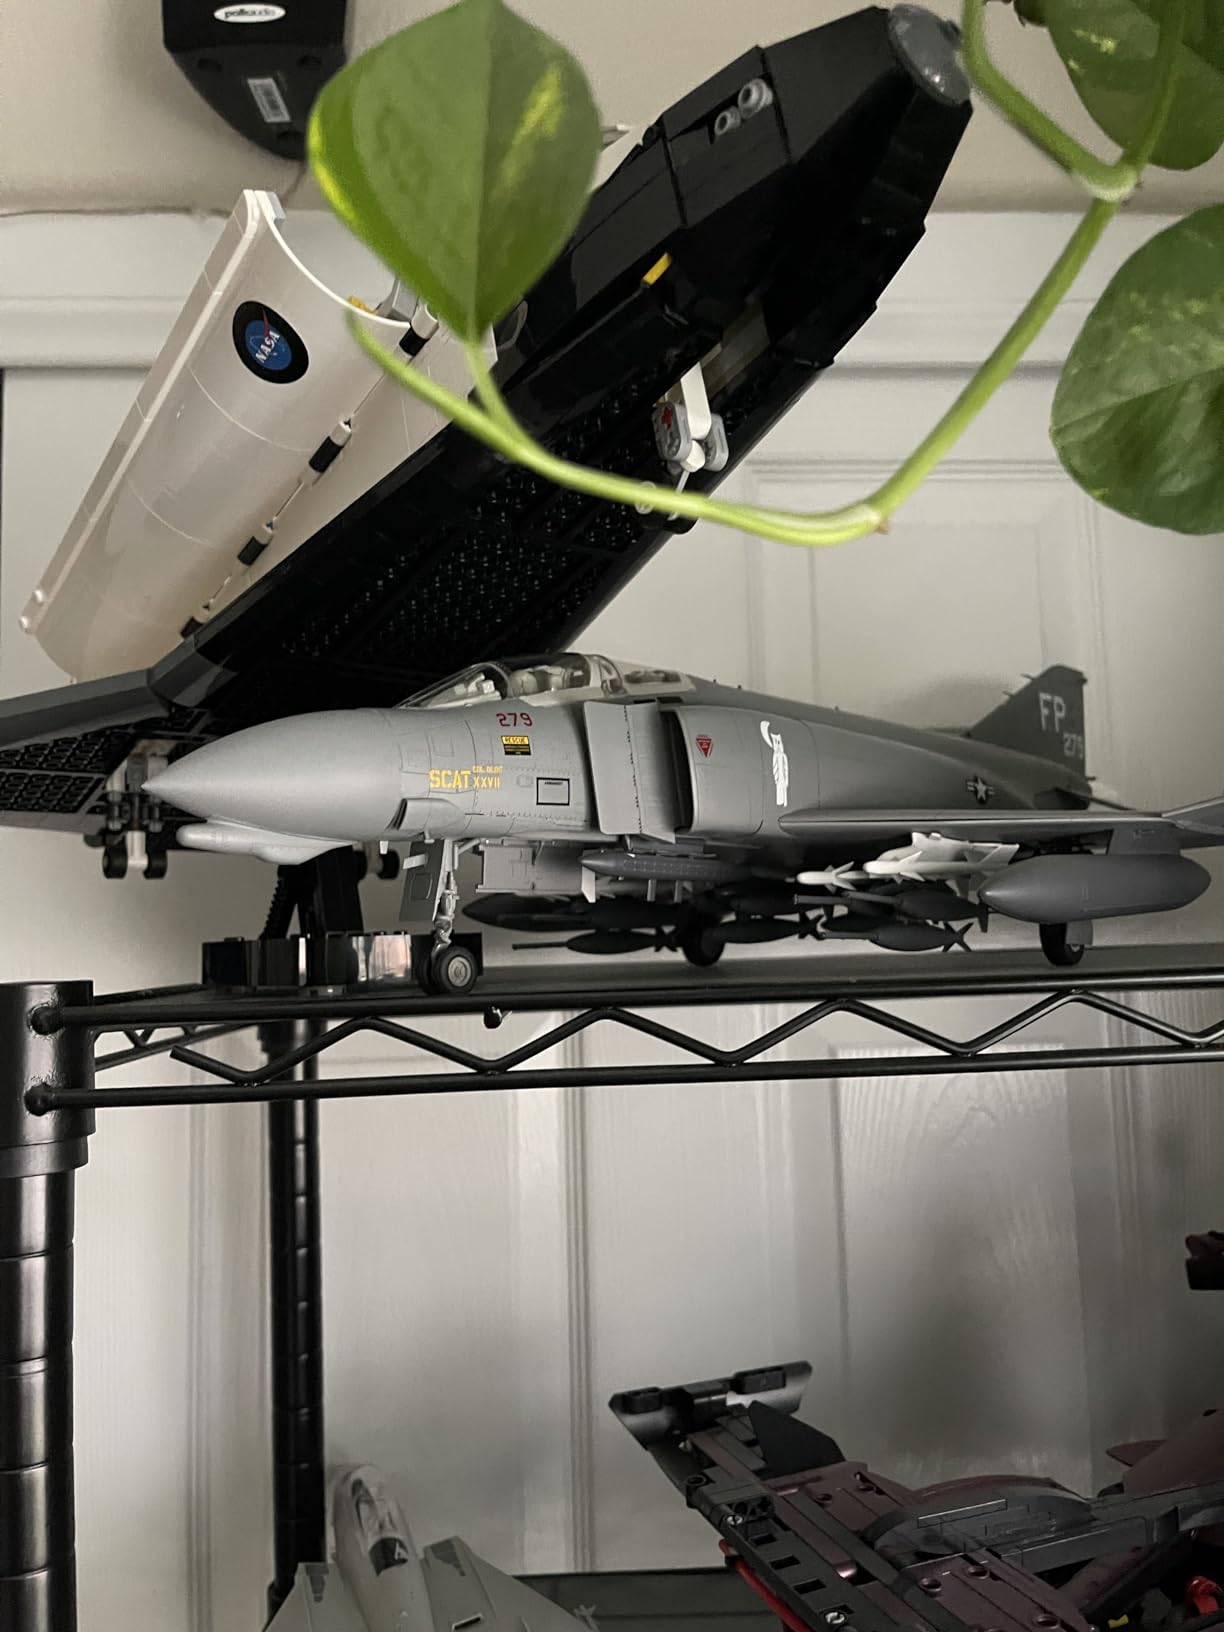
8. Tamiya 1/32 McDonnell F-4 C/D Phantom II – Twin Engine Vietnam Era Classic
Tamiya 60305 1/32 Mcdonnell F-4 C/D Phantom II Plastic Model Airplane Kit
Twin J79 engines
One-piece fuselage
Die-cast landing gear
Pros
- Perfect part fit
- Metal landing gear
- Rubber tires
- One-piece fuselage
- No putty needed
Cons
- None significant reported
The F-4 Phantom II is one of the most iconic aircraft of the Vietnam War era, and Tamiya’s 1/32 kit does justice to this legendary fighter. What makes this Phantom particularly interesting for display is the twin J79 engine configuration combined with Tamiya’s exceptional engineering. When I built this kit, I was impressed by how straightforward the assembly was – this is one of the most enjoyable large-scale kits I’ve ever built.
The Phantom’s twin engines are a major display feature. While you can’t remove them like the F-16’s engine, the kit is engineered so that the exhaust nozzles are prominent and highly detailed. The twin-engine configuration creates visual interest from multiple angles, and the afterburner sections are beautifully rendered. When displayed with proper lighting, the exhaust nozzles become focal points that draw the eye.
I spent approximately 100 hours building my F-4, and it was one of the most enjoyable builds in my experience. The one-piece fuselage design eliminates the seam lines that plague other kits, and the screw-together sub-assemblies make construction straightforward. No putty needed for assembly – the parts fit so well that seams virtually disappear. This is Tamiya at their engineering best.
Technical details are excellent throughout. The die-cast landing gear struts add real weight and durability, important for a model this size. The solid synthetic rubber tires look realistic and roll smoothly. The kit includes comprehensive armament options, allowing you to display the Phantom loaded for different mission types. Decals are provided for multiple aircraft, covering both USAF and USMC schemes.
One aspect I particularly appreciate is how Tamiya engineered the removable panels. The access panels that expose the engines can be displayed open or closed, and they fit perfectly in either position. This means you can switch between flight configuration and maintenance display anytime. The panel lines are finely engraved, and the surface detail is subtle but realistic.
The Phantom is a large aircraft, and the 1/32 scale gives it impressive presence. The twin-engine configuration creates a wide rear profile that’s visually interesting from multiple viewing angles. I recommend displaying this model where viewers can walk around it – the different perspectives reveal different aspects of the engineering and detail.
Unlike most complex kits, the F-4 has almost no significant cons reported by builders. The fit is excellent, the instructions are clear, and the engineering is thoughtful. This is one of those rare kits where everything just works. If I had to nitpick, I’d say the price is high, but the quality justifies every penny.
Best Display Applications
The F-4 Phantom II excels when displayed with the engine access panels open and a full armament load. This configuration emphasizes the Phantom’s role as a heavy fighter and showcases the twin-engine arrangement. Position the model at eye level with lighting from above and behind – this illuminates the exhaust nozzles and creates shadows that emphasize the depth of detail.
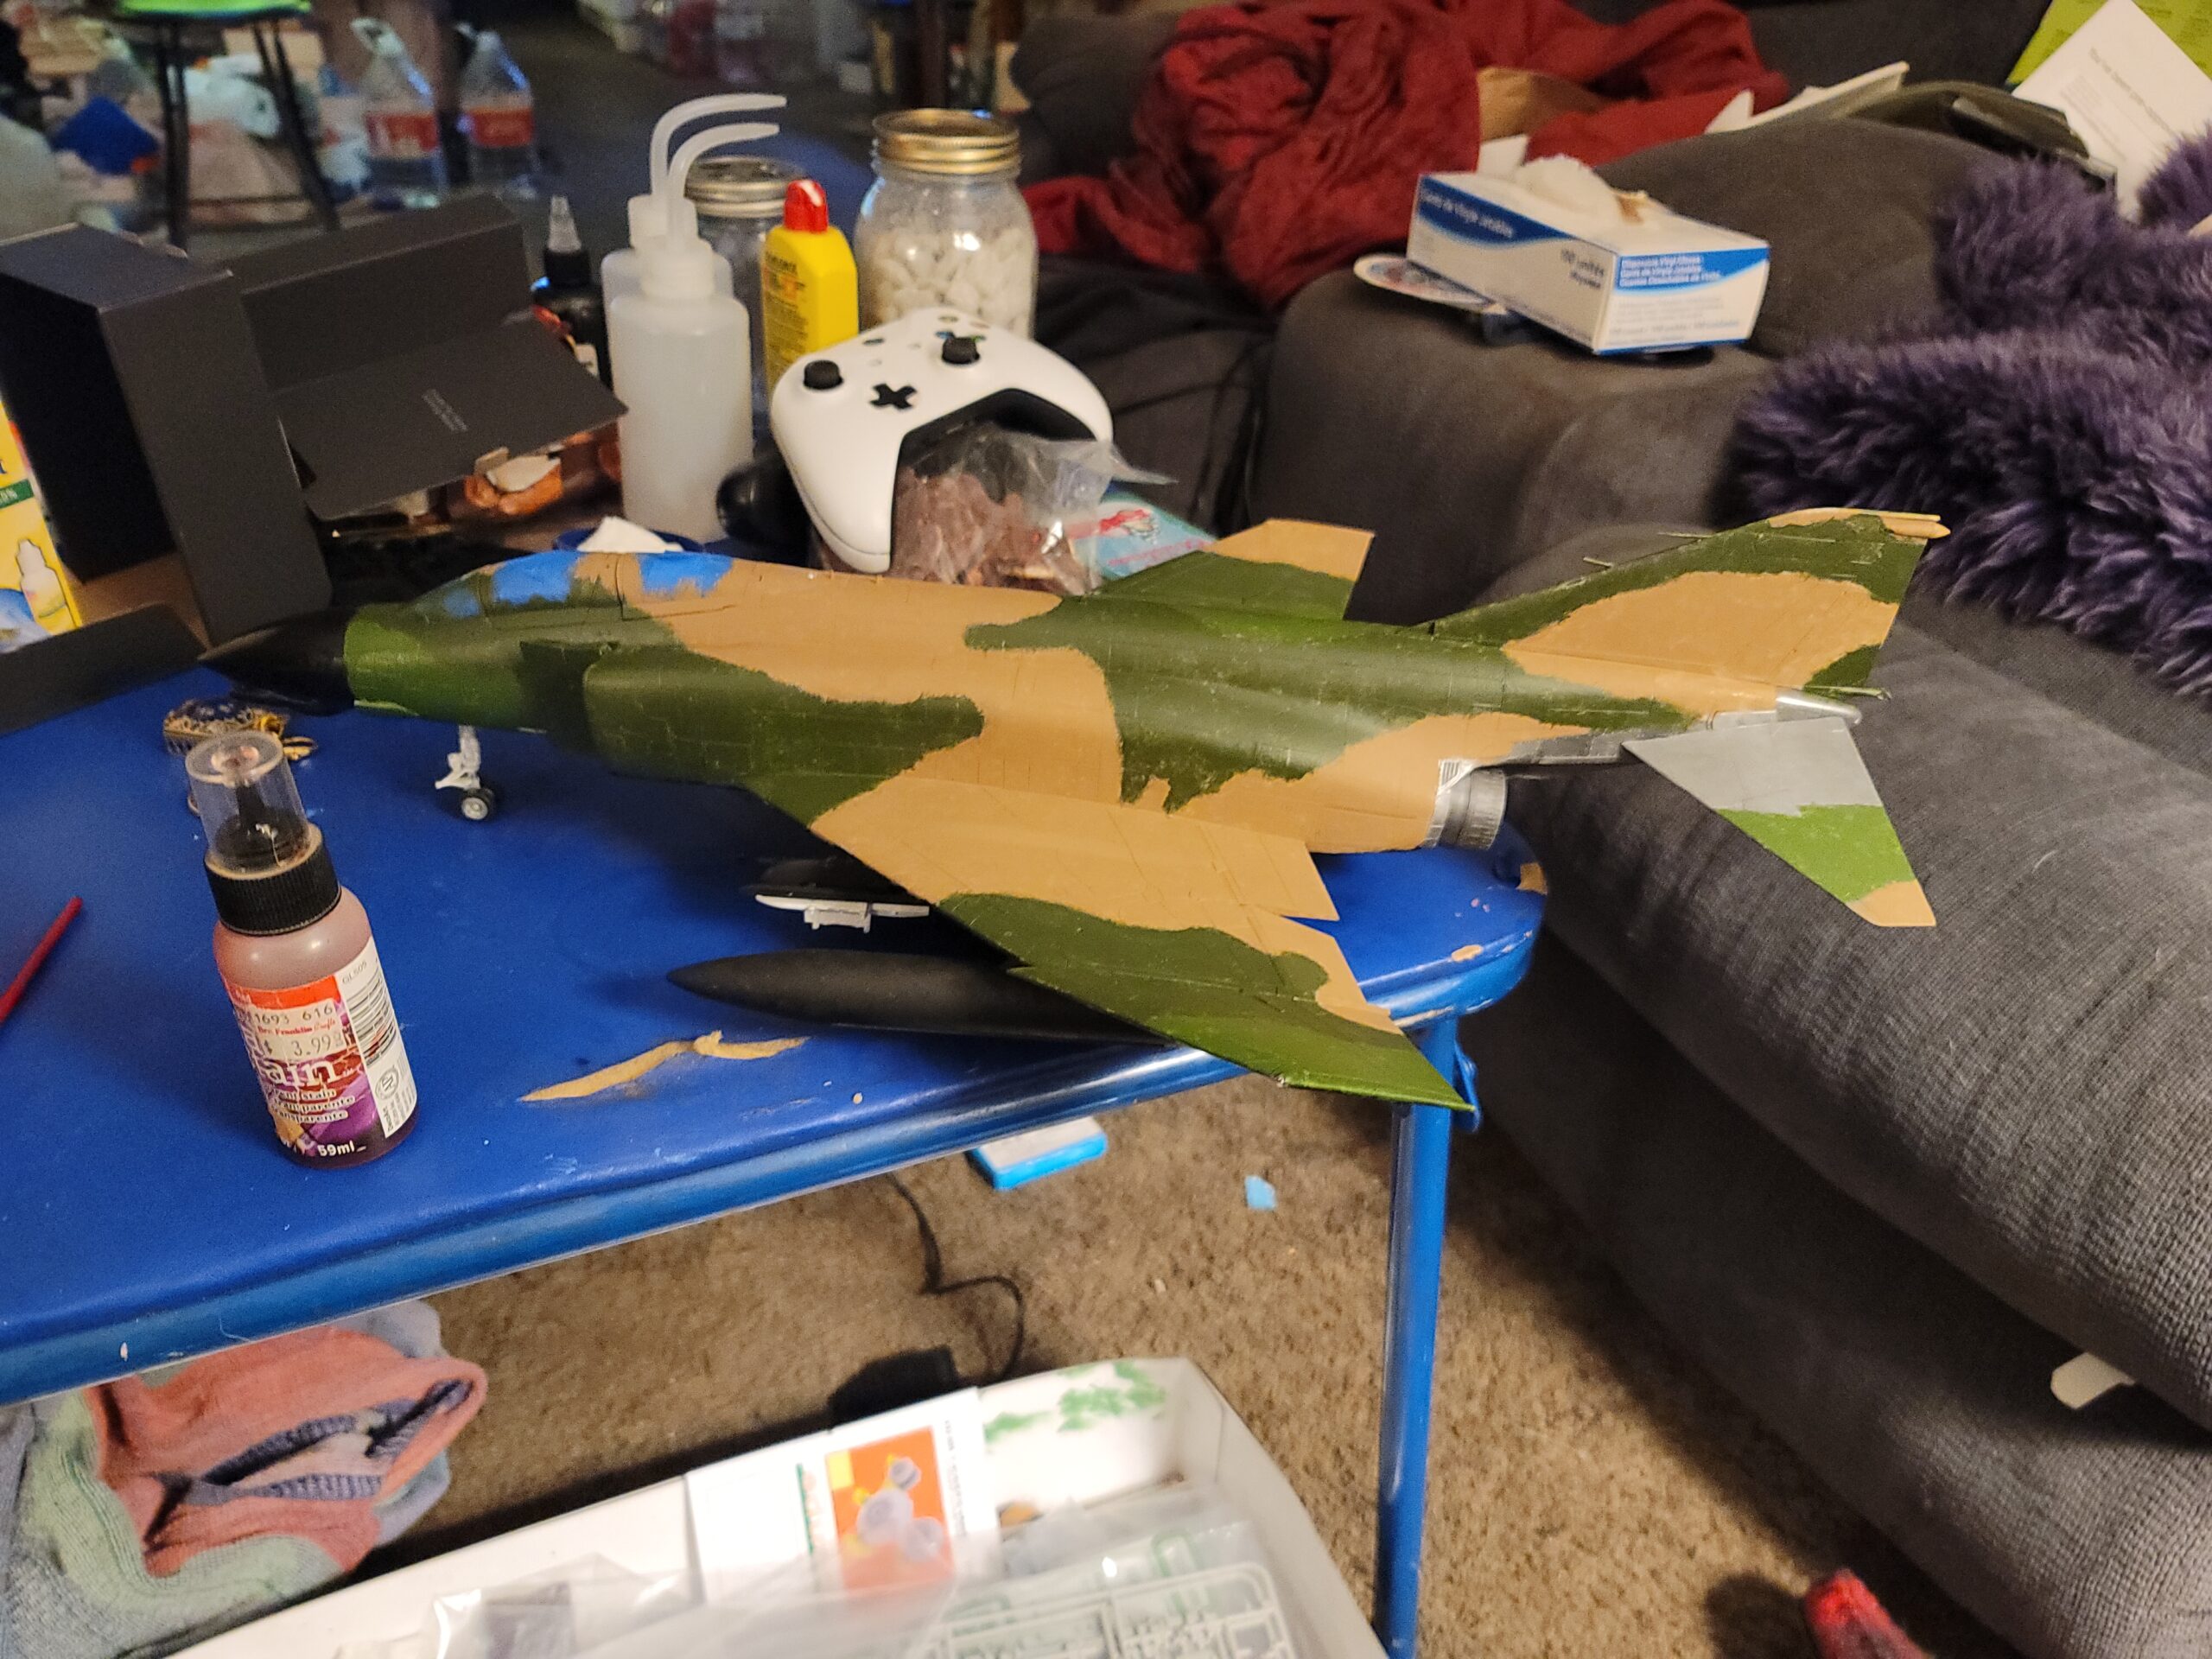
For Vietnam-era displays, the Phantom is essential. Consider displaying it alongside other Vietnam War aircraft like the F-105 Thunderchief or A-7 Corsair II. The Phantom’s distinctive shape, twin engines, and heavy armament make it immediately recognizable. The USAF Southeast Asia camouflage scheme is particularly striking under display lighting.
Build Considerations
Plan for 100-120 hours of build time. The one-piece fuselage and screw-together sub-assemblies make construction straightforward, but don’t rush – the excellent fit deserves careful assembly. The die-cast landing gear requires careful painting – the metal doesn’t take paint as well as plastic, so use appropriate primers and allow extra drying time.
The exhaust nozzles should be painted with metallic paints and washes to create realistic depth. The afterburner rings are particularly prominent and deserve careful attention. Test fit the access panels frequently during assembly to ensure they fit perfectly in both open and closed positions.
9. Trumpeter 1/32 F6F-5 Hellcat – Budget Pick with Excellent Detail
Trumpeter 1/32 F6F5 Hellcat Fighter Model Kit
Detailed Wright R-2800 engine
Photo-etched parts
Redesigned cowling
Pros
- Excellent quality under $60
- Very impressive fine details
- Excellent molding
- Photo-etched included
- Detailed cockpit
Cons
- Limited decal options
- Very low stock
The Trumpeter F6F-5 Hellcat represents exceptional value for modelers seeking engine detail on a budget. At under $60, this kit offers detail and quality that rival kits costing twice as much. When I built this Hellcat, I was impressed by the molding quality and the attention to detail – Trumpeter has really stepped up their game with this release.
The Hellcat’s Wright R-2800 engine is beautifully rendered, with crisp detail that looks fantastic when displayed with the cowling removed. Trumpeter redesigned the engine cowling for this release, improving the fit and making it easier to display the engine. The photo-etched parts included in the kit add extra detail to areas that would otherwise be difficult to reproduce in plastic.
I spent approximately 80 hours building my Hellcat, making it one of my faster large-scale projects. The molding quality is excellent with little to no flash – the parts are clean and require minimal cleanup before assembly. The fit is generally good, though not quite up to Tamiya standards. For the price point, however, the engineering is more than acceptable.
Technical details include a finely detailed engine, photo-etched parts for extra realism, a positionable canopy, rotating propeller, and retractable landing gear. The cockpit is well-detailed for the price, with instrument panels, controls, and seat belts all represented. The kit includes hundreds of pieces, giving you options for how much detail you want to add.
One aspect I particularly appreciate is the redesigned engine cowl. Trumpeter listened to feedback from earlier releases and improved the cowling fit and detail. The cowl panels can be displayed open or closed, and they fit well in either position. The engine detail is more than adequate for display purposes, with all the major components clearly represented.
The only real limitation is the decal options. The kit includes markings for only one aircraft, and the decals themselves are adequate but not exceptional. Aftermarket decals are available if you want more options, but that adds to the cost. Stock is also very limited – if you find this kit in stock, grab it before it disappears.
For modelers on a budget who want engine detail without breaking the bank, this Hellcat is hard to beat. The quality exceeds the price point by a considerable margin. While it may not have quite the engineering excellence of a Tamiya kit, it’s more than adequate for display purposes and represents excellent value.
Best Display Applications
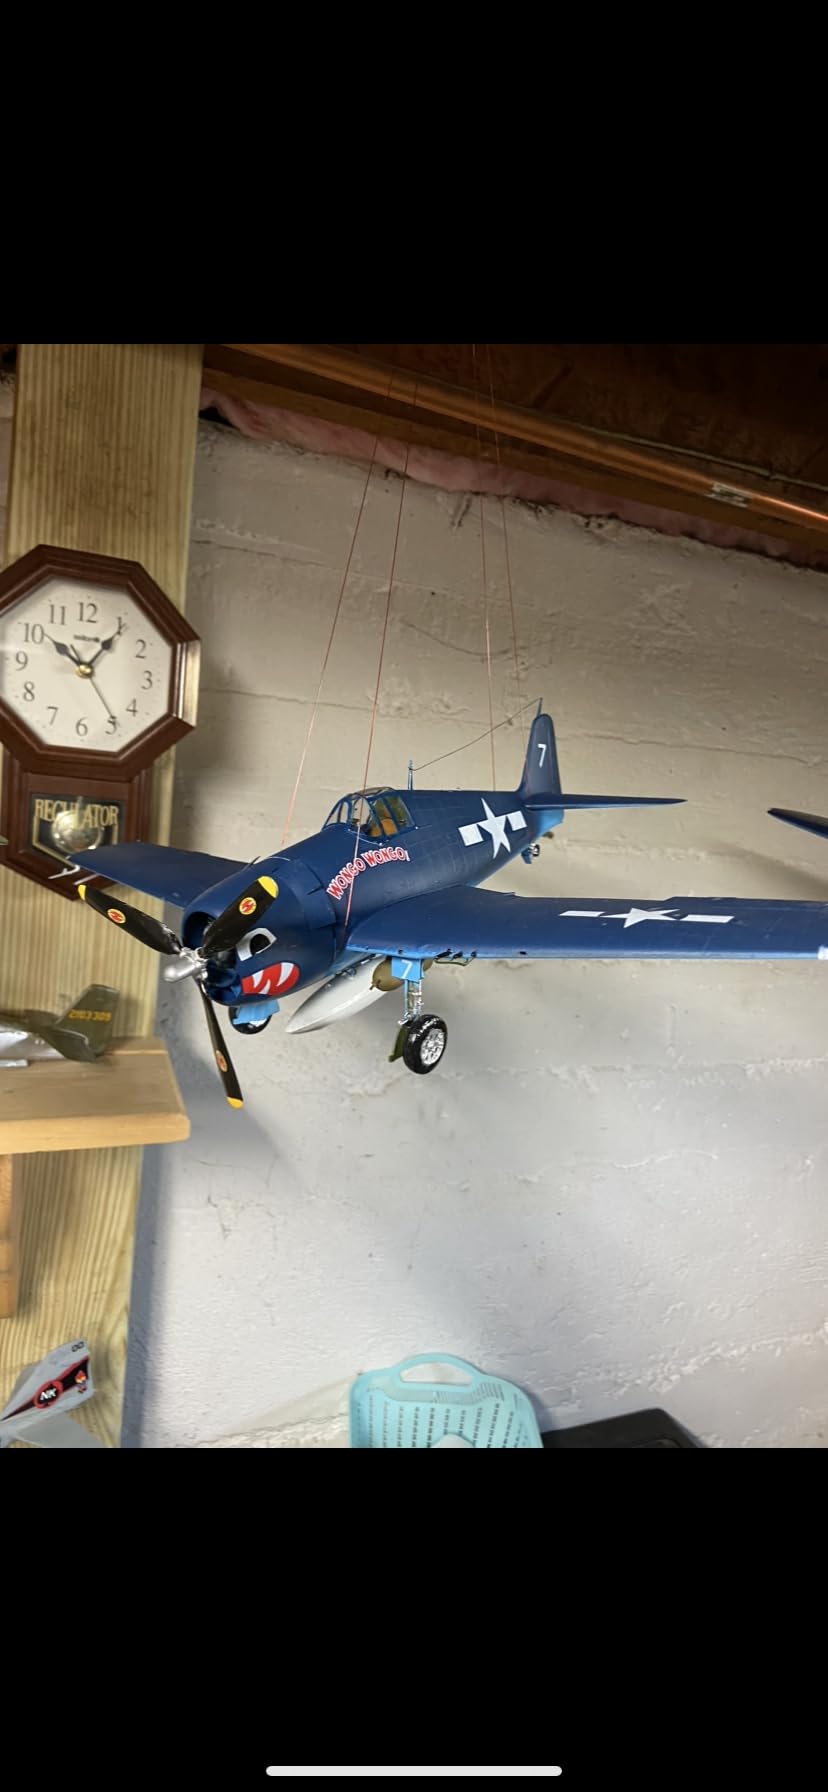
The F6F-5 Hellcat excels when displayed with the cowling removed and the landing gear down. This configuration emphasizes the Hellcat’s role as a carrier-based fighter and showcases the R-2800 engine. The Hellcat’s distinctive blue-gray Navy paint scheme provides excellent contrast under display lighting. Consider displaying this model alongside other carrier aircraft like the Corsair or Wildcat for a themed display.
For budget-conscious displays, this Hellcat delivers maximum impact for minimum investment. The engine detail is prominent enough to be a focal point, and the overall quality is good enough that it doesn’t look out of place alongside more expensive kits. This is an excellent choice for your first foray into 1/32 scale engine display modeling.
Build Considerations
Plan for 80-100 hours of build time. The photo-etched parts require careful handling – invest in quality tools before starting. The engine assembly is straightforward but requires careful painting to look realistic. Test fit the cowling panels frequently during assembly to ensure proper alignment.
The molding quality is excellent, but you may still encounter some ejector pin marks that need filling. The decals are adequate but not outstanding – consider using aftermarket decals if you want more marking options. The overall build is straightforward and suitable for intermediate modelers.
10. Hasegawa 1/32 P-40E Warhawk – Classic Choice with Allison Engine
Hasegawa 1/32 P-40E Warhawk Texas Longhorn with Pilot Figure, Drop Tank and 500Ib Bomb
Allison V-1710 engine
Flying Tigers markings
Pilot figure included
Pros
- Excellent fit and detail
- Great kit for price
- High quality plastic
- Flying Tigers markings
- Good for intermediate
Cons
- Some fit issues behind cockpit
- Multi-part pilot figure
- Cockpit too complex
- Discontinued
The Hasegawa P-40E Warhawk represents excellent value for modelers interested in the Flying Tigers and early American fighter aircraft. At under $25, this kit offers remarkable detail and quality. When I built this Warhawk, I was impressed by how much Hasegawa packed into such an affordable package – the Allison V-1710 engine is well-detailed and looks great when displayed with the cowling panels removed.
The P-40’s Allison engine is an inline V-12, very different from the radial engines covered earlier in this guide. This creates different display challenges and opportunities. The inline engine is more compact and fits snugly in the fuselage, requiring careful lighting to illuminate properly. But when displayed correctly, the V-12 configuration creates interesting shadows and depth that radial engines can’t match.
I spent approximately 70 hours building my P-40E, making it one of my faster 1/32 projects. The engineering is typical Hasegawa – generally good fit with some areas requiring attention. The plastic quality is excellent and doesn’t break easily, even when working with small parts. The kit includes two decal choices, including the iconic Flying Tigers scheme that’s perfect for display.

Technical details include a pilot figure, drop tank, 500lb bomb, and two marking options including the famous Flying Tigers. The cockpit is detailed, though some builders find it more complex than necessary. The engine is well-represented for the price, with all major components clearly molded. The fit is generally excellent, with some reported issues behind the cockpit that require minor attention.
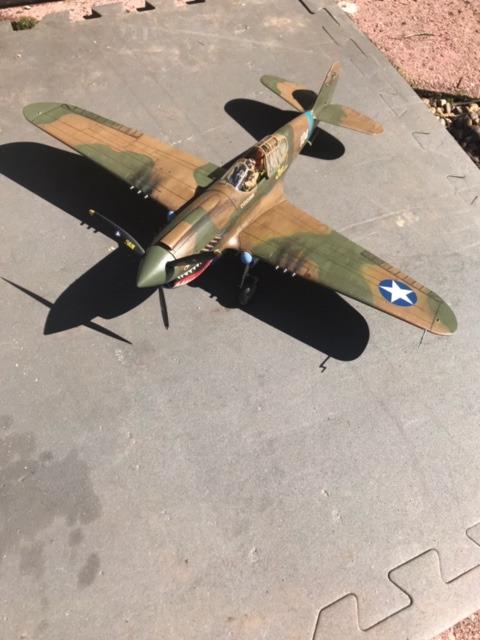
One aspect I particularly appreciate is the Flying Tigers marking option. The shark mouth and Flying Tigers insignia create immediate visual recognition and display interest. This is one of those aircraft that everyone recognizes, even people who know nothing about aviation. When displayed with the cowling removed, you get both historical significance and technical detail in one package.
The kit has been discontinued by the manufacturer, which may affect availability. However, stock is still available at the time of writing, and the low price makes it worth grabbing while you can. The discontinued status may actually increase collector value over time, making this a good investment for serious collectors.
Some builders have reported fit issues behind the cockpit, including gaps up to 1/4 inch. My kit didn’t have this problem, but be prepared to do some minor filling and sanding if you encounter it. The pilot figure is multi-part assembly, which some builders find unnecessarily complex – a single-piece casting would have been easier to work with.
Best Display Applications
The P-40E Warhawk excels when displayed in the Flying Tigers scheme with the shark mouth and cowling removed. This configuration creates immediate visual recognition and historical interest. The inline Allison engine requires careful lighting – position the model at eye level with directional lighting from above to create shadows in the V between the cylinder banks.
For historical displays, the P-40 is essential for any WWII American fighter collection. The Flying Tigers connection adds display interest, particularly if you include signage explaining the volunteer group’s role in China before America entered the war. The distinctive shark mouth creates a fierce appearance that’s particularly striking under display lighting.
Build Considerations
Plan for 70-90 hours of build time. The fit issues behind the cockpit may require putty and sanding – test fit this area carefully before final assembly. The pilot figure is multi-part and requires careful assembly – consider leaving it out if you find it too fiddly. The decals are good quality but require setting solution to conform to surface details properly.
The Allison engine compartment is darker than radial engine installations, so use lighter reference photos when painting. Consider adding LED lighting inside the cowling if you plan to display it with panels removed – this will illuminate the V-12 engine and make it more visible. The shark mouth decal requires careful alignment – take your time and use plenty of setting solution.
Buying Guide: How To Choose the Right 1/32 Aircraft Kit for Engine Displays?
Engine Detail Types: Radial vs Inline
When selecting a kit for engine display, the first decision is between radial and inline engine configurations. Radial engines like the Pratt & Whitney R-2800 (Corsair, Hellcat) and Wright R-2600 (Devastator) are more visually complex and create more immediate visual impact. The multiple cylinders arranged in a circle create fascinating geometric patterns that are visible from multiple angles. For display purposes, radial engines generally offer more “wow factor” and are easier to illuminate effectively.
Inline engines like the Packard Merlin (Mustang), Allison V-1710 (P-40), and Rolls-Royce Griffon (Spitfire) present different challenges and opportunities. The V-12 configuration creates interesting shadows when properly lit, but the engine compartment is generally darker and less immediately visible. Inline engines require more careful lighting consideration but can be equally impressive when displayed correctly. The narrow profile also means they take up less display space.
Jet engines like the General Electric F110 (F-16) and Pratt & Whitney J79 (F-4) offer completely different display aesthetics. The turbofan configuration with multiple compressor stages, combustion chambers, and turbine sections creates a mechanical appearance that appeals to viewers interested in modern engineering. Jet engines are typically displayed through exhaust nozzles or removable access panels rather than open cowlings.
Display Considerations for Open Engines
Lighting is critical for engine display. For radial engines, I recommend lighting from above at approximately 45 degrees – this creates shadows between cylinders that emphasize the three-dimensional depth. Inline engines require more direct illumination from directly overhead to light the V between cylinder banks. Jet engines look best with backlighting that illuminates the exhaust nozzle from the rear.
Dust is a major consideration for open engine displays. The intricate detail of engine compartments catches dust quickly, which can obscure fine details over time. I recommend using display cases with filtered airflow for models with exposed engines. If open display is necessary, plan for regular dusting with compressed air – the engine compartment will need cleaning every 2-3 months in most environments.
Weight and stability are often overlooked but critically important. Large 1/32 models with open cowling panels are heavier and less stable than their closed counterparts. The missing cowling panels remove structural elements, potentially creating weak points. I recommend using display stands that support the model from below rather than attaching to the gear only. For models with removable engines like the F-16, ensure the display base can support the weight when the engine is extended.
Manufacturer Quality Comparison
Tamiya sets the gold standard for 1/32 aircraft kits. Their engineering is consistently excellent, with perfect part fit, comprehensive instructions, and thoughtful design. Tamiya kits typically include photo-etched parts, metal landing gear, and other premium features. The only downside is price – Tamiya kits are consistently the most expensive option. For display-focused modelers, the extra cost is usually justified by the superior engineering and detail.
Hasegawa offers excellent quality at lower price points. Their kits generally have good fit and detail, though they may lack some of the premium features found in Tamiya kits. Hasegawa is particularly strong in Japanese aircraft subjects, where their research and attention to detail are exceptional. For modelers on a budget who still want quality, Hasegawa is an excellent choice.
Trumpeter provides good value for money, with recent releases showing significant improvement in quality. Their kits may not have quite the engineering excellence of Tamiya, but they often offer subjects that other manufacturers don’t cover. The F6F-5 Hellcat reviewed here is an excellent example of Trumpeter’s improved quality – good detail, acceptable fit, and an attractive price point.
Revell offers entry-level 1/32 kits that are suitable for beginners. Their detail and fit aren’t up to Tamiya standards, but the lower price point makes them accessible to modelers just starting in large-scale modeling. Revell kits are often described as “cheap as chips” in modeling forums – fun to build but with faults that more experienced modelers will notice.
Build Difficulty Assessment
Build complexity varies significantly between kits, even from the same manufacturer. Tamiya’s P-51D Mustang and F-4U Corsair are complex kits requiring 100+ hours and advanced modeling skills. These kits include many tiny parts, photo-etched details, and multiple assembly options that can overwhelm beginners. I recommend these only for modelers with several previous kits completed.
The Hasegawa P-40E and Trumpeter F6F-5 are more accessible to intermediate modelers. They still offer excellent engine detail but with fewer parts and simpler assembly. These are good choices for your first foray into 1/32 scale engine display modeling. The build time is typically 70-90 hours, making them less intimidating than the complex Tamiya kits.
When assessing build difficulty, consider your experience with photo-etched parts, airbrushing, and fine detail painting. All 1/32 kits require these skills to some degree, but the more complex kits demand mastery. Be honest about your skill level when selecting a kit – it’s better to choose a simpler kit and complete it successfully than to struggle with a kit beyond your current abilities.
Price vs Value Analysis
1/32 aircraft kits range from under $25 (Hasegawa P-40E) to over $150 (Tamiya F-14A Tomcat). Price doesn’t always correlate with display value. The Hasegawa P-40E at $25 offers excellent engine detail and display value, while some more expensive kits may have less prominent engine features. Consider your specific display goals when evaluating price.
For maximum display impact per dollar, I recommend the Trumpeter F6F-5 Hellcat at under $60. The R-2800 radial engine is prominently displayed, the quality is excellent, and the price is very reasonable. This kit delivers 90% of the display quality of kits costing twice as much.
If budget is not a constraint, the Tamiya F4U-1D Corsair and F-16CJ Fighting Falcon offer the most advanced display features. The Corsair’s removable cowling panels and the F-16’s sliding engine provide display options that simply aren’t available in less expensive kits. For serious display-focused modelers, these premium kits are worth the investment.
Consider aftermarket costs when budgeting. Even expensive kits often benefit from aftermarket detail sets, particularly for engine detailing. Budget $50-100 for aftermarket photo-etched parts, resin engines, or decals if you want the ultimate display quality. However, all the kits reviewed here look excellent out of the box, particularly for display purposes.
Frequently Asked Questions
What are some complex aircraft kits with engine detail?
Which 1/32 aircraft kits have removable engine panels?
Most Tamiya 1/32 radial engine kits (Corsair, Hellcat, Zero) feature removable cowling panels. The Tamiya F4U-1A includes clear cowling parts for engine display without removing panels. The Tamiya F-16CJ features a unique sliding engine that can be partially extracted from the fuselage. The Tamiya F-4 Phantom includes openable access panels for engine display.
What are the best 1/32 aircraft kits under $100?
The Trumpeter F6F-5 Hellcat (under $60) offers excellent R-2800 engine detail and quality. The Hasegawa P-40E Warhawk (under $25) provides good Allison V-12 engine representation and Flying Tigers markings. The Tamiya A6M5 Zero (around $80-85) includes detailed Sakae engine with movable cowl flaps. All three deliver excellent engine display value without breaking the budget.
Why choose 1/32 scale over 1/48?
1/32 scale offers 50% more size than 1/48, translating to significantly more visible engine detail. At 1/32, individual engine components, wiring harnesses, and panel lines are clearly visible to the naked eye. The larger scale also allows for more complex engineering features like removable cowlings, sliding engines, and movable control surfaces. For display purposes, 1/32 creates significantly more visual impact and showcase potential.
Which manufacturer makes the best 1/32 aircraft kits?
Tamiya is universally recognized as the leading manufacturer of 1/32 aircraft kits, with exceptional engineering, perfect part fit, and comprehensive detail. Hasegawa offers excellent quality at lower prices, particularly strong in Japanese aircraft subjects. Trumpeter has improved significantly recently, offering good value for money. Revell provides entry-level options suitable for beginners. For engine detail specifically, Tamiya’s removable cowling panels and clear engine parts make them the top choice.
Conclusion
The world of 1/32 aircraft modeling offers incredible opportunities for showcasing engine detail, and the kits reviewed here represent the best options available in 2026. Whether you choose the Tamiya F4U-1D Corsair with its magnificent Pratt & Whitney R-2800, the Hasegawa P-40E with its iconic Flying Tigers markings, or any of the other exceptional kits covered in this guide, you’re investing in models that will become showcase pieces in your collection.
For my top recommendation, I continue to endorse the Tamiya F4U-1D Corsair as the best 1/32 aircraft kit with engine detail for display. The combination of exceptional R-2800 engine detail, removable cowling panels, and gull wing configuration creates a display piece that never fails to impress. The engineering is Tamiya at their finest, and the display options are virtually unlimited. This is the kit that will define your collection and become the centerpiece of your display shelves.
Remember that the best 1/32 aircraft kits with engine detail for display are those that match your interests, skills, and display goals. Whether you’re drawn to the radial engines of WWII fighters, the inline engines of British and American aircraft, or the turbofans of modern jets, there’s a kit here that will meet your needs. Take your time, choose wisely, and enjoy the process of building and displaying these magnificent models.