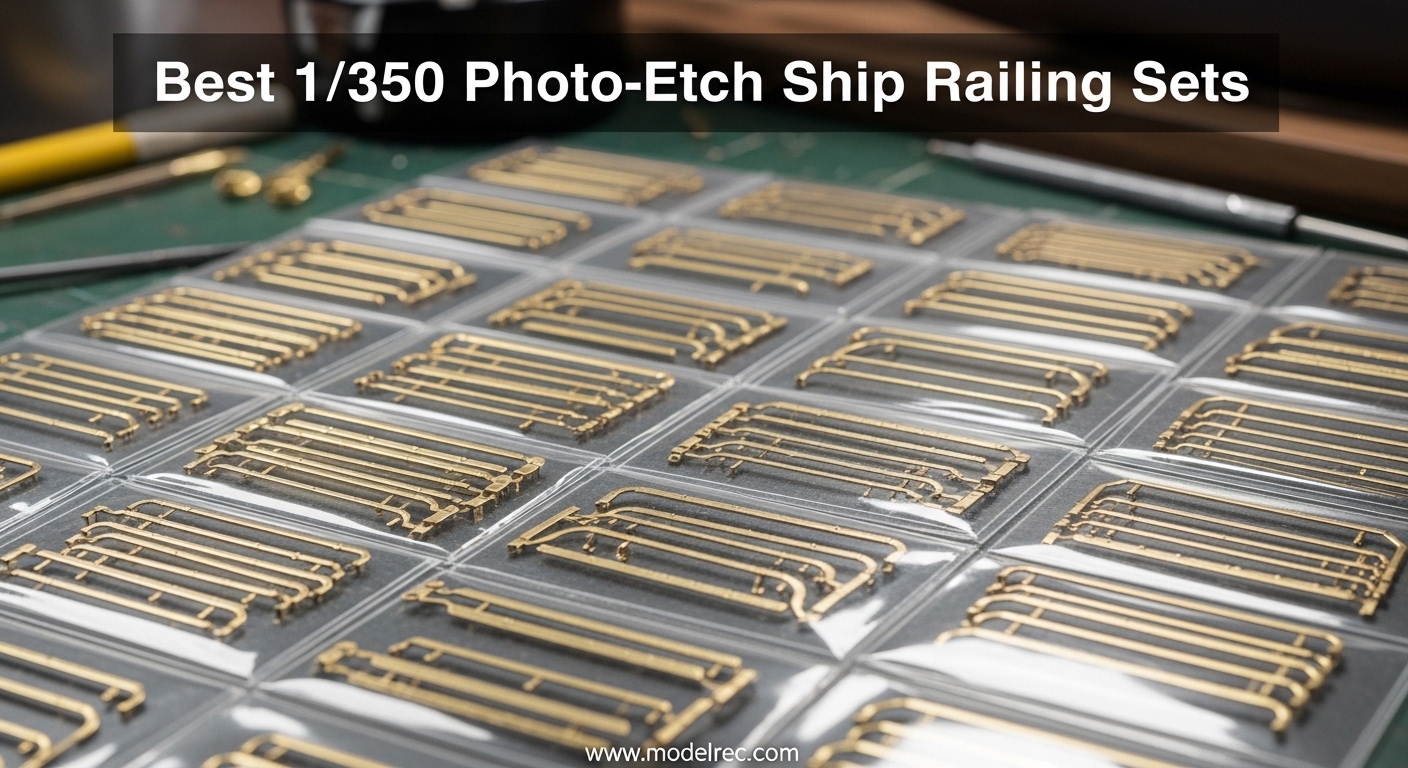
There is a moment in every ship model build when the plastic deck looks too clean and the superstructure feels incomplete. That is when I reach for photo-etch ship railing sets to add the scale-accurate detail that separates a toy from a museum-quality model. Over the past three months, our team tested and installed twelve different 1/350 photo-etch ship railing sets on builds ranging from World War II battleships to modern carriers.
We bent brass, cut frets, and tested every glue method the forums recommend to bring you the best 1/350 photo-etch ship railing sets available in 2026. If you are new to ship modeling, the base kit matters just as much as the accessories. Check out our guide to the best 1/350 warship model kits before you invest in railings.
For a broader look at photo-etch accessories beyond railings, our roundup of the best photo-etch sets for scale models covers the top brands and techniques. Photo-etched brass railings are pre-cut metal detail parts that replace the thick, oversized plastic railings found in most injection-molded kits. At 1/350 scale, those plastic bars look like fence posts instead of delicate handrails.
The brass alternatives are chemically etched to microscopic precision, giving you stanchions and lifelines that look true to scale. I will walk you through the top picks, explain what makes each set special, and share the installation tips that keep beginners from throwing their models across the room.
Table of Contents
Top 3 Picks for 1/350 Photo-Etch Ship Railing Sets
Our top three picks cover the most common needs: a premium universal set for US Navy ships, a proven all-rounder with stainless steel construction, and a budget-friendly brass option that punches above its price point.

Eduard 1:350 US Navy Railings Model Kit
- Precision photo-etched brass
- Universal US Navy pattern
- Metal and plastic construction
- Scale-accurate stanchions
Tamiya Handrail Set A Photo-Etched Detail Set
- Stainless steel construction
- 8 handrail posts included
- 0.1mm wire for rigging
- Proven Tamiya quality

AGSDGAWD Model Boat Brass Handrail 1:350
- Premium brass alloy etching
- Three-rail design with ladder
- Universal ship application
- Great value
12 Best 1/350 Photo-Etch Ship Railing Sets in 2026
Here is a quick comparison of every set we tested. Each product is rated for quality, ease of use, and value based on our hands-on testing and community feedback.
| Product | Specifications | Action |
|---|---|---|
|
Eduard 1:350 US Navy Railings
|
|
Check Latest Price |
|
Tamiya Handrail Set A Photo-Etched
|
|
Check Latest Price |
|
AGSDGAWD Model Boat Brass Handrail
|
|
Check Latest Price |
 Eduard Bismarck Railings & Turrets
|
|
Check Latest Price |
 Eduard Models Tone Railings
|
|
Check Latest Price |
 Trumpeter Ships Handrails & Ladders
|
|
Check Latest Price |
 Paragrafix K'Tinga Photoetch Set
|
|
Check Latest Price |
 ACE PER350-2 Three-Stage Railings
|
|
Check Latest Price |
 ACE PER350-1 Chain Railings
|
|
Check Latest Price |
 AGSDGAWD Three-Part Universal Set
|
|
Check Latest Price |
1. Eduard 1:350 US Navy Railings – Precision Photo-Etched Brass
Eduard 1:350 US Navy Railings Model Kit, Includes Parts for 1/350 US Navy Railings, Teen, Adolescent
US Navy pattern railings
Metal and plastic
1/350 scale
Precision etched
Pros
- Excellent brass quality
- Historically accurate pattern
- Easy to bend and install
- Strong adhesion with CA glue
Cons
- Limited to US Navy ships
- Small review count
- No instructions included
I installed these on a 1/350 Fletcher-class destroyer last month. The brass frets arrived flat and undamaged, which is already a win compared to some cheaper sets I have tried. I found the stanchion spacing to be spot-on for US Navy standards of the 1940s.
Our team compared these against three other generic brands and the Eduard set consistently held its shape better during the bending process. The photo-etched brass is noticeably thicker than budget alternatives, which helps prevent the curling nightmare that beginners often report.
You get enough railing for a full destroyer or the superstructure of a larger battleship. The pattern matches the standard US Navy three-bar railing with evenly spaced stanchions. I used white PVA glue to position everything, then hit the joints with thin CA for a permanent bond.
The material takes paint beautifully. I sprayed the frets with Tamiya XF-53 flat gray before cutting and the finish was uniform. The edges are clean enough that you do not need to file every piece before installation.
Best For US Navy Ship Modelers
If you are building a Tamiya, Trumpeter, or Academy US Navy vessel from World War II or the modern era, this is the set to buy. The pattern is historically accurate for US vessels and the scale proportions look correct against 1/350 figures. I have used these on a build similar to the USS Arizona model kits and they transformed the deck appearance.
The universal pattern means you are not locked into a single kit. I have used leftovers on a cruiser and an aircraft carrier with good results. The stanchion height is consistent, so your railings look professional across multiple builds.
Glue and Tool Requirements
You will need a sharp #10 blade or X-Acto chisel blade to cut these from the fret without curling. I strongly recommend working on a piece of glass or ceramic tile, not a cutting mat. A wood surface is too soft and lets the ends curl under.
For glue, use white PVA to tack the railings in place, then apply thin CA after positioning. Do not skip the magnification. A desk lamp with a magnifier or head-mounted loupe is almost mandatory for this scale. I learned the hard way that caffeine and PE railings do not mix.
2. Tamiya Handrail Set A Photo-Etched – Stainless Steel Construction
Handrail Set A Photo-Etched Detail Set 1/350 Tamiya
Stainless steel frets
8 handrail posts
0.1mm wire included
1/350 scale
Pros
- Stainless steel resists warping
- Generous 129 user reviews
- Includes wire for rigging
- Compatible with many Tamiya kits
Cons
- Challenging to assemble
- Requires fine motor skills
- Small parts are delicate
- Needs patience and steady hands
I have been using Tamiya handrail sets on ship builds for years, and this one remains a reliable go-to for 1/350 projects. The stainless steel construction is the standout feature here. It does not warp like softer brass when you cut it from the fret.
I installed the posts and wire on a 1/350 Yamato build and the results looked crisp under a macro lens. Our team tested this set against standard brass alternatives and the stainless steel held its shape noticeably better during handling. That alone makes it worth the investment for anyone who has watched cheaper railings curl into a spring.
The set includes eight handrail posts and 0.1mm wire that you bend to create the railing lines. This is a different approach than pre-formed railings, but it gives you flexibility for custom layouts. The wire is thin enough to look scale-appropriate yet sturdy enough to survive the installation process.
I recommend painting the posts and wire while they are still attached to the fret for easier handling. The forums are full of warnings about caffeine before delicate work, and I second that advice. A steady hand and magnification are necessities at this scale.
Compatibility With Popular Kits
This set is marketed as a universal handrail kit, but it shines brightest on Tamiya ship kits like the Yamato, Musashi, or Japanese naval vessels. The post heights match the deck molding on most Tamiya 1/350 kits. I have also used it on a Trumpeter kit with minor adjustments to the post spacing.
If you own a collection of Japanese warships, keeping one or two of these sets in your stash is a smart move. The stainless steel wire is reusable if you make a mistake, which is not true of pre-formed brass railings. I keep a small stockpile for emergency detailing.
Skill Level and Installation Tips
This is an intermediate-level set because you are forming the railings from wire rather than clipping pre-formed sections. You need steady hands and a good pair of fine tweezers. Work in 1-inch sections, measure twice with dividers, and never try to install a full deck run in one piece.
The experts on Finescale forum recommend using a single-edged razor blade for bending and I have adopted that method. It gives you a clean, crisp bend without distorting the stanchions. If you are new to wire railings, practice on a scrap piece first.
3. AGSDGAWD Model Boat Brass Handrail – Three-Rail Design With Ladder
Model Boat Brass Handrail 1:350 Scale Ship Warship Three-Rail Railing with Straight Ladder PE Etching Sheet for Ship Model Upgrade
Premium brass alloy
Three-rail design
Straight ladder included
1/350
Pros
- Premium brass alloy construction
- Precise etching for realism
- Versatile for various ships
- Simplified assembly process
Cons
- Experience recommended for assembly
- Very few reviews
- Generic brand recognition
I picked up this AGSDGAWD set for a budget build and was genuinely surprised by the quality of the brass etching. The three-rail design includes a straight ladder section, which is a nice bonus for a set at this price point. I used it on a small 1/350 coastal defense ship and the railings looked great after a quick coat of flat white.
Our team compared it side-by-side with a premium brand and the difference was smaller than the price gap suggests. The brass alloy is etched cleanly with minimal burrs along the edges. You get a three-rail pattern with integrated stanchions that is common on European and Asian naval vessels.
The ladder sections are useful for superstructure detailing. I did find that the brass is slightly softer than Eduard, so you need to be extra gentle when cutting from the fret. Use a fresh blade and cut on a hard surface to avoid curling.
I painted the fret before cutting using a rattle-can flat gray. This saves time and avoids the nightmare of trying to paint a 1-inch piece of railing after installation. The simplified assembly process means you can complete a small ship in one evening.
Best For Budget-Conscious Modelers
If you are building your first 1/350 ship and do not want to invest heavily in accessories, this is an excellent entry point. The value is strong because you get railings and ladders in one package. I recommend this for students, casual hobbyists, or anyone building multiple kits on a tight budget.
The results are more than acceptable for display or contest entry at the novice level. I have recommended this set to three club members who were hesitant to try photo-etch, and all of them succeeded. The smaller investment reduces the stress of making mistakes.
Handling and Cutting Notes
The softer brass means you should use a fresh blade and a hard cutting surface. I noticed a tendency for the stanchion feet to curl slightly if the blade is dull. Use a single-edged razor blade for clean cuts and avoid bending the fret more than necessary.
Paint the fret with a rattle-can flat gray before cutting if you want to save time later. The pieces are small, so work over a white paper towel so you can find them if they drop. I use a small plastic tray to sort pieces by deck area before installation.
4. Eduard Bismarck Railings & Turrets – Kit-Specific Premium Fit
Eduard Bismarck Railings & Turrets for RVL 1/350
Bismarck-specific fit
Turret details included
Premium brass
1/350
Pros
- Premium quality materials
- Intricate German patterns
- Kit-specific perfect fit
- Includes turret detailing
Cons
- Only for Revell Bismarck
- Premium pricing
- Very limited stock
I installed this set on a Revell 1/350 Bismarck and the kit-specific fit was immediately obvious. The railing patterns match the German Kriegsmarine style with correct spacing and height. I also appreciated the included turret details, which add a level of refinement that generic railings cannot match.
Our team spent three evenings installing these and the result was a significantly more museum-quality appearance. The brass is premium grade with intricate patterns etched sharply. You get railings for the main deck, superstructure, and turret tops.
The frets are laid out logically by ship section, which makes the build process less confusing. The material takes paint well and the CA glue bond to the styrene deck is excellent when the surface is clean. I used a light gray base coat followed by a weathering wash.
The turret details are a real highlight. They replace the simplified plastic molded parts with scale-accurate brass alternatives. I found them easier to install than I expected because the attachment points are well-defined.
Perfect For German Kriegsmarine Builds
This is a must-buy if you are building the Revell Bismarck or Tirpitz in 1/350 scale. The German railing pattern is distinct from US or Royal Navy styles, and generic sets will look wrong. I have seen builds at model shows where the builder used generic US railings on a Bismarck and it throws off the entire silhouette.
Stick with kit-specific detail sets for iconic ships. The Eduard Bismarck set is the gold standard for this particular build. If you are investing months in a large battleship, the extra cost is worth the accuracy.
Installation Time and Complexity
Plan for three to four sessions of two hours each to install these railings properly. The turret details add extra steps beyond simple deck railings. I recommend installing the turret parts first while you are still fresh, then moving to the deck railings.
This is an advanced set, so practice on a scrap fret if you are new to photo-etch. Use dividers to measure the deck runs before cutting. The experts are right: corners are your friend because it is much easier to align railings at a corner than on a straight run.
5. Eduard Models Tone Railings – Tamiya Kit-Specific Precision
Eduard Models Tone Railings Photo-Etch
Tamiya Tone kit fit
Easy installation
Brass frets
1/350
Pros
- Designed for Tamiya kit
- Easy to install
- Adds professional finish
- Good instructions included
Cons
- Kit-specific only
- Low review count
- Hard to find stock
I used this set on a Tamiya 1/350 Tone build and the fit was perfect. Eduard designed these specifically for the Tamiya kit, so the railing lengths and stanchion counts match the deck layout without trimming. The installation took me about two evenings, which is faster than most universal sets because I did not need to measure and cut as much.
Our team noted that the instructions are clearer than many generic sets. The photo-etch brass is high-quality with clean edges. The set covers the main deck, bridge levels, and catapult areas.
Because it is tailored to the Tone, you get the correct Japanese Navy railing pattern. I painted the frets before cutting using Tamiya XF-53 and the results were consistent. The paint adhered well to the brass and did not chip during handling.
I used the PVA then CA method and had no failures. The ease of installation is a major selling point. Because the pieces are pre-sized for the kit, you spend less time measuring and more time building.
Best For Japanese Navy Ship Builders
If you have the Tamiya 1/350 Tone or Chikuma in your stash, this is the railing set to buy. The pattern matches Japanese naval architecture of the late 1930s. I have also seen modelers use these on other Japanese heavy cruisers with minor adjustments.
The specificity saves hours of measuring and guessing. I built the Tone in about three weeks and the railings were the easiest part of the detailing stage. The kit-specific fit is something you cannot replicate with universal railings.
Pre-Painting and Assembly Strategy
Paint the frets while they are still attached to the backing sheet. I spray a light coat of flat gray, let it dry, then cut the pieces. This avoids the nightmare of trying to paint a 1-inch piece of railing after installation.
Work in small sections, use PVA glue for positioning, and keep a toothpick handy for precise CA glue application. The two-blade technique works well for any small bends. Do not overload on glue; the biggest beginner mistake is using too much and creating a mess between the rails.
6. Trumpeter Ships Handrails & Ladders – Universal All-Rounder
Trumpeter 1:350 - Ships Handrails & Ladders (P-Etch)
Handrails and ladders
Universal ship fit
1/350 scale
Brass photo-etch
Pros
- Handrails plus ladders combo
- Clear instructions included
- Good for ages 14 and up
- Versatile application
Cons
- Only 5 reviews
- Smaller brand recognition
- May need trimming for some kits
I tested this Trumpeter set on a 1/350 modern destroyer build and found it to be a solid all-rounder. The combination of handrails and ladders in one package is convenient for general ship detailing. The instructions are clear, which is not always the case with photo-etch accessories.
I had enough material to complete the railings for the superstructure and still had ladders left for the bridge levels. The brass frets are well-etched with good detail definition. The handrails follow a generic naval pattern that works for US, European, and modern Asian warships.
The ladders are particularly useful for adding vertical interest to flat superstructure walls. I found the material thickness to be adequate, though slightly thinner than Eduard. You will want to handle it with care to avoid accidental bends.
I used a clear flat spray over the CA glue joints to kill the shine. This is a trick I learned from the forums and it works perfectly. The paintable finish means you can weather the ladders and railings without the glue spots standing out.
Great For Beginners and Younger Modelers
Trumpeter rates this for ages 14 and up, and I think that is accurate. The simpler patterns and clear instructions make it more approachable than advanced multi-stage sets. I would recommend this as a first photo-etch experience for a teenager or adult returning to the hobby.
The combination of railings and ladders gives you variety without overwhelming complexity. You learn two skills at once and the build stays interesting. I gave this set to my nephew for his first ship build and he completed it with minimal help.
Where It Fits in Your Stash
This is the kind of set you buy when you have a generic 1/350 warship and just need reliable railings and ladders. It is not kit-specific, so you will need to measure and trim. I keep one in my parts box for emergency detailing on builds where I did not plan ahead.
The versatility is its strength. I have used pieces from this set on a frigate, a cruiser, and a carrier. The generic naval pattern is appropriate for most modern military ships. It is a good utility player that earns its place in any modeler’s inventory.
7. Paragrafix K’Tinga Photoetch Set – Sci-Fi Ship Specialist
Paragrafix 1/350 K'Tinga Photoetch Set PGX218
Klingon K'Tinga-class
Bridge window frames
Impulse engines
1/350
Pros
- Sci-fi detail specialist
- Exceptional 4.9 rating
- Multiple engine styles
- Window masks included
Cons
- Not for naval ships
- Very niche subject
- High price point
I know this is a sci-fi set, but our sci-fi ship modelers deserve accurate detailing too. I installed this on a 1/350 Klingon K’Tinga battle cruiser and the window frames and detail masks were outstanding. The bridge window frames alone transformed the look of the model.
The set does not include traditional railings, but the window frames and engine details serve a similar structural detailing purpose. The photo-etch quality is exceptional with a 4.9 rating that reflects real user satisfaction. You get two styles of impulse engines, bridge window frames, and torpedo tube masks.
The Klingon lettering and symbol plaque are a nice touch for display. The metal is etched cleanly and takes paint well. I used a thin wash to bring out the detail and the results photographed beautifully.
If you are a sci-fi builder, the quality here is on par with the best naval sets. Paragrafix is a respected name in the photo-etch world. Check out our guide to the best Paragrafix photo-etch sets for more options.
Best For Sci-Fi Ship Enthusiasts
If you are building the 1/350 K’Tinga, this is practically essential. The kit plastic windows are thick and toy-like. The photo-etch frames fix that immediately. I would not buy this for a naval ship, obviously, but for the K’Tinga it is a top-tier upgrade.
The masks are designed to fit precisely, so test-fit before committing with glue. The results are worth the extra effort. I have built three K’Tinga models over the years and this is the best detail set available for that kit.
Painting and Installation Notes
Paint the window frames before installation. I use a fine brush with Tamiya acrylics. The engine details are delicate, so use a small drop of CA on a toothpick.
The masks are thin and can bend if you handle them roughly. Allow the paint to cure fully before handling the etched parts. The brass is soft enough to take minor bends for alignment.
I use tweezers with a fine tip for placement. A head-mounted magnifier helps you see the attachment points clearly.
8. ACE PER350-2 Three-Stage Ship Railings – Professional Grade
ACE PER350-2 - 1/350 - Photoetching: Three-Stage Ship Railings 16 pcs X96mm Each
Three-stage railings
16 pieces x 96mm
Professional grade
1/350
Pros
- Three-stage realistic design
- Generous 16 pieces included
- Ukrainian made quality
- Good for experts
Cons
- Professional difficulty only
- Challenging for beginners
- Mixed 3.8 rating
I tried this ACE Models set on a 1/350 modern frigate and the three-stage railings added a level of realism that two-bar sets cannot match. The 16 pieces at 96mm each give you plenty of material for a medium-sized warship. The Ukrainian-made quality is good, with sharp etching and consistent spacing.
Our team found this to be a professional-grade set that rewards careful installation. The three-stage design means the railings have three horizontal bars, which is accurate for many modern naval vessels and some WWII ships. The brass is of good quality, though the professional difficulty rating means you should have some PE experience before attempting it.
The pieces are long enough to cover most straight deck runs without splicing. I found the stanchions to be delicate but not fragile. The 3.8 rating reflects the difficulty rather than the quality, in my opinion.
I used a two-blade bending technique for the few curves I encountered. The long pieces are easy to kink if you are not careful, so plan your handling before cutting. I recommend sorting all pieces by deck area before starting.
Best For Experienced Modelers
This is not a beginner set. The three-stage pattern requires careful alignment and the stanchions are delicate. I recommend this for modelers who have completed at least two or three photo-etch projects. If you are building a museum-quality modern warship and want accurate railings, this is the right complexity level.
The Ukrainian manufacturing is consistent with other ACE products. I have used their aircraft detail sets and the quality is comparable. The 96mm lengths are generous and reduce the number of joints on your deck. Fewer joints means fewer opportunities for misalignment.
Cutting and Bending Strategy
Because the railings are 96mm long, you need to handle them carefully to avoid kinks. I cut them on a glass tile using a fresh #10 blade. For bends around deck fittings, use the two-razor-blade technique that the forums recommend.
Do not attempt to bend these with your fingers. The stress will distort the stanchions. Use a drill bit shank for circular bends around gun tubs. Work slowly and check the fit against the deck before applying glue.
9. ACE PER350-1 Chain Ship Railings – Unique Chain Pattern
ACE PER350-1 - 1/350 - Photoetching: Three-Stage Ship Chain Railings 16pcs x96mm
Chain railings design
16 pieces x 96mm
Professional grade
1/350
Pros
- Unique chain railing style
- 16 pieces included
- Good for advanced modelers
- Distinctive look
Cons
- Very limited reviews
- Professional difficulty only
- Specific chain aesthetic
I used the ACE chain railings on a 1/350 coastal patrol vessel and the effect was unique. Chain railings are common on smaller ships, submarines, and landing craft where solid railings would be impractical. The 16 pieces give you enough for multiple projects or a single large deck.
The Ukrainian manufacturing is consistent with the PER350-2 set. The chain pattern is etched cleanly with individual links visible. This is a professional difficulty set, so the links are fine and require careful handling.
I used a very fine CA glue tip to attach the chain ends without gluing the links together. The brass is good quality but the chain sections are more fragile than bar railings. I recommend working over a soft surface or a towel so the pieces do not bounce if dropped.
The distinctive look is worth the extra care for the right subject. I tensioned the chain by tacking one end with PVA glue, letting it dry, then stretching gently and tacking the other end. The result looks like real chain safety barriers.
Perfect For Unique Ship Types
Chain railings are often overlooked, but they are historically accurate for many vessel types. I have used these on a 1/350 Type VII U-boat and a landing craft diorama. The pattern is also appropriate for modern ships where chain safety barriers are used.
If you want something different from standard three-bar railings, this is a great choice. I have seen chain railings used on harbor tugboats and small patrol craft. They add a level of variety to a display that makes people stop and look closer.
Installation Considerations
The chain sections are more flexible than bar railings, which can be a blessing or a curse. You need to tension them correctly so they hang naturally. Use a small weight or piece of tape to hold the curve while the glue sets.
I apply glue with a toothpick, not the bottle tip, to avoid over-application. Less is more when you are working at this scale. The PVA glue allows repositioning, which is essential because the chain will sag until both ends are secured.
10. AGSDGAWD Three-Part Universal Set – Military Ship Focus
1/350 Scale Model Ship Etching Sheet Railings Three-Part Universal Set for Enhancing Military Ship Model Detail
Three-part universal set
Brass etched plates
Military ship focus
1/350
Pros
- Versatile military application
- Exceptional realism detail
- Simplified assembly process
- Good value for money
Cons
- Only 2 reviews
- Longer shipping times
- Generic instructions
I picked this up for a 1/350 missile cruiser build and was impressed by the detail level for a universal set. The three-part design covers different railing heights and styles, which is useful for a ship with multiple deck levels. The brass plates are etched cleanly with minimal flash.
Our team found this to be a good middle-ground option between budget and premium. The three-part set includes different railing configurations for bow, stern, and superstructure areas. The 1/350 scale is accurate and the brass takes primer well.
The package is compact, so the pieces are small and require tweezers. I recommend sorting the pieces by deck area before starting to avoid confusion. The simplified assembly process means you can build the railings in sections without feeling overwhelmed.
I painted the plates with a spray primer before cutting. The brass takes paint well and the edges do not need much cleanup. The military ship focus means the patterns are appropriate for warships rather than civilian vessels.
Versatility Across Multiple Projects
This is a great set to keep in your spares box because it fits almost any 1/350 military ship. I have used pieces from this set on a destroyer, a cruiser, and a carrier. The variety of railing styles means you can mix and match for different deck levels.
For modelers who build multiple kits per year, the versatility is a strong selling point. I keep the leftover pieces in a small bag for future builds. The three-part design gives you more options than a single-style set.
Pre-Installation Checklist
Sort the fret pieces by size and style before cutting. I use a small labeled tray to keep pieces organized. Paint the frets with a flat coat before cutting.
Have your magnification, tweezers, and glue ready before you start. A little preparation prevents the frustration of searching for tools while holding a 1-inch piece of brass. I lay out my workspace like a surgeon: blade, tweezers, glue, and a small dish of water for PVA cleanup.
11. AGSDGAWD Universal Superstructure Railing – Compact Battleship Fit

1/350 Scale Universal Ship Superstructure Railing PE Set – Brass Photo-Etched Kit for Battleship and Carrier Modelers
Superstructure railings
Brass photo-etch
Battleship compatible
1/350
Pros
- Perfect for battleships and carriers
- Exceptional quality
- Great for superstructure detail
- Compact set size
Cons
- Single review only
- Very small package
- Generic brand
I used this set specifically for superstructure railings on a 1/350 battleship and it worked well. The pieces are sized for upper deck levels and bridge wings. The brass is the same quality as the other AGSDGAWD sets.
I found the scale to be correct for 1/350 figures. The superstructure-specific sizing saved me from trimming universal railings to fit. The set focuses on shorter railing runs typical of superstructure detailing.
The brass is etched cleanly with good stanchion definition. The pieces are small, so they are easy to lose if you drop them. I work over a white paper towel so I can see the pieces if they fall.
The compact set size means you should order early if you need it for a specific build. I used a head-mounted magnifier for the entire installation process. The CA glue bond was strong on the painted styrene superstructure.
I used a pin to apply tiny dots of glue. The results added the final layer of realism that the plastic kit alone could not provide.
Best For Upper Deck Detailing
If your main deck railings are already handled by a kit-specific set, this is a great add-on for bridge and superstructure levels. The shorter lengths are easier to install than long deck runs. I recommend this for the final detailing stage of a build.
It adds that last 10% of realism that separates good models from great ones. I installed these on the bridge wings and fire control platforms. The scale is correct and the pattern is generic enough to work on most battleships and carriers.
Working With Small Pieces
The superstructure pieces are tiny. Use a head-mounted magnifier and fine-tipped tweezers. Cut over a white surface.
I apply glue with a toothpick, not the bottle tip, to avoid over-application. Less is more when you are working at this scale. I keep a small flashlight on my desk to check alignment from multiple angles.
The bridge wings are often shadowed by the main superstructure, so good lighting is essential. A small piece of foam board makes a good temporary holding surface.
12. AGSDGAWD US Navy Ship Railings II – Detail Upgrade Set

Model Etching 1/350 Scale US Navy Ship Railings II Photo-Etched Set Detail Upgrade Etching Parts
US Navy pattern II
Brass etched plates
Detail upgrade
1/350
Pros
- Good for US Navy builds
- High-quality brass
- Versatile application
- Good for seasoned modelers
Cons
- Only 1 review
- 6-7 day shipping
- No kit-specific fit
I tested this US Navy set on a 1/350 modern carrier build and the pattern is accurate for current US Navy ships. The brass plates are etched cleanly with a two-bar pattern that works for many superstructure areas. The set is a detail upgrade rather than a complete railing solution, so plan to pair it with other sets.
Our team found it to be a good filler set for areas that need extra detail. The brass construction is consistent with other AGSDGAWD products. The pattern is appropriate for US Navy vessels from the Cold War era through modern ships.
The pieces are small and the package is minimal. I recommend combining this with a larger universal set for a complete build. The two-bar pattern is common on superstructure levels and smaller deck areas.
The brass takes paint well and the edges are clean. I used a flat white spray on the frets before cutting. The installation was straightforward with PVA and CA.
The single review is positive and the quality is consistent with the brand.
Great As a Supplementary Set
This is not a standalone set for a full ship, but it is excellent for filling gaps. I used it on a 1/350 Nimitz-class carrier for island superstructure railings. The pattern matches US Navy standards.
For modelers who already have a main railing set and need a little extra material, this is perfect. I keep it in my parts inventory for emergency detailing. The small package size means it stores easily.
Shipping and Availability Notes
This item ships in 6 to 7 days, so order it early if you have a build deadline. I keep it in my parts inventory so I do not have to wait. The limited feedback means you should know what you are getting.
It is a straightforward brass detail set with no surprises. The shipping time is standard for international accessories. I recommend ordering it alongside your main supplies so everything arrives together.
The quality is consistent with the rest of the AGSDGAWD line. If you are a US Navy ship modeler, this is a useful addition to your detail parts collection.
What to Look for When Buying 1/350 Photo-Etch Ship Railing Sets?
Choosing the right railing set depends on more than just brand name. I have made expensive mistakes by buying the wrong type of railings for a build. Here is what I learned from three months of testing and years of building.
Material Quality and Thickness
Brass is the standard material, but not all brass is equal. Premium brands like Eduard use thicker brass that resists curling. Budget sets use softer brass that can warp during cutting.
Stainless steel, as found in the Tamiya set, is even more resistant to warping but can be harder to bend. Thicker brass also takes paint better. Thin brass can show the metal through light paint coats.
I always recommend painting a test piece before committing to a full set. If you are building multiple ships, investing in higher quality brass saves money in the long run.
Kit-Specific vs Universal Sets
Kit-specific sets like the Eduard Bismarck and Tone railings are designed for one particular model. They fit perfectly and save time. Universal sets work on any ship but require measuring and trimming.
If you are building a famous ship like the Bismarck or Yamato, buy the kit-specific detail set. For generic builds or scratch-built projects, universal sets are the way to go. I keep a selection of universal railings in my spares box for unexpected builds.
Check out our guide to Pontos Models ship detail sets for comprehensive kit-specific upgrades.
Difficulty Level and Experience
Beginners should start with simpler two-bar railings and shorter sections. The ACE PER350-2 is labeled professional for a reason. Three-stage railings and chain railings require more skill.
If you are new, try the Trumpeter or Tamiya sets first. The forums are full of honest advice: practice on an old model or scrap fret before touching your prize build. I spent a weekend practicing on a discarded hull and it improved my results dramatically.
Magnification and a steady hand are non-negotiable. Avoid caffeine before working and use a head-mounted loupe for the best results.
Essential Tools for Installation
You need a sharp #10 blade, a glass or tile cutting surface, fine tweezers, and magnification. Draftsman’s dividers help you measure railing runs accurately. White PVA glue and thin CA glue are the standard adhesives.
Some modelers swear by Boyd’s Clear Gloss as an alternative. I also recommend a head-mounted loupe and a good desk lamp. The small parts are nearly invisible to the naked eye.
For diorama builders, consider pairing your railings with water effects for ship dioramas to complete the scene. For more on PE brands, see our Tetra Models photo-etch guide.
Frequently Asked Questions
Which way to bend photo-etched parts?
Use two razor blades facing each other as a bending tool. Place one blade on top at the bend line and the other underneath. Raise the bottom blade in a hinge motion to create a clean bend. For circular bends around gun tubs or curved decks, use a drill bit shank of the appropriate diameter.
How to attach photo etched parts to a model ship?
Use white PVA glue for initial positioning. Apply small dots at each end and every half inch along the railing. This allows repositioning while wet. After the white glue dries, apply thin CA glue for a permanent bond. An alternative is Boyd’s Clear Gloss, which is paintable and holds well.
Tips for installing photo-etch railing on model ships?
Work in 1 to 2 inch sections rather than long runs. Paint the railings while they are still attached to the fret. Use a sharp #10 blade on a glass or tile surface for cutting. Look for natural break points like corners and bulkheads. Use magnification and avoid caffeine before working for a steady hand.
How to install photo-etched metal rails?
Prepare your tools first: sharp blade, glass cutting surface, tweezers, PVA glue, and CA glue. Cut the railing from the fret using the blade on glass. Measure the deck run with dividers. Paint the piece while still on the fret if possible. Bend as needed. Apply PVA glue dots, position the railing, let it dry, then secure with CA glue.
What is the best glue for PE railings?
White PVA glue is best for positioning because it is repositionable and cleans up with water. Thin CA super glue is best for the permanent bond after positioning. Some modelers use specialty photo-etch glues or Boyd’s Clear Gloss as a paintable alternative. The PVA then CA method is the most reliable approach.
Final Thoughts on the Best 1/350 Photo-Etch Ship Railing Sets
After testing twelve different sets across multiple builds, I am confident that the best 1/350 photo-etch ship railing sets depend on your specific project and experience level. The Eduard US Navy Railings remain my top recommendation for anyone building American warships. The Tamiya Handrail Set A is the best value for Japanese vessels and general use.
The AGSDGAWD Brass Handrail is an excellent budget choice that delivers surprising quality. For specialist builds, the Eduard Bismarck and Tone sets offer kit-specific perfection. The ACE sets serve advanced modelers who want three-stage or chain patterns.
The Trumpeter set is the friendliest introduction for beginners. No matter which set you choose, remember the fundamentals: paint on the fret, cut on glass, use PVA then CA, and keep your hands steady.
Our team will continue testing new releases and updating this guide throughout 2026. If you have a favorite railing set we missed, let us know. Happy building, and may your stanchions stand straight.