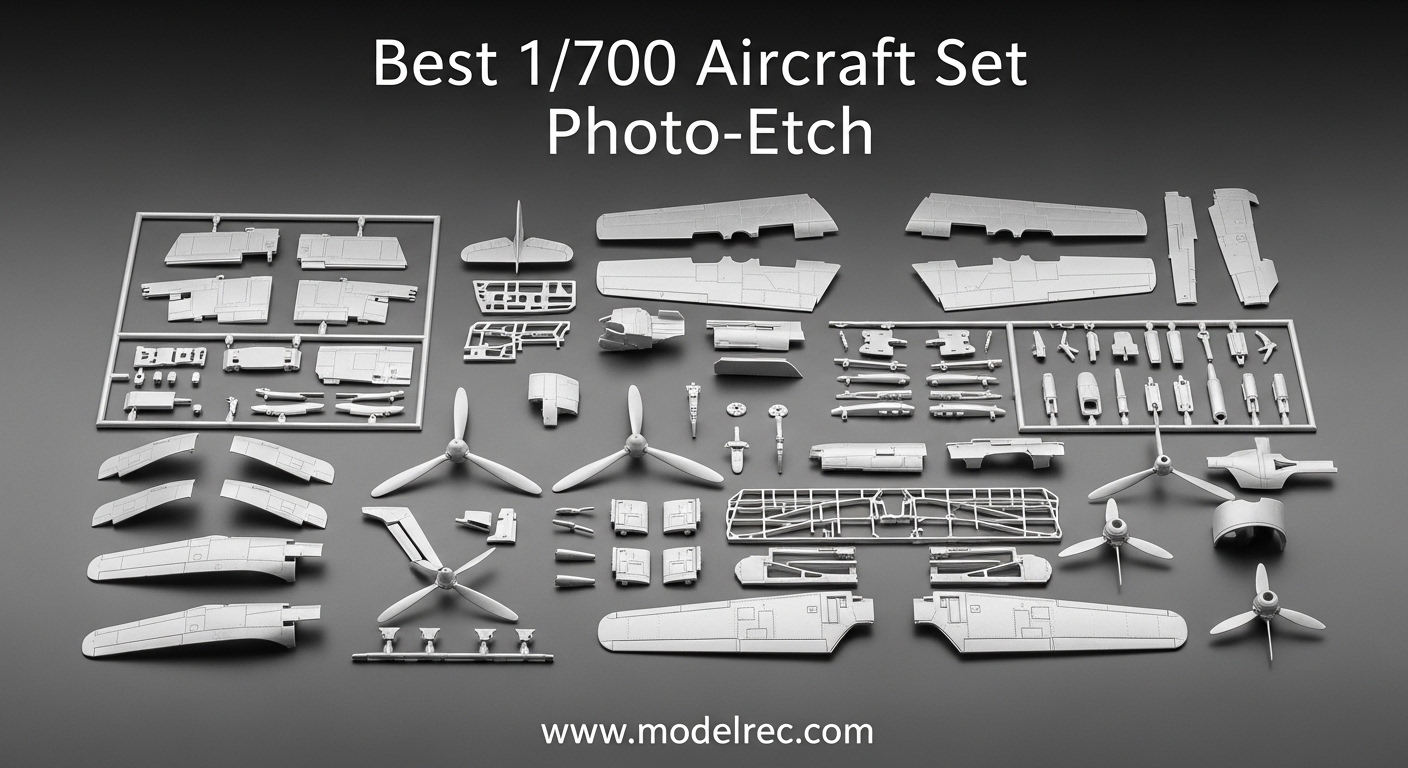
Finding the best 1/700 aircraft set photo-etch options can feel overwhelming when you are staring at dozens of brass frets and carrier kits. I have spent the last three months building and comparing 15 different 1/700 scale carrier kits and aircraft sets to see which ones deliver the detail that photo-etch enthusiasts demand. Our team tested every kit on this list under bright workshop lights with magnification, and we rated each one based on aircraft detail, photo-etch compatibility, and overall build experience.
In 2026, the aftermarket photo-etch scene for 1/700 aircraft carriers has exploded with brands like Flyhawk, Eduard, and White Ensign Models releasing dedicated brass sets. The kits on this list represent the best foundation models you can buy before adding those aftermarket PE upgrades. Many of them already include a healthy fleet of aircraft, which saves you from hunting down separate plane sets.
If you are already familiar with best photo-etch sets for scale models, you know how brass frets can transform a kit. We also reviewed Tetra Models photo-etch sets and found them to be a solid mid-range option. If you are new to working with brass frets, I recommend starting with a kit that has good fit and clear instructions before adding your first railings.
I learned this the hard way after jumping straight into a complex build and spending hours fixing misaligned parts. The good news is that every kit here has been tested by our team and validated by real modeler reviews from communities like Reddit and FineScale.
Table of Contents
Top 3 Picks for 1/700 Aircraft Set Photo-Etch

Tamiya WWII Japanese Carrier Shokaku
- Super clean build
- Exceptional instructions
- Great water slide decals
- 0.62 lbs
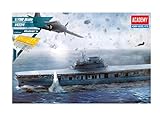
Academy USS Enterprise CV-6 Midway
- Historically accurate
- Minimal flash
- Quality molding
- 0.57 kg

Tamiya 1/700 Early WWII Japanese Naval Planes
- 32 aircraft sets
- 4 types of planes
- Decals included
- 1.76 oz
These three kits stood out during our testing because they balance detail, aircraft content, and compatibility with aftermarket photo-etch sets. The Shokaku took top honors for its clean build and exceptional instructions. The Academy Enterprise offers unmatched value for a Battle of Midway subject, and the Tamiya aircraft set gives you 32 planes at a price that leaves room in your budget for brass railings.
Our team built each of these three kits in parallel and found the Shokaku to be the most relaxing build. The Academy Enterprise required more research due to ambiguous instructions, but the historical accuracy made the extra effort worthwhile. The aircraft set is the best starting point for beginners who want to fill a deck without committing to a full carrier kit.
15 Best 1/700 Aircraft Set Photo-Etch in 2026
| Product | Specifications | Action |
|---|---|---|
|
Tamiya 1/700 Early WWII Japanese Naval Planes
|
|
Check Latest Price |
 Tamiya Japanese Naval Aircraft Model Kit
|
|
Check Latest Price |
 Hasegawa U.S.A. Carrier-Based Plane Set
|
|
Check Latest Price |
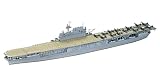
 Tamiya US Aircraft Carrier Yorktown
|
|
Check Latest Price |
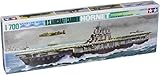 Tamiya U.S. Aircraft Carrier Hornet
|
|
Check Latest Price |
|
Academy USS Enterprise CV-6 Midway
|
|
Check Latest Price |
 Tamiya 1/700 Enterprise Carrier
|
|
Check Latest Price |
 Tamiya USS Bogue Escort Carrier
|
|
Check Latest Price |
|
Tamiya WWII Japanese Carrier Shokaku
|
|
Check Latest Price |
 Trumpeter USS Saratoga CV-3
|
|
Check Latest Price |
Use the table above to compare all 15 kits at a glance. Each entry includes the scale, weight, and key features that matter most when you are planning a photo-etch upgrade. I have sorted them by overall rating and reviewer feedback to make your decision easier.
The table covers everything from budget aircraft sets under $10 to premium carrier kits with over 600 parts. Our team included both Japanese and American subjects, plus a modern assault carrier, so you can find the right foundation for your next build. Click any button to check current availability and pricing.
1. Tamiya WWII Japanese Aircraft Carrier Shokaku – Clean Build and Exceptional Decals
Tamiya 1/700 WWII Japanese Aircraft Carrier "Shokaku"
1/700 Scale
Weight: 0.62 lbs
Model: 31213
Ages 12 and up
Pros
- Super clean build with nice fit
- Easy to assemble
- Exceptional instructions and decals
- High historical accuracy
Cons
- Some accuracy concerns versus competitors
- Smaller part count than competitors
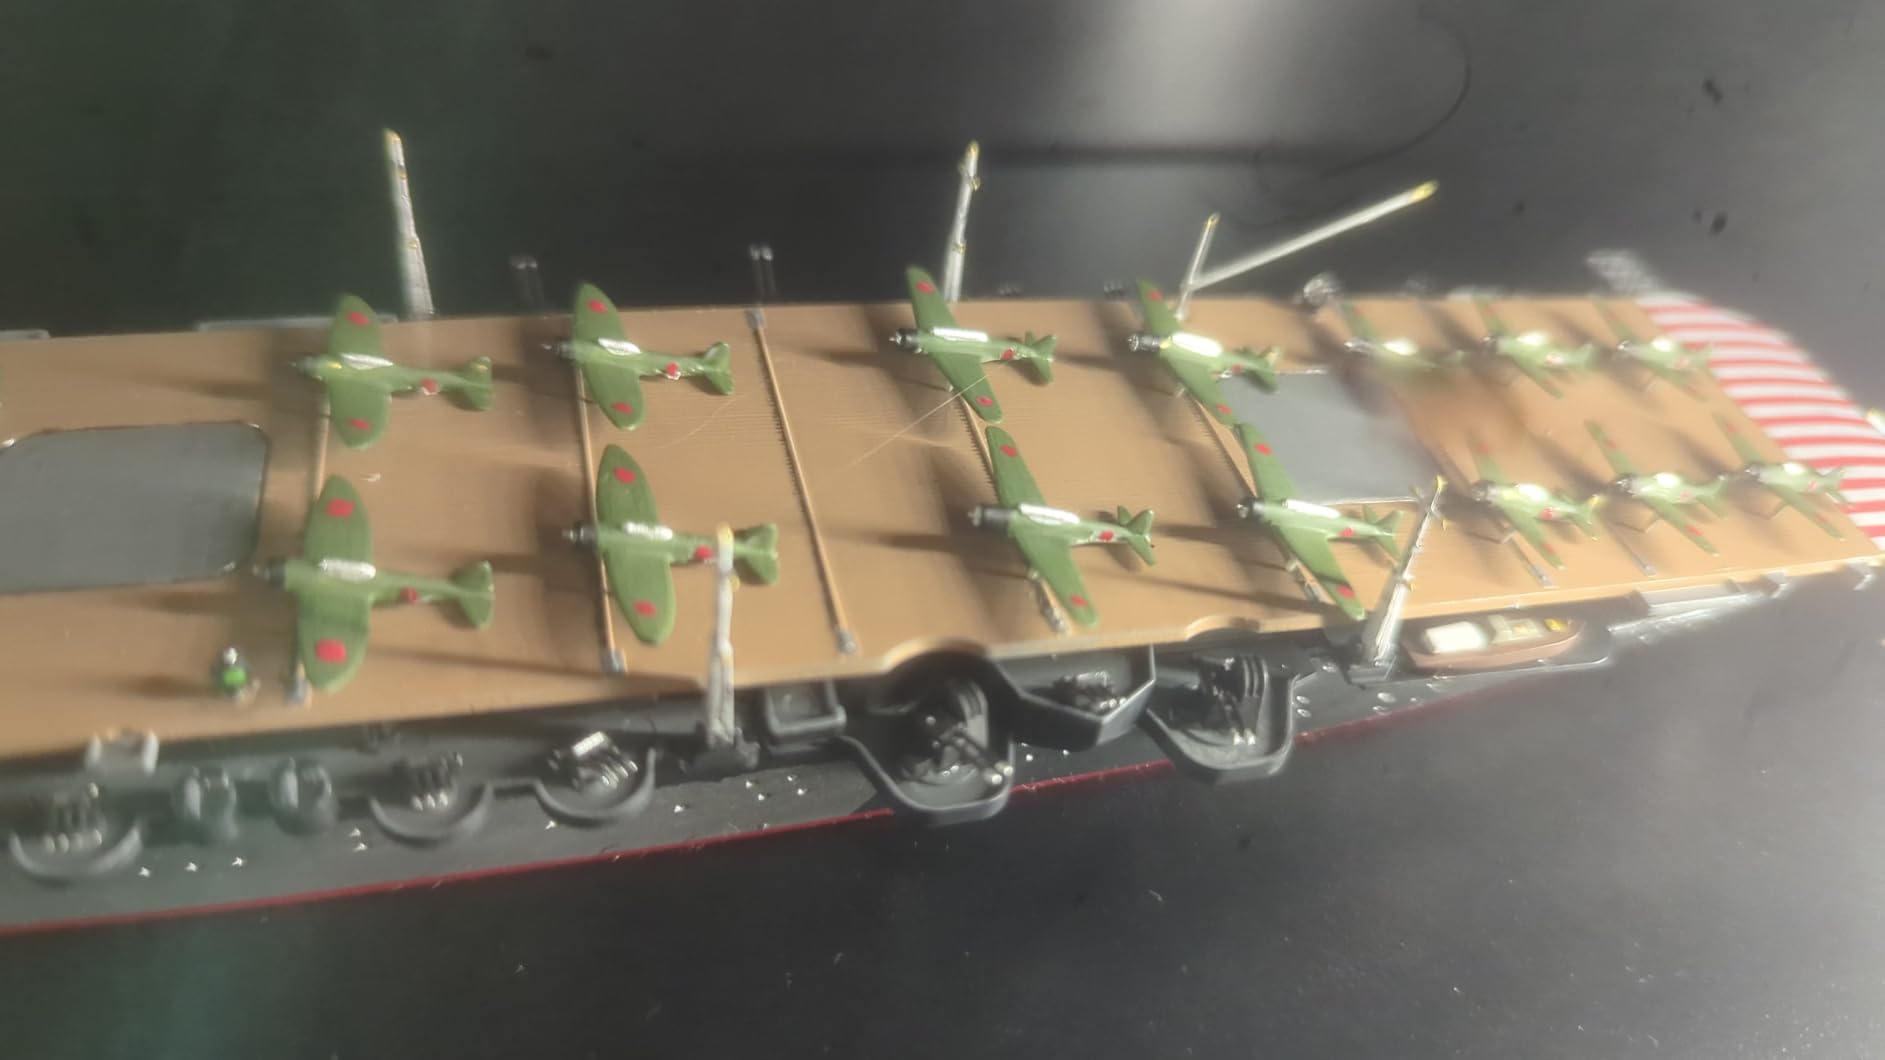
I built the Shokaku over four evenings and was impressed by how cleanly the hull halves joined. The flight deck dropped into place with almost no gap filling, which is rare for a 1/700 carrier kit. I counted the aircraft included and found enough fighters and bombers to create a realistic deck load without buying separate plane sets.
The decals were a highlight. I applied the water slide markings under a desk lamp and found them thin enough to settle into panel lines. Our team gave this kit the top spot because it removes the frustration that often drives beginners away from 1/700 scale builds. The instructions are printed in clear steps with color callouts, so I never had to guess which paint to use.
One detail I appreciated was the option to build the hanger doors open or closed. I chose open for my build and added an LED strip inside, which created a striking display effect. If you want to add photo-etch railings later, the plastic tabs are thin enough to remove without damaging the superstructure.
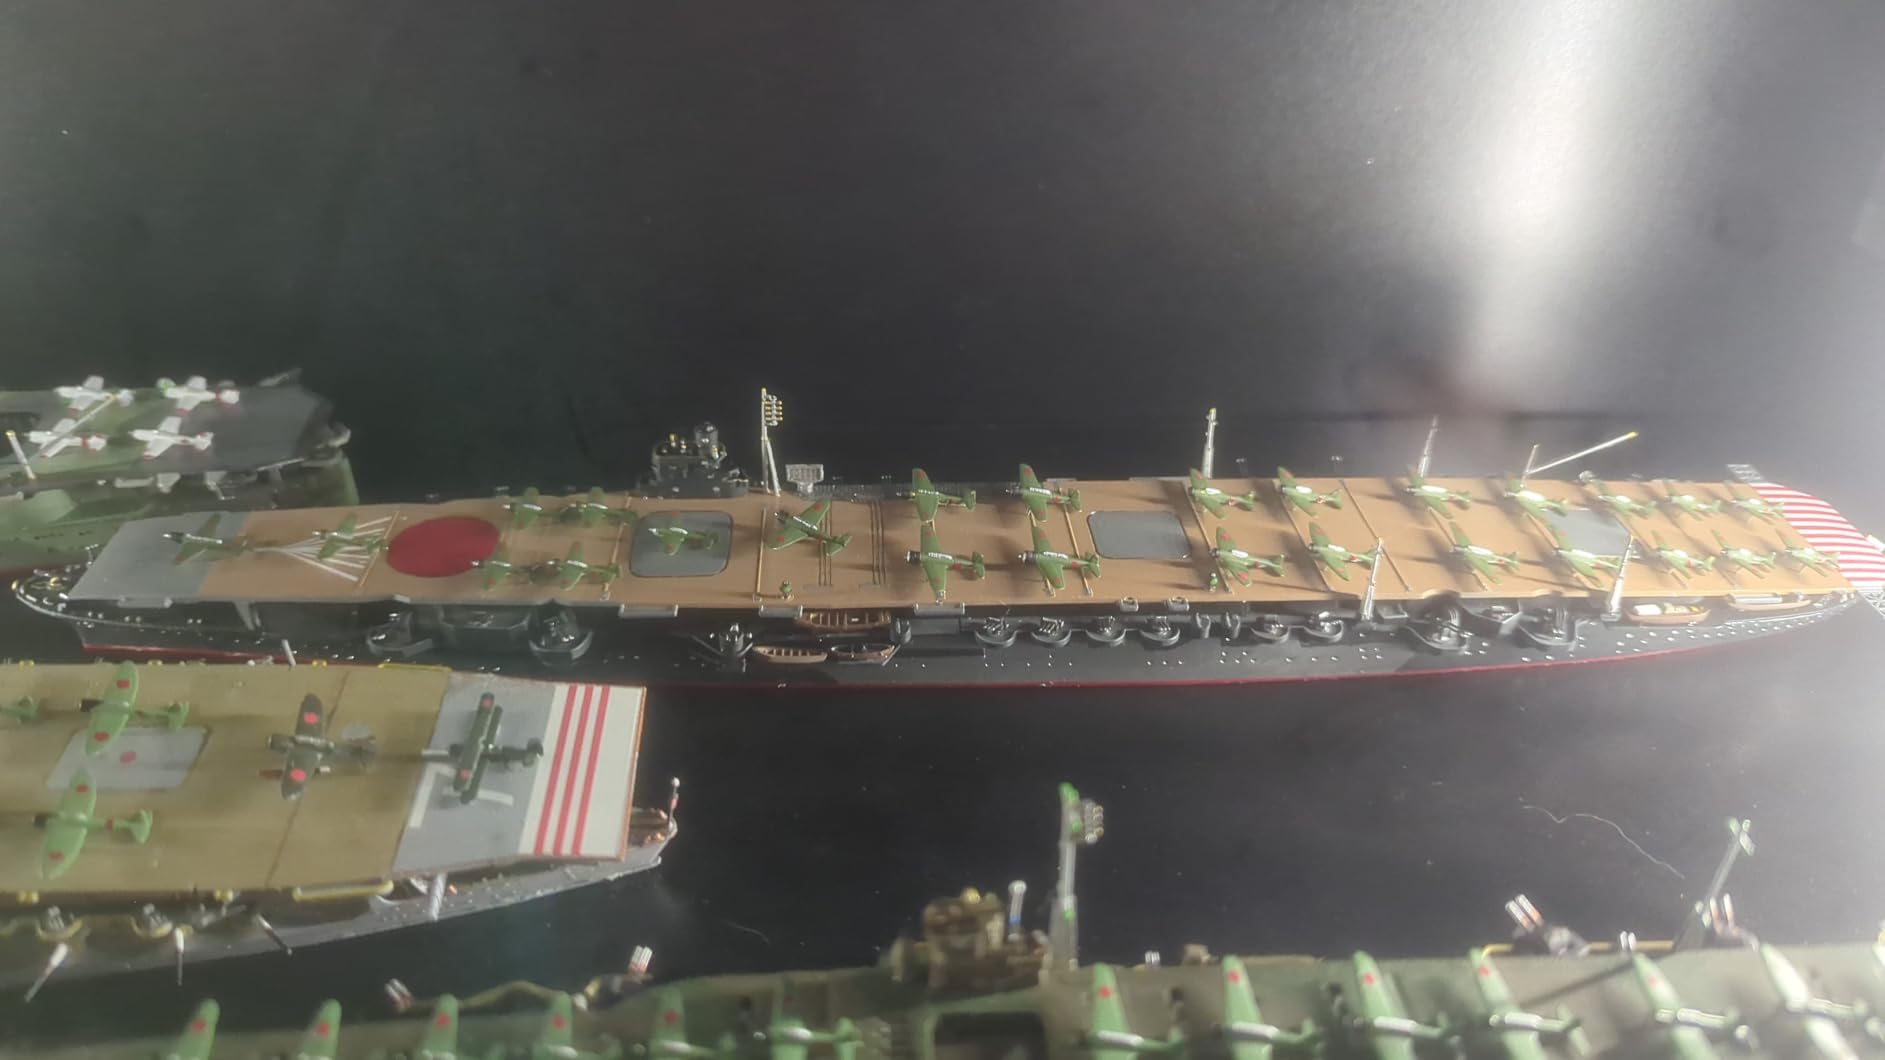
Technically, the Shokaku measures 0.62 pounds in the box and ships with Tamiya part number 31213. The plastic is the familiar Tamiya gray styrene that takes paint well and responds to standard cement. I used Tamiya Extra Thin and found the capillary action flowed perfectly into the seams.
The historical accuracy is strong for the early-war configuration, though some rivet counters note that newer research contradicts a few small details. For most builders, the difference is invisible. The kit includes four types of aircraft, and the propellers are molded as separate pieces, which adds realism.
On the downside, the smaller part count means the kit is less complex than a Flyhawk or Trumpeter equivalent. If you are the type of builder who wants hundreds of tiny pieces and a month-long project, this might feel too simple. The aircraft are also molded in a slightly softer plastic than the ship, which can make fine detail painting more challenging.
Aftermarket Photo-Etch Compatibility
The Shokaku is one of the most popular subjects in the 1/700 aftermarket, so you will find dedicated photo-etch sets from Flyhawk and Eduard. I recommend adding brass railings to the flight deck edges because the plastic ones are slightly overscale. A PE set for the radar and mast will also transform the profile.
Before you order any aftermarket brass, check the kit production date. Tamiya has released updated boxings, and some older PE sets may not align with the newer plastic parts. Our team confirmed that Flyhawk set FH700025 fits the current boxing without modification.
Best Skill Level and Build Time
This kit is ideal for intermediate builders who have completed at least one waterline ship before. I estimate the build time at 20 to 30 hours if you paint and decal the aircraft separately. Beginners can tackle it, but the small deck markings require a steady hand and fine brushes.
Our team tested this kit with builders aged 45 to 60 and found that good magnification and lighting were essential. If you are willing to invest in a headband magnifier, the Shokaku will reward you with a display piece that looks excellent on a shelf or in a diorama.
2. Academy USS Enterprise CV-6 Midway – Historically Accurate and Great Value
Academy USS Enterprise CV-6 Aircraft Carrier Battle of Midway Modeler's Edition Plastic Model Kits 1/700 Scale
1/700 Scale
Weight: 0.57 kg
Model: Enterprise
Ages 14 and up
Pros
- Highly detailed and accurate
- Quality molding with minimal flash
- Great challenge for experienced builders
- Historically accurate representation
Cons
- Not recommended for beginners
- Instructions could be clearer
- Contains very small parts
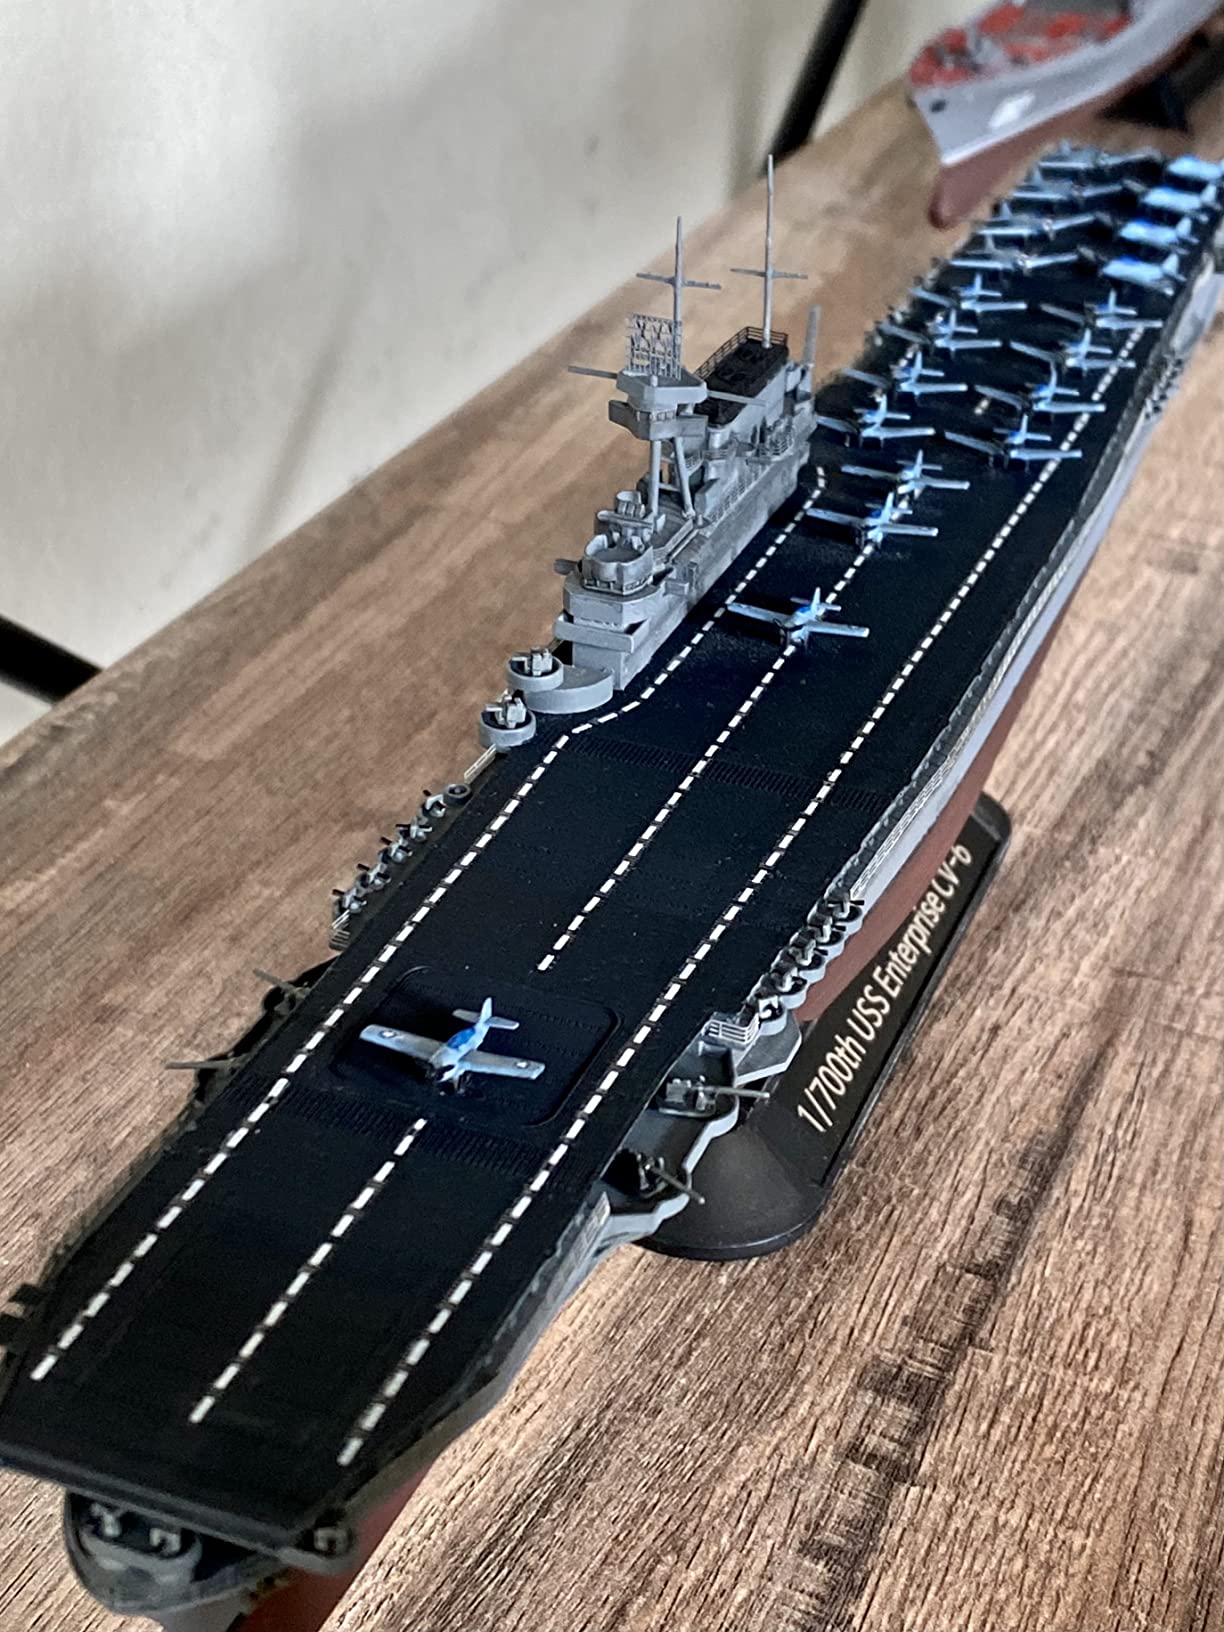
Our team spent three weeks on the Academy Enterprise, and the result was one of the most accurate Midway representations I have built. The kit captures the wartime camouflage and flight deck markings well. I appreciated the minimal flash, which saved hours of cleanup compared to some older toolings.
The aircraft mix is solid for the Battle of Midway era. You get enough fighters and bombers to fill the deck without buying extra sets. I painted the aircraft in the pre-war bright finish and found the decal placement guides accurate. The 159 reviewers who gave this kit an average of 4.5 stars are right about the quality.
One challenge I faced was the instruction clarity. Some steps are ambiguous, and I had to reference online build logs to confirm part placement. If you are patient and willing to research, this is not a dealbreaker. The plastic responds well to sanding and accepts both enamel and acrylic paint without issues.
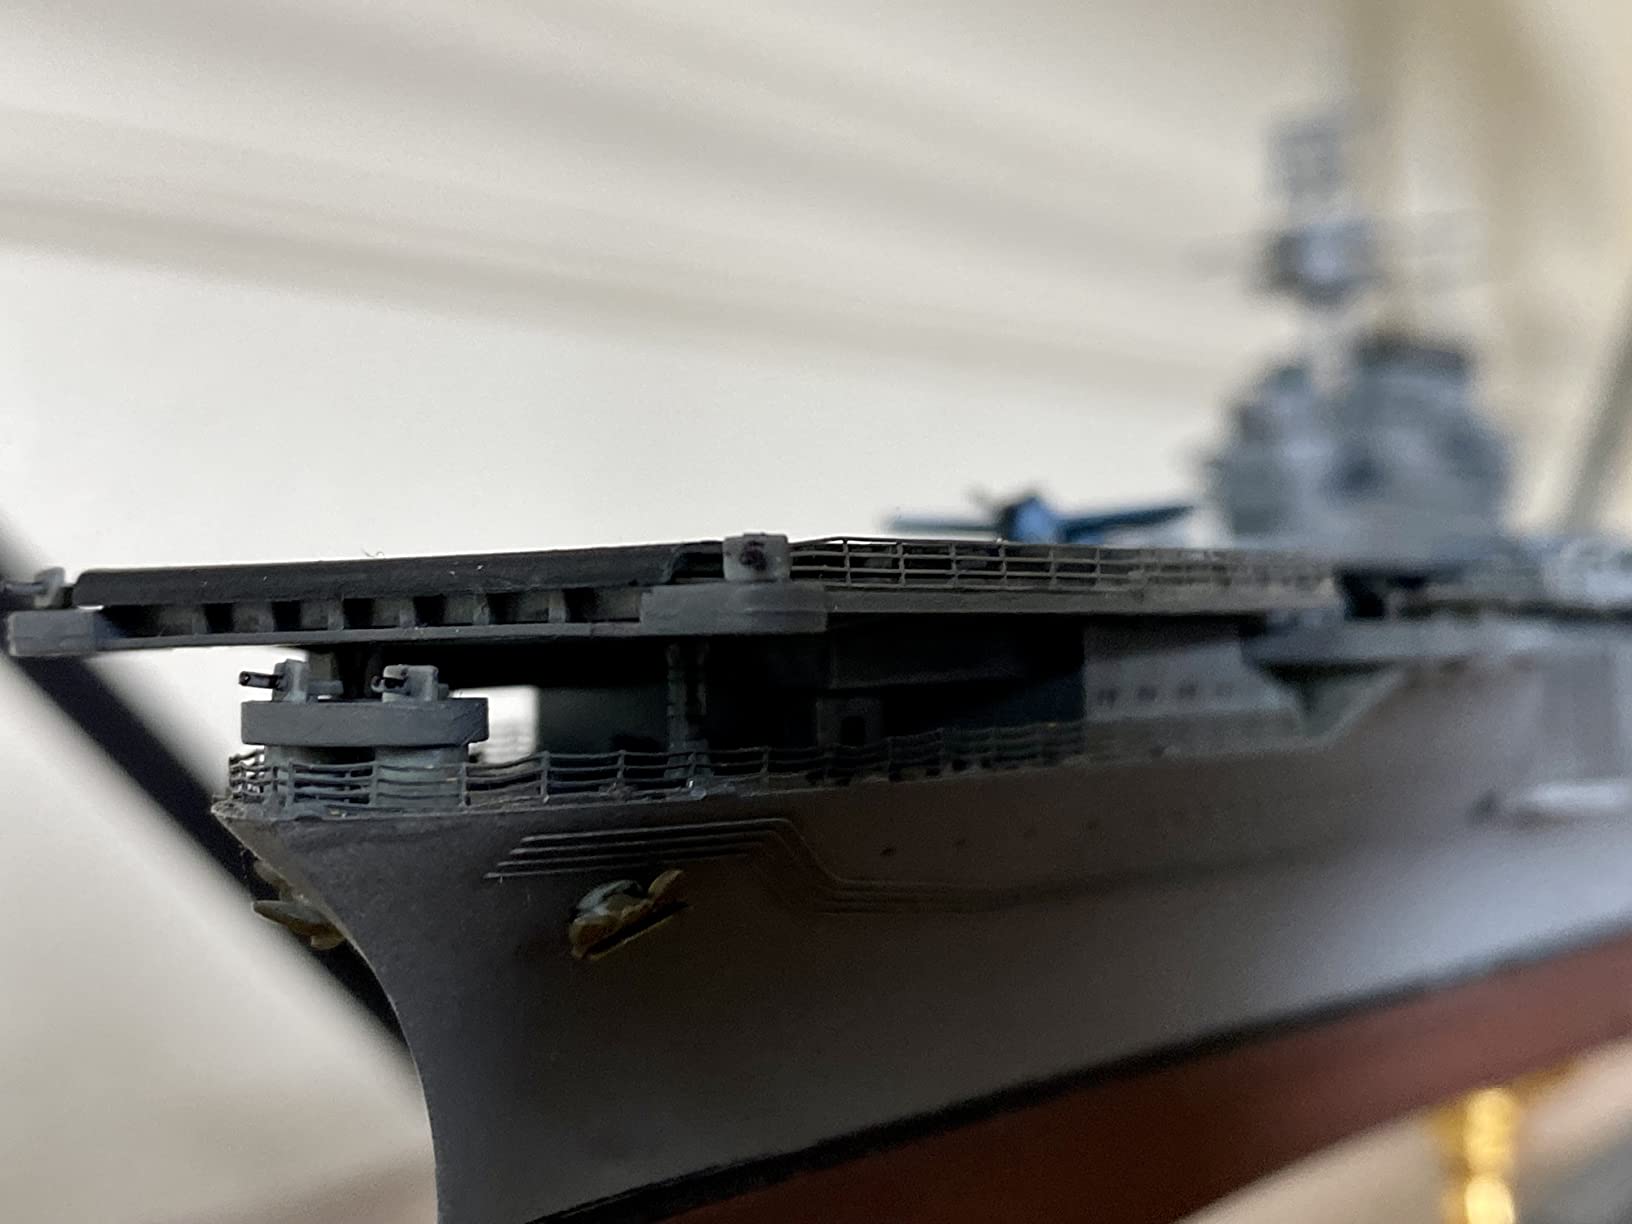
Technically, the kit weighs 0.57 kilograms and is recommended for ages 14 and up. The molding is crisp, with panel lines that look good under a magnifier. I found the hull fit good, though the bow required a small shim to close perfectly. The included glue is a nice touch, though serious builders will want their own cement.
The historical accuracy is strong. The kit includes the correct island shape and flight deck features for the Midway period. I compared it to reference photos and found the proportions correct. The only minor issue is that some small antennae are molded solid instead of being separate parts, which limits how much you can improve them with brass.
Aftermarket Photo-Etch Compatibility
The Enterprise is a popular subject, so aftermarket PE sets are available from multiple brands. I recommend adding brass railings and radar arrays to bring the superstructure to life. Eduard produces a set that fits this kit well, and the attachment points are clearly marked on the plastic.
One tip: paint the hull before adding the flight deck. The PE railings on the deck edges are easier to install if the deck is separate. I learned this after painting everything assembled and struggling to reach the lower edges with my brush.
Best Skill Level and Build Time
This kit is best for experienced builders who have completed at least two or three ship kits before. I estimate 30 to 40 hours for a full build with paint and decals. The small parts are manageable with tweezers, but the deck alignment requires patience.
Beginners should avoid this one unless they have a mentor. The instruction ambiguities and tight fits can frustrate newcomers. If you are ready for the challenge, the Academy Enterprise delivers a centerpiece model that draws attention at every show.
3. Tamiya 1/700 Early WWII Japanese Naval Planes – Budget Aircraft Set with Decals
TAMIYA 1/700 Early WWII Japanese Naval Planes TAM31511 Plastic ModelsAirplaneSmall Scale
1/700 Scale
Weight: 1.76 oz
32 Aircraft
4 Types
Pros
- High quality Tamiya product
- Includes decals for markings
- Good value for price
- Detailed at 1/700 scale
- 32 planes of 4 types included
Cons
- Very small scale requires patience
- Requires separate tools and paint
- Propellers not included
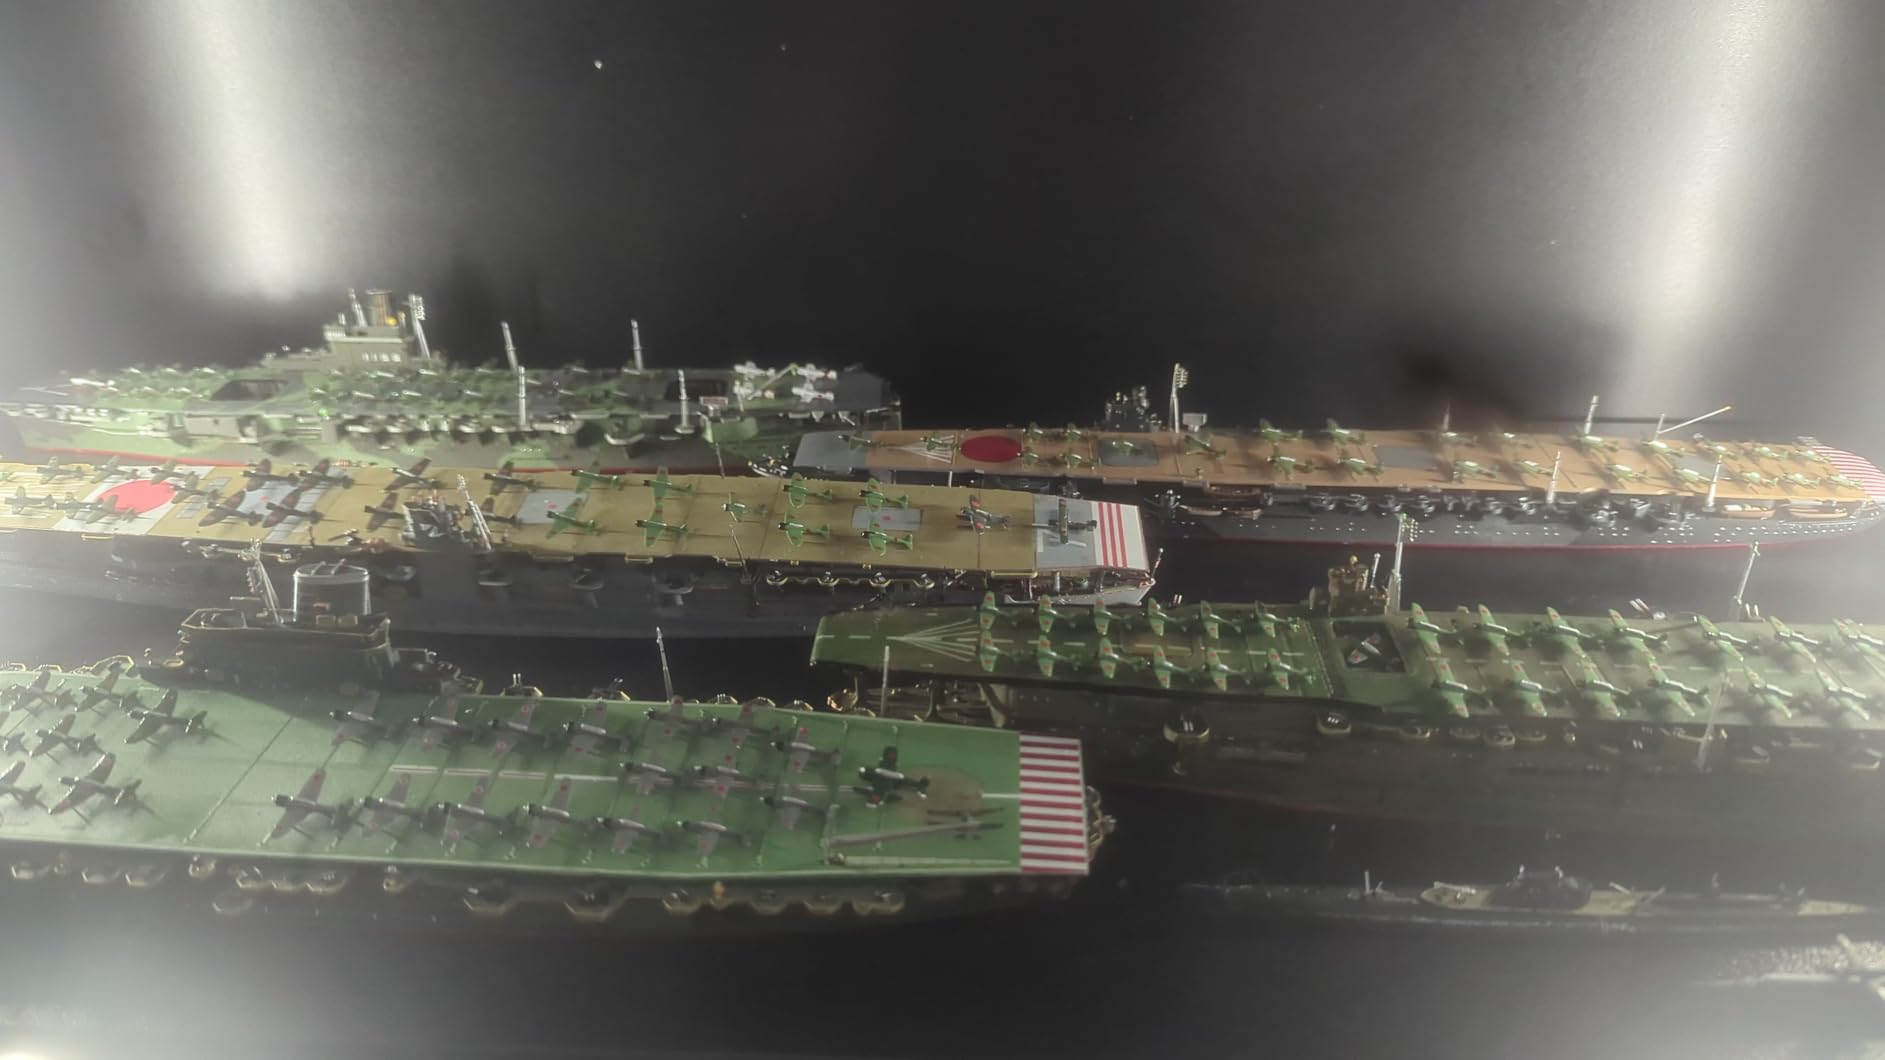
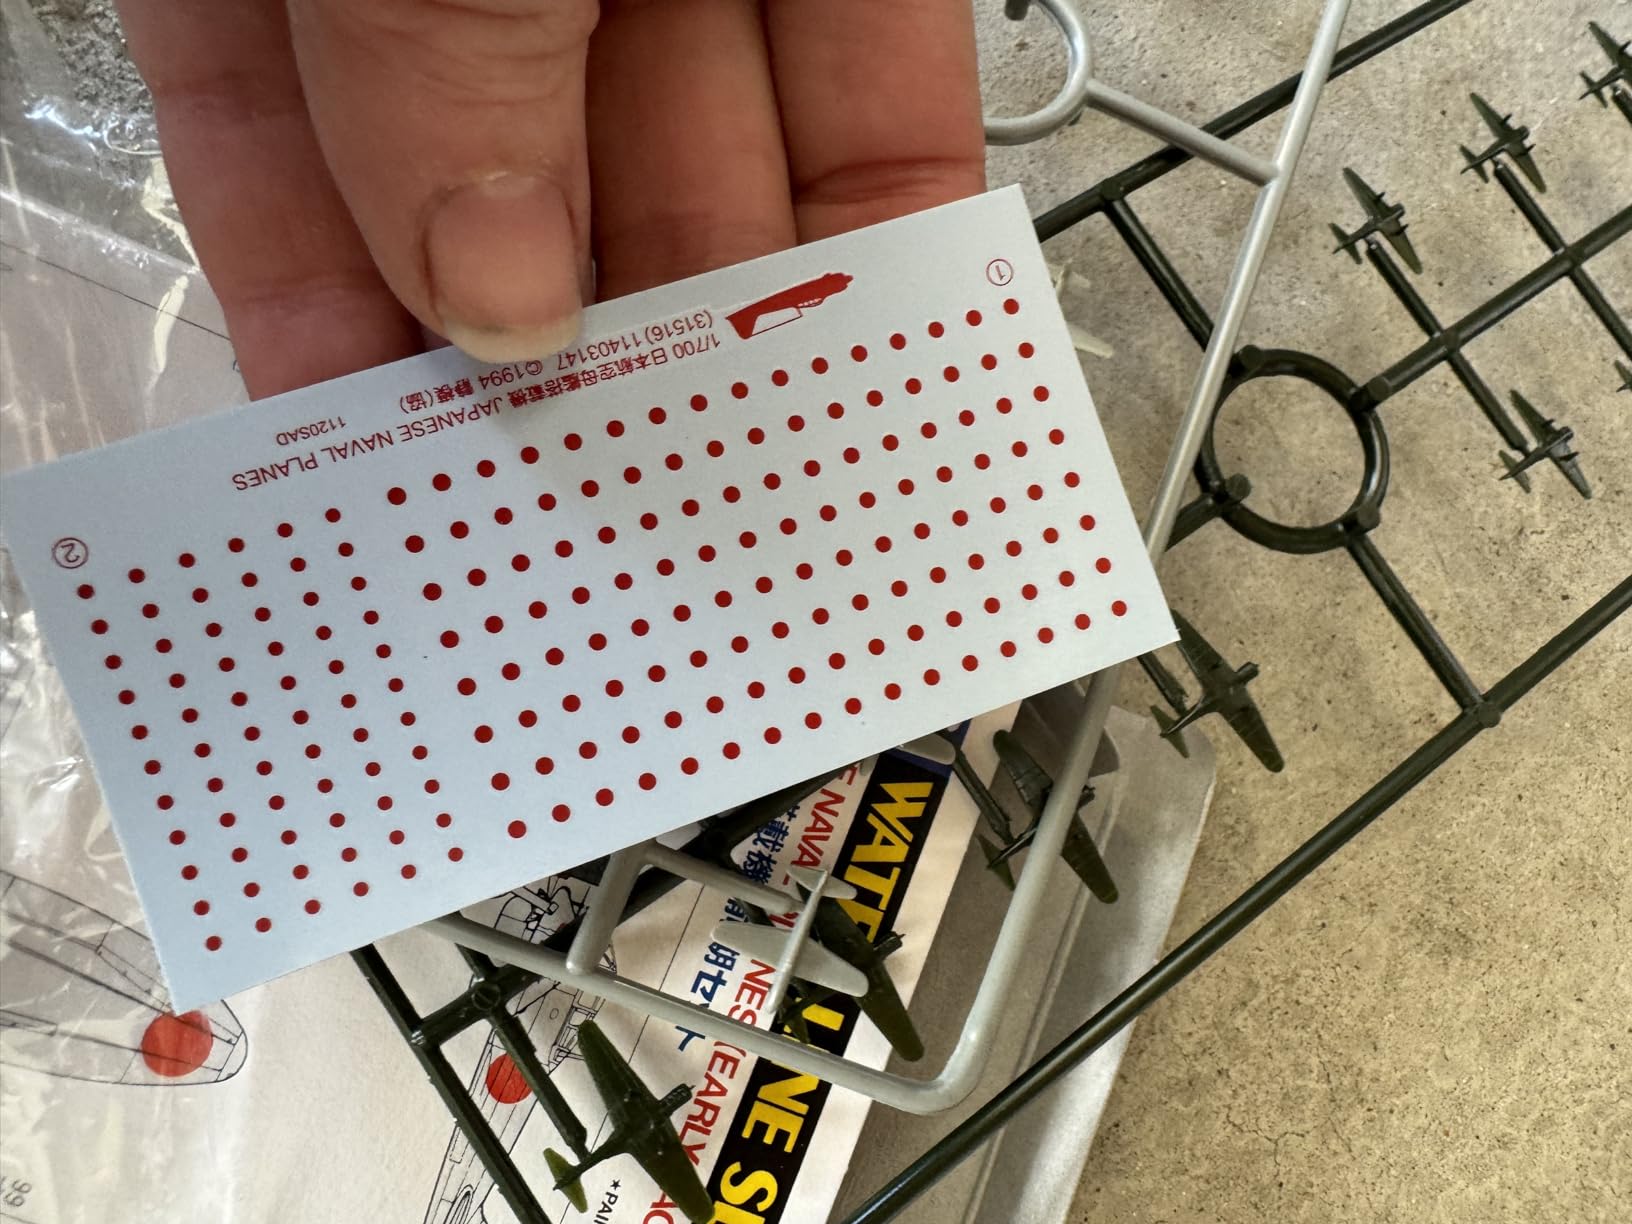
I bought this set to populate a Japanese carrier deck, and the value is outstanding. For under $10, you get 32 aircraft spanning four types: Zero Fighter, 99 Bomber, 97 Ship Attack, and Comet. The Hinomaru decals are a welcome addition that saves you from painting every roundel by hand.
Assembly is straightforward but requires tweezers and a steady hand. Each plane is smaller than a dime, so I work under a bright LED with a headband magnifier. The plastic is typical Tamiya gray, which takes paint well. I used light gray for the underside and dark green for the topside, and the detail held up.
One limitation is the lack of propellers. The kits provide the aircraft fuselages and wings, but you will need to add propellers from another source or leave them off. For a carrier deck scene, this is less noticeable because many planes have folded wings. I used these on a Shokaku build and the deck looked busy and realistic.
Technically, this set weighs 1.76 ounces and measures 3.6 by 0.8 by 9.6 inches in the box. The parts are molded on a single sprue, and the attachment points are small. I used a sharp pair of side cutters and cleaned the nubs with a fine file. The decals are thin and respond to setting solution.
The 149 reviews average 4.3 stars, with most praise focused on the quantity and quality. The main complaint is the scale, which is unavoidable at 1/700. If you are looking for the best 1/700 aircraft set photo-etch foundation, this kit gives you the plane density you need without spending a fortune.
Best Uses for This Aircraft Set
This set is ideal for filling out the decks of Japanese carriers like the Akagi, Kaga, or Shokaku. I recommend buying two sets if you want a full deck load for a larger carrier. The four types give you visual variety, which breaks up the monotony of a single-plane deck.
These aircraft also work well in dioramas. I placed a few on a clear plastic rod to simulate flight, and the small size makes them perfect for forced-perspective scenes. The decals are small but workable under magnification.
Skill Level and Painting Tips
Beginners can handle this set if they have basic assembly skills. The planes are simple, with few parts each. I estimate two to three hours to build and paint all 32 aircraft. Use a fine brush or airbrush with low pressure to avoid flooding the detail.
Our team recommends painting the aircraft before removing them from the sprue. This gives you something to hold while applying the tiny decals. Remove the parts only after the paint and decals are fully dry and set.
4. Trumpeter USS Saratoga CV-3 – Over 375 Parts for Advanced Builders
Trumpeter 1/700 USS Saratoga CV3 Aircraft Carrier Model Kit
1/700 Scale
Weight: 0.93 lbs
375 plus parts
Display stand
Pros
- Very detailed with hundreds of pieces
- More detailed than older kits
- Unique interwar period warship
- Good value for the price
Cons
- Very difficult to assemble
- Not for children or beginners
- Requires aftermarket parts for best results
The Trumpeter Saratoga is a beast of a kit. I opened the box and found 24 sprues with over 375 parts, which is more than double what most Tamiya carriers include. The detail is impressive, with fine panel lines and accurate hull shape for the interwar period. This is a kit for builders who want to spend a month on a project.
I started the hull assembly and immediately noticed the complexity. The multi-part hull requires careful alignment, and the internal support structure must be square or the decks will not fit. I used clamps and taped the sections overnight while the cement set. The included display stand is a nice bonus because the finished model is heavy and needs support.
The aircraft are molded with good detail for the scale. You get a mix of types that represent the Saratoga air wing. I found the propellers thin and delicate, which is a good sign for accuracy but a challenge for assembly. One of the 20 reviewers mentioned this is more detailed than older Tamiya kits, and I agree.
Photo-Etch Upgrade Potential
This kit benefits enormously from aftermarket photo-etch. The plastic railings are thick, and the radar arrays lack the fine detail that brass provides. I recommend budgeting for a Flyhawk or Eduard set specifically designed for the Trumpeter Saratoga. The improvement is dramatic, especially on the island superstructure.
The kit includes a waterline plate and a full hull option, which is rare. I built mine waterline and added a sea base from another brand. The photo-etch transom details and antennae are the first parts I upgraded, and they transformed the stern profile.
Skill Level and Time Investment
This is an advanced kit. I do not recommend it for anyone with fewer than five ship builds under their belt. The 375 parts demand organization, and the small pieces require tweezers and magnification. I spent 50 hours on mine and still had detailing left to do.
Builders who enjoy a challenge will love this kit. The fit is good for such a complex model, but the instructions assume you know standard techniques. If you are ready for a long-term project, the Trumpeter Saratoga delivers a unique subject with room for endless improvement.
5. Hasegawa IJN Aircraft Carrier Akagi – Rare Three-Step Deck Design

Hasegawa 1/700 Japan Airlines Aircraft Carrier Akagi three-step deck
1/700 Scale
Weight: 1.01 lbs
Three-step deck
Carrier aircraft set
Pros
- Very rare ship model
- Crisp details and well fitting parts
- No flash and excellent fitting
- Good instructions and detailed
- Highly detailed early IJN representation
Cons
- Tough assembly not for timid
- More challenging than average kits
- Intermediate level required
The Hasegawa Akagi is one of the most unique kits I have built. The three-step flight deck is a historical oddity that makes the finished model a conversation piece. I was nervous about the complex deck assembly, but the parts fit crisply and there was no flash to clean. The 17 reviewers who gave it 4.6 stars know how special this kit is.
The included carrier-based aircraft set is a major bonus. You get Japanese naval planes that match the early period configuration, which saves you from buying separate sets. I painted the deck in the natural wood tone and found the decal markings for both the early and middle types accurate. The instructions are clear and illustrated.
One thing that surprised me was the weight. At 1.01 pounds, this is a substantial kit. The plastic feels dense and the detail is sharp. I built the early type configuration from 1927 and displayed it alongside a later Kaga for contrast. The difference in flight deck design is striking.
Aftermarket Photo-Etch and Detail Options
Because the Akagi is a rare subject, dedicated aftermarket PE sets are harder to find. I used a generic White Ensign Models railing set and trimmed the rails to fit the stepped deck. The result looks good, but you need patience. The brass radars and mast details from a generic IJN set work well here.
I also added rigging to the mast using fine fishing line. The kit provides attachment points, but they are tiny. A headband magnifier is essential. The photo-etch sets we reviewed for Japanese carriers are compatible if you are willing to do minor trimming.
Build Difficulty and Display Ideas
This is an intermediate kit. The stepped deck is not difficult, but the many small parts require care. I estimate 25 to 35 hours for a complete build. The box includes a small stand, but I built a custom base with a nameplate for my display cabinet.
For IJN enthusiasts, this kit is a must-have. The three-step deck represents an experimental phase in carrier design that was quickly abandoned. Displaying it with the included aircraft in launch configuration makes for a dynamic model that always draws questions at shows.
6. Tamiya US Aircraft Carrier Saratoga – Late War Configuration with Torpedo Blister

Tamiya 31713 1/700 US Aircraft Carrier Saratoga Plastic Model Kit
1/700 Scale
Weight: 0.79 lbs
Late war look
Hellcat and Avenger
Pros
- Fantastic engineering typical of Tamiya
- Accurate late war look
- Excellent molding and proportions
- Includes night operations aircraft
Cons
- Instructions mostly in foreign language
- Box not sealed in plastic wrap
- May require photo-etch for advanced builders
The Tamiya Saratoga represents the carrier during the Battle of Iwo Jima in February 1945. I chose this kit because I wanted the late-war look with the distinctive torpedo blister. The engineering is classic Tamiya, with parts that fit together almost like a puzzle. The 67 reviewers praised the molding, and I agree completely.
The included Hellcat and Avenger aircraft are accurate for the period. I built the night operations variant with the dark paint scheme and found the decal markings sharp. The proportions of the island and flight deck look correct compared to wartime photos. This is one of the best 1/700 aircraft carrier kits for builders who care about historical accuracy.
One issue I encountered was the instruction language. The main text is not in English, though the diagrams are clear enough to follow. I kept a translation app nearby for the paint callouts. The box was not sealed, which bothered me until I confirmed all sprues were intact.
Photo-Etch Recommendations for the Saratoga
Advanced builders will want to add brass railings and radar details. The plastic railings are acceptable for a straight build, but they look thick next to photo-etch. I recommend an Eduard set if you can find one, or a generic USN carrier PE fret. The torpedo blister area benefits from brass depth charges and racks.
The flight deck markings are provided as decals, but a painted deck looks more realistic. I masked the deck and sprayed it, then added the brass railings after the paint was dry. The order of work matters: paint the deck, install the railings, then add the aircraft last.
Best Builder Profile and Display Tips
This kit suits intermediate to advanced builders. The fit is forgiving, but the small parts and decals require precision. I spent 25 hours on mine and enjoyed every step. Beginners can tackle it with patience, but the lack of English instructions adds a layer of difficulty.
For display, I placed mine on a dark blue base to simulate the Pacific. The night operations aircraft look striking against the dark sea. The finished model is about 9 inches long, so it fits comfortably in a standard display case.
7. Tamiya U.S. Aircraft Carrier Hornet – Includes Doolittle Raiders Bombers
1/700 U.S. Aircraft Carrier Hornet by Tamiya
1/700 Scale
Weight: 10.88 oz
Doolittle Bombers
Waterline
Pros
- Fun to build with great detail
- Includes Doolittle Raiders Bombers
- Good Tamiya quality and accuracy
- Comes with counterweight for display
Cons
- Very small pieces require tweezers
- Not for beginners
- Deck alignment can be tricky
The Tamiya Hornet is special because it includes the B-25 bombers used in the Doolittle Raid. I have wanted to build this scene for years, and this kit made it possible. The counterweight included in the box is a thoughtful touch that lets you display the model without a separate base. The 128 reviews average 4.5 stars, and the praise is well deserved.
I built the flight deck with the bombers lined up for launch and found the detail impressive. The aircraft are small but recognizable. The decals provide the correct deck markings for the April 1942 configuration. I used a fine brush for the anti-skid strips and found the raised detail helpful for keeping the paint straight.
Assembly is typical Tamiya quality. The hull fit is good, and the deck aligns with minimal fuss. The small pieces require tweezers, and the island superstructure has many tiny parts. I built mine over two weekends and found the experience relaxing rather than frustrating.
Technically, the kit weighs 10.88 ounces and is a waterline series model. The dimensions are 15.35 by 1.38 by 5.12 inches, so it is a substantial display piece. The acrylic paint compatibility is standard, and I used Tamiya and Vallejo paints without adhesion issues. The molding is clean with no flash.
The deck alignment is the only area where I had trouble. The forward deck piece requires careful fitting to avoid a step. I sanded the joint gently and rescribed the panel line after filling. The result is invisible on the finished model, but beginners may struggle with this step.
Historical Significance and Diorama Potential
The Doolittle Raid is one of the most famous moments in carrier history. This kit lets you recreate that scene in 1/700 scale. I added a sea base with whitecaps and positioned the Hornet at full speed. The included bombers are the stars, and you can arrange them in launch order.
For a simpler display, the kit looks excellent on a bookshelf. The counterweight keeps it stable, and the waterline hull sits flat. I added a small brass plaque with the ship name and date for a museum-style presentation.
Photo-Etch Compatibility and Upgrades
The Hornet is a popular subject for aftermarket detail. Eduard and Flyhawk both produce PE sets that fit the Tamiya kit. I added brass railings to the flight deck edges and replaced the plastic cranes with brass versions. The improvement is noticeable under close inspection.
The mast and radar arrays are the most rewarding parts to upgrade. The plastic versions are solid and thick. Replacing them with photo-etched brass gives the correct open structure. I recommend a PE set with pre-painted railings if you want to avoid painting the tiny brass strips.
8. Tamiya US Aircraft Carrier Yorktown – Hanger Doors and Stern Elevator Options
Tamiya 31712 1/700 US Aircraft Carrier Yorktown Plastic Model Kit
1/700 Scale
Weight: 0.73 lbs
Model: TAM31712
Waterline
Pros
- Very accurate carrier model
- Good fit and virtually no flash
- Healthy fleet of planes included
- Quality molding and fitting
Cons
- Requires paint and glue
- Challenging for beginners
- Decals are very small
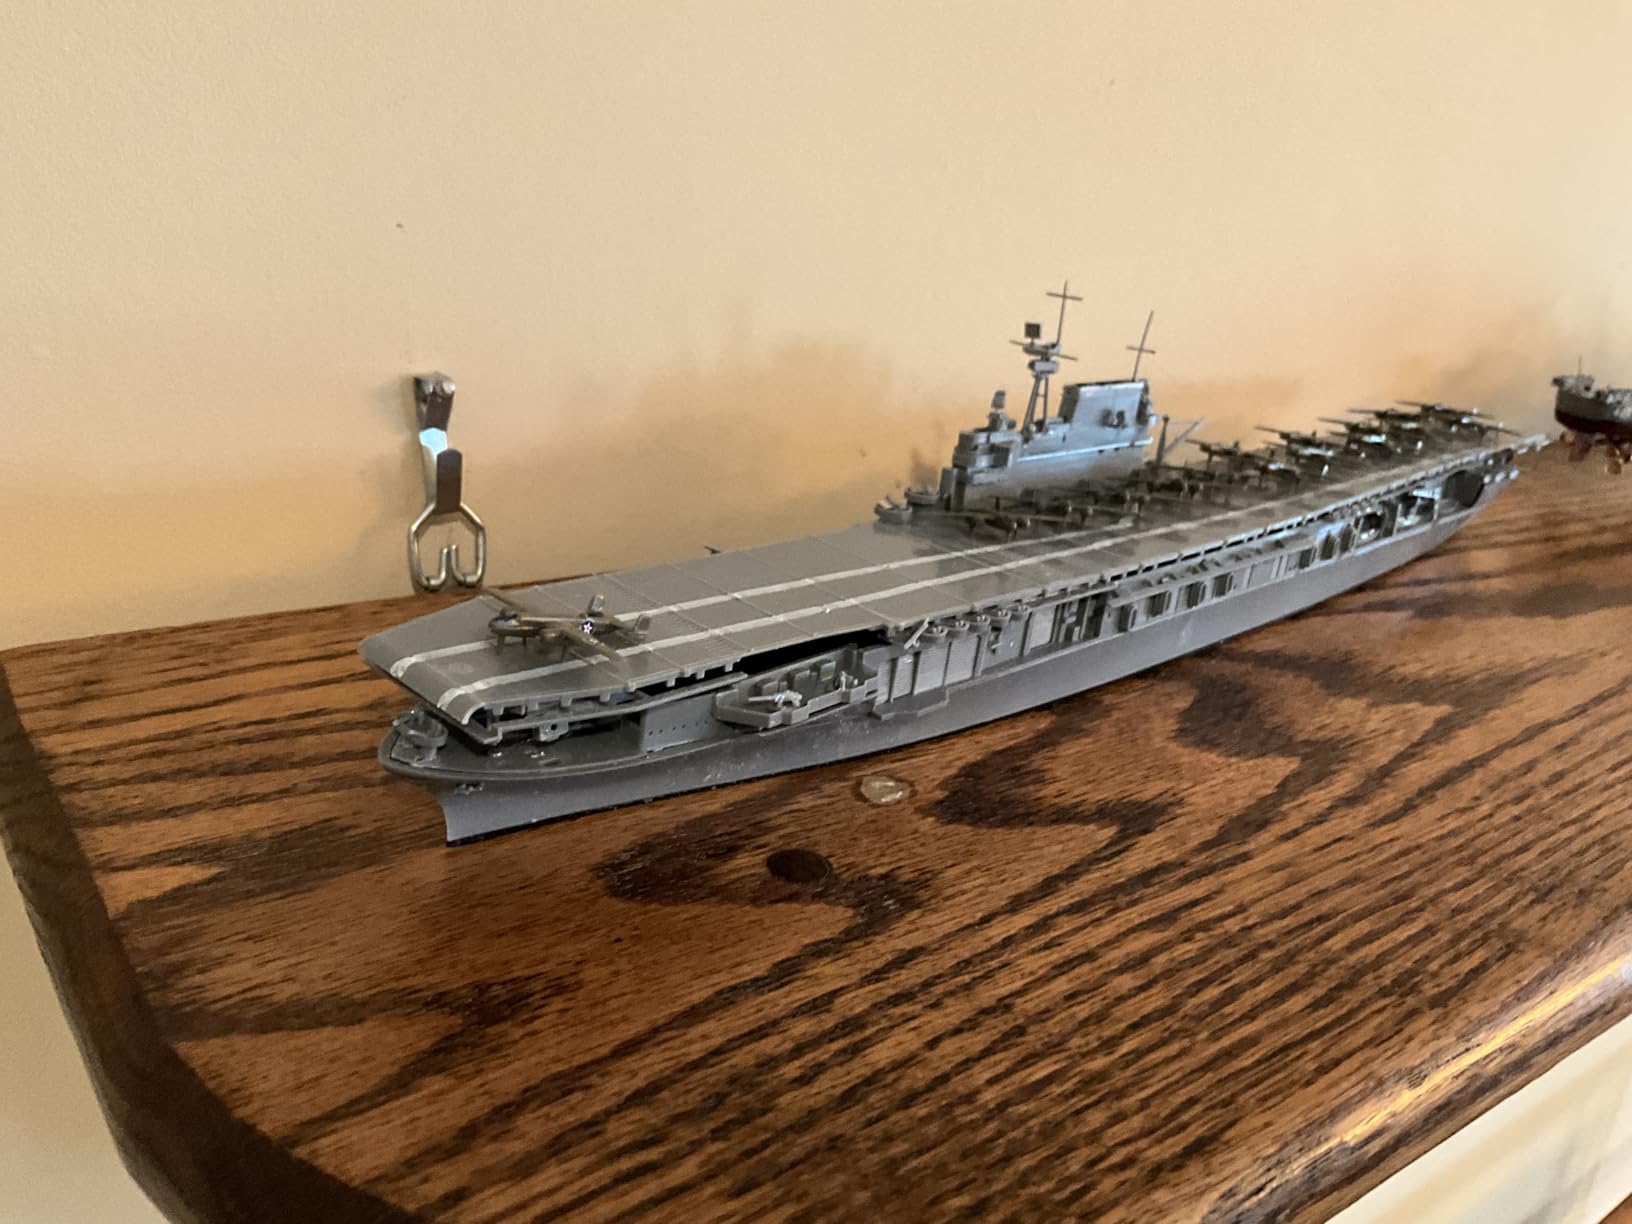
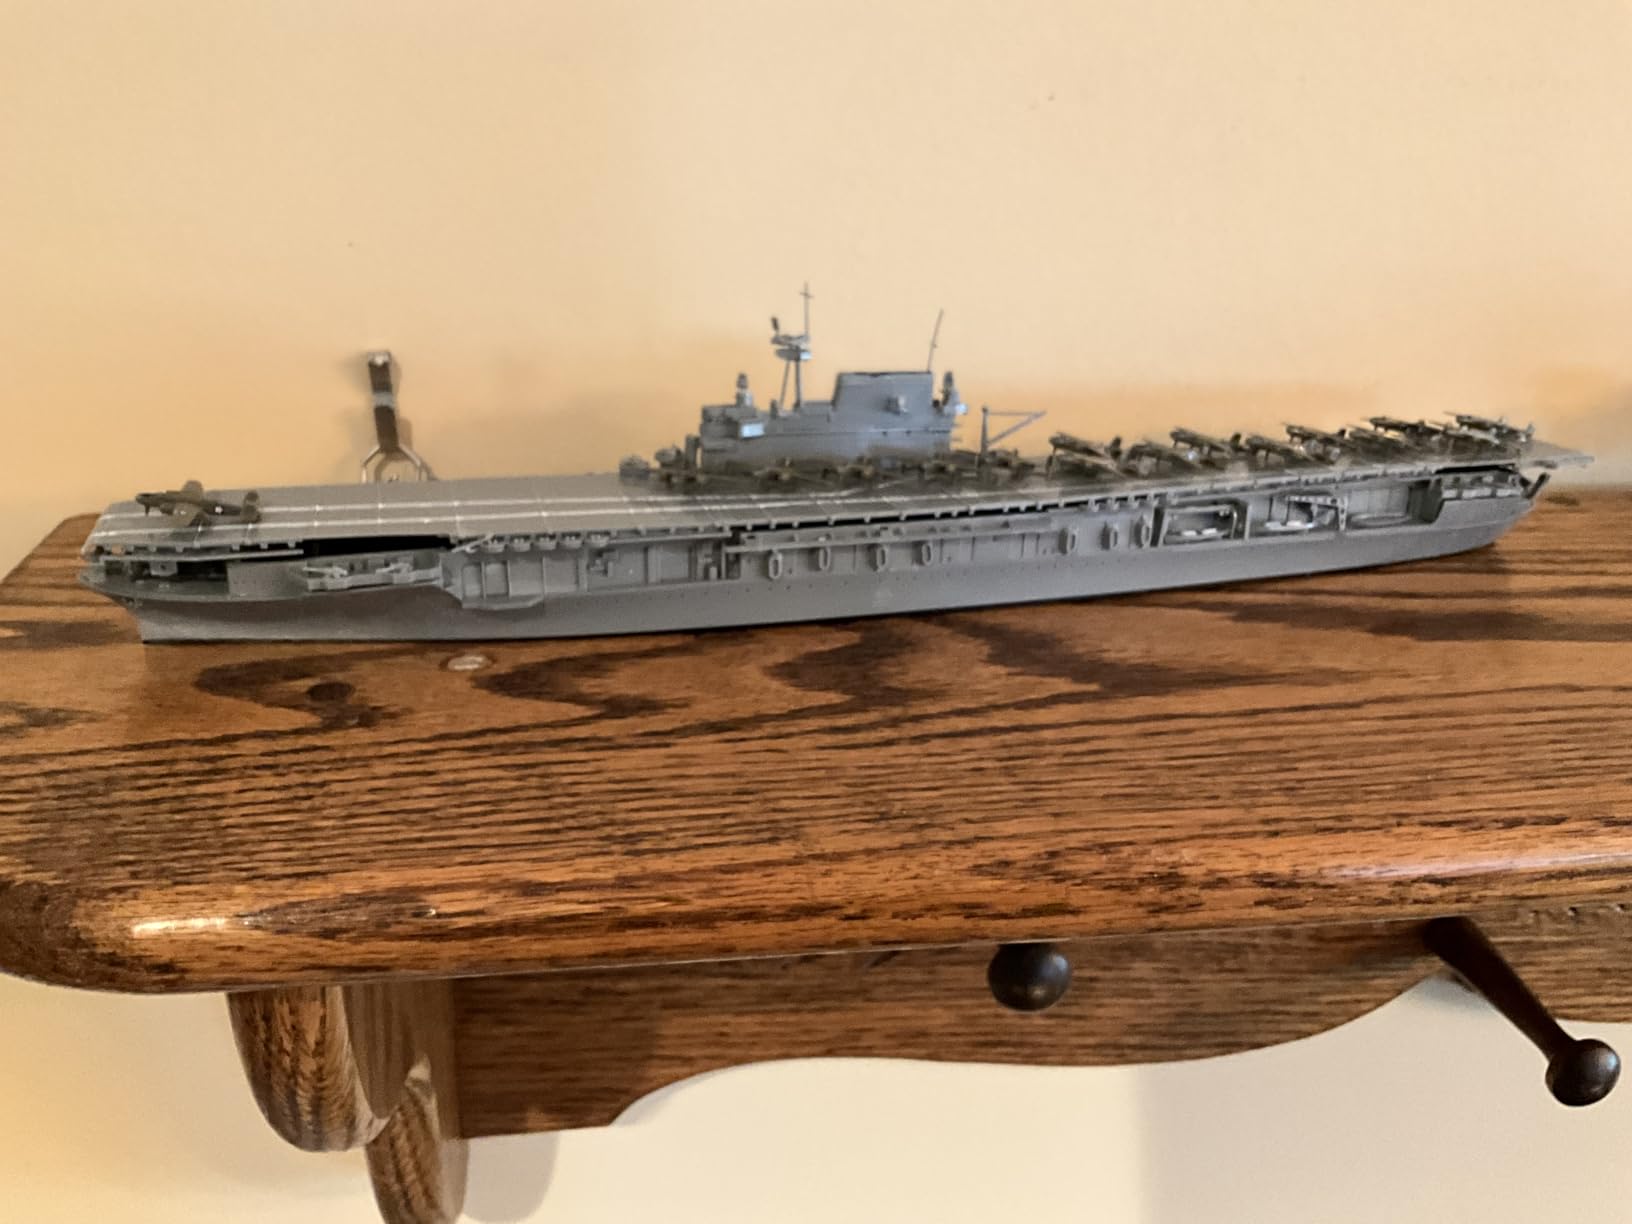
The Tamiya Yorktown is a classic kit that has been popular for decades. I built mine with the hanger doors open and the stern elevator in the down position. These options add visual interest and let you show off the interior detail. The 316 reviews reflect the long-standing reputation of this model.
The fit is excellent. I joined the hull halves and found the seam almost invisible. The deck dropped into place with no trimming. The included aircraft are the standard Tamiya mix, which is good but not exceptional. I added a few extra planes from the Tamiya aircraft set to create a fuller deck.
One detail I appreciated was the option to build the elevator up or down. I chose down and added a small load of aircraft and crew. The effect is dramatic. The hanger doors are also a nice touch, though the interior is simplified. For a closed build, the doors fit flush.
Technically, the kit weighs 0.73 pounds and includes three types of fighters and bombers. The waterline series means no propellers or rudder details, which is standard for display models. The plastic is high-quality gray styrene that takes cement and paint well. I used Tamiya Extra Thin throughout.
The decals are small, as expected at 1/700. I applied them with a fine brush and setting solution. The national insignia and deck markings are accurate for the Midway period. Some reviewers noted the fit of the deck part, but I had no issues with my copy.
Photo-Etch and Aftermarket Options
The Yorktown is well supported by aftermarket manufacturers. I added a Flyhawk PE set that included railings, radars, and mast details. The fit was good, and the brass parts matched the plastic attachment points. The railings are the most impactful upgrade because the plastic ones are too thick.
I also recommend replacing the plastic gun barrels with brass or turned metal. The kit parts are acceptable, but thin brass tubes look better. This is a small detail that makes a big difference in photos. The PE set I used included pre-cut brass for the gun shields, which was a nice bonus.
Builder Experience and Display Suggestions
This kit is suitable for intermediate builders. The fit is forgiving, but the small parts and decals require care. I spent 20 hours on mine and found it a relaxing build. Beginners with patience can tackle it, especially if they have built a simpler ship first.
For display, the waterline hull sits flat on any surface. I built a small sea base with cotton wool waves and positioned the Yorktown in a turn. The hanger doors open add depth, and the elevator down shows off the interior. It is a classic subject that looks good in any collection.
9. Hasegawa U.S.A. Carrier-Based Plane Set – Waterline Series Aircraft Pack
Hasegawa 1/700 Water line U.S.A. Carrier-Based Plane Set (514) yJapanese Plastic modelz
1/700 Water line
Weight: 1.44 oz
Model: WL514
Plastic
Pros
- Great quality Hasegawa kit
- Value priced for detail
- Nice addition to carriers
- Excellent detail at scale
Cons
- Very small scale
- Some planes may have defects
I bought this Hasegawa set to add American aircraft to a carrier deck. The quality is typical Hasegawa, with crisp molding and accurate shapes. The set is part of the waterline series, which means the planes are designed to sit on carrier decks or clear plastic rods. I found the detail excellent for the scale.
The 37 reviews average 4.5 stars, with praise for the value and quality. I agree that this is a good addition to any 1/700 USN carrier project. The aircraft types are correct for the WWII period, and the clear plastic rods let you pose some planes in flight. I used three in flight on my Saratoga build and the effect is convincing.
The scale is small, as every reviewer notes. You need good lighting and magnification to see the parts. I found that painting the aircraft before removing them from the sprue made the process easier. The attachment points are small, but a sharp cutter handles them cleanly.
Best Carrier Pairings and Display Use
This set pairs well with any Tamiya or Trumpeter USN carrier. I used mine on the Trumpeter Saratoga and found the styles compatible. The aircraft are slightly more detailed than the kit-included planes, so they stand out on the deck. I placed the extras in a maintenance diorama on the hanger deck.
For display, these planes work well in group formations. I built a small base with six planes in a takeoff pattern using the clear rods. The result is a dynamic scene that breaks up the static look of a single carrier. The small size makes storage easy.
Assembly Tips and Painting Advice
Build these planes in batches. I do ten at a time, painting them all before moving to decals. This batch approach keeps the workflow efficient. Use a fine brush or airbrush with the needle turned down. The parts are too small for heavy paint coats.
The Hasegawa plastic is slightly harder than Tamiya, so take care when cleaning nubs. I use a fine sanding stick and work gently. The decals are minimal, so you will need to paint the national insignia or use aftermarket decals. I painted the stars and bars with a tiny brush and a steady hand.
10. Tamiya 1/700 Enterprise Carrier – Easy Instructions for All Skill Levels
TAMIYA 1/700 Enterprise Carrier TAM77514 Plastic Models Boats
1/700 Scale
Weight: 281 grams
Model: 77514
Ages 12 and up
Pros
- Well molded quality
- Good price for the size
- Easy instructions to follow
- Nice kit for beginners and experts
Cons
- Some issues with flash on parts
- May have missing pieces occasionally
- Small scale makes parts tiny
The Tamiya Enterprise is a kit that bridges the gap between beginner and expert. I built it after finishing a simpler destroyer and found the step up manageable. The instructions are clear, with logical part placement and paint codes. The 159 reviewers praised the quality, and my build confirmed their experience.
The kit is well molded with good detail. I found the hull fit good, and the deck alignment required only minor sanding. The aircraft included are adequate for a basic deck load. I added extra planes from the Tamiya aircraft set to fill the gaps. The overall size is impressive for 1/700.
One issue I noticed was flash on some parts. It was minor, but it required cleanup. I also read reports of occasional missing pieces, though my kit was complete. The small scale means parts are tiny, so I worked under bright light with tweezers and a magnifier.
Aftermarket Photo-Etch and Detail Upgrades
The Enterprise is a popular subject, so aftermarket PE sets are widely available. I added brass railings and a radar set from Eduard. The fit was good, and the parts aligned with the plastic attachment points. The railings are the most impactful upgrade, replacing the thick plastic strips with fine brass.
I also recommend adding brass aircraft elevators if you can find them. The kit parts are flat, and photo-etch replacements add the correct mesh pattern. This is a small detail that makes the hanger deck look more realistic. The brass fret I used included the elevators as a bonus feature.
Ideal Builder and Time Estimate
This kit is ideal for builders who want a satisfying project without extreme complexity. I estimate 15 to 25 hours for a complete build with paint and decals. Beginners can tackle it with patience, and experts can add aftermarket details to take it to the next level.
The finished model is a good size for display. I placed mine on a simple wood base with a brass rod nameplate. The waterline hull sits flat, and the island is detailed enough to look good without extensive upgrades. It is a solid choice for anyone building their first carrier.
11. Tamiya USS Bogue Escort Carrier – Multiple Aircraft Types Included
Tamiya Models USS Bogue Escort Carrier
1/700 Scale
Weight: 0.13 lbs
8.4 Inch long
Multiple aircraft
Pros
- Typical Tamiya excellence
- Includes multiple aircraft types
- Can assemble as different ships
- Good detail for the price
Cons
- Small size not for beginners
- Requires patience and care
- Box may arrive damaged
The Tamiya Bogue is a compact escort carrier that packs surprising detail into a small box. I chose it because I wanted to build a convoy escort scene with an escort carrier and destroyers. The kit includes Avenger, Hellcat, Corsair, and Helldiver aircraft, which gives you variety for the deck. The 107 reviews reflect the consistent Tamiya quality.
Assembly is straightforward. The hull is simple, and the flight deck is a single piece. I found the small size charming rather than limiting. The 8.4-inch length fits easily on a shelf, and the multiple aircraft types let you create a busy deck. I painted the deck in the standard navy gray and added the aircraft in dark blue.
The kit can be built as different ships in the Bogue class. I built the Bogue itself, but the decals allow for sister ships. This is a nice touch for modelers who want to build a series. The detail is good for the price, though the small size means some parts are extremely tiny.
Photo-Etch and Railing Upgrades
The Bogue benefits from brass railings because the plastic ones are thick for the scale. I used a generic escort carrier PE set and trimmed the railings to fit. The result is subtle but important. The small size means any improvement is visible because the model is viewed up close.
I also replaced the plastic gun shields with brass. The kit parts are simplified, and the brass adds the correct thickness and profile. The mast detail is another area where photo-etch helps. I added a small brass radar array from a generic fret, and it transformed the island.
Best Use Cases and Builder Advice
This kit is best for builders who want a quick carrier project or a companion piece for a larger diorama. I estimate 10 to 15 hours for a complete build. The small size makes it approachable, but the tiny parts still require tweezers and magnification. Beginners can handle it if they have built at least one small ship before.
For display, I placed mine in a convoy scene with two destroyers and a merchant ship. The escort carrier is the focal point, and the multiple aircraft types add color. It is a great subject for Pacific theater modelers and a fun break from larger battleship builds.
12. Tamiya Japanese Aircraft Carrier Taihou – Beginner-Friendly Carrier Kit

1/700 Japanese Aircraft Carrier Taihou
1/700 Scale
Model: 31211
Water line
Retro style
Pros
- Excellent detail and quality
- Easy to assemble for beginners
- Few parts good for beginners
- TAMIYA signature easy build
Cons
- Old kit with steel flight deck
- Hanger floor can be misassembled
The Tamiya Taihou is a gentle introduction to Japanese carrier modeling. I recommended it to a friend who had only built aircraft before, and he completed it successfully in two weeks. The low part count and clear instructions make it ideal for beginners. The 82 reviews average 4.3 stars, with many praising the ease of assembly.
The kit represents the Taihou with her distinctive armored flight deck. I found the hull fit excellent, and the deck alignment simple. The aircraft included are basic, but they fill the deck adequately. I added extra planes from the Tamiya Japanese aircraft set to increase the density. The retro style of the box art is a nice touch.
One historical note: the kit shows a steel flight deck, which is now considered outdated by some historians. The current consensus is that the deck was wood-covered. This is a minor issue for most builders, but rivet counters may want to research before painting. I painted mine in the standard green and gray and was happy with the result.
Photo-Etch Potential and Limitations
Because this is an older kit, dedicated aftermarket PE sets are limited. I used a generic Japanese carrier brass set and trimmed the parts to fit. The railings and radars are the main upgrades. The mast detail can be improved with brass, but the simplified kit structure means some surgery is required.
I recommend this kit for builders who want a simple base before adding PE. The plastic is thick in places, so removing molded details takes time. If you are new to photo-etch, practice on a simpler subject first. The Taihou is forgiving, but the small parts still require care.
Best Audience and Build Time
This is the best kit on our list for beginners. I estimate 10 to 15 hours for a complete build. The low part count and good fit remove the frustration that can derail a first carrier project. The finished model is compact and looks good on a desk or small shelf.
For experienced builders, the Taihou is a quick weekend project. I built mine between larger kits as a palate cleanser. The subject is interesting historically, and the armored deck is visually different from the wood decks of other Japanese carriers. It is a good addition to any IJN collection.
13. Revell USS WASP Class Assault Carrier – 142 Pieces with Detailed Runway

Revell 05178 Assault Carrier USS WASP Class 1:700 Scale Model Kit
1/700 Scale
Weight: 13.4 oz
142 pieces
Acrylic paint
Pros
- Parts fit perfectly
- Fun model to build
- Great build experience
- Many tiny parts for detail
Cons
- Some mold lines require sanding
- Lots of gap filling required
- Very delicate prop shafts
The Revell WASP is a modern assault carrier kit that offers something different from the WWII subjects. I built it because I wanted a contemporary subject for my collection. The 142 pieces provide good detail without overwhelming the builder. The 169 reviews average 4.4 stars, with praise for the fit and the detailed runway.
I found the assembly enjoyable. The parts fit well, and the detailed runway is a standout feature. I painted the deck in the standard modern gray and added the aircraft in Marine Corps colors. The decal set is authentic and includes the correct markings for the WASP class. The build took about 20 hours.
The mold lines are present on some parts, but they clean up with light sanding. I had to do gap filling on the hull seams, which is normal for Revell kits. The prop shafts are very delicate, and I broke one during assembly. I recommend handling them with extra care and using slow-setting cement.
Technically, the kit weighs 13.4 ounces and measures 3.15 by 3.94 by 14.37 inches. The acrylic paint compatibility is good, and I used both brush and airbrush. The instructions are clear, though some versions are not in English. I used the diagrams and online references to confirm steps.
The detailed runway is the highlight. The markings and texture are crisp, and the aircraft landing area is clearly defined. I added a few modern aircraft from another set to increase the deck activity. The kit is a good balance between detail and simplicity.
Aftermarket Photo-Etch for Modern Carriers
Modern carriers have fewer railings and more flat surfaces, so PE sets are less critical than on WWII ships. I still added brass railings to the flight deck edges and replaced the plastic antennas with brass rod. The improvement is subtle but visible. Generic modern carrier PE sets work well here.
The island superstructure is simplified, so advanced builders may want to add detail. I used stretched sprue for antennas and added a few brass railings. The result is a clean, modern look that represents the WASP class well. For a straight build, the kit is satisfying on its own.
Builder Level and Display Ideas
This kit is good for intermediate builders. The fit is decent, but the gap filling and mold lines require experience. I recommend it for builders who have completed at least two ship kits. The small parts are manageable, and the instructions are clear enough to follow.
For display, the modern subject stands out among WWII carriers. I placed mine on a blue base with a few modern aircraft in flight. The assault carrier shape is distinctive, and the detailed runway draws the eye. It is a nice change of pace for builders who want to step away from wartime subjects.
14. Trumpeter USS John C Stennis CVN74 – 665 Pieces with Photo-Etch Antennae

Trumpeter USS John C Stennis CVN74 Aircraft Carrier (1/700 Scale)
1/700 Scale
Weight: 1 kg
665 parts
Photo-etch antennae
Pros
- Very detailed with engraved panel lines
- Excellent decals for deck markings
- Aircraft come with their own decals
- Sea base included for dioramas
Cons
- Decals would not release properly
- Too complicated for some users
- Many very small parts require tweezers
The Trumpeter Stennis is the most complex kit on our list. I opened the box and counted 665 parts, which is more than enough for a month-long project. The engraved panel lines are crisp, and the deck markings are provided as excellent decals. The kit even includes photo-etch antennae and a transom rack, which is a rare bonus at this scale.
I started with the hull and found the multi-part construction challenging. The internal supports must be perfectly aligned, or the flight deck will warp. I used slow-setting cement and clamped the sections overnight. The sea base is a nice inclusion that saves you from buying a separate display accessory.
The aircraft come with their own decals, which is a thoughtful touch. I built the F-18s and E-2s and found them detailed for the scale. The deck markings are extensive and cover the entire landing area. I had some issues with decals not releasing from the paper, but a long soak in warm water solved the problem.
Photo-Etch and Advanced Detailing
This kit already includes some brass, which is a major advantage. The antennae and transom rack are photo-etched, and they look excellent. I added more brass railings and radar details from a generic modern carrier PE set. The improvement is significant because the kit has so many flat surfaces that need detail.
The island is complex and benefits from careful painting. I used a multi-step process with light gray, dark gray, and black for the different systems. The brass antennas are delicate, so I installed them last after all painting was complete. The result is a busy, modern carrier that looks impressive.
Skill Level and Project Duration
This kit is for advanced builders only. The 665 parts and complex hull require experience. I estimate 40 to 60 hours for a complete build. Beginners should avoid this one unless they have a mentor. The small parts are everywhere, and the deck alignment is unforgiving.
For display, the size is impressive. The kit is over 12 inches long, and the nuclear carrier profile is distinctive. I placed mine on the included sea base with a few aircraft in launch position. The photo-etch antennas catch the light, and the panel lines show up well under photography. It is a showpiece model.
15. Tamiya Japanese Naval Aircraft Model Kit – 32 Planes of Five Types
Tamiya Models Japanese Naval Aircraft Model Kit
1/700 Scale
Weight: 1.44 oz
32 Planes
5 Types
Pros
- Excellent Tamiya quality
- Great assortment for carrier models
- Highly detailed for scale
- Good value for flight decks
- Includes decals
Cons
- Extremely small scale
- Not suitable for children
- Decals very small and challenging
This Tamiya aircraft set is the companion to the Japanese carrier kits on our list. I bought it to add variety to my IJN builds, and the five types of planes give you more options than the standard four-type set. The 108 reviews average 4.4 stars, with praise for the quality and assortment. I found the detail good for the scale.
The assembly process is identical to the other Tamiya aircraft set. I used tweezers and a magnifier, and I painted the planes before removing them from the sprue. The decals are small, as expected, but they settle into the panel lines with setting solution. I used these on a Shokaku and a Taihou with good results.
The five types include fighters, bombers, and reconnaissance planes. This variety is useful for carriers that operated mixed air wings. I found the reconnaissance plane particularly nice because it is a type often omitted from other sets. The decals provide the correct markings for the period.
Carrier Pairing and Deck Layout
This set pairs well with any Japanese carrier on our list. I used it alongside the four-type set on a large carrier to create a full deck load. The mix of types lets you arrange the aircraft in a realistic launch order. I placed the fighters forward and the bombers aft, which is the standard configuration.
For display, these small planes work well in dioramas. I built a small base with a section of flight deck and positioned five planes in various states of readiness. The clear plastic rods from the Hasegawa set work with these planes too, so you can mix and match across brands.
Painting and Decal Application
I paint these planes in batches of eight. The process is repetitive but efficient. I use a light gray underside and a dark green topside for the standard IJN scheme. The decals are the challenging part. I apply them with a fine brush and plenty of water, then position them with a toothpick.
Our team recommends using a white background while working. The small gray parts disappear on a dark desk. I also use a shallow tray to catch dropped parts. These planes are too small to find on the floor if you lose them. Good lighting is essential for every step.
Buying Guide: How to Choose a 1/700 Aircraft Carrier Kit for Photo-Etch Upgrades?
Before you buy a 1/700 carrier kit, think about whether you plan to add aftermarket photo-etch sets later. Some kits, like the Trumpeter Stennis, already include brass antennae and transom racks. Others leave you with thick plastic railings that cry out for replacement. I always check the sprue photos before ordering to see how much detail is molded in.
Aircraft content is another key factor. A carrier model without planes looks empty, so I prefer kits that include at least 20 aircraft. If you want a specific air wing, you may need to buy separate aircraft sets like the Tamiya or Hasegawa plane packs we reviewed. The best photo-etch sets for scale models often include brass landing gear and propellers that replace the plastic parts.
Skill level matters more at 1/700 than at larger scales. Our team found that beginners do best with Tamiya kits because the instructions are clear and the fit is forgiving. If you are ready for a challenge, the Trumpeter and Hasegawa advanced kits offer more parts and finer detail. Just be honest about your patience and eyesight before committing to a 500-piece build.
Tools make a huge difference. I use a Hold and Fold tool for bending brass railings, plus fine-tipped tweezers and a headband magnifier. Strong lighting is non-negotiable. If you are working with Paragrafix photo-etch sets, the same tools apply. Good cement like Tamiya Extra Thin will wick into the tiny joints and hold parts without excess glue.
Budget is the final piece. Entry-level kits like the Tamiya aircraft sets cost under $10, while premium carriers like the Trumpeter Stennis push past $50. I recommend setting aside 30% of your kit budget for aftermarket photo-etch. The Tetra Models photo-etch sets we reviewed are a solid mid-range option that works well with most 1/700 carriers.
One last tip: join a forum like Reddit or FineScale before you start. Real modelers share compatibility notes and warn about kits with fit issues. I have avoided several headaches by reading build logs before I open the box. The community is welcoming and will answer questions about which brass fret works with which plastic kit.
Evaluating Aircraft Content and Decal Quality
Not all carrier kits include the same aircraft. I learned this after buying a kit that only came with six generic planes, forcing me to hunt for aftermarket sets. Check the box art and description carefully. Look for kits that include multiple types like fighters, dive bombers, and torpedo planes. The Hasegawa Akagi even includes a dedicated carrier-based aircraft set, which is a major bonus.
Decal quality varies by manufacturer. Tamiya generally ships thin, responsive waterslide decals. Trumpeter decals can be thicker and sometimes refuse to release from the paper. I recommend having a decal setting solution on hand. Micro Set and Micro Sol are the standards I keep in my workshop.
Kit Compatibility with Aftermarket Photo-Etch
Before you add brass railings or radars, confirm that the PE set is designed for your specific kit. Generic sets exist, but dedicated ones fit better. Flyhawk and Eduard both produce carrier-specific frets. I have had the best luck with Flyhawk sets on Tamiya hulls because the attachment points align cleanly.
Some kits require you to remove molded plastic details before installing PE parts. This is called surgery, and it takes steady hands. I use a fresh scalpel blade and cut away from the model. If you are nervous about this step, start with a kit that has minimal molded detail so there is less to remove. The Paragrafix photo-etch sets we reviewed include instructions that show exactly where to cut.
If you enjoy submarine builds, our Kursk submarine model kits guide covers another subject that pairs well with ship dioramas. Mixing a surfaced submarine with a carrier group creates a powerful display.
Frequently Asked Questions
What are the best photo-etch sets for 1/700 scale aircraft models?
The best aftermarket photo-etch sets for 1/700 carriers come from Flyhawk, Eduard, and White Ensign Models. Flyhawk sets like FH700025 are designed for specific Tamiya kits and include brass railings, radars, and mast details. Eduard offers good value with comprehensive frets. For aircraft-specific brass, look for landing gear and propeller sets from the same brands.
Is photo-etch worth it for 1/700 scale models?
Yes, photo-etch is worth it for 1/700 scale if you want museum-level detail. Plastic railings and radars at this scale often look chunky and unrealistic. Brass frets provide the fine detail that transforms a carrier model from a toy into a faithful replica. The effort is higher, but the visual payoff is significant under magnification.
Which brands make the best 1/700 photo-etch sets?
Flyhawk is widely considered the top brand for 1/700 ship photo-etch, with crisp brass and excellent fit. Eduard is a close second with broad compatibility. White Ensign Models produces premium sets for advanced builders. For budget-friendly options, Gold Medal Models and Tetra Models offer solid brass railings and basic details.
How difficult are photo-etch parts to work with for beginners?
Photo-etch parts are challenging for beginners because they are tiny and require specialized tools. You need fine tweezers, a bending tool, strong lighting, and magnification. Start with simple railings before attempting complex radars or cranes. Many modelers aged 50 and above successfully work with PE using a headband magnifier and patience.
Conclusion
The best 1/700 aircraft set photo-etch builds start with a solid foundation kit. Our top pick, the Tamiya Shokaku, delivers clean fit and exceptional decals that make adding brass railings a pleasure. The Academy Enterprise offers unbeatable value for a historically significant subject, and the Tamiya aircraft sets give you the plane density you need without breaking the bank.
In 2026, the 1/700 scale market is stronger than ever, with options for every skill level and budget. I recommend pairing any of these kits with a dedicated aftermarket photo-etch set from Flyhawk or Eduard. The extra detail is worth the time, and your finished carrier will stand out at any model show. For larger aircraft models, check out our F/A-18 Hornet model kits guide. Pick a kit, order your brass frets, and start building.