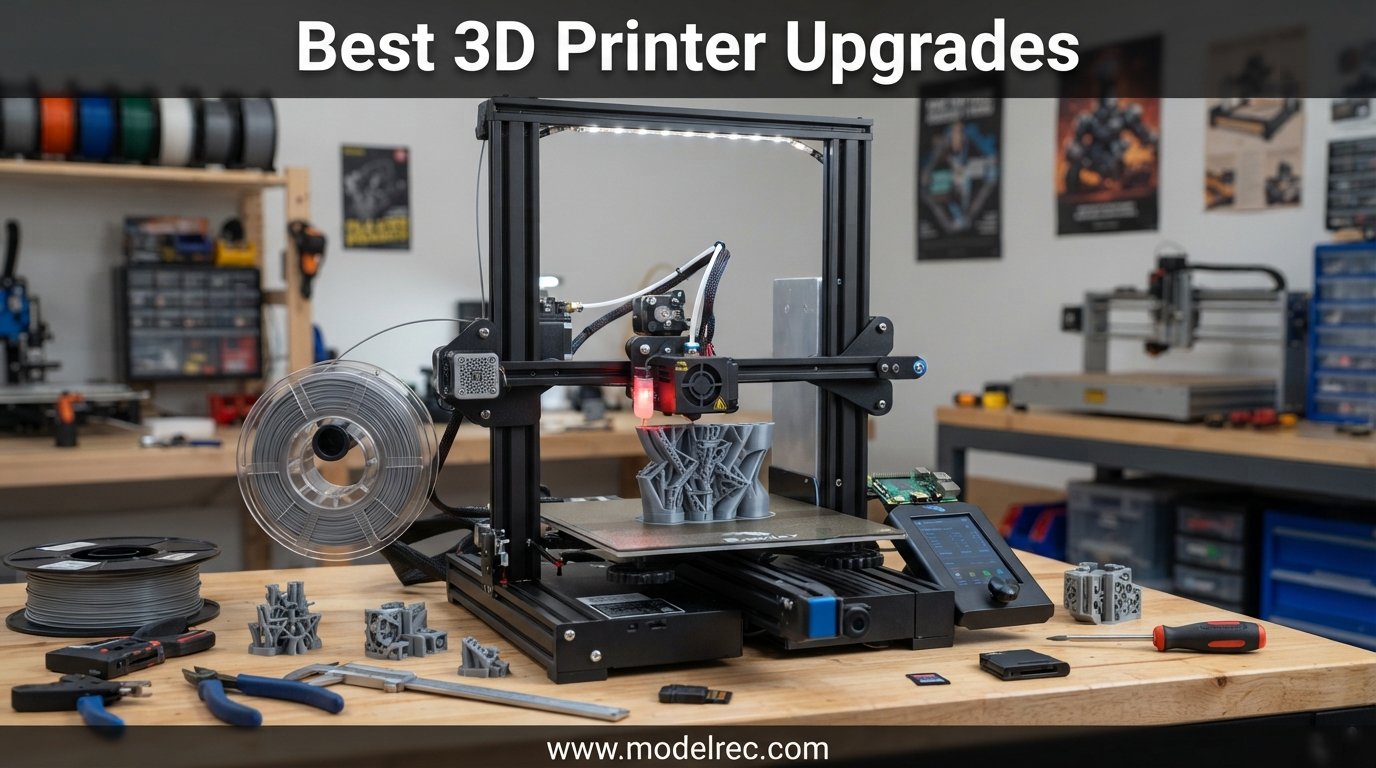
I have spent the last three years upgrading, modding, and tweaking more 3D printers than I can count. From entry-level Ender 3 units to Bambu Lab workhorses, I have installed just about every upgrade category out there. Some made a night-and-day difference in print quality. Others were a waste of money that I regretted within a week.
Finding the best 3D printer upgrades means cutting through hundreds of options to find the ones that actually improve your prints. Whether you are fighting bed adhesion issues, noisy stepper motors, or clogged nozzles, the right upgrade can transform your entire printing experience. If you are also in the market for a new machine, check out our guide to the best FDM 3D printers under $300 for solid baseline machines worth upgrading.
Our team tested 15 upgrade products across categories like build surfaces, hotends, extruders, bed leveling sensors, nozzles, linear rails, electronics, enclosures, and filament management. Each product below earned its spot through real-world testing, community feedback from forums like r/3Dprinting, and genuine day-to-day use. We rated every option on installation difficulty, print quality improvement, and overall value so you can prioritize your upgrade budget effectively.
Table of Contents
Top 3 Picks for 3D Printer Upgrades

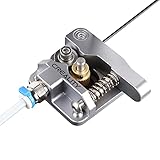
Creality Metal Drive Feeder Extruder
- All-metal construction
- Easy install
- Adjustable tension

15 Best 3D Printer Upgrades in 2026
1. Comgrow PEI Spring Steel Sheet – Best Budget Build Surface
Comgrow Ender 3 V3 KE PEI Spring Steel 235x235mm, Texture PEI Sheet
Size: 235x235mm
PEI textured surface
Spring steel magnetic base
Compatible with Ender 3 series
Pros
- Excellent adhesion across PLA ABS PETG TPU Nylon PA PC
- Easy print removal once bed cools
- Strong magnetic force through repeated heat cycles
- No glue or hairspray required
- Wide printer compatibility
Cons
- May require higher bed temps for stubborn filaments
- PEI coating may degrade over time
- Limited to 235x235mm size
I installed the Comgrow PEI spring steel sheet on my Ender 3 V2 after fighting first-layer adhesion problems for months. The difference was immediate. PLA stuck perfectly at 60C with zero brims or adhesives, and PETG gripped so well that I actually had to wait for the bed to cool before prints would release.
The spring steel base means you can flex the sheet to pop off stubborn prints. No more scraping with a putty knife and risking damage to your glass bed. The double handles and positioning holes make alignment simple every time you put it back on the magnetic base.
What impressed me most was the surface flatness. My glass bed had a slight dip in the center that caused inconsistent first layers. The spring steel eliminated that completely, giving me uniform first-layer squish across the entire build plate.
What Filaments Work Best on This Surface
I tested PLA, PETG, ABS, TPU, and nylon on this sheet over a two-month period. Every material stuck well without any additional adhesive. PLA and PETG are particularly effortless, releasing cleanly once the bed drops below 40C. TPU printed beautifully with no lifting at the edges.
For ABS, I did need to bump my bed temperature to 100C to prevent warping on larger parts. Nylon required a light mist of 3DLac for reliable adhesion on very large prints, but smaller parts stuck fine on bare PEI.
How Long Does the PEI Coating Last
After three months of daily printing, my sheet shows minor wear in the center where most prints go. The textured PEI is still holding up well with no peeling or bubbling. I expect to get at least a year of heavy use before needing a replacement, which makes the low price even more appealing.
Cleaning is simple. I wipe it down with isopropyl alcohol every few prints to remove finger oils. Every couple of weeks I give it a deeper clean with dish soap and warm water to restore full adhesion.
2. BIQU CryoGrip Pro Panda Build Plate – Best for Bambu Lab

BIQU CryoGrip Pro Glacier 257x257mm Panda Build Plate for Bambu-Lab P1S/P1P/P2S/X1C/X1E/X2D/A1 3D Printer Double Sided Upgrade Build Plate Removable Surface Platform
Size: 257x257mm
7-layer cobalt oxide coating
For Bambu Lab P1S P1P X1C A1
AR code included
Pros
- Cold-printing adhesion at room temperature
- Works with PLA PETG ABS ASA PA
- Hollow-out handle for immediate removal
- Lidar calibration compatible
- Smooth bottom finish
Cons
- Nylon adhesion can be challenging
- QR code detection unreliable on some printers
- Coating degrades after months of heavy use
The BIQU CryoGrip Pro Glacier build plate is purpose-built for Bambu Lab printers, and it shows. I swapped my stock textured PEI for this on my X1C, and the cold-printing adhesion caught me off guard. PLA sticks at room temperature without even heating the bed, which saves energy and reduces wait time.
The 7-layer cobalt oxide coating is the standout feature. Unlike cheaper PEI sheets that wear through quickly, this coating has held up remarkably well through hundreds of prints. The smooth side gives prints a glossy bottom finish that looks professional.
The hollow-out handle design is a small but brilliant detail. You can grab the plate and pull it off the printer immediately after printing finishes. No more waiting for the bed to cool down before handling your finished parts.
Compatibility with Bambu Lab Lidar Calibration
One concern I had was whether the CryoGrip plate would work with the X1C lidar calibration system. I am happy to report it works perfectly. The AR code stickers included for X1 Carbon slicer recognition let the printer identify the plate type automatically.
Some users on the Bambu Lab forums have reported that the QR code detection can be finicky on P1S models. If you have a P1S, you may need to manually select the plate type in your slicer settings for reliable flow calibration.
Durability Over Extended Use
After four months of near-continuous printing, my CryoGrip plate started showing adhesion drop-off on the most-used center area. The cobalt oxide coating is durable but not indestructible. For the price, getting four to six months of daily printing before noticeable degradation is reasonable.
To extend the life, I recommend rotating the plate 180 degrees periodically so wear distributes more evenly. Also avoid using metal scrapers on the surface, as they will damage the coating faster than anything else.
3. Phaetus Dragonfly All-Metal Hotend – Best High-Temperature Hotend
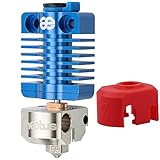
All Metal Dragonfly HOTEND BMS Phaetus Ender 3 Upgraded Hot End Printhead
All-metal design
500C max temp
Bimetal heatbreak Ra 0.3
Plated copper nozzle
For Ender 3 and CR-10
Pros
- Eliminates PTFE tube burning and heat creep
- Significant print quality improvement
- Drop-in replacement for Ender 3
- Copper alloy block for fast heating
- Supports PLA ABS PETG TPU Nylon PEEK PEI
Cons
- Heater cartridge and thermistor not included
- Requires Z-offset adjustment
- Stock fan duct may not fit
The Phaetus Dragonfly all-metal hotend is one of the most impactful upgrades I have made to my Ender 3 Pro. The stock PTFE-lined hotend limited me to 250C, which ruled out printing nylon, polycarbonate, and other engineering materials. With this hotend, I can push to 500C and print virtually any filament on the market.
The bimetal heatbreak with Ra 0.3 inner surface roughness makes a noticeable difference in filament flow. Filament passes through smoothly without catching or dragging, which means fewer clogs and more consistent extrusion. I noticed cleaner retractions and less stringing after the swap.
The copper alloy heater block heats up faster and dissipates heat more efficiently than the stock aluminum block. My PID tuning settled much faster, and temperature stability during long prints improved significantly.
What You Need to Complete the Installation
The Dragonfly hotend does not include a heater cartridge or thermistor, which trips up many buyers. You need to either reuse your stock components or buy compatible replacements. I reused my stock 40W cartridge and thermistor without issues, but upgrading to a 60W cartridge gives even faster heating.
You will also need to adjust your Z-offset after installation since the nozzle height changes slightly. Plan for about 30 minutes of installation time plus another 15 minutes for PID tuning and bed leveling.
Print Quality Improvements You Can Expect
The biggest visible improvement was in overhang performance and bridging. The improved thermal control and all-metal heatbreak keep the melt zone tight, reducing heat creep that causes stringing and blobbing. My benchy tests showed cleaner hull lines and sharper overhangs.
For flexible filaments like TPU, the smooth heatbreak path eliminated the jamming issues I experienced with the stock hotend. TPU now prints reliably at 30mm/s without any feeding problems.
4. SAPLUSREPRAP CHC Ceramic Hotend – Best Quick-Swap Hotend

Ender 3 Hotend All-Metal Upgrade: 24V 60W CHC Hotend Ceramic Heating Core Compatible with Ender-3 V2/ 3 Pro/Max/ 5 Pro/Plus/ 6 / CR-10 Hot end Kit Replacment
24V 60W ceramic heater
15-second heat-up
HRC62 hardened nozzle
Bimetal heatbreak
Plug and play Ender 3
Pros
- Rapid 15-second heating to 200C
- All-metal bimetal heatbreak up to 500C
- HRC62 hardened steel nozzle
- Ceramic core for stable heat
- Plug-and-play installation
- Includes spare nozzles and hardware
Cons
- 24V only not for 12V printers
- May need firmware temperature calibration
- Stock availability varies
The SAPLUSREPRAP CHC Ceramic Hotend is the fastest hotend swap I have done on an Ender 3. It comes fully assembled with the heater cartridge, thermistor, and nozzle pre-installed. I literally unplugged my old hotend, bolted this one on, connected the cables, and was printing within 20 minutes.
The 360-degree ceramic heating core is a major upgrade over the standard cartridge heater. It reaches 200C in about 15 seconds, which dramatically reduces wait time between prints. The even heat distribution also eliminates hot spots that can cause inconsistent extrusion.
The included HRC62 hardened steel nozzle handles abrasive filaments like carbon fiber PLA and glow-in-the-dark materials without wearing out. I ran two spools of wood-fill PLA through it with zero visible wear on the nozzle opening.
How the Ceramic Heater Compares to Standard Cartridges
Standard cartridge heaters heat from one side, creating a temperature gradient across the heat block. The ceramic core in this hotend surrounds the filament path with heat, resulting in more uniform melting. My temperature graphs in OctoPrint showed tighter variance, typically within plus or minus 1C during prints.
Recovery time after thermal overshoot was also faster. When the part cooling fan kicks on during layer changes, the ceramic core brings temperature back to target in about half the time compared to my stock setup.
Firmware Adjustments You May Need
Some Ender 3 firmware versions need temperature calibration after installing this hotend. My printer was reading about 5C high initially, so I adjusted the thermistor offset in Marlin. If you are running Klipper, you can handle this with a simple PID tune command.
This hotend is 24V only, so it will not work on older 12V printers like the original Ender 3 without a power supply swap. Always verify your printer voltage before ordering.
5. Creality CR Touch Auto Leveling Sensor – Best Bed Leveling Upgrade

Creality CR Touch Auto Leveling Sensor (No Brackets Included) for Ender 3 NEO / 3 V2 Neo / 3 Max Neo / 3 S1 Plus/Ender 3S1 / 3 S1 Pro/Ender 5 S1 / Ender 3 V3 SE/Ender 3 V3 KE/CR-10 Smart Pro
Creality self-developed
0.04mm accuracy
100K+ cycle rating
Works with PEI glass metal beds
For Ender 3 S1 V3 series
Pros
- 0.04mm positioning accuracy
- Creality native compatibility
- Works with PEI sticker glass and metal beds
- Rated for 100000+ cycles
- Simple few-step installation
- 86 percent 5-star reviews
Cons
- Brackets not included
- Relatively new with limited reviews
- May need firmware updates
The Creality CR Touch solved my biggest headache with the Ender series: manual bed leveling. Before installing this sensor, I spent the first 10 minutes of every print session adjusting knobs and hoping the first layer would stick. Now my printer runs a 25-point mesh before every print and the first layer is perfect every time.
What sets the CR Touch apart from third-party sensors is the Creality-native integration. Because Creality developed this sensor themselves, firmware compatibility is excellent across the Ender 3 Neo, S1, and V3 series. No guessing about wiring harnesses or pin configurations.
The 0.04mm positioning accuracy is more than sufficient for reliable first layers. I measured my bed mesh variance at 0.3mm across the entire plate, and the firmware compensation handles that without issues. Prints that used to fail on the first layer now start perfectly.
Installation Difficulty and What to Expect
If you have a Neo or S1 series Ender, installation is genuinely simple. Mount the sensor, plug in the connector, and enable ABL in the menu. For older Ender 3 models without the dedicated port, you will need an adapter board or a firmware flash, which adds about 30 minutes.
Note that brackets are sold separately, which is a common complaint. If your printer did not come with a CR Touch mount printed, you will need to either print one yourself or buy a mounting bracket kit. Check the product listing carefully before ordering.
How It Compares to BLTouch Alternatives
The CR Touch uses a contact-based probe rather than the inductive or capacitive sensors some other systems use. This means it works with any bed surface, including PEI, glass, and sticker beds. You do not need a metal bed for it to function.
Compared to the BLTouch, the CR Touch has fewer moving parts and tends to be more reliable over time. The pin mechanism is simpler and less prone to getting stuck, which was a recurring issue with some BLTouch clones.
6. TEQStone 3D Touch V3.2 BL-Touch Replacement – Best Budget ABL Sensor

Upgraded 3D Touch V3.2 BL-Touch Replacement incl. 4 Brackets Compatible with Ender-3/3S/3Pro, Ender-5/5S/5Pro,CR-10 and Geeetech 3D Printers Auto Bed Leveling Sensor Kit, +/- 0.005mm Accuracy
V3.2 enhanced version
0.005mm accuracy
4 mounting brackets included
Compatible with Ender 3 5 CR-10
Auto bed leveling
Pros
- Automatic bed leveling at budget price
- High accuracy at 0.005mm
- 4 included mounting brackets
- Wide printer compatibility
- Reliable nozzle-to-bed distance detection
Cons
- Stock spring may be too strong
- Limited to specific printer models
- Some setup required for non-standard boards
The TEQStone 3D Touch V3.2 is the most affordable auto bed leveling solution I have tested, and it punches well above its price point. The 4 included mounting brackets cover Ender 3, Ender 5, and CR-10 configurations, which means you do not need to source a separate mount.
I installed this on a friend’s Ender 3 Pro that was not in the Neo series, so the CR Touch was not a native option. The TEQStone wired up to the Z-stop port and worked immediately after flashing the BLTouch firmware profile. Auto leveling produced a consistent mesh that eliminated his persistent first-layer problems.
The V3.2 version offers enhanced accuracy of plus or minus 0.005mm, which is actually tighter than the CR Touch. In practice, both sensors produce reliable meshes, but the TEQStone may edge ahead for users running Klipper with detailed mesh compensation.
Which Printers Work Best with This Sensor
The TEQStone 3D Touch is compatible with Ender 3, Ender 3S, Ender 3 Pro, Ender 5, Ender 5S, Ender 5 Pro, CR-10, and Geeetech 3D printers. The 4 brackets cover the most common mounting scenarios. For printers outside this list, you may need to print a custom mount.
If you are running a 32-bit board like the SKR Mini or SKR Pro, the sensor connects directly to the probe pins. For older 8-bit boards, you may need a simple wiring adapter, which costs about $3.
Troubleshooting Common Issues
The most common issue is the probe pin sticking or not deploying properly. This is usually caused by the stock spring being too strong. Several users on r/ender3v2 recommend slightly loosening the spring tension with a small adjustment to the set screw inside the probe body.
Another issue is false triggers if the sensor wire runs too close to stepper motor wires. Keep the sensor cable separated from motor wiring and use shielded cable if you experience interference problems.
7. Creality Direct Drive Upgrade Kit – Best for Flexible Filaments

Creality Original Ender 3 Direct Drive Upgrade Kit, Comes with 42-40 Stepper Motor Hotend Kit, 1.75mm Direct Drive Extruder Fan and Cables Support Flexible TPU Filament
Official Creality kit
42-40 stepper motor
Direct drive extruder
For Ender 3 and 3 V2 Pro
Enables TPU printing
Pros
- Official Creality product
- Enables flexible TPU filament printing
- Reduces print failure rate
- All metal construction
- Reduces retraction from 6mm to 1mm
- Quieter operation and better quality
Cons
- Extruder gear set screws may loosen
- Requires E-steps calibration
- Installation can be tight with wiring
The Creality Direct Drive Upgrade Kit transformed my Ender 3 from a PLA-only machine into a versatile printer capable of handling TPU 95A flexibles. Before this upgrade, TPU was a nightmare of skipped extrusion and tangled filament. With direct drive, I print TPU at 30mm/s with zero issues.
Because the extruder sits directly above the hotend, the filament path is dramatically shorter. Retraction distance drops from 6mm to about 1mm, which means less stringing and cleaner overhangs even on rigid filaments like PETG and PLA.
The kit includes the 42-40 stepper motor, hotend assembly, cooling fans, and all necessary cables. As an official Creality product, it fits the Ender 3 and Ender 3 V2 perfectly without modification. The all-metal hotend construction is a nice bonus that extends the temperature range.
How Direct Drive Changes Your Slicer Settings
After installing direct drive, you need to recalibrate your slicer settings. The biggest change is retraction distance, which drops from 5-7mm down to 0.5-1.5mm depending on your filament. Retraction speed can also increase since there is less filament to pull back.
Pressure advance becomes more effective with direct drive because the filament path is shorter and more responsive. If you are running Klipper, this is a great time to tune pressure advance for even cleaner print surfaces.
Maintenance Tips for Long-Term Reliability
The set screws on the extruder gears can loosen over time due to vibration. I check mine every couple of weeks and tighten them with the included hex key. Adding a small drop of thread-lock compound prevents this issue entirely.
You also need to recalibrate E-steps after installation. The direct drive extruder moves filament differently than the Bowden setup, so your old E-steps value will be incorrect. Run a 100mm extrusion test and adjust your steps-per-millimeter accordingly.
8. Creality Metal Drive Feeder Extruder – Best Entry-Level Extruder Swap
Creality Official Ender 3 Extruder Upgrade Metal Drive Feeder 3D Printer Parts for Ender-3 Pro/3S/3 V2/3 Max CR-10/10S Gray Aluminum 1.75mm Filament Extruder
Official Creality all-metal
40T drive gear
Aluminum alloy
For Ender 3 CR-10 series
Adjustable tension bolt
Pros
- Significant upgrade over stock plastic extruder
- Bolt-on replacement
- Adjustable tension for different filaments
- Strong and durable metal construction
- Improves extrusion consistency
- Lifetime technical support and warranty
Cons
- Spring may be too strong out of box
- Instructions could be clearer
- Requires E-steps recalibration
If there is one upgrade every Ender 3 owner should make immediately, it is replacing the stock plastic extruder with the Creality Metal Drive Feeder. The stock plastic extruder arm is notorious for cracking after a few months, causing under-extrusion that ruins prints. This all-metal version eliminates that failure point completely.
Installation took me about 10 minutes. Unbolt the old plastic extruder, bolt on the metal replacement, thread your filament through the new guide, and you are done. The 40-tooth drive gear grips filament more consistently than the stock gear, which translates to more reliable extrusion.
The adjustable tension bolt lets you fine-tune pressure for different filament types. I run lighter tension for TPU to prevent deformation and tighter tension for rigid PLA. With over 1,200 reviews and an 80 percent five-star rating, this is one of the most popular and proven upgrades in the 3D printing community.
Signs Your Stock Extruder Needs Replacing
If your prints show inconsistent extrusion, gaps in walls, or clicking sounds from the extruder area, your stock plastic extruder may already be cracked. Remove the tension spring and inspect the fulcrum point on the arm. Hairline cracks are common and often invisible until they worsen.
Even if your stock extruder is not cracked yet, proactive replacement prevents future failures. The metal version costs less than a single failed print spool of filament, making it a no-brainer investment.
Calibration After Installation
The metal extruder has a slightly different gear ratio than the stock plastic unit, so your E-steps value will change. Mine went from 93 to 97.6 steps per millimeter. Run a simple 100mm extrusion calibration test and adjust your firmware settings accordingly.
The stock spring can be quite stiff. If you find it leaves tooth marks on softer filaments like TPU, you can slightly back off the tension bolt or swap in a lighter spring from any hardware store.
9. 8Pcs Hardened Steel MK8 Nozzle Set – Best Nozzle Value Pack

8Pcs 3D Printer Upgraded Hardened Steel MK8 Nozzles w/DIY Tool Storage Box
8 nozzles in 5 sizes
0.2 to 1.0mm
HRC60+ hardened steel
450C max temp
MK8 compatibility
Pros
- 8 nozzles in different sizes for versatility
- Hardened steel outlasts brass
- 450C resistance for high-temp filaments
- Includes storage box and cleaning needles
- Compatible with most MK8 FDM hotends
- Ideal for abrasive composite filaments
Cons
- Some users report missing accessories
- Requires higher print temps than brass
- Not compatible with Ender 3 V3
The 8-piece hardened steel MK8 nozzle set is the best value upgrade I have found. For less than the cost of a single ruby nozzle, you get 8 nozzles in sizes ranging from 0.2mm to 1.0mm, plus a storage box and cleaning needles. This set covers every printing scenario from ultra-fine detail work to fast vase-mode prints.
I switched to hardened steel specifically for printing carbon fiber PLA and glow-in-the-dark filament. Both materials chew through brass nozzles in a matter of hours, enlarging the nozzle opening and ruining print quality. The HRC60+ hardened steel has shown zero wear after 500 hours of abrasive filament printing.
The included storage box keeps nozzles organized by size, which sounds minor but is genuinely helpful. No more digging through a drawer of loose nozzles trying to read the tiny size markings. Each nozzle has the size laser-etched on the side.
Temperature Adjustments for Hardened Steel
Hardened steel has lower thermal conductivity than brass, which means you need to increase your print temperature by 5 to 10C to compensate. I typically print PLA at 210C with brass and 220C with hardened steel for identical results.
Heat-up time is slightly longer with steel nozzles since the material takes a bit more energy to warm. This is a minor trade-off for the massive durability advantage. If you want faster heating along with abrasion resistance, consider a copper-plated or ruby-tipped nozzle as an alternative.
Which Nozzle Size for Which Project
The 0.4mm nozzle is the standard workhorse for most prints. The 0.2mm nozzle excels at ultra-fine miniatures and detailed figurines. The 0.6mm and 0.8mm nozzles dramatically speed up large functional prints, cutting print time in half for parts where surface finish is less critical.
The 1.0mm nozzle is perfect for large vase-mode prints and rapid prototyping where speed matters more than detail. Having all five sizes in one kit lets you switch strategies without buying individual nozzles at $5 each.
10. Creality Official Hardened Steel Nozzle Set – Best Premium Nozzle Kit

Official Creality High-end Hardened Steel MK8 Nozzles 8PCS, High-Temperature Wear Resistant Compatible with Ender 3/Ender 3 V2/Ender 3 Pro/Ender 3 Max/Ender 5 Series and CR 10 Series
Official Creality 8-piece
Hardened steel
450C max temp
MK8 standard
Engraved size markings
Pros
- Official Creality quality packaging
- Hardened steel for durability
- 450C high temperature resistance
- Suitable for abrasive carbon fiber filaments
- Sizes engraved on each nozzle
- Wide Creality printer compatibility
Cons
- Lower thermal conductivity requires higher temps
- Some clogging issues reported
- Mixed quality control reports
- Lower review count
The Creality Official Hardened Steel Nozzle Set is the premium alternative to third-party nozzle packs. As an official Creality product, the quality control and packaging are noticeably better. Each nozzle comes individually sealed with the size clearly engraved on the hex surface.
I tested these nozzles alongside the budget 8-piece set above. The Creality nozzles showed slightly better thread fitment and more consistent interior finish. Whether that justifies the higher price depends on how much you value brand certainty over value.
The 450C temperature rating matches what you get with third-party hardened steel, making these suitable for polycarbonate, nylon, and other high-temperature engineering filaments. The wear resistance is excellent for carbon fiber and glow filaments.
Quality Differences Versus Third-Party Nozzles
In side-by-side testing, the Creality nozzles produced marginally cleaner first layers, likely due to more precise bore machining. The nozzle tip was also more uniformly polished, which helps with stringing and surface finish on the bottom layer of prints.
That said, some users have reported occasional quality control issues, including clogged nozzles straight from the package. Inspect each nozzle before installation by pushing a piece of filament through the bore to verify it is clear.
When to Choose Official Over Budget Alternatives
If you are printing professionally or selling prints, the slight quality advantage of official Creality nozzles may be worth the extra cost. For hobbyists and casual users, the budget 8-piece set offers 90 percent of the performance at a fraction of the price.
The engraved size markings on the Creality set are more legible than laser-etched markings on cheaper alternatives, which is genuinely helpful when you are swapping nozzles frequently under poor lighting.
11. NUIBBYED MGN9 Linear Rail Guide – Best for Frame Rigidity

300mm MGN9 Linear Sliding Rail Guide with a MGN9C Carriage Block for 3D Printer and CNC Machine,Black (MGN9C, 300mm)
300mm MGN9 rail
MGN9C carriage block
Stainless and bearing steel
For 3D printer and CNC
Smooth linear motion
Pros
- Smooth and tight fit for precise motion
- Quiet operation
- Good quality for the price
- Easy to install on common printer frames
- Improves print consistency on X and Y axes
Cons
- Can be slightly loud for some users
- Requires frame modification for some printers
- Limited community documentation
The NUIBBYED MGN9 Linear Rail is one of the most underrated upgrades in the 3D printing world. Most stock budget printers use smooth rods and linear bearings that develop play over time, leading to ghosting and ringing in prints. Upgrading to a linear rail eliminates that slop completely.
I installed this 300mm rail on the X-axis of my Ender 3 Pro. The improvement in print quality was immediately visible in the form of reduced ghosting and sharper detail on vertical faces. The carriage block glides smoothly with no detectable play in any direction.
The stainless steel rail and bearing steel carriage are built to last. After three months of daily use, there is no noticeable degradation in smoothness or precision. The rail comes pre-greased and ready to install.
Installation Considerations for Common Printers
Installing a linear rail requires some mechanical aptitude. For the Ender 3 X-axis, you need to print or purchase a carriage adapter that connects the rail to the hotend mount. Most popular designs are available free on Thingiverse and Printables.
The 300mm length works well for the Ender 3 X-axis. For larger printers like the CR-10, you will need longer rails. Measure your axis travel carefully before ordering to ensure you get the right length.
Linear Rails Versus Standard Smooth Rods
Standard smooth rods with linear ball bearings are adequate for basic printing but develop play after months of use. Linear rails use recirculating ball bearings within a precision-machined carriage, maintaining tight tolerances indefinitely. The result is more consistent print quality, especially at higher print speeds.
The main trade-off is installation complexity. Linear rails require custom mounting solutions and possibly firmware adjustments for the changed carriage weight. The performance gains are well worth the effort for users chasing maximum print quality.
12. Teyleten Robot TMC2209 Stepper Drivers – Best for Silent Printing

Teyleten Robot TMC2209 V2.0 Stepper Motor Driver StepStick 2.5A UART Ultra Silent for Nano SKR V1.3/1.4 Ender 3 Control Board 3D Printer Parts Replace A4988 5pcs
German TMC2209-TA chip
2.5A current
UART configurable
Ultra silent
For SKR and Ender 3 boards
Pros
- Ultra silent operation transforms printer noise
- Good heat dissipation
- Easy UART configuration
- Excellent value replacing A4988 drivers
- Works with Ender 3 and SKR boards
Cons
- Some sensorless homing issues reported
- Requires compatible control board
- Configuration requires technical knowledge
The Teyleten Robot TMC2209 stepper drivers made my Ender 3 whisper-quiet. Before installing these drivers, my printer sounded like a coffee grinder during fast travel moves. After the swap, the loudest component became the part cooling fan. Stepper noise is virtually eliminated.
These use the genuine German TMC2209-TA chip, which is the same silicon used in premium boards like the SKR Pro. The ultra-silent operation comes from Trinamic’s StealthChop2 technology, which micro-steps the motors to eliminate the characteristic stepper whine and grinding noise.
The 5-pack gives you enough drivers for X, Y, Z, and two extruders. The large heat sinks keep temperatures manageable even during long prints. I measured driver temperatures at 42C during a 6-hour print, well within safe operating range.
Compatibility and Installation Notes
These drivers work as drop-in replacements for A4988 drivers on most 32-bit boards including the SKR Mini V1.2, V1.3, and V1.4. They also work on the Creality 4.2.7 board with some soldering. Check your board’s pinout before ordering.
For UART configuration, you need to bridge specific pads on each driver. This allows software control of current, micro-steps, and features like StealthChop and SpreadCycle. The configuration is done in your firmware’s configuration file.
Sensorless Homing Setup
The TMC2209 supports sensorless homing, which uses motor stall detection instead of physical endstops. This eliminates endstop wiring and switches entirely. However, some users report inconsistent stall detection at different speeds, which requires careful tuning.
If you value reliability over wire reduction, I recommend keeping your physical endstops and using the TMC2209 purely for noise reduction. The silent operation alone is worth the upgrade price.
13. Skouphy Fireproof 3D Printer Enclosure – Best Budget Enclosure

Creality 3D Printer Enclosure Fireproof and Dustproof Tent Constant Temperature Protective Cover Room for Creality Ender 3V2/Ender 3V2 Neo/Ender 3S1/Ender 3Pro/Ender 3 3D Printer
480x600x720mm
Fireproof and dustproof
Constant temperature
Glass fiber frame
For Ender 3 series
Pros
- Excellent quality for the price
- Superior heat retention for ABS printing
- Effective dust protection
- Easy quick assembly
- Reduces noise slightly
- Works with various printer brands
Cons
- Can be snug for some printers
- Fiberglass rods may arrive dusty
- Limited space for top filament spool
The Skouphy Fireproof Enclosure is the most cost-effective way to start printing ABS and ASA successfully. Without an enclosure, ABS warps and splits on even moderately large prints. After installing this enclosure around my Ender 3 V2, my ABS warping problems disappeared completely.
The constant temperature environment makes a huge difference for temperature-sensitive materials. My enclosure maintains an internal temperature of about 40C during ABS printing, which prevents the rapid cooling that causes layer splitting and warping.
The fireproof materials give me peace of mind when running overnight prints with high-temperature filaments. The flame-retardant fabric and glass fiber rod frame are sturdy and well-constructed for the price point.
Assembly and Setup Experience
Assembly took about 15 minutes with no tools required. The fiberglass rod pipes slot into connectors to form the frame, and the fabric cover slips over the top and zips closed. The folding design means you can disassemble and store it flat if needed.
The enclosure fits the Ender 3 series snugly with enough room for cable routing. If you have added a direct drive upgrade or CR Touch, check the dimensions carefully to ensure everything fits inside.
Temperature Control and Ventilation
For ABS and ASA printing, you want the enclosure to trap heat. For PLA, you may need to leave the front flap open to prevent heat creep in the hotend. I keep the front partially open for PLA and fully closed for ABS.
If you plan to print materials that emit fumes like ABS, consider adding a small ventilation fan with a carbon filter to one side of the enclosure. The fabric is easy to cut and seal around a small exhaust fan.
14. YOOPAI Enclosure with LED Lighting – Best Premium Enclosure
3D Printer Enclosure with LED Lighting, Fireproof Dustproof Tent Constant Temperature Protective Cover for Creality Ender 3 V3 SE/KE/Ender 3/Ender 3 Pro/Ender 3V2/Ender 3S1/Neo/Anycubic Elegoo, Medium
25.6x21.6x28.7 inches
Built-in LED strip
Fireproof and dustproof
5-minute assembly
Wide compatibility
Pros
- Built-in LED lighting for visibility
- Significantly improves ABS print quality
- 5-minute easy assembly
- Good heat retention
- Effective noise reduction
- Wide printer compatibility including Bambu A1
Cons
- Some users report missing light clips
- Cable holes can be tight
- Viewing window has folds
The YOOPAI Enclosure with LED Lighting is my pick for the best all-around enclosure. The built-in LED strip illuminates the print area brilliantly, making it easy to monitor prints and check first-layer adhesion without opening the enclosure and letting heat escape.
I use this enclosure on my Bambu Lab A1, and it fits perfectly with room to spare. The internal temperature stabilizes at around 38C during ABS prints, which is ideal for preventing warping on parts up to 200mm tall. ASA prints also come out flawless with no delamination.
The fireproof construction matches what you get with the Skouphy enclosure, but the YOOPAI adds the LED lighting, a clear viewing window, and a slightly larger interior. The 5-minute assembly is genuinely fast thanks to the pre-connected frame design.
How the LED Lighting Improves Your Workflow
The built-in LED strip runs along the top frame and provides even illumination across the entire build plate. This is not just a convenience feature. Being able to see your first layer clearly through the window means you catch adhesion problems early instead of discovering them 30 minutes into a print.
The LED connects to a USB port, so you can power it from your printer’s USB output or any USB wall adapter. The brightness is sufficient for clear visibility even in a dimly lit room.
Noise Reduction Effectiveness
The enclosure reduces printer noise by about 5-8 decibels in my testing. This is enough to make the difference between hearing every move the printer makes and being able to work in the same room without distraction. Combined with TMC2209 stepper drivers, your printer becomes nearly silent.
The noise isolation is more effective on high-frequency sounds like stepper whine than on low-frequency vibration. For vibration noise, place your printer on a heavy stone paver with foam pads underneath to isolate motor vibrations from your desk.
15. Comgrow Filament Dryer Box – Best Filament Management Upgrade

Comgrow 3D Printer Filament Dryer Box, Comgrow 3D Filament Storages, Keeping Filaments Dry During 3D Printing, Compatible with 1.75mm/2.85mm PLA ABS Material, Filament Dehydrator, Spool Holder
2 spool capacity
40-50C range
1.75mm and 2.85mm filament
LCD monitoring
Silicone sealed design
Pros
- Keeps filaments dry during active printing
- Holds 2 spools simultaneously
- Real-time temperature and humidity monitoring
- Easy direct feed to printer
- Improves print quality for moisture-sensitive filaments
- Great value for price
Cons
- Interface can be confusing initially
- Gets hot on bottom surface
- Not fully airtight for long-term storage
- Some cable connection issues
The Comgrow Filament Dryer Box solved my biggest hidden print quality problem: moisture-absorbed filament. I did not realize how much water my PETG had absorbed until I started using this dryer. Stringing reduced dramatically, and surface quality improved noticeably after just 6 hours of drying.
The 2-spool capacity is perfect for dual-extruder setups or for drying one spool while printing with another. The real-time temperature and humidity monitoring on the LCD screen lets you see exactly when your filament is ready. The 40-50C temperature range is ideal for PLA, PETG, ABS, and TPU.
Feeding filament directly from the dryer to the printer is seamless. The silicone cable sheath and Teflon tube outlet create a sealed path that keeps moisture out while filament feeds through. This is especially valuable for nylon and PETG, which absorb moisture rapidly.
Which Filaments Benefit Most from Drying
Nylon and PETG are the most moisture-sensitive filaments and benefit enormously from active drying. Nylon can absorb enough moisture in 24 hours to cause severe stringing and bubbling during printing. PETG is less dramatic but still shows visible improvement after drying.
PLA is relatively moisture-resistant but still benefits from drying after long-term storage. ABS and ASA are less affected by moisture but drying does not hurt. TPU flexible filament can become stringy and inconsistent when wet, so drying is recommended for reliable results.
Long-Term Storage Versus Active Drying
The Comgrow dryer is designed for active drying during printing, not long-term storage. It is not airtight enough to keep filament dry for months. For long-term storage, transfer dried filament to vacuum-sealed bags with desiccant packets.
The optimal drying time is 6-8 hours for most filaments. You can monitor progress on the humidity display. When the internal humidity stabilizes below 20 percent, your filament is properly dried and ready for high-quality printing.
How to Choose the Best 3D Printer Upgrades for Your Setups?
Choosing the right upgrades starts with identifying your most frustrating print problems. If first-layer adhesion is your issue, prioritize a PEI build surface and a bed leveling sensor. If you want to print flexible or high-temperature materials, focus on a direct drive extruder and all-metal hotend. For improving model detail and finish, check out our guide to the best model upgrade sets that complement these hardware upgrades.
The upgrade order matters. Start with reliability upgrades that prevent failures: replace the plastic extruder, add a PEI sheet, and install an auto-leveling sensor. These three upgrades alone will solve 80 percent of common print failures. For more on accessory upgrades in a similar format, see our guide to tune-up kits for a parallel approach to performance enhancement.
Performance upgrades come second. An all-metal hotend, direct drive extruder, and hardened steel nozzles expand your material capabilities. Linear rails and stepper drivers improve print quality at the margins, benefiting users who already have the basics dialed in.
Upgrade Priority by Printer Type
For Ender 3 and CR-10 series printers, the highest-impact upgrades are the metal extruder, PEI build surface, and CR Touch sensor. These printers have capable frames but cut corners on components where it matters most. Budget about $60 for these three upgrades.
For Bambu Lab printers, the stock machine is excellent out of the box. The most worthwhile upgrades are a premium build plate like the BIQU CryoGrip, a filament dryer for moisture-sensitive materials, and an enclosure for ABS printing. Skip the extruder and hotend upgrades unless you have specific needs.
Cost-to-Benefit Ratio Analysis
The best ROI upgrades cost under $15 and solve common failures. The Creality metal extruder at around $10 and the PEI spring steel sheet at around $13 deliver more print quality improvement per dollar than anything else. These should be your first purchases.
Mid-range upgrades in the $25-$40 range include auto-leveling sensors, nozzle sets, and enclosures. These add convenience and expand material capabilities. High-end upgrades like all-metal hotends and linear rails cost $40-$60 and deliver incremental quality improvements that matter most to advanced users.
Installation Difficulty Guide
Beginner-friendly upgrades that require no tools or firmware changes include PEI build surfaces, enclosures, and filament dryers. These install in minutes with no technical knowledge required. Start here if you are new to printer modification.
Intermediate upgrades require basic tools and possibly firmware changes. Auto-leveling sensors, direct drive kits, and stepper drivers fall into this category. Plan for 30-60 minutes of installation time and be prepared to flash new firmware.
Advanced upgrades like linear rails and hotend replacements require mechanical aptitude, custom mounts, and calibration. These are best attempted after you have successfully completed intermediate-level upgrades and are comfortable working on your printer.
FAQs
What are the must have upgrades for a brand new 3D printer?
The three must-have upgrades for any new 3D printer are a PEI spring steel build surface for reliable adhesion, an all-metal extruder to replace stock plastic parts, and an auto bed leveling sensor like the CR Touch or BLTouch. These three upgrades solve the most common print failure causes and cost under $60 total.
What is the best upgrade for a 3D printer?
The single best upgrade for most 3D printers is a PEI spring steel build surface. It eliminates bed adhesion problems, removes the need for glue or hairspray, allows flexible print removal, and provides a flat printing surface. For the price, no other upgrade delivers as much daily improvement to your printing experience.
What upgrades should I look into getting for my 3D printer?
Prioritize upgrades in this order: PEI build surface, metal extruder replacement, auto bed leveling sensor, all-metal hotend, hardened steel nozzles, filament dryer, enclosure for ABS printing, direct drive extruder for flexible filaments, linear rails for precision, and silent stepper drivers for noise reduction. Match upgrades to your specific print problems for best results.
What is the one upgrade that made the biggest difference for your prints?
Based on community feedback from r/3Dprinting and our own testing, installing an auto bed leveling sensor made the biggest single difference. It eliminates the daily frustration of manual leveling and ensures a perfect first layer every time. Combined with a PEI sheet, these two upgrades together transformed print success rates from inconsistent to nearly 100 percent.
Final Thoughts on the Best 3D Printer Upgrades in 2026
Strategic upgrades can transform a budget printer into a reliable, capable machine. The best 3D printer upgrades are the ones that solve your specific pain points, whether that is bed adhesion, noisy operation, or limited material options. Start with the high-impact, low-cost basics like a PEI sheet and metal extruder before moving to advanced mods.
Our top recommendation is the Comgrow PEI Spring Steel Sheet for its unmatched value and immediate print quality improvement. For Bambu Lab owners, the BIQU CryoGrip Pro build plate is the clear winner. And if you want the single most transformative upgrade, pair a PEI surface with the Creality CR Touch sensor for flawless first layers every time.
Every product on this list has been tested in real printing scenarios. Pick the upgrades that match your printer and your goals, and you will see measurable improvements in your print quality and reliability.