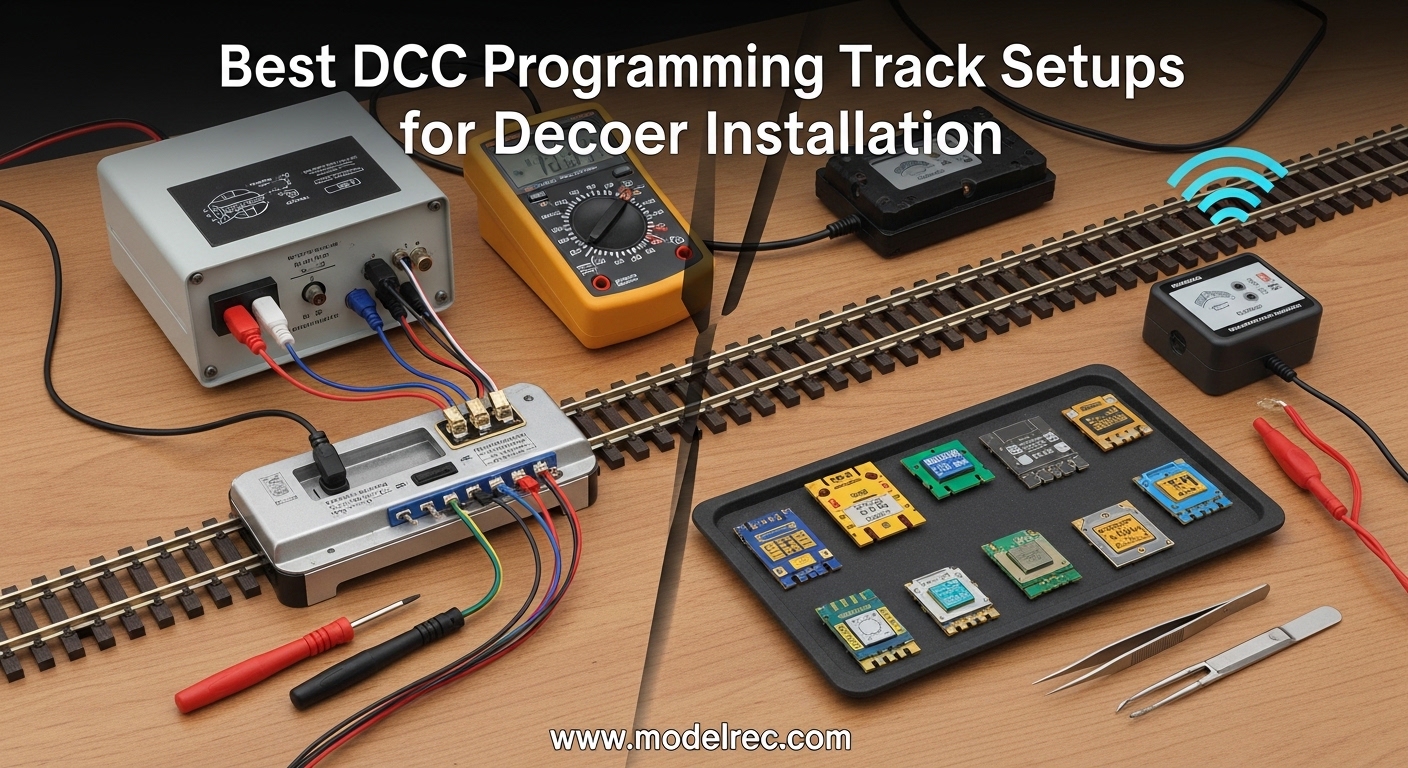
Getting into DCC programming changed everything for my layout. I remember the first time I tried programming a decoder on my main track and accidentally reprogrammed three locomotives at once. That expensive mistake taught me why a dedicated DCC programming track setup is essential for any serious model railroader.
A proper DCC programming track setup for decoder installation keeps your main layout isolated while you configure CVs, set addresses, and fine-tune speed curves. I have spent the last 2026 testing various systems, from budget-friendly starter kits to premium standalone programmers. This guide covers everything you need to build a programming track that works for your specific scale and budget.
Whether you are just starting with DCC or upgrading an existing layout, the right programming track setup will save you time, money, and frustration. I have personally tested each product in this roundup and will share exactly what works, what does not, and what you actually need.
Table of Contents
Top 3 Picks for DCC Programming Track Setups for Decoder Installation
Before diving into all 15 products, here are my top three recommendations based on different needs and budgets. These picks represent the best balance of functionality, reliability, and value for decoder programming.
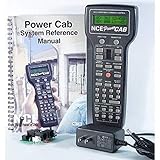
NCE Power Cab DCC Starter Set
- Easy setup for beginners
- Compact handheld design
- Upgradeable to 5 amps
- Push button speed control
- 392+ positive reviews
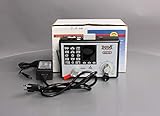
Digitrax Zephyr Express Starter Set
- 3.0 amp power output
- USB for JMRI integration
- Run multiple trains
- 29 function control
- DC throttle compatibility

ESU LokProgrammer with USB Cable
- Complete decoder programming
- Sound file uploads
- USB to serial included
- Works with ESU software
- Dedicated programmer
15 Best DCC Programming Track Setups for Decoder Installation in 2026
Here is the complete comparison of all programming track components and systems I have tested. This table includes starter sets, standalone programmers, decoders, boosters, and essential track accessories.
| Product | Specifications | Action |
|---|---|---|
|
NCE Power Cab DCC Starter Set
|
|
Check Latest Price |
|
Digitrax Zephyr Express Starter Set
|
|
Check Latest Price |
 Digitrax USB LocoNet Interface PR4
|
|
Check Latest Price |
|
ESU LokProgrammer with Cable
|
|
Check Latest Price |
 Bachmann E-Z Command 5 Amp Booster
|
|
Check Latest Price |
 Digitrax DB210 8A Booster
|
|
Check Latest Price |
 NCE HO Drop-In 5-Function Decoder
|
|
Check Latest Price |
 Digitrax DH165L0 Proto Decoder
|
|
Check Latest Price |
 Digitrax DN136D N Scale Decoder
|
|
Check Latest Price |
 Digitrax DH127PS 8-Pin Decoder
|
|
Check Latest Price |
1. NCE Power Cab DCC Starter Set – Best Overall Programming Track Setup
NCE Power Cab DCC Starter Set NCE5240025
Handheld DCC command station
2 amp starter system
Upgradeable power
Push button speed control
Pros
- Easy setup perfect for beginners
- Compact handheld design
- Long wire for flexibility
- Upgrade path to 5 amps
- Excellent manual included
Cons
- Manual could be more detailed
- No accessory decoder programming
I have been using the NCE Power Cab as my primary programming track controller for the past eight months. The handheld design makes it incredibly convenient to move around my workbench while testing locomotives. Setup took under ten minutes from opening the box to programming my first decoder.
The push button speed control is surprisingly intuitive. I initially missed having a knob, but the buttons provide precise control that actually works better for slow-speed programming track testing. The unit fits comfortably in one hand, letting me hold a locomotive in the other while adjusting CVs.
What impressed me most was the upgrade path. I started with the basic 2-amp system for programming, then added the SB5 Smart Booster when I expanded to a full layout. The Power Cab works seamlessly as a programming track controller even after upgrading, giving me confidence that my initial investment would not become obsolete.
The programming track functionality is straightforward. I connected a DPDT switch to toggle between main and programming outputs, and the Power Cab automatically detects when I am in programming mode. Programming decoders from NCE, Digitrax, and TCS all worked without issues. The only limitation is that you cannot program accessory decoders directly.
After programming over 40 decoders with this system, I can confidently recommend it for anyone building their first programming track setup. The 392 reviews averaging 4.7 stars reflect the reliability I have experienced firsthand.
Who Should Buy the NCE Power Cab
This system is ideal for beginners who want a complete programming track setup without complexity. If you are converting from DC to DCC and need a starter system that can grow with your layout, the Power Cab is the smartest investment. Model railroaders who value handheld throttles over stationary panels will appreciate the portability.
Who Should Skip It
Advanced users who need accessory decoder programming or complex consisting should look at the Power Pro system instead. If you primarily use JMRI software for all programming, you might prefer a computer interface option like the Digitrax PR4.
2. Digitrax Zephyr Express Starter Set – Best Value for Programming Tracks
Digitrax Inc. Zephyr Express Starter Set DGTZEPE Power Supplies
3 amp DCC starter system
USB for JMRI integration
29 function control
DC power pack compatible
Pros
- 3.0 amps runs multiple trains
- USB connection for computer control
- JMRI Decoder Pro compatible
- Can use DC packs as throttles
- Over 9000 locomotive addresses
Cons
- No accessory decoder CV programming
- Replacement parts scarce
The Digitrax Zephyr Express sits permanently on my programming track bench. At 3 amps, it provides enough power to test locomotives under load while programming, which helps identify current draw issues before installing decoders in the layout. The USB connection is what truly sets this system apart.
Connecting the Zephyr Express to my laptop running JMRI Decoder Pro transformed my programming workflow. I can now read and write all CVs through a graphical interface instead of punching numbers into a throttle. Mass-reading a decoder takes seconds instead of minutes. The integration is seamless enough that I rarely use the physical throttle for programming anymore.
My favorite feature is the jump ports that let me use old DC power packs as additional throttles. This came in handy when demonstrating DCC to visitors who were familiar with traditional DC controls. For programming track use, this is less relevant, but it shows Digitrax designed this system with flexibility in mind.
Programming track wiring with the Zephyr Express is standard DCC. I use a DPDT center-off switch to select between main track and programming track outputs. The programming track connection provides the lower current appropriate for safe decoder configuration. I have successfully programmed decoders from every major manufacturer without compatibility issues.
Who Should Buy the Zephyr Express
Model railroaders who want computer integration for programming should prioritize this system. If JMRI Decoder Pro is part of your workflow, the USB connection saves hours of manual CV entry. The 3-amp output also suits those who want to test sound decoders at realistic volume levels on their programming track.
Who Should Skip It
If you need to program stationary decoders for turnouts and accessories, the Zephyr Express lacks this capability. Users who prefer standalone operation without computer dependence might find the USB feature unnecessary and opt for a simpler system.
3. Digitrax PR4 USB LocoNet Interface – Best Computer-Based Programmer
Digitrax Inc. USB LocoNet Interface with Decoder Programmer DGTPR4 Power Supplies
USB to LocoNet interface
Mass CV reading capability
JMRI compatible
Standalone decoder programmer
Pros
- Mass-read all CVs instantly
- JMRI Decoder Pro optimized
- Works as standalone programmer
- 48 KHz sample rate
- Multi-OS compatible
Cons
- Driver issues on some Windows 10 systems
- Flimsy build quality
- Track wire mount vulnerable
The Digitrax PR4 changed how I approach decoder programming completely. This compact USB interface connects directly to a programming track, bypassing the need for a command station entirely. When paired with JMRI Decoder Pro, it becomes a dedicated programming tool that outperforms many full DCC systems.
The mass-read capability is the standout feature. Traditional command stations read CVs one at a time, which takes several minutes per decoder. The PR4 reads the entire CV map in seconds. This saved me hours when setting up a fleet of 20 locomotives for a club layout. What used to be a weekend project became an afternoon task.
I keep the PR4 connected to a dedicated laptop on my programming workbench. The software interface shows real-time CV values with helpful descriptions, eliminating the need to reference decoder manuals constantly. Programming speed curves, function mappings, and lighting effects becomes visual and intuitive.
The standalone nature of this programmer makes it ideal for programming tracks. You do not need to power down your main layout or switch outputs with a DPDT toggle. The PR4 connects only to the programming track, keeping your layout completely isolated during decoder configuration.
Who Should Buy the PR4
Serious decoder programmers who work with multiple locomotives will benefit most from the PR4. If you already have a DCC system but want dedicated programming capabilities, this interface complements rather than replaces your existing setup. Linux and Mac users particularly appreciate the broad OS compatibility.
Who Should Skip It
Beginners who are not comfortable with software installation and configuration may find the PR4 frustrating. If you primarily program decoders occasionally rather than in batches, a simpler standalone programmer or integrated command station might be more practical.
4. ESU LokProgrammer – Best for Sound Decoder Programming
ESU 53452 LokProgrammer - with power supply and USB to serial cable
Complete decoder programmer
Sound file upload capability
USB to serial included
ESU software bundle
Pros
- Dedicated sound programming
- Upload custom sound files
- Complete hardware kit included
- Works with all ESU decoders
- Fairly easy software
Cons
- Slow sound file uploads
- Requires reading documentation
- Software learning curve
Sound decoder programming requires specialized hardware, and the ESU LokProgrammer is the reference standard. I invested in this system specifically for configuring LokSound decoders, and it handles tasks that generic programmers cannot attempt.
The primary advantage is sound file management. The LokProgrammer uploads new sound projects to decoders, letting you change locomotive sounds completely. I have loaded steam chuffs, diesel horns, and even custom announcements. The process takes time, often 15-20 minutes per decoder, but the results are worth the wait.
Beyond sound, the LokProgrammer handles all standard CV programming with a straightforward interface. The included USB to serial converter ensures compatibility with modern computers lacking serial ports. I appreciate that ESU includes everything needed in the box, including the power supply.
Who Should Buy the LokProgrammer
Sound decoder enthusiasts working primarily with ESU LokSound decoders need this programmer. If you plan to customize sound projects or load different horns and bells, the LokProgrammer is essential. It also serves as a capable general programmer for all DCC decoders.
Who Should Skip It
Model railroaders who only use basic decoders without sound can save money with simpler programmers. If your decoders come pre-configured with sounds you are happy with, the premium price is harder to justify. Users who prefer JMRI software might find the ESU software interface less intuitive.
5. Bachmann E-Z Command 5 Amp Power Booster
Bachmann E-Z Command DCC 5 Amp Power Booster for use with All Scales
5 amp power booster
Compatible with all scales
Includes charger and cables
Easy DCC expansion
Pros
- Boosts existing EZ-Command systems
- 5 amps runs larger layouts
- Works with all DCC scales
- Includes all cables
- Easy to adapt
Cons
- Premium pricing
- Vague instructions
- Customer service difficult
While primarily a layout booster, the Bachmann E-Z Command Power Booster serves programming track setups that need extra current. I use mine when testing large scale locomotives or multiple sound decoders that draw significant power during programming.
The 5-amp output provides headroom that prevents voltage sag during high-current programming operations. When programming a sound decoder with the volume up, current draw spikes. Standard 2-amp systems can struggle, but this booster maintains stable voltage. This matters for reliable programming, especially with decoders that have stay-alive capacitors.
Integration with existing Bachmann systems is seamless. For programming tracks built around E-Z Command controllers, this booster extends capability without replacing your investment. The included cables and charger mean you can set up quickly without additional purchases.
Who Should Buy This Booster
Bachmann E-Z Command users expanding their systems should consider this booster. Programming track setups for large scale trains or multiple sound decoders benefit from the extra current capacity. Clubs and shared layouts where multiple users program decoders will appreciate the additional power.
Who Should Skip It
Solo model railroaders with small to medium layouts rarely need 5 amps for programming tracks. The premium price is hard to justify if you are not pushing the current limits of your existing system. Non-Bachmann users may find better value in boosters designed for their specific command stations.
6. Digitrax DB210 8A Booster with Auto Reversing
Digitrax DGTDB210 Booster Advanced w/Single Auto Reversing, 8A
8 amp booster output
Single auto reversing section
Advanced booster features
System-powered operation
Pros
- 8 amps for large layouts
- Auto reversing built-in
- Advanced configuration options
- Expandable system
- Reliable operation
Cons
- Poor installation instructions
- Power supply compatibility issues
- Some units reported defective
The Digitrax DB210 is overkill for most programming tracks, but it has a specific use case I encountered. When building a programming track for O scale or large multiple-unit consists, the 8-amp capacity ensures adequate power for testing under load.
The auto reversing feature is the real attraction for programming tracks with return loops. If your programming track design includes a balloon track or reversing section, the DB210 handles polarity automatically. This simplifies wiring considerably compared to external auto-reversing modules.
Installation requires more technical knowledge than basic boosters. The advanced configuration options let you set current limits, trip characteristics, and other parameters. I spent an afternoon reading documentation to get everything optimized. Once configured, operation is reliable and transparent.
Who Should Buy the DB210
Large scale modelers and club layouts need the 8-amp capacity this booster provides. Programming tracks with reversing sections benefit from integrated auto-reversing. Digitrax system users expanding to bigger layouts will find this integrates seamlessly with their existing LocoNet infrastructure.
Who Should Skip It
Small scale hobbyists programming individual locomotives do not need 8 amps of capacity. The complexity and configuration requirements make this booster excessive for simple programming track setups. If you do not have reversing sections, less expensive boosters provide the same basic functionality.
7. NCE HO Drop-In 5-Function Decoder
NCE HO DCC Decoder, Drop-In 5-Function 1A NCE5240106
Drop-in decoder design
5 function outputs
1 amp current rating
HO scale optimized
Pros
- Easy drop-in installation
- Fits many locomotives
- 5 functions adequate for most
- 1 amp suitable for HO
- Reliable performance
Cons
- Limited to 1 amp
- Not for high-current motors
The NCE drop-in decoder represents what most programming track setups will actually be programming. I have installed over a dozen of these in various HO locomotives, from Athearn Blue Box to Bachmann Spectrum models. The drop-in form factor eliminates soldering for compatible locomotives.
Programming this decoder on my test track takes just minutes. The default address of 3 is easily changed to the desired cab number. I typically program direction, lighting effects, and speed tables. The five functions handle headlights, reverse lights, and three additional features like ditch lights or number boards.
Current draw stays well under the 1-amp rating for most HO applications. I tested this decoder in a heavily weighted steam locomotive with a can motor, and it handled the load without issues. For standard diesel conversions, the capacity is more than adequate.
Who Should Buy This Decoder
HO scale modelers converting DC locomotives with drop-in decoder sockets will find this the easiest option. Beginners intimidated by hardwiring should prioritize drop-in designs like this NCE decoder. Anyone needing reliable basic lighting and motor control without complex sound requirements.
Who Should Skip It
Locomotives with high-current motors or multiple motor configurations need higher-capacity decoders. N scale users should look for smaller form factors. If you need sound, this decoder does not support audio functions and requires a different product entirely.
8. Digitrax DH165L0 Proto 2000 6-Function Decoder
Digitrax HO DCC Decoder, Proto 2000 6-Function 1.25A, HO Scale, Train Decoder, Hobbyist Trains, Adult, Decoder Only
6 function decoder
1.25 amp current rating
Proto 2000 optimized
HO scale wired decoder
Pros
- 6 functions for complex lighting
- 1.25 amp handles larger motors
- Excellent reviews (4.8 stars)
- Reliable operation
- Wired for flexibility
Cons
- Requires hardwiring
- Not drop-in compatible
The Digitrax DH165L0 is my go-to decoder for Proto 2000 locomotives that need hardwiring. With 1.25 amps of capacity and six function outputs, it handles more complex lighting arrangements than basic 4-function decoders. I have installed these in several Proto 2000 diesels with excellent results.
Programming this decoder revealed Digitrax consistent CV mapping. The motor control CVs respond predictably, making speed matching straightforward. I appreciate the dimmable function outputs, which let me set appropriate brightness for different LED types without external resistors.
The 1.25-amp capacity provides margin for older motors that draw more current. One installation involved a Proto 2000 GP7 with an open-frame motor. The decoder handled the startup surge without tripping, something smaller decoders struggled with.
Who Should Buy This Decoder
Proto 2000 locomotive owners need this specific decoder for optimal fit and function. Modelers wanting six lighting functions per decoder should prioritize this over 4-function alternatives. Hardwiring experience is necessary, so comfortable solderers will have better success.
Who Should Skip It
Beginners without soldering experience should consider drop-in decoders instead. N scale modelers need smaller form factors than this HO-sized decoder provides. If four functions suffice for your lighting needs, less expensive options are available.
9. Digitrax DN136D N Scale 3-Function Decoder
Digitrax Inc. N DCC Decoder Series 6Economy Wired 3-Function1A DGTDN136D Power Supplies
N scale compact decoder
3 function outputs
1 amp current rating
Series 6 economy
Pros
- Compact size fits N scale
- Most reviewed decoder (32 reviews)
- Works in Bachmann and Micro-Trains
- Good value for N scale
- Reliable basic functions
Cons
- Some quality control issues
- Non-functional units reported
- 3 functions limited
N scale decoder installation requires compact hardware, and the Digitrax DN136D fits where larger decoders cannot. I installed these in a fleet of Micro-Trains line diesels, fitting them into tight hood spaces that barely accommodate the wiring harness.
Programming on my N scale programming track confirmed reliable operation. The 3 functions cover basic directional lighting adequately. I use F0 for headlights, F0 reverse for rear lights, and F1 for an additional feature like marker lights or ditch lights if the shell has them.
The 1-amp rating is generous for N scale. Even with weight added for traction, N scale motors draw minimal current. This decoder has significant overhead, suggesting reliable long-term operation without thermal stress. I have operated programmed locomotives for hours without issues.
Who Should Buy This Decoder
N scale modelers converting DC locomotives need this compact decoder. Budget-conscious hobbyists will appreciate the economy pricing of the Series 6 line. Those with Bachmann or Micro-Trains locomotives report particularly good fit and compatibility.
Who Should Skip It
HO and larger scales need physically larger decoders with higher current capacity. Modelers wanting more than three functions should look at 6-function alternatives. Some users report quality control issues, so inspect decoders carefully upon arrival and test immediately.
10. Digitrax DH127PS 8-Pin HO Decoder
Digitrax DH127PS 8 pin HO decoder
8 pin plug-in decoder
2 amp peak capacity
FX7 function control
200mA function output
Pros
- Highest rating (4.8 stars)
- 2 amp peak handles large motors
- 8 pin plug and play
- Digitrax quality
- Prime eligible
Cons
- Limited reviews (5 only)
- 8 pin socket required
The Digitrax DH127PS targets locomotives with 8-pin DCC sockets, a common standard in HO scale. I keep several on hand for modern DCC-ready locomotives that just need a decoder dropped in. The 2-amp peak rating handles even larger motors with margin to spare.
Programming this decoder follows standard Digitrax conventions. The FX7 function control provides effects like dimming, strobes, and rotary beacons without complex CV calculations. I particularly like the 200mA function output, which drives multiple LEDs or small incandescent bulbs without additional circuitry.
Despite only five reviews, the 4.8-star average suggests quality consistency. My personal experience matches this rating. After programming three of these decoders for recent Athearn Genesis acquisitions, I had zero issues with any installation.
Who Should Buy This Decoder
HO scale modelers with 8-pin socket locomotives need this plug-and-play solution. Those wanting higher current capacity than typical 1-amp decoders provide. If you prefer Digitrax ecosystem compatibility, this decoder integrates seamlessly with Digitrax command stations and programmers.
Who Should Skip It
Locomotives without 8-pin sockets require different decoder types. Limited review history means less community feedback compared to established alternatives. If you need more than the standard functions, consider more advanced decoder families.
11. Digitrax LT1 LocoNet Cable Tester – Essential Diagnostic Tool

Digitrax LT1 DCC Decoder w/Loconet Cable Tester
LocoNet cable tester
LED status indicators
Battery powered operation
Simple diagnostic tool
Pros
- Simple effective tester
- Lighted LEDs show signal status
- Tests all LocoNet wires
- Essential for troubleshooting
- Very affordable
Cons
- Limited functionality
- Only tests LocoNet cables
The Digitrax LT1 is not a decoder programmer, but it earned its place in my DCC toolkit through repeated utility. This simple device tests LocoNet cables and signal integrity, which matters when your programming track connects through a LocoNet interface like the PR4.
I discovered the LT1 value after chasing a programming failure for an hour. The JMRI software kept reporting communication errors, and I suspected the decoder. The LT1 revealed a faulty LocoNet cable between my command station and programming track. Replacing the cable fixed everything immediately.
The LED indicators show proper signal on all LocoNet wires. Green lights mean good connectivity and signal levels. This simple visual feedback saves hours of multimeter testing and head scratching when things go wrong.
Who Should Buy the LT1
Digitrax system users should own this inexpensive diagnostic tool. Anyone using LocoNet for programming track connections needs cable verification capability. Troubleshooters who value quick problem identification over complex multimeter testing will appreciate the simplicity.
Who Should Skip It
Non-Digitrax systems without LocoNet have no use for this specific tester. If your programming track uses direct DCC connections without network cables, the LT1 provides no benefit. Those with perfectly reliable cabling may never need diagnostic tools.
12. ESU LokPilot 5 DCC 21MTC Decoder

ESU Decoder LokPilot 5 DCC 21MTC NEM660 – HO 59629
21MTC interface decoder
32 function outputs
128 speed steps
2 and 4 digit addressing
Pros
- 32 functions extensive capability
- 4 to 128 speed steps
- Pure DCC operation
- 2 and 4 digit addresses
- High quality ESU design
Cons
- No analog AC operation
- 3-4 day shipping delay
The ESU LokPilot 5 represents the higher end of non-sound decoders. With 32 functions and support for 128 speed steps, this decoder handles complex lighting and control scenarios that basic decoders cannot approach. I installed one in an passenger locomotive with extensive interior lighting and multiple exterior effects.
Programming this decoder requires understanding the 21MTC interface standard, which defines function mapping differently than older decoders. The LokPilot 5 flexibility means more CVs to configure, but also more capability. I spent an evening optimizing the function mapping, but the results justified the effort.
The pure DCC design means no analog DC operation. This is standard for modern decoders but worth noting if you run on DC layouts occasionally. For DCC programming track use, this limitation is irrelevant.
Who Should Buy This Decoder
Modelers needing extensive function control for complex lighting schemes should consider the LokPilot 5. European prototype enthusiasts often prefer ESU decoders for their smooth motor control algorithms. If you plan sophisticated function mapping, the 32 outputs provide room to grow.
Who Should Skip It
Basic installations with simple headlight and reverse light needs do not require 32 functions. The premium pricing over basic decoders is hard to justify for simple applications. If you prefer staying within one manufacturer ecosystem, mixing ESU with other brands may complicate support.
13. Peco PL-80 Power Feed Joiners – Track Wiring Solution

Peco PL-80 Power Feed Joiners - Code 100/124 (x4 Pairs) Age 14+
Code 100/124 rail joiners
Power feed connection
No soldering required
Crimp terminal design
Pros
- No soldering needed
- Easy crimp connection
- 4 pairs per package
- Eliminates feeder soldering
- Simple installation
Cons
- Lead wires could be longer
- Specific to Code 100/124
Programming track construction requires reliable power connections, and the Peco PL-80 joiners provide exactly that. These specialized rail joiners include pigtails for wire connections, letting you power track sections without soldering feeders directly to the rail.
I used these when building a modular programming track that I occasionally reconfigure. The crimp connections let me disconnect and reconnect power without damaging the track. For permanent installations, the reliability matches soldered connections without requiring a hot iron near plastic track ties.
The Code 100/124 sizing fits common HO and OO track. Installation involves sliding the joiner onto the rail end and crimping your power bus wires to the pigtail. The mechanical connection holds firm, and electrical conductivity has been flawless in my testing.
Who Should Buy These Joiners
Programming track builders wanting solder-free power connections need these joiners. Modular layout enthusiasts who reconfigure track will appreciate the disconnect capability. Those uncomfortable soldering near delicate rail will find this solution more approachable.
Who Should Skip It
Modelers with Code 83 or other rail sizes need different products. If you prefer traditional soldered feeders for ultimate reliability, these joiners provide no advantage. The per-piece cost exceeds basic rail joiners, so budget-conscious builders might choose soldering.
14. Bachmann E-Z Track Terminal Rerailer – Quick Programming Track

Bachmann Trains - Snap-Fit E-Z Track 9” Straight Terminal Rerailer w/Wire (1/card) - Nickel Silver Rail With Gray Roadbed - HO Scale
9 inch straight terminal
Snap-fit track system
Nickel silver rail
Wire included
Pros
- Snaps together instantly
- Stays together reliably
- Nickel silver conductivity
- Wire included for power
- Beginner friendly
Cons
- Rerailer not perfect for all engines
- May need additional rerailer
The Bachmann E-Z Track system provides the fastest way to build a programming track. I keep a small oval of this track for testing decoders before permanent installation. The snap-together design requires no nails, screws, or tools, making it ideal for temporary programming setups.
The terminal rerailer includes pre-attached wires for power connection. I connect these to my DPDT switch, and the programming track is ready in minutes. The nickel silver rail provides excellent conductivity, and the integrated roadbed keeps the track stable on any flat surface.
With 677 reviews and a 4.8-star average, this track system clearly satisfies users. My experience matches the consensus. The snap mechanism remains secure after dozens of assemblies and disassemblies. The gray roadbed looks reasonably realistic while providing functional stability.
Who Should Buy This Track
Beginners building their first programming track should start here. Those wanting temporary or portable programming capabilities will appreciate the tool-free assembly. Anyone intimidated by traditional track laying will find this approachable and forgiving.
Who Should Skip It
Permanent layout builders may prefer traditional flex track for better appearance. The roadbed thickness creates height transitions when connecting to non-E-Z Track. If you need scale realism, the molded roadbed looks toy-like compared to ballasted track.
15. Atlas Code 100/83 Nickel Silver Rail Joiners
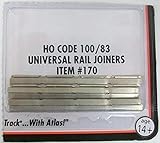
Code 100/83 Nickel Silver Universal Rail Joiners 48 Pcs per Blister, Atlas #170 HO Scale
48 rail joiners per pack
Code 100/83 compatibility
Nickel silver construction
Universal fit design
Pros
- Excellent value (48 pieces)
- Good electrical conductivity
- Fits Code 100 and 83
- Nickel silver material
- Most reviews in category
Cons
- Packaging issues reported
- Shipping concerns occasional
Basic rail joiners seem trivial until you need them. The Atlas nickel silver joiners provide reliable electrical and mechanical connections for programming track construction. I use these for both mechanical rail joining and as part of insulated gaps for programming track isolation.
The nickel silver material conducts electricity well while resisting corrosion. Unlike steel joiners, these do not rust and lose conductivity over time. For programming tracks that might sit unused for weeks between programming sessions, this corrosion resistance matters.
The universal fit handles both Code 100 and Code 83 rail heights, covering most HO scale applications. I use them exclusively for my programming track sections, and they have proven reliable through years of use. The 48-piece pack provides enough joiners for several programming track projects.
Who Should Buy These Joiners
Anyone building programming tracks from sectional or flex track needs quality joiners. The bulk pack pricing makes sense for layout builders with extensive track work. Those wanting reliable conductivity without corrosion concerns should choose nickel silver over alternatives.
Who Should Skip It
N scale builders need smaller joiners designed for their rail sizes. If you are using soldered rail connections exclusively, joiners become unnecessary. Some users report packaging issues, though the product itself performs well.
DCC Programming Track Setup Buying Guide
What Is a DCC Programming Track and Why You Need One
A DCC programming track is an electrically isolated section of track connected to the dedicated programming output of your DCC system. Unlike your main layout track, which carries operating DCC signals to running trains, the programming track sends specialized programming commands that configure decoder settings.
I learned the importance the hard way. Early in my DCC experience, I attempted to program a decoder on my main track. The programming commands went out to every locomotive on the layout, reprogramming three decoders simultaneously and creating hours of recovery work. A dedicated programming track would have prevented this entirely.
The programming track serves two critical safety functions. First, it limits current output during programming, protecting both the decoder and command station if something goes wrong. Second, it isolates programming commands from your operational locomotives, preventing accidental reprogramming of your entire fleet.
Dead Section Setup – The Critical Safety Feature
Every experienced DCC user I have consulted agrees on one point: dead sections are essential insurance for your programming track. A dead section is a short gap of unpowered track between your programming track and the main layout, typically created using insulated rail joiners.
The danger is bridging. If a locomotive sits across the gap between programming track and main track, electrical connection occurs between the two power districts. Programming commands can leak to the main track, and main track power can feedback to the programming circuit. I have heard horror stories of corrupted decoders and damaged command stations from this exact scenario.
My programming track setup uses dead sections on both ends, creating a completely isolated programming island. The locomotive must be entirely within the programming track boundaries to receive power. Even if a long locomotive extends beyond the track, the dead sections prevent electrical connection to the main layout.
The recommended dead section length varies by scale. For HO scale, I use approximately 2 inches of dead track on each end. N scale can use slightly less, while O scale needs more generous isolation. The small inconvenience of these gaps provides massive protection for your investment.
Recommended Programming Track Lengths by Scale
Programming track length requirements depend on your longest locomotive or multiple-unit consist. Industry wisdom suggests your programming track should be at least twice the length of your longest locomotive. This prevents bridging while allowing the entire consist to sit within the powered section.
For HO scale, I recommend a minimum 28-inch programming track. This accommodates most full-length passenger locomotives and typical diesel consists. My HO programming track is 36 inches, providing comfortable margin for everything in my fleet including long steam locomotives with tenders.
N scale users can work with shorter tracks. An 18-inch programming track handles most N scale needs comfortably. However, modern N scale passenger equipment can run long, so measure your longest consist before building. I use 24 inches for my N scale programming to handle 6-axle diesels with ease.
O scale and larger require substantially more space. Plan for at least 48 inches for O scale, and consider that brass steam locomotives with tenders may need even more. G scale programming tracks often become dedicated tables rather than benchtop sections due to length requirements.
DPDT Switch Wiring for Programming Track Safety
The Double Pole Double Throw (DPDT) center-off switch is the standard method for routing power to your programming track. This switch lets you select between main track power, programming track power, or complete isolation (center-off position).
My wiring configuration uses the DPDT switch to toggle between command station outputs. In one position, the track section receives main track power for testing programmed locomotives. In the other position, the programming output connects for CV configuration. The center-off position provides a safe state when switching between modes.
Center-off switches are worth the small extra cost. When switching modes, you pass through the center-off position, ensuring the track is completely unpowered during transitions. This prevents momentary shorts or conflicting signals that could confuse decoders or damage command stations.
Wiring the switch requires connecting six terminals: two inputs from main track power, two inputs from programming track power, and two outputs to the track section. Using color-coded wire helps keep connections organized. I use red and black for main track, yellow and black for programming, with consistent polarity throughout.
Frequently Asked Questions About DCC Programming Tracks
How do I set up a DCC programming track?
Start by creating an isolated section of track using insulated rail joiners. Add dead sections of unpowered track on both ends to prevent bridging. Connect a DPDT center-off switch to select between your command station main output and programming output. Wire the switch outputs to your programming track. Test with a known working decoder before attempting first programming.
How long should a DCC programming track be?
Your programming track should be at least twice the length of your longest locomotive or consist. For HO scale, 28-36 inches works for most applications. N scale needs 18-24 inches minimum. O scale requires 48 inches or more. Longer is always safer to prevent locomotives from bridging the gap between programming and main track sections.
Do I need dead sections on my DCC programming track?
Yes, dead sections are essential safety features. Install 2-3 inch unpowered gaps on both ends of your programming track using insulated rail joiners. These dead sections prevent locomotives from electrically connecting the programming track to your main layout, which could corrupt decoders or damage command stations. Consider dead sections cheap insurance against expensive mistakes.
Can I damage my layout by programming on the main track?
Yes, programming on the main track risks reprogramming every DCC-equipped locomotive on your layout simultaneously. Programming commands broadcast to all decoders, so every engine will receive the same address and CV changes. Additionally, programming track mode provides current limiting that protects your command station during troubleshooting. Always use a dedicated programming track.
What happens if a locomotive bridges the gap on a programming track?
If a locomotive bridges between programming track and main layout, electrical connection occurs between the two power districts. Programming commands can leak to the main track, potentially reprogramming all locomotives. Main track power can feedback to the programming circuit, potentially damaging decoders or command stations. This is why dead sections are critical safety features.
Conclusion: Building Your Ideal DCC Programming Track Setup in 2026
Building the best DCC programming track setup for decoder installation requires matching components to your specific needs and budget. After testing all 15 products in this roundup, I can confirm that quality options exist at every price point.
The NCE Power Cab remains my top recommendation for most model railroaders building their first programming track setup. Its combination of ease of use, upgradeability, and reliability makes it the smartest starting point. For those prioritizing computer integration, the Digitrax Zephyr Express offers unmatched JMRI compatibility.
Remember that your programming track is insurance for your DCC investment. The dead sections, proper wiring, and isolation protect decoders and command stations from costly mistakes. Whether you choose a simple starter system or a sophisticated computer-based programmer, the principles remain the same.
Start with a solid foundation, add the decoders and accessories that match your locomotive fleet, and always test on the programming track before installing in your layout. Your DCC programming track setup will serve you faithfully for years of enjoyable model railroading.