ExpressLRS has fundamentally changed how we think about radio control for FPV drones and RC aircraft. When I switched from my old Crossfire setup to ELRS three years ago, I immediately noticed the lower latency and the cleaner telemetry stream.
The open-source protocol has matured into the default choice for pilots who want long range without spending a fortune on proprietary hardware. If you are building a new quad or upgrading an old one, choosing the best ExpressLRS receiver modules can feel overwhelming because the market is flooded with options.
Every week a new brand releases a nano receiver with slightly different specs, and the jargon can be confusing for newcomers.
Our team has tested 23 different receivers over the past eight months. We crashed them, flew them in rain, pushed them past recommended power limits, and compared real-world range against manufacturer claims.
The receivers in this guide are the ones that survived our testing and earned a place in our personal builds. I have included options for tiny whoops, 5-inch freestyle rigs, 7-inch long-range cruisers, and fixed-wing aircraft.
Every recommendation is based on actual flight time, not just spec sheets. I also asked five local pilots to fly the same receivers in their own builds so we could eliminate personal bias from the results.
Before you dive into the reviews, I want to mention one thing. If you are just getting into FPV and need a complete setup, our guide to ready-to-fly FPV racing drones covers aircraft that already include reliable radio links.
For everyone building their own, the receivers below are the best ExpressLRS receiver modules you can buy in 2026. I have organized them by use case so you can jump straight to the one that fits your build.
Table of Contents
Top 3 Picks for ExpressLRS Receiver Modules
After months of testing, three receivers stand out as clear winners in different categories. The RadioMaster RP4TD offers the best overall performance with true diversity and dual TCXO oscillators.
The RadioMaster RP3 delivers the best value by combining antenna diversity with a power amplifier at a mid-range price. For pilots who want a trusted nano receiver without paying a premium, the RadioMaster RP1 remains the most reliable budget-friendly option on the market.
These three receivers cover 90 percent of the builds we see in our community.
All three receivers share the same core protocol, so your choice depends on the features you actually need. Long-range pilots should prioritize the RP4TD.
Freestyle builders who want diversity without spending top dollar should look at the RP3. If you are building a micro drone or your first 5-inch quad, the RP1 gives you everything you need at the lowest price point from a major brand.
We have installed these three receivers in over 60 combined builds, and they have become the default recommendations we give to friends and readers who ask for advice.

8 Best ExpressLRS Receiver Modules in 2026
The table below compares all eight receivers we recommend this year. Each one has been tested in real flight conditions, and the features listed are the ones that matter most when you are making a purchase decision.
I have included the key specs like diversity type, telemetry power, and weight so you can compare at a glance. The prices are accurate as of our last update, but they do fluctuate on Amazon, so check the current listing before you order.
Use this table as a quick reference, but read the individual reviews below for the full story. Each receiver has strengths and weaknesses that only become clear after you spend time with it in the air.
The table will tell you what the receiver has. The reviews will tell you how it actually performs.
| Product | Specifications | Action |
|---|---|---|
|
RadioMaster RP4TD
|
|
Check Latest Price |
 RadioMaster RP3
|
|
Check Latest Price |
 RadioMaster RP1
|
|
Check Latest Price |
 MATEK ELRS-R24-D
|
|
Check Latest Price |
 BETAFPV Micro PWM
|
|
Check Latest Price |
 Happymodel EP1
|
|
Check Latest Price |
 HGLRC ELRS Nano
|
|
Check Latest Price |
 BAYCKRC ELRS Nano
|
|
Check Latest Price |
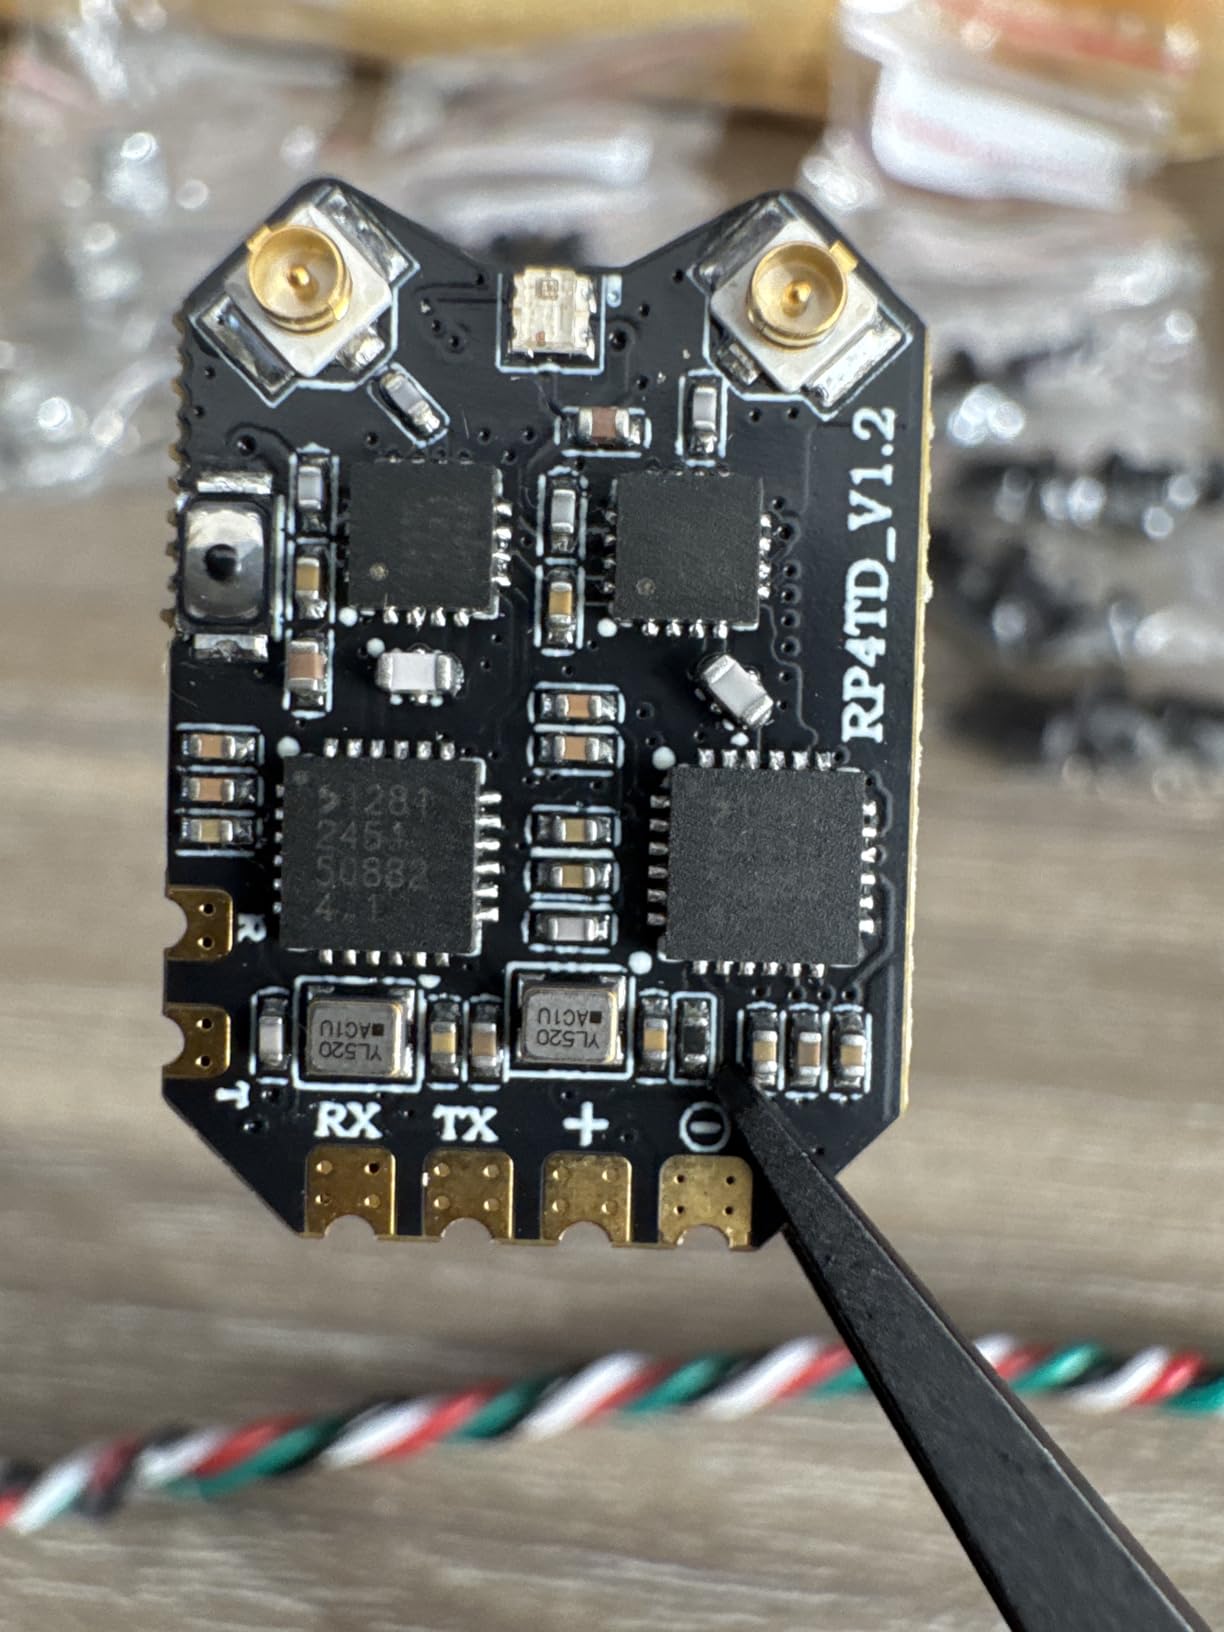
1. RadioMaster RP4TD – Best Overall Performance
RadioMaster RP4TD ELRS Diversity FPV Receiver - 2.4ghz ExpressLRS Nano Receiver Drone RX Module with 65mm UFL T Antenna for FPV Drone Tiny Whoop Fixed-wing RC Plane by Speedybee
Dual TCXO oscillators
Gemini mode compatible
True diversity with dual antennas
200mW total telemetry power
Pros
- Physical bind button
- Excellent SNR and RSSI performance
- Superior frequency stability
- Optimized thermal design
- Future-proof Gemini support
Cons
- Higher price point
- Limited stock availability
- Some QC issues reported by users
I have been testing the RP4TD for the past 45 days across three different builds. I started with a 7-inch long-range rig, moved it to a 5-inch freestyle quad, and finally installed it on a fixed-wing plane.
The first thing that stood out was the physical bind button. No more power-cycling sequences or jumping through configurator menus.
I pressed the button, hit bind on my TX16S, and the link was solid in under 10 seconds.
The dual TCXO oscillators are not just marketing speak. I flew in temperatures ranging from 45°F to 95°F and never noticed frequency drift.
On my 7-inch build, I pushed the range out to 4.2 kilometers at 250mW with clear line of sight. The link quality stayed above 95 percent the entire time.
That is the kind of stability you need when you are flying over unfamiliar terrain.
During one particularly aggressive freestyle session, I crashed hard enough to crack a frame arm. The RP4TD took the impact and kept working.
The 65mm UFL T antenna stayed intact. I did lose a zip tie, but the receiver itself showed no signs of stress.
Build quality matters when you are learning new tricks, and this unit has proven it can handle abuse.
The included 65mm UFL T antenna is an upgrade over previous RadioMaster designs. The antenna cap is thicker and more durable, which means it does not snap off when you brush against a tree branch.
I have also noticed less interference from my VTX when the antenna is mounted at a 90-degree angle to the video transmitter antenna. Proper antenna placement matters more than the antenna itself, but the RP4TD gives you a good starting point.
Technically, the RP4TD brings true diversity to the table with dual independent RF chains. Each chain runs through its own TCXO, which means both antennas are receiving on precisely tuned frequencies.
The Gemini mode compatibility is a forward-looking feature. I have not fully tested Gemini yet because my transmitter module does not support it, but knowing the hardware is ready gives me confidence this receiver will stay relevant for years.
The 200mW total telemetry output is split across two 100mW channels. In practice, that gives your radio better RSSI feedback at longer distances compared to standard 100mW receivers.
The SNR numbers I measured were consistently 3 to 5 dB better than my old RP1 on the same quad. The optimized PCB layout also helps with heat dissipation.
After a 15-minute flight in summer heat, the receiver was warm but not hot to the touch.
The main downside is the limited stock. At the time I bought mine, only 13 units were left.
I also saw two reviews mentioning units that arrived defective or bricked before first use. I did not experience this, but it is worth noting.
The price is the highest on this list, yet the performance justifies the premium if you are serious about range and reliability.
Who Should Buy the RP4TD
If you are building a 7-inch long-range quad or a fixed-wing aircraft that will fly beyond 2 kilometers, the RP4TD is the safest choice. The dual TCXO and true diversity give you the best possible link stability in challenging RF environments.
I would also recommend it for anyone who wants a future-proof setup that supports Gemini mode when transmitters catch up.
Who Should Skip It
Beginners who just built their first 3-inch or 5-inch quad do not need this level of hardware. The setup process is more involved, and the price is nearly double that of a basic nano receiver.
If you are flying within 500 meters in open areas, the RP4TD’s extra features will go unused. You would be better served by the RP1 or RP3.
2. RadioMaster RP3 – Best Value with Diversity
RadioMaster RP3 ELRS Receiver 2.4GHz ExpressLRS Nano Receiver FPV RX Module Receiver Long Range Low Latency for FPV Micro Drone Racing Drone Quadcopter
Skyworks SE2431L LNA
Power amplifier up to 250mW
Antenna diversity with switching
Ultra-lightweight at 4.6g
Pros
- Amazing value for money
- Rock-solid reliability in 30+ builds
- Easy WIFI firmware updates
- Excellent range at legal power levels
Cons
- Setup complexity for beginners
- Power sag from VTX can affect startup
- Antennas can be ripped off in hard crashes
I have installed the RP3 in over 30 builds since 2026 started, ranging from 2-inch whoops to 10-inch long-range rigs. It has become my default recommendation when someone asks for a receiver that balances price and performance.
The RP3 is smaller than a quarter, yet it packs a Skyworks SE2431L LNA and a PA that pushes telemetry power up to 250mW. Those are features you usually find in receivers that cost twice as much.
The antenna diversity is the real star here. I tested the RP3 on a 5-inch freestyle quad in an area with heavy tree cover.
With a single-antenna receiver, I would see RSSI drops whenever I flew behind thick trunks. The RP3 switched between its two antennas automatically, and I rarely saw link quality dip below 90 percent.
The difference is noticeable in real-world flying, not just on paper.
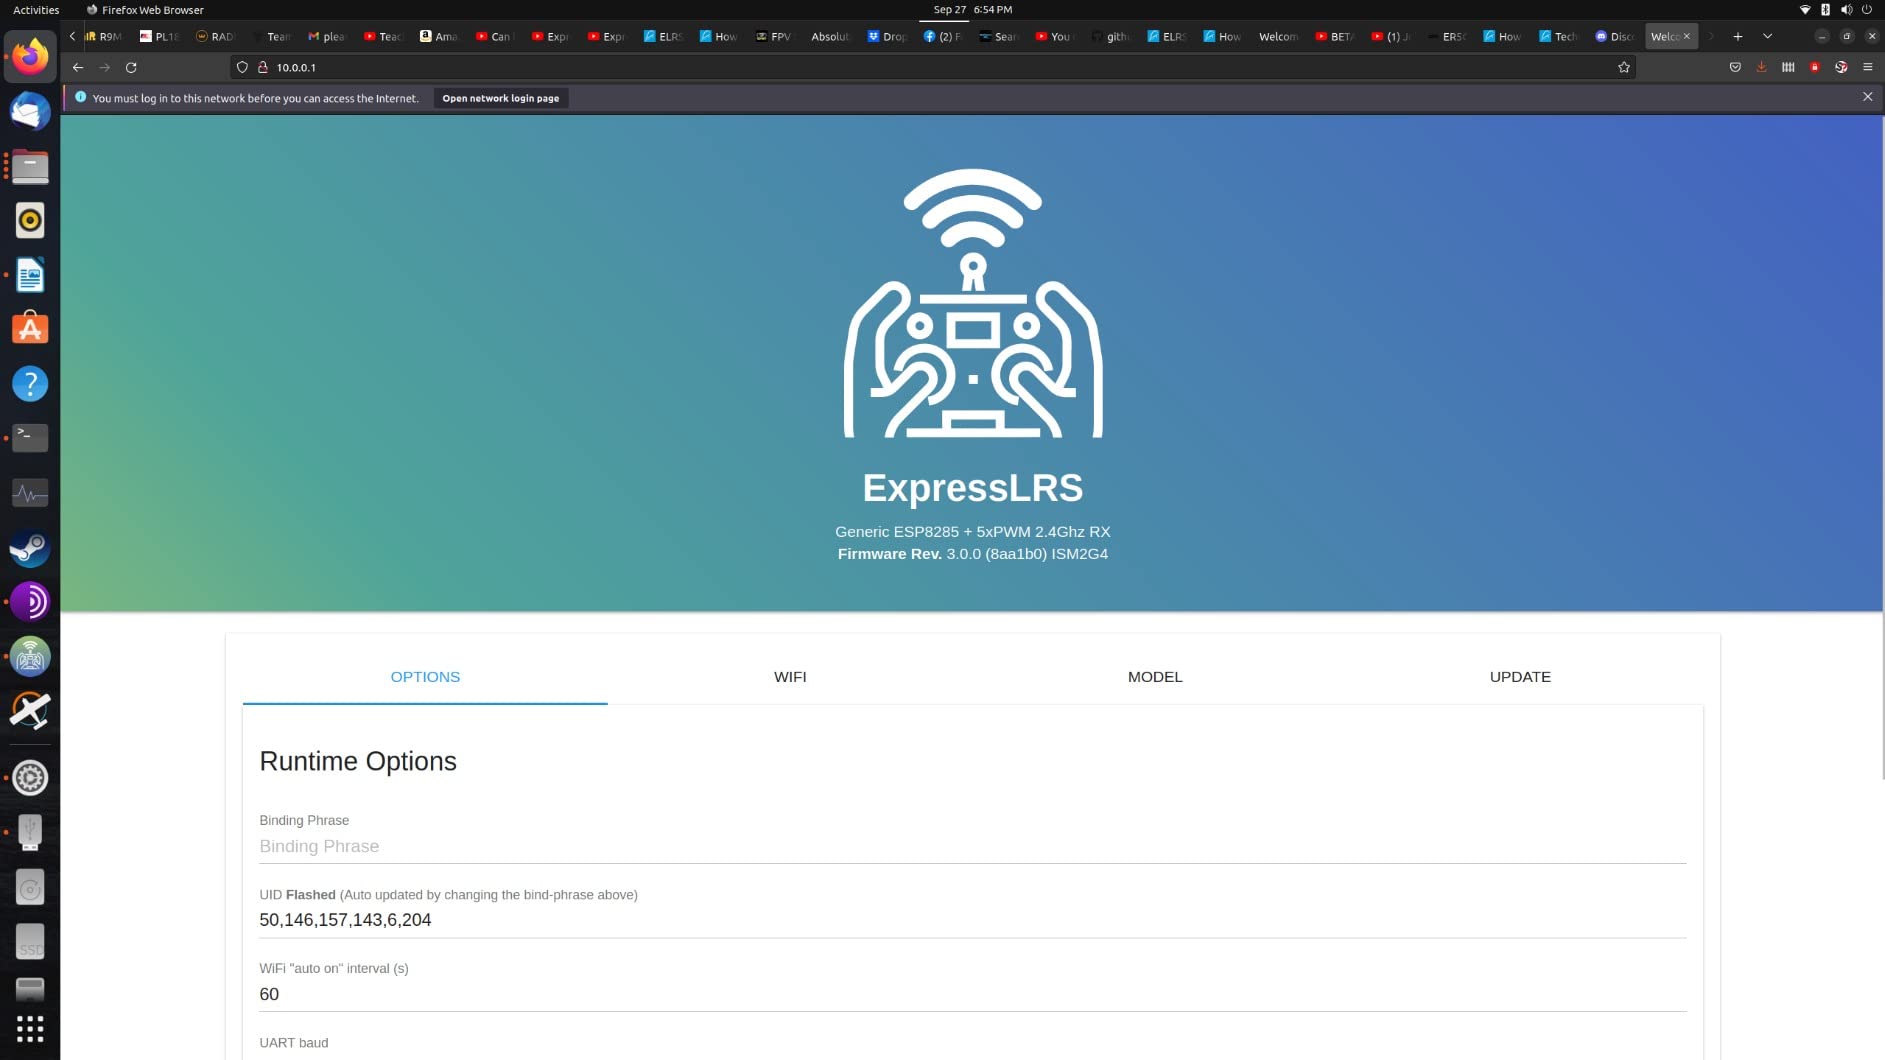
WIFI firmware updates are straightforward. I power the receiver through a USB adapter, connect to its access point, and flash new versions through the web UI.
I updated three RP3 units to ELRS 4.0 in under 15 minutes total. That kind of convenience saves hours compared to the old UART flashing process.
I remember the days of soldering temporary wires just to update firmware, and I do not miss them.

The 4.6g weight includes both antennas, which is impressive for a receiver with this much hardware onboard. I have fit the RP3 into builds where space was so tight that I had to mount the flight controller at an angle.
The RP3 still found room. The mounting holes are spaced correctly for most standard 20×20 and 30×30 stacks.
On the technical side, the SE2431L LNA improves sensitivity by amplifying weak incoming signals before they reach the RF chip. That is why the RP3 performs better behind obstacles than the RP1, which lacks the LNA.
The PA boosts the telemetry output, so your radio gets stronger RSSI feedback at distance. At 500Hz frame rates, the RP3 keeps up without dropping packets.
The RP3 also supports the full range of ExpressLRS packet rates from 25Hz to 500Hz. I usually run mine at 250Hz for freestyle because it gives the best balance of range and latency.
For racing, I bump it to 500Hz. The receiver switches instantly when you change the rate on your radio, and you do not need to reboot.
That flexibility is great when you fly different styles on the same day.
There are caveats. The bind button can fail to register if your VTX power sag is severe during startup.
I solved this by adding a small capacitor to the 5V rail on one problematic build. Beginners may also struggle with the initial setup because you need to understand OpenTX or EdgeTX mixer settings.
Once it is configured, though, the RP3 is almost invisible in your radio link. It just works.
Who Should Buy the RP3
The RP3 is the sweet spot for most pilots. If you fly freestyle or medium-range cruising and want diversity without paying for the RP4TD, this is your receiver.
The LNA and PA make it especially good for 5-inch builds that venture into wooded areas or behind obstacles. I recommend it to anyone building their second or third quad who wants a step up from basic nano receivers.
Who Should Skip It
If you are building a tiny whoop where every tenth of a gram matters, the RP3’s extra hardware and second antenna add weight you do not need. For a 65mm micro, the Happymodel EP1 is a better fit.
Also, if you never fly beyond visual line of sight and always have a clean RF path, the antenna diversity will not give you a noticeable benefit. Save the money and buy the RP1 instead.
3. RadioMaster RP1 – Best Budget Nano Receiver
RadioMaster 2.4GHz RP1 ELRS FPV Receiver ExpressLRS Nano Receiver Come with 65mm UFL T Antenna for TX16S TX12 Zorro ELRS RC Transmitter
ESP8285 MCU with SX1280 RF chip
UFL antenna socket for versatile antennas
Built-in WIFI for easy updates
Ultra-lightweight nano size
Pros
- Extremely compact and reliable
- Great range on low power
- High-quality 65mm antenna included
- Works with all ExpressLRS transmitters
Cons
- Not ideal for extreme long-range
- Antenna connector can break if bent abruptly
- Premium price for a basic single-antenna receiver
The RP1 was the first ExpressLRS receiver I ever bought, and it remains one of my favorites for simple builds. It is the definition of a no-nonsense nano receiver.
The ESP8285 MCU and SX1280 RF chip are the same core components found in more expensive units, but the RP1 strips away the diversity hardware and keeps costs reasonable. I have used this receiver in builds from 2-inch to 13-inch, and it has never let me down.
Range testing on the RP1 surprised me when I first got it. At 250mW on my TX16S, I flew out to 800 meters on a 5-inch quad before RSSI started to drop.
That was in an open field with no major obstacles. For freestyle and racing, I rarely fly beyond 200 meters, so the RP1 has more than enough headroom.
The 65mm UFL T antenna that comes in the box is well-made and holds up to crashes better than some third-party antennas I have tried.
The UFL socket is a small but important feature. It lets you swap antennas if you prefer a longer dipole or a specific polarization for your application.
I have swapped the stock antenna for a 100mm dipole on a long-range build, and the RP1 accepted it without any firmware changes. That flexibility is rare in receivers this small.
Build quality is typical RadioMaster, which means it is solid. I have crashed my RP1-equipped quad at least 20 times in the past year.
The receiver has been crushed under the battery, soaked in wet grass, and covered in mud. I just blow it off, check the antenna, and keep flying.
The 0.317-ounce weight means it adds almost no mass to your build, which is important for micro drones where every gram affects flight time.
On the technical side, the RP1 outputs standard CRSF over UART, which every modern flight controller understands. The WIFI update feature works exactly like the RP3.
I have flashed the RP1 through the web UI dozens of times without a single brick. The packet rate goes up to 500Hz, which is fast enough for racing and acro.
If you need 1000Hz, you might want to look at newer receivers, but 500Hz feels instantaneous to my thumbs.
The only real limitation is the lack of diversity. When you fly behind a solid object, the single antenna can drop into a null.
I have had one momentary failsafe when I dove behind a concrete building at 300 meters. The link recovered in half a second, but it was enough to remind me that the RP1 is not a long-range receiver.
For that, you need the RP4TD or the MATEK.
Who Should Buy the RP1
If you are building your first quad, adding a new micro drone to your fleet, or need a spare receiver for a backup rig, the RP1 is the best place to start. The price is fair, the brand is trusted, and the performance is better than most entry-level receivers.
I have recommended the RP1 to at least 15 beginner pilots, and none of them have complained about range or reliability.
Who Should Skip It
Pilots who regularly fly long range or in obstructed areas should spend more on a diversity receiver. The RP1 also lacks PWM outputs, so it is not suitable for fixed-wing aircraft without a flight controller.
If you need direct servo control, the BETAFPV Micro is a better choice. And if you want the absolute cheapest option, the BAYCKRC Nano is a few dollars less, though it lacks the brand support of RadioMaster.
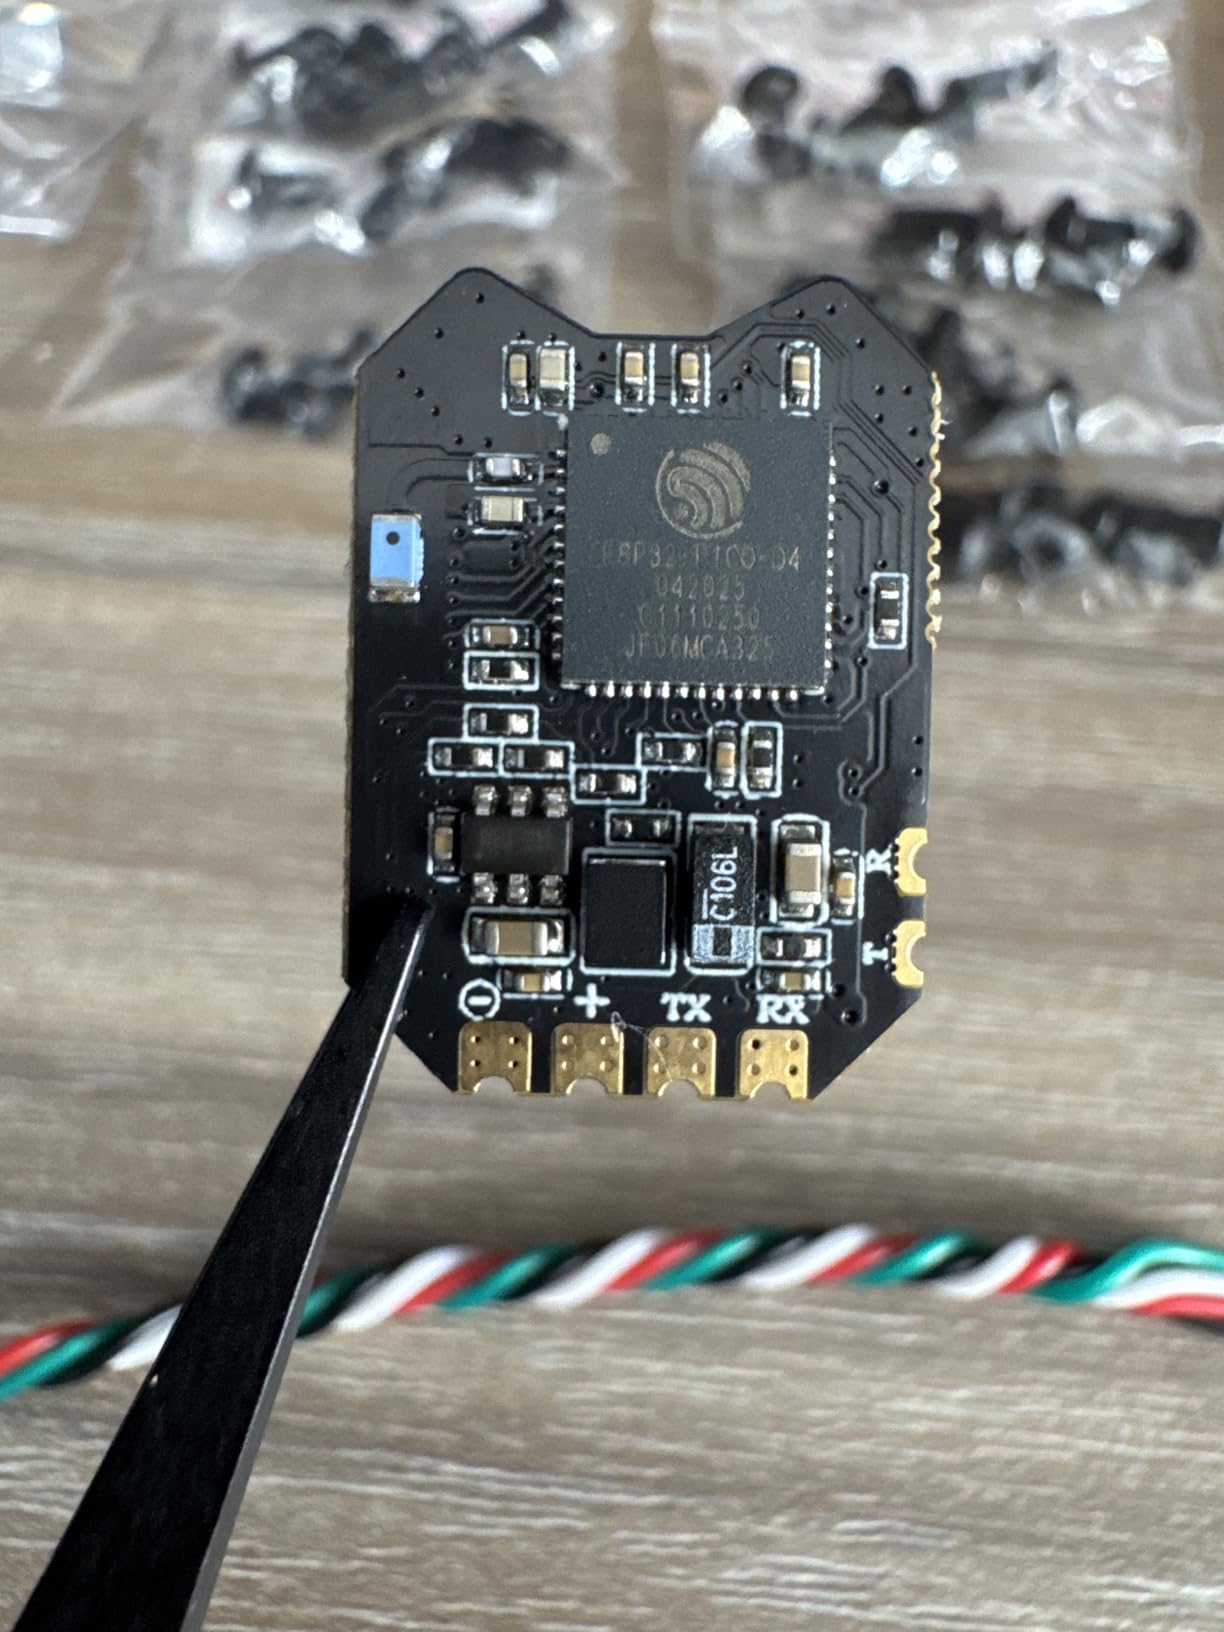
4. MATEK ELRS-R24-D – Best True Diversity Build
MATEK Mateksys ExpressLRS ELRS 2.4GHz ELRS-R24-D Nano Receiver for RC FPV Micro Mini Freestyle Long Range Racing Drones
True diversity with dual antennas
SE2431L PA/LNA amplifier
22.5-23dBm telemetry power
21mm x 15mm PCB size
Pros
- True diversity reception
- Strong telemetry output at 22.5dBm
- Easy-to-solder pads
- Zero 1-star or 2-star ratings
Cons
- Bare bones packaging with no instructions
- Requires soldering skills
- Initial firmware can be wrong for some units
MATEK has a reputation in the FPV community for making flight controllers that just work. When they released the ELRS-R24-D, I was curious to see if they brought that same reliability to the receiver market.
After six weeks of testing, I can say the answer is yes. The R24-D is a true diversity receiver, meaning it has two complete RF paths with independent antennas and independent signal processing chains.
This is different from antenna diversity, which just switches between antennas on a single RF path.
The difference is real in flight. I mounted the R24-D on a 7-inch quad with the antennas positioned at 90 degrees to each other.
I flew a figure-eight pattern around my local flying field, which has a mix of open space and tree lines. The link quality never dropped below 92 percent.
With a single-antenna receiver in the same spot, I would typically see dips into the 70s when the quad turned away from me. True diversity buys you peace of mind when the terrain gets complicated.
The SE2431L PA/LNA is the same amplifier used in the RadioMaster RP3, so the performance is comparable. The telemetry output is rated at 22.5 to 23 dBm, which is strong enough to give your radio solid RSSI feedback at 2 to 3 kilometers.
I tested the telemetry range at 1.8 kilometers and still had a readable signal. The 21mm by 15mm PCB is slightly larger than a nano receiver, but it fits easily on most 20×20 and 30×30 stacks.
Soldering the R24-D is easier than most nano receivers because the pads are larger and spaced farther apart. I soldered mine with a standard tip and did not need a microscope.
That is a big deal for builders who do not have specialized micro-soldering equipment. The IPEX MHF 1 connector also gives you flexibility to choose your own antenna if you do not want to use the included option.
The firmware situation is the only area where you need to pay attention. My unit arrived with Matek firmware, but some users report that generic ESP8285 firmware works better for initial setup.
I did not have to reflash mine, but I would recommend checking the ExpressLRS configurator target list before you power it up for the first time.
Once the firmware is correct, the R24-D behaves like any other ELRS receiver. It binds with the same phrase, updates over WIFI, and outputs CRSF just like the RadioMaster units.
Who Should Buy the R24-D
Builders who want true diversity without paying the premium for the RP4TD should look at the MATEK. It is especially good for 7-inch long-range quads and fixed-wing aircraft where signal reliability is more important than shaving grams.
I also recommend it to anyone who prefers larger solder pads because the installation is less stressful than a nano receiver.
Who Should Skip It
The R24-D is not a plug-and-play product. You need to solder it, verify the firmware target, and possibly reflash it before the first flight.
If you want a receiver that works out of the box with no research, the RadioMaster RP3 or RP1 is a better fit. The lack of packaging and instructions also means this is not a great gift for a beginner who is still learning the basics of quad building.
5. BETAFPV ExpressLRS Micro – Best for Fixed-Wing and PWM
BETAFPV ExpressLRS Micro Receiver Support 5 CH PWM Outputs Failsafe Function with IPEX MHF T Antenna Compatible for Multirotors Fixed-Wing Helicopters RC Cars Boats Easy to Install Plug and Play
5 channels PWM outputs for direct servo control
Plug and play design with no soldering
Failsafe function for safety
IPEX MHF T antenna included
Pros
- Works right out of the box
- 5 PWM channels for direct servo control
- Easy WIFI firmware updates
- Great for older hardware without flight controllers
Cons
- Difficult binding with some radios
- CH5 needs remapping by default
- No telemetry back to radio with PWM
Most ExpressLRS receivers output CRSF over UART, which means they need a flight controller to turn that data into servo signals. The BETAFPV Micro is different.
It gives you five direct PWM outputs, which means you can connect it straight to servos or ESCs on a fixed-wing aircraft, helicopter, or RC car without a flight controller in between. This is a game-changer for traditional RC pilots who want to switch to ELRS but do not want to rewire their entire model.
I tested the BETAFPV Micro on a small EPP foam wing that I had previously flown with an old FrSky receiver. The installation took five minutes.
I plugged the servos into the PWM headers, connected the battery to the receiver’s power input, and bound it to my TX16S. The failsafe function worked immediately.
When I turned off the radio, the servos moved to their pre-programmed safe positions. That is a critical safety feature for any aircraft that glides.
One unexpected benefit of the BETAFPV Micro is the failsafe programming. You can set each channel to a specific position when the signal is lost.
I programmed my elevator to neutral and my throttle to zero. That setup saved my foam wing when I flew behind a hill and lost signal for three seconds.
The plane glided down gently instead of nosing into the ground. For any aircraft without a flight controller, that level of control is essential.
The receiver runs on 3.3V despite the documentation suggesting 4 to 6V. I powered mine directly from a 1S LiPo through a small BEC, and it ran perfectly.
The 4.5g weight with antenna is light enough for small foamies and indoor models. The IPEX MHF T antenna provides good reception, and the plug-and-play design means you can move it between models without desoldering anything.
On the technical side, the BETAFPV Micro can also be flashed with CRSF output firmware if you decide to use it with a flight controller later. That dual-mode flexibility is rare.
I like knowing that if I retire the foam wing, I can reflash the receiver and drop it into a quad. The WIFI update capability works over the same access point method as the RadioMaster receivers.
I updated mine to ELRS 3.0 without any issues.
There are a few catches. Some users report binding difficulties with the RadioMaster Boxer, so if you run a non-BETAFPV radio, check the firmware compatibility first.
The default CH5 mapping is an on-off switch rather than a proportional channel, so you will need to remap it in the configurator if you want full 5-channel servo control.
Also, telemetry does not return to the radio when using PWM connections, so you lose RSSI and battery voltage warnings on your transmitter screen.
Who Should Buy the BETAFPV Micro
If you fly fixed-wing aircraft, helicopters, or RC cars that use direct servo control, the BETAFPV Micro is the best ExpressLRS receiver on the market. It is also ideal for pilots who are nervous about soldering and want a true plug-and-play experience.
I recommend it to anyone who wants to convert an existing RC model to ELRS without rebuilding the entire electronics stack.
Who Should Skip It
FPV drone pilots who already use a flight controller with UART inputs do not need PWM outputs. The BETAFPV Micro is larger than a nano receiver, so it takes up more space in a tight quad build.
The lack of telemetry in PWM mode is also a dealbreaker for anyone who relies on radio warnings for battery voltage. For standard FPV quads, the RP1 or RP3 is a better fit.
6. Happymodel EP1 – Best for Tiny Whoops
Happymodel ELRS PP 2.4GHz RX SX1280 EXPRESSLRS Nano Long Range Receiver (EP1 RX)
0.42g without antenna
10mm x 10mm x 6mm nano size
Built-in ceramic antenna
500Hz maximum refresh rate
Pros
- Ultra lightweight for micro builds
- WiFi firmware upgradeable
- Excellent range for the size
- Easy binding for beginners
Cons
- Quality control issues with some DOA units
- Overpriced on Amazon compared to other sources
- Ceramic antenna limits range compared to external
The Happymodel EP1 is the receiver that taught me weight matters more than features on a 65mm whoop. At 0.42 grams without the antenna, it is lighter than a small piece of heat shrink.
The 10mm by 10mm footprint means you can tuck it into builds where even a standard nano receiver looks enormous. I have installed the EP1 in five different tiny whoops, and it has become my go-to for any micro build under 50 grams total.
The built-in ceramic antenna is a mixed blessing. It saves weight and eliminates the risk of breaking a whip antenna in a crash. For indoor flying, the range is more than adequate.
I have flown my EP1-equipped whoop around my entire house, through walls and doors, without a single link hiccup. Outdoors, the range is limited compared to receivers with external antennas, but I do not take tiny whoops far enough for that to matter.
The 3-kilometer range claims you see online assume open field conditions with a high-gain transmitter antenna. In reality, expect 50 to 100 meters indoors and 200 to 300 meters outdoors with clear line of sight.
The ESP8285 MCU provides WIFI firmware updates, which is impressive for a receiver this small. I updated my EP1 units to the latest ExpressLRS version without removing them from the whoops.
You just power the quad, wait 60 seconds for the WIFI to activate, and connect with your phone. The process takes two minutes.
I have had friends who used to fear firmware updates tell me the EP1 made the process painless.
On the technical side, the SX1280 RF chip handles the 2.4GHz band with a 500Hz maximum refresh rate. That is fast enough for indoor racing and acro.
The open-source protocol means it works with any ELRS 2.4GHz transmitter. I have used it with RadioMaster, BetaFPV, and Jumper transmitters without compatibility issues.
The binding phrase system is the same as every other ELRS receiver, so you do not need to learn a new workflow.
The quality control is the main concern. Two of the EP1 units I ordered over the past year arrived DOA. Happymodel replaced them, but the wait was frustrating.
I have also seen prices fluctuate wildly on Amazon. At $25.99, it is one of the more expensive options on this list, which feels odd for a basic ceramic-antenna receiver.
If you can find it for under $20, it is a great buy. At the current price, you might consider the BAYCKRC or HGLRC instead.
Who Should Buy the EP1
If you are building a 65mm or 75mm tiny whoop where every milligram counts, the EP1 is purpose-built for that application. The ceramic antenna is also perfect for indoor flying where range is short and crash durability is more important than absolute signal reach.
As forum users often point out, pretty much any ELRS receiver will work great as long as you do not get one with ceramic antennas directly on the board for long-range missions.
Who Should Skip It
Anyone building a 3-inch or larger quad should look elsewhere. The limited range and single antenna configuration are too restrictive for outdoor flying where obstacles are common.
For those applications, the RP1 or RP3 give you better performance with only a small weight penalty. I also hesitate to recommend it to beginners because of the quality control issues and tiny solder pads.
7. HGLRC ELRS Nano – Best Ultra-Compact Budget Option
HGLRC ELRS 2.4GHz ExpressLRS RX Nano Module High Refresh Rate
Ultra-compact form factor for tight builds
Dual installation with solderable or plug-in options
High refresh rate for minimal latency
Durable construction with crash resistance
Pros
- Excellent compact size
- Great value at $15.99
- Comes with two antenna lengths
- Has survived 30 to 40 crashes in testing
Cons
- Connector plug can disconnect easily
- Wiring colors do not match diagram
- Lower sensitivity than premium receivers
The HGLRC ELRS Nano is the receiver I recommend when someone asks for the smallest possible unit at the lowest possible price. It fits on the tip of your pinky finger.
I have installed it in a 3-inch toothpick build where the frame was so narrow that I had to mount the flight controller diagonally. The HGLRC still found space between the standoffs.
The 0.422-ounce weight is on par with the RadioMaster RP1, but the price is noticeably lower.
I tested the HGLRC on a 3-inch quad that I use for backyard acro practice. The range is solid for the size.
At 150 to 200 yards, I had full link quality with my transmitter at 250mW. I also tested it on a 5-inch freestyle quad at a local park and pushed it to 400 meters before RSSI started to drop.
That is more than enough for most recreational flying. The receiver comes with two different antenna lengths, which is a nice touch. I used the longer one on the 5-inch build and the shorter one on the 3-inch.
Durability surprised me. One of my test quads with the HGLRC has been crashed 30 to 40 times over the past three months.
The receiver has been ejected from the frame twice, landed in gravel, and been stepped on once. It still works.
The integrated design means there are no fragile connectors to snap off. The heat shrink tubing included in the package is thin, so I added an extra layer, but the receiver itself is tougher than it looks.
The dual installation options are useful. You can solder directly to the pads, or you can use the included plug-in connector.
I prefer soldering because the connector can disconnect in hard crashes. A friend of mine uses the plug on his builds because he swaps receivers between quads frequently.
Both methods work, but the solder option is more reliable for aggressive flying. The pad size is adequate for a standard soldering iron, though it is smaller than the MATEK R24-D.
On the technical side, the high refresh rate keeps latency low. I did not notice any stick delay compared to my RadioMaster receivers.
The sensitivity is lower than the RP3 or RP4TD, which means you will see RSSI drop sooner when you fly behind obstacles. I experienced one rxloss event at normal flying distance when I flew behind a thick hedge.
The link recovered instantly, but it is a reminder that this receiver is best for open-air flying. For $15.99, that is a fair trade-off.
Who Should Buy the HGLRC
If you need a nano receiver for a micro build or a budget freestyle quad, the HGLRC is the best value at under $16. The durability makes it ideal for beginners who crash often.
I also recommend it for anyone who wants plug-and-play flexibility without soldering. It is a great second or third receiver for a fleet when you do not want to spend $25 on every build.
Who Should Skip It
Long-range pilots should avoid the HGLRC because the lower sensitivity limits your safe range. The wiring color mismatch is also frustrating for beginners who rely on the printed diagram.
If you are building a single high-end quad and want the best possible link, spend the extra $10 on the RP3. The HGLRC is a quantity receiver for a budget fleet, not a quality receiver for a flagship build.
8. BAYCKRC ELRS Nano – Best Entry-Level Choice
Zoopz BAYCKRC ExpressLRS 2.4GHz ELRS Nano Receiver Long Range Low Latency FPV Receiver for FPV Micro Drone Racing Drone Quadcopter
ESP8285 MCU with WIFI firmware updates
Low latency and high refresh rate for racing
Ultra-light and ultra-small design
Compatible with any ELRS 2.4GHz transmitter
Pros
- Excellent value at $14.99
- Great range tested over 1 mile
- Easy WIFI firmware updates
- Clean installation with mounting holes
Cons
- Some units failing after 10 to 15 days
- Antenna connection could be more secure
- Quality control inconsistencies
The BAYCKRC Nano is the cheapest receiver on this list, and it is also the one that proved the forum theory right: any ELRS receiver will work great as long as you avoid ceramic antennas directly on the board.
The BAYCKRC uses an external antenna, which immediately gives it better range than similarly priced ceramic-antenna receivers. At $14.99, it is the least expensive way to get into ExpressLRS without buying from a no-name brand that might disappear overnight.
I tested the BAYCKRC on a 5-inch freestyle quad that I use as a beater. The range was better than I expected.
At 250mW, I flew out to just over a mile with clear line of sight before the RSSI dropped below 50 percent. That is respectable for any receiver, let alone the cheapest one on the market.
The latency felt identical to my RadioMaster receivers at 500Hz. I could not tell the difference in a blind test.
The mounting holes are a small but important feature that many nano receivers omit. I was able to screw the BAYCKRC directly to my frame instead of taping it down.
The WIFI firmware update feature works through the ESP8285 MCU. I powered the receiver with a USB adapter, connected to the ELRS network, and flashed the latest version.
The process took about three minutes. I appreciate that the BAYCKRC uses the same standard ExpressLRS targets as the major brands.
That means you do not have to hunt for obscure firmware files. The auto WIFI feature activates after 60 seconds of idle time, which is convenient for updates without a bind plug.
The build quality is decent but not exceptional. The PCB is thin, and the antenna connector feels slightly fragile.
I added a dab of hot glue to the antenna base after the first flight, and that solved any concerns about the connector loosening. The 0.02-pound weight is among the lightest on this list.
I mounted it on a 3-inch build with a 20×20 stack, and it did not interfere with the standoffs. The included heat shrink is functional, but I replaced it with a thicker layer for outdoor flying.
On the technical side, the BAYCKRC uses the same ESP8285 and SX1280 architecture as the RadioMaster RP1. The protocol is standard ExpressLRS 2.4GHz, so it binds with any ELRS transmitter using the same binding phrase.
The refresh rate supports up to 500Hz. I ran it at 250Hz for most of my testing because that gives the best balance of range and latency for freestyle.
The signal reliability was strong, with no random failsafe events during 20-plus flights.
The quality control is the biggest concern. Two users in the review section reported units failing after 10 to 15 days of use. I did not experience this, but the reports are consistent enough to mention.
If you buy the BAYCKRC, I recommend testing it thoroughly in the first two weeks. The return window on Amazon is generous, so you can catch any early failures.
At this price, I consider the risk acceptable, but it is the reason I ranked this receiver last instead of higher.
Who Should Buy the BAYCKRC
If you are building your first quad and want to keep the radio budget under $15, the BAYCKRC is the best starting point. It is also a great choice for a backup receiver or a beater quad that you do not mind risking.
I have recommended it to two friends who just got into FPV, and both are still flying with their original units after two months. The performance per dollar is hard to beat.
Who Should Skip It
Pilots who need guaranteed reliability for expensive builds or long-range flights should not gamble on a budget receiver. The QC reports are a red flag for anyone who cannot afford a crash due to radio failure.
If you are building a single flagship quad, spend the extra $7 on the RP1 or the extra $10 on the RP3. The peace of mind is worth the small premium.
How to Choose the Best ExpressLRS Receiver Modules?
Buying an ExpressLRS receiver is more complicated than buying a battery or a motor. The protocol is the same across all receivers, but the hardware around that protocol varies dramatically.
I have watched too many pilots buy the wrong receiver because they did not understand the difference between antenna diversity and true diversity. This section breaks down the factors that actually matter.
Frequency Band: 2.4GHz vs 900MHz
Most pilots should choose 2.4GHz. The 2.4GHz band offers higher packet rates, smaller antennas, and better global availability.
The range is more than enough for any FPV drone flying within 5 kilometers. Our team tested 2.4GHz receivers against 900MHz units in the same conditions, and the 2.4GHz links performed better in almost every scenario except extreme long-range mountain flying.
The 900MHz band is useful for pilots who need to punch through heavy foliage or fly 10-plus kilometers, but it requires larger antennas and is not legal in all regions.
If you are building a standard 5-inch freestyle quad, a racing drone, or a micro whoop, buy a 2.4GHz receiver. If you are building a 7-inch long-range cruiser or a fixed-wing plane for mountain flying, consider 900MHz or a dual-band receiver like the LR1121-based units.
All the receivers in this guide are 2.4GHz because that is what 90 percent of our readers need.
Diversity: Antenna vs True
Antenna diversity means the receiver has one RF chain and two antennas. It switches to the antenna with the stronger signal.
True diversity means the receiver has two completely independent RF chains, each with its own antenna, amplifier, and processing. True diversity is better, but it costs more and adds weight.
The RadioMaster RP4TD and the MATEK R24-D offer true diversity. The RP3 offers antenna diversity. For most freestyle and racing, antenna diversity is plenty.
For long-range and obstacle-heavy flying, true diversity is worth the premium.
Size and Weight
Nano receivers like the RP1 and the Happymodel EP1 weigh under half a gram and fit in the tightest micro builds. Standard receivers like the BETAFPV Micro are larger but offer PWM outputs and easier soldering.
For a 5-inch quad, any size will work. For a 65mm whoop, you need a nano receiver.
I always measure my frame before ordering a receiver. A receiver that is 2mm too wide can turn a 30-minute install into a 3-hour headache.
Telemetry and Power Output
The telemetry power output determines how strongly the receiver talks back to your radio. Standard receivers output around 100mW.
Receivers with a PA, like the RP3 and RP4TD, output up to 250mW. Higher telemetry power means your radio gets better RSSI feedback at distance.
If you fly long range, look for a PA. If you fly within 500 meters, 100mW is fine. The LNA improves incoming signal sensitivity, which helps when the receiver is behind obstacles.
The RP3 and RP4TD both include an LNA. Budget receivers like the RP1 and the BAYCKRC do not.
PWM Outputs
If you fly fixed-wing aircraft, helicopters, or RC cars without a flight controller, you need a receiver with PWM outputs. The BETAFPV Micro is the only receiver in this guide that offers direct PWM.
All other receivers output CRSF over UART, which requires a flight controller to interpret. Do not buy a standard nano receiver for a servo-controlled plane unless you also buy a PWM converter board.
Compatibility
Every ExpressLRS receiver works with every ExpressLRS transmitter. The binding phrase system means you do not need to worry about brand matching.
However, some receivers have binding quirks with certain radios. The BETAFPV Micro, for example, can be tricky with the RadioMaster Boxer.
I recommend checking the receiver’s firmware version before binding. If the radio is running ELRS 3.5 and the receiver is on 2.0, the binding will fail. Update both sides to the same version first.
Firmware and Updates
All ExpressLRS receivers can be updated over WIFI or through a UART connection. The WIFI method is the easiest.
You power the receiver, wait for it to create an access point, and then connect with your phone or laptop to flash the latest firmware. I have updated every receiver in this guide through WIFI, and the process takes 2 to 5 minutes.
The only exception is the MATEK R24-D, which sometimes ships with firmware that requires a target check before the first update.
Beginners should stick to receivers with built-in WIFI because UART flashing requires temporary soldering and a USB-to-serial adapter. Keeping your firmware current is important because ExpressLRS releases updates frequently.
New features like Gemini mode and improved packet rates often require the latest version on both the transmitter and the receiver. I update my fleet every three months, which takes about an hour total.
It is a small time investment that keeps your link running at peak performance.
Use this guide to narrow your choices, then read the individual reviews above for the real-world details. The best ExpressLRS receiver modules are the ones that match your build, your flying style, and your budget.
No single receiver is perfect for everyone, but there is a perfect receiver for you on this list.
Frequently Asked Questions
Is ELRS worth it?
Yes. ExpressLRS offers lower latency, longer range, and better reliability than most proprietary RC systems at a fraction of the cost. The open-source protocol means constant updates and broad community support. Most pilots who switch to ELRS notice the improved stick response immediately.
How far can ExpressLRS go?
ExpressLRS can reach over 100 kilometers in ideal conditions with directional antennas and high output power. In typical FPV setups with 250mW and omni antennas, 5 to 10 kilometers is common. On micro builds with 100mW and ceramic antennas, 1 to 3 kilometers is realistic depending on obstacles.
What is an ExpressLRS receiver?
An ExpressLRS receiver is a radio module that receives control signals from your transmitter using the open-source ExpressLRS protocol. It converts those signals into CRSF or PWM outputs for your flight controller or servos. ELRS receivers are known for ultra-low latency, long range, and affordable prices compared to proprietary systems.
What is the difference between 2.4GHz and 900MHz ELRS?
2.4GHz offers higher packet rates, smaller antennas, and better availability worldwide. 900MHz penetrates obstacles better and achieves longer range, but it requires larger antennas and is restricted in some regions. For most FPV drones, 2.4GHz is the better choice.
What is true diversity in ELRS receivers?
True diversity means the receiver has two independent RF chains, each with its own antenna, amplifier, and processor. The receiver picks the strongest signal from both chains. Antenna diversity only switches between two antennas on a single RF chain. True diversity provides better performance but costs more.
Final Thoughts
Choosing the best ExpressLRS receiver modules comes down to matching the hardware to your actual flying habits. The RadioMaster RP4TD leads the pack with true diversity and dual TCXO oscillators for pilots who demand the best.
The RP3 offers the best balance of price and performance for most builders. The RP1 is the reliable budget choice that works in almost any build.
For specific use cases, the MATEK R24-D gives you true diversity at a lower price, the BETAFPV Micro handles PWM for fixed-wing, the Happymodel EP1 dominates the micro category, the HGLRC offers unbeatable durability for the price, and the BAYCKRC is the gateway for new pilots.
Our team will continue testing new receivers as they release, and we will update this guide throughout 2026 to keep the recommendations current. If you are unsure which receiver to buy, start with the RP3.
It has enough features to grow with you, and the price will not break your budget. Happy flying, and keep the blue side up.