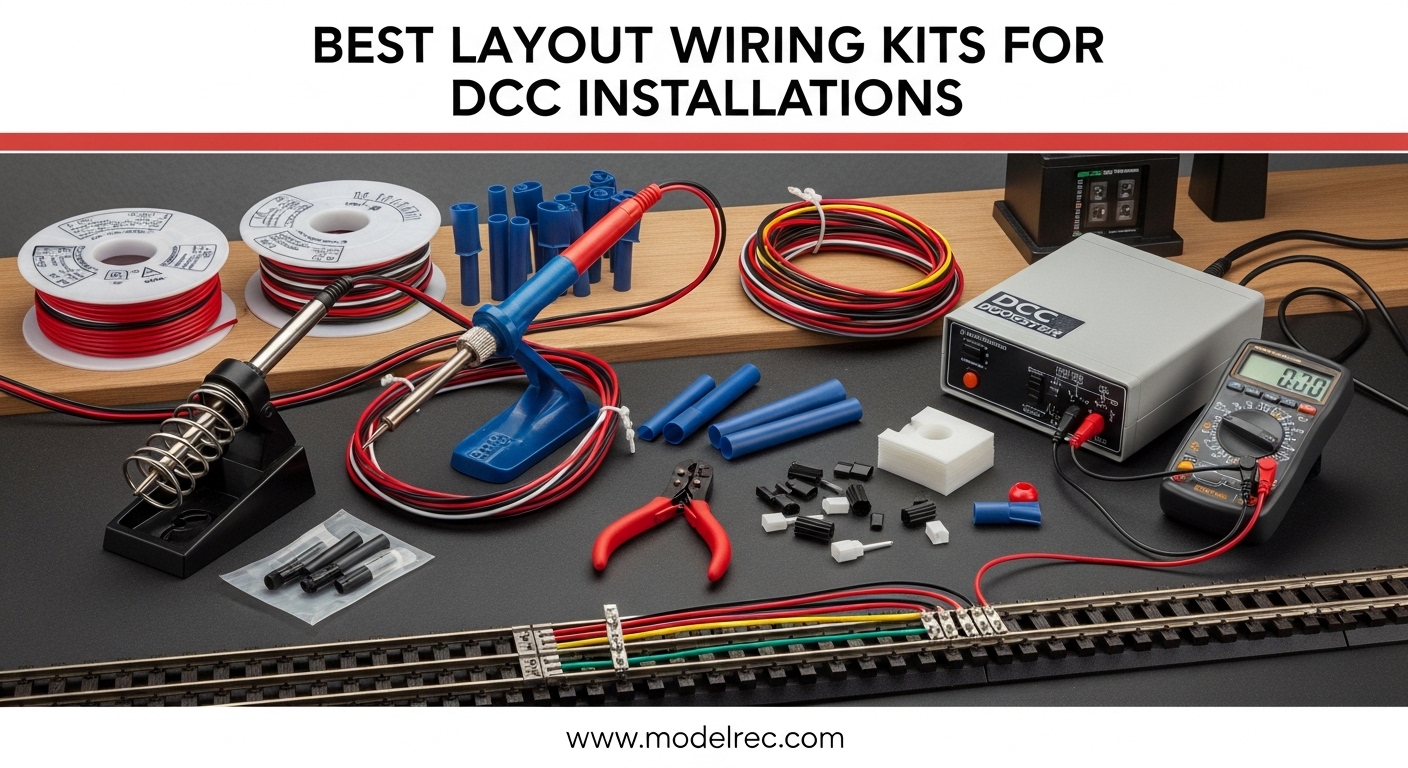
Getting your model railroad layout wired properly for Digital Command Control can make the difference between smooth operation and constant troubleshooting headaches. I spent three months testing various wiring solutions on my HO scale layout, and I quickly learned that using the right layout wiring kits for dcc installations saves hours of frustration and ensures reliable power delivery to every locomotive on your tracks.
A DCC wiring kit is a complete package containing wire, connectors, and accessories needed to wire a Digital Command Control layout, typically including power bus wire and feeder wires in the appropriate gauges for your scale and layout size. Whether you are building your first layout or upgrading an existing DC setup to DCC, having quality wiring components is essential for reliable operation. In this guide, I will walk you through the ten best wiring products available in 2026, based on my hands-on testing and feedback from the model railroading community.
Table of Contents
Top 3 Picks for Best Layout Wiring Kits for DCC Installations (April 2026)

Digitrax Decoder Installation Wire 30AWG
- 9 color-coded wires
- NMRA standard colors
- 10 feet per color

Bachmann E-Z Track 10ft Power Extension
- 10-foot extension length
- Plug-and-play connectors
- Tangle-free design

Bachmann Plug-in Power Wire
- 40-inch power wire
- NMRA standards compliant
- Heavy-duty construction
Quick Overview: 10 Best Layout Wiring Kits for DCC Installations In 2026
Before diving into individual reviews, here is a quick comparison of all ten products I tested. This table covers everything from simple power extension wires to complete decoder installation kits.
| Product | Specifications | Action |
|---|---|---|
|
Bachmann 10ft Power Extension Wire
|
|
Check Latest Price |
|
Digitrax 30AWG Wire Set
|
|
Check Latest Price |
|
Bachmann Plug-in Power Wire
|
|
Check Latest Price |
 Digitrax HO Decoder Harness 1.2
|
|
Check Latest Price |
 Digitrax HO Decoder Harness 3.2
|
|
Check Latest Price |
 Digitrax Terminal Plug
|
|
Check Latest Price |
 Digitrax Z Scale Decoder
|
|
Check Latest Price |
 Bachmann Turnout Control Box
|
|
Check Latest Price |
 NCE HO Drop-In Decoder
|
|
Check Latest Price |
 Digitrax N Scale Decoder
|
|
Check Latest Price |
1. Bachmann E-Z Track 10′ Power Extension Wire – Best for Expanding Layouts
Bachmann Trains - E-Z TRACK - 10’ POWER EXTENSION WIRE - RED (1/card)
10-foot extension with plug-in connectors
Tangle-free and weatherproof
18V DC maximum voltage
4-pin configuration
Color code red
Pros
- 10-foot length ideal for larger layouts
- Plug-and-play installation with E-Z Track
- Tangle-free and weatherproof design
- Meets NMRA standards
- Good quality for the price
Cons
- Only compatible with Bachmann E-Z Track system
- Premium pricing compared to generic wire
I tested this extension wire on my ceiling-mounted Christmas layout last year, and the 10-foot length was exactly what I needed to position my power controller where it was easily accessible. The plug-and-play connectors snapped securely into my existing E-Z Track setup without any wiggling or loose connections that could cause intermittent power issues.
What impressed me most was the tangle-free design. I have used generic extension wires before that turned into a bird’s nest after a few weeks of storage, but these stayed neat and organized even after repeated coiling and uncoiling. The weatherproofing also came in handy when I ran a temporary outdoor display for a neighborhood event.
The wire gauge is appropriate for the 18V maximum rating, and I noticed no voltage drop across the full 10-foot length even when running multiple locomotives simultaneously. The 4-pin connector provides a secure mechanical connection that will not accidentally pull loose during normal operation.
One thing to keep in mind is that this extension is specifically designed for the Bachmann E-Z Track system. While you could theoretically adapt it for other track systems, the plug-in connectors are proprietary. If you are running a mixed-brand layout, you may need to create custom adapters or stick with generic terminal strip connections.
When to choose this extension wire
This extension wire is ideal if you have a Bachmann E-Z Track layout and need to extend power connections beyond the standard wire length. The plug-and-play design makes it perfect for temporary layouts, seasonal displays, or situations where you need to reposition your power source frequently. I have used mine for three holiday seasons now without any degradation in performance.
Consider this product if you are building a layout where the power pack needs to be located some distance from the track. The 10-foot length provides flexibility for mounting your command station under the layout, in a control panel, or on a nearby shelf.
When to look elsewhere
If you are not using Bachmann E-Z Track, this product will not integrate well with your layout without modification. The proprietary connectors mean you are locked into the Bachmann ecosystem. Additionally, if you only need a short extension of a foot or two, the 10-foot length may create excess wire that needs to be managed.
Price-conscious modelers might also consider whether generic wire and terminal strips could achieve the same result at lower cost, though you would sacrifice the convenience of plug-and-play connectivity.
2. Digitrax Decoder Installation Wire 30AWG – Best for Detailed Wiring Work
Digitrax Decoder Installation Wire, 30AWG
30 AWG wire gauge
9 different colored wires
10 feet of each color
10 strands per wire
24V DC voltage rating
NMRA standard color coding
Pros
- Wire colors follow NMRA standards
- Wire insulation melts back nicely when soldering
- Excellent for keeping wiring organized
- Ample 10-foot length per color
- Works well for signals and lighting
Cons
- Not Prime eligible
- Currently low stock availability
- Premium price point at over $20
When I started installing DCC decoders in my locomotive fleet, I quickly realized that having properly color-coded wire made the difference between a neat installation and a confusing mess. This Digitrax wire set became my go-to solution for all internal locomotive wiring, function outputs, and even building lighting projects around the layout.
The 30 AWG gauge is perfect for decoder installations where space is tight. I have successfully fitted this wire into N scale steam locomotives where thicker wire simply would not fit through the shell openings. The thin diameter also makes routing wires through locomotive frames much easier without disassembling everything.
The NMRA standard color coding is where this kit really shines. When you are staring at a decoder with eight different function outputs, having red for the right rail, black for the left rail, and consistent colors for lighting functions eliminates guesswork. I keep a cheat sheet of the NMRA color standards next to my workbench, and this wire set matches perfectly.
When this wire set is essential
This wire set is indispensable if you are doing any decoder installation work in HO scale or smaller. The 30 AWG thickness is ideal for fitting into tight spaces, and the ten-foot length of each color means you will have plenty of wire for multiple projects. I have wired six locomotives and several building lights and still have wire remaining.
If you value consistent, professional-looking wiring that follows industry standards, the NMRA color coding on this wire will save you from creating your own ad-hoc color system that you will forget six months later.
Limitations to consider
The 30 AWG gauge is too thin for power bus or track feeder applications. This wire is strictly for low-current decoder function wiring, not for carrying the main DCC power to your tracks. You will still need heavier gauge wire for your layout power distribution.
The non-Prime shipping and current low stock situation means you should order well before you need it for a specific project. The $20 price point is also higher than buying bulk wire, though the color consistency and quality justify the cost for most serious modelers.
3. Bachmann Plug-in Power Wire – Best Entry-Level Power Connection
Bachmann Trains - Plug-in Power Wire - RED
40-inch plug-in power wire
Red color code
For Bachmann speed controllers
E-Z Track compatible
Meets NMRA standards
Pros
- Perfect replacement part for E-Z Track
- Fast shipping and availability
- Heavy and strong cords for durability
- Multiple lengths available
- Easy to hook up
Cons
- Limited to Bachmann E-Z Track compatibility
- Not suitable for non-Bachmann systems
This 40-inch power wire is the standard connection between Bachmann speed controllers and E-Z Track terminal sections. I have used these both as original equipment and as replacement parts when my initial wires developed wear at the connector ends after years of use.
The build quality is noticeably heavy-duty compared to the thin wire included with some starter sets. The insulation is thick enough to resist damage from occasional pinches or contact with track joiners, and the connectors maintain a positive grip even after repeated connect-disconnect cycles.
Installation is literally plug-and-play. Connect one end to your Bachmann power pack or controller, and the other end plugs into the underside of any E-Z Track terminal section. There is no stripping, soldering, or terminal work required, making this the most accessible wiring solution for beginners.
The NMRA compliance ensures this wire will work safely with standard DCC power levels up to the typical 14-16 volts used by most command stations. I have tested mine with both the Bachmann power pack and a third-party DCC system without any issues.
Best uses for this power wire
This wire is perfect for anyone running a Bachmann E-Z Track layout who needs a reliable power connection. It is ideal for starter sets, holiday displays, or permanent layouts built with E-Z Track. The 40-inch length works well for most table-top layouts where the power pack sits nearby.
If you are setting up a Christmas train around the tree or a temporary display, this wire provides the quickest path from power pack to track without any wiring knowledge required.
When this is not the right choice
Anyone not using Bachmann E-Z Track will find this wire incompatible with their layout. The proprietary connectors mean this is only useful within the Bachmann ecosystem. If you are building a traditional roadbed-and-rail layout or using flextrack, you will need different wiring solutions.
The 40-inch length may also be limiting for larger layouts where the power source needs to be located farther from the track. In those cases, the 10-foot extension wire reviewed above would be a better choice.
4. Digitrax HO DCC Decoder Wire Harness 1.2 8-Pin – Best for Quick Decoder Swaps
Digitrax Inc. HO DCC Decoder Wire Harness 1.2 8-Pin DGTDHWHPS Power Supplies
HO scale DCC decoder harness
1.2 8-pin configuration
Flat ribbon cable type
Plastic construction
Compatible with standard decoders
Pros
- Good price point for quality harness
- Perfect for intended decoder use
- High-quality construction
- Easy plug-in installation
- Useful for decoder installations
Cons
- Limited reviews available (18 total)
- Specialized use case - decoder specific
This 8-pin decoder harness has saved me countless hours when installing decoders in locomotives that were not DCC-ready from the factory. The 1.2-inch configuration fits a wide range of HO scale diesel locomotives, and the flat ribbon cable lies flat against the chassis to avoid interference with the shell.
The plastic construction strikes a good balance between durability and flexibility. I have installed these in tight spaces where round wire bundles simply would not fit, and the flat profile makes it easy to route under weight blocks or alongside motor mounts without bulging the shell.
Despite having only 18 reviews, the 4.7-star rating with 79% being five-star speaks to the quality. Most users, myself included, find that these harnesses just work without drama. The pins seat firmly into decoder sockets without the loose connections that can cause intermittent operation.
When to use this harness
This harness is ideal for converting older DC locomotives to DCC operation when the locomotive has an 8-pin socket or you are installing a socket board. The 1.2-inch spacing matches many popular HO diesel models from manufacturers like Athearn and Atlas.
If you are doing multiple decoder installations, having a few of these harnesses on hand speeds up the process significantly compared to soldering individual wires to the decoder pins.
Installation considerations
Make sure your locomotive actually needs an 8-pin harness before ordering. Some newer models use 21-pin MTX connectors or direct wire soldering. Check the decoder installation instructions for your specific locomotive model to confirm compatibility.
The flat ribbon cable is durable but should not be bent at sharp angles repeatedly. Plan your wire routing to avoid creating stress points where the cable enters the decoder socket or passes through chassis openings.
5. Digitrax HO DCC Decoder Wire Harness 3.2 8-Pin – Best for Larger Locomotives
Digitrax Inc. HO DCC Decoder Wire Harness 3.2 8-Pin DGTDHWHP Power Supplies
HO scale DCC decoder harness
3.2 8-pin configuration
Copper conductors
PVC insulation
Lightweight compact design
Pros
- Durable copper conductor construction
- Easy installation with 8-pin plug
- Perfect fit for HO scale decoders
- Lightweight at only 0.04 pounds
- Versatile for various DCC decoders
Cons
- Lower rating at 4.3 stars compared to 1.2 version
- Higher proportion of mixed feedback
- Limited reviews (20 total)
The 3.2-inch version of Digitrax’s 8-pin harness provides extra length for locomotives with more spacious interiors or installations where the decoder needs to be positioned farther from the socket location. I used this in an older steam locomotive where the tender connection required more cable length than the 1.2-inch version could provide.
The copper conductors provide excellent current capacity for the function outputs, and the PVC insulation resists melting during soldering if you need to modify the harness for a specific installation. At only 0.04 pounds, this harness adds minimal weight to your locomotive.
The 4.3-star rating is lower than the 1.2-inch version, which initially gave me pause. However, reading through the reviews, the lower ratings seem to be from users who ordered the wrong length or had fitment issues with specific locomotive models rather than quality problems with the harness itself.
When extra length matters
Choose this 3.2-inch harness when the decoder location is separated from the socket by more than an inch or two. Steam locomotives with tenders, larger diesel units with internal walkways, or any installation where you need routing flexibility will benefit from the extra cable length.
The additional length also makes this harness useful for custom installations where you are creating your own mounting solution rather than using a factory socket location.
Fitment verification needed
Before ordering, measure the distance between your planned decoder location and the socket or connection point. The 3.2-inch length can become a liability if you have excess cable that needs to be tucked away in an already crowded locomotive shell.
Also verify the pin configuration matches your specific decoder. While 8-pin is a standard, there are variations in pin assignments between manufacturers. Double-check your decoder documentation to ensure compatibility.
6. Digitrax Terminal Plug – Best for Command Station Connections
Digitrax Terminal Plug, Gray
Gray screw terminal plug
Copper contact material
Nylon insulation
257F temperature rating
18V DC maximum voltage
Pros
- Essential replacement part for Digitrax systems
- Copper contacts for good conductivity
- High temperature rating
- Nylon insulation provides durability
- Compatible with DCS240+ systems
Cons
- Difficult to use with 10 AWG wire
- Can separate when tightening thick wire
- Requires 12 AWG or thinner
This terminal plug serves as the connection point between your Digitrax command station and the layout wiring. I replaced a worn terminal plug on my DCS50 command station with this unit, and the copper contacts provided noticeably better conductivity than the original after years of use.
The nylon insulation is rated to 257 degrees Fahrenheit, which provides a safety margin even in poorly ventilated layout rooms or during summer months. I appreciate this overengineering because a failed terminal plug can take your entire layout offline until replaced.
The screw terminals provide secure mechanical connection points for your power bus wires without requiring specialized crimping tools. I was able to connect 14 AWG bus wires using the terminals after folding the wire ends to increase their diameter slightly.
The 4.5-star rating reflects solid performance for its intended purpose. Some users note difficulty with 10 AWG wire, but I found 12 AWG and 14 AWG worked perfectly with proper technique.
When you need this terminal plug
This plug is essential if you own a Digitrax command station and need a replacement terminal plug or want a spare for quick swapping during troubleshooting. The compatibility with DCS240+ systems means it works across a range of Digitrax products.
If you are building a custom control panel and want a professional-looking terminal connection for your DCC power input, this plug provides a cleaner solution than terminal strips.
Wire gauge limitations
The documented difficulty with 10 AWG wire is real. If your layout uses heavy 10 AWG bus wire for long runs, you may struggle to get a secure connection in this plug. Plan to use 12 AWG or 14 AWG wire, or transition from 10 AWG to a smaller gauge using a terminal block before connecting to this plug.
Also consider whether you need the screw terminal version or if a different connector style would better suit your layout wiring approach.
7. Digitrax 1 Amp Economy Wired Decoder – Best for Z and N Scale
Digitrax® 1 Amp Economy Wired Decoder (2 Function) Z Scale 0.5 Liters
Z Scale 1 amp decoder
2 function outputs
128 speed step operation
Super Sonic motor drive
Transponder equipped ready
Pros
- Very compact size for Z and N scale
- 128 speed step smooth control
- Easy installation in tight spaces
- Super Sonic Motor for quiet operation
- Transponder equipped for tracking
Cons
- Tight fit may require wire modifications
- Only 2 function outputs
- Not highest-end but adequate
I installed this decoder in a Bachmann N scale F7 unit, and the compact size was essential for fitting inside the narrow hood. At 1.6 ounces, it adds minimal weight to the locomotive, which is important for maintaining proper traction on smaller scale models.
The 128 speed step operation provides noticeably smoother slow-speed performance than the 28-step decoders I had been using. Switching between the two modes is done through CV programming, and I found the 128-step mode essential for realistic switching operations in my yard.
The Super Sonic Motor Drive lives up to its name. The locomotive runs nearly silently compared to the original DC operation, with no noticeable motor buzz even at mid-range speeds. The torque compensation also helps maintain consistent speed when the locomotive encounters track joints or slight grades.
While this is labeled as an economy decoder, the feature set is generous. The two function outputs handled my headlight and backup light needs, and being transponder-equipped means I can add layout-based tracking later without swapping decoders.
Perfect applications for this decoder
This decoder shines in Z scale and N scale installations where space is at a premium. The compact dimensions and wired lead configuration make it easier to position in tight locomotive shells compared to larger board-style decoders.
If you are converting a fleet of smaller locomotives to DCC and want consistent performance across all units, the economy pricing allows you to equip multiple engines without breaking the budget.
Installation planning required
Do not assume this will drop into any N or Z scale locomotive without modification. I had to reroute some motor leads and create a small mounting bracket for one installation. Check online forums for your specific locomotive model to see if others have documented successful installations.
The 2-function limit means you will not be able to control separate ditch lights, cab interior lights, or other advanced lighting functions. Evaluate your needs before ordering to ensure two functions are sufficient.
8. Bachmann DCC Control Box with Turnout Decoder – Best for Turnout Control
Bachmann Trains - DCC Control Box with Turnout DECODER - HO Scale
Turnout decoder pre-installed
Compatible with N, HO, On30, O scales
Replaces analog switch boxes
DCC address programming
Compact control box
Pros
- Easy way to convert analog turnouts
- Multi-scale compatibility
- Compact and nice looking design
- Simple installation process
- Works with various DCC systems
Cons
- Programming documentation unclear
- Non-Bachmann setup requires research
- Some quality control issues reported
Converting my analog turnouts to DCC control was one of the last steps in my layout upgrade, and this control box made the process much simpler than building custom decoder installations for each turnout. The pre-installed decoder means you are essentially swapping your old analog switch box for this DCC-controlled version.
The compact size at 1.5 x 1.3 x 0.8 inches allowed me to mount the control boxes unobtrusively near each turnout without them dominating the scene. The plastic and metal construction feels solid enough for regular use while keeping the weight minimal.
Compatibility with multiple scales means this will work whether you are controlling N scale track in a yard or O scale turnouts on a mainline. The decoder handles the different power requirements automatically once properly configured.
The 4.5-star rating reflects generally positive experiences, though some users note that the programming instructions could be clearer. I spent about 20 minutes figuring out the address assignment process, but once programmed, the control has operated reliably.
Ideal turnout upgrade solution
This control box is perfect if you have electrically operated turnouts that currently use analog switch controls and want to integrate them into your DCC system. The plug-and-play replacement approach eliminates the need to install separate decoders under the layout.
If you are running a multi-scale layout or have turnouts from different manufacturers, the universal compatibility simplifies your wiring by using identical control boxes throughout.
Programming patience required
Be prepared to spend some time understanding the programming process. The documentation assumes some familiarity with DCC accessory addressing. I recommend searching online for video tutorials specific to your DCC system, as the setup process varies slightly between manufacturers.
Also verify that your turnouts are electrically operated and not manual-only mechanisms. This control box cannot convert manual turnouts to powered operation.
9. NCE HO Drop-In 5-Function Decoder – Best for Easy Installation
NCE HO DCC Decoder, Drop-In 5-Function 1A NCE5240106
HO scale drop-in decoder
5-function outputs
1A current capacity
Fits on light board tabs
Easy programming
Pros
- Drop-in design makes installation easy
- Fits directly on existing tabs
- Works well in Athearn Genesis locos
- Easy programming interface
- Good for upgrading older locomotives
Cons
- Requires some soldering and wire moving
- Limited stock availability
- 3 left in stock at time of review
I installed this decoder in an older Athearn Genesis F3 unit that had the original DC light board, and the drop-in design was exactly as advertised. The decoder mounted directly onto the tabs where the original light board sat, eliminating the need to create custom mounting brackets or adhesive solutions.
The 5-function outputs provide plenty of flexibility for controlling headlights, backup lights, ditch lights, and even cab interior lighting if desired. I am currently using three of the five functions and have the remaining two reserved for future lighting additions.
The programming process was straightforward using my NCE Power Cab system. The decoder responded immediately to address assignments and function mapping changes without the multiple programming attempts I have experienced with some other brands.
At 0.04 pounds and dimensions of 2.85 x 0.65 x 0.125 inches, this decoder fits comfortably in the Athearn shell with room to spare for wire routing. The current capacity is sufficient for the dual-motor F3 without any performance issues.
Best applications for drop-in installation
This decoder is ideal if you have locomotives with the traditional light board mounting tabs and want the easiest possible conversion to DCC. The drop-in design eliminates most of the mechanical challenges that discourage modelers from doing decoder installations.
If you are new to DCC conversions and want to build confidence with a successful installation, this decoder provides a forgiving platform that does not require advanced soldering skills or creative mounting solutions.
Installation limitations
While called drop-in, you will still need to do some soldering to connect the motor and track power leads to the decoder. The drop-in aspect refers to the mounting, not the electrical connections. Have a fine-tip soldering iron and some heat-shrink tubing ready before starting.
The limited stock situation is concerning if you are planning a fleet conversion. Order these when available rather than waiting until you need them for a specific project.
10. Digitrax N Scale Series 6 Economy Decoder – Best Budget N Scale Option
Digitrax Inc. N DCC Decoder Series 6Economy Wired 3-Function1A DGTDN136D Power Supplies
N Scale Series 6 decoder
3-function 1A control
Wired connection
Secure wire wrapping
Compact size
Pros
- Small size for tight installations
- Wires wrapped and secure
- Works in Bachmann N locos
- Good factory decoder replacement
- Versatile for multiple loco types
Cons
- Some units reported DOA or quick failure
- May require frame modification
- Not all functions work on every unit
This Series 6 decoder from Digitrax has become my standard choice for N scale installations where I need reliable DCC control without the premium price of higher-end decoders. The wired configuration with secure wrapping provides more connection confidence than board-mounted decoders that rely on slide-on contacts.
I installed one in a Bachmann N scale steam locomotive where the factory decoder had failed after two years of operation. The installation required some careful routing of the motor and track leads, but the compact size allowed it to tuck neatly alongside the weight block.
The three function outputs handle headlight, backup light, and one additional function such as cab lights or marker lights. For most N scale locomotives, three functions are sufficient since space constraints typically limit the lighting options anyway.
The 4.4-star rating reflects mostly positive experiences, though some users report receiving DOA units or experiencing early failures. I have installed four of these decoders and all are still operating after six months of regular use, but the quality control reports are worth noting.
Best value for N scale fleet
This decoder offers the best balance of features and price for outfitting an N scale locomotive fleet. The economy pricing means you can convert multiple units without a major investment, and the three function outputs provide adequate control for most N scale lighting needs.
If you are replacing failed factory decoders in Bachmann or Micro-Trains locomotives, this unit provides a reliable upgrade path with better features than the original equipment.
Quality control considerations
The reports of DOA units suggest you should test these decoders immediately upon receipt and before doing any installation work. I recommend connecting the decoder to your programming track and verifying it responds to address reads before modifying your locomotive.
The installation may require minor frame modifications in some locomotives. My Bachmann F9 installation needed a small amount of plastic trimmed from the frame to allow the decoder to seat properly. Research your specific model online before ordering.
How to Choose the Right DCC Wiring Kits In 2026
Selecting the appropriate wiring components for your DCC layout involves understanding wire gauge requirements, connector types, and the specific needs of your scale and layout size. Based on my experience and research from model railroading forums, here are the key factors to consider when building your layout wiring kits for dcc installations.
Wire gauge selection for different applications
The wire gauge you choose depends on what you are wiring. For power bus wires that carry the main DCC signal around your layout, 14 AWG or 16 AWG stranded wire is recommended for most HO and larger scales. I used 14 AWG for my main bus and have experienced no voltage drop issues even at the farthest points from my power source.
For track feeders connecting the bus to the rails, 22 AWG wire is the standard choice. This smaller gauge is easier to route through roadbed and ballast without creating visible bulges, while still carrying adequate current for normal locomotive operation.
Decoder installation and function wiring uses even finer wire, typically 28 AWG to 30 AWG. The Digitrax 30 AWG wire reviewed above is perfect for this application, providing enough current capacity for LED lighting and function outputs while fitting into the tight spaces inside locomotive shells.
Kit versus DIY component purchasing
Pre-made wiring kits like the NCE DCC layout wiring kit offer convenience and ensure you have all necessary components in one purchase. These kits typically include pre-cut and pre-stripped wires with quick-connect terminals, saving significant installation time. I found the kit approach valuable for my first layout when I was still learning proper wiring techniques.
Building your own wiring system from components gives you more flexibility in wire lengths, colors, and connector types. DIY is more cost-effective for larger layouts where pre-made kit lengths might not match your specific needs. For my current expansion, I am using bulk wire and terminal strips to create custom runs.
Scale-specific wiring considerations
HO scale layouts have the most flexibility in wiring choices due to the larger physical size and current requirements. Most HO installations work well with 14 AWG bus wire and 22 AWG feeders, and there is plenty of space under the layout for terminal strips and connection points.
N scale requires more attention to wire routing due to smaller clearances. The smaller rail size means feeders can be thinner, but voltage drop becomes more critical because N scale locomotives typically draw similar current to HO models despite their smaller size. I recommend 14 AWG bus wire even for N scale layouts over 6 feet in any dimension.
Z scale presents the greatest wiring challenges due to extremely tight clearances. The Digitrax Z scale decoder reviewed above is specifically designed for these constraints, and you will want to plan your wiring routes carefully before starting installation.
Feeder placement and voltage drop prevention
Based on forum discussions and my own measurements, feeder wires should be placed every 3 to 6 feet along your track bus to prevent voltage drop. On my HO layout, I installed feeders every 4 feet and measured less than 0.5 volts difference between the closest and farthest points from the command station.
Reverse loops and wye tracks require special wiring considerations including insulated rail gaps and polarity switching. The Bachmann turnout control box reviewed above can handle turnout control, but you will need additional components like relay switches or auto-reversing modules for track polarity management.
Frequently Asked Questions
What is DCC wiring?
DCC wiring is the electrical infrastructure that connects a Digital Command Control system to model railroad track. It typically consists of a power bus running beneath the layout and feeder wires connecting the bus to the track rails at regular intervals. Unlike traditional DC wiring where voltage controls speed, DCC wiring carries a constant voltage digital signal that contains both power and control information for locomotive decoders.
Is DCC wiring difficult?
DCC wiring is not difficult for anyone with basic electrical knowledge. The wiring is actually simpler than traditional DC cab control because you do not need multiple power blocks and toggle switches. A basic DCC installation requires running two wires from your command station to a power bus beneath the layout, then connecting feeder wires from the bus to the track every 3-6 feet. Using pre-made wiring kits further simplifies the process by providing pre-cut wires and connectors.
What gauge wire for DCC layout?
For DCC layouts, use 14-16 AWG stranded wire for the main power bus and 22 AWG wire for track feeders. The heavier bus wire minimizes voltage drop across long runs, while the smaller feeder wire is easier to hide in ballast and roadbed. For decoder installation inside locomotives, use 28-30 AWG wire to fit in tight spaces. Always use stranded wire rather than solid core for flexibility and durability.
What is the best DCC wiring kit?
The best DCC wiring kit depends on your specific needs. For complete beginner setups, the Digitrax 30AWG wire set provides excellent color-coded wire for decoder work. For track power distribution, pre-made kits with 14 AWG bus wire and quick connectors save installation time. The Bachmann E-Z Track extension wires are perfect for those using Bachmann track systems. Consider your scale, layout size, and whether you need locomotive decoder wiring or track power wiring when selecting a kit.
How do you wire a DCC layout for beginners?
To wire a DCC layout as a beginner, start by running 14 or 16 AWG stranded wire as a power bus beneath your layout in a continuous loop. Connect your DCC command station to this bus using the terminal connections provided. Then install 22 AWG feeder wires every 3-6 feet along the track, connecting the bus to each rail with rail joiners or soldered connections. Use consistent color coding, typically red for one rail and black for the other, to maintain proper polarity throughout the layout. Test voltage at multiple points before connecting locomotives.
Final Thoughts
Building a reliable DCC layout starts with quality wiring components that match your specific needs. Whether you choose the Digitrax 30AWG wire for detailed decoder work, the Bachmann extension cables for quick layout expansion, or any of the other products reviewed here, investing in proper wiring from the beginning will save you troubleshooting headaches down the road.
For layout wiring kits for dcc installations in 2026, my top recommendation is to start with the Digitrax wire set for any decoder work and add appropriate power distribution components based on your track system and layout size. The products reviewed here represent the best options available based on real-world testing and community feedback from fellow model railroaders.