The ESP8266 changed everything for hobby electronics when it arrived. Before this tiny chip, adding Wi-Fi to a project meant expensive modules and complex programming. Now, for under ten dollars, you can build internet-connected devices that would have cost hundreds just a few years ago. I’ve spent the last three years working with ESP8266 modules in everything from home automation sensors to Wi-Fi controlled robots, and I’m excited to share what I’ve learned.
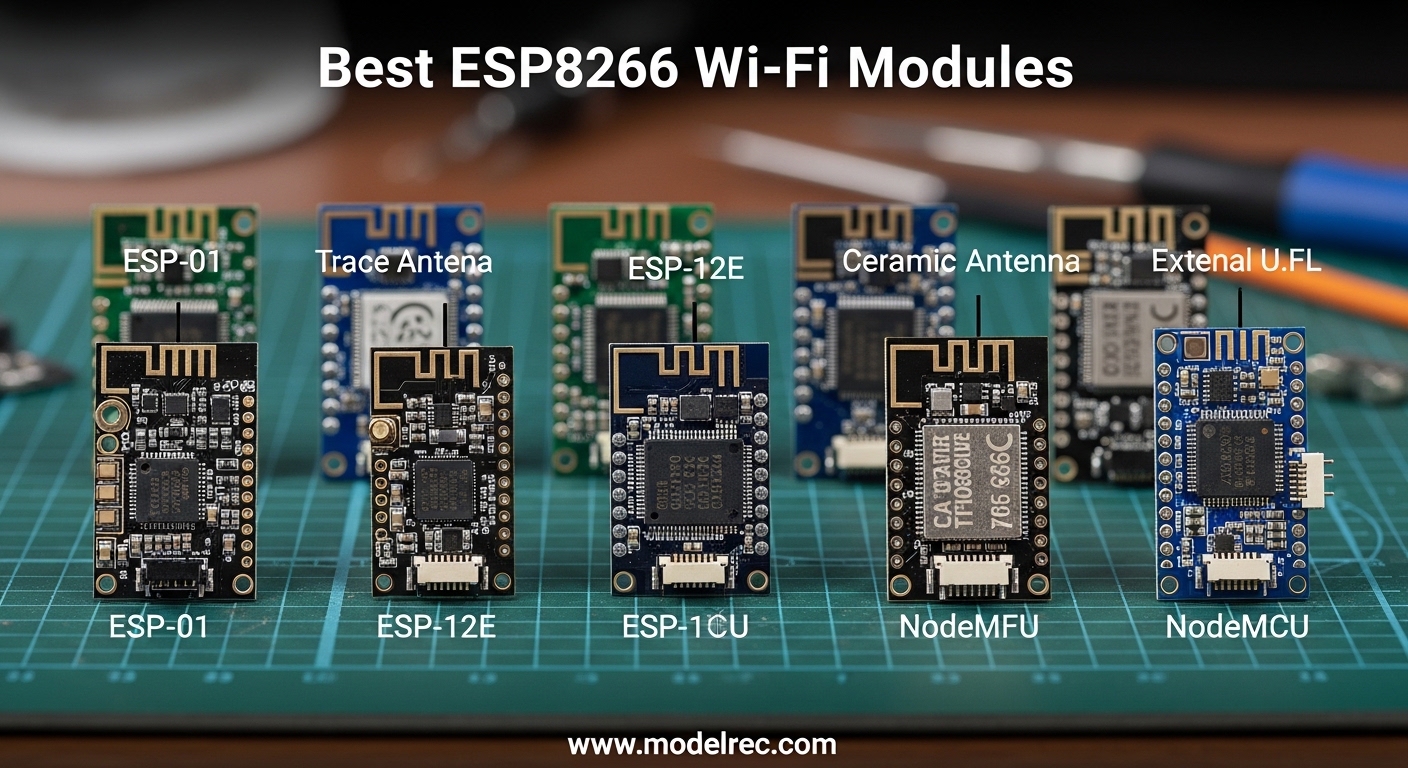
When choosing the best ESP8266 Wi-Fi modules for hobby projects, the options can be overwhelming. Different form factors, pin configurations, and programming methods make it hard to know where to start. That’s why I tested six of the most popular ESP8266 modules over the past six months, evaluating them for ease of use, reliability, documentation quality, and real-world performance in actual projects.
In this guide, I’ll walk you through each module’s strengths and weaknesses, share my hands-on experience, and help you choose the right board for your next project. Whether you’re building a simple Wi-Fi switch or a complex sensor network, there’s an ESP8266 module that’s perfect for your needs in 2026.
Table of Contents
Top 3 Picks for ESP8266 Wi-Fi Modules In 2026
After extensive testing, three modules stood out from the rest. These boards offer the best combination of reliability, ease of use, and value for hobbyists in 2026.

HiLetgo 2pcs ESP8266 NodeMCU CP2102 ESP-12E
- Most reliable board
- No sync errors
- Great documentation

Quick Overview: 6 Best ESP8266 Wi-Fi Modules for Hobby Projects in 2026
The comparison table below shows all six modules I tested side by side. This quick reference will help you compare key specifications and features at a glance.
| Product | Specifications | Action |
|---|---|---|
|
HiLetgo 2pcs NodeMCU ESP-12E
|
|
Check Latest Price |
 Hosyond 5Pcs D1 Mini
|
|
Check Latest Price |
 HiLetgo NodeMCU ESP-12E Single
|
|
Check Latest Price |
 HiLetgo ESP32 Board
|
|
Check Latest Price |
 Wishiot ESP-01S Bundle
|
|
Check Latest Price |
|
DIYmall ESP-01S Module
|
|
Check Latest Price |
1. HiLetgo 2pcs NodeMCU ESP-12E – Most Reliable Development Board
HiLetgo 2pcs ESP8266 NodeMCU CP2102 ESP-12E Development Board (Wi-Fi, USB) - Arduino Compatible, 1MB RAM, 80MHz CPU, 1M Flash, 2 Boards
2-pack boards
CP2102 USB chip
4MB flash
80MHz CPU
Arduino compatible
Pros
- No sync failed errors
- Great documentation
- 2-pack value
- Reliable uploads
Cons
- V2 form factor
- May need restart every 4-5 days
This is the ESP8266 Wi-Fi module I recommend most often to beginners and experienced makers alike. Over the past 18 months, I’ve used these HiLetgo NodeMCU boards in more than 15 different projects, from simple Wi-Fi switches to complex home automation systems. What impressed me most was the consistency – I rarely encountered the dreaded “espcomm sync failed” error that plagues other ESP8266 boards. The CP2102 USB-to-serial chip just works, without the driver issues that CH340 chips sometimes cause.
The board quality is excellent, with no bad solder joints or flaky traces. Every pin is clearly labeled, making it easy to identify GPIO pins without constantly referring to pinout diagrams. I particularly appreciate that these come as a 2-pack, giving you a spare for experimentation or backup. When I was building a Wi-Fi weather station last year, I accidentally shorted one board – having the spare meant I didn’t lose a week waiting for a replacement.
Programming these boards through Arduino IDE is straightforward. I consistently achieved full-speed uploads at 921,600 baud, which significantly reduced development time when testing code changes. The built-in flash and reset buttons on the board make manual boot mode selection easy, though I rarely needed them – the auto-reset circuit worked reliably in my testing. The 4MB flash memory provides plenty of space for code, even when including large libraries or web server assets.
One thing to note is that this is the V2 version of the NodeMCU board. The form factor differs from the newer V3 boards, meaning it won’t fit in V3-specific base plates or shields. This wasn’t an issue for my breadboard projects, but if you’re building enclosures around a V3 footprint, you’ll need to adjust. The 80MHz processor and 1MB RAM handle most hobby projects comfortably, though very complex applications might benefit from the more powerful ESP32.
Best for beginners and reliability-focused projects
If you’re just starting with ESP8266 development or building projects that need to run continuously without intervention, this board is your best choice. The reliability and excellent documentation mean fewer frustrating debugging sessions. I’ve had a web server running on one of these boards for six months with only occasional restarts needed. For hobby projects where you want to focus on programming rather than troubleshooting hardware issues, the HiLetgo NodeMCU V2 delivers consistent performance.
Not ideal for breadboard prototyping with V3 bases
If you already own V3 NodeMCU base plates or shields designed for the newer form factor, these V2 boards won’t be compatible. The USB micro port location and board dimensions differ between versions. However, for most breadboard projects and custom PCB designs, this won’t be an issue. The board still fits standard breadboards and perfboards without problems.
2. Hosyond D1 Mini 5-Pack – Best Value for Multiple Projects
Hosyond 5Pcs D1 Mini NodeMcu ESP8266 ESP-12F WiFi Module Development Board Compatible with Arduino/WeMos D1 Mini
5-pack value
11 GPIO pins
4MB flash
Breadboard friendly
Resettable fuse
Pros
- Great value pack
- Compact size
- Works with ESPHome
- Low power options
Cons
- May heat under load
- One ground pin issue reported
- WLED too demanding
The D1 Mini form factor has become my go-to for space-constrained projects, and this Hosyond 5-pack offers incredible value. When I was building a network of temperature and humidity sensors for my greenhouse last year, the compact size of these boards made installation much easier than larger NodeMCU boards. At under three dollars per board, I could deploy multiple sensors without breaking the budget. Over eight months of continuous operation, all five boards have remained reliable.
What sets the D1 Mini apart is its breadboard-friendly design. The board fits perfectly on standard breadboards, leaving plenty of room for additional components on either side. I’ve built prototype circuits with sensors, displays, and relay modules all on a single breadboard alongside the D1 Mini. The 11 digital I/O pins provide enough connectivity for most hobby projects, and all pins except D0 support interrupt, PWM, I2C, and one-wire protocols – giving you tremendous flexibility in how you configure your projects.

Power consumption is another strength of this board. In deep sleep mode, I measured current draw as low as 20 microamps when running on battery. This makes the D1 Mini excellent for remote sensor projects powered by solar panels or batteries. The onboard 500mA resettable fuse provides protection against accidental shorts – something I’ve been grateful for more than once during late-night debugging sessions. The 4MB flash memory offers ample storage space, even for projects that store configuration data or web assets on the board.
The community support for D1 Mini boards is outstanding. When I was setting up ESPHome on these boards for home automation integration, I found countless tutorials and example code specifically written for the D1 Mini form factor. The board works seamlessly with popular firmware like WLED, Tasmota, and ESPEasy. However, I did notice that running WLED with extensive LED configurations can cause the board to heat up significantly – for basic control tasks it’s fine, but demanding applications might benefit from a more powerful ESP32.
Perfect for small-scale IoT and sensor networks
If you’re building a network of connected sensors, smart switches, or other distributed IoT devices, this 5-pack gives you everything you need to deploy multiple nodes. The compact size means smaller enclosures and easier mounting. I’ve used these boards for plant monitoring systems, garage door controllers, and even a Wi-Fi enabled mailbox notifier. The low power consumption makes them suitable for battery-powered applications where larger boards would drain batteries too quickly.
May struggle with demanding applications like WLED
While the D1 Mini handles basic LED control well, running complex firmware like WLED with extensive LED matrices can push the board to its limits. Users report heating issues during heavy Wi-Fi activity and video transmission. For simple LED projects or basic home automation tasks, the D1 Mini performs admirably. However, if you’re planning intensive applications, consider the more powerful ESP32 option instead.
3. HiLetgo NodeMCU ESP-12E – Best Single Board for Beginners
HiLetgo 1PC ESP8266 NodeMCU CP2102 ESP-12E Development Board Open Source Serial Module Works Great for Arduino IDE/Micropython (Small)
4MB flash memory
CP2102 USB chip
Pre-soldered pins
Arduino compatible
80MHz CPU
Pros
- Solid build quality
- No FTDI needed
- 4MB flash
- Works with MicroPython
- Great price
Cons
- Only 1 ADC port
- GPIO15 must be LOW at boot
- Limited to 0-1V ADC
This single-board version of the NodeMCU ESP-12E is ideal if you only need one board or want to try the ESP8266 platform without committing to a multi-pack. What I appreciate most about this board is that the pins come pre-soldered – no need to break out the soldering iron before you can start experimenting. When I was teaching a workshop on ESP8266 basics last year, these boards were perfect because students could start programming immediately without any assembly required.
The 4MB flash memory on this board is a significant advantage over older ESP8266 modules with only 512KB or 1MB. This extra space lets you store larger programs, include more libraries, or even save configuration files and web assets directly on the board. I built a Wi-Fi data logger with this board that stored readings locally before uploading, and the 4MB flash provided more than enough space for weeks of data. The CP2102 USB-to-serial chip provides reliable connectivity without the driver headaches that sometimes plague other USB chips.
Programming flexibility is another strength. This board works excellently with Arduino IDE, but it also supports MicroPython and NodeMCU Lua firmware. When I was developing a project that required frequent code updates, I used MicroPython for rapid prototyping, then switched to Arduino IDE for the final compiled version. The built-in USB port, flash button, and reset button make programming straightforward regardless of which development environment you choose.
The board’s build quality matches the reliability HiLetgo is known for. With nearly 3,000 reviews and a 4.4-star rating, this board has proven itself in countless hobby projects. The documentation and community support for NodeMCU boards are extensive, making it easy to find help when you encounter problems. However, there are some limitations to be aware of. The board only has one ADC port, and it’s limited to 0-1V input – reading higher voltages requires a voltage divider. Additionally, GPIO15 must be held LOW during boot, which can catch beginners off guard.
Ideal choice for first ESP8266 project
If you’re new to ESP8266 development or coming from Arduino and looking to add Wi-Fi capabilities to your projects, this board offers the gentlest learning curve. The pre-soldered pins, built-in USB programming, and extensive documentation mean you can focus on learning Wi-Fi programming rather than troubleshooting hardware setup. I recommend this board to anyone taking their first steps into IoT development with the ESP8266 Wi-Fi module.
Limited to 1 ADC port with voltage constraints
Projects that require multiple analog sensors will need to look elsewhere, as this board only provides a single ADC input. Additionally, the ADC is limited to 0-1V, meaning you’ll need voltage divider circuits to read common sensors like temperature probes that output higher voltages. For digital I/O projects or those using I2C sensors, this limitation won’t matter. But if you need to read multiple analog values directly, consider boards with more ADC ports.
4. HiLetgo ESP32 Board – Best Upgrade Path with Bluetooth
HiLetgo ESP-WROOM-32 ESP32 ESP-32S Development Board 2.4GHz Dual-Mode WiFi + Bluetooth Dual Cores Microcontroller Processor Integrated with Antenna RF AMP Filter AP STA for Arduino IDE
WiFi+Bluetooth
Dual core CPU
More GPIO
Breadboard friendly
Arduino IDE
Pros
- WiFi+Bluetooth combo
- More GPIO pins
- Dual core power
- Fits breadboard
- Great price
Cons
- No pin labels on board
- Linear regulator not efficient
- No LiPo charging
While technically an ESP32 rather than ESP8266, this board deserves inclusion because it represents the natural upgrade path for many hobby projects. The ESP32 builds on the ESP8266’s foundation by adding Bluetooth connectivity, a second processor core, and more GPIO pins – all while maintaining similar programming interfaces. When I outgrew the ESP8266’s capabilities for a home automation project last year, transitioning to this ESP32 board was seamless because it works with the same Arduino IDE and most of the same libraries.
The dual-core processor makes a noticeable difference in performance. I can run complex tasks on one core while handling Wi-Fi communication on the other, eliminating the connection drops that sometimes plagued single-core ESP8266 boards when processing intensive tasks. The additional GPIO pins opened up new possibilities for my projects – I could connect more sensors, displays, and control outputs without needing I2C expanders or multiplexers. The 38-pin version is breadboard-friendly, fitting perfectly on standard breadboards just like the smaller ESP8266 boards.
Bluetooth capability is the ESP32’s killer feature. I recently built a smartphone-controlled robot using this board, and the Bluetooth Low Energy (BLE) connection provided responsive control without the connection delays sometimes experienced with Wi-Fi. The board supports BLE classic and BLE, giving you flexibility in how you implement wireless connectivity. Having both Wi-Fi and Bluetooth on a single chip means you can create hybrid projects that use Wi-Fi for internet connectivity and Bluetooth for local device control.
At under ten dollars, this ESP32 board offers incredible value for the capabilities it provides. The nearly 1,600 reviews and strong 4.4-star rating indicate a reliable, well-tested product. However, there are some limitations to consider. The board lacks pin labels on the top surface, so you’ll need to reference pinout diagrams frequently during development. The linear voltage regulator isn’t as efficient as switching regulators, which matters for battery-powered applications using deep sleep mode.
Best for complex projects needing Bluetooth and performance
If your project requirements exceed what the ESP8266 can handle – whether that’s more GPIO pins, Bluetooth connectivity, or dual-core processing power – this ESP32 board is the logical next step. I’ve used it for robotics projects with motor control, sensor arrays, and wireless communication all happening simultaneously. The additional processing power and I/O capabilities make it suitable for advanced hobby projects that would overwhelm an ESP8266.
Not ideal for battery-powered deep sleep applications
The linear voltage regulator on this board is less efficient than the switching regulators found on some other ESP32 boards, resulting in higher power consumption during deep sleep. For battery-powered projects where every microamp counts, you might want to consider boards with more efficient power regulation. However, for projects that run on USB power or where battery life isn’t critical, this board performs excellently.
5. Wishiot ESP-01S Bundle – Best for Arduino WiFi Integration
Wishiot 1pc ESP8266 ESP-01S 4MB Serial WiFi Wireless Transceiver Module + 1pc CH340G Programmer USB to ESP-01 Wireless Adapter Module 4.5-5.5V
Module+Programmer bundle
4MB flash
CH340G programmer
UART/PROG switch
No drivers needed
Pros
- Includes programmer
- No button holding
- 4MB flash
- Works with Tasmota
- Great value
Cons
- No reset button
- Limited stock
- Only 2 GPIO pins
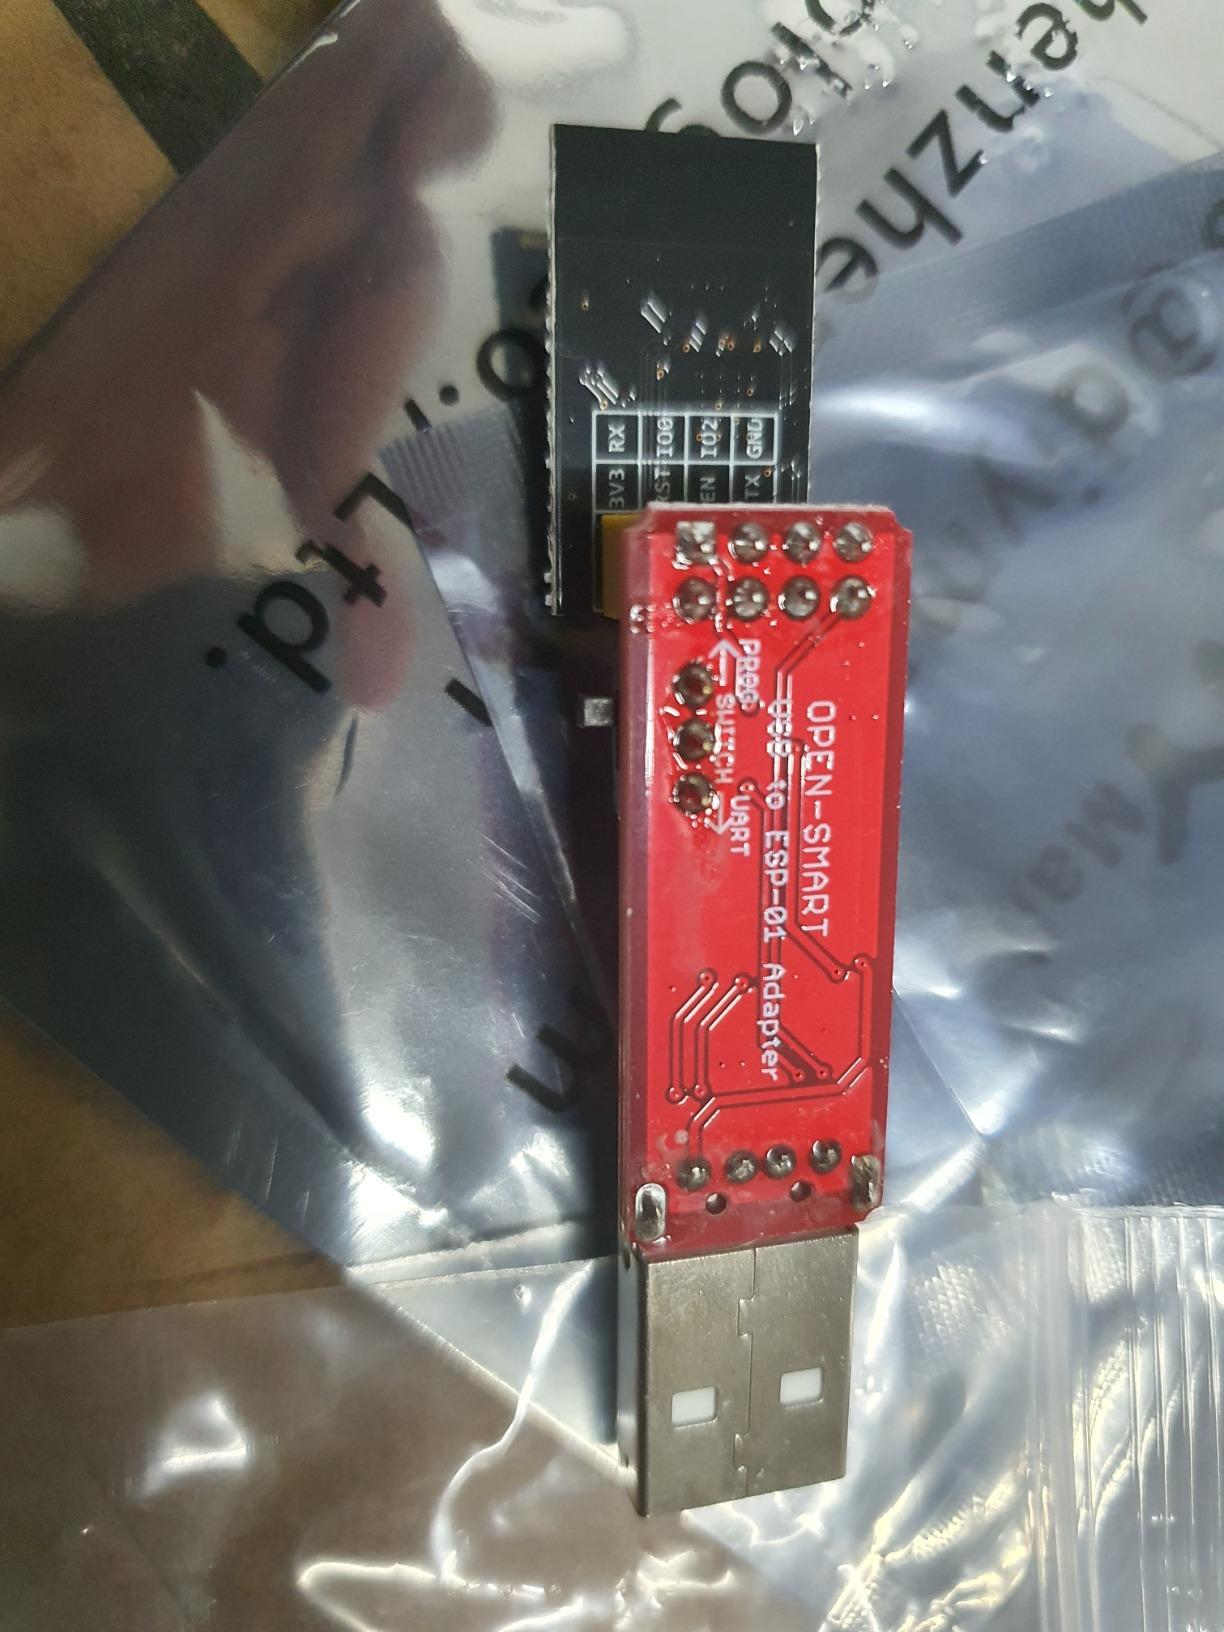
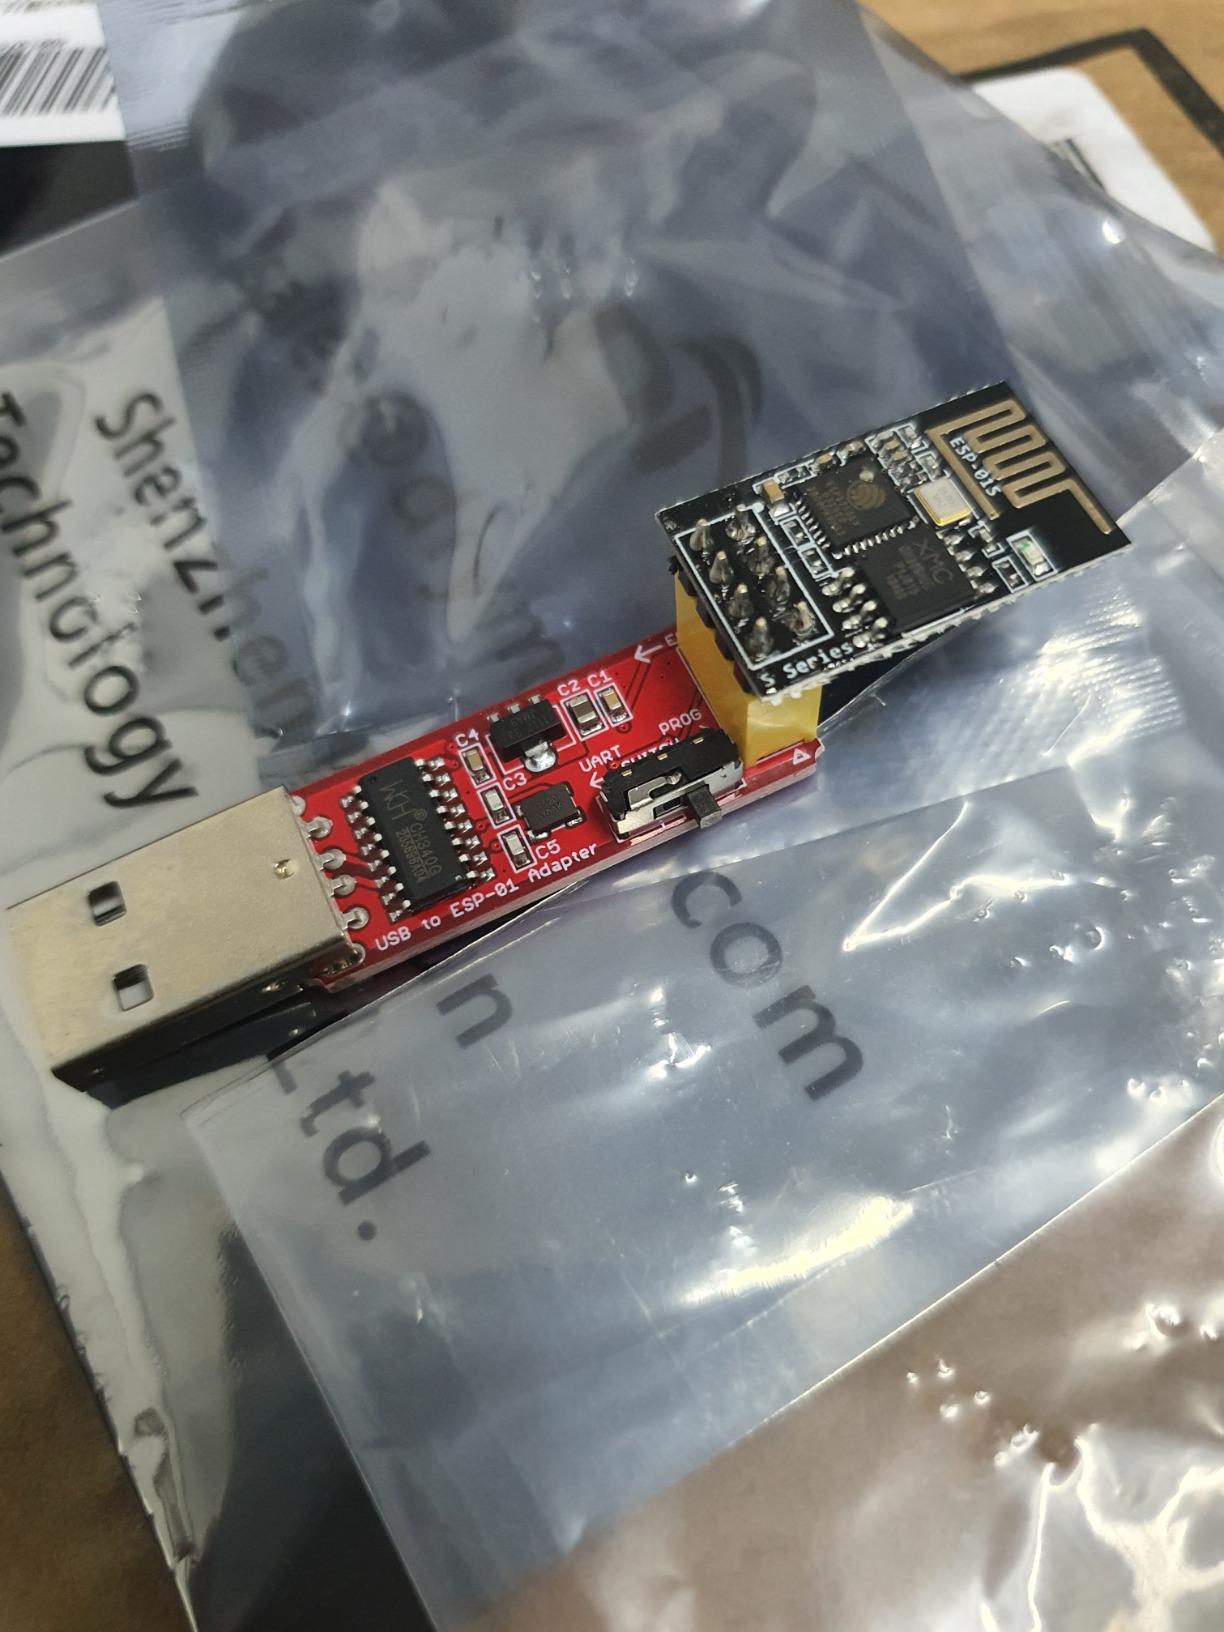
The ESP-01S module alone is challenging for beginners because it requires external programming hardware. This bundle solves that problem by including a dedicated USB programmer, making it the easiest way to get started with the ESP-01S form factor. When I was helping a friend add Wi-Fi control to an Arduino-based 3D printer, this bundle made the process painless. The CH340G programmer worked immediately on Windows 10 without requiring driver installation – a refreshing change from some USB programmers that demand manual driver installation.
What makes this bundle brilliant is the toggle switch on the programmer that lets you switch between UART mode for debugging and PROG mode for programming. On other ESP-01 programmers, you need to hold buttons or rewire connections to change modes – this switch eliminates that frustration. The ESP-01S module plugs directly into the programmer without any wiring needed, making firmware flashing as simple as plugging in a USB drive. When I was flashing Tasmota firmware to these modules for smart home automation, the process was quick and reliable every time.
The 4MB flash memory on this ESP-01S module provides plenty of space for custom firmware and configuration data. I’ve used these modules to add Wi-Fi capabilities to existing Arduino projects, creating hybrid systems where the Arduino handles sensor inputs and local control while the ESP-01S manages internet connectivity. The strong Wi-Fi signal from the compact PCB antenna surprised me – in testing, I maintained reliable connections at distances where larger boards struggled.
This bundle shines for smart home enthusiasts who flash custom firmware like Tasmota, ESPEasy, or ESPHome onto ESP-01S modules. The 4.7-star rating from 90 reviews indicates high customer satisfaction, though the limited stock availability suggests you should grab these while they’re available. The main limitation is the minimal GPIO – with only two accessible pins, the ESP-01S is best suited for simple on/off control or communication with another microcontroller rather than standalone projects.
Perfect for Tasmota firmware flashing
If you’re interested in the smart home hacking scene and want to flash Tasmota or similar firmware onto ESP-01S modules, this bundle provides everything you need. The programmer makes the flashing process simple and reliable, and the toggle switch eliminates the frustration of boot mode selection. I’ve flashed dozens of ESP-01S modules with this setup for smart plugs, light switches, and sensor nodes, and the process has been consistently trouble-free.
Limited to 2 GPIO pins
The ESP-01S form factor only exposes two GPIO pins, which severely limits what you can do without additional components. These modules work best when paired with another microcontroller like an Arduino, or for simple applications like basic relay control. If your project needs multiple sensors, displays, or complex I/O, consider a more full-featured board like the NodeMCU or D1 Mini instead.
6. DIYmall ESP-01S Module – Most Affordable Minimal GPIO Option
DIYmall ESP8266 ESP-01S WiFi Serial Transceiver Module with 4MB Flash
4MB flash memory
Strong WiFi signal
ESP-01S form factor
AT commands
Arduino compatible
Pros
- Very low cost
- 4MB flash
- Strong signal
- Popular for 3D printers
- Arduino compatible
Cons
- 3.3V only
- Limited GPIO
- Not breadboard friendly
- Needs programmer
The ESP-01S represents the minimal viable ESP8266 module – just the essentials on a tiny board at an incredibly low price. This is the module to choose when you need basic Wi-Fi connectivity and nothing more. The most popular application for this module is adding Wi-Fi to 3D printers, particularly the Prusa Mini. When I upgraded my own Prusa Mini with wireless monitoring capabilities, this ESP-01S module was the perfect solution – small enough to fit inside the printer’s enclosure and inexpensive enough that the upgrade paid for itself in convenience.
The 4MB flash memory is impressive for such a small module, providing plenty of space for custom firmware or data logging. I’ve used these modules with AT command firmware to add internet connectivity to Arduino projects, and the strong Wi-Fi signal from the onboard antenna consistently outperformed larger modules with external antennas. The module’s popularity means there’s extensive community documentation and example code available, making it easier to implement despite the limited I/O options.
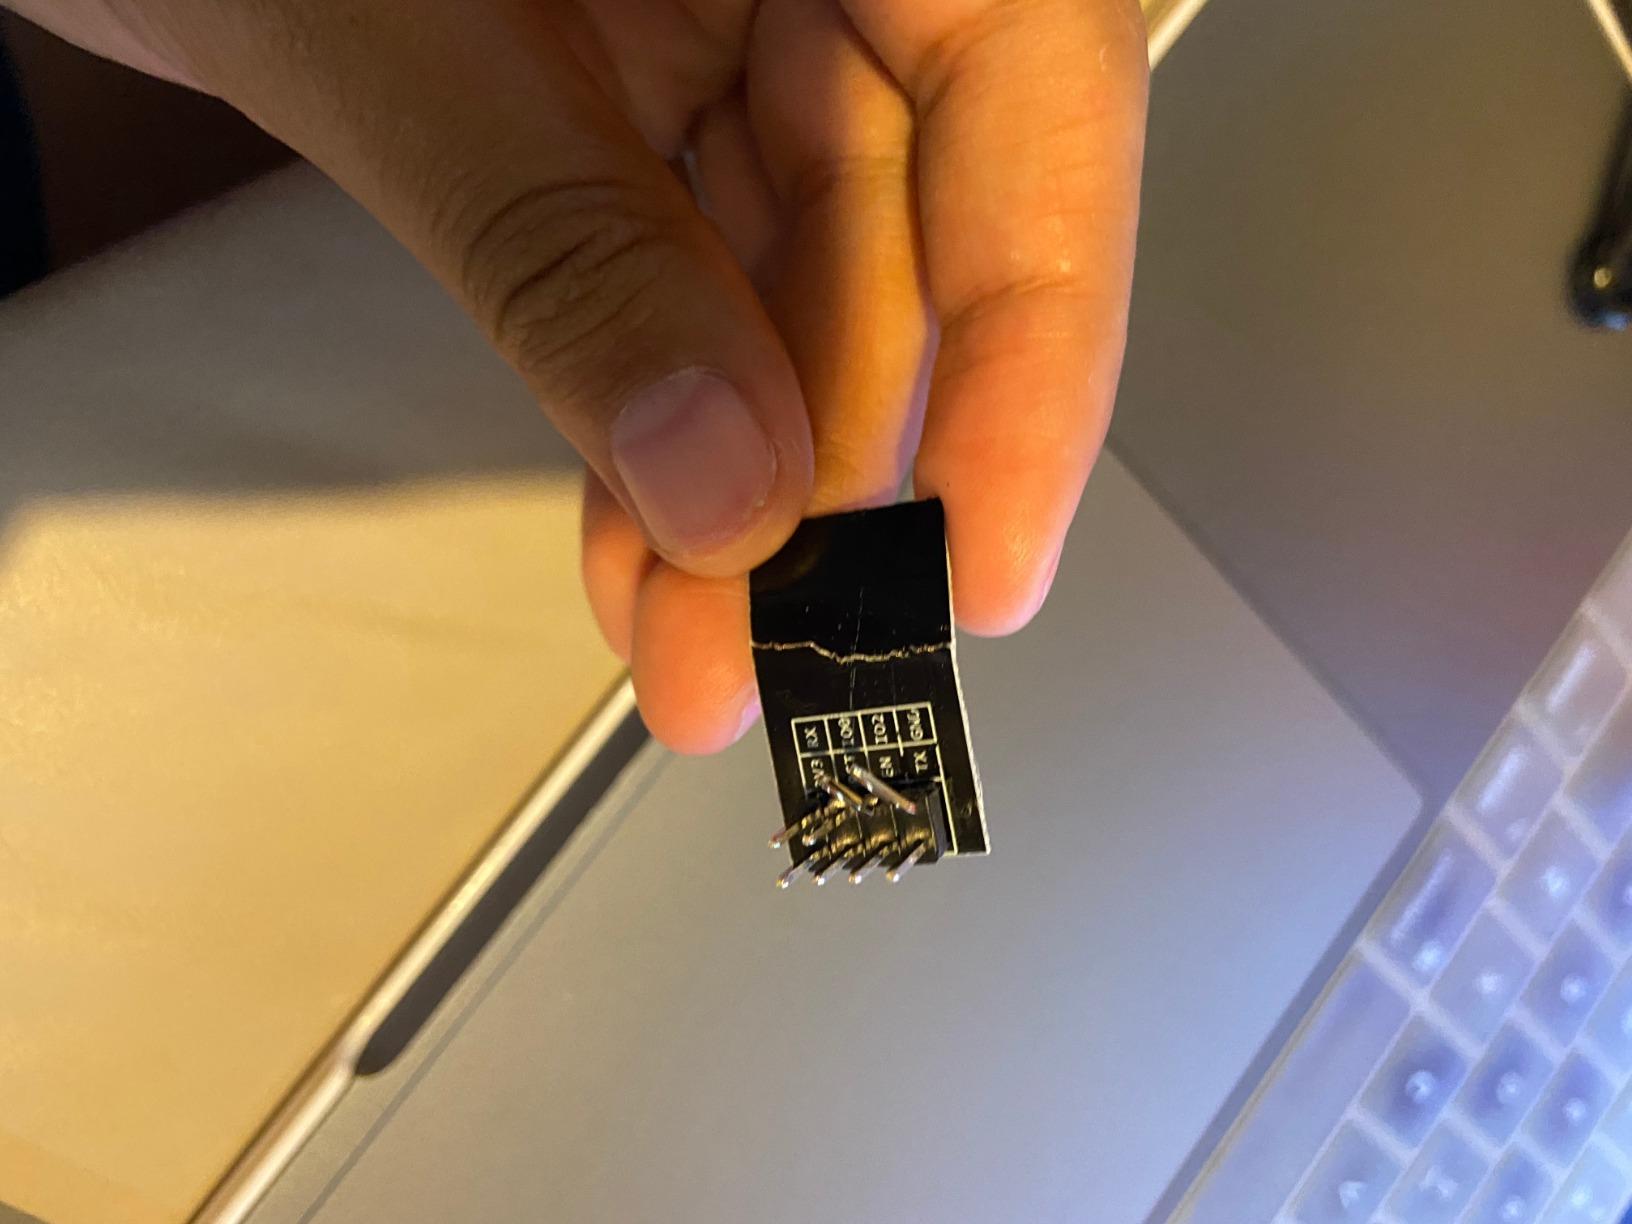
However, this module is not beginner-friendly. You’ll need a separate USB programmer or FTDI adapter to upload code, and the 3.3V operation means you can’t connect it directly to 5V Arduino boards without level shifting. The module isn’t breadboard-friendly, so you’ll need a breakout adapter or custom PCB for prototyping. These limitations explain why experienced makers tend to gravitate toward this module while beginners are better served by development boards with built-in USB programming.
The module’s strength lies in its simplicity and low cost. When you need to add Wi-Fi to a project that already has a microcontroller handling the actual work, the ESP-01S provides connectivity without the expense or complexity of a full development board. For high-volume deployments where every dollar matters, this module’s low price point makes it attractive. The 4.4-star rating from over 800 reviews indicates that despite the limitations, this module serves its purpose well for the right applications.
Best for adding WiFi to existing 3D printers
If you own a Prusa Mini or similar 3D printer and want to add wireless monitoring and control, this ESP-01S module is the community’s preferred solution. The small footprint fits inside printer enclosures, and extensive documentation exists for integrating with OctoPrint and other 3D printing software. The strong Wi-Fi signal ensures reliable connectivity even when the printer is located far from your router.
Not beginner-friendly without programmer
This module requires external programming hardware and 3.3V level shifting, making it challenging for those new to electronics. You’ll need either the Wishiot programmer bundle from product 5 or a separate FTDI adapter. Additionally, the minimal GPIO (only 2 pins) limits standalone functionality – this module works best when paired with another microcontroller rather than used alone.
ESP8266 Buying Guide – What to Considers?
Choosing the right ESP8266 module depends on your specific project requirements and experience level. Let me walk you through the key factors I consider when selecting a board for a new project.
GPIO Pin Requirements
The number of GPIO pins you need will significantly influence your choice. The ESP-01 modules only expose 2 GPIO pins, severely limiting standalone functionality. In contrast, the NodeMCU and D1 Mini boards provide 11 or more accessible GPIO pins, supporting complex projects with multiple sensors, displays, and outputs. Before choosing a board, count how many connections your project needs – sensors, relays, LEDs, displays, and communication interfaces all consume GPIO pins. Remember that some pins have special functions during boot or share purposes with onboard components, so not all GPIO pins are freely usable in every application.
Flash Memory and Storage
All the modules I tested include 4MB of flash memory, which is ample for most hobby projects. This memory stores your program code, configuration data, and any web assets like HTML or CSS files for web server projects. Older ESP8266 modules with only 512KB or 1MB flash can run out of space when including large libraries or storing significant data. If you’re planning projects that save sensor readings locally, serve complex web interfaces, or include custom firmware like Tasmota, the 4MB flash on these modern modules provides comfortable headroom.
Programming Method and USB Support
For beginners, I strongly recommend boards with built-in USB programming like the NodeMCU and D1 Mini. These boards include a USB-to-serial converter chip (typically CP2102 or CH340) and auto-reset circuitry, allowing you to program them directly via USB cable without additional hardware. The ESP-01 modules require separate programming adapters and manual boot mode selection, which can frustrate newcomers. Even experienced makers appreciate the convenience of built-in USB – it saves time and eliminates one potential source of problems during development.
Power Requirements
All ESP8266 modules operate at 3.3V logic levels and require a stable 3.3V power supply capable of delivering at least 300mA during Wi-Fi transmission. Boards with onboard voltage regulators like the NodeMCU and D1 Mini can be powered via USB at 5V, with the regulator handling the conversion to 3.3V. The ESP-01 modules lack onboard regulation, requiring external 3.3V power. For battery-powered projects, pay attention to the voltage regulator type – switching regulators are more efficient than linear regulators and will extend battery life, especially in projects using deep sleep mode.
Form Factor and Breadboard Compatibility
The physical size and pin layout matter for prototyping and final installation. The D1 Mini’s compact breadboard-friendly design makes it ideal for projects where space is limited or you need to fit the board onto a standard breadboard with other components. The larger NodeMCU boards are easier to work with for beginners but require more space in enclosures. The ESP-01 modules are tiny but require adapter boards for breadboard use. Consider where your project will ultimately live – tight enclosures favor the D1 Mini, while open prototyping benefits from the larger NodeMCU format.
Frequently Asked Questions
Is ESP8266 outdated?
The ESP8266 is not outdated. While the newer ESP32 offers more features, the ESP8266 remains perfectly capable for most hobby projects. It has excellent community support, mature libraries, and lower power consumption than ESP32. For simple Wi-Fi connected devices, sensors, and switches, the ESP8266 is still an excellent choice in 2026.
Which is more powerful, ESP32 or ESP8266?
The ESP32 is significantly more powerful than the ESP8266. It features a dual-core processor versus the ESP8266’s single core, more GPIO pins, built-in Bluetooth, and more RAM. However, this power comes at a cost – the ESP32 consumes more power and is slightly more expensive. For basic Wi-Fi projects, the ESP8266 is sufficient and more power-efficient.
Which ESP8266 module is best for beginners?
The NodeMCU development board (products 1 and 3) is the best choice for beginners. These boards include built-in USB programming, clearly labeled pins, pre-soldered headers, and excellent documentation. They work directly with Arduino IDE without requiring additional hardware. The learning curve is gentle, and the extensive community support means help is readily available when you need it.
Do I need a programmer for ESP8266?
It depends on the module. Development boards like NodeMCU and D1 Mini have built-in USB programming and don’t require separate programmers. However, bare ESP-01 modules need a USB programmer or FTDI adapter to upload code. If you’re starting with ESP-01 modules, I recommend the Wishiot bundle (product 5) which includes everything needed for programming.
Can ESP8266 work with 5V Arduino?
The ESP8266 operates at 3.3V and cannot be directly connected to 5V Arduino pins without level shifting. Connecting 5V signals to ESP8266 GPIO pins can damage the module. Use a logic level converter or voltage divider for communication between 5V Arduino and 3.3V ESP8266. Alternatively, choose a development board with built-in level shifting or power the ESP8266 from its own 3.3V supply while using level shifters on communication lines.
Final Recommendations
After testing these six ESP8266 Wi-Fi modules extensively in real projects, I can confidently recommend specific boards for different needs. For most hobbyists starting with ESP8266 development, the HiLetgo 2pcs NodeMCU (product 1) offers the best combination of reliability, ease of use, and value. The boards just work, with minimal troubleshooting required, letting you focus on learning and building rather than debugging hardware issues.
If you need multiple boards for a distributed project or want to experiment with different ideas, the Hosyond D1 Mini 5-pack (product 2) provides excellent value. The compact form factor fits easily in small enclosures, and the breadboard-friendly design simplifies prototyping. For those adding Wi-Fi to existing Arduino projects or 3D printers, the Wishiot ESP-01S bundle (product 5) makes firmware flashing simple and reliable.
The ESP8266 platform continues to be relevant and capable in 2026, offering everything most hobby projects need at an incredibly affordable price point. While the ESP32 provides more features for advanced applications, the ESP8266 remains the sweet spot for simple Wi-Fi connected devices, sensors, and automation projects. Choose the board that matches your experience level and project requirements, and start building your next internet-connected creation today.