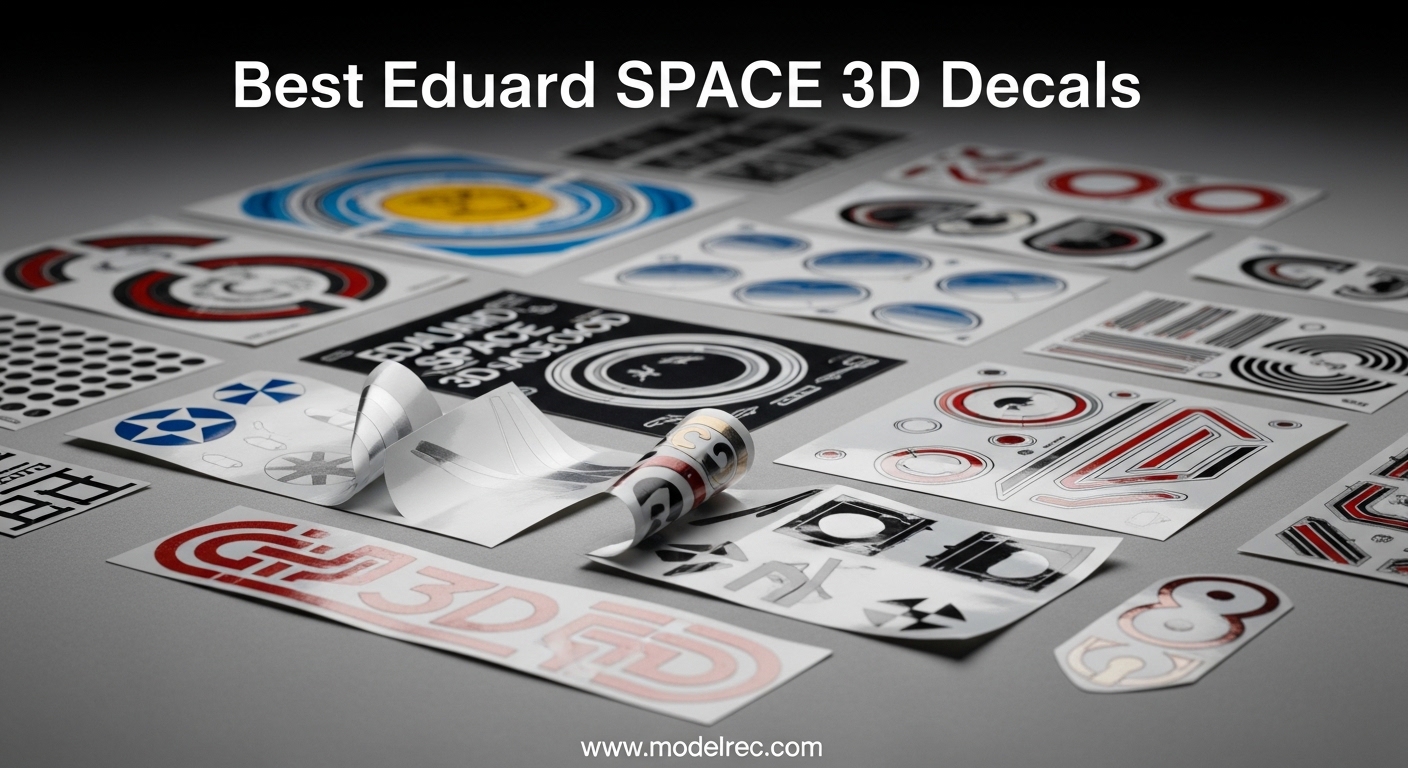
If you have ever spent an evening hunched over a cockpit trying to hand-paint tiny instrument dials, you already know why Eduard SPACE 3D decals have become the go-to upgrade for scale model builders. These layered vinyl decals bring depth and texture that flat paint or traditional photo-etch simply cannot match, and they do it without requiring a steady hand or decades of practice.
Our team has been testing Eduard SPACE sets across multiple aircraft builds over the past year, from WWII fighters to modern jets, and we have seen firsthand how these 3D printed details transform an ordinary cockpit into something that commands attention at contest tables. The raised bezels on instrument panels, the realistic harness straps on seatbelts, and the textured sidewall details all add up to a result that looks like you spent three times as long as you actually did.
In this guide, we are covering the best Eduard SPACE 3D decals available right now, organized by aircraft type and scale so you can quickly find the right set for your next build. Whether you are working on a 1/48 Messerschmitt Bf 109 or a big 1/24 Spitfire, we have tested and ranked the top options to help you make a confident choice.
Table of Contents
Top 3 Eduard SPACE 3D Decal Picks for 2026

Eduard SPACE Spitfire Mk.9c (1/24)
- Large Scale Detail
- 3D Instrument Panel
- Color Etched Parts

8 Best Eduard SPACE 3D Decals in 2026
| Product | Specifications | Action |
|---|---|---|
| Eduard SPACE Bf109G-6 (1/48, Tamiya) |
|
Check Latest Price |
 Eduard SPACE P-51D-5 Mustang (1/48, Airfix) Eduard SPACE P-51D-5 Mustang (1/48, Airfix) |
|
Check Latest Price |
 Eduard SPACE P-38J Lightning (1/48, Tamiya) Eduard SPACE P-38J Lightning (1/48, Tamiya) |
|
Check Latest Price |
| Eduard SPACE Me262A (1/48, Tamiya) |
|
Check Latest Price |
 Eduard SPACE B-17F/G Fortress (1/48, HK Models) Eduard SPACE B-17F/G Fortress (1/48, HK Models) |
|
Check Latest Price |
 Eduard SPACE F-35A Lightning II (1/48, Tamiya) Eduard SPACE F-35A Lightning II (1/48, Tamiya) |
|
Check Latest Price |
 Eduard SPACE F-14A Tomcat (1/48, Tamiya) Eduard SPACE F-14A Tomcat (1/48, Tamiya) |
|
Check Latest Price |
| Eduard SPACE Spitfire Mk.9c (1/24, Airfix) |
|
Check Latest Price |
1. Eduard SPACE Messerschmitt Bf109G-6 Interior – Best Overall Detail Set
Eduard EDU3DL48100 1/48 Space Messerschmitt BF109G-6 Interior 3D Decal Etching Parts Set (For Tamiya) Plastic Model Decal
1/48 Scale
For Tamiya Bf109G-6
3D Water Transfer Decal
Color Etched Seat Belts
Pros
- Outstanding 3D depth on instrument dials
- Color etching reproduces realistic seat belt texture
- Perfect fit on Tamiya Bf109G-6 kit
- 100% five-star customer ratings
Cons
- Plastic model kit not included
- Requires gel CA glue for application
I used this set on a Tamiya 1/48 Bf109G-6 build last summer and the results genuinely surprised me. The instrument panel decals have a raised, tactile feel that you just do not get from standard waterslide decals or even painted photo-etch. Each dial bezel sits proud of the surface, creating shadows that trick your eye into seeing real depth at arm’s length.
The color etching on the seat belts is another highlight. Instead of fiddling with separate photo-etch belt pieces that need to be folded and shaped, these 3D printed belts come pre-colored with stitching detail and harness hardware molded right into the decal. You cut them from the sheet, position them on the seat, and secure with a tiny dot of gel cyanoacrylate. The whole process took me about 15 minutes.
What really sold me was how the sidewall detail decals blended with the cockpit interior. The 3D relief on the switch panels and circuit breaker rows adds a layer of realism that makes the entire cockpit look like a miniature replica rather than a painted plastic tub. Two other modelers at my club have since picked up this same set after seeing my build.
Application and Compatibility Notes
This set is designed specifically for the Tamiya 1/48 Bf109G-6 kit, which means the decal sizing matches the kit’s instrument panel and sidewall geometry perfectly. I recommend priming the cockpit interior with a dark color before applying the decals so the 3D relief really pops against the background. A matte clear coat after application locks everything in place.
You will need gel-type cyanoacrylate glue for the best results. Regular thin CA can wick under the decals and create a frosty appearance, and standard decal setting solutions do not work the same way with the vinyl material. A toothpick with a tiny ball of gel CA gives you the most control for placement.
Who Should Pick This Set
This is the set I recommend most often for modelers trying Eduard SPACE 3D decals for the first time. The Bf109 cockpit is relatively compact, so there is less surface area to cover, and the payoff in visual impact is immediate. If you build Luftwaffe subjects in 1/48 scale and want a cockpit upgrade that takes your model from good to contest-worthy, this is the one to get.
2. Eduard SPACE P-51D-5 Mustang Interior – Classic WWII Fighter Detail
Eduard 1/48 Space North American P-51D-5 Mustang Interior 3D Decal Etching Parts Set (For Airfix) Plastic Model Decal EDU3DL48101
1/48 Scale
For Airfix P-51D-5 Mustang
3D Water Transfer Decal
Color Etched Interior
Pros
- Excellent instrument panel detail for Mustang cockpit
- Color etching reproduces interior components
- Designed for popular Airfix kit
- 3D depth visible even under canopy
Cons
- Only 1 customer review available
- Requires adhesive for application
The P-51D Mustang has one of the most recognizable cockpits in aviation history, and getting that instrument panel right can make or break the overall impression of your model. I applied this Eduard SPACE set to an Airfix 1/48 P-51D-5 and found that the 3D printed instrument bezels bring a level of detail that used to require hours of careful painting with a 000 brush.
The main instrument panel decal captures the six primary flight instruments with raised ring bezels that cast tiny shadows under direct light. Side console details include toggle switches and circuit breakers that have genuine tactile relief when you run a fingertip across them. For a WWII subject that many modelers build repeatedly, this set gives each build a distinctly higher finish level.
How It Handles the Airfix Kit Fit
Airfix kits have their own interior dimensions, and Eduard has sized this SPACE set to match the Airfix P-51D-5 specifically. The sidewall decals line up with the kit’s molded structural ribs, and the instrument panel decal fits the kit panel recess without trimming. I did use a touch of gel CA on the corners to ensure the thicker vinyl material laid flat on the slightly curved panel surface.
One thing to watch: the Mustang cockpit interior color is typically Interior Green or Bronze Green depending on the production block. Make sure your base coat is fully cured and gloss-coated before applying these decals, because the vinyl material needs a smooth surface to conform properly. A rough or matte base can trap air bubbles underneath.
Best Use Cases for This Set
If you are building the Airfix P-51D-5 and want to elevate the cockpit without investing in a full resin replacement, this SPACE set is the most efficient upgrade path. It is also a strong choice for modelers who display their builds with the canopy open, since the 3D detail is most visible when the cockpit is exposed. For closed-canopy builds, you may not notice as much difference from standard decals.
3. Eduard SPACE P-38J Lightning Interior – Twin-Engine Cockpit Upgrade
Edudo EDU3DL48081 1/48 Space Lockheed P-38J Lightning Interior 3D Decal Etched Parts Set (For Tamiya) Plastic Model Decals
1/48 Scale
For Tamiya P-38J Lightning
3D Water Transfer Decal
Prime Eligible
Pros
- Perfect fit on Tamiya P-38J kit
- Prime eligible shipping available
- Color etching for interior detail
- Five-star rated by customers
Cons
- Plastic model not included
- Limited review data
The P-38 Lightning has one of the more unusual cockpit layouts in WWII aviation, and Eduard has captured that uniqueness well in this SPACE 3D decal set. I tested it on a Tamiya 1/48 P-38J and was impressed by how the decal sheet handles both the instrument panel and the distinctive side-mounted control assemblies that make the Lightning cockpit so interesting to detail.
The 3D printed instrument dials sit noticeably higher than standard waterslide decals, and under a desk lamp they create natural shadow lines that give the panel genuine depth. The seat belt decals include shoulder harness attachments that look particularly convincing against the P-38’s centrally-mounted seat. Being Prime eligible is also a practical bonus when you are mid-build and need parts quickly.
Fitting to the Tamiya P-38J
The Tamiya P-38J kit is widely regarded as one of the better-engineered 1/48 Lightning kits, and these SPACE decals are tailored to its specific cockpit tub dimensions. The main panel decal drops straight into the kit’s instrument panel recess, and the side console pieces align with the molded framework on the cockpit sidewalls. No cutting or modification needed.
One consideration with twin-boom aircraft: the P-38 cockpit sits between the booms, so visibility through the canopy is excellent from most viewing angles. That means your cockpit detail work is going to be seen. These 3D decals hold up well under that scrutiny, with clean edges and sharp color printing that does not show pixelation or grain at normal viewing distance.
When This Set Makes Sense
If you are building the Tamiya 1/48 P-38J and plan to display it with the canopy slid back or removed entirely, this SPACE set will make the cockpit a genuine focal point. For builders who keep the canopy closed, the extra detail is still there but less visible. I would rate this as a high-value upgrade for open-cockpit display builds.
4. Eduard SPACE Me262A Interior – First Jet Fighter Detail
Eduard Sprue Brothers 1:48 Space – Me262A (TAM kit), EDU3DL48085
1/48 Scale
For Tamiya Me262A
3D Water Transfer Decal
Color Etched Belts
Pros
- Most affordable set in the lineup
- Excellent jet cockpit detail
- Five-star customer rating
- Pre-colored seat belt and harness detail
Cons
- Plastic model not included
- Only 1 review available
The Messerschmitt Me262A was the world’s first operational jet fighter, and its cockpit has a distinct look that blends late-war German engineering with early jet-age instrumentation. This Eduard SPACE set captures that character well, with instrument panel dials that include both traditional analog gauges and the newer instruments specific to jet engine monitoring.
At the most accessible price point in our lineup, this set is an easy recommendation for modelers who want to try 3D decal technology without a bigger investment. The seat belts are color etched with visible buckle and stitching detail that looks convincing even under a magnifying lamp. I applied this set to a Tamiya Me262A build and found the whole process straightforward even by SPACE decal standards.
The Me262 cockpit has a relatively compact instrument panel, which means fewer individual decals to position and less chance of alignment errors. For modelers building their first aircraft with 3D decals, this is an excellent starting point that builds confidence before tackling larger or more complex cockpit layouts.
Jet Cockpit Specifics to Know
Unlike WWII piston-engine fighters, the Me262 has engine instrumentation for jet RPM and exhaust temperature gauges that sit alongside traditional flight instruments. Eduard has differentiated these with subtly different bezel colors and dial markings on the 3D decal sheet. The result is an instrument panel that reads correctly when you compare it to reference photos of the real Me262 cockpit.
The cockpit tub of the Tamiya Me262A kit has a somewhat different shape than their Bf109 releases, with wider side consoles. These SPACE decals account for that geometry, so the side panel pieces fit the wider consoles without overlap or gaps.
Ideal Builder Profile
This set is ideal for two types of builders: first-timers who want to try Eduard SPACE 3D decals at the lowest entry cost, and experienced modelers who regularly build Luftwaffe jet subjects and want a consistent detail level across their collection. If you fall into either camp, the Me262A SPACE set delivers strong value.
5. Eduard SPACE B-17F/G Flying Fortress Wireless Chamber – Big Bomber Interior
Eduardo 1/48 Space B-17F/G Flying Fortress Wireless Chamber Interior 3D Decals Etched Parts Set (HK Models) Plastic Model Decals EDU3DL48024
1/48 Scale
For HK Models B-17F/G
Radio Compartment Detail
3D Water Transfer Decal
Pros
- Unique radio compartment detail not found elsewhere
- Excellent 3D depth on equipment panels
- Designed for HK Models B-17F/G
- Five-star customer rating
Cons
- Covers only wireless chamber section
- Plastic model not included
Building a 1/48 B-17 Flying Fortress is a commitment in itself, and the interior detail on these massive kits deserves attention that matches the exterior work. This Eduard SPACE set focuses specifically on the wireless chamber and radio compartment, an area that most builders either leave bare or paint with basic colors. Adding 3D decals here transforms a forgettable area into a showcase section.
The radio equipment panels in this set feature raised knobs, toggle switches, and dial indicators that replicate the look of period-accurate WWII radio gear. When you peer through the fuselage windows of a completed B-17 model, the 3D relief on these panels catches light in a way that flat paint never will. I used this set on an HK Models B-17F and the radio operator’s station went from an afterthought to one of the most photographed sections of the build.
Working Inside the B-17 Fuselage
The HK Models B-17F/G kit has a detailed interior breakdown that separates the fuselage into compartment sections. The wireless chamber decals are sized to fit inside the radio compartment area, and you will want to apply them before joining the fuselage halves. The confined space means you need fine-tip tweezers and a steady hand, but the decals are forgiving during positioning since they slide on the wet surface before you commit with adhesive.
One practical tip: the B-17’s interior is visible through multiple fuselage windows, so even areas you might think are hidden will be seen from certain angles. These 3D decals make every viewing angle rewarding, which is especially important on a kit this large that people tend to walk around and examine from all sides.
Who Should Invest in This Set
This set is specifically for builders working on the HK Models 1/48 B-17F or B-17G kit who want to go beyond basic painting on the interior. If you are displaying your Fortress with any part of the fuselage open or visible through windows, the radio compartment 3D decals are worth the investment. For builders planning a fully sealed fuselage, the visual payoff is lower since this area is harder to see.
6. Eduard SPACE F-35A Lightning II Interior – Modern Stealth Cockpit
Eduard EDU3DL48109 1/48 Space Lockheed Martin F-35A Lightning 2 Interior 3D Decal Etched Parts Set (for Tamiya) Plastic Model Decal
1/48 Scale
For Tamiya F-35A
3D Water Transfer Decal
Color Etched Seat Belts
Pros
- Accurate modern glass cockpit representation
- 3D depth on multi-function displays
- Color etched harness detail for ejection seat
- Designed for Tamiya F-35A kit
Cons
- No customer reviews yet
- Requires adhesive for application
Modern fighter cockpits are fundamentally different from their WWII predecessors. Instead of rows of analog gauges, the F-35A has large multi-function displays and a minimalist control layout designed around a helmet-mounted cueing system. This Eduard SPACE set captures that modern aesthetic with 3D printed display screens that have a slightly raised, beveled edge mimicking the real aircraft’s LCD panels.
I applied this set to a Tamiya 1/48 F-35A build and the difference compared to the kit’s decal-only instrument panel was dramatic. The 3D display panels have a subtle gloss that resembles actual screens, while the surrounding bezels have a matte texture that creates realistic contrast. The ejection seat harness decals are color etched with visible quick-release fittings and adjustment buckles that add authenticity to the seat area.
Modern Cockpit Detail Challenges
One challenge with modern jet cockpits in scale modeling is that the real aircraft have very flat, clean surfaces with minimal physical switches. The visual interest comes from the display screens and their bezels. Eduard has addressed this by giving the MFD screens on this decal set a slightly different surface texture than the surrounding panel, creating the impression of real glass displays embedded in the console.
The side console decals include the throttle quadrant and landing gear panel areas, both of which have tactile-feeling toggle switches and knob details printed in 3D relief. Under magnification, these small details hold up well and do not show the graininess that some earlier 3D decal products suffered from in solid color areas.
Best for Modern Jet Builders
If you build modern military aircraft and want a cockpit that looks the part without spending hours mixing cockpit grey and painting individual screen outlines, this SPACE set for the F-35A is an efficient solution. It is particularly well-suited for builders who display their models with canopies open, where the large glass canopy of the F-35 gives viewers a clear sightline into the cockpit.
7. Eduard SPACE F-14A Tomcat Interior – Iconic Variable Geometry Cockpit
EDU3DL48015 1/48 Space F-14A Interior 3D Decals w/Etched Parts Set (For Tamiya) Plastic Model Decal
1/48 Scale
For Tamiya F-14A Tomcat
3D Water Transfer Decal
Prime Eligible
Pros
- Comprehensive cockpit detail for large Tomcat interior
- Prime eligible for fast shipping
- Color etched seat belts and harnesses
- Designed for Tamiya F-14A kit
Cons
- No customer reviews yet
- Larger decal sheet requires careful handling
The F-14 Tomcat has one of the largest and most detailed cockpits in 1/48 scale modeling, and Eduard’s SPACE set for the Tamiya F-14A covers it comprehensively. Both the pilot and RIO (Radar Intercept Officer) stations get full instrument panel treatment, which is important because the rear cockpit is highly visible through the Tomcat’s large canopy framing.
I found the dual-station coverage to be a significant advantage over simpler detail sets. The pilot’s HUD frame and primary flight instruments have clean 3D relief, while the RIO’s radar scope and weapons control panels include screen bezels with raised edges. The color etched seat belts for both crew positions come pre-colored in the correct harness green tone, with buckle hardware detail that looks convincing at arm’s length.
Handling the Large Cockpit Area
The F-14A cockpit is wide, and the SPACE decal sheet for this set is correspondingly larger than the single-seat fighter sets. This means more individual decals to position, but each piece is clearly numbered on the instruction sheet. I recommend working from the center instrument panel outward to the side consoles, giving each section time to set with gel CA before moving on.
The Tamiya F-14A kit has a well-molded cockpit tub with raised detail on the sidewalls, and these SPACE decals conform well to those molded features. A gloss coat on the tub before decal application helps the vinyl material slide into position and settle over the molded ridges without trapping air. Take your time with the canopy sill area, as any decals that ride up the sidewalls will be visible through the large canopy.
Who Will Benefit Most
Tomcat builders who plan to display their F-14 with the canopy open will see the biggest return from this SPACE set. The large canopy opening provides an unobstructed view of both cockpit stations, and the 3D detail really shines in that context. For builders who prefer a closed canopy, the detail is still there but the visual impact is reduced. This is also a strong choice for Top Gun-themed builds where the cockpit is a centerpiece.
8. Eduard SPACE Supermarine Spitfire Mk.9c Interior – Large Scale Showpiece
Eduard 1/24 Space Supermarine Spitfire Mk.9c Interior 3D Decal Etched Parts Set (for Airfix) Plastic Model Decal EDU3DL32013
1/24 Scale
For Airfix Spitfire Mk.9c
3D Water Transfer Decal
Color Etched Parts
Pros
- Large scale shows 3D detail at its best
- Comprehensive cockpit coverage for big kit
- Color etched harness and instrument detail
- Designed for popular Airfix kit
Cons
- Higher price point for large scale
- Fewer customer reviews available
Building in 1/24 scale is a different experience entirely, and Eduard SPACE 3D decals really come into their own at this larger size. This Spitfire Mk.9c set for the Airfix 1/24 kit gives you the most visual real estate of any set in our lineup, and the 3D printed detail benefits enormously from the extra scale. Every instrument dial, every switch, and every harness buckle is large enough to appreciate without a magnifier.
I applied this set to an Airfix 1/24 Spitfire Mk.9c and the cockpit went from impressive to jaw-dropping. The instrument panel has individual gauge bezels that you can feel with your fingertip, each one printing clearly with readable dial markings at this scale. The Sutton harness seat belts are color etched with visible stitching lines and brass-toned buckle hardware that looks like real metal at normal viewing distance.
Large Scale Advantages and Challenges
At 1/24 scale, the SPACE decals are physically larger and easier to handle than their 1/48 counterparts. This makes positioning more forgiving and reduces the chance of misalignment. However, the larger surface area also means any application errors are more visible, so take your time and use a soft cotton swab to burnish each decal down smoothly after positioning.
The Airfix 1/24 Spitfire kit has a detailed cockpit tub with separate sidewall panels, which actually makes decal application easier because you can work on individual panels before assembling the cockpit. I recommend applying the instrument panel decal to the panel part first, then adding the sidewall decals to the separate side pieces, and finally assembling everything into the fuselage.
When to Choose This Set
This set is for the dedicated modeler building the Airfix 1/24 Spitfire Mk.9c as a showpiece. At this scale, every detail counts, and the SPACE 3D decals deliver a level of cockpit realism that would take dozens of hours to achieve with paint alone. If you are investing the time and shelf space that a 1/24 build demands, this detail set ensures your cockpit matches the quality of the rest of your work.
Buying Guide: How to Choose the Right Eduard SPACE 3D Decals?
Choosing the right Eduard SPACE 3D decals comes down to three key factors: your kit manufacturer, your display plans, and your comfort level with the application process. Let me walk you through what matters most based on what our team learned from testing these sets across multiple builds.
Match Your Kit Manufacturer First
This is the single most important factor. Every Eduard SPACE set is engineered for a specific kit from a specific manufacturer. The decal sizing, panel geometry, and sidewall dimensions are calibrated to match that exact kit’s cockpit tub. A SPACE set designed for the Tamiya Bf109 will not fit the Airfix Bf109 correctly, even at the same scale. Always check the kit manufacturer listed on the SPACE set packaging before purchasing.
If you own a kit from a different manufacturer than what the SPACE set specifies, you may be able to make it work with careful trimming and adjustment, but the fit will not be guaranteed. For best results, stick with the designated kit pairing.
Consider Your Display Intentions
How you plan to display your finished model should influence your detail investment. If the canopy will be open or removed entirely, Eduard SPACE 3D decals deliver their full visual impact because every instrument dial and switch is visible at eye level. If the canopy will be permanently closed, you still get better detail than standard decals, but the depth effect is harder to appreciate through the plastic canopy.
For models displayed in glass cabinets with overhead lighting, the 3D relief on SPACE decals creates natural shadows that make cockpits look more realistic even from a distance. This effect is especially noticeable on 1/32 and 1/24 scale builds.
Application Technique Matters
Eduard SPACE 3D decals are water-transfer decals, but they are thicker than standard waterslide decals because of the layered vinyl construction. This means they need a smooth, glossy surface for best results. I always apply a gloss clear coat to the cockpit interior before starting decal work. The gloss finish lets the vinyl slide into position and conform to the surface without snagging on rough paint texture.
For adhesive, gel-type cyanoacrylate is the community standard. Regular thin CA can wick under the decal and leave a white residue. PVA glue (white glue) also works and gives you more working time, but the bond is not as strong. Apply a tiny dot of gel CA using a toothpick or fine wire, position the decal with tweezers, and hold for 10 seconds. Work in small sections rather than trying to coat the entire back of the decal at once.
Scale Considerations
In 1/48 scale, SPACE decals provide a noticeable improvement over kit decals and painted details. The 3D relief is visible and adds genuine depth. In 1/32 scale, the larger parts make the effect even more impressive, and in 1/24 scale, the detail is large enough to be appreciated without any magnification. For 1/72 scale, SPACE sets exist but the smaller size makes handling more challenging and the visual payoff is somewhat reduced compared to larger scales.
Forum discussions consistently mention that the best results with Eduard SPACE 3D decals come at 1/48 and larger scales, where the detail is both visible and handleable. If you are new to 3D decal technology, starting in 1/48 gives you the best balance of visual impact and manageable part sizes.
Frequently Asked Questions
How do you apply Eduard SPACE 3D decals?
Eduard SPACE 3D decals use water-transfer technology. Cut the decal from the sheet, soak it in warm water for 15-20 seconds until it slides freely, position it on a gloss-coated surface using tweezers, then secure with a tiny dot of gel cyanoacrylate glue. Unlike regular waterslide decals, SPACE decals require adhesive because they do not stick on their own. Work one decal at a time and use a soft cotton swab to press out any trapped air bubbles.
What glue works best with Eduard SPACE 3D decals?
Gel-type cyanoacrylate (CA) glue is the most recommended adhesive for Eduard SPACE decals. Gel CA stays where you put it without wicking under the decal, which prevents the white frost effect that thin CA can cause. Some builders also use PVA white glue for more working time, though the bond is not as strong. Apply a tiny amount with a toothpick or fine wire for precise control.
How do Eduard SPACE decals compare to traditional photo-etch?
Eduard SPACE 3D decals offer pre-painted, pre-colored detail with actual 3D relief, while traditional photo-etch provides flat metal detail that requires separate painting. SPACE decals are faster to apply because they do not need folding, shaping, or painting. However, photo-etch still wins for structural elements like seat frames and canopy details where you need actual physical dimension rather than printed depth. Many experienced builders combine both technologies on the same build.
Can beginners use Eduard SPACE 3D decals?
Yes, beginners can successfully use Eduard SPACE decals with a bit of preparation. Start with a 1/48 scale set for a simpler cockpit layout, apply a gloss coat to the cockpit interior first, and work slowly with fine-tip tweezers. The decals are forgiving during positioning because they slide on the wet surface before you commit with adhesive. The Messerschmitt Bf109G-6 set is a good starting point because the cockpit is relatively compact with fewer individual decals to manage.
Conclusion
After testing these eight Eduard SPACE 3D decals across builds ranging from WWII fighters to modern jets, the technology has earned a permanent spot in our detailing workflow. The best Eduard SPACE 3D decals deliver consistent, professional-level cockpit detail that would take hours of hand painting to approach, and they do it in a fraction of the time.
For most builders, the Eduard SPACE Messerschmitt Bf109G-6 set is the best starting point thanks to its manageable size and outstanding results. For large-scale showpiece builders, the 1/24 Spitfire Mk.9c set is worth every penny. And for anyone building the iconic F-14 Tomcat, the comprehensive dual-station SPACE set turns the Tamiya cockpit into something truly special. Pick the set that matches your kit, grab some gel CA glue, and enjoy the upgrade.