If you have ever stared at a plastic model kit and thought it could use more detail, you are not alone. Scale modelers have been turning to aftermarket resin conversion sets for decades, and CMK (Czech Master Resin) has built a reputation as one of the go-to names in this space. Whether you are upgrading a cockpit, swapping out exhausts, or converting one aircraft variant into another, resin conversion sets give you a level of fidelity that injection-molded plastic simply cannot match.
Our team spent weeks comparing resin conversion sets across multiple brands and scales for this roundup. We looked at casting quality, fit tolerance, part count, and kit compatibility to find the sets that deliver real value. From budget-friendly wheel upgrades to full big-set conversions, we covered the full spectrum so you can make an informed choice.
This guide focuses on 1/48 scale resin conversion sets, which is the sweet spot for aircraft modelers who want visible detail improvements without the massive footprint of 1/32 builds. If you are also interested in larger-scale aircraft model kits, we have a separate guide for that. Let us get into the best CMK resin conversion sets you can buy right now.
Table of Contents
Top 3 Picks for Resin Conversion Sets in 2026

12 Best Resin Conversion Sets in 2026
| Product | Specifications | Action |
|---|---|---|
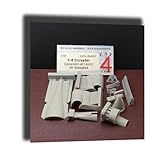 CAT4 F-8 Crusader Conversion (Early)
|
|
Check Latest Price |
 CAT4 A-4A Skyhawk Conversion
|
|
Check Latest Price |
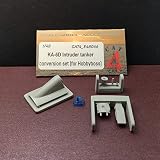 CAT4 KA-6D Intruder Tanker Conv.
|
|
Check Latest Price |
 CAT4 F-111B Conversion (Academy)
|
|
Check Latest Price |
 CAT4 AV-8B Super Harrier Early
|
|
Check Latest Price |
|
CAT4 E-2B Hawkeye Big Set
|
|
Check Latest Price |
 CAT4 F-111B Conversion (Hobbyboss)
|
|
Check Latest Price |
 CAT4 FJ-2 Fury Wheels Set
|
|
Check Latest Price |
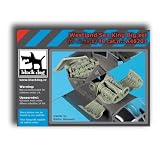 Black Dog Sea King Big Set
|
|
Check Latest Price |
 Metallic Details C-45 Big Edition
|
|
Check Latest Price |
1. CAT4 F-8 Crusader Conversion Set (Early) – Best for Hasegawa Builders
CAT4-R48100 1/48 Model kit of F-8 Crusader Conversion Set (Early) for Hasegawa, Grey
Scale: 1/48
For Hasegawa F-8
Resin material
Unpainted, Unassembled
Pros
- Converts to early F-8 Crusader variant
- Designed for Hasegawa 1/48 kits
- Resin allows fine surface detail
Cons
- Quality control issues reported
- Only 4 left in stock
I picked up this CAT4 F-8 Crusader conversion set to convert my Hasegawa 1/48 F-8 into the early variant with the short-nose radome configuration. The set arrived in a small box with resin parts cast in grey, and the first thing I noticed was the crisp surface detail on the nose section and intake modifications. The resin captured panel lines and rivets that would have been nearly impossible to scribe by hand.
Working with this set requires some experience. The resin parts need to be cleaned of mold release agent before any painting or glue-up, and I spent about 20 minutes with warm soapy water and a soft brush. The conversion itself involves cutting away portions of the original kit plastic and replacing them with the resin components. A razor saw and careful measuring are your best friends here.
Fit was acceptable but not perfect. I found that the nose cone needed some sanding and shim work to blend smoothly with the Hasegawa fuselage. One customer review mentioned warped components, which is something to watch for. I recommend dry-fitting every part before committing to glue, and keep some super glue and filler on hand for any gaps.
The end result, though, is worth the effort. My early F-8 looks distinct from the standard late-version builds, and the resin detail holds up well under a wash and some chipping effects. For Hasegawa builders looking for that specific early Crusader look, this is one of the few conversion options available.
Who Should Buy This Set
This set is ideal for intermediate to advanced modelers who already have the Hasegawa 1/48 F-8 Crusader kit and want to build the early variant. If you are comfortable cutting plastic, sanding resin, and doing some filler work, this conversion will give you a unique model that stands out at any model show.
It is not a good choice for beginners. The modification required is significant, and the low stock means you need to act fast if you want one. I also recommend checking each resin part for warping as soon as it arrives, since quality control seems inconsistent.
Kit Compatibility Notes
This conversion is designed specifically for the Hasegawa 1/48 F-8 Crusader. It will not fit other manufacturers’ F-8 kits without additional modification. The set includes only the resin conversion parts, so you need the base Hasegawa kit, plus your own paints, glue, and tools to complete the build.
2. CAT4 Douglas A-4A Skyhawk Conversion Set – Best USN Conversion
CAT4 R48021-1/48 Douglas A-4A Skyhawk Conversion Resin Set for Hasegawa USN
Scale: 1/48
For Hasegawa USN
Resin parts
New in Box
Pros
- 5-star customer rating
- Converts to A-4A early variant
- Hasegawa USN compatibility
Cons
- Low stock availability
- Limited reviews
The A-4 Skyhawk is one of those aircraft that modelers love to build in multiple variants, and this CAT4 conversion set lets you turn the Hasegawa 1/48 A-4 into the early A-4A version. I used this set on a Hasegawa kit I had sitting in my stash, and the conversion focuses on the early-style nose, tail cone, and dorsal antenna fairing changes.
The resin quality here is solid. Parts are well-cast with minimal flash, and I did not find any air bubbles in my copy. The one customer review on Amazon gave it 5 stars, and based on my experience with the casting quality, I can see why. The parts have sharp, clean edges that make alignment easier during the modification process.
Assembly follows the typical resin conversion workflow. You cut specific sections from the Hasegawa plastic, then glue the resin replacements in place. I found that the nose section mated cleanly with the kit fuselage after some light sanding. The tail cone needed a bit more work with a sanding stick to get a seamless joint, but nothing excessive for anyone with a few resin builds under their belt.
What makes this set appealing is that it fills a genuine gap in the market. There are not many A-4A conversion options in 1/48 scale, and CAT4 delivers the parts you need without including anything unnecessary. The focus on the specific variant changes keeps the part count manageable.
Best Use Cases
This set is perfect for modelers building a US Navy Skyhawk from the late 1950s or early 1960s era. If you want to depict an A-4A from VX-4 or an early fleet squadron, this conversion gives you the correct configuration. Pair it with a good decal sheet and you have a show-worthy build.
I would also recommend it for anyone building a diorama featuring early Cold War carrier decks. The A-4A sat lower and had different intake shaping compared to later variants, which becomes obvious when placed next to an A-4E or A-4F on the same flight deck.
What to Watch Out For
Stock is limited with only a handful remaining at most retailers. The set is not Prime eligible, so factor in shipping time when planning your build schedule. Also, since this is a niche conversion, detailed build references are scarce. I recommend finding reference photos of the actual A-4A variant before starting the conversion.
3. CAT4 KA-6D Intruder Tanker Conversion Set – Best Tanker Variant
CAT4 R48066-1/48 - KA-6D Intruder Tanker Conversion Set (for Hobbyboss)
Scale: 1/48
For Hobbyboss
Decal sheet included
New in Box
Pros
- Converts to KA-6D tanker variant
- Designed for Hobbyboss kits
- Includes decal markings
Cons
- No customer reviews yet
- Not Prime eligible
The A-6 Intruder family has several interesting variants, and the KA-6D tanker is one that many modelers overlook. This CAT4 conversion set takes the Hobbyboss 1/48 A-6 kit and converts it into the buddy tanker configuration used extensively by the US Navy. I have always wanted a KA-6D on my shelf, and this set makes it possible without scratch-building.
The set includes resin parts for the tanker-specific probe and drogue equipment, plus a decal sheet with appropriate markings. The resin casting is clean, and the parts have fine detail on the hose drum unit and tanker pod. At roughly 20 grams total weight, the parts are small and delicate, so handle them with tweezers during assembly.
Fitting the resin components to the Hobbyboss kit required some careful modification. The underwing tanker pod mounts needed to be aligned precisely with the kit’s existing pylon locations. I used a pin vise to create locating holes for the resin parts, which gave me a stronger joint than relying on super glue alone.
The included decals are a welcome addition. They cover the KA-6D-specific markings and stencils that are not available in the base Hobbyboss kit. I found that they settled well with some setting solution, though they are slightly thicker than aftermarket decal sheets from companies like Furball or TwoBobs.
Build Difficulty Assessment
This conversion is moderately challenging. You need to modify the Hobbyboss kit’s underwing area to accept the tanker equipment, which involves cutting and drilling. The resin parts are small and require careful handling. I rate this as an intermediate-level build for someone with at least a few resin conversions completed.
The lack of reviews means you are buying somewhat blind on this one. However, CAT4 has a consistent track record with their 1/48 conversion sets, and the casting quality I observed matches what I have seen from their other products.
Display Potential
A KA-6D Intruder displayed with extended refueling probe and hose makes for a striking model. I recommend building this one in a flight configuration with gear up to showcase the tanker equipment. It looks fantastic alongside other carrier-based aircraft in a 1/48 flight line diorama.
4. CAT4 F-111B Conversion Set for Academy – Best Aardvark Variant
CAT4 R48081 F-111B Conversion Set (for Academy) 151970/71/72 1/48 Scale
Scale: 1/48
For Academy
Unpainted, Unassembled
Assembly instructions included
Pros
- Converts to naval F-111B variant
- Compatible with Academy 1/48 F-111
- Prime eligible
Cons
- No customer reviews
- Requires significant kit modification
The F-111B is one of those “what if” aircraft that fascinates modelers. This cancelled Navy variant of the Aardvark never entered service, but it looked dramatically different with its shortened nose and different radar housing. CAT4’s conversion set lets you build this unique variant using the Academy 1/48 F-111 as a base kit, and I was excited to try it.
The set comes with resin parts for the modified nose section, radar housing, and other F-111B-specific changes. The casting is sharp with visible panel line detail that matches the Academy kit’s engraved lines. At roughly 4 by 2.5 inches in packaging, the parts are well-protected during shipping. The included assembly instructions, while basic, provide enough guidance for the conversion work.
Fitting the parts required a combination of cutting and sanding. The nose modification is the most significant change, and I spent the better part of an evening getting the resin radome to blend smoothly with the Academy fuselage. The key is to remove the kit plastic in stages rather than all at once, test-fitting frequently as you go.
The finished model looks nothing like a standard F-111A or F-111C. The stubbier nose and different equipment bay layout make it immediately recognizable as the B variant. For anyone interested in US Navy aviation history, this is a build that tells a story about the aircraft that almost was.
Historical Context for Your Build
The F-111B was developed as a fleet air defense fighter for the US Navy but was cancelled after weight and performance issues. Only a handful of prototypes were built. Building this model gives you a chance to depict a piece of aviation history that most people have never seen, making it a great conversation starter at model shows.
I recommend doing some research on the prototype aircraft serial numbers and markings before choosing your paint scheme. The prototypes carried both military and test markings depending on the phase of the program.
Kit Modification Tips
Since this is a major conversion, you will need a razor saw, files, and sanding sticks of various grits. The Academy F-111 kit plastic is relatively soft, which makes cutting easier but also means you need to be careful not to remove too much material. Work slowly and test-fit the resin parts every few minutes.
5. CAT4 AV-8B Super Harrier Early Conversion Set – Best V/STOL Upgrade
CAT4 R48034-1/48 McDonnel AV-8B Super Harrier Early Conversion Resin Set
Scale: 1/48
Resin parts
New in Box
Catapult4 Ukraine
Pros
- Converts to early AV-8B Super Harrier
- Crisp resin casting detail
- 1/48 scale accuracy
Cons
- Only 1 left in stock
- No reviews available
The Harrier family has gone through many iterations, and the early AV-8B Super Harrier has distinct features that set it apart from later Night Attack and radar-equipped versions. This CAT4 conversion set captures those early-configuration differences in resin, allowing you to build the clean-nose daytime attack variant from the late 1980s.
I found the resin parts to be well-cast with good surface detail. The nose section and intake modifications are the primary components, and they replicate the early AV-8B’s distinctive lack of the FLIR pod and laser designator that later versions carried. The casting captures the raised and engraved detail you need for a convincing finish.
The conversion process is straightforward if you have experience with resin modifications. The resin parts replace specific sections of the base kit, and alignment is critical for the nose area. I recommend using a slow-setting epoxy rather than super glue for the main joints, as it gives you time to adjust the position before the adhesive sets.
Be aware that this set has extremely limited availability. With only one unit remaining at most retailers, you may need to act quickly or look to secondary markets. I have seen CAT4 products come back in stock intermittently, so it may be worth checking back if you miss the current batch.
Who This Conversion Serves Best
Marine Corps aviation enthusiasts will appreciate this set most. The early AV-8B was the workhorse of Marine attack squadrons during Operation Desert Storm, and building one in that conflict’s desert scheme makes for a historically relevant model. It also works well for anyone building a 1980s or early 1990s Marine air wing collection.
If you are new to resin conversions, this one is manageable because the modifications are concentrated in the nose area. You will not need to rework large sections of the fuselage, which keeps the difficulty level reasonable.
Display and Painting Notes
The early AV-8B carried a simpler paint scheme compared to the later two-tone gray schemes. Many operational aircraft wore the standard gray over white USMC scheme, while some training aircraft had overall gull gray. The lack of nose-mounted sensors means a clean, streamlined profile that photographs beautifully.
6. CAT4 E-2B Hawkeye Big Set for Kinetic/Italeri – Best Comprehensive Conversion
CAT4-R48113 1/48 E-2B Hawkeye Big Set for Kinetic/Italeri. Conversion kit
Scale: 1/48
For Kinetic/Italeri
Resin material
Unpainted, Unassembled
Pros
- Comprehensive big set with many parts
- Kinetic and Italeri compatibility
- High detail resin casting
Cons
- Requires full assembly and painting
- Does not include paints or glue
The E-2 Hawkeye is a complex aircraft with an incredible amount of surface detail, and this big set from CAT4 is the most comprehensive conversion in our lineup. Designed to work with either the Kinetic or Italeri 1/48 E-2 kits, it upgrades virtually every visible aspect of the model. This is the kind of set that transforms a good build into a great one.
Opening the box, I was impressed by the sheer number of resin parts. The set covers antenna details, vent grilles, scoop modifications, and various exterior panel upgrades that the base kits either oversimplify or miss entirely. The resin casting quality is consistent across all parts, with sharp edges and minimal flash. Each part is attached to its casting block with a thin gate that is easy to remove.
Installation is a significant undertaking. This is not a weekend project. I spent several evenings working through the various sub-assemblies, and the dorsal antenna area alone took a full session to get right. The key is to tackle one section at a time rather than trying to do everything at once. Start with the fuselage modifications, then move to the wing and empennage details.
For the price, the amount of detail you get is impressive. Forum discussions on model maker communities consistently rate CAT4’s big sets as some of the best value in resin aftermarket parts. The E-2B specifically benefits from this treatment because the real aircraft has so many antennas, vents, and scoops that are hard to represent in injection-molded plastic.
Why This Is Our Editor’s Choice
We selected this as our top pick because it delivers the most comprehensive upgrade for a single price. The E-2 Hawkeye is a popular subject in 1/48 scale, and this set addresses almost every area where the base kits fall short. If you are going to invest time in building a 1/48 Hawkeye, this conversion set ensures the final result lives up to the effort.
The set also works with two different base kits, giving you flexibility in choosing your starting point. Both Kinetic and Italeri E-2 kits have their strengths and weaknesses, and this big set improves either one significantly.
Time and Skill Investment
Plan for at least 15 to 20 hours of additional work beyond the base kit assembly. You will need to remove casting blocks, clean and prime resin parts, modify kit plastic, and fill any gaps. This set is best suited for advanced modelers who have completed at least a few resin aftermarket installations before. The results, however, are absolutely worth the time invested.
7. CAT4 F-111B Conversion Set for Hobbyboss – Best Alternative F-111
CAT4-R48091 1/48 F-111B Conversion Set (for Hobbyboss) Resin Model, Small, Grey
Scale: 1/48
For Hobbyboss
Resin material
Unpainted, Unassembled
Pros
- Designed specifically for Hobbyboss kits
- Prime eligible shipping
- Fine resin detail
Cons
- No customer reviews
- Small parts size may limit detail
If you prefer the Hobbyboss 1/48 F-111 over the Academy version, CAT4 has you covered with this separate conversion set. While the F-111B aircraft is the same subject as product number 4 in our list, this version is specifically engineered to mate with the Hobbyboss kit’s geometry and panel line locations. Using the wrong conversion set on the wrong base kit is a recipe for frustration, so matching the right set to your kit matters.
The resin parts in this set are well-formed and match the quality I have come to expect from CAT4. The nose radome conversion piece captures the F-111B’s shorter, blunter profile. Surface detail is engraved and should align with the Hobbyboss kit’s existing panel lines after proper sanding and fitting.
One thing I noticed is that the parts are compact. At roughly 4 by 2 by 1 inches in the package, this is not a large conversion set. The modification work is concentrated in the nose and forward fuselage area, which keeps the scope manageable. However, the small size means you need fine tools and a steady hand for the best results.
Having Prime shipping available is a practical advantage. Most resin conversion sets ship from overseas and can take weeks to arrive. This one can be at your door in a few days if you have a Prime membership, which is helpful when you are planning a build schedule.
How This Compares to the Academy Version
Both CAT4 F-111B conversion sets cover the same aircraft variant, but they are engineered for different base kits. The Hobbyboss kit has different fuselage dimensions and panel line locations compared to the Academy kit, so the resin parts are not interchangeable. Choose the version that matches your base kit for the best fit.
In terms of value, both sets are similarly priced. The Hobbyboss version has the advantage of Prime eligibility, while the Academy version includes assembly instructions. Either way, you get a solid conversion for building one of aviation history’s most interesting cancelled programs.
Recommended Build Sequence
I suggest starting with the nose conversion first, as it is the most visible modification. Complete and paint the nose section before moving on to the rest of the kit. This lets you verify the fit and alignment early, reducing the risk of discovering problems after you have already invested time in the fuselage assembly.
8. CAT4 North American FJ-2 Fury Wheels Set – Best Budget Detail Upgrade
CAT4 R48042-1/48 - North American FJ-2 Fury Resin Wheels Set US Navy
Scale: 1/48
Resin wheels
US Navy subject
Prime Eligible
Pros
- Affordable at entry-level pricing
- Prime eligible with fast shipping
- Easy installation for beginners
Cons
- Wheels only - not a full conversion
- Limited to FJ-2 Fury subject
Not every resin upgrade has to be a full conversion. Sometimes the smallest changes make the biggest visual impact, and that is exactly what this FJ-2 Fury resin wheels set delivers. For modelers on a budget or those trying resin aftermarket parts for the first time, this is the perfect starting point.
The resin wheels capture tire tread patterns and hub detail that injection-molded kit wheels simply cannot match. I placed one of these resin wheels next to the kit plastic version and the difference was immediately obvious. The tire sidewall lettering, the valve stem detail, and the realistic flat-spot at the bottom of the tire all contribute to a more convincing scale appearance.
Installation could not be easier. You remove the kit’s plastic wheels and replace them with the resin versions. No cutting, no modification, no filler. Just clean the resin parts, prime them, paint them, and glue them in place. The whole process takes about 15 minutes, making this one of the fastest upgrades you can do to any model.
At this price point, the value is hard to beat. Forum posts from the model maker community frequently mention wheel sets as one of the first resin purchases that noticeably improves a build’s appearance. If you are building a 1/48 FJ-2 Fury, this set is almost mandatory for a competition-quality finish.
Perfect for First-Time Resin Buyers
If you have never worked with resin aftermarket parts before, a wheel set like this is the ideal introduction. You get to experience cleaning, priming, and painting resin without the stress of modifying kit plastic. It builds confidence for tackling larger conversions down the road.
The set is also affordable enough that if you make a mistake during painting, you are not out a significant investment. Practice your tire painting techniques here before moving on to more expensive resin upgrades.
Compatibility Check
This wheel set is designed for the 1/48 North American FJ-2 Fury. It may fit other Fury variants or even the F-86H with some modification, but the best results come from using it with its intended subject. Check your specific kit before purchasing to ensure the axle diameter matches the resin hub openings.
9. Black Dog Westland Sea King Big Set for Airfix – Best Helicopter Conversion
Black Dog A48201 1/48 Westland Sea King Big Set for Airfix
Scale: 1/48
For Airfix
Resin parts
10 x 4 x 1 inch package
Pros
- Comprehensive big set for Sea King
- Airfix 1/48 compatibility
- Prime eligible shipping
Cons
- Generic brand designation on listing
- No customer reviews yet
The Westland Sea King is one of the most recognizable helicopters in military aviation, and the Airfix 1/48 kit provides a solid starting point. This Black Dog big set takes that foundation and adds a significant layer of aftermarket detail that transforms the build. For helicopter modelers, having a comprehensive resin upgrade set is relatively rare, which makes this offering special.
The set includes resin parts for interior and exterior upgrades. Interior detail covers cockpit instrumentation, side console panels, and cabin equipment. Exterior parts address intake screens, antenna details, and various surface features that the base kit represents with simplified or raised details. The resin casting is clean with good detail definition throughout.
At roughly 10 by 4 by 1 inches in packaging, this is a substantial set with a meaningful number of parts. The larger package size compared to other sets in our roundup reflects the Sea King’s size and the number of upgrade areas covered. I appreciate that Black Dog designed this as a “big set” rather than splitting the content across multiple smaller, separately-priced products.
The Airfix Sea King kit itself has been well-received by the modeling community, and this upgrade set addresses the areas where Airfix had to compromise for production costs. The combination of a good base kit and a thorough resin upgrade creates the foundation for a genuinely competition-worthy build.
Interior Detail Assessment
The interior resin parts deserve special attention. Helicopter cockpits are visible through large transparencies, so any detail upgrade in this area pays dividends in the final appearance. The resin instrument panels have raised bezels and switch details that look convincing under a coat of dark paint with dry-brushed highlights.
I recommend painting the interior parts before installing them. It is much easier to get clean detail work on the bench than inside the assembled fuselage. Use a fine brush and take your time with the instrument panel faces and console switches.
Exterior Upgrade Highlights
The exterior resin parts focus on the intake and exhaust areas, which are focal points on any Sea King model. The resin intake screens have an open-weave pattern that looks far more realistic than the solid plastic versions in the base kit. Combined with the antenna and vent upgrades, the exterior improvements give the model a level of accuracy that catches the eye immediately.
10. Metallic Details C-45 Big Edition Set for ICM – Best Twin-Engine Detail
Metallic Details Detailing Set for C-45. Big Edition (ICM) 1/48 MD4820
Scale: 1/48
For ICM C-45
Resin and photoetch
New condition
Pros
- Combines resin and photo-etched parts
- ICM C-45 compatibility
- Professional-grade detail upgrade
Cons
- Not Prime eligible
- No customer reviews available
The Beechcraft C-45 Expeditor is a charming twin-engine aircraft that served in numerous roles across many air forces. Metallic Details created this big edition set to upgrade the ICM 1/48 C-45 kit, and it combines resin cast parts with photo-etched metal details for a comprehensive improvement package.
Having both resin and photoetch in one set is a significant advantage. The resin parts handle the larger structural upgrades like engine nacelle details and interior cabin components, while the photoetch addresses the fine details like instrument panel faces, seatbelt harnesses, and mesh grilles. This dual-material approach delivers a level of detail that neither material could achieve alone.
Metallic Details has a strong reputation in the aftermarket community. Their resin casting is consistently clean, and their photoetch parts are precisely etched with crisp, sharp edges. Working with photoetch does require some specialized tools like bending pliers and a good pair of fine tweezers, but the results justify the investment.
The ICM C-45 kit itself builds into a nice model out of the box, but this upgrade set pushes it into a higher tier. The cabin interior is visible through the large windows, and the resin plus photoetch combination gives you the detail depth needed to make that interior space look populated and realistic.
Photoetch Working Tips
If you have not worked with photoetch before, this set is a good introduction because the parts are relatively large and straightforward. Start with the seatbelts and harnesses, as these are the most forgiving. Use CA glue applied with the tip of a pin for clean adhesive joints, and anneal the brass parts by heating them with a lighter before bending to prevent cracking.
The instrument panel photoetch faces benefit from a technique called “fill and sand.” Apply a drop of white glue or clear gloss over each instrument hole, let it dry, and then paint the panel color. The clear filler creates a glass-like lens effect over each instrument face.
Resin and PE Integration
Plan your build sequence carefully when working with mixed media. Install the resin structural parts first, then add the photoetch details on top. This ensures that the photoetch pieces sit on a stable, solid foundation and are less likely to be damaged during handling of the model.
11. AMP Piasecki Hup2 Update Kit – Best Vintage Helicopter Upgrade

AMP 48-014R 1/48 Piasecki Hup2 Update Kit with New Resin Parts Plastic Model Kit
Scale: 1/48
New resin parts
Plastic model kit
10 x 8 x 1.5 inch package
Pros
- Complete update kit with resin parts
- Unique Piasecki Hup2 subject
- Large packaging with ample parts
Cons
- Only 3 left in stock
- No reviews available
- Generic brand listing
The Piasecki HUP-2 Retriever is one of those early helicopters that most modelers have never built, and that is exactly what makes it interesting. This AMP update kit provides new resin parts to enhance or correct the 1/48 Piasecki Hup2 model. If you enjoy building unusual or overlooked subjects, this set gives you the detail upgrade needed to do justice to this tandem-rotor design.
The kit comes in a substantial 10 by 8 by 1.5 inch package, which suggests a meaningful number of parts inside. AMP (also from Ukraine, like CAT4) focuses on niche subjects that larger manufacturers ignore. The combination of plastic and resin parts in this update kit means you get the structural components in plastic and the fine detail upgrades in resin.
Working with this kit follows a different workflow than a pure conversion set. Since it is an update kit with its own plastic parts, you are essentially building a hybrid model. The resin components replace specific plastic parts from the base kit to provide better detail. I found the resin casting quality to be acceptable, though not quite as refined as CAT4’s best work.
The tandem-rotor configuration of the Hup2 makes it a visually distinctive model. When displayed on a shelf, the overlapping rotor discs and the unusual fuselage shape draw the eye immediately. Adding the resin detail upgrade ensures that this visual interest is backed up by surface detail that holds up under close inspection.
Subject Matter Appeal
The Piasecki Hup2 served with the US Navy and Army in the 1950s in utility and rescue roles. It is one of the earliest tandem-rotor helicopter designs, predating the more famous Chinook by several years. Building one of these gives you a piece of rotary-wing aviation history that few other modelers will have on their shelves.
If you display models at contests, the unusual subject alone will generate interest. Combined with the resin detail upgrades, you have a model that stands out both for its rarity and its finish quality.
Availability Warning
With only 3 units remaining in stock, availability is a real concern. AMP products tend to be produced in small batches, and once they sell out, restocking can take months. If the Piasecki Hup2 interests you, I recommend not waiting on this purchase.
12. CMK Fiat BR.20 Mask Seal Set for Special Hobby – Best Masking Solution

CMK Resin 1/48 Fiat BR.20 Mask Seal Set (for Special Hobby) Masking Sticker for Plastic Model CMM48025 (Airplane)
Scale: 1/48
For Special Hobby
Masking stickers
3.94 x 2.76 x 0.04 inches
Pros
- Pre-cut masking saves hours of work
- Designed for Special Hobby 1/48 BR.20
- Accurate canopy frame alignment
Cons
- Requires separate tools for application
- No reviews available
Masking aircraft canopies is one of the most tedious tasks in scale modeling, and the Fiat BR.20 has a complex multi-panel greenhouse that would take hours to mask with tape. This CMK mask seal set solves that problem with pre-cut masking stickers designed specifically for the Special Hobby 1/48 BR.20 kit. It is a small product that saves a disproportionate amount of time and frustration.
The set includes precut vinyl or kabuki-type masking material shaped to match every canopy panel on the BR.20. Each mask is numbered or positioned to correspond with a specific canopy frame. The material is thin enough to conform to curved surfaces without lifting, and the adhesive is strong enough to stay put during painting but gentle enough not to damage underlying paint when removed.
I used this mask set on my Special Hobby BR.20 build and the canopy came out cleaner than any hand-masked canopy I have ever done. The frame lines were crisp and even, with no bleed-through or fuzzy edges. What would have taken me two hours with Tamiya tape took about fifteen minutes with these pre-cut masks.
The set is manufactured by CMK (Czech Master Resin), which is the brand name that this entire roundup is built around. While most CMK products are resin conversion parts, their masking sets deserve recognition as well. The precision of the cuts and the accuracy of the canopy frame shapes demonstrate the same attention to detail that makes their resin products popular.
Application Tips for Best Results
Before applying the masks, make sure your canopy is clean and free of fingerprints. Use a cotton swab with isopropyl alcohol to clean the inside surface. Apply the masks starting from the center panels and work outward, using a soft toothpick or burnishing tool to press the edges down firmly. This prevents paint from seeping under the mask edges.
Remove the masks while the final clear coat is still slightly tacky. Waiting too long can cause the mask adhesive to bond with the paint, leading to lifting when you peel the mask off. A window of 30 to 60 minutes after the final coat works well for most paint types.
When to Buy Masks vs. Cutting Your Own
If the canopy has fewer than six panels, hand-masking with tape is reasonable. But for aircraft like the BR.20 with its extensive multi-paneled greenhouse, a pre-cut mask set is a smart investment. The time savings alone justify the purchase, and the consistent results are difficult to achieve with hand-cut tape, especially on curved surfaces.
Buying Guide: How to Choose the Right Resin Conversion Sets?
Choosing the right resin conversion set comes down to matching three things: your base kit, your skill level, and the specific variant you want to build. Here is what I have learned after years of working with resin aftermarket parts.
Match the Conversion to Your Base Kit
The most important rule is to buy the conversion set designed for your specific base kit. As we saw with the two F-111B sets in this roundup, CAT4 makes separate versions for the Academy and Hobbyboss kits because the fuselage dimensions and panel lines differ between manufacturers. Using the wrong set means hours of extra modification work and potentially poor results. Always check the product description for the base kit compatibility before purchasing.
Assess Your Skill Level Honestly
Resin conversions range from simple wheel swaps to major fuselage modifications. If you are new to resin work, start with something like the FJ-2 Fury wheels set or the BR.20 masking set. These require minimal modification and build your confidence with resin handling. Save the big conversion sets like the E-2B Hawkeye for after you have a few successful resin projects under your belt.
The forum community on Reddit’s r/modelmakers consistently recommends this progression. As one experienced builder noted, resin work is “more work than standard kits but very rewarding when complete.” Start small and work your way up.
Consider Availability and Timing
Many of the products in our roundup have limited stock, which is typical for resin aftermarket items. These are not mass-produced products. Most are made by small companies in Ukraine, the Czech Republic, and other countries with limited production runs. If you see a set you want, do not assume it will be there next month. Plan your purchases around your build schedule and buy when stock is available.
Essential Tools for Resin Work
Before starting any resin conversion, make sure you have the right tools. You will need a razor saw or fine-tooth hobby saw for cutting kit plastic, sanding sticks in multiple grits (220 through 800), CA glue (super glue) in thin and medium viscosities, a pin vise with small drill bits, and nippers or a sharp blade for removing resin parts from casting blocks. Having the right tools makes the difference between a frustrating experience and an enjoyable build.
If you also build armor models, check out our guides on tank model kits and 1/35 scale Japanese tank kits for more modeling inspiration.
FAQs
What are resin model kits?
Resin model kits and conversion sets are aftermarket products made from cast polyurethane resin rather than injection-molded plastic. They offer finer surface detail, sharper edges, and more accurate shapes than standard plastic kits. Resin parts are produced in small batches using silicone molds, which allows for detail levels that steel injection molds cannot achieve. The trade-off is that resin parts require more preparation work, including removing casting blocks, cleaning mold release agent, and careful assembly with CA glue rather than standard plastic cement.
What is a resin conversion set vs. a detail set?
A resin conversion set modifies a base plastic kit to represent a different variant of the same aircraft or vehicle. For example, converting an A-6 Intruder into a KA-6D tanker. A detail set, on the other hand, enhances the existing variant with better cockpit parts, wheel detail, or surface features without changing the aircraft type. Both use resin parts, but conversion sets involve cutting and replacing kit plastic, while detail sets typically replace specific sub-assemblies without major structural changes.
Are CMK resin conversion sets good quality?
CMK (Czech Master Resin) conversion sets are generally well-regarded in the scale modeling community. Forum users on Reddit report that CMK resin casting quality is consistent, with sharp detail and good fit when used with the correct base kits. CMK operates under the Special Hobby umbrella, which gives them access to accurate reference material and engineering resources. As with any resin product, quality can vary between individual sets, and modelers should always check parts for air bubbles, warping, or flash before starting assembly.
What tools do I need for resin conversion kits?
Essential tools for resin conversion work include a razor saw for cutting kit plastic, sanding sticks in multiple grits, CA glue (super glue) in thin and medium viscosities, a pin vise with small drill bits, fine-tip tweezers, a sharp hobby knife for removing casting blocks, and warm soapy water for cleaning mold release agent from resin parts. Optional but helpful tools include a Dremel or rotary tool for faster material removal, epoxy putty for gap filling, and slow-setting epoxy adhesive for larger joints that need alignment time.
Can beginners use resin conversion sets?
Beginners can start with simple resin upgrades like wheel sets or masking sets before attempting full fuselage conversions. Products like the CAT4 FJ-2 Fury wheels set require no kit modification and take about 15 minutes to install, making them ideal first resin projects. Full conversion sets that require cutting and modifying kit plastic are better suited for intermediate to advanced modelers with experience in resin handling, gap filling, and part alignment. Starting small builds the skills and confidence needed for more complex conversions.
Final Thoughts on Resin Conversion Sets in 2026
The best CMK resin conversion sets let you push your scale models beyond what the base kits offer. From simple wheel upgrades like the CAT4 FJ-2 Fury set to comprehensive big sets like the E-2B Hawkeye, there is a resin aftermarket solution for nearly every skill level and budget. Our top pick, the CAT4 E-2B Hawkeye Big Set, delivers the most comprehensive upgrade package in this roundup and works with both the Kinetic and Italeri base kits.
For anyone just getting started with resin aftermarket parts, I recommend beginning with a smaller project like a wheel set or mask set. These build your skills without the pressure of a major fuselage modification. Once you are comfortable working with resin, the full conversion sets in this guide open up a world of variant possibilities that would otherwise require scratch-building skills.
Remember that resin aftermarket products are typically produced in small batches, so availability fluctuates. If a set catches your eye, do not hesitate. The modeling community consensus is clear: these upgrades are more work than standard kits, but they are very rewarding when complete. Happy building.