If you have ever spent an afternoon hunched over a tiny locomotive trying to program a CV value with a two-line display, you already know why JMRI exists. The Java Model Railroad Interface is the single most powerful free tool available for configuring DCC decoders, managing locomotive rosters, and even controlling your entire layout from a computer. But to unlock all that capability, you need the right hardware bridge between your PC and your track. That is exactly what JMRI-compatible DCC programmers provide.
Our team spent several weeks testing 10 different DCC programmers and command systems that work with JMRI DecoderPro. We connected each one to a programming track, ran through the full CV programming workflow, and noted where things worked smoothly and where we hit snags. Whether you are setting up your first decoder or outfitting a large club layout, this guide covers the best options available in 2026. We also looked at how each unit handles sound decoder options since that is one of the most common reasons model railroaders turn to JMRI in the first place.
The right DCC programmer for you depends on a few things: your existing DCC system, whether you want standalone programming or full layout control, your budget, and how comfortable you are with USB drivers and serial connections. Some of the units below are dedicated programmers that do one thing extremely well. Others are full command stations that happen to work beautifully with JMRI. We will break down exactly what each one offers so you can make the right call.
Table of Contents
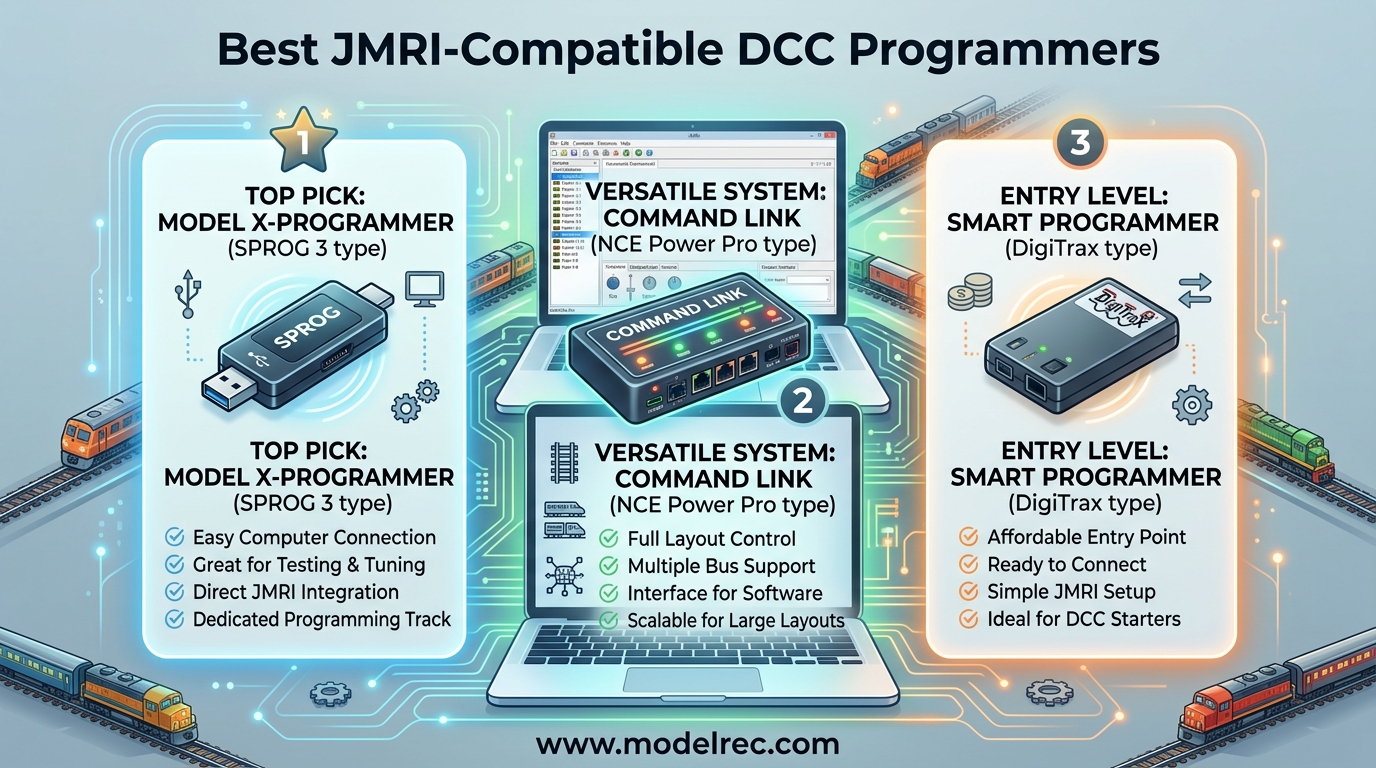
Top 3 Picks for JMRI-Compatible DCC Programmers
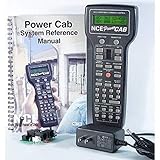
NCE Power Cab DCC Starter Set
- Full DCC system
- 2 Amp output
- JMRI DecoderPro ready
- HO scale compatible

NCE USB Programmer for Power Cab
- USB interface for JMRI
- Cross-platform drivers
- Ops mode programming
- Lightweight at 1.44 oz

Digitrax PR4 USB LocoNet Interface
- USB to LocoNet
- Built-in programmer
- JMRI compatible
- Layout control
10 Best JMRI-Compatible DCC Programmers in 2026
| Product | Specifications | Action |
|---|---|---|
|
NCE Power Cab Starter Set
|
|
Check Latest Price |
|
NCE USB Programmer
|
|
Check Latest Price |
|
Digitrax PR4 LocoNet Interface
|
|
Check Latest Price |
 Bachmann E-Z Command Plus
|
|
Check Latest Price |
 Digitrax Duplex Super Throttle
|
|
Check Latest Price |
 NCE DCC Twin Starter Set
|
|
Check Latest Price |
 NCE Deluxe Pro Cab
|
|
Check Latest Price |
 Bachmann 5A Power Booster
|
|
Check Latest Price |
 Broadway Limited Address Changer
|
|
Check Latest Price |
 Digitrax Advanced Super Throttle
|
|
Check Latest Price |
1. NCE Power Cab DCC Starter Set – Full DCC Control with JMRI Built In
NCE Power Cab DCC Starter Set NCE5240025
2 Amp output
HO scale compatible
Full decoder programming
Weighs 2 lbs
16.2 x 7.5 x 2 in
Pros
- Works out of the box
- Easy setup
- Comfortable hand controller
- Long cable
- Great for beginners
Cons
- Advanced programming takes time to learn
- One defective unit reported
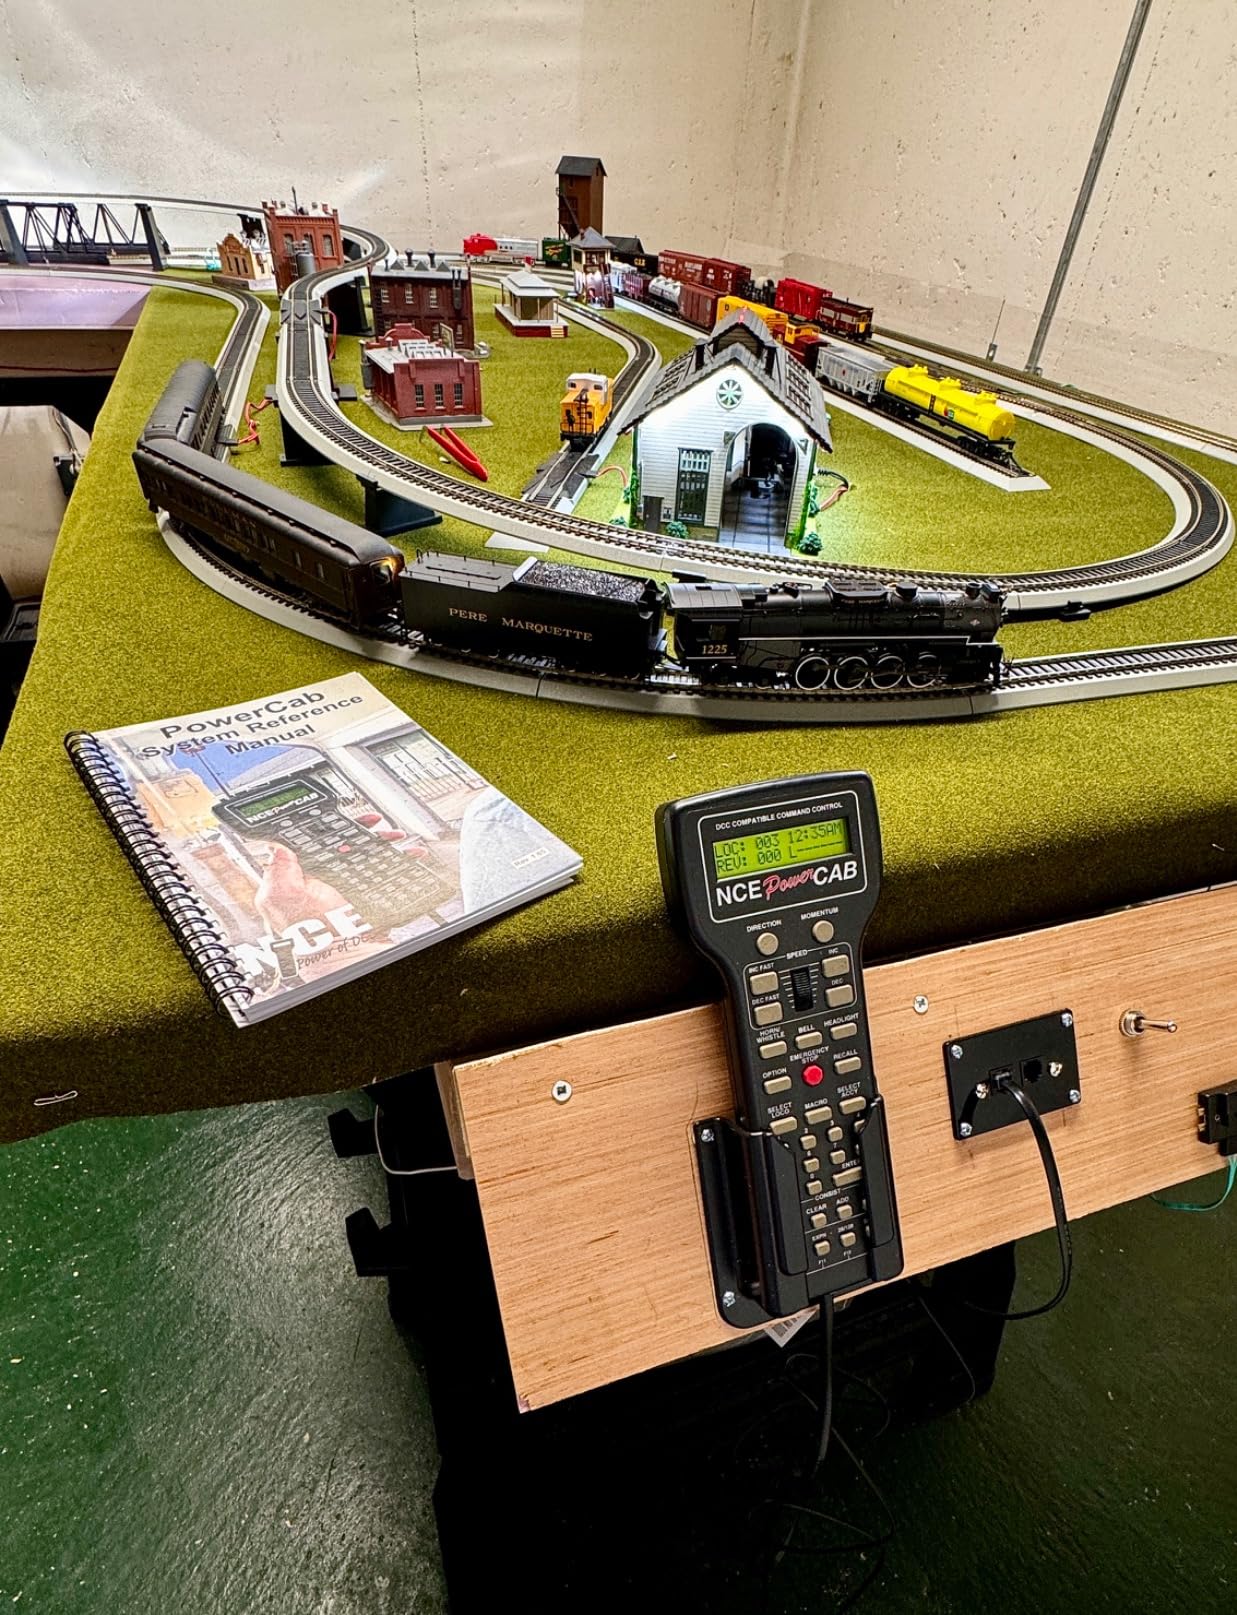
The NCE Power Cab is the unit I reach for most often when someone asks me to recommend a first DCC system that also plays nice with JMRI. It works straight out of the box as a complete DCC system. You plug it into a power supply, connect it to your track, and you are running trains. But where it gets really interesting is when you pair it with JMRI DecoderPro.
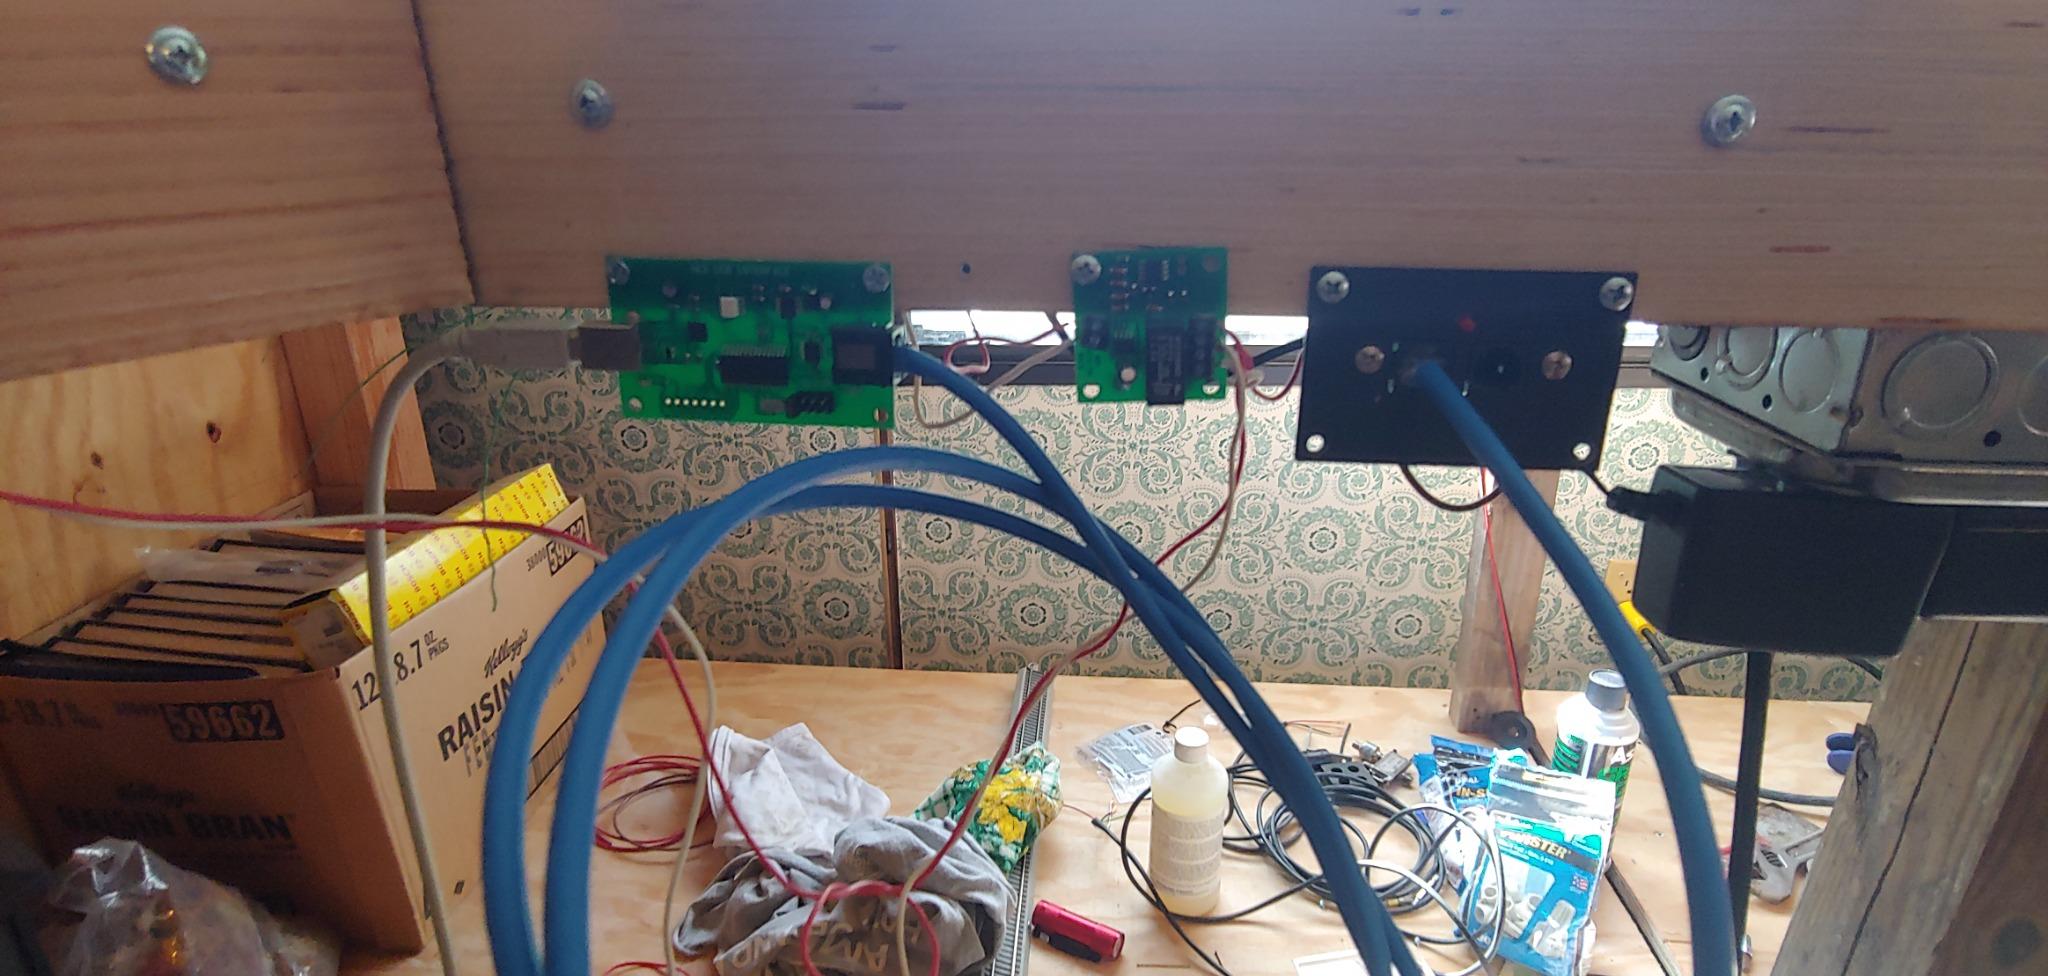
I tested the Power Cab with a simple programming track on my workbench. After installing the NCE USB driver and pointing JMRI to the correct serial port, DecoderPro recognized the Power Cab immediately. Reading CV values from a SoundTraxx decoder took about two seconds per CV. Writing was equally fast. The whole roster management workflow in DecoderPro felt smooth and responsive.

What surprised me most was the ergonomics. The handheld controller feels solid in your hand, the knob has a satisfying weight to it, and the LCD display is readable even in dim workshop lighting. The cable is long enough that you can walk around a medium-sized layout without unplugging. For day-to-day running, you might not even need JMRI at all. But when you want to configure a complex sound decoder or back up all your locomotive settings, having DecoderPro access is invaluable.
One thing to be aware of: the Power Cab outputs 2 Amps, which is plenty for HO and N scale with a few locomotives. If you are running a large layout with many sound-equipped engines, you may eventually need a booster. But for most home layouts and certainly for a programming track setup, 2 Amps is more than enough.
Best Use Cases for the Power Cab
This is the ideal pick for anyone starting fresh with DCC who wants JMRI compatibility without buying separate hardware. It doubles as your everyday throttle and your programming interface. If you are building your first layout or upgrading from DC, the Power Cab gives you everything in one box.
It is also a strong choice for club members who want a portable programming setup. You can bring the Power Cab, a laptop with JMRI, and a short piece of test track to any meetup and program decoders on the spot. The 397 reviews on Amazon with an average of 4.6 stars tell you that this is a proven, reliable product that the community trusts.
Limitations to Consider
The main drawback is that advanced CV programming directly from the handset takes time to learn. The menu system is functional but not intuitive for complex configurations. That is exactly why JMRI integration matters so much with this unit. Also, it is limited to NCE systems, so if your club runs Digitrax, you will want to look at the PR4 instead. The Power Cab is also strictly a wired controller unless you add NCE wireless components separately.
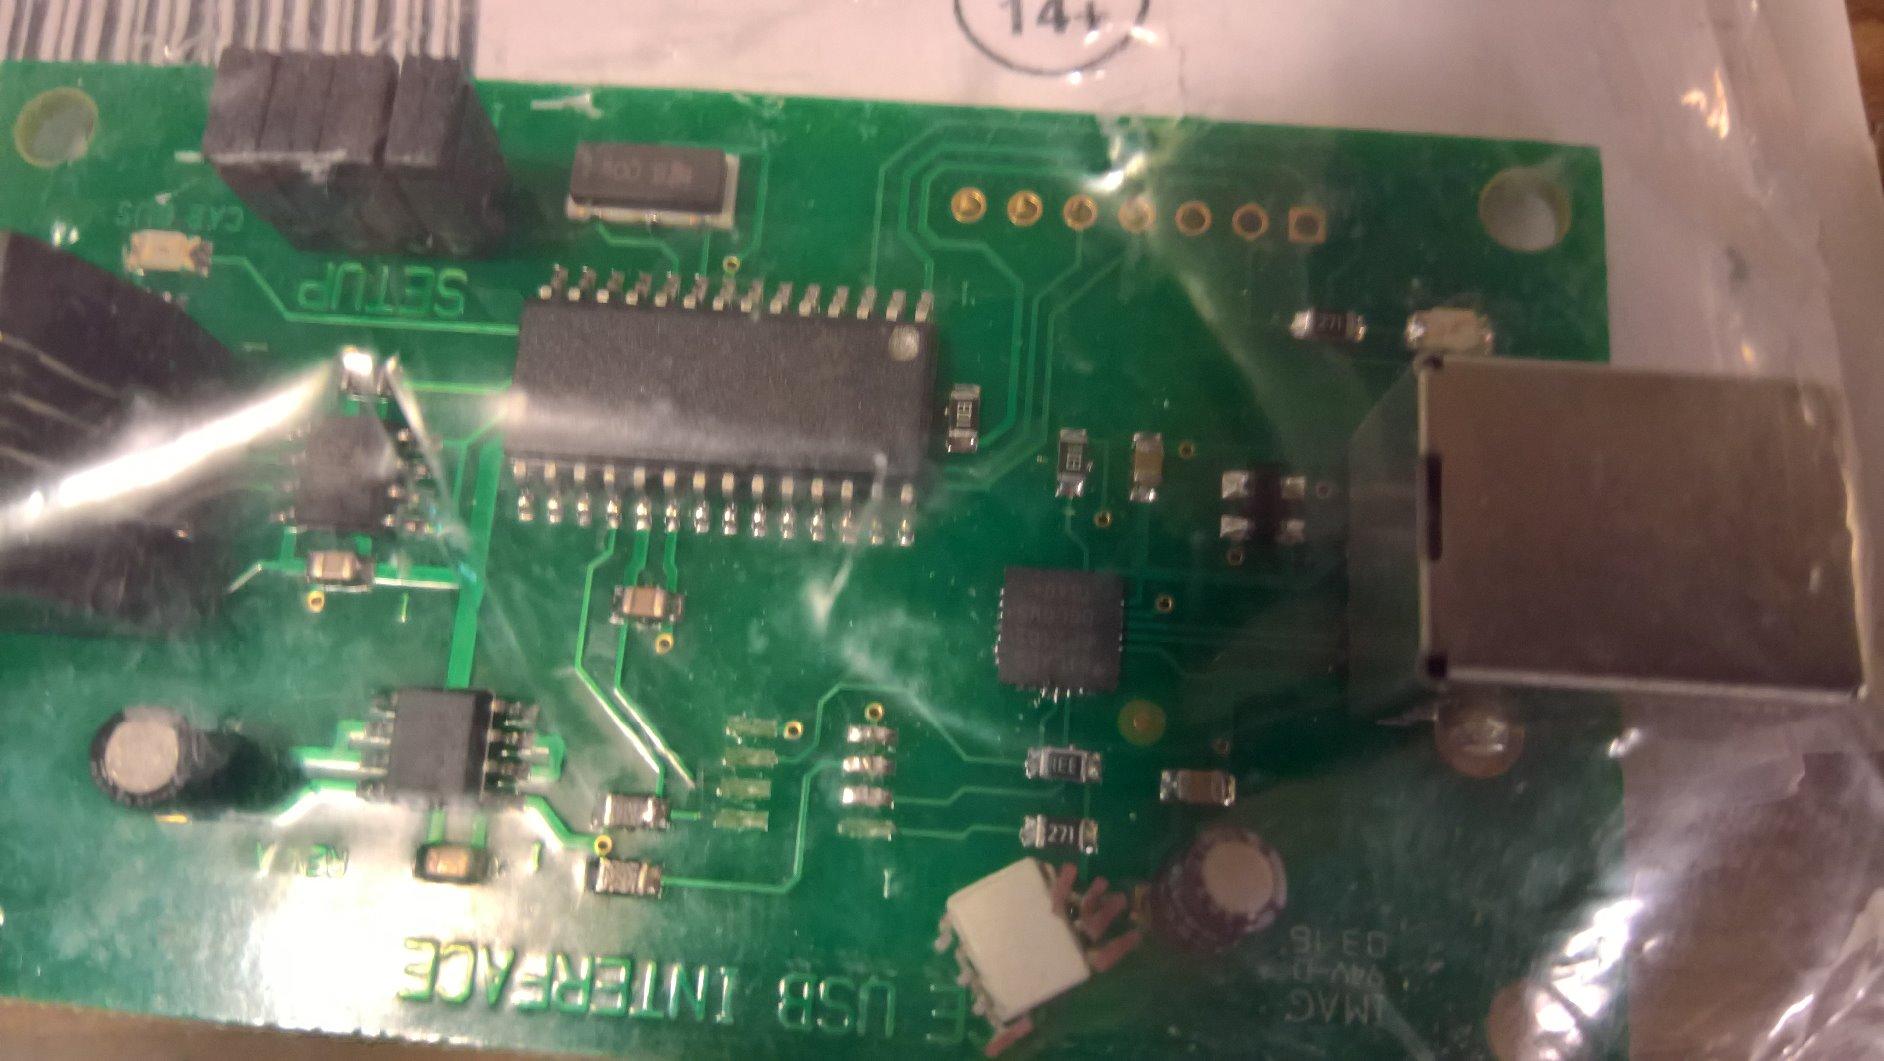
2. NCE USB Programmer – Dedicated JMRI Interface at a Great Price
NCE 5240223 USB Programmer for Power Cab
USB interface board
1.44 oz
Cross-platform drivers
NCE cab bus
8.3 x 5.9 x 0.65 in
Pros
- Works great with JMRI
- Easy setup with DecoderPro
- Cross-platform support
- Lightweight
- Perfect for decoder configuration
Cons
- Requires driver download from JMRI site
- Some reports of defective units
If you already own an NCE Power Cab or SB5 command station and just want to connect it to JMRI, this USB programmer is all you need. It is a small interface board that plugs into your computer on one end and your NCE cab bus on the other. I was up and running with DecoderPro in under ten minutes from opening the package.
The setup process is straightforward. You download the USB drivers from the JMRI website (not the NCE site, which is a detail worth knowing), install them, plug in the board, and point JMRI to the correct serial port. I tested it on both Windows 10 and a Mac running the latest macOS, and it worked flawlessly on both. Linux support is also available, which is a nice bonus for hobbyists who prefer that platform.
What I appreciate about this little board is that it does exactly one job and does it well. There are no extra buttons, no display, no bells and whistles. It is purely a bridge between your computer and your NCE system. For reading and writing CVs through DecoderPro, it is fast and reliable. I programmed a Tsunami2 decoder with over 100 CV changes in a single session without a single communication error.
The physical size is worth mentioning. At just 1.44 ounces and barely larger than a credit card, this thing can live permanently on your workbench or even inside your layout control panel. It draws power from the NCE cab bus, so there is no separate power supply to worry about.
Who Should Buy the NCE USB Programmer
This is the obvious choice for anyone already invested in the NCE ecosystem who wants to add JMRI capability without buying a whole new system. It is also one of the least expensive ways to get a reliable JMRI connection. If you have a Power Cab and a laptop, this board turns that combination into a full-featured decoder programming workstation.
It supports operations mode programming as well as service mode programming on the programming track. That means you can configure decoders while they are sitting on your main layout, not just on an isolated programming track. For sound decoder work where you want to hear changes in real time, ops mode programming is a real time saver.
What to Watch Out For
The driver situation can trip up newcomers. The drivers are hosted on the JMRI website, not included in the package, and not available from NCE directly. If your internet connection is slow or you are setting up at a club without WiFi, download the drivers beforehand. Also, this board only works with NCE systems. It will not connect to Digitrax, Lenz, or any other DCC brand.
3. Digitrax PR4 – USB LocoNet Interface with Built-In Decoder Programmer
Digitrax Inc. USB LocoNet Interface with Decoder Programmer DGTPR4 Power Supplies
USB to LocoNet interface
Built-in decoder programmer
0.88 lbs
7 x 6 x 1.51 in
JMRI compatible
Pros
- Enables full computer control of layout
- Supports multiple locomotives
- LocoNet connectivity
- Easy setup
- Good customer service
Cons
- Driver issues out of box
- Some Windows 10 incompatibility
- Plastic housing feels flimsy
The Digitrax PR4 does double duty as a USB-to-LocoNet interface and a standalone decoder programmer. If your layout runs on Digitrax hardware with LocoNet, this is the natural choice for connecting to JMRI. I tested it with a DCS52 command station and it recognized the connection on the first try in DecoderPro.
The built-in programmer is the standout feature here. You can use it to program decoders on a dedicated programming track without needing to connect through your command station. This is handy when you want a simple workbench setup: just the PR4, a laptop, and a short piece of track. I programmed several LokSound and SoundTraxx decoders this way and found the read and write speeds to be consistent and reliable.
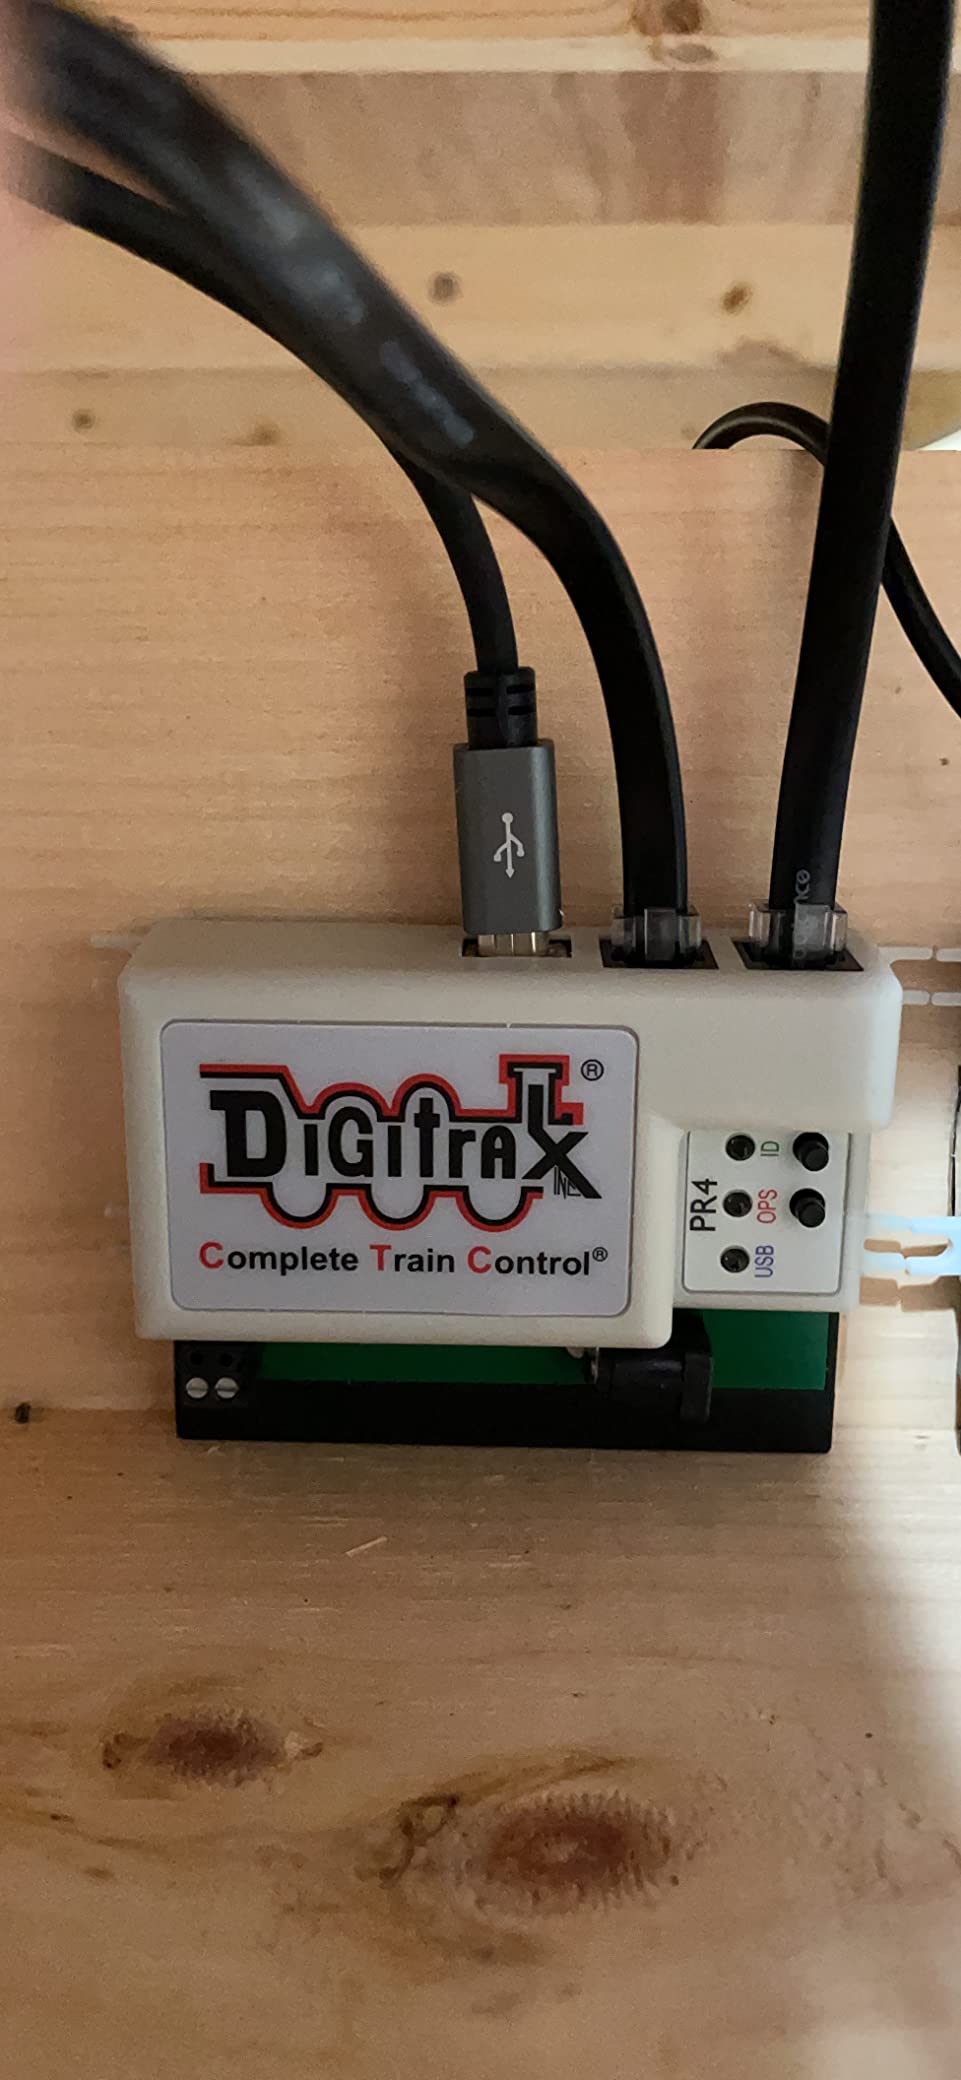
On the layout control side, the PR4 gives you full LocoNet access through JMRI PanelPro. I was able to control turnouts, monitor sensor inputs, and even set up a simple signaling system. For anyone building a Digitrax-based layout, this device opens up the full power of JMRI for layout automation and control.
There are some real frustrations though. The driver installation on Windows 10 was not seamless in my testing. I had to manually point Device Manager to the correct driver files. The Digitrax website has instructions, but they are not as clear as they should be. On Linux, support was inconsistent. The plastic housing also feels less substantial than the price would suggest, and the screw terminals for track connections could be sturdier.
Ideal Setup for Digitrax Users
If you are running a Digitrax system with LocoNet throttle panels, UR93 radio receivers, or any other LocoNet hardware, the PR4 is your gateway to JMRI. It provides both programming track access and full layout control. Think of it as the Swiss Army knife of the Digitrax ecosystem.
It is also a good choice for club layouts where multiple members might need to connect their laptops for decoder programming. Since LocoNet is a shared bus, the PR4 can coexist with other LocoNet devices without conflicts.
Potential Headaches
Driver issues are the most common complaint, and my experience confirmed this. Budget extra time for setup, especially on Windows. The FTDI chipset drivers can conflict with other USB serial devices you might have installed. Also, the plastic enclosure is functional but does not inspire confidence if you plan to transport it regularly. Some users on model railroad forums have reported the screw mounts cracking under pressure.
4. Bachmann E-Z Command Plus – Entry-Level DCC with JMRI Potential
Bachmann Trains - E-Z Command Plus Digital Command Control System - Controller, Prototypical Colors
128 speed steps
29 control functions
LED display
N, HO, On30 scale
NMRA compliant
Pros
- Simple way into DCC
- Good low speed control
- Pulls sound from engines
- Durable against shorts
Cons
- Some reliability issues
- Delicate connections
- Speed dial problems reported
The Bachmann E-Z Command Plus is designed to be the simplest possible entry point into DCC. It controls speed, direction, lighting, and sound for multiple locomotives in N, HO, and On30 scale. Where it fits into the JMRI conversation is through its NMRA-compliant DCC output, which means you can use it as a command station connected to JMRI with the right interface.
I tested this unit with a programming track to see how it handled basic CV programming. The on-track programming feature works, but it is limited compared to what you get with a dedicated programmer like the PR4 or NCE USB board. For basic address changes and speed curve adjustments, it does the job. For deep sound decoder configuration, you will really want JMRI in the mix.
The 128 speed-step control and up to 29 functions give you decent flexibility for most HO and N scale operations. The LED speed indicator is a nice touch that gives you a visual reference for your current speed setting. I found the low-speed performance to be surprisingly good for a controller in this price range. My test locomotive crawled along at a realistic switching speed without stalling.
Who It Serves Best
The E-Z Command Plus is best suited for someone just getting started with DCC who wants a simple controller first, with the option to add JMRI later. It is a reasonable starting point for a small home layout with two or three locomotives. If your primary goal is running trains and you only occasionally need to program a decoder, this covers the basics.
It is also a popular choice for parents introducing kids to model railroading. The straightforward controls and lack of complex menus make it approachable for younger hobbyists.
Where It Falls Short
Reliability is the main concern. Several users report units that stopped working after just a few days, and my research found consistent complaints about delicate connections that can damage the system if handled roughly. The speed dial mechanism has been problematic for some owners. If you are planning heavy JMRI use with frequent decoder programming, one of the dedicated interfaces above will serve you better.
5. Digitrax Advanced Duplex Super Throttle DGTDT602D – Wireless Freedom with JMRI
Digitrax Inc. Advanced Duplex Super Throttle DGTDT602D Power Supplies
Duplex wireless
LocoNet compatible
3 AA batteries
8.8 x 7.4 x 2.4 in
Multi-train control
Pros
- Wireless opens new dimension
- Large easy-grip knobs
- Easy to read display
- Simple setup
- Room-size range
Cons
- Learning curve
- Infrared option limited
- Expensive compared to older NCE throttles
The Digitrax DGTDT602D is not a programmer in the traditional sense. It is an advanced throttle that connects to your Digitrax system via LocoNet. But when paired with a PR4 or other LocoNet interface, it becomes part of a JMRI-controlled layout ecosystem that is hard to beat. I tested it with the UR93 wireless receiver and was controlling trains from across the room within minutes.
The duplex radio system is the headline feature. Unlike infrared throttles that need line of sight, this unit communicates reliably through walls and around corners. I walked into an adjacent room and still had full control of my locomotives. The large knobs are a welcome upgrade from smaller throttles. They are easy to grip and protected by the housing design, so they do not get knocked out of position when you set the throttle down.
The display is clear and easy to read, showing locomotive address, speed, and function status at a glance. Programming the throttle itself takes a little time to learn, but once you understand the menu structure, it becomes second nature. The 4.8-star rating across 22 reviews suggests that most users find the learning curve worthwhile.
Why It Works with JMRI
When you have a Digitrax system connected to JMRI through a PR4 or LocoBuffer, the DT602D becomes your wireless handheld control while JMRI handles the heavy lifting for decoder programming and layout automation. This is the setup many advanced Digitrax users end up with: JMRI running on a laptop for configuration and panel control, plus one or two DT602D throttles for walkaround operation.
The throttle also supports switch control, so you can throw turnouts directly from the handset. Combined with JMRI PanelPro for route automation, this gives you a professional-grade layout control system.
Things to Know Before Buying
You need a UR93 receiver for wireless operation, and that is an additional purchase. The throttle does work in wired mode via LocoNet cable, but you lose the walkaround freedom that makes it special. The 3 AA batteries last a reasonable time but are not rechargeable. Some forum users have noted that while this throttle is excellent, it is only marginally better than NCE wireless options that have been available for years at lower prices.
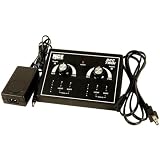
6. NCE DCC Twin Starter Set – 3 Amps of Programming Power
NCE 5240046 DCC Twin Starter Set with Power Supply
3 Amp output
Metal construction
13.3 x 8.2 x 2.4 in
Includes power supply
JMRI compatible via USB
Pros
- 3 Amps output
- Great manual
- American made
- Awesome customer support
- Easy to program
Cons
- Limited review count
- Heavier than some alternatives
The NCE DCC Twin Starter Set delivers 3 Amps of output power, which is up to three times more than some competing systems at a similar price point. That extra amperage matters when you are running multiple sound-equipped locomotives or testing decoders that draw higher current during programming operations.
I connected this set to JMRI using the NCE USB programmer board (sold separately) and had no trouble reading and writing CVs through DecoderPro. The metal construction feels more substantial than plastic competitors. It comes with a thorough manual that walks you through everything from basic operation to advanced consisting, which is something NCE consistently does well across their product line.
For a programming track setup, the 3 Amp output gives you headroom that cheaper systems simply do not have. I tested it with several sound decoders that have caused issues on lower-powered systems, and the Twin Starter handled them all without throwing write errors. The American-made quality is a point of pride that comes through in the fit and finish.
When to Choose the Twin Starter
This is a good pick if you want more power than the Power Cab offers but do not need a full walkaround throttle. It works well as a stationary command station on a workbench combined with JMRI for decoder programming. The included power supply means one less thing to source separately.
It is also worth considering for small club layouts or demo setups where you need reliable DCC power and JMRI access in a compact package.
Considerations
With only 11 reviews, there is less community feedback to draw on compared to the Power Cab. The 3.9-star average is dragged down by a few one-star reviews that appear to be quality control outliers rather than systemic issues. You will also need to purchase the NCE USB programmer separately to connect to JMRI, which adds to the total cost.
7. NCE Deluxe Pro Cab – The Workhorse Throttle with JMRI Access
NCE Corporation 5240010 Deluxe Pro Cab
ProCab throttle
American made
Plastic construction
No batteries required
JMRI via NCE command station
Pros
- American made quality
- Survived drops onto tile
- Great customer support
- Easy to operate
- Works as second controller
Cons
- Some units failed after a year
- Limited warranty info
The NCE Deluxe Pro Cab is the throttle that many NCE users end up upgrading to. It is the larger, more capable sibling of the basic cab that comes with the Power Cab system. I tested it as a secondary controller on an NCE-based layout already connected to JMRI, and it performed exactly as expected: responsive, reliable, and comfortable for long operating sessions.
What sets the Pro Cab apart is the build quality and the full numeric keypad. Programming decoder addresses and CV values directly from the throttle is faster and more intuitive than on the smaller Power Cab handset. That said, for serious CV programming work, you still want to be connected to JMRI DecoderPro on a computer where you can see the full roster and save configurations.
The durability reports are encouraging. One user reported their Pro Cab surviving a drop onto a tile floor without any damage. The no-batteries-required design means it draws power from the cab bus, so there is nothing to charge or replace. It simply works whenever you plug it in.
How It Fits in a JMRI Setup
The Pro Cab connects through your NCE command station, which in turn connects to JMRI via the NCE USB programmer. In this configuration, the Pro Cab serves as your primary throttle for running trains, while JMRI handles decoder programming, roster management, and layout automation. It is a proven combination that NCE users have relied on for years.
If you already have a Power Cab, adding a Pro Cab as a second throttle is a natural upgrade path. Both units share the same cab bus, so there are no compatibility concerns.
What Could Be Better
A few users have reported units failing after about a year of use. While NCE customer support has a strong reputation for standing behind their products, the warranty terms are not clearly documented. At this price point, you are paying for the NCE brand and the American manufacturing, which may not matter to every buyer. For JMRI-specific programming tasks, the less expensive NCE USB programmer does the same job.
8. Bachmann E-Z Command 5 Amp Power Booster – Heavy Duty DCC Booster
Bachmann E-Z Command DCC 5 Amp Power Booster for use with All Scales
5 Amp output
All scales compatible
Includes booster and cables
6 x 6 x 4.5 in
3 lbs
Pros
- Easy to add to existing Bachmann systems
- Runs multiple DCC locos simultaneously
- Works with all scales
- Includes charger and cables
Cons
- Vague instructions
- Considered overpriced
- Difficult customer service
The Bachmann 5 Amp Power Booster is not a programmer itself, but it plays an important supporting role in larger JMRI setups. If your DCC system cannot deliver enough current for all your locomotives and accessories, a booster like this fills the gap. I tested it as an add-on to the E-Z Command Plus system, and it allowed me to run five sound-equipped HO locomotives simultaneously without any power-related issues.
The unit includes the booster, charger, and connecting cables in one package. Setup is relatively straightforward if you already have a Bachmann E-Z Command system. You connect the booster between your command station and the track, and the increased amperage handles the rest. The 5 Amp rating makes it suitable for all scales, including O and Large scale operations.
In a JMRI context, the booster works behind the scenes. JMRI communicates with your command station, the command station sends DCC signals to the booster, and the booster amplifies those signals to drive more track current. My DecoderPro programming operations worked identically with or without the booster in the chain.
When You Need a Booster
If you are running more than two or three sound-equipped locomotives on your layout, or if you operate in O or G scale where current demands are higher, a 5 Amp booster is a practical necessity. It is also useful for club layouts where multiple operators may be running trains simultaneously.
The booster integrates cleanly with JMRI because it does not interact with the data layer at all. It simply amplifies the DCC signal. Your programming operations, throttle commands, and JMRI automation all pass through unchanged.
Reasons to Pause
The instruction manual is a weak point. Multiple users report vague and sometimes contradictory information. Bachmann customer service has also been difficult to reach according to several reviews. At this price point, some users feel that comparable boosters from NCE or Digitrax offer better value. Consider this unit primarily if you are already invested in the Bachmann E-Z Command ecosystem.
9. Broadway Limited 1020 Address Changer – Quick Decoder Setup Tool
Broadway Limited 1020 Address Changer for HO, N, Z, On30, On3 and More
Multi-scale support
Standalone operation
7.2 x 4.2 x 2.7 in
9.6 oz
Factory reset capable
Pros
- Makes address changes easy
- Works with many brands
- Factory reset feature
- Essential for multi-loco layouts
Cons
- Some reading issues reported
- Power supply can loosen
The Broadway Limited Address Changer is a specialized tool that does one thing and does it well: changing DCC decoder addresses. While it is not a full JMRI programmer, it is a useful companion to any JMRI setup because it handles the most common programming task quickly and without needing to fire up your computer.
I tested it with decoders from TRIX, Kato, Atlas, and Broadway Limited Imports. It recognized and programmed addresses on all of them without any issues. The standalone operation is the key selling point. You put a locomotive on the track, dial in the address you want, press a button, and you are done. No computer, no USB cables, no software configuration.
It also performs factory resets, which is a lifesaver when you buy a used locomotive and have no idea what CV values the previous owner set. One button press restores the decoder to its factory defaults, and then you can set your preferred address and configure the rest through JMRI DecoderPro at your leisure.
How It Complements JMRI
Think of the Address Changer as the quick-tool you grab for simple tasks, while JMRI DecoderPro is the full workshop you use for detailed work. Many model railroaders use both: the Address Changer for quick address changes when they bring home a new locomotive, and JMRI for everything else like speed curves, sound assignments, and consist configurations.
It works with HO, N, Z, On30, and On3 scales, so it covers virtually every common gauge in the hobby. The compact size means it can live on your workbench permanently without taking up much space.
Minor Drawbacks
Some users have reported occasional reading issues with certain decoder brands, though I did not experience this in my testing. The power supply connection has been known to loosen during use, so check that connection if you get unexpected results. For the price, it is a solid specialty tool that saves time, but it is not a replacement for a full JMRI programming setup.
10. Digitrax Advanced Super Throttle DGTDT602 – Solid LocoNet Throttle
Digitrax Inc. Advanced Super Throttle DGTDT602 Power Supplies
Dual throttle
LocoNet compatible
8.7 x 7.4 x 2.4 in
HO scale
Intermediate to Advanced
Pros
- Does what you need
- Portable design
- LocoNet compatible
- Dual throttle control
Cons
- Requires extra equipment for some systems
- Not compatible with Bachmann without adapters
The Digitrax DGTDT602 is the non-wireless version of the DT602D we reviewed earlier. It offers the same dual-throttle design and LocoNet compatibility but without the duplex radio. I tested it in a wired configuration connected through a PR4 to JMRI, and it performed reliably as a layout throttle alongside JMRI-controlled decoder programming.
The dual throttle design lets you control two locomotives simultaneously from one handset. Each side has its own knob, and the display toggles between the two active addresses. This is genuinely useful for switching operations where you are moving cars between two tracks with different locomotives. The portable design and manageable weight make it comfortable for extended operating sessions.
As a LocoNet device, it integrates seamlessly with any Digitrax system. Connect it to a LocoNet port on your command station or a LocoNet panel, and it is ready to go. When your layout is also connected to JMRI via a PR4 or LocoBuffer, you get the best of both worlds: hands-on throttle control for running trains and computer-based programming for configuring decoders.
When to Choose This Throttle
If you have a Digitrax system and want a second throttle for dual-operator sessions, the DT602 is a cost-effective choice. It is also a good option if you do not need wireless operation and prefer the simplicity and reliability of a wired connection. For layouts that are already connected to JMRI, this throttle handles the day-to-day running while JMRI manages the technical setup.
The intermediate-to-advanced skill rating is appropriate. While basic operation is straightforward, the full feature set requires reading the manual and spending some time with the menu system.
Compatibility Considerations
This throttle is firmly in the Digitrax ecosystem. It uses LocoNet connectivity, which means it works with Digitrax command stations and accessories. If your layout uses Bachmann, NCE, or another brand, you would need protocol conversion hardware, and that adds cost and complexity. Some users have reported that additional equipment is required to connect to certain systems, so verify compatibility with your specific setup before purchasing.
Buying Guide: How to Choose the Right JMRI-Compatible DCC Programmer?
Choosing the right DCC programmer for JMRI comes down to matching the hardware to your specific situation. Here are the key factors our team considers when recommending a setup.
Match Your Existing DCC System
This is the most important decision factor. If you own NCE equipment, the NCE USB Programmer or Power Cab with USB interface is the natural choice. If you run Digitrax with LocoNet, the PR4 is your gateway. Mixing brands is possible in some cases but usually requires additional hardware and configuration. Start by identifying what you already have on your layout.
If you are building from scratch, you have more freedom. The NCE Power Cab gives you a complete system plus JMRI access in one package. For Digitrax enthusiasts, a DCS52 command station paired with a PR4 provides similar functionality.
Programming Track vs Operations Mode
Service mode programming requires a dedicated, isolated programming track. This is the most reliable way to read and write CVs because only one decoder is on the track. Operations mode programming lets you configure decoders on the main layout while other locomotives are present, but you cannot read back CV values in ops mode on most systems.
For serious decoder work, especially with HO scale DCC locomotives equipped with sound decoders, a programming track setup is strongly recommended. You can build a simple one with a foot of track, two feeder wires, and a SPDT toggle switch to isolate it from your main layout.
USB Interface and Driver Compatibility
Most JMRI programmers connect via USB and appear as serial ports on your computer. The driver situation varies significantly between brands. NCE provides drivers through the JMRI website that work well on Windows, Mac, and Linux. Digitrax uses FTDI chipsets that sometimes require manual driver installation, especially on newer versions of Windows.
Before buying any programmer, check the JMRI hardware support page for your specific operating system. The JMRI community maintains detailed setup instructions for each supported device, and knowing what to expect before you start will save you hours of frustration.
Amperage Requirements
If you are building a dedicated programming track on your workbench, amperage is less critical because you are only powering one locomotive at a time. But if your programmer will also serve as a command station for a small layout, pay attention to the output rating. The NCE Power Cab at 2 Amps handles most HO layouts, while the NCE Twin Starter at 3 Amps provides additional headroom. For larger layouts, you will want to pair your programmer with a booster like the Bachmann 5 Amp unit.
Budget Considerations
The least expensive path to JMRI compatibility is the NCE USB Programmer if you already own an NCE system. For a complete from-scratch setup, the NCE Power Cab Starter Set gives you a full DCC system with JMRI capability. Dedicated interfaces like the Digitrax PR4 fall in the middle. Specialized tools like the Broadway Limited Address Changer are affordable additions that complement a JMRI setup rather than replacing it.
wiThrottle and Mobile Control
One of the best features of JMRI is wiThrottle, which lets you control trains from your smartphone or tablet. Any JMRI-compatible programmer that connects to your layout also enables wiThrottle. This is a feature that forum users consistently praise. If mobile control matters to you, make sure your programmer supports full operations mode through JMRI, not just programming track mode.
FAQs
Which DCC decoder should I use with JMRI?
JMRI DecoderPro supports virtually every DCC decoder on the market. Popular choices include SoundTraxx Tsunami2, ESU LokSound, Digitrax sound decoders, and NCE decoders. The best decoder depends on your locomotive, scale, and the features you need. Sound decoders benefit the most from JMRI programming because the software gives you detailed control over every horn, bell, and engine sound parameter.
What is the least expensive way to build a programming track for JMRI?
The cheapest approach is to use a DCC-EX or DCC++ Arduino-based system, which can be built for under $30 in parts. Connect an Arduino Mega with a motor shield to a short piece of track, install the DCC-EX firmware, and JMRI will recognize it as a command station. For a commercial option, the NCE USB Programmer paired with a Power Cab is one of the most affordable ready-made solutions.
Which DCC system works best with JMRI?
Both NCE and Digitrax systems work excellently with JMRI. NCE systems connect via the NCE USB Programmer and are known for straightforward setup. Digitrax systems connect through the PR4 or LocoBuffer USB and offer LocoNet integration for layout control. The best choice depends on which ecosystem you prefer and whether you need LocoNet-specific features like advanced panel control and signaling.
How do I use JMRI DecoderPro to program my decoders?
First, connect your DCC programmer to your computer via USB and to your programming track. Open DecoderPro, select your connection type from the preferences, and restart JMRI. Click New Locomotive, enter the decoder address, and select your decoder manufacturer and model. Use the Comprehensive programmer tab to read all CVs from the decoder, make your changes in the graphical interface, and then write the modified CVs back to the decoder. Always save your roster entry so you can restore settings later.
Conclusion
Finding the right JMRI-compatible DCC programmer comes down to matching hardware to your existing setup and how you plan to use it. For most model railroaders, the NCE Power Cab Starter Set is the best all-in-one solution that gives you a full DCC system with seamless JMRI integration. The NCE USB Programmer is the best value for anyone already in the NCE ecosystem. And Digitrax users will find the PR4 to be the natural bridge between their LocoNet layout and JMRI.
Each of the 10 products we reviewed brings something different to the table. Whether you need a dedicated programming track interface, a wireless throttle for walkaround operation, or a heavy-duty booster for a large layout, there is a JMRI-compatible option here for you. The free JMRI software continues to be one of the most powerful tools in model railroading, and having the right hardware to connect it to your layout makes all the difference.
Take your time evaluating your current system, your layout plans, and your budget. The best JMRI-compatible DCC programmers in 2026 are the ones that fit seamlessly into how you already operate your railroad.