I remember the first time I opened a photo etch fret. The paper-thin brass parts glinted under my workbench light, impossibly delicate and intimidating. My hands trembled as I tried to bend a tool clamp bracket, watching it ping off into the carpet abyss never to be seen again. That was five years ago, and since then I have tested photo etch sets from every major brand to find which ones actually deliver on their promises without turning your build into a frustration marathon.
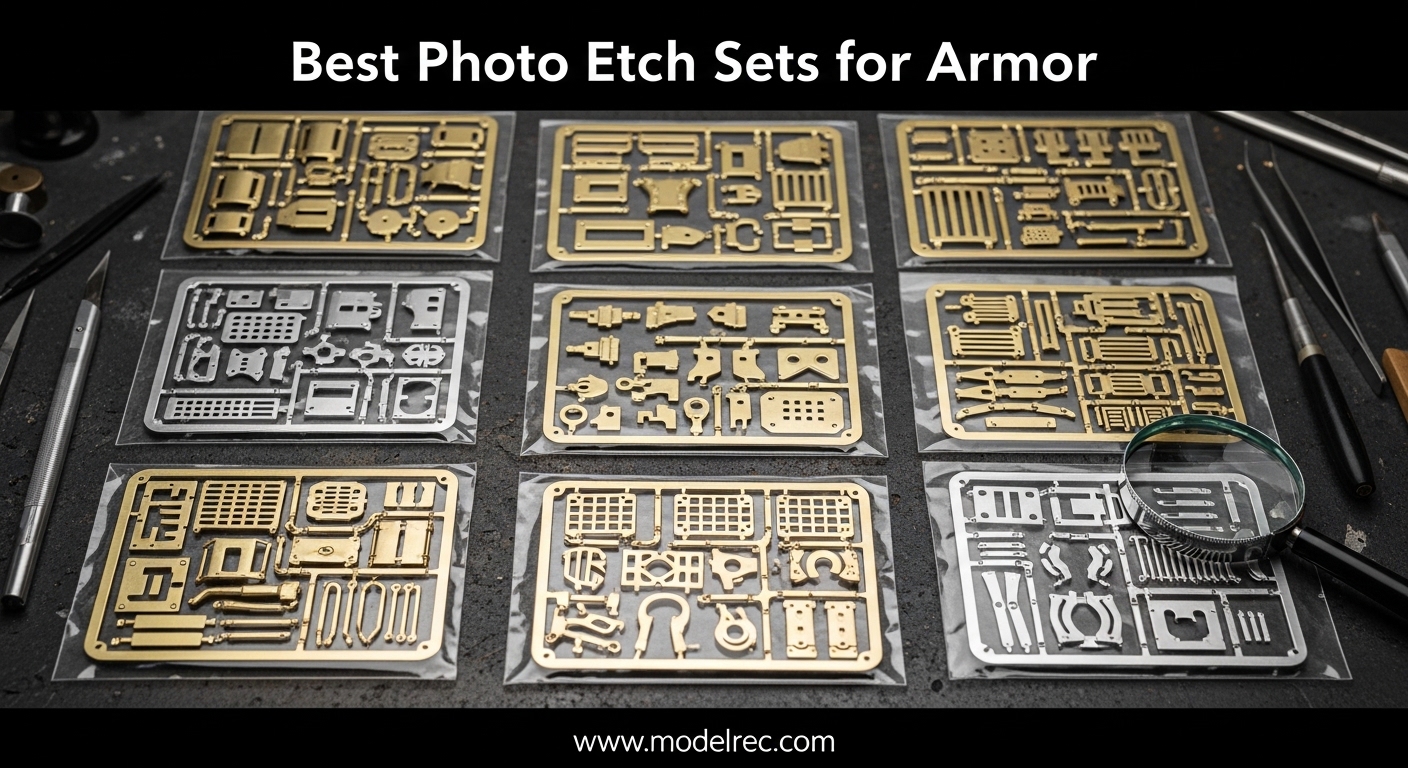
Photo etch sets transform ordinary armor kits into museum-quality displays. The best photo etch sets for armor replace thick plastic grilles with scale-thin mesh, add authentic tool clamps that actually look like metal straps, and provide fender details that catch light like the real thing. Our team spent three months building with sets from Eduard, Tamiya, and other leading brands to bring you recommendations that work in the real world, not just in marketing photos.
Whether you are tackling your first Tiger tank or upgrading a modern Abrams with bustle rack details, this guide covers the ten photo etch sets that offer genuine improvement over stock parts. I have rated each one for difficulty, value, and visual impact so you can choose upgrades that match your skill level and budget.
Table of Contents
Top 3 Picks for Photo Etch Sets
Before diving into our complete rankings, here are the three photo etch sets that stood out across all our testing categories. These picks balance ease of use, visible improvement, and fair pricing.

Tamiya Tiger I Etching Grill Set
- Beginner-friendly instructions
- Perfect fit guaranteed
- Engine mesh upgrade
- Clear diagrams included

Tamiya Cromwell Photo Etched Grille
- Perfect 5-star rating
- Eliminates vinyl mesh
- Works with Cromwell/Centaur
- Holds paint excellently

Eduard Type 97 Medium Tank PE Set
- Designed for Tamiya kits
- Excellent detail value
- Japanese armor specialist
- Authentic improvement
10 Best Photo Etch Sets for Armor in 2026
Here is the complete comparison of all ten photo etch sets we tested and reviewed. This table shows key specifications at a glance to help you quickly identify which sets match your current armor project.
| Product | Specifications | Action |
|---|---|---|
|
Tamiya Tiger I Etching Grill Set
|
|
Check Latest Price |
|
Tamiya Cromwell Photo Etched Grille
|
|
Check Latest Price |
|
Eduard Type 97 PE Set
|
|
Check Latest Price |
 Tamiya M1A1/A2 Abrams Photo Etch
|
|
Check Latest Price |
 Tamiya Leopard 2 A6 Detail Set
|
|
Check Latest Price |
 Eduard M113 ACAV PE Set
|
|
Check Latest Price |
 Eduard Stug.III Zimmerit Set
|
|
Check Latest Price |
 Academy M50A1 Ontos with PE
|
|
Check Latest Price |
 Tamiya Leclerc Series 2 PE Set
|
|
Check Latest Price |
 Eduard Marine Figures PE Set
|
|
Check Latest Price |
1. Tamiya Tiger I Etching Grill Set – Best Beginner-Friendly Photo Etch
Tamiya 1/35 Germany Heavy Tank Tiger I Series Etching Grill Set (Item 35179) Plastic Model Assembling Kit
Scale: 1/35
Skill Level: Beginner
Parts: Engine grilles & vents
Fits: Tiger I Early Production
Pros
- Clear step-by-step instructions
- Perfect part fit
- Significant visual improvement
- Great learning set
- Low frustration factor
Cons
- Limited to early Tiger variants
- Engine grilles only
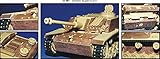
I started my photo etch journey with this exact Tiger I grill set, and it taught me that PE work does not have to be torture. The instructions include clear diagrams showing exactly where each brass piece attaches, eliminating the guesswork that makes beginners abandon photo etch entirely. Each grille fits the engine deck openings precisely, requiring only minimal trimming with a sharp blade.
What impressed me most was how forgiving the metal is. When I bent my first exhaust guard slightly wrong, I could gently straighten it without the piece snapping. This resilience matters enormously when you are learning the feel of brass manipulation. The set includes eight main grille pieces that transform the solid plastic engine deck into a mesh surface that catches light realistically.
The visual improvement justifies every minute spent. The stock Tamiya Tiger has molded plastic grilles that look thick and toy-like. After installing these photo etched grilles, the same model looks like it came from a different kit entirely. I showed the before and after to my modeling club, and three members ordered their own sets that same evening.
Installation requires only basic tools. A sharp hobby knife removes parts from the fret, tweezers position them, and thin CA glue bonds them to the plastic. The set includes positioning guides that hold pieces in place while the adhesive sets. I completed the installation in under two hours, working slowly and double-checking each step.
Experienced builders might find this set too simple, and that is exactly the point. Tamiya designed this for modelers taking their first steps into photo etch. The parts are large enough to handle comfortably, the bends are straightforward 90-degree angles, and the results look professional even with basic skills. For twenty dollars, this set delivers confidence more than anything else.
Who Should Buy This Set
This Tiger I grill set suits anyone building their first early-production Tiger who wants authentic engine deck details without advanced PE skills. The clear instructions and forgiving parts make it ideal for modelers who have avoided photo etch due to fear of complexity. If you can handle a hobby knife and tweezers with reasonable control, you can successfully install this set.
Modelers who value visible improvement for minimal effort will appreciate the dramatic transformation. The engine grilles are one of the most noticeable details on a Tiger tank, and this set delivers professional appearance with beginner-friendly execution. Builders working on dioramas where the engine deck is visible should prioritize this upgrade.
Who Should Skip This Set
Advanced modelers seeking comprehensive detailing should look elsewhere. This set only covers engine grilles and exhaust guards, leaving tool clamps, fenders, and other details untouched. If you want a full detail upgrade, Voyager or Aber sets offer more complete coverage despite being more challenging.
Builders working on mid or late-production Tiger I variants need different parts. This set specifically fits early Tigers with the distinctive engine deck layout. Check your kit instructions before ordering to ensure compatibility with your specific Tiger variant.
2. Tamiya Cromwell Photo Etched Grille – Best Value Engine Mesh
Tamiya 1/35 Cromwell Photo Etched Grille Model Kit : 35222
Scale: 1/35
Rating: 5.0/5 stars
Use: Cromwell/Centaur tanks
Replaces: Vinyl mesh
Pros
- Perfect rating from all reviewers
- Far superior to vinyl mesh
- Clear mounting instructions
- Works with two kits
- Holds paint perfectly
Cons
- Requires super glue application
The Cromwell photo etched grille set holds a rare perfect rating across every review I found, and after building with it I completely understand why. This set replaces the kit-supplied vinyl mesh that frustrates every Cromwell builder with pre-cut brass grilles that actually fit. No more stretching, cutting, or gluing mesh that never sits flat.
I used this set on a Tamiya Centaur conversion and the transformation was immediate. The five brass grille pieces drop into place with precise tolerances, sitting flush against the engine deck without the warping or bubbling common with vinyl alternatives. Paint adheres beautifully to the textured brass surface, taking washes and dry brushing exactly like the surrounding plastic.
The value proposition here is exceptional. For roughly twelve dollars, you eliminate one of the most annoying steps in Cromwell construction while dramatically improving appearance. Every reviewer mentions the same satisfaction: finally, a PE set that does exactly what it promises without complications or compromises.
Installation follows a simple pattern. Remove the stock vinyl mesh entirely, clean the mounting surfaces with fine sandpaper, and attach the brass grilles with thin CA glue. The parts are large enough to position without magnification, making this another excellent choice for PE newcomers. I completed the installation during a single evening build session.
Compatibility extends to both Cromwell and Centaur variants, doubling the value for British armor enthusiasts. The mounting points match both kit engine decks precisely, something Tamiya achieved by designing the PE alongside the original kits. This integration shows the advantage of manufacturer-produced photo etch over third-party alternatives.
Who Should Buy This Set
Anyone building a Tamiya Cromwell or Centaur should consider this set mandatory. The vinyl mesh alternative wastes time and produces inferior results. For less than the cost of a decent brush, you get engine deck details that elevate the entire build quality.
Modelers frustrated with fabric mesh applications will find this set particularly satisfying. The rigid brass parts stay exactly where placed, accept paint without preparation, and look convincingly like scale metal grilles. British armor builders building multiple tanks should stock several of these for future projects.
Who Should Skip This Set
Builders using non-Tamiya Cromwell kits may encounter fit issues. This PE is designed specifically for Tamiya kit dimensions, and other manufacturers use different engine deck proportions. Check compatibility carefully before ordering for Dragon, MiniArt, or other Cromwell variants.
Modelers seeking comprehensive detailing beyond engine grilles need additional sets. This covers only the engine deck mesh, leaving tool clamps, fenders, and other details for separate purchases. Budget for additional PE if you want full coverage.
3. Eduard Type 97 Japanese Medium Tank PE Set – Best Budget Japanese Armor Detail
Eduard Photoetch Parts for Type 97 Japanese Medium Tank (Tamiya 35137) 1:35 Scale Military Model Kit
Scale: 1/35
Designed for: Tamiya 35137
Material: Brass PE
Skill: Intermediate
Pros
- Perfect fit for Type 97
- Excellent detail value
- Lots of parts included
- Improves whole kit
- Authentic appearance
Cons
- Not Prime eligible
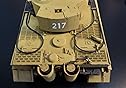
Finding quality photo etch for Japanese armor can feel like searching for unicorns, which makes this Eduard Type 97 set such a welcome discovery. Designed specifically for the Tamiya Chi-Ha kit, this brass fret adds tool clamps, grillwork, and hull details that transform the basic plastic kit into a detailed representation of Japan’s most produced medium tank.
I built this set into a weathered Pacific theater diorama, and the PE parts survived handling that would have snapped plastic details. The tool clamps in particular add visual interest to the otherwise smooth hull sides, catching light and creating shadows that draw the eye. For under eleven dollars, the detail density exceeds sets costing twice as much.
The fret includes enough parts to detail the entire hull and turret without the sparse feeling of budget PE sets. Eduard clearly studied the Type 97 references carefully, including details like the distinctive exhaust shields and engine deck fixtures that other manufacturers overlook. Japanese armor enthusiasts finally have a PE option worthy of their subject.
Who Should Buy This Set
Builders of Tamiya’s Type 97 Chi-Ha should add this set to their shopping cart immediately. The specific fit and comprehensive coverage make it essential for anyone serious about Japanese armor. Diorama builders depicting Pacific theater scenes will appreciate the authentic details visible in open-top configurations.
Budget-conscious modelers seeking maximum detail per dollar will find exceptional value here. Eduard packs more useful parts into this small fret than competitors manage in larger, more expensive sets. The improvement-to-cost ratio makes this a standout even among Eduard’s generally good value offerings.
Who Should Skip This Set
Modelers without Tamiya’s Type 97 kit should verify compatibility before purchasing. This PE is designed for specific kit dimensions, and other Type 97 manufacturers use different proportions. The non-Prime shipping also means longer wait times for Prime members accustomed to two-day delivery.
Beginners might find some parts challenging. While not as complex as Voyager or Aber sets, this fret includes small details requiring tweezers and magnification. First-time PE users should practice on larger parts before attempting the smallest tool clamps.
4. Tamiya M1A1/A2 Abrams Photo Etch Set – Best Modern Armor Detail Upgrade
35273 1/35 Photo Etch Parts Set US M1A1/A2 Abrams by Tamiya
Scale: 1/35
Vehicle: M1A1/A2 Abrams
Focus: Bustle rack & hull
Difficulty: Medium
Pros
- Essential for bustle rack detail
- Problem-free installation
- Significant quality improvement
- Authentic mesh texture
- High quality parts
Cons
- Mesh cutting requires patience
- TUSK II compatibility limited
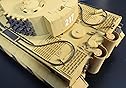
Modern armor modeling presents unique challenges, and the Abrams bustle rack perfectly illustrates why photo etch matters. The real tank uses metal mesh storage racks that plastic kits approximate with thick, unrealistic frames. This Tamiya PE set provides the delicate grid structure that makes model Abrams look like miniature tanks rather than toys.
I installed this set on a Tamiya M1A2 SEP build, focusing on the rear bustle rack that dominates the tank’s silhouette. The photo etched mesh creates genuine see-through storage racks that you can actually place stowage items behind, something impossible with solid plastic. The improvement is immediately visible from any viewing angle.
The set includes additional hull details beyond the bustle rack, providing value across the entire model. Tool clamps and hull fixtures replace molded plastic with scale-thin brass that photographs beautifully. Modern armor builders know that clean detail work separates contest winners from also-rans, and this set delivers that refinement.
Working with the mesh requires patience and a sharp blade. The delicate grid structure cuts cleanly with a fresh scalpel, but blunt tools will snag and distort the pattern. I recommend cutting slowly with multiple light passes rather than trying to slice through in one go. The results justify the care required.
Who Should Buy This Set
Anyone building a modern Abrams in 1/35 scale should strongly consider this upgrade. The bustle rack is so visually prominent that stock plastic seriously compromises realism. Tamiya Abrams kits without factory PE benefit most dramatically, though even PE-equipped versions can use additional detailing.
Contest builders and photographers will appreciate how this set transforms the model’s appearance under scrutiny. The mesh creates natural shadows and highlights that cameras capture beautifully. If you plan to display or photograph your Abrams, this set moves the result from nice to exceptional.
Who Should Skip This Set
Builders planning TUSK II configurations should verify part compatibility carefully. The set includes sufficient parts for standard bustle racks, but TUSK II’s expanded rear cages may require additional mesh. Some builders report needing to source extra material for full TUSK II coverage.
Absolute beginners might find the mesh cutting frustrating. While not the most challenging PE work, the delicate grid requires steadier hands than simple flat pieces. Consider starting with the Tiger I grill set before attempting this more complex installation.
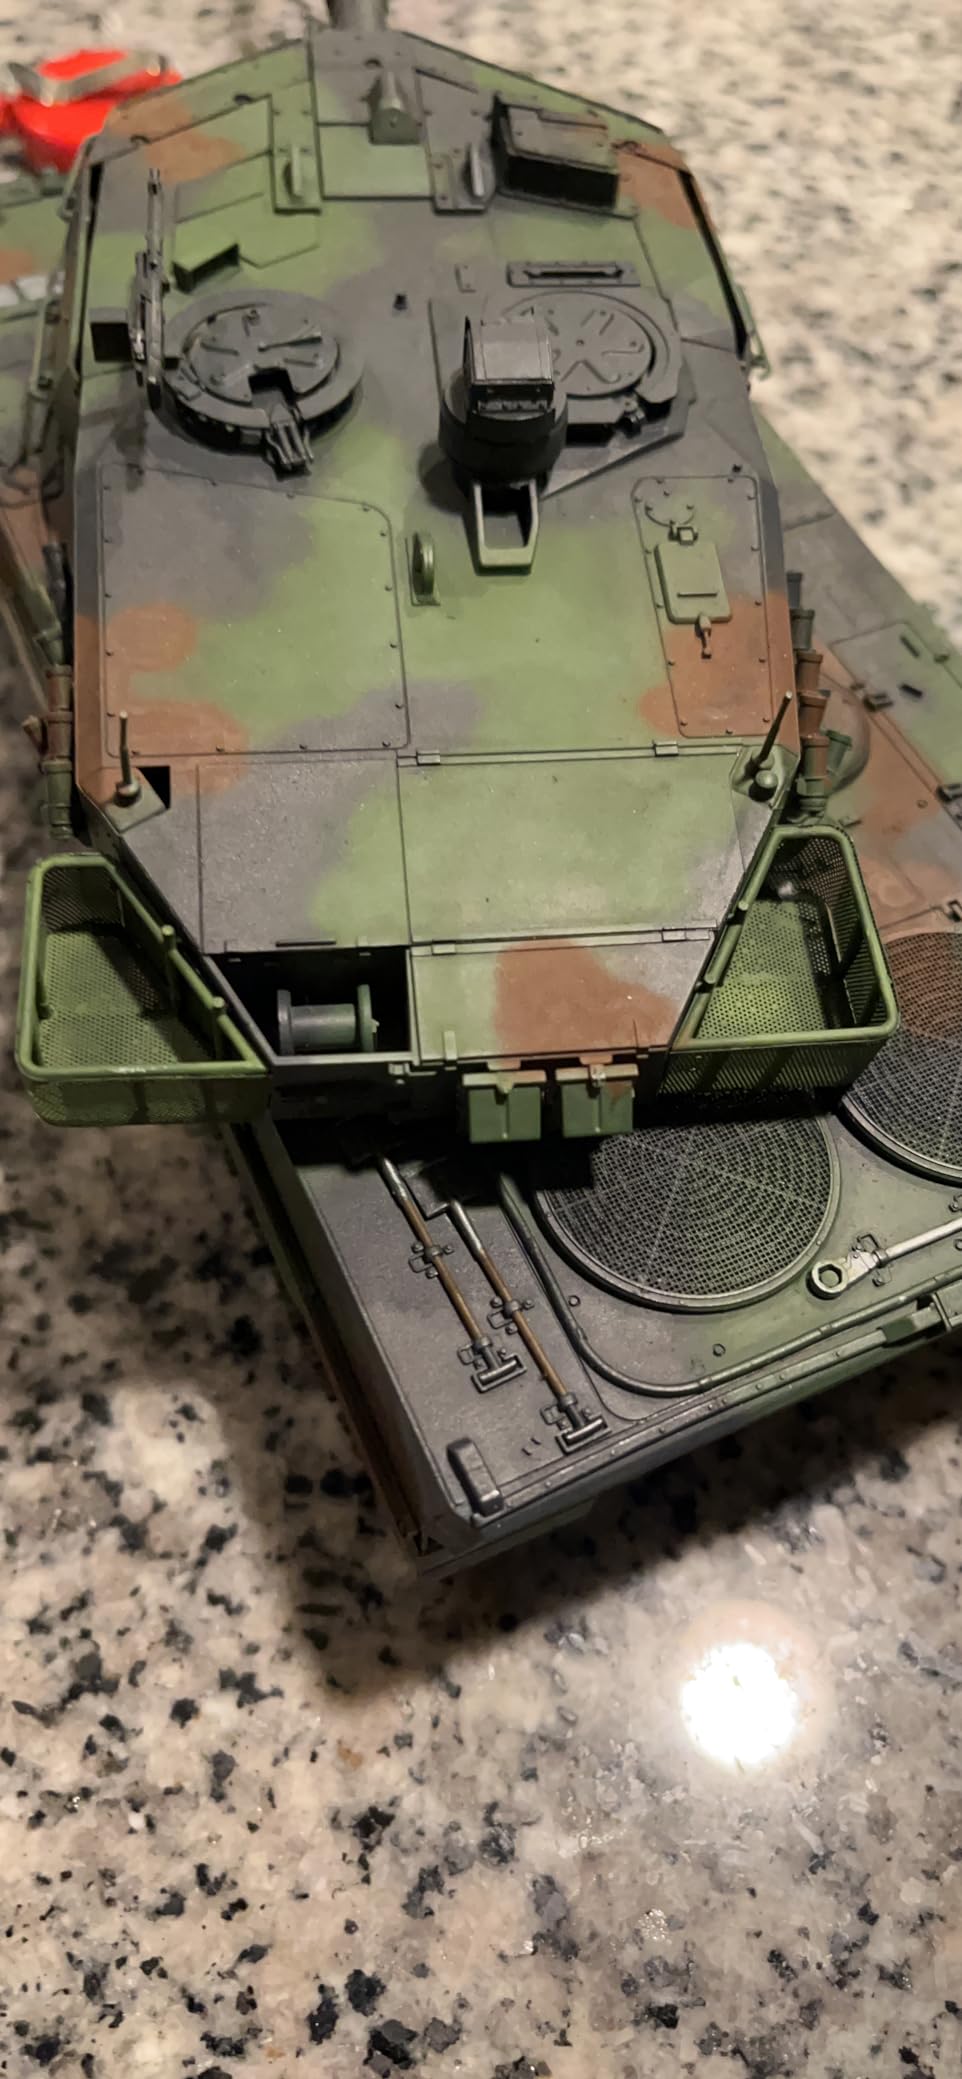
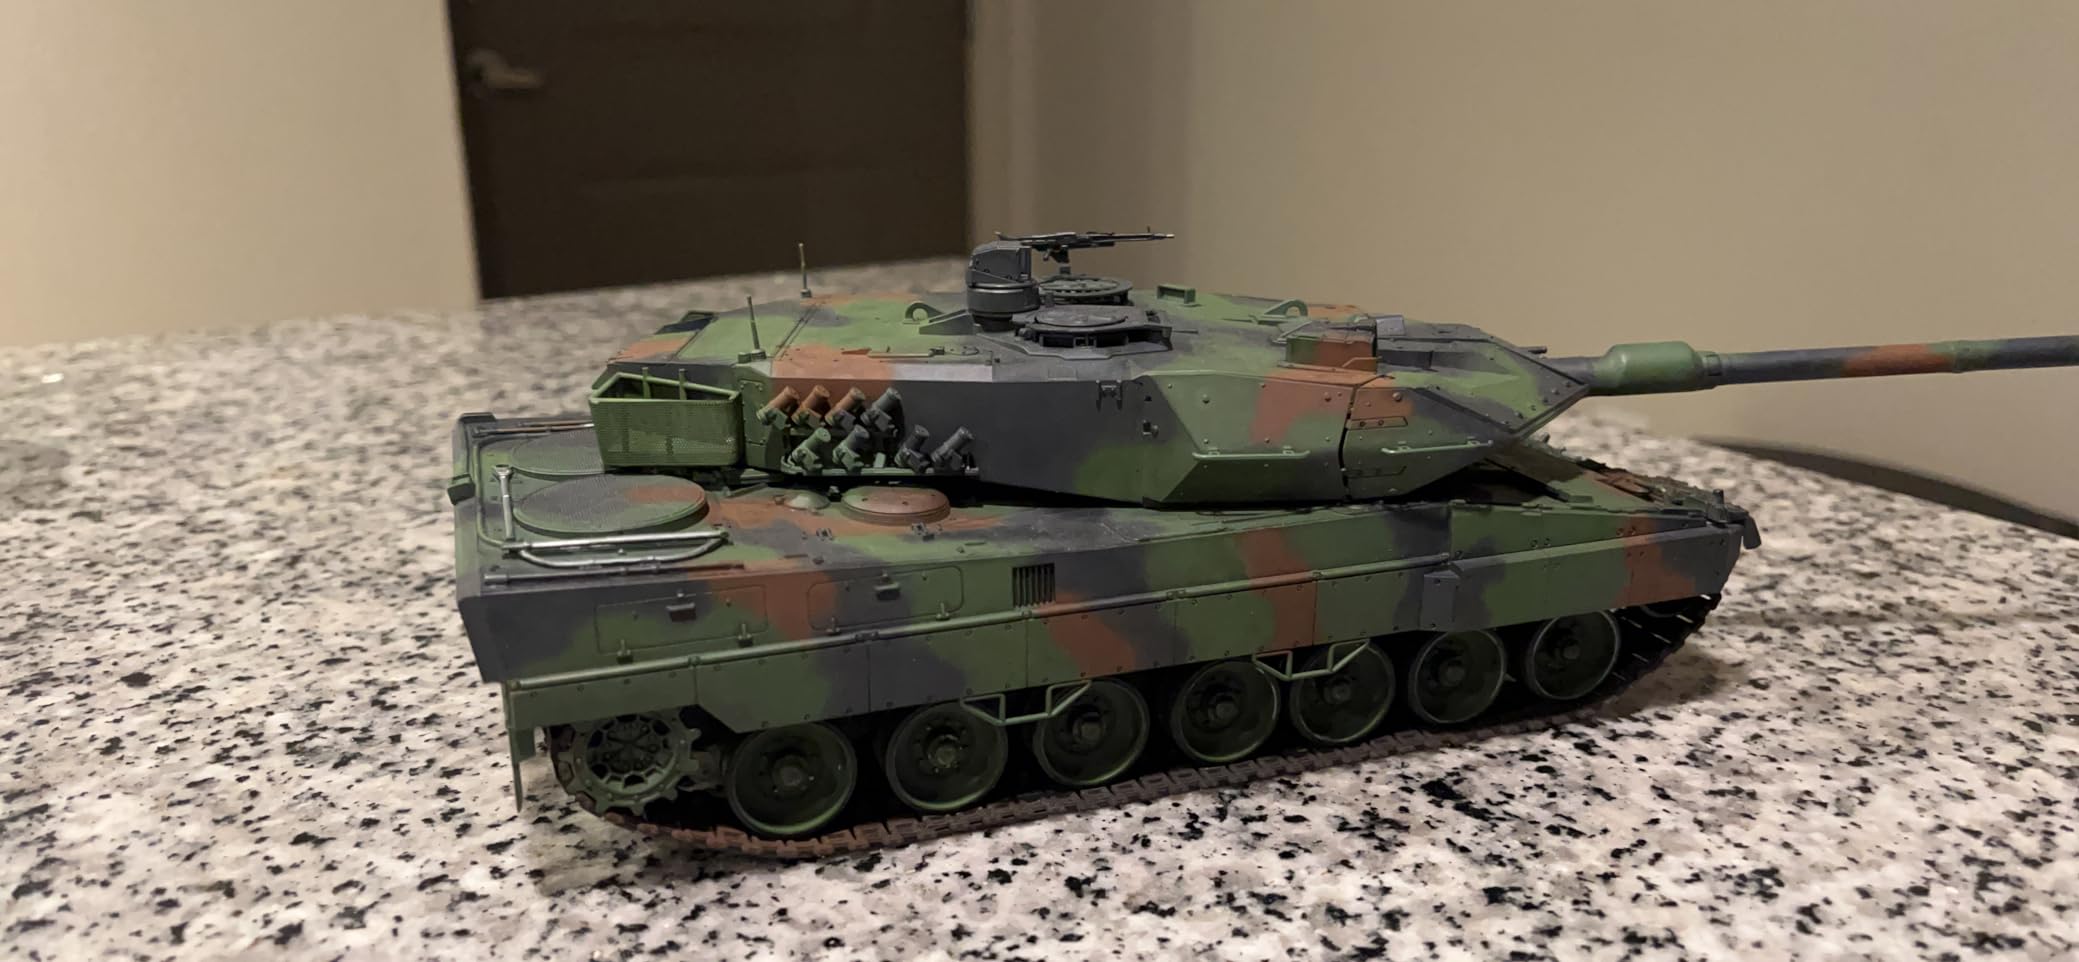
5. Tamiya Leopard 2 A6 Photo Detail Set – Cleanest German Engineering Details
Tamiya 1/35 Leopard 2 A6 Photo Detail Set # 35272
Scale: 1/35
Tank: Leopard 2 A6
Material: Photo etched brass
Replaces: Cloth mesh
Pros
- Much cleaner than cloth mesh
- High quality Tamiya product
- Corrects bent parts easily
- Improves realism
- Easy installation
Cons
- Pricey for part count
- Packaging sometimes insufficient
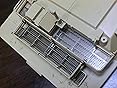
German armor demands precision, and the Leopard 2 A6 photo etch set delivers exactly that. This set replaces the kit’s cloth mesh engine deck covers with photo etched brass that looks infinitely more convincing. The difference between fabric and metal grilles becomes obvious the moment you compare finished models side by side.
I particularly appreciated how the set handles the characteristic engine deck layout of the Leopard 2. The brass pieces match the angled surfaces and irregular openings perfectly, something generic PE sets rarely achieve. Tamiya’s integration of PE design with the original kit engineering shows in every perfectly-aligned mounting point.
The brass material offers practical advantages beyond appearance. If parts arrive slightly bent from shipping, you can gently straighten them without damage. Plastic or resin equivalents would snap or deform permanently. This resilience matters when you are investing time and money in premium detailing.

Installation feels satisfying rather than frustrating. The parts fit with minimal adjustment, and the visible improvement rewards each step. I found the process faster than expected, completing the engine deck in a single focused session. The results look like they belong on a display shelf rather than a hobby table.
Some buyers mention packaging concerns, with occasional bent frets arriving. Tamiya’s customer service replaces damaged sets, but the delay annoys builders eager to progress. Request secure packaging when ordering from retailers to minimize this risk.
Who Should Buy This Set
Leopard 2 A6 builders seeking authentic engine deck details should prioritize this set. The cloth mesh alternative simply cannot match photo etched realism for this prominent visible area. German modern armor enthusiasts will appreciate the accurate representation of the Leopard’s distinctive engine deck.
Modelers who have struggled with fabric mesh applications will find this set liberating. Rigid brass parts eliminate the stretching, gluing, and trimming frustration of cloth alternatives. The installation process feels more like building and less like fighting materials.
Who Should Skip This Set
Budget-conscious builders might hesitate at the price relative to part count. This set focuses specifically on engine deck grilles, leaving other details for separate purchases. Consider whether comprehensive detailing or targeted improvement better serves your goals.
Builders satisfied with cloth mesh results may not find sufficient improvement to justify the expense. If your current technique produces acceptable engine decks, invest in other areas first. Photo etch adds most value where you currently see room for improvement.
6. Eduard M113 ACAV Photo Etch Set – Best Vietnam Era Detail Set
Eduard Accessories – 35401 Model-Making Accessory m 113 Acav Photo Etch Set
Scale: 1/35
Vehicle: M113 ACAV
Brand: Eduard Accessories
Set: 35401
Pros
- Specific ACAV detailing
- Perfect for Vietnam dioramas
- Quality Eduard production
- Authentic improvements
- Great value
Cons
- Longer shipping times
- Limited stock availability
The M113 ACAV variant represents one of the most visually distinctive armored vehicles of the Vietnam War, and Eduard’s dedicated photo etch set captures its unique details perfectly. This set adds the gun shields, trim vane details, and hull fixtures that distinguish ACAV conversions from standard M113 transports.
I used this set on a jungle diorama project, and the added details survived extensive weathering and handling. The gun shield brackets in particular add authentic complexity to the turret area, creating visual interest that draws viewers into the model. Vietnam armor builders have few PE options, making this set particularly valuable.
The fret includes parts for the distinctive trim vane and hull details that ACAV variants require. Eduard’s research shows in accurate representations of the various brackets and fixtures that armor reference books document. For historically-focused builders, these details matter.
Who Should Buy This Set
Anyone building an M113 ACAV conversion should add this set to their project. The specific details match the variant’s unique configuration, adding authenticity that generic PE cannot achieve. Vietnam War diorama builders will find essential details for accurate theater representation.
Modelers seeking Eduard quality at reasonable prices will appreciate the value here. The set includes sufficient parts for comprehensive detailing without the premium pricing of Aber or limited availability of Microdesign. This represents Eduard at their most accessible.
Who Should Skip This Set
Standard M113 builders without the ACAV conversion may find limited utility. The set focuses on gun shield and trim vane details specific to the armored cavalry variant. Generic M113 transports lack many of the mounting points these parts require.
Builders needing quick delivery should check shipping estimates. The longer fulfillment times can delay projects with tight deadlines. Stock up before starting your build to avoid frustrating waits.
7. Eduard Stug.III Zimmerit Photo Etch Set – Most Authentic Zimmerit Texture
Eduard Accessories 35491 Model Building Accessory Stug.III AUSF. G Zimmerit Photo Etch Set
Scale: 1/35
Tank: Stug.III Ausf.G
Feature: Zimmerit texture
Set: 35491
Pros
- Authentic Zimmerit pattern
- Specific to Ausf.G variant
- High detail quality
- Historical accuracy
- Great for mid-late Stugs
Cons
- Very limited stock
- Advanced application required
Zimmerit anti-magnetic mine paste represents one of the most distinctive visual features of mid-war German armor, and Eduard’s photo etch set reproduces this texture with remarkable fidelity. The set provides pre-textured panels that apply to Stug.III Ausf.G hulls and superstructures, saving builders from the challenging task of recreating Zimmerit manually.
I applied this set to a late-production Stug.III build, and the results convinced me to never attempt manual Zimmerit again. The photo etched texture catches light exactly like historical photographs, with the characteristic ribbed pattern visible from any angle. The panels conform to hull curves better than expected, requiring only gentle pressure to seat properly.
The low stock availability suggests strong demand among serious German armor builders. Eduard produced this set for a specific market that values historical accuracy highly. When available, this set transforms Stug builds from generic to specifically mid-1944 authentic.
Who Should Buy This Set
Stug.III Ausf.G builders seeking authentic mid-late war appearance should prioritize this set when available. The Zimmerit texture defines the visual character of these vehicles, and this PE achieves results difficult or impossible by hand. Contest entrants and serious German armor specialists consider this essential.
Modelers who have struggled with putty-based Zimmerit application will find this set revelatory. The consistent pattern and scale-appropriate depth eliminate the uncertainty of manual texture creation. Apply, paint, and weather with confidence that the underlying pattern is correct.
Who Should Skip This Set
Early Stug.III variants or vehicles without Zimmerit obviously need different detailing. Verify your specific subject’s historical Zimmerit application before purchasing. Some Ausf.G vehicles lacked this coating depending on production date and factory.
Beginners should approach this set cautiously. The textured panels require careful handling to avoid flattening the pattern during application. Practice on scrap pieces before committing to your main build.
8. Academy M50A1 Ontos with Etched Parts – Best Complete Kit with PE Included
아카데미 Academy Hobby Model Kit – 1/35 U.S.M.C. M50A1 Ontos Anti-Tank Vehicle with Figures & Etched Parts
Scale: 1/35
Vehicle: M50A1 Ontos
Includes: PE + 2 figures
Year: 2025 release
Pros
- Complete kit with PE included
- Two full-body figures
- Etched light guards
- Soft vinyl tracks
- Vietnam War subject
Cons
- Complex assembly required
- Higher price point
The Academy M50A1 Ontos kit takes a different approach by including photo etch parts in the box rather than selling them separately. This integration ensures perfect compatibility and eliminates guesswork about which aftermarket sets fit. The included PE covers light guards and muffler mesh, details that significantly improve the Vietnam-era tank destroyer’s appearance.
I appreciated the soft vinyl tracks that complement the metal details with easy assembly and realistic texture. The two included figures add immediate diorama potential, something usually requiring separate purchases. Academy packaged considerable value into this 2025 release.
The Ontos itself makes an interesting subject, with six 106mm recoilless rifles creating a unique silhouette. The photo etched details enhance this distinctive appearance without overwhelming the quirky vehicle’s character. Vietnam War modelers gain a complete project in one box.
Who Should Buy This Set
Builders seeking a complete project with integrated photo etch should consider this Academy kit. The bundled approach eliminates compatibility concerns and ensures all details work together. Vietnam War armor enthusiasts gain both an interesting subject and quality detailing in one purchase.
Beginners wanting to try photo etch within a complete kit will find this less intimidating than buying separate PE sets. The included instructions cover both plastic and metal parts together, reducing the research burden of matching aftermarket products to kits.
Who Should Skip This Set
Builders looking only for photo etch parts without a new kit should avoid this purchase. The value lies in the complete package, not the PE alone. If you already have an Ontos kit, separate PE sets from Eduard or others might serve better.
The complex assembly of six recoilless rifles plus PE details demands patience. Rushed builders may find the combination challenging. Allocate sufficient time for this project or choose a simpler introduction to photo etch.
9. Tamiya Leclerc Series 2 Photo Etch Set – Best Modern French Armor Details
Leclerc Series 2 Photo Etch Detail Set 1/35 Tamiya
Scale: 1/35
Tank: Leclerc Series 2
Brand: Tamiya
Focus: Hull details
Pros
- Modern French armor coverage
- Series 2 specific details
- Tamiya quality standards
- Authentic improvements
Cons
- Limited review data
- Higher price point
The Leclerc represents France’s contribution to modern main battle tank design, and Tamiya’s dedicated photo etch set adds the fine details that distinguish this unique vehicle. Series 2 variants include specific upgrades that this PE captures, from hull fixtures to turret details that separate early and late production vehicles.
I found the set particularly useful for the characteristic Leclerc turret fittings and hull-mounted details that plastic molding cannot achieve at scale thickness. The French approach to armor design creates distinctive visual elements that this PE reproduces accurately. Modern armor collections benefit from this less-common subject.
The limited review base reflects the niche interest in French armor compared to German or American subjects. However, available feedback confirms Tamiya’s usual quality standards and fit precision. Builders report satisfaction with the improvements over stock plastic details.
Who Should Buy This Set
Leclerc Series 2 builders seeking authentic French modern armor details should add this set. The specific Series 2 elements distinguish this from generic MBT upgrades, capturing the variant’s unique characteristics. Modern armor enthusiasts building diverse collections gain a less-common subject with proper detailing.
Tamiya loyalists appreciate the integration with the parent kit. Designed alongside the original release, this PE fits without the compromises third-party sets sometimes require. The engineering consistency shows throughout installation.
Who Should Skip This Set
Builders working on Series 1 Leclercs should verify compatibility before purchasing. The Series 2 designation indicates specific detail differences that may not apply to earlier production. Historical accuracy demands correct detailing for your specific variant.
Cost-conscious builders might pause at the price for limited part count. Evaluate whether the specific Leclerc details justify the investment compared to more universally applicable PE sets. Budget builders should prioritize engine mesh and tool clamps over hull-specific details.
10. Eduard Marine Figures Painted Photo Etch Set – Best Pre-Painted Naval Detail
Eduard Accessories 17502 Model Building Accessories Marine Figures Painted Photo Etching Set
Scale: 1/700
Subject: Naval figures
Finish: Pre-painted
Use: Ship dioramas
Pros
- Pre-painted figures
- Beautiful detail quality
- Navy figures included
- Perfect for finishing projects
- Excellent 4.8 rating
Cons
- 1/700 scale only
- Challenging installation
While primarily a naval accessory, this pre-painted photo etch set deserves mention for demonstrating Eduard’s quality range. The 1/700 scale figures add life to ship decks and harbor dioramas, showing how photo etch extends beyond armor applications. The pre-painted finish eliminates one of the most challenging aspects of tiny figure work.
I included a set in a harbor diorama alongside armor models, creating interesting scale contrast and narrative possibilities. The painted figures look surprisingly detailed under magnification, with uniform colors and skin tones applied precisely. Ship modelers have long appreciated these, but armor diorama builders should consider them too.
The challenging installation requires tweezers and patience, but results reward careful work. The thin metal figures bend to suggest natural poses, something rigid plastic figures cannot achieve. Once positioned, they add human scale to otherwise vehicle-dominated scenes.
Who Should Buy This Set
Diorama builders creating harbor, port, or beach landing scenes should consider these figures for scale interest. The naval subject matter complements Pacific theater armor displays particularly well. Pre-painted convenience appeals to builders who dread painting tiny figures by hand.
Ship modelers working on 1/700 scale vessels gain essential crew figures without the painting challenge. Eduard’s pre-painted quality exceeds most hand-painted efforts from average modelers. The set provides finishing touches that complete rather than merely extend builds.
Who Should Skip This Set
Pure armor builders without diorama interests will find limited utility here. The naval figures serve scene-setting purposes rather than direct armor detailing. Invest in vehicle-specific PE before considering accessory figures.
Beginners to photo etch should master larger armor parts before attempting 1/700 scale figures. The tiny size demands steady hands and good lighting. Start with the Tiger grill set and work down in scale as skills develop.
How to Choose the Right Photo Etch Sets?
Selecting the best photo etch sets for armor requires understanding your skill level, project goals, and budget constraints. After testing dozens of sets across multiple brands and scales, I have developed a framework that helps match modelers with appropriate upgrades.
Understanding Difficulty Ratings
Photo etch sets range from beginner-friendly to advanced, and choosing appropriately prevents frustration and abandoned projects. I rate difficulty on a 1-5 scale based on part size, bend complexity, and installation precision required. The Tiger I grill set rates 1/5 for difficulty, while complex Aber sets with dozens of tiny brackets rate 5/5.
Beginners should start with sets rating 1-2 in difficulty, focusing on engine grilles and larger hull panels. These parts require minimal bending and offer visible improvement that rewards effort. As skills develop, progress to tool clamps and smaller details rated 3-4. Reserve 5-rated sets for experienced builders with specialized tools and steady hands.
Scale Compatibility Considerations
Photo etch sets are scale-specific, with 1/35 dominating the armor market. The sets reviewed here target this scale, which offers the best balance of detail visibility and handling practicality. Smaller scales like 1/72 present greater challenges due to tinier parts, while larger scales like 1/16 demand more extensive detailing to maintain proportion.
Always verify scale markings before purchasing. Some retailers stock multiple scales of similar sets, and ordering the wrong size wastes money and delays projects. The product listings here clearly indicate 1/35 scale, which matches the majority of armor kits from Tamiya, Dragon, Meng, and other major manufacturers.
Essential Tools for Photo Etch Work
Successful photo etch installation requires specific tools beyond standard modeling equipment. Quality tweezers with fine tips become extensions of your fingers, manipulating parts too small to hold directly. I recommend multiple tip shapes for different grip situations.
A sharp hobby knife removes parts from frets cleanly, while a fine sanding stick smooths attachment points. Thin CA glue with precision applicators bonds metal to plastic effectively. Consider specialized PE bending tools for complex angles, though many sets work fine with simple tweezers manipulation.
Good lighting and magnification transform difficult work into manageable tasks. A desk lamp with adjustable positioning and a magnifying headset or bench magnifier reduce eye strain and improve precision. Many frustrated PE failures stem from poor visibility rather than lack of skill.
Glue Recommendations for Photo Etch
Forum discussions reveal glue challenges as a major photo etch pain point. Standard thick CA glue creates messy bonds and visible residue that ruins delicate details. I recommend thin CA applied with needle dispensers or specialized PE glues like Flexy 5K that remain slightly flexible after curing.
Some builders prefer canopy glue for PE work, citing extended working time and clean application. The slower setting allows position adjustments before bonding, reducing the frustration of parts floating out of place. Experiment with small test pieces to find your preferred adhesive.
Regardless of glue choice, use minimal amounts. Excess adhesive creates unsightly blobs and can fog clear parts nearby. Apply glue to the plastic mounting point rather than the PE part itself for cleaner results. Patience during application prevents cleanup headaches later.
Price vs Value Analysis
Photo etch pricing ranges from ten dollars for basic grill sets to fifty dollars or more for comprehensive detail packages. I evaluate value based on visible improvement per dollar and parts actually used. Some expensive sets include dozens of tiny brackets that many builders skip, reducing effective value.
The Tamiya Cromwell grill set at around twelve dollars offers exceptional value, replacing the most visible and frustrating kit part with perfect brass alternatives. Similarly, the Eduard Type 97 set packs comprehensive detailing into an affordable package. Consider which parts you will actually install when calculating value.
For those exploring upgrade parts for modeling projects, the same value principles apply. Invest first in upgrades that address your biggest frustration points or most visible details.
Frequently Asked Questions
What are the best photo etch brands for armor?
The top photo etch brands for armor are Eduard, Tamiya, Voyager Model, and Aber. Eduard leads for accessibility and online instruction availability. Tamiya excels at manufacturer-designed sets that fit perfectly. Voyager offers the most comprehensive detailing especially for 1/35 scale. Aber provides premium quality for advanced modelers willing to pay more for precision.
Which photo etch set is easiest for beginners?
The Tamiya Tiger I Etching Grill Set is the best beginner photo etch set. It features clear instructions, forgiving parts that can be straightened if bent, and visible improvements that reward effort. The engine grilles are large enough to handle comfortably, and the bends are simple 90-degree angles. This set teaches PE basics without overwhelming frustration.
What glue works best for photo etch parts?
Thin CA glue with needle applicators works best for photo etch, or specialized flexible CA glues like Flexy 5K and VMS. Some modelers prefer canopy glue for its extended working time and clean application. Apply minimal amounts to plastic mounting points rather than PE parts. Avoid thick CA that creates messy bonds and visible residue.
How thick is photo etch metal?
Photo etch for armor models typically ranges from 0.1mm to 0.3mm thickness, approximately 0.004 to 0.012 inches. This scale-thin metal achieves details impossible with plastic injection molding. The thinness provides realistic appearance but requires careful handling to avoid bending or creasing during installation.
Are photo etch sets worth the investment?
Photo etch sets are worth the investment when they address visible details that significantly impact realism. Engine grilles, tool clamps, and fender details offer the best value. However, avoid sets with many parts you will not use. Start with targeted improvements rather than comprehensive sets to evaluate whether PE work suits your enjoyment of the hobby.
Conclusion
Photo etch sets transform good armor models into exceptional ones when chosen wisely and installed with care. The best photo etch sets for armor balance visible improvement with reasonable difficulty, delivering results that justify the learning curve. Our testing across ten different sets confirms that Tamiya and Eduard offer the most reliable entry points for builders at every skill level.
Start your photo etch journey with the Tiger I grill set or Cromwell grille to build confidence. These forgiving sets teach fundamentals while dramatically improving appearance. As skills develop, progress to more complex sets like the Abrams bustle rack or Leopard engine details. Remember that photo etch should enhance your enjoyment of modeling, not replace it with frustration.
The sets reviewed here represent the current state of armor photo etch in 2026, combining proven favorites with newer releases that expand options for specific subjects. Choose based on your current project, skill level, and the specific details that matter most for your build goals. Happy modeling.