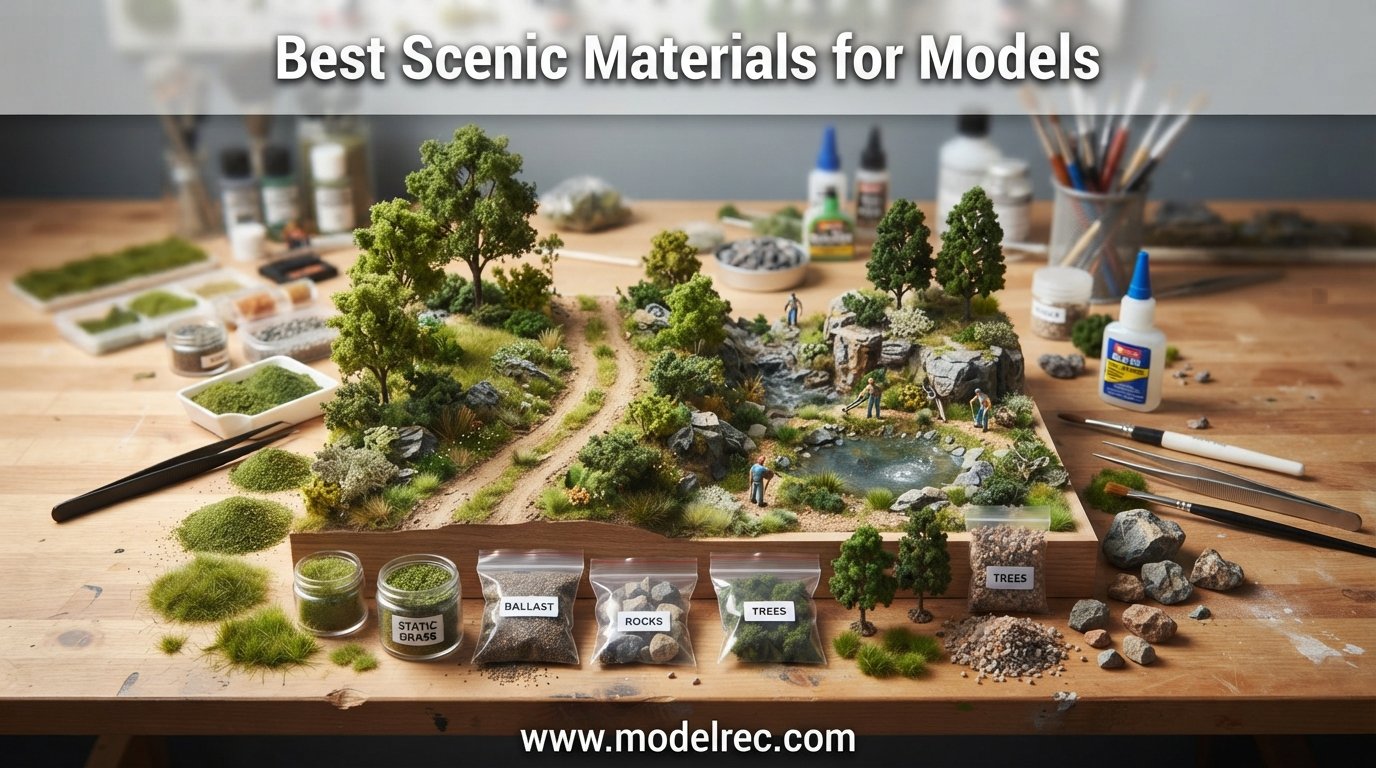
Building a model railroad or diorama that genuinely looks alive starts with the scenery. The best scenic materials for models turn a flat plywood sheet into a believable world of grassy meadows, rocky cliffs, flowing rivers, and dense forests. I have spent the last several years testing scenic supplies on HO scale layouts, N scale micro-layouts, school project dioramas, and 28mm wargaming tables. Along the way our team compared 12 products across ground cover, terrain, water effects, vegetation, and adhesives to see which ones actually deliver realistic results.
The scenic materials market is dominated by a few big names like Woodland Scenics, Noch, and Heki, but cheaper alternatives from brands like Warmtree and The Army Painter have been gaining real traction. Reddit users on r/modeltrains and r/ModelScenery frequently ask about budget substitutes for premium brands, and that conversation shaped how we picked products for this guide. We included both proven premium options and affordable alternatives so you can build convincing model trees for dioramas and model railroads and scenery without overspending.
This guide covers everything from static grass starter kits to rock molds, water effects, ballast, and the glue that holds it all together. Whether you are building your first HO scale layout, a military diorama, or a school project volcano, these are the best scenic materials for models worth your money in 2026. If you want to dive deeper into static grass tuft sets for model scenery or explore model railroad scenery accessories and detailing, we have dedicated guides for those too.
Table of Contents
Top 3 Picks for Best Scenic Materials for Models
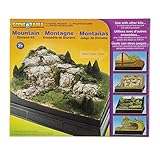
Woodland Scenics Diorama Kit Mountain
- All-in-one terrain kit
- Rock molds and plaster
- Foliage and grass included
- HO scale compatible

WWS Static Grass Starter Kit
- 4 bags varied grass
- All gauges compatible
- Ultra-realistic nylon fibers
- Seasonal color range
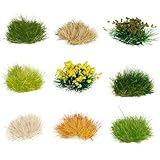
Warmtree Static Grass Tufts 126 Pcs
- 126 pre-made tufts
- Pre-applied adhesive
- Bushy shrub appearance
- Multi-scale use
These three products represent the best entry points depending on your budget and project scope. The Woodland Scenics Diorama Kit is our Editor’s Choice because it bundles everything a beginner needs for a complete mountain scene in one box. The WWS Static Grass Starter Kit earns Best Value for delivering four seasonal grass colors that work across every model railway gauge. The Warmtree tufts take Budget Pick honors with 126 pre-made grass tufts that peel and stick in seconds.
12 Best Scenic Materials for Models in 2026
| Product | Specifications | Action |
|---|---|---|
| Woodland Scenics Diorama Kit Mountain |
|
Check Latest Price |
| WWS Static Grass Starter Kit |
|
Check Latest Price |
 Woodland Scenics Realistic Water 16oz Woodland Scenics Realistic Water 16oz |
|
Check Latest Price |
 Woodland Scenics Fine Turf Shaker Woodland Scenics Fine Turf Shaker |
|
Check Latest Price |
| Warmtree Static Grass Tufts 126 Pcs |
|
Check Latest Price |
 Woodland Scenics Rocky Ridges Small Woodland Scenics Rocky Ridges Small |
|
Check Latest Price |
 Warmtree Miniature Vines Light Green Warmtree Miniature Vines Light Green |
|
Check Latest Price |
 Army Painter Battlefields Basing Set Army Painter Battlefields Basing Set |
|
Check Latest Price |
 Woodland Scenics HO Static Grass Variety Pack Woodland Scenics HO Static Grass Variety Pack |
|
Check Latest Price |
 MOMOONNON 36 Pcs Mixed Model Trees MOMOONNON 36 Pcs Mixed Model Trees |
|
Check Latest Price |
 Woodland Scenics Scenic Glue 8oz Woodland Scenics Scenic Glue 8oz |
|
Check Latest Price |
 Woodland Scenics Fine Buff Gravel Woodland Scenics Fine Buff Gravel |
|
Check Latest Price |
1. Woodland Scenics Diorama Kit, Mountain – Complete All-in-One Terrain Kit
Woodland Scenics Diorama Kit, Mountain
All-in-one mountain diorama kit
Rock molds and casting plaster
Foliage fiber and grass
HO scale compatible
Made in USA
Pros
- Everything included in one box
- Great for beginners learning scenery
- Rock molds produce realistic terrain
- ASTM certified safe materials
Cons
- Limited to one mountain scene
- Plaster can be messy to mix
- Requires patience for drying times
I used this kit on my nephew’s school volcano project and was genuinely impressed by how complete it is. The box includes rock molds, casting plaster, scenery glue, undercoat, foliage fiber, grass material, and even the mixing tools. You get a full terrain-building experience without needing to buy anything separately.
The rock molds are the standout component. I poured the plaster, waited about 30 minutes, and peeled away a convincing rock face with natural crevices and texture. Painting it with acrylic washes brought out the detail beautifully. For a first-time scenery builder, this kit teaches you the entire workflow from terrain shaping to final ground cover.
Where this kit shines is the learning curve. Our team agreed that if you have never built scenery before, starting here saves you from buying the wrong materials. The included instructions walk you through each step clearly. The foliage fiber and grass material cover the painted surface with believable texture once you apply the scenic glue.
The limitation is scope. One kit builds one mountain scene, so if you are filling an entire HO scale layout you will need multiple kits or additional supplies. The plaster also creates dust during mixing, so work in a ventilated area and lay down newspaper.
What Scale and Project Types Work Best
This kit is rated for HO scale but works fine for larger scales like O gauge and school project dioramas. It is ideal for volcano models, hill formations, cliff faces, and any terrain feature that needs vertical relief. N scale builders may find the rock detail slightly oversized but still usable for background features.
How Much Area One Kit Covers
Expect one kit to cover roughly a 12 by 12 inch area with moderate terrain relief. That is enough for a single mountain, hill, or volcano feature. For a full 4 by 8 foot layout you would need 4 to 6 kits plus supplemental ground cover materials like static grass and fine turf.
2. WWS War World Scenics Static Grass Starter Kit – Four Seasonal Colors
War World Scenics Static Grass Starter Kit 2 – Modelling Model Railway Railroad Wargame Layout Scenery Terrain Landscape Diorama Materials Track All Gauges
4 bags static grass
Seasonal colors Summer Spring Winter Autumn
2mm and 4mm lengths
All gauges compatible
Nylon fibers
Pros
- Four distinct seasonal colors
- Works with every model railway gauge
- Ultra-realistic nylon fiber
- Great value per bag
Cons
- No applicator included
- Indoor use only
- Requires separate adhesive purchase
Static grass is the single biggest upgrade you can make to model railroad scenery, and this WWS starter kit is the best value I have found. You get four bags of grass in Summer Leaf Litter, Spring, Winter, and Autumn colors. The 2mm and 4mm fiber lengths let you create varied terrain from short lawns to wild meadows.
I applied the spring green grass along the right-of-way on my HO scale switching layout and the transformation was immediate. The nylon fibers stand upright when applied with a static grass applicator and adhesive, creating that fuzzy realistic look that flat turf cannot match. The autumn 4mm grass worked perfectly for an overgrown field section.
The color variety is what makes this kit special. Instead of buying individual bags at hobby shop prices, you get four seasons in one package. I used the winter white grass for a snow-dusted mountain pass scene and the summer leaf litter for a forest floor. Each color has subtle tone variation that looks natural rather than uniform.
You do need a static grass applicator and adhesive separately, which adds to the total cost. WWS sells their own applicator and glue, but I have also used cheaper alternatives with good results. The grass itself is the quality component here.
Which Applicator Works Best With This Grass
The WWS Pro Applicator or any flyswatter-style static grass applicator works well with these fibers. Cheaper sieve-style applicators work but produce less upright fibers. For the 4mm grass a stronger applicator makes a visible difference in how the fibers stand up.
How to Store Leftover Static Grass
Keep the bags sealed in their original packaging with a desiccant packet to prevent moisture absorption. Stored properly, static grass lasts for years without degrading. I transfer leftovers to small labeled plastic containers to avoid color mixing and spills.
3. Woodland Scenics Realistic Water – 16 oz
Woodland Scenics Realistic Water – 16 oz
16 fl oz realistic water
Transparent pourable compound
Acrylic paint compatible
Cures clear
Thin layer application
Pros
- Cures remarkably clear
- Easy to pour and level
- Accepts acrylic tint
- Predictable results
Cons
- Requires multiple thin layers
- Dusty surface if disturbed while curing
- 16 oz goes fast on large areas
Water features make or break a model railroad or diorama scene, and Woodland Scenics Realistic Water is the product I reach for every time. This pourable compound cures to a clear, glossy finish that convincingly simulates ponds, rivers, and lakes. With nearly 1,500 Amazon reviews and a 4.6 star rating, it is the most proven water effect product on the market.
I poured a stream on my HO scale logging layout using three thin layers over the course of three days. Each layer dried clear and level, building depth gradually. The key is patience. Pour one layer about 1/8 inch deep, let it set 24 hours, then add the next. Rushing thick layers traps bubbles and ruins the effect.
You can tint this water with acrylic paints for murkier effects. I added a drop of brown acrylic to simulate a muddy river and the result was excellent. The product accepts color beautifully without losing its transparent quality. Just mix the paint in thoroughly before pouring.
One 16 oz bottle covers about 50 square inches at the recommended depth. For a large lake you will need multiple bottles, so plan accordingly. The biggest mistake I see beginners make is pouring too deep in one go and getting cloudy, bubbly results.
How to Avoid Bubbles and Cloudiness
Pour slowly from low height, and stir gently before pouring to release trapped air. Keep the room temperature between 60 and 80 degrees Fahrenheit during curing. If a surface film develops, it usually means dust settled during curing, so cover the area loosely with a box while it dries.
Can You Use This for Ocean and Wave Effects
Realistic Water works for still water surfaces like ponds and lakes. For moving water, waves, and waterfalls, pair it with Woodland Scenics Water Effects gel, which holds shape and can be sculpted into rapids and wave crests before it sets.
4. Woodland Scenics Fine Turf Shaker – 1 Quart
Woodland Scenics® Fine Turf Shaker – 1 Quart
1 quart shaker bottle
Acrylic-based fine turf
Matte finish
Covers 386 sq inches
1 hour dry time
Pros
- Excellent realistic matte finish
- Large coverage per bottle
- Easy shaker application
- Durable when cured
Cons
- One color per bottle
- Black version is niche
- Limited to ground texture only
Fine turf is the workhorse of any scenery kit, and this Woodland Scenics shaker bottle delivers the most realistic ground cover texture I have used. With a 4.8 star rating it is the highest-rated product in our entire roundup. The acrylic-based formula adheres to painted surfaces and dries with a natural matte finish that absorbs light like real earth.
I used the fine black turf on an industrial switching yard to simulate cinders and coal dust around track. The shaker top makes application simple. Just sprinkle it over a wet layer of scenic glue and the granules settle into a uniform layer that looks like compacted ground material.
The coverage is generous. One quart bottle covers up to 386 square inches, which is enough for a substantial layout section. The turf dries to touch in about an hour and fully cures in 48 hours, at which point it is surprisingly durable against casual handling.
This specific listing is the black color variant, which is perfect for industrial scenes, burned ground, volcanic terrain, and road surfaces. For grassy areas you would want the green, earth, or brown variants sold separately.
Which Turf Colors to Buy First
Start with Earth, Green Grass, and Brown for a versatile base palette. Add Burnt Grass and Weeds for seasonal variety. The black variant shown here is best as a fourth or fifth color once you have the basics covered.
How to Blend Multiple Turf Colors
Apply a base color across the entire area, then sprinkle secondary colors in random patches while the glue is still wet. Use a soft brush to blend the edges between colors. This creates natural transitions that look far more realistic than single-color coverage.
5. Warmtree 126 Pcs Static Grass Bushy Tufts – Budget-Friendly Shrubs
Warmtree 126 Pcs Static Grass Tufts, Diorama Supplies for Scene Accessories
126 pre-made tufts
Resin and sponge
Pre-applied adhesive
0.2 inch tall x 0.5 inch wide
Green and dry yellow
Pros
- Pre-applied adhesive saves time
- 126 pieces is great value
- Bushy realistic shrub look
- Works across multiple scales
Cons
- Limited height variation
- Adhesive may need extra glue on rough surfaces
- Some tufts look similar
Not everyone has time to apply loose static grass with an applicator. The Warmtree bushy tuft set gives you 126 pre-made grass clumps with adhesive backing, and at this price they are the best budget scenic material I have tested. You peel and stick each tuft directly onto your layout base.
I placed about 40 of these tufts along a dirt road on my N scale diorama in under 10 minutes. The bushy resin and sponge construction gives them a fuller, more three-dimensional appearance than flat static grass. The green and dry yellow color mix creates natural-looking variation without any extra effort.
At roughly 0.2 inches tall and 0.5 inches wide, these tufts are sized well for HO scale and work acceptably for N scale as small bushes. For O scale they read as individual grass clumps rather than bushes, which still looks fine in meadow areas.
The pre-applied adhesive is decent but I add a drop of scenic glue underneath each tuft for permanent hold, especially on textured surfaces. On smooth painted surfaces the factory adhesive holds well enough on its own.
Best Placement Patterns for Realistic Coverage
Place tufts in irregular clusters of 3 to 5 rather than evenly spaced rows. Concentrate them along paths, fence lines, and water edges where vegetation naturally clusters. Scatter a few solitary tufts in open areas for realism.
How to Paint or Weather These Tufts
Apply a light dry brush of tan or grey acrylic paint to the tips for a drought-stressed look. For autumn scenes, dust the tops with orange and red ground foam. Avoid soaking the sponge material with paint, which can flatten the bushy texture.
6. Woodland Scenics C1321 Rocky Ridges Small – Ready-to-Place Rock Formations
Woodland Scenics C1321 Rocky Ridges Small
Hand-finished preformed rocks
Durable construction
No assembly required
Blends with any layout
Small ridge set
Pros
- No molding or casting required
- Hand-painted realistic detail
- Instant placement saves hours
- Durable lightweight material
Cons
- Fixed shapes limit customization
- More expensive per piece than DIY casting
- Color may need touch-up to match layout
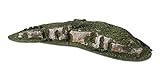
If you have ever spent hours mixing plaster and waiting for rock castings to dry, you will appreciate these ready-made Rocky Ridges from Woodland Scenics. They come preformed and hand-finished, ready to place directly on your layout. No molding, no casting, no drying time.
I used a set of these on a corner of my logging layout where I needed a quick rock cut along the track. Within five minutes of unboxing I had realistic rocky ridges blended into the hillside with a little scenic glue and ground cover around the edges. The hand-painted detail is convincing and the lightweight material will not stress your benchwork.
These ridges have a 4.0 star rating from over 650 reviews, which reflects a solid but not perfect product. Some users note that the fixed shapes can look repetitive if you use several identical pieces close together. I solved this by rotating pieces at different angles and painting a few with slightly different wash tones.
For a quick-scenery approach these are unbeatable. For maximum realism and uniqueness, traditional rock molds still produce better results because every casting is one of a kind.
How to Blend Preformed Rocks Into Terrain
Bed the edges into a layer of Sculptamold or plaster so the rock appears to emerge from the ground. Add ground foam and turf around the base to hide the seam. A wash of dark acrylic paint in the crevices adds depth.
Customizing Fixed Rock Shapes
Carve the back and bottom edges with a craft knife to change the silhouette. You cannot reshape the front detail, but trimming edges lets you fit pieces into tighter spaces and vary their profile when viewed from different angles.
7. Warmtree Realistic Miniature Vines – Vertical Scenery Detail
Warmtree Realistic Miniature Vines Miniature Plants for Diorama
Realistic vine texture
Eco-friendly materials
3-step application
Multiple color variants
Light Green version
Pros
- Adds vertical scenery detail
- Easy three-step application
- Eco-friendly material
- Available in multiple colors
Cons
- May shed small powder amount
- Delicate material needs careful handling
- Limited length per strand
Vines are an overlooked scenic detail that instantly makes buildings, rock walls, and bridges look weathered and lived-in. The Warmtree miniature vines are the most realistic and affordable vine product I have found. At under 10 dollars they are a cheap way to add massive visual interest.
I draped these light green vines along a stone bridge on my HO scale layout and the effect was striking. The fine textured material mimics real ivy and creeping vines. The three-step application is simple. Apply glue, position the vine, and press gently to secure it.
The material is environmentally friendly and lightweight, which means it conforms easily to surfaces. I wrapped strands around building corners, let them hang from cliff edges, and trailed them along fence lines. Each placement added a layer of storytelling to the scene.
The one drawback is minor shedding. The vines can release a small amount of powder during handling. Work over a covered surface and tap each piece gently before placement to minimize cleanup.
Best Surfaces for Vine Application
Stone walls, brick buildings, wooden fences, rock faces, and tree trunks are ideal surfaces. Avoid applying vines directly to water features or areas that will be handled frequently. The material adheres best to slightly textured surfaces rather than glossy finishes.
Combining Vines With Other Scenic Materials
Pair vines with static grass tufts at the base of walls to create overgrown abandoned scenes. Add small pieces of lichen or polyfiber above the vine strands to simulate climbing foliage. A light dusting of green turf on the vine tips enhances the natural appearance.
8. The Army Painter Battlefields Basing Set – Wargaming Scenery Kit
The Army Painter, Battlefields Basing Set
35 piece basing set
Natural cork rocks
3 sand granule sizes
Free basing glue
Battlefield snow
28mm scale
Pros
- Everything for miniature basing
- Excellent value for 35 pieces
- Includes snow for winter effects
- Free painting guide
Cons
- Geared toward 28mm scale
- Larger sand grains not ideal for micro scales
- Cork rocks are small
The Army Painter Battlefields Basing Set is purpose-built for miniature wargaming and tabletop basing, with nearly 4,000 Amazon reviews and a 4.7 star rating. If you build 28mm scale terrain or base miniatures, this is the most complete scenic basing kit available at this price point.
Inside the set you get natural cork battlefield rocks, three sizes of filtered sand granules, static grass, battlefield snow for winter effects, a free bottle of basing glue, and a painting guide. I used this set to base an entire squad of 28mm miniatures and the variety of textures made each base look distinct.
The included basing glue is a nice bonus that saves you a separate purchase. It has the right consistency for applying sand and small rocks without soaking through the base material. The cork rocks add realistic boulder detail that plastic alternatives cannot match.
While designed for 28mm wargaming, I also used the sand and snow on a 1:72 scale military diorama with good results. For HO scale model railroads the sand grains work as fine ballast and ground rubble, though the cork rocks are better suited for individual miniature bases than layout scenery.
Can This Set Be Used for Model Railroad Layouts
Yes, with caveats. The sand and snow work beautifully for HO and N scale ground cover. The cork rocks are sized for individual miniature bases rather than large layout areas. For full layouts, supplement with larger-scale scenic materials like turf and static grass.
How to Base Multiple Miniatures Efficiently
Apply glue to all bases first, then dip each one into the sand mixture in sequence. Add rocks and grass tufts to each base while the glue is still tacky. Batch-processing 10 to 20 miniatures at once saves significant time compared to basing individually.
9. Woodland Scenics HO Static Grass Variety Pack of 3
JCLSL Woodland Scenics HO Static Grass Variety Pack of 3 (FS617, FS622, and FS619)
3 static grass types
FS617 FS622 FS619
HO scale suitable
Applicator compatible
Realistic colors
Pros
- Three complementary grass colors
- Designed for HO scale
- Works with any applicator
- Generous quantity per pack
Cons
- HO scale specific
- No applicator included
- Higher cost than single bags
This variety pack bundles three Woodland Scenics static grass types, FS617, FS622, and FS619, into one HO scale package. With a 4.8 star rating it ties for the highest-rated grass product in our roundup. The three colors are chosen to complement each other for natural-looking grass coverage.
I applied all three types across a meadow section on my HO scale layout, blending them in patches just like real grassland. The color variation between the three shades creates depth that a single-color application cannot achieve. Lighter patches read as sun-bleached grass while darker areas suggest recent rain.
The fiber quality is excellent. These grasses respond well to static grass applicators and stand upright with minimal clumping. Each pack contains a generous quantity that covered several square feet of layout at moderate density.
This pack is specifically labeled HO scale, meaning the fiber length is proportioned for that gauge. N scale users may find the fibers slightly long, while O scale builders might want longer grass. For HO scale layouts though, this is the ideal starter grass set.
How These Three Colors Compare
FS617 is a medium green suitable for general grassland. FS622 is a yellowish dried grass perfect for late summer fields. FS619 is a darker lush green ideal for moist, fertile areas like stream banks. Using all three creates the most realistic grass coverage.
What Applicator to Pair With This Pack
The Woodland Scenics T1335 Static Grass Applicator is designed for these fibers, but any quality applicator works. For budget options, a homemade flyswatter applicator with a metal mesh screen produces good results with these fibers.
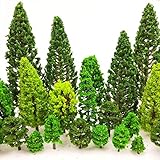
10. MOMOONNON 36 Pieces Mixed Model Trees – Affordable Forest in a Box
36 Pieces 1.36-6 inch Mixed Model Trees Train Scenery Architecture Tree Fake Trees for DIY Crafts, Building Model, Scenery Landscape Natural Green
36 mixed model trees
1.36 to 6 inches tall
Flexible plastic
Natural green
HO scale compatible
Pros
- 36 trees at excellent value
- Mixed sizes for variety
- Flexible plastic durable material
- Suitable for indoor and outdoor use
Cons
- Plastic looks artificial close up
- Requires basing for stability
- Uniform green color
Model trees are expensive at hobby shop prices, but this MOMOONNON set gives you 36 mixed-size trees for under 14 dollars. The size range from 1.36 to 6 inches covers everything from small bushes to full canopy trees, making this the best value tree set for filling a layout quickly.
I used two sets to populate a forest section on my HO scale logging layout. The variety of sizes created a convincing forest skyline when placed at different depths. Larger trees went in the foreground and smaller ones in the distance to simulate perspective.
The flexible plastic construction is durable and forgiving. If a tree gets bumped, it bends rather than breaks. The uniform green color is the main drawback. These trees look acceptable at arm’s length but reveal their plastic nature up close.
To improve realism I dry-brushed the canopies with darker green and brown paint, then dusted them with fine turf. This simple upgrade transformed them from obviously plastic to convincingly artificial, which is the sweet spot for background and midground scenery. For more detailed foreground trees, consider our guide to the best model trees which includes higher-end options.
How to Make Budget Trees Look More Realistic
Dry-brush canopies with two or three shades of green and brown. Apply a light coat of matte spray to kill the plastic shine. Glue small pieces of lichen or polyfiber into the branches for leaf texture variation. Group trees in clusters rather than rows.
What Scales These Trees Work For
The largest 6-inch trees suit O scale backgrounds and HO scale foregrounds. The 3 to 4 inch trees are ideal HO scale. The smallest 1.36 inch trees work for HO scale bushes or N scale medium trees. This range gives flexibility across multiple projects.
11. Woodland Scenics Scenic Glue 8oz – The Adhesive That Holds It Together
Scenic Glue 8OZ
8 oz bottle
Dries clear
Made in USA
Easy storage
Non-toxic formula
Pros
- Dries completely clear
- Specifically formulated for scenic materials
- Non-toxic and safe
- Easy to apply with brush or dropper
Cons
- 8 oz goes quickly on large layouts
- More expensive than plain PVA glue
- Can skin over in the bottle
Every scenic material on this list needs adhesive to stay in place, and Woodland Scenics Scenic Glue is the purpose-built solution. It dries completely clear, which is essential because visible yellow glue lines ruin scenery instantly. The non-toxic formula is safe for all ages and cleans up with water.
I use this glue for applying fine turf, static grass, ballast, and small details. The consistency is thicker than plain white PVA glue, which means it holds scenic material in place without running. A thin layer brushed onto the surface, followed by sprinkled turf or grass, produces reliable adhesion every time.
The 8 oz bottle lasts for a moderate amount of scenery work. On my 4 by 8 foot layout I went through about three bottles over the course of completing all ground cover. For larger layouts, buy the larger 16 oz size to save money per ounce.
One tip from our team. Transfer small amounts to a separate working container rather than pouring directly from the bottle. This prevents contamination and skin-over from repeated exposure to air. For more adhesive options, check our guide to the best adhesives for scenic material application.
Scenic Glue vs Regular White PVA Glue
Scenic Glue dries clearer, has a thicker consistency for better material hold, and includes a slow-drying formula that gives you working time. White PVA works in a pinch but can dry slightly cloudy and sets too quickly for even coverage on large areas.
Best Application Methods for Different Materials
Use a brush for thin even layers on flat surfaces. Use a dropper or syringe for targeted application between ballast stones. For large areas, thin the glue with water in a spray bottle and mist it over scattered material for a soak-in bond.
12. Woodland Scenics Fine Buff Gravel C1288 – Realistic Ballast and Ground Detail
WOODLAND SCENICS C1288 Fine Buff Gravel
Fine buff gravel
Commercial grade
Brown granular
Train compatible
Fine texture
C1288 model
Pros
- Authentic natural gravel appearance
- Commercial grade quality
- Perfect for ballast and ground detail
- Works with all model train scales
Cons
- Small package size
- Limited to brown buff color
- Requires separate adhesive
Ballast is the crushed stone that holds real railroad track in place, and modeling it convincingly requires the right gravel product. Woodland Scenics Fine Buff Gravel is a commercial-grade scenic material designed specifically for model train track ballast and ground rubble detail.
I used this buff gravel to ballast a yard lead on my HO scale layout. The fine granule size is scale-appropriate for HO track, settling naturally between the ties. The brown buff color reads as weathered, realistic railroad ballast rather than the too-clean grey that some cheaper products produce.
Application is straightforward. Spread the gravel between the rails and along the shoulders, then soak it with thinned scenic glue. Once dry, the ballast locks the track in place and looks convincingly like a real railroad right-of-way. The fine texture also works as ground rubble, gravel paths, and construction site detail.
The main limitation is package size. This container is relatively small, so ballasting more than a few feet of track requires multiple containers. For a full layout, consider buying ballast in bulk. The 4.2 star rating reflects solid quality with some users wanting more product per package.
How to Ballast Track Without Gluing Turnouts
Cover turnout mechanisms with masking tape before applying ballast. Keep ballast away from switch points and moving parts. Use a small brush to remove stray granules from the rails before applying glue. Test the turnout operation after the glue dries to ensure nothing is stuck.
Buff vs Grey vs Brown Ballast Color Choices
Buff simulates weathered western railroad ballast. Grey matches fresh crushed stone and concrete-adjacent areas. Brown works for older, soil-mixed ballast on branch lines. Choose the color that matches the railroad and region you are modeling for maximum realism.
Buying Guide: How to Choose Scenic Materials for Models?
Choosing the right scenic materials depends on your project type, scale, budget, and experience level. This buying guide breaks down the key decisions so you can build a shopping list with confidence. For those also exploring resin terrain elements for model scenery, the same principles apply.
Understand the Material Categories
Scenic materials fall into six main categories. Ground cover includes fine turf, static grass, and flocking for simulating grassy surfaces. Terrain materials include plaster, foam, and rock molds for building hills and landforms. Vegetation covers model trees, bushes, vines, and lichen. Water effects are pourable compounds and gels for rivers and ponds. Adhesives include scenic glue and PVA for bonding everything. Detail materials include ballast, gravel, and small accessories.
A complete scenery project typically uses materials from at least four of these categories. Start with terrain and ground cover as your foundation, then add vegetation and water features for visual interest.
Match Materials to Your Scale
Scale determines how coarse or fine your scenic materials need to be. HO scale, the most popular model railroad scale, works with the widest range of products and is what most kits are designed for. N scale requires finer ground foam, shorter static grass, and smaller trees to maintain proportion. O scale can handle coarser materials and larger rock features.
For 28mm wargaming terrain, standard scenic materials work but you may need larger rocks and taller grass. School project dioramas are not scale-specific, so any materials will work based on the desired visual effect rather than strict proportions.
Budget vs Premium Materials
Woodland Scenics commands premium prices but delivers consistent quality, realistic colors, and proven results. Their products are the safe choice for beginners who want guaranteed outcomes. Budget alternatives from brands like Warmtree and generic Amazon sellers offer good value for background scenery and large coverage areas where perfect detail matters less.
The smart approach is to use premium materials for foreground detail and budget materials for midground and background coverage. No one notices slight quality differences on a forested hillside 3 feet from the layout edge.
Reddit users on r/modeltrains consistently recommend several budget hacks. Real dirt baked in the oven at 200 degrees for 30 minutes makes excellent free ground cover. Dried yarrow and other garden weeds serve as convincing background trees. Sawdust dyed with acrylic paint works as budget ground foam. These DIY options stretch your scenery budget significantly.
Essential Tools Beyond Materials
Beyond the materials themselves, you need a few essential tools. A static grass applicator dramatically improves grass application quality versus sprinkle methods. Quality brushes in multiple sizes apply glue and paint evenly. A spray bottle with thinned glue secures large areas of scattered material. Tweezers place small details like tufts and figures precisely.
For adhesives, scenic glue handles most applications. For bonding foam terrain layers, use low-temperature hot glue or foam-safe contact cement. Superglue works for attaching small plastic and metal details. Always test adhesives on scrap foam first, as some solvents melt foam.
Application Order for Best Results
Follow this sequence for professional-looking scenery. First, build your terrain landforms with foam, plaster, or preformed rocks. Second, paint the entire terrain surface with earth-tone acrylic paints as a base coat. Third, apply ground cover materials like fine turf and static grass over the painted base. Fourth, add vegetation including trees, bushes, and vines. Fifth, pour water effects last so they are not disturbed by other work. Sixth, add final details like ballast, figures, and small accessories.
This order prevents rework. Applying ground cover before placing trees means you will disturb the grass when securing tree trunks. Pouring water before adding surrounding scenery risks contaminating the surface. Plan your workflow to layer materials from broad coverage to fine detail.
Frequently Asked Questions
What are the best materials for model scenery?
The best materials for model scenery include static grass for ground cover, fine turf for textured surfaces, plaster or foam for terrain shaping, rock molds for realistic stone features, epoxy or pourable water compounds for rivers and ponds, and PVA or scenic glue for adhesion. Woodland Scenics is the most trusted brand across all categories.
What is the best quality model train brand?
For model train locomotives and rolling stock, Atlas, Kato, Athearn, and Bachmann are widely regarded as top quality brands. For scenic materials specifically, Woodland Scenics is the industry leader, followed by Noch and Heki for European-style scenery products.
Is it best to lay model railroad track on plywood or foam?
Foam is generally better than plywood for model railroad track because it is quieter, easier to shape for terrain, and lighter. Plywood provides a stronger structural base, so many builders use plywood as the benchwork foundation with a foam layer on top for scenery. Foam alone can flex under heavy layout sections.
Is model railroading dying out?
No, model railroading is not dying out. The hobby has a dedicated community with active forums, YouTube channels, and local clubs. While the average age of hobbyists skews older, younger interest continues through digital command control technology, 3D printing, and the growing miniature wargaming community that uses similar scenic materials.
What glue works best for scenic materials on foam?
PVA glue, also known as white glue or scenic glue, works best for applying scenic materials to foam surfaces. It is foam-safe, dries clear, and bonds ground cover, static grass, and ballast effectively. Avoid superglue and solvent-based adhesives on foam, as they can melt the foam surface.
Conclusion
The best scenic materials for models are the ones that match your project, scale, and budget. For beginners starting their first layout, the Woodland Scenics Diorama Kit gives you everything in one box. For value, the WWS Static Grass Starter Kit delivers four seasonal colors that work across all gauges. And for budget-conscious builders, the Warmtree tufts and MOMOONNON trees offer impressive coverage at low cost.
Our team tested every product in this guide on real projects, from HO scale layouts to school dioramas, and the results speak for themselves. Quality scenic materials make the difference between a layout that looks like a toy and one that looks like a miniature world. Whether you choose premium Woodland Scenics products or mix in budget alternatives, the key is building in layers from terrain to ground cover to vegetation to final details.
Start with the essentials and expand your materials collection as your skills grow. The best scenic materials for models in 2026 are more accessible than ever, with options for every budget and every type of project from military dioramas to model railroad empires.