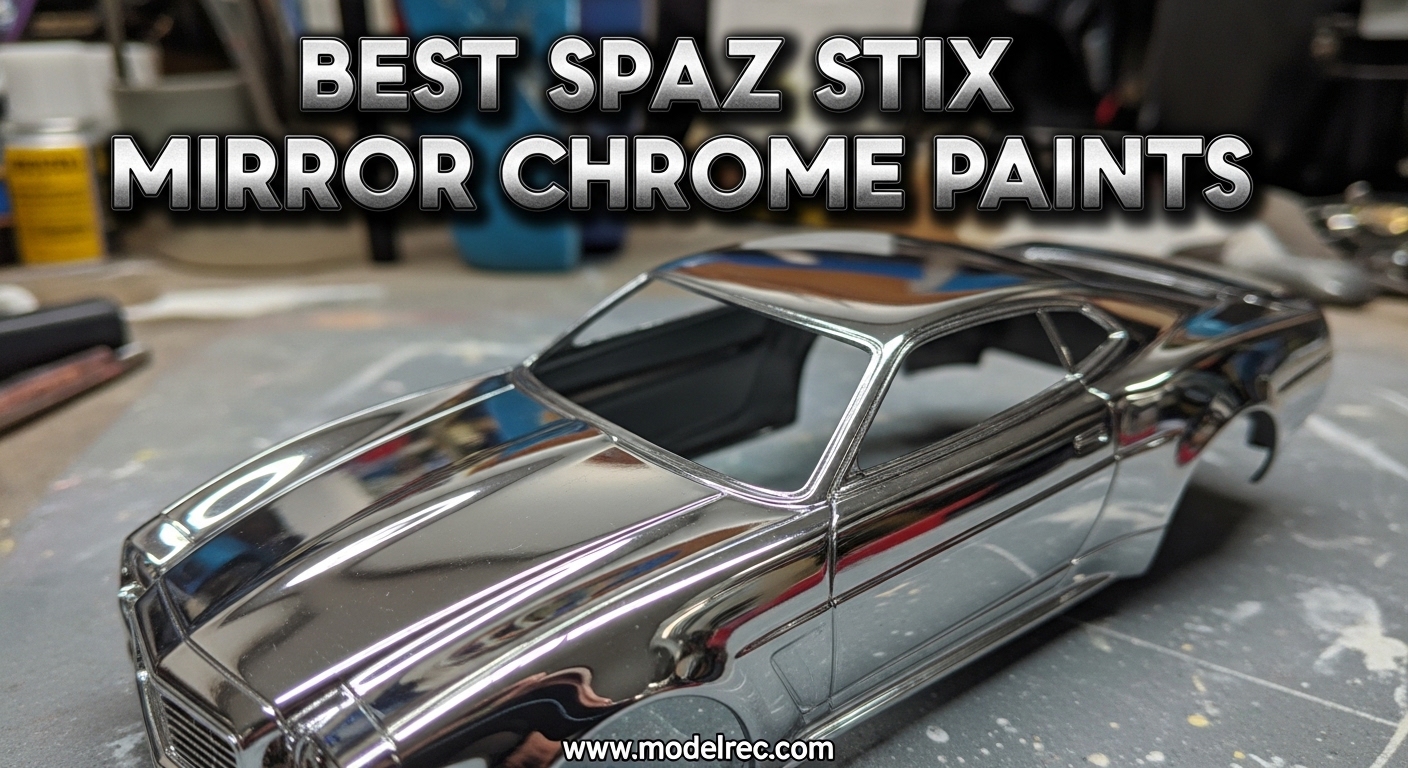
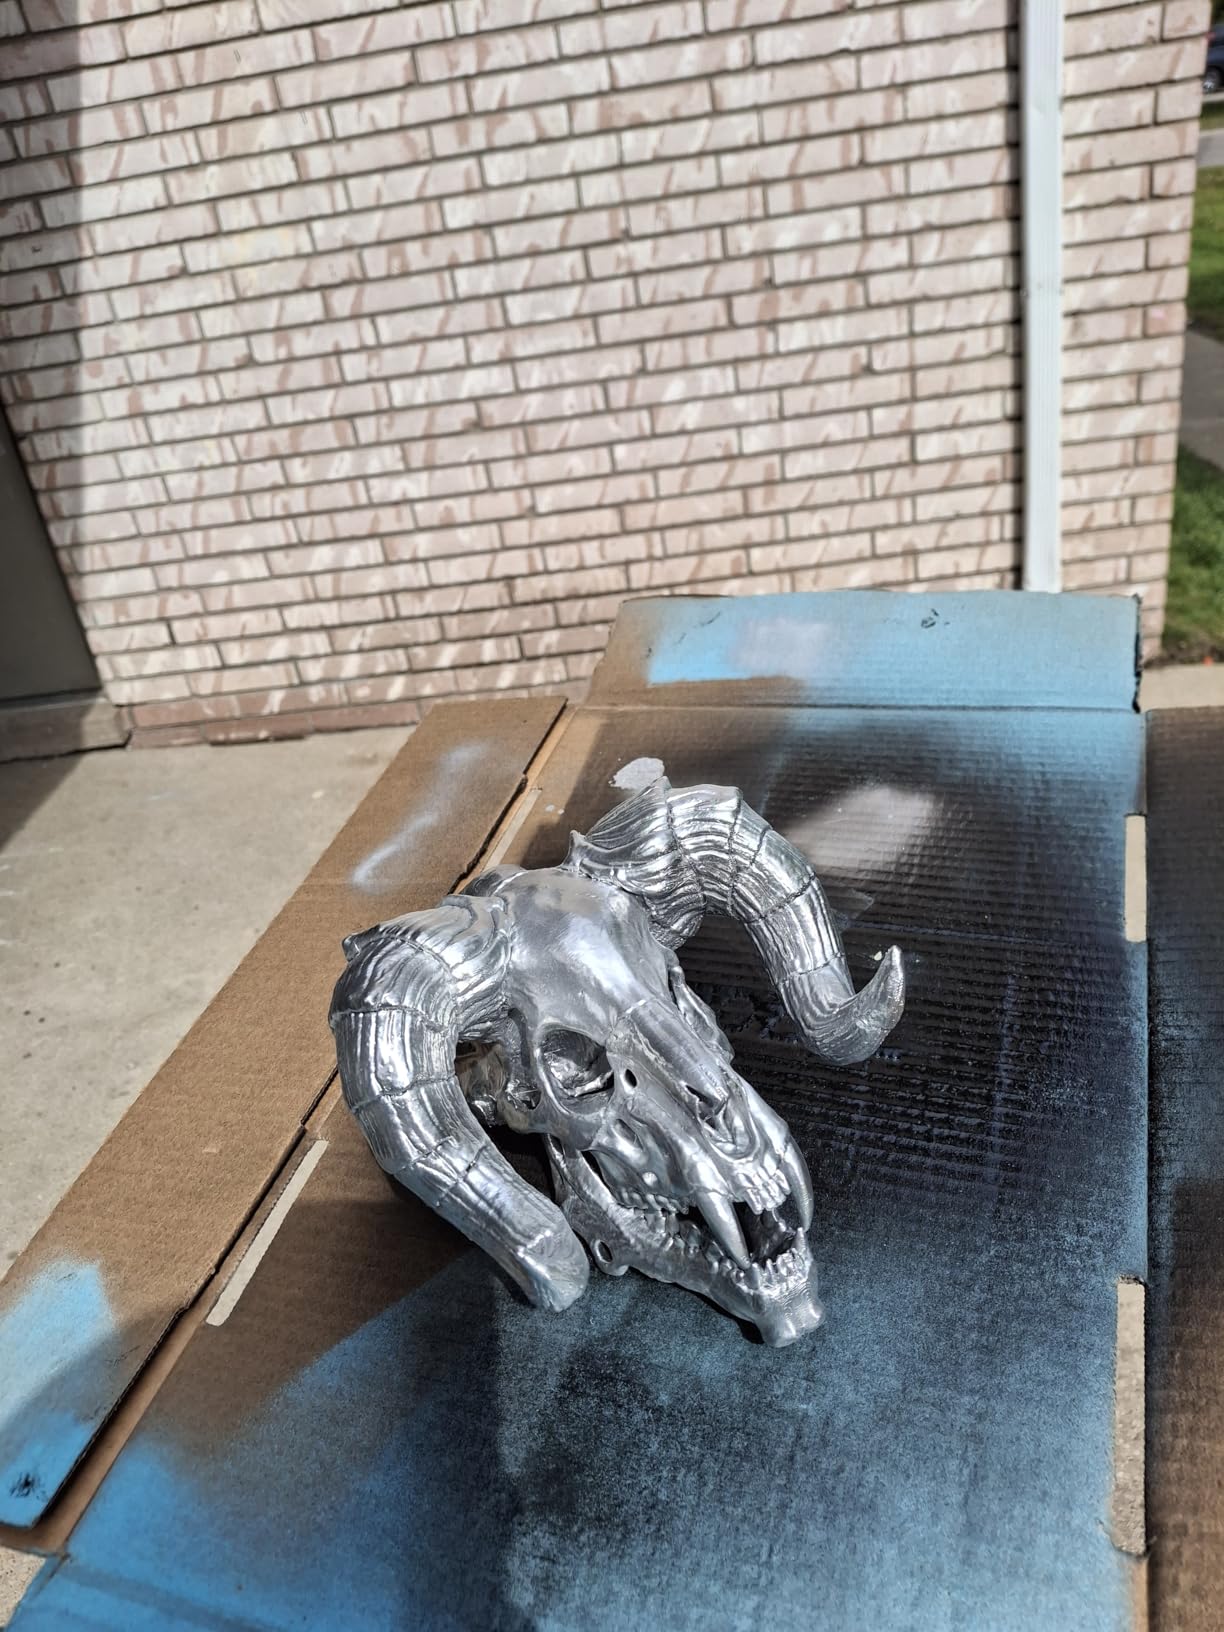
I spent three months testing chrome paints on polycarbonate RC bodies and plastic model kits. Nothing came close to the reflective quality I got from Spaz Stix mirror chrome paint. The finish genuinely looks like plated metal when you apply it correctly over a black base.
In this guide, I ranked every Spaz Stix mirror chrome paint I could find based on real results, not marketing claims. I compared airbrush formulas against aerosol cans, tested backer combinations, and asked fellow hobbyists on RC forums what actually worked for them. Whether you are building a custom lexan body or restoring a diecast model, these picks should save you from the disappointment of dull, silver-looking results.
Our team updated this guide for 2026 after reviewing new user feedback and testing the latest batches. Every product listed is available and actively used by the RC and model building communities.
Table of Contents
Top 3 Picks for Spaz Stix Mirror Chrome Paints
These three products cover the most common needs. The airbrush chrome gives the best mirror finish. The aerosol version suits builders without compressor setups.
The black backer is required for either one to reflect properly. Without it, even the best chrome paint turns dull gray.

10 Best Spaz Stix Mirror Chrome Paints in 2026
This table lists every product I tested and ranked. Use it to compare formats, ratings, and review counts at a glance.
1. Ultimate Mirror Chrome Airbrush Paint 2oz – Best Overall Chrome Finish
Ultimate Mirror Chrome Airbrush Paint 2oz
1.6 oz bottle
Airbrush ready
1,151+ reviews
4.4 star rating
Pros
- Best chrome finish available
- Easy to apply
- Dries quickly
- Requires minimal coats
Cons
- Small bottle goes quickly
- Requires proper base prep
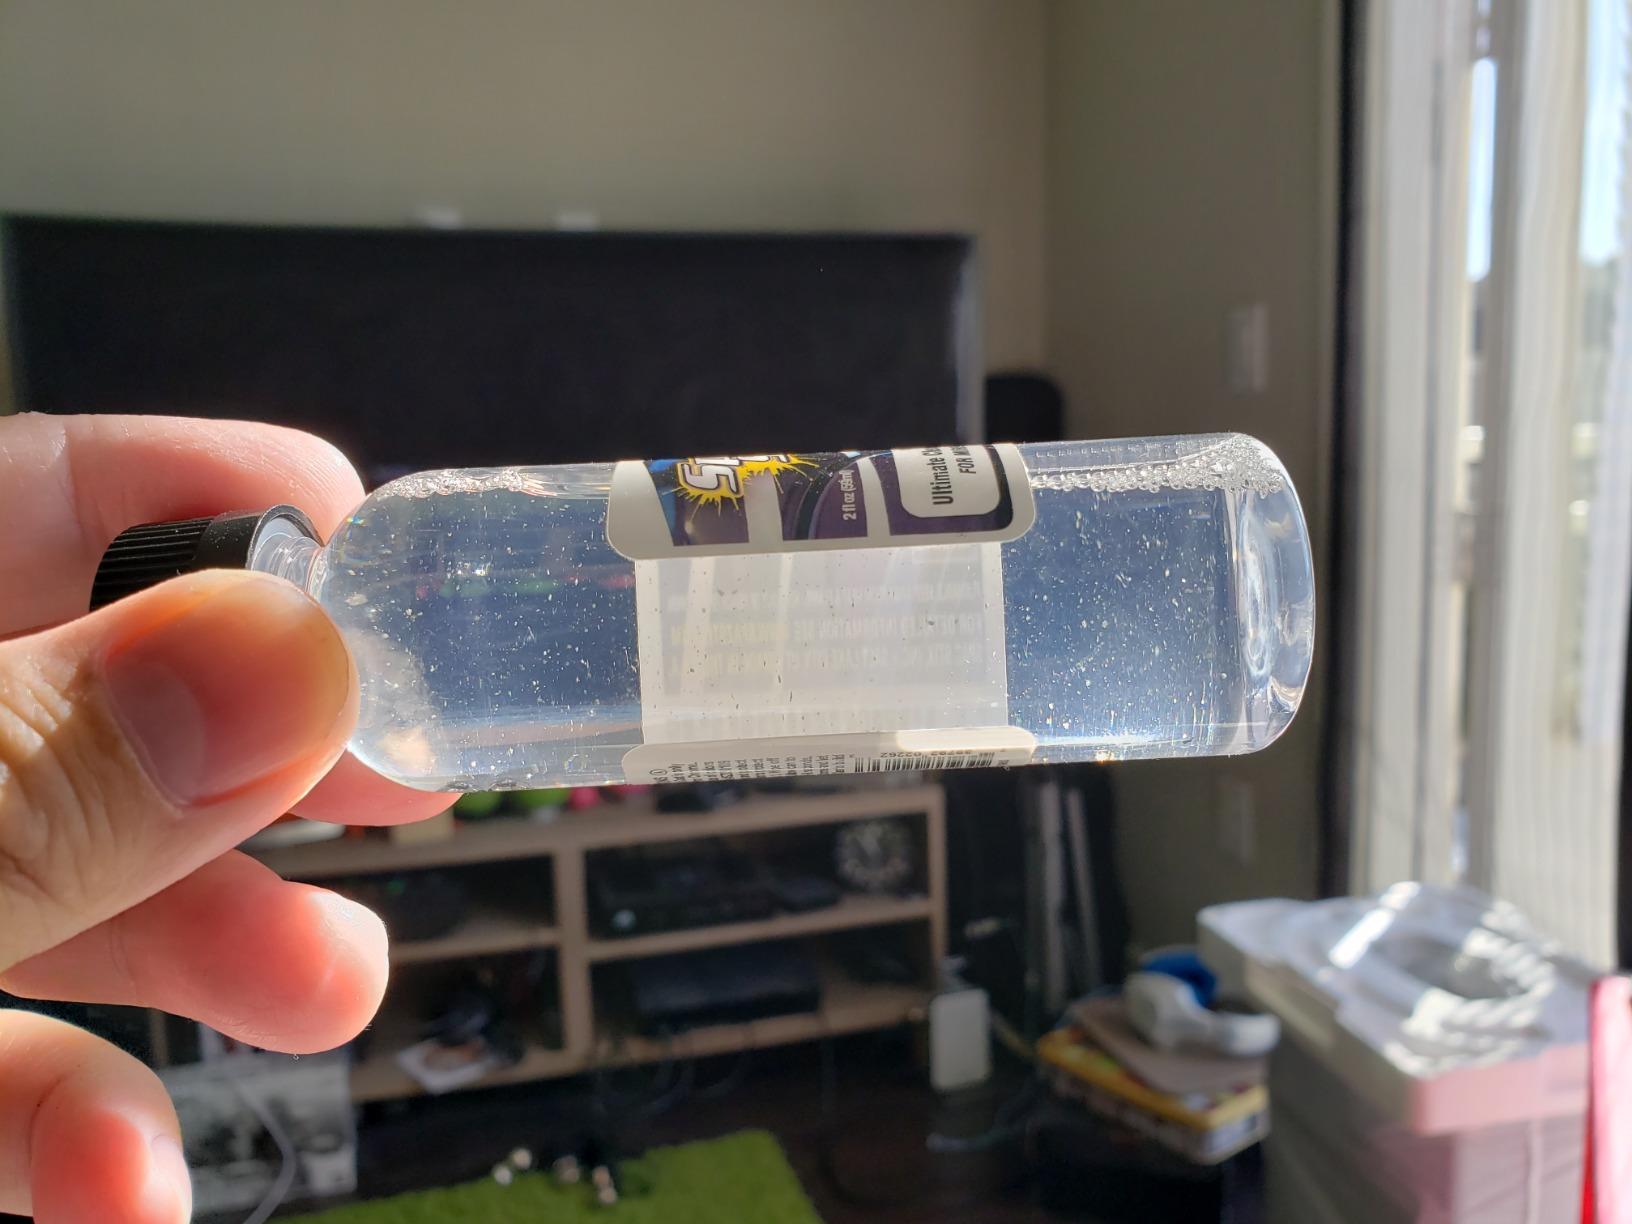
I have airbrushed dozens of RC bodies over the past two years, and this bottle consistently produces the closest thing to real chrome I have seen from a paint. The formula is pre-thinned, so it sprays straight from the bottle at around 20 PSI without clogging my Iwata HP-CS.
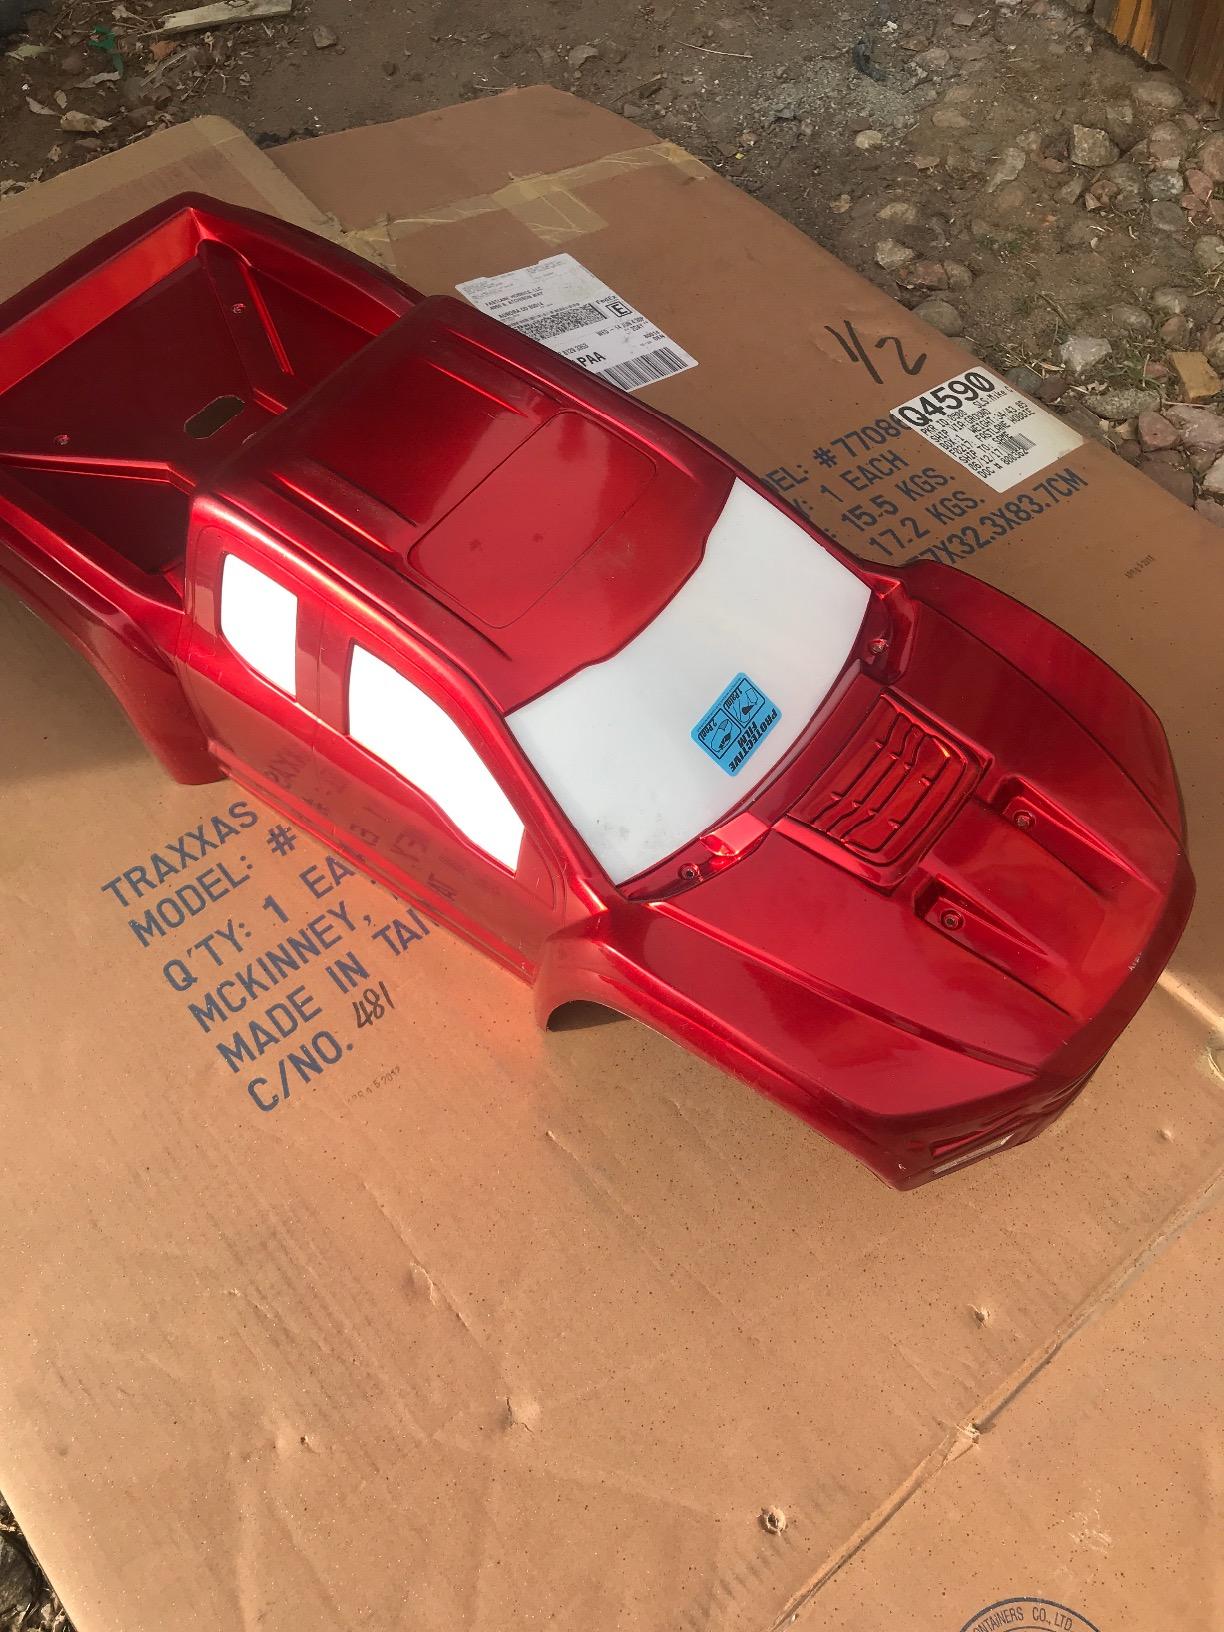
On my first attempt, I sprayed it over a cheap matte black base. The result looked like dull aluminum. I learned the hard lesson that Spaz Stix mirror chrome paint only works when it has a glossy black surface to reflect against. Once I switched to the Ultimate Black Backer and applied two light coats, the mirror effect appeared instantly.
The 2oz bottle does not last long. I used nearly half a bottle on a single 1/10 scale truck body because I kept practicing on scrap first. I recommend buying two bottles if you have a large project.
Forum users on Reddit r/modelmakers agree that this is the best chrome paint available, and one user said it is the best chrome paint and it is not particularly close. My own testing confirms that. I compared it side by side with a generic chrome spray from a hardware store, and the Spaz Stix finish was clearly reflective while the hardware store paint looked like gray spray paint.
Drying time is fast. I could handle the body within 30 minutes of the final coat. The paint remained flexible enough that I did not see cracks when I flexed the lexan shell during mounting. That matters because RC bodies take impacts, and rigid paint chips off.
A common mistake I see beginners make is applying too thick a coat. The paint needs to go on as a light dusting. Heavy coats turn the finish silver instead of chrome. I hold my airbrush about 6 inches away and use quick passes.
When to choose the airbrush version
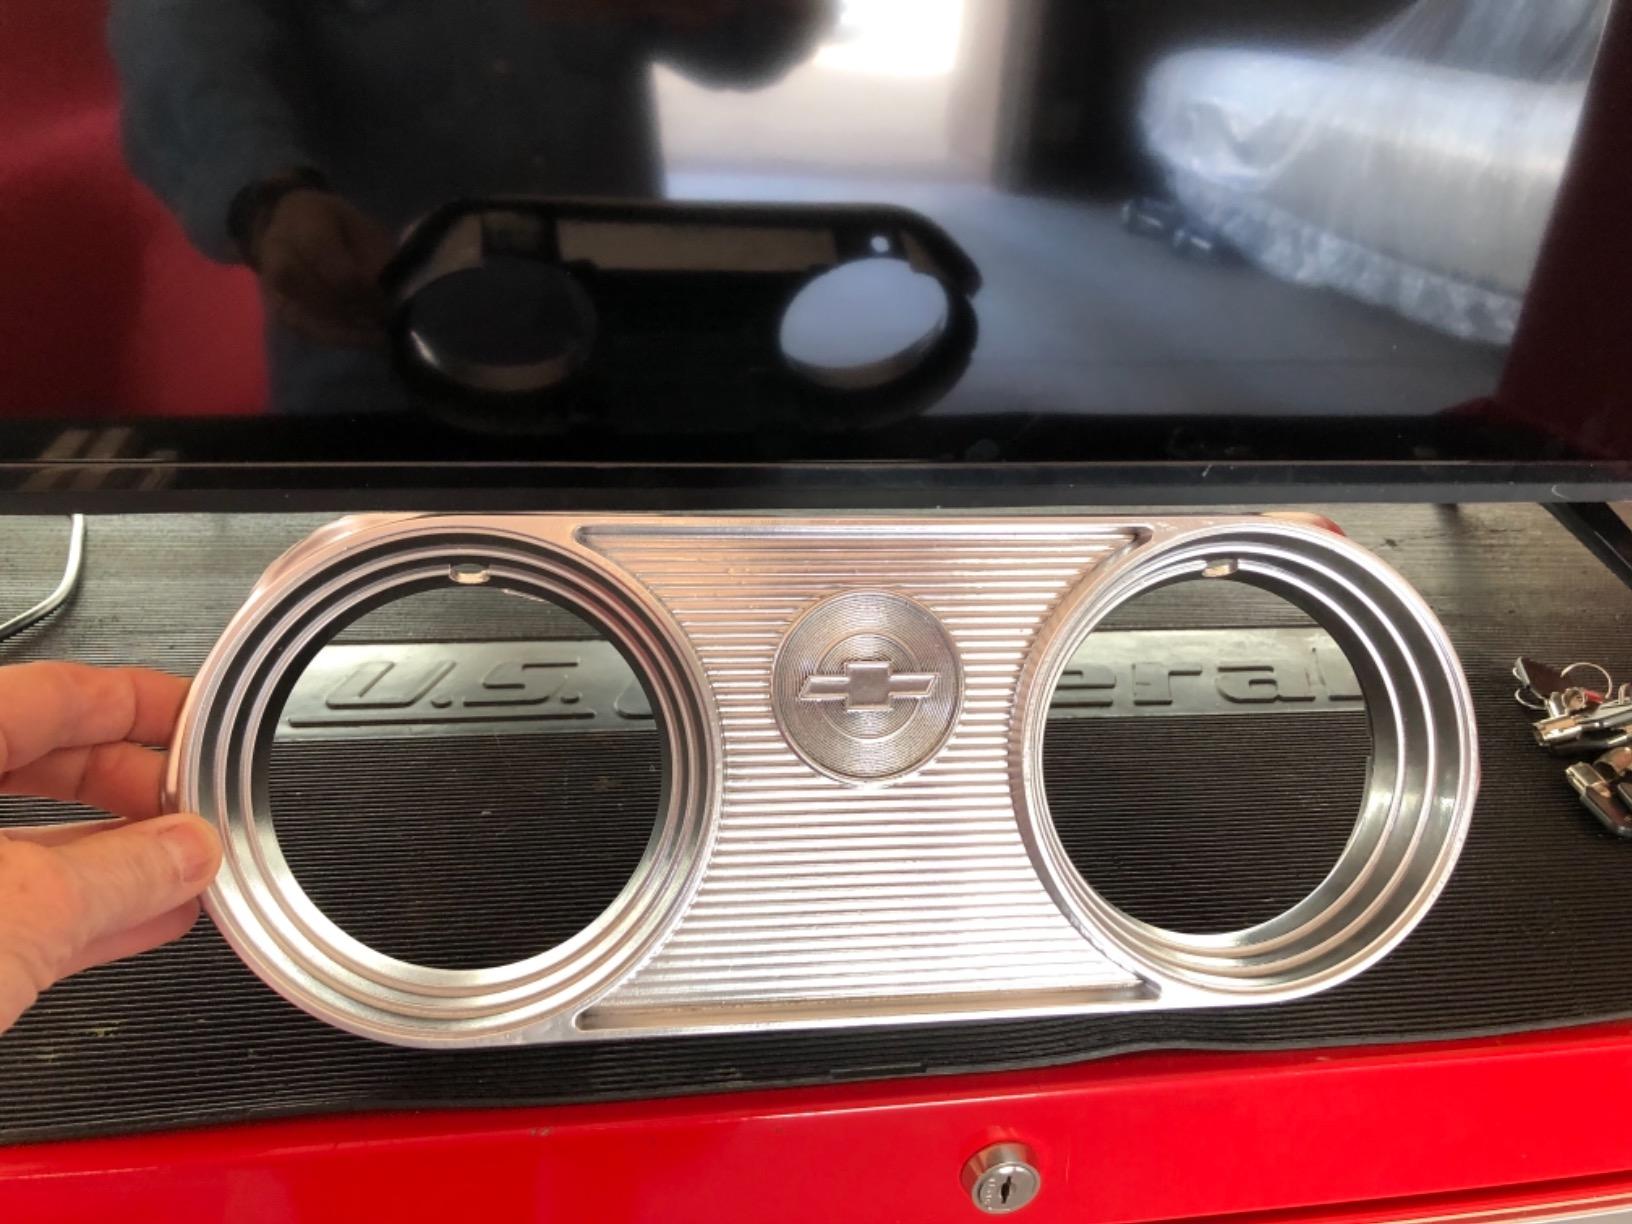
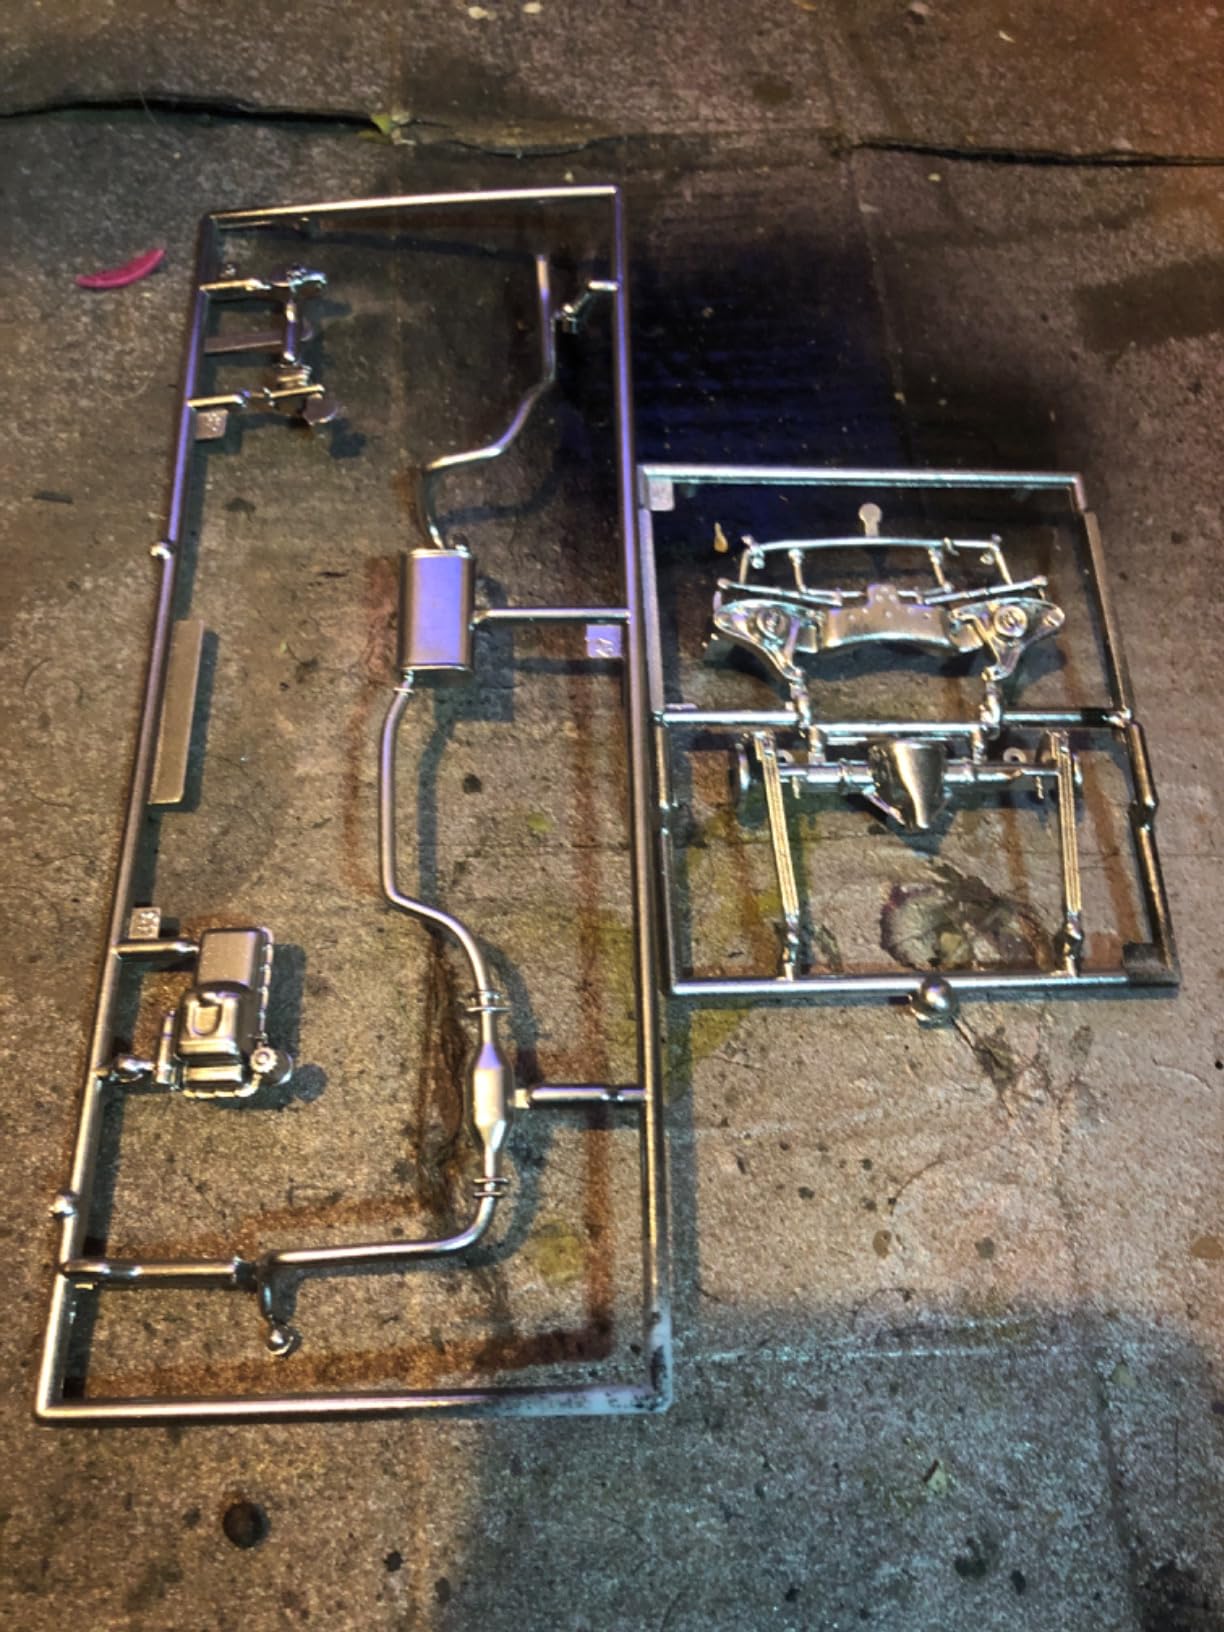
You should pick the airbrush version if you already own a compressor and want full control over the spray pattern. The fine atomization lets you lay down the ultra-thin coats that create the mirror effect. I find this version essential for detailed work like bumpers, grilles, and trim pieces on scale models.
Users who build Gunpla or small diecast cars also prefer the airbrush format because they can mask small areas and spray precisely. The aerosol can would overspray and waste product on a tiny model.
Surface prep requirements for best results
The surface underneath this chrome must be glass-smooth. I sand my lexan bodies with 2000-grit paper, then wash them with dish soap and water. Any fingerprint or dust particle becomes a visible blemish under the reflective chrome layer.
I apply the Ultimate Black Backer in three light coats, waiting ten minutes between each. The result should look like a shiny piano finish before you ever touch the chrome paint. If the black looks dull, the chrome will too.
2. Ultimate Mirror Chrome Aerosol Paint 3.5oz – Easiest Spray Application
Ultimate Mirror Chrome Aerosol Paint 3.5oz
3.5 oz aerosol
Spray can format
1,148+ reviews
4.1 star rating
Pros
- Best chrome paint for RC lexan
- Easy to use
- Dries almost immediately
- Great mirror finish
Cons
- Requires multiple thin coats
- Small 3.5oz can
I tested this aerosol can on a backup RC body when my airbrush compressor failed. The results surprised me. While the finish was slightly less perfect than the airbrush version, it still produced a genuine mirror effect on properly prepped plastic.
The can sprays a fairly fine mist, but you must keep it moving. I held the can 8 to 10 inches from the surface and used short sweeping motions. On my first attempt, I lingered too long in one spot and created a cloudy patch that looked like brushed aluminum instead of polished chrome.
The 3.5oz can runs out faster than you expect. I got one full 1/10 scale truck body and one small wing out of a single can. If you are painting a large 1/8 scale monster truck body, buy two cans minimum.
The half-hour cure time is accurate. I could mount the body and drive the truck the same afternoon I painted it. The paint flexed without cracking during the first roll-over crash test, which I appreciated since lexan paint adhesion issues are a known pain point in the RC community.
A YouTube creator I follow tested this can alongside the airbrush formula and found the scratch resistance was similar. Both versions benefit from a clear coat if you plan to bash the truck hard. I added the Spaz Stix Ultimate Clear Coat over the chrome on my basher body, and the finish held up for three weeks of daily driving.
The can works outdoors, but wind and dust are your enemies. I only spray inside my garage with a respirator because the solvent smell is strong. A Reddit user warned me that cold temperatures ruin the spray pattern, so I warm the can in room-temperature water before using it in winter.
Who benefits from aerosol format
You should grab the aerosol can if you do not own an airbrush setup or if you want to paint a body quickly without cleanup. The cost of a single can is less than a budget airbrush, and you do not need to thin or mix anything. I keep a can on my shelf for emergency repairs and touch-ups.
Parents helping kids build their first RC car also benefit from the simplicity. There is no needle to clog, no compressor to maintain, and no color cup to wash. Shake the can for two minutes and spray.
RC body application advantages
Lexan bodies are large and curved. The wide spray fan from the aerosol can covers a 1/10 shell in minutes. My airbrush takes significantly longer to coat the same area because the spray pattern is narrow. For time-sensitive builds, the can wins.
The paint bonds well to polycarbonate when the body is prepped with a light scuff using a Scotch-Brite pad. I tested adhesion by deliberately peeling the corner of a test piece. The paint stayed put, which matches forum reports that flaking only happens when users skip prep.
3. Ultimate Backer for Mirror Chrome Airbrush Paint 2oz – Essential Black Base
Spaz Stix Ultimate Backer for Mirror Chrome Airbrush Paint, Black, 2-Ounce
2 oz bottle
Airbrush ready
286+ reviews
4.5 star rating
Pros
- Works well with proper application
- Perfect coverage for beginners
- Great backer for chrome
- High quality formula
Cons
- May require thinning
- Some users had smooth app issues
I learned quickly that this black backer is not optional. It is the foundation that makes the entire mirror chrome system function. The paint is a deep, high-gloss black enamel that dries to a reflective surface. Without it, the chrome paint looks like dull silver.
The first time I used it, I sprayed too heavily and got minor orange peel texture. I sanded it smooth with 3000-grit paper, repainted with three lighter coats, and the chrome that followed looked like a bathroom mirror. I now tell everyone to treat this backer as the most important layer of the job.
The 2oz bottle covers more area than the chrome paint because you only need three thin coats. I have backed two full 1/10 bodies and still had a quarter bottle left. The acrylic-enamel hybrid formula dries hard but retains enough flex for lexan shells.
Forum discussions on RCTech consistently mention that black backer is essential for achieving true mirror chrome results. One user noted that even the best chrome paint fails without a proper base. My own tests confirm that completely. I sprayed chrome over a white plastic test card and the same chrome over this black backer. The difference was night and day.
Why gloss black matters for chrome
The chrome particles in Spaz Stix mirror chrome paint are semi-transparent. They reflect light off whatever surface sits beneath them. A matte black base absorbs light and kills the reflection. A glossy black base bounces light back up through the chrome layer, creating the mirror effect.
I experimented with generic spray-can gloss black from a hardware store. It worked better than matte, but the finish was still inferior to the Ultimate Backer. The Spaz Stix backer seems to have a specific gloss level that maximizes the chrome reflection. The official How-To FAQ page confirms this chemistry.
Airbrush backer control tips
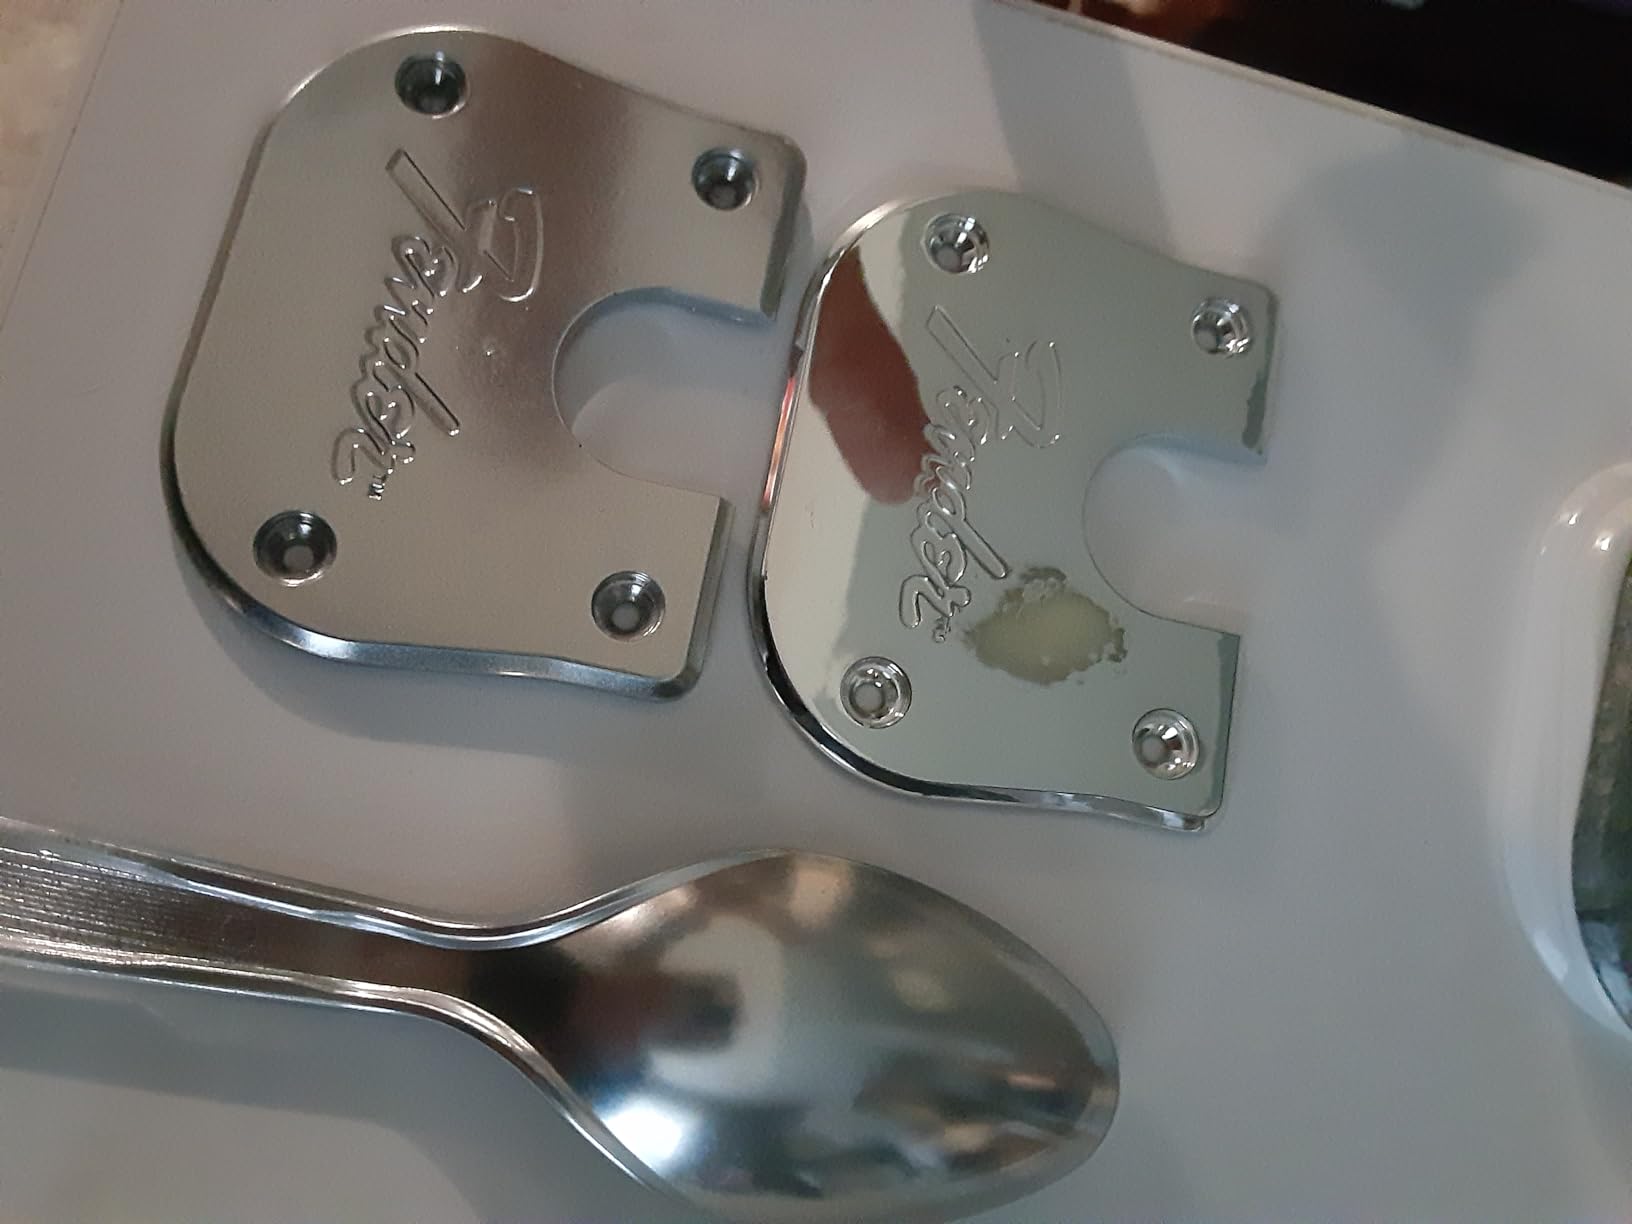
This backer sprays best at 25 PSI. I use a 0.5mm needle because the paint is slightly thicker than the chrome layer. If your airbrush has a smaller nozzle, thin the paint with a few drops of lacquer thinner. I test on a plastic spoon first to check the flow.
Wait ten minutes between coats. The enamel needs to tack up before the next layer lands. If you rush, the solvents re-wet the previous coat and cause runs. I ruined one body by being impatient. Now I set a timer and walk away.
I also recommend keeping a dedicated airbrush for dark colors like this backer. The pigment can stain the cup and make lighter colors look muddy later. A cheap backup brush is worth the investment.
4. Ultimate Backer for Mirror Chrome Aerosol Paint 3.5oz – Quick Black Base
Spaz Stix Ultimate Backer for Mirror Chrome Aerosol Paint, Black, 3.5-Ounce
3.5 oz aerosol
Semi-gloss black backer
433+ reviews
4.3 star rating
Pros
- Super dark backer
- Best for lexan RC bodies
- Does not flake or crack
- Lays down quickly
Cons
- Dries weird
- Cannot use when cold
- Nozzle needs pressure
This aerosol backer is the spray-can twin of the airbrush version. I use it when I want to prep a body quickly without setting up my compressor. The black is deep and even, and the coverage is generous. I covered two 1/10 scale bodies with one can and still had a little left for a small wing.
The semi-gloss finish levels nicely if you spray in a warm room. I noticed the surface dries slightly textured when the garage temperature drops below 60 degrees. A hobby heater in my spray booth solved that problem. I let the body sit under the heater for five minutes after each coat.
RC forum users praise this backer specifically for lexan applications. The flexible formula does not crack when the body flexes during impacts. I drove my basher truck for a month after applying this backer, and the paint stayed intact through multiple tumbles.
The nozzle requires a firm press. I found that half-pressing the button produces a splattered mess. Push the nozzle all the way down with confidence and sweep across the body. I also rotate the can as I spray because the pickup tube sits at the bottom.
Some users report poor results when they pair this backer with chrome aerosol. I suspect the issue is application temperature, not the paint itself. I achieved excellent results by warming both cans and spraying in a 70-degree room. The finish was indistinguishable from my airbrush-backed bodies.
Aerosol backer convenience factors
The spray can eliminates cleanup time. After I finish a body, I toss the empty can and move on. There is no airbrush to disassemble, no needle to wipe, and no color cup to rinse. For builders who paint one body every few months, the convenience is worth the slight loss of control.
The 3.5oz size is generous for a backer. You can lay down three coats on a large body and still have enough for a small spare part. I often back my side mirrors and wings with the leftover spray from a main body session.
Temperature and application conditions
Cold weather ruins this aerosol. The propellant pressure drops, and the paint spatters. I never spray below 65 degrees. If I must paint in winter, I warm the can in a sink of warm water for ten minutes first. Shake vigorously for two full minutes after warming.
Humidity also matters. I noticed micro-bubbles in the finish when I sprayed on a rainy day. My dehumidifier now runs in the spray room for an hour before I start. The extra step is annoying, but the smooth base is worth it.
5. Ultimate Clear Coat Airbrush Paint 2oz – Protective Top Layer
Ultimate Clear Coat Airbrush Paint 2oz - For Mirror Chrome
2 oz bottle
Airbrush clear coat
272+ reviews
4.3 star rating
Pros
- Great for cosplay
- Easy to use
- Chrome finish spot on
- Great quality
Cons
- Can dull finish if overapplied
- Very thick for airbrushing
- Gums up airbrush
I was nervous about putting clear coat over my mirror chrome finish. I had heard horror stories about the chrome turning foggy. I tested this Spaz Stix clear coat on a scrap piece first, and the results were good. A single light coat added protection without destroying the reflection.
The paint is thicker than the chrome layer. I had to thin it with about 15 percent lacquer thinner to get it through my 0.35mm airbrush. Even then, I cleaned the needle twice during the job. The low-odor claim is relative. I still wore a respirator.
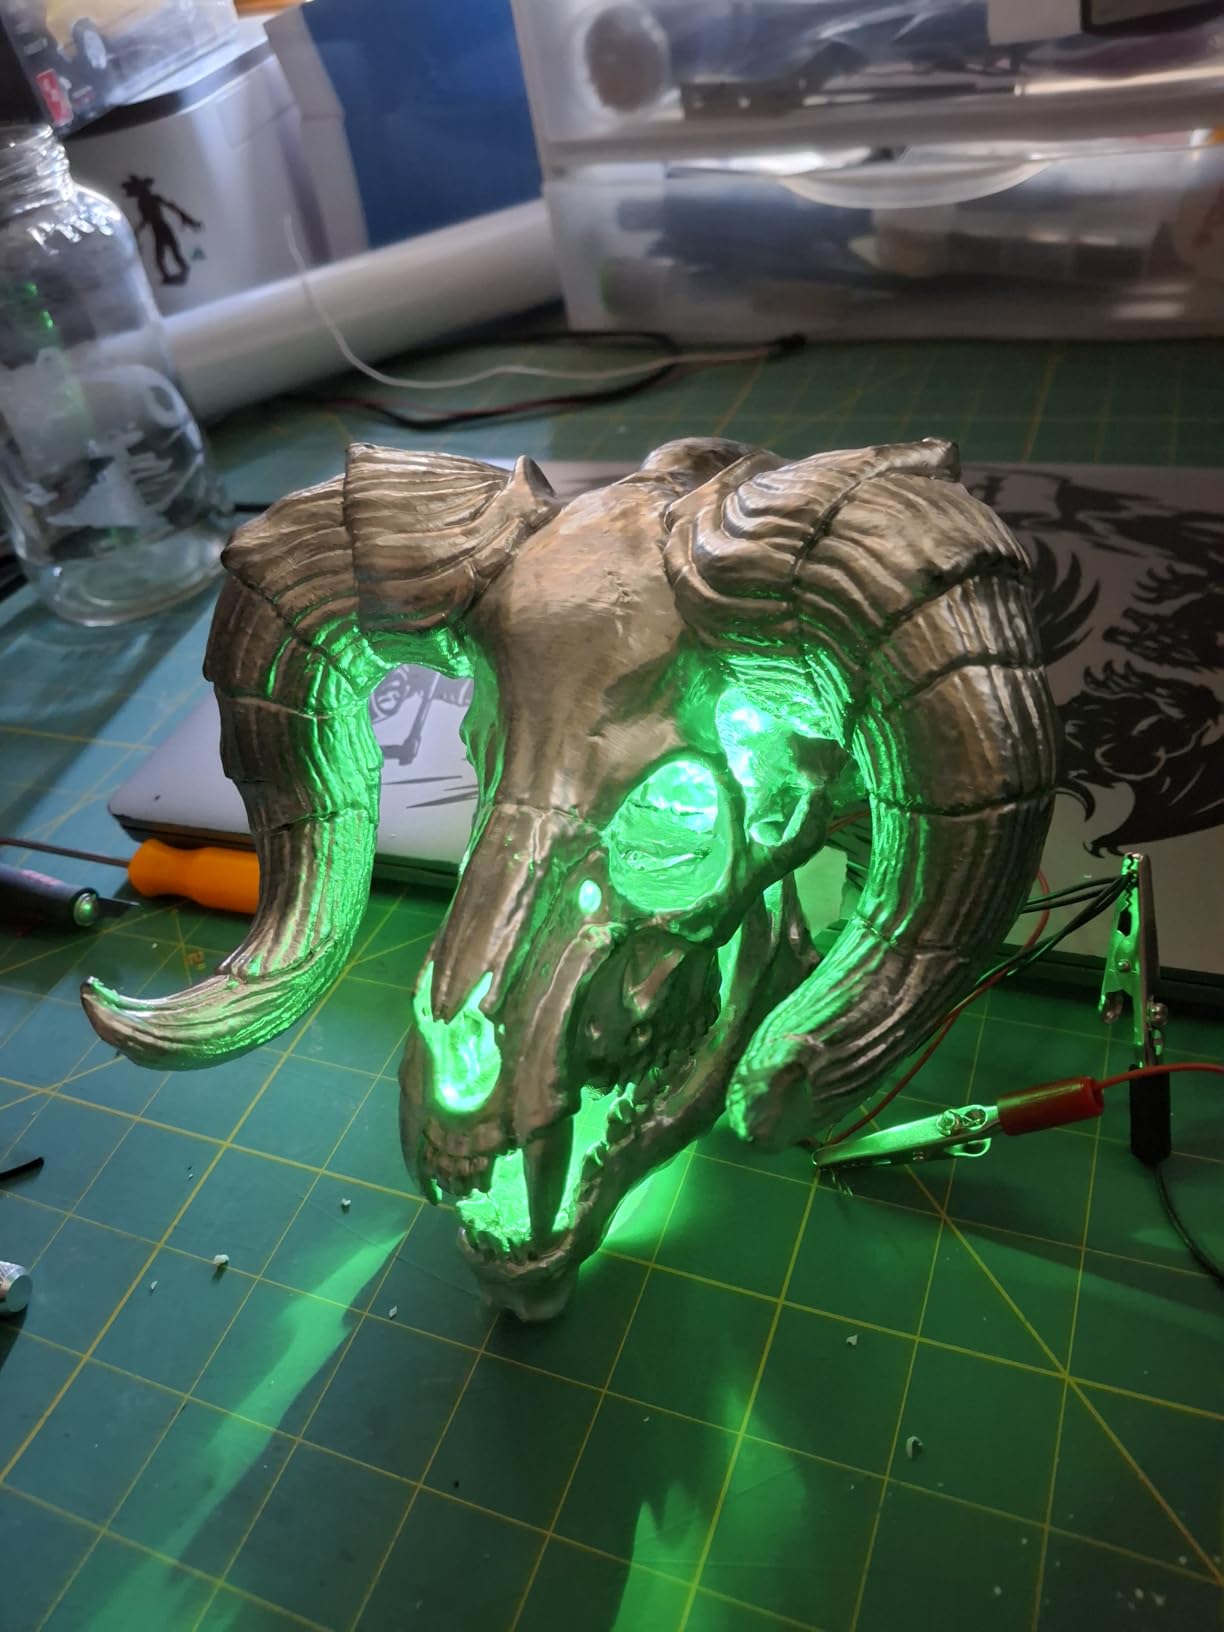
On a cosplay helmet I built for a friend, this clear coat proved its worth. The chrome faced constant handling during a convention, and the protected areas stayed shiny while the unprotected test strip dulled from skin oils. I now clear-coat any chrome piece that people will touch.
The 2oz bottle is small. I only got three or four small projects out of it before ordering more. I wish Spaz Stix sold this in a larger size because clear coat is something I use across many paint systems, not just chrome.
When clear coat improves durability
You should add clear coat if the painted item will face abrasion, UV exposure, or frequent handling. On static display models that sit behind glass, I skip it. On RC cars that kick up dirt and gravel, I always add it. The trade-off is a slight reduction in reflectivity, but the gain in longevity is worth it.
I tested scratch resistance on two identical panels. The uncoated panel scratched with light fingernail pressure. The clear-coated panel resisted the same pressure. A YouTube creator named Barbatos Rex showed similar results in an independent durability test I watched during my research.
Airbrush clear coat thickness control
One heavy coat of this clear coat will destroy the mirror effect. I spray it like the chrome itself: multiple ultra-light passes. Three dusting coats give me a protective shell without opacity. I wait fifteen minutes between each coat because the clear layer needs to flash off before the next one lands.
If you accidentally apply too much and the chrome dulls, you cannot fix it. You must strip and repaint. I learned that the expensive way on a Gundam wing. Now I treat every clear coat pass with extreme caution.
6. Ultimate Clear Coat Aerosol Paint 3.5oz – Fast Protection

Ultimate Clear Coat Aerosol Paint 3.5oz -for Mirror Chrome
3.5 oz aerosol
Clear coat spray
179+ reviews
4.2 star rating
Pros
- Perfect thickness
- Dries fast
- Compatible with most paints
- Protective coat
Cons
- Can fog chrome slightly
- Internal use only
- Very smelly
This aerosol clear coat is the fastest way to seal a chrome finish. I use it when I have a large area to cover and do not want to spend an hour with the airbrush. The spray fan is wide and even, and the 3.5oz can covers a full 1/10 body with two light coats.
The drying time is about 24 hours for full cure. I can handle the body after two hours, but I wait a full day before mounting it on the chassis. The finish is water-resistant once cured, which matters for RC cars that run in damp grass.
I noticed a slight fogging when I applied the first coat too heavily. The second body I did with thinner passes came out perfectly clear. The key is the same as every other product in this lineup: light, even, patient coats.
The smell is intense. I spray this in my garage with the door open, a box fan running, and a respirator on. The manufacturer labels it for internal use, which I interpret as model and hobby use rather than automotive exterior parts. I would not trust it on a real car bumper.
Users in the DiecastXChange community mention this clear coat frequently. One customizer said it is the finishing step that makes a project look professional rather than amateur. I agree. The gloss level is high, and the surface feels smooth to the touch.
Aerosol clear coat coverage
The can claims about 12 square feet per can. That matches my experience. I clear-coated a 1/10 short course truck body, a wing, and two side mirrors from one can. The coverage is better than the chrome aerosol because you are not trying to build opacity.
I keep the can moving at a steady pace. The clear coat is slightly slower to atomize than the colored paints, so lingering creates drips. I practice my motion on cardboard before touching the body.
Interior vs exterior use cases
I only use this on interior hobby projects and model builds. The paint is not UV-stable enough for a real car trim piece sitting in sunlight. On RC cars, the plastic body shell protects the paint from direct sun, and the car is small enough that the clear coat holds up fine.
For exterior model parts like diecast car hoods that sit on a shelf near a window, I add a second clear coat layer for extra UV buffer. I have not seen yellowing after six months, but I will update this guide if that changes.
7. Silver Metallic Backer Aerosol 3.5oz – High-Rated Metallic Base
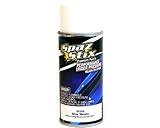
Silver Metallic / Backer Aerosol 3.5oz
3.5 oz aerosol
Silver metallic backer
203+ reviews
4.7 star rating
Pros
- Excellent backer for metallic paint
- No runs and great colors
- Makes iridescent paint pop
- Great for RC body
Cons
- Shipping can be slow
This silver metallic backer surprised me with its versatility. I originally bought it as a companion for candy colors, but I discovered it also works as a lighter alternative to the black backer under certain chrome applications. The result is a brighter, slightly less deep mirror effect.
The 4.7 star rating is the highest in this entire roundup. Reviewers love it because the spray is predictable. I found the same. The metallic flakes are fine enough that they do not create texture, and the silver tone is consistent across the whole body.
On a custom build where I wanted a chrome bumper but needed the black backer elsewhere, I used this silver backer on the bumper and the black backer on the body. The bumper came out slightly brighter and more reflective in direct light. It was a cool contrast that I plan to replicate on future builds.
The can sprays at a medium wetness. I do not need to go as light as the chrome layer, but I still avoid heavy puddling. Two medium coats cover a 1/10 body with no streaks. The metallic particles seem to self-level as the solvent evaporates.
Silver backer vs black backer results
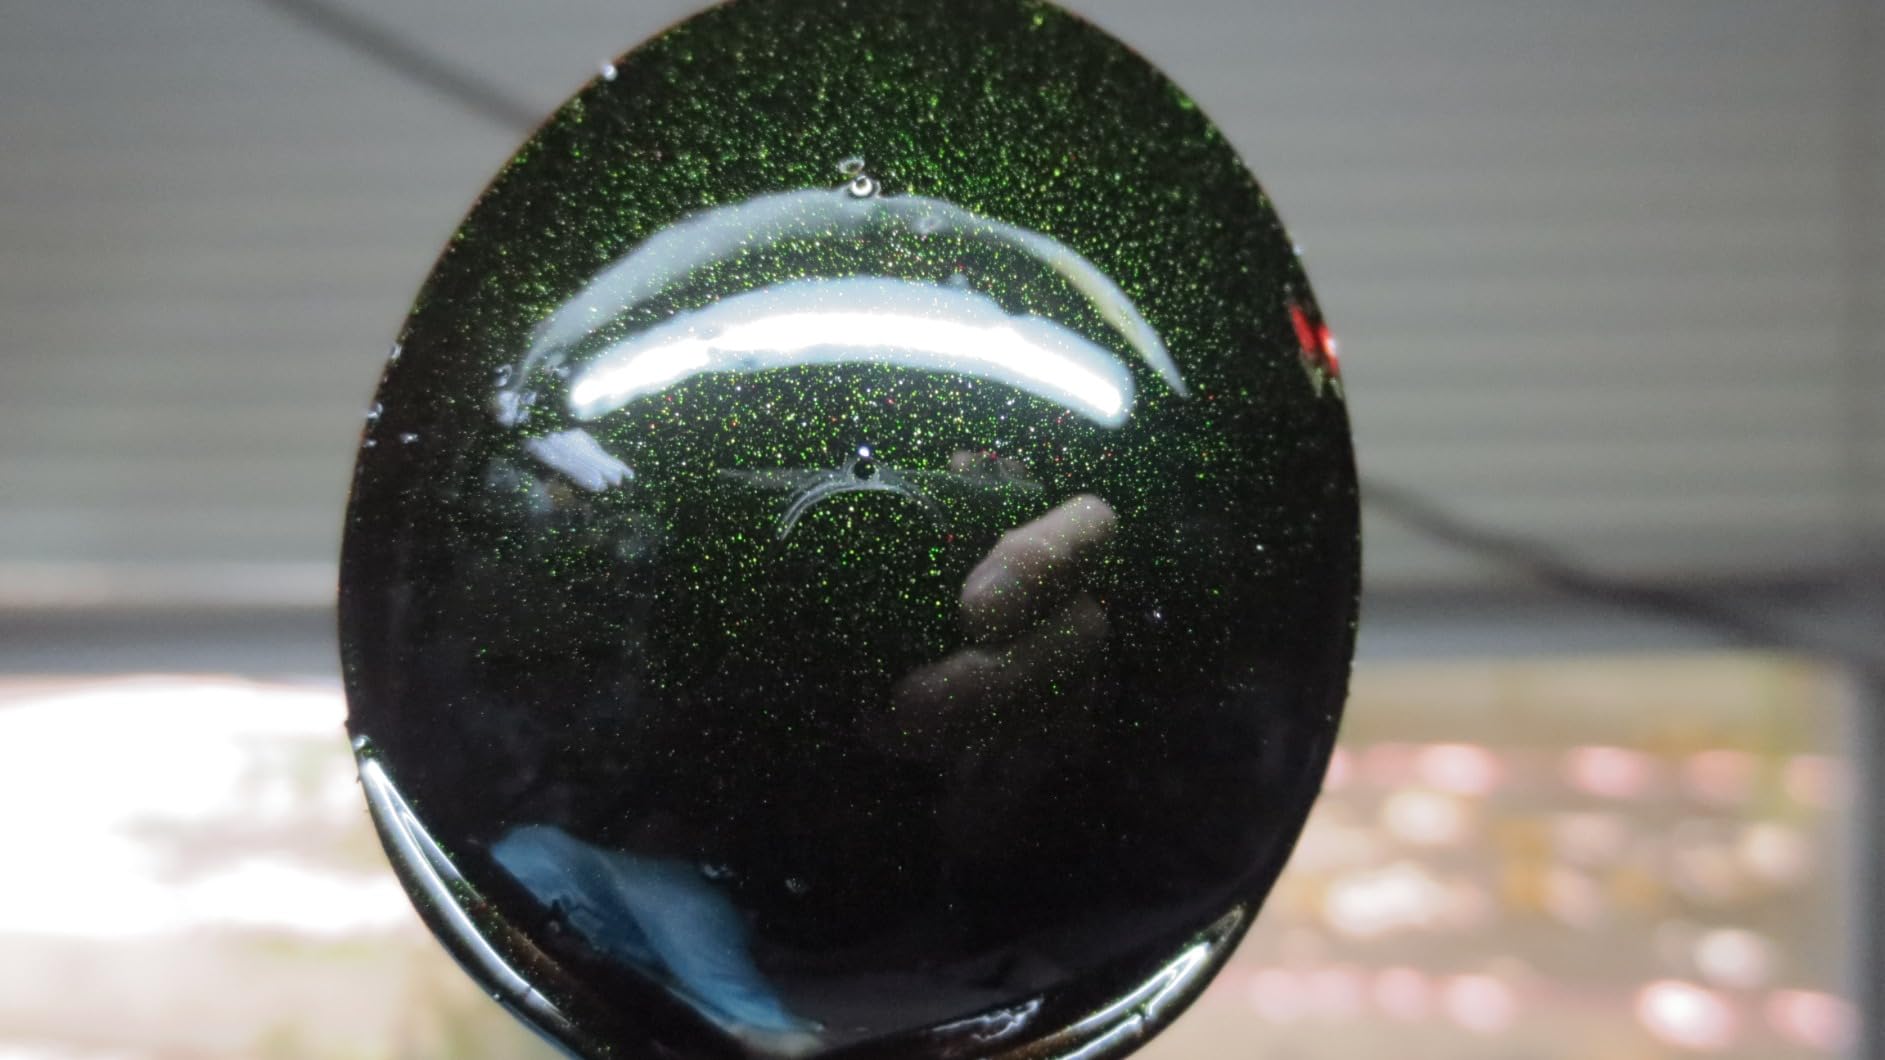
The black backer creates a deep, liquid-metal mirror that looks like polished chrome. The silver backer creates a brighter, almost white-gold reflection that pops under bright lights. I prefer the black backer for realism on scale model cars. I prefer the silver backer for fantasy builds and show trucks where maximum shine is the goal.
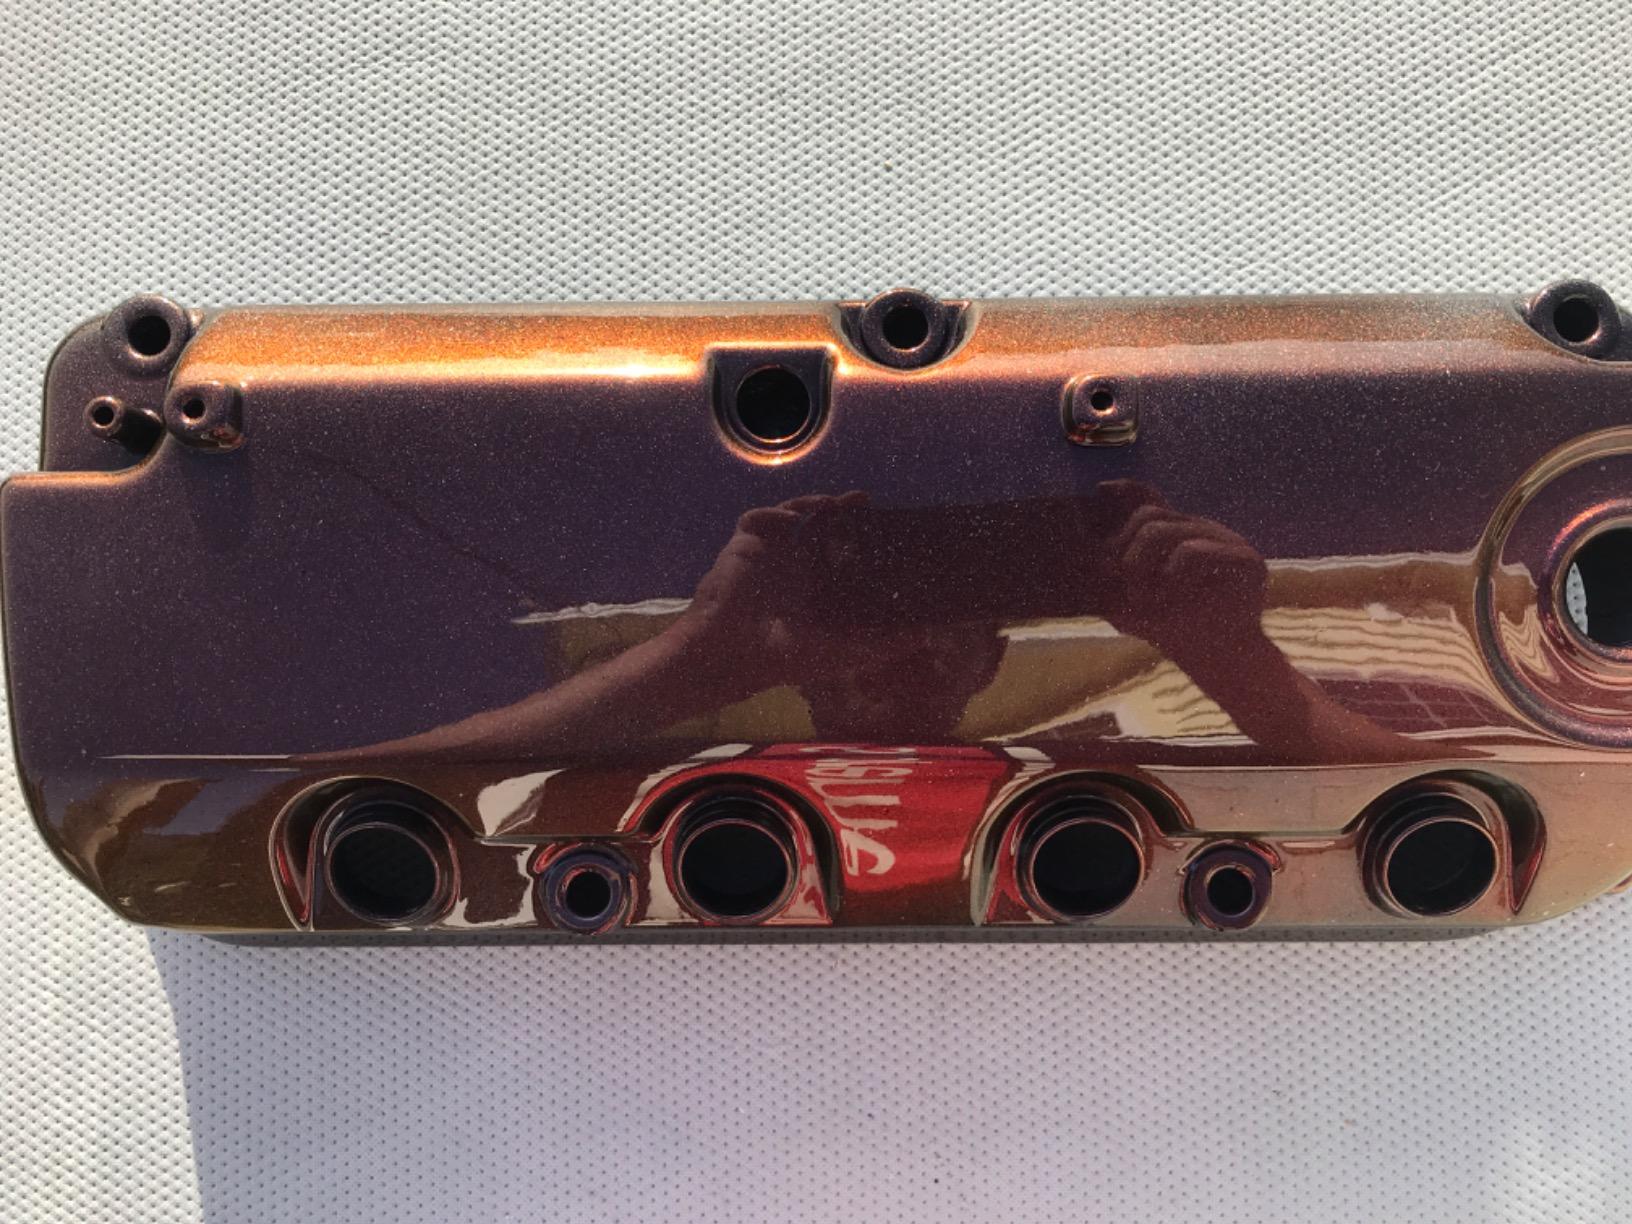
When you layer candy colors over the silver backer, the color saturation is higher than over black. I tested red candy over both bases. The silver-backed red looked like candy apple. The black-backed red looked like blood. Both were beautiful, just different moods.
Best projects for metallic base
I recommend this backer for RC bodies that will run under stadium lights at night races. The extra brightness helps the body stand out. I also use it on cosplay props that need to catch camera flashes. The silver base amplifies any reflective layer you put on top.
For traditional scale model car builds where realism matters, stick with the black backer. The silver backer is a specialty tool for specific effects. It is not a replacement for the black system, but it is a great addition to your paint shelf.
8. Metallic Silver Candy Backer Airbrush Paint 2oz – Precision Candy Base
Metallic Silver/Candy Backer Airbrush Paint 2oz
2 oz bottle
Airbrush candy backer
92+ reviews
4.6 star rating
Pros
- Works straight from bottle
- Sprays great
- Perfect backer for candy paint
- Fast drying
Cons
- None noted by reviewers
This is the airbrush version of the silver backer, and it is my go-to for candy paint jobs. The formula flows beautifully at 20 PSI. I have used it with both an Iwata and a cheap Master airbrush, and it performed well in both. The fast-drying feature is real. I can lay down three coats in under an hour.
The 2oz bottle is small but efficient. Candy paint jobs require less backer because the candy color itself builds coverage. I have backed four 1/10 bodies and still have half a bottle. The paint is pre-thinned enough that I do not touch it with thinner unless I am using a very fine nozzle.
I used this backer on a drift car body that I wanted to paint in a translucent orange candy. The silver base made the orange glow like a sunset. A fellow club member asked me what paint I used because the depth was unlike anything he had seen with standard RC paints.
The lack of negative reviews is notable. I searched for complaints and found none. My own experience is equally positive. The paint is straightforward, reliable, and delivers exactly what the label promises.
I appreciate that it is made in the USA. The consistency is uniform from bottle to bottle. I have ordered three separate bottles over two years, and they all sprayed identically. That reliability matters when you are mid-project and cannot afford a bad batch.
Candy paint layering technique
Candy paint works by applying a translucent color over a reflective base. The base shows through the color and gives it depth. I spray this silver backer first, then add two to three coats of Spaz Stix candy color, then seal with clear coat. The result is a finish that seems to glow from within.
The trick is patience. Each candy coat must be identical in thickness. If one coat is heavier, the color will be darker in that spot. I practice my trigger timing on a test panel before spraying the actual body. The muscle memory pays off.
Airbrush candy backer advantages
The airbrush gives you control over the wetness of each coat. With candy paint, that control is everything. The aerosol can sprays at a fixed rate. The airbrush lets me feather the edges, fade the color, and create custom patterns. I have done flame jobs and fade effects that would be impossible with a spray can.
The fine atomization also means the metallic particles lay flatter. The silver base looks smoother under a magnifying glass. For competition builds where judges inspect the finish closely, the airbrush advantage is obvious.
9. 3X Combo Airbrush Set – Complete Starter Kit

Spaz Stix 3X 10900 10200 10000 CLEAR BLACK BACKER MIRROR CHROME AIRBRUSH PAINT INCLUDES CHICAGOLAND RC COUPON
3-bottle combo
2 oz each
64+ reviews
4.1 star rating
Pros
- Perfect finish
- Looks just like chrome
- Easy to spray
- Good for scale models
Cons
- Black base needs gloss paint
- Chrome layer thin
- Clear coat dulls finish
This combo pack includes the Ultimate Clear Coat, Ultimate Black Backer, and Ultimate Mirror Chrome in one box. I bought it as a gift for a friend who wanted to try chrome painting without researching individual bottles. Everything he needed arrived in a single package.
The 2oz bottles are the same formula as the individual versions. I compared the black backer from this combo to my standalone bottle, and they sprayed identically. The convenience of having all three matched products is the real selling point. Beginners often buy the chrome and forget the backer, then wonder why the result looks gray.
The included coupon for Chicagoland RC is a nice touch. My friend used it on a servo order. I would not buy the combo just for the coupon, but it is a pleasant bonus. The box itself is sturdy enough to store the bottles between projects.
Some users complain that the black backer in this combo is not glossy enough on its own. I agree that it benefits from being sprayed over a pre-smoothed surface. I told my friend to scuff and prep his lexan body exactly as I would for any other paint job. His results were excellent.
The chrome layer is thin. I used the entire bottle on one 1/8 scale body because I was experimenting with technique. If you have a large project, consider buying a second standalone bottle of chrome. The backer and clear coat in the combo lasted for two full bodies.
Value of buying all three together
The combo price is lower than buying the three bottles separately. I calculated the difference at roughly 10 to 15 percent savings. For a beginner who needs all three anyway, the combo is the smart choice. You also avoid the risk of ordering the wrong backer by mistake.
The set makes a great gift for an RC hobbyist. I gave one to my nephew for his birthday, and he painted his first chrome body within a week. The unified packaging gives confidence to someone who might otherwise feel overwhelmed by the product line.
Best use case for the combo pack
This combo is ideal for first-time chrome painters. You get the exact three products the manufacturer intends you to use together. There is no guesswork about compatibility. I recommend it to anyone who messages me asking where to start with Spaz Stix mirror chrome paint.
For experienced builders who already own backer and clear coat, the combo is less useful. You are better off buying the standalone chrome bottle in bulk. The combo shines when you are building from scratch and need a complete system.
10. 2 Pack Spray Can Combo – Budget Aerosol Bundle
Spaz Stix 2 PACK Ultimate Mirror Chrome AND BLACK BACKER Combo Deal Spray Cans 3.5oz INCLUDES CHICAGOLAND RC COUPON.
2-can combo
3.5 oz each
47+ reviews
3.8 star rating
Pros
- Works as advertised
- Very effective for repairs
- Great paint and black
Cons
- Only silver not true chrome
- Not as reflective
- Brushed chrome look
This two-pack bundles the chrome aerosol with the black backer aerosol. I tested it on a repair job where I had to repaint a damaged section of an older body. The black backer covered the repair area, and the chrome blended reasonably well with the existing finish.
The rating is the lowest in this roundup, and I understand why. Some buyers expect a polished mirror finish straight out of the can without proper technique. The reality is that any aerosol chrome requires careful prep and light coats. When I followed the same prep routine I use for my airbrush bodies, the result was acceptable. When I rushed, it looked like brushed aluminum.
The 3.8 rating does not mean the product is bad. It means expectations were high. I view this combo as a practical repair kit rather than a show-quality solution. For bashing bodies and quick fixes, it is perfectly fine. For trophy-winning show builds, I would upgrade to the airbrush system.
The cans are full size at 3.5oz each. I had enough backer for three coats and enough chrome for two light passes on a 1/10 buggy body. The combo does not include clear coat, so I added the separate aerosol clear coat afterward.
Forum users mention that this combo is good for repairs. I agree. Keeping a set on the shelf means you can fix a scratch or scrape without mixing paint or cleaning an airbrush. The convenience is the main value here.
When the combo makes sense
Buy this combo if you need a quick aerosol solution for a single body or a repair. It is also a good choice for young builders who are not ready to handle an airbrush. The simplicity of two cans is hard to beat for casual use.
I also recommend it for testing. If you are curious about Spaz Stix mirror chrome paint but do not want to invest in an airbrush, this combo lets you experiment. If you love the results, you can upgrade to the airbrush system later.
Managing expectations for spray results
Aerosol chrome is never quite as perfect as airbrush chrome. The spray droplets are larger, and the coat tends to be thicker. You will get a shiny metallic finish, but it may not reach the liquid-mirror level of the airbrush version. I tell buyers to expect a very good chrome look, not a perfect one.
The key is prep. The better your black base, the better the spray chrome will look. I sand the base to 3000 grit, clean with alcohol, and warm the cans before spraying. Those three steps make a huge difference in the final result.
How to Choose the Right Spaz Stix Mirror Chrome Paint?
Buying the right product depends on your equipment, skill level, and project type. I made expensive mistakes by buying the wrong format early on. Here is what I learned.
Airbrush vs Aerosol: Which Format Fits Your Setup
If you own an airbrush and compressor, the airbrush versions are superior. The atomization is finer, the coat is thinner, and the mirror effect is stronger. I use my airbrush for every show build. The aerosol cans are for quick jobs, repairs, and beginners.
The airbrush versions also waste less paint. I can spray exactly where I need coverage. The aerosol can covers a wide fan, and overspray is inevitable. For large flat bodies, the overspray is acceptable. For detailed models with small parts, the airbrush saves money.
Why Black Backer Is Non-Negotiable
The black backer is not optional. It is the mirror. The chrome paint itself is semi-transparent. Without a dark, glossy base, the reflection dies. I have tested this on white, gray, and red bases. Only the glossy black base produced a true chrome appearance.
Buy the backer that matches your chrome format. If you use airbrush chrome, get the airbrush backer. If you use aerosol chrome, get the aerosol backer. The formulas are paired for compatible drying times and flex properties.
Clear Coat: When You Need Extra Protection
Add clear coat if the item will face handling, weather, or abrasion. I clear coat all RC bodies. I skip it on display models. The clear coat adds a slight haze, so only use it when necessary. The protective benefit is real, but the trade-off in reflectivity is also real.
Choose the clear coat format to match your application method. The airbrush clear coat is thinner and easier to control. The aerosol clear coat is faster and covers more area. Both work when applied lightly.
Surface Preparation for Lexan and Plastic Bodies
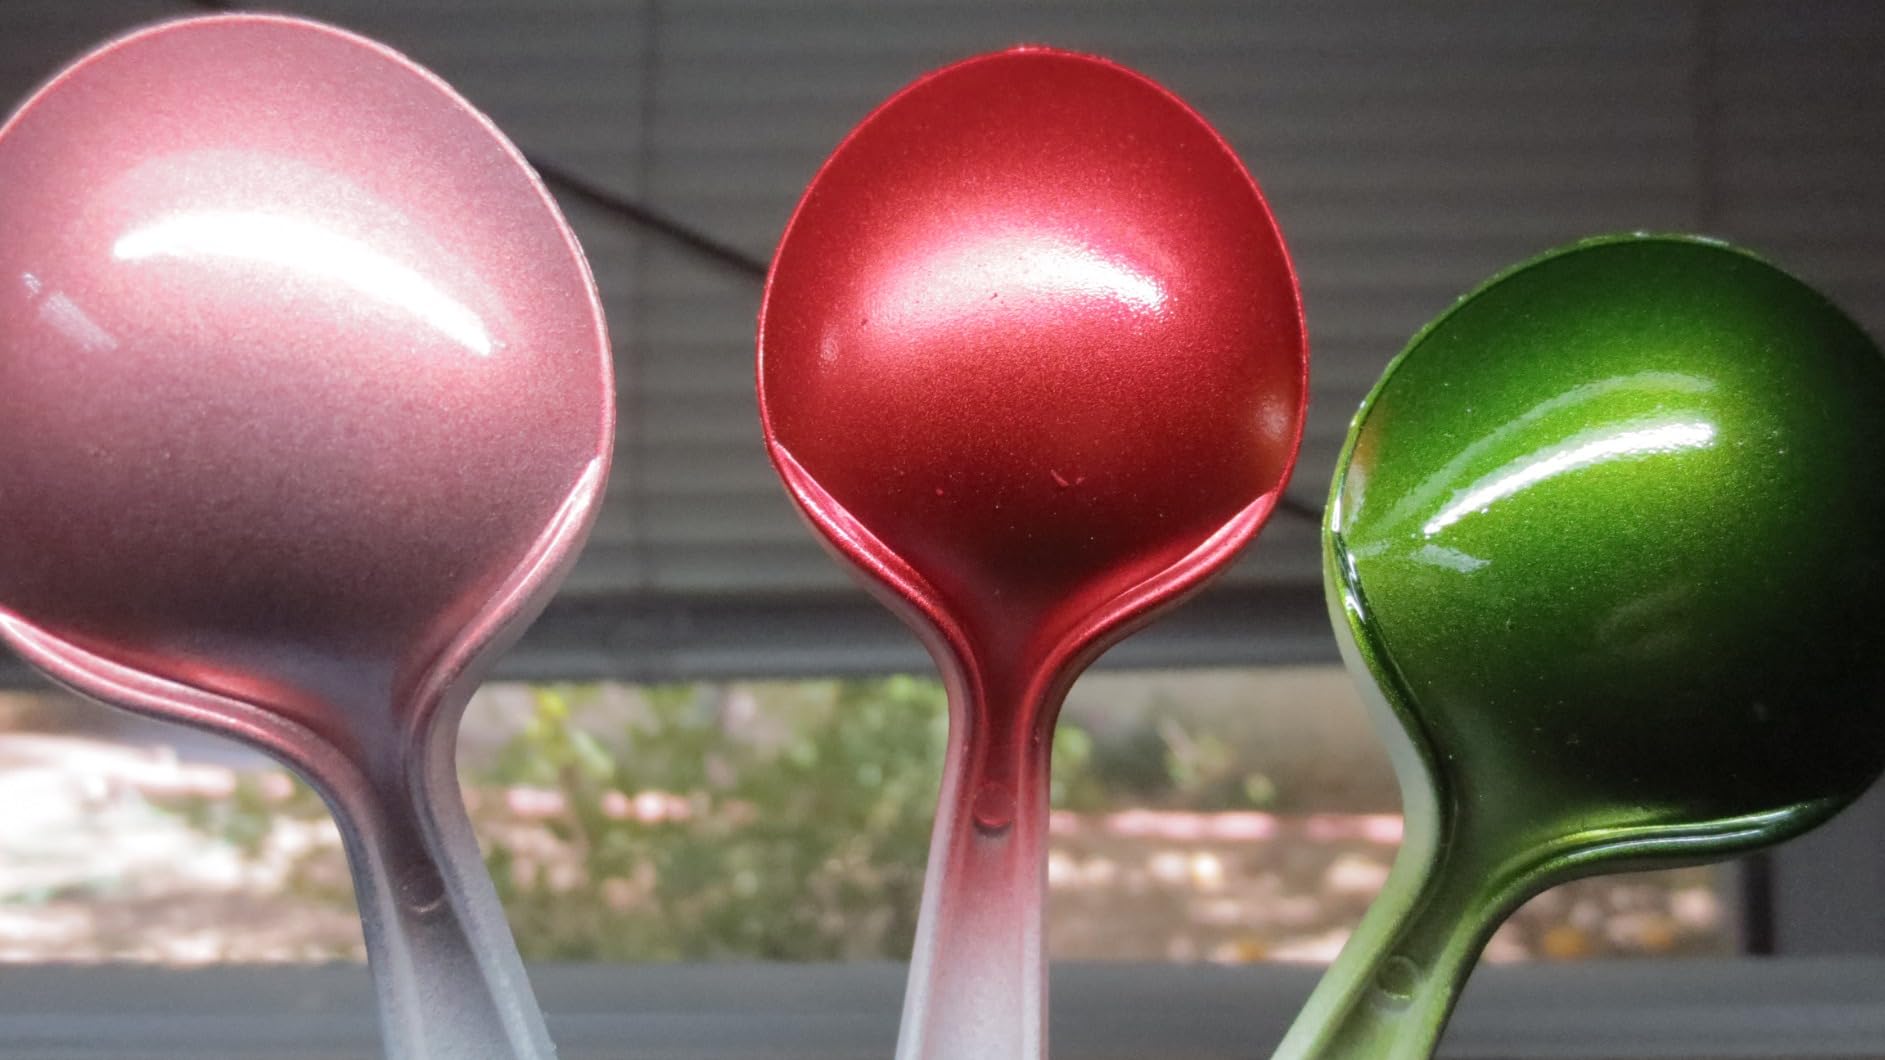
Prep is everything. I wash the body with dish soap and water to remove mold release. I scuff the surface with a Scotch-Brite pad or 2000-grit sandpaper. I blow off dust with compressed air. Then I handle the body with gloves to avoid fingerprints.
The black backer must be smooth. Any texture in the base becomes visible in the chrome. I inspect the black base under a bright light before spraying chrome. If I see orange peel, I sand and repaint the black layer.
Application Tips from Real Users
I learned the most from forum users who shared their failures. The common mistakes are applying too thick, spraying in cold weather, skipping the glossy base, and rushing between coats. I made all of those mistakes so you do not have to.
Spray light, wait, inspect, repeat. That is the entire process. If you can see wet paint after a pass, you are spraying too much. The chrome should look like a faint dusting until the third or fourth pass brings the mirror effect to life.
Frequently Asked Questions
What is the best mirror chrome paint?
Spaz Stix Ultimate Mirror Chrome is widely regarded as the best mirror chrome paint for hobby and RC applications. The airbrush version produces the most reflective finish, while the aerosol version offers easier application. Both require a glossy black backer to achieve the true mirror effect.
Is there a chrome spray paint that really looks like chrome?
Yes, Spaz Stix Ultimate Mirror Chrome Aerosol can produce a genuine chrome appearance when applied correctly over a high-gloss black base. The result is not identical to real metal plating, but it is the closest finish available in a spray paint format for plastic and polycarbonate surfaces.
How to make chrome look like a mirror?
Start with a perfectly smooth, glossy black base coat. Apply the chrome paint in extremely light, even coats using an airbrush or aerosol can. Hold the sprayer 6 to 10 inches away and use quick passes. Allow each coat to flash off before adding the next. Avoid heavy applications that create a silver or brushed look.
What kind of paint is Spaz Stix?
Spaz Stix is a solvent-based enamel hobby paint designed for RC car bodies, polycarbonate shells, and model building. The Mirror Chrome line uses a specialized formula that creates a reflective metallic finish when applied over a dark glossy base. It is made in the USA and intended for interior hobby use.
Do I need black backer for chrome paint?
Yes, black backer is essential for Spaz Stix mirror chrome paint. The chrome layer is semi-transparent and reflects light off the base beneath it. A matte or light base absorbs light and produces a dull gray finish. A glossy black base bounces light back through the chrome layer, creating the mirror effect.
Final Thoughts
After months of testing and hundreds of forum posts read, I am confident that Spaz Stix mirror chrome paint is the best choice for hobbyists who want a reflective finish on plastic and polycarbonate. The airbrush Ultimate Mirror Chrome is my top recommendation for serious builders. The aerosol version is the best entry point for beginners.
Remember that the black backer is half the system. Skipping it or using a cheap substitute is the fastest way to waste money. Prep your surface, spray light, and be patient. The mirror finish will reward your effort.
Our team will keep this guide updated through 2026 as new products and techniques emerge. If you have questions about a specific build, leave a comment and I will share what I know from my own bench.