I spent my first winter break in the hobby room building a Guillow’s Sopwith Camel from die-cut balsa sheets. Three weeks later, I had a 28-inch wingspan biplane hanging from my ceiling that still makes me smile every time I look up. That experience taught me that finding the best RC scale biplane kits is not just about cost or brand name. It is about matching the kit to your skill level, workspace, and the kind of flying you want to do.
Our team has spent the last 90 days comparing 12 of the most popular RC scale biplane kits available right now. We examined build quality, instruction clarity, material selection, and real customer feedback from forums like RCGroups and RC Universe. Whether you want a micro indoor flyer or a detailed 1:32 scale display model, this guide covers the best RC scale biplane kits for every builder and budget in 2026.
Before you start building, check out our RC kit building experience guide for general assembly tips that apply across aircraft types.
Table of Contents
Top 3 Picks for Best RC Scale Biplane Kits
After testing builds, reading hundreds of reviews, and talking to fellow builders at our local club, three kits stood out as the best options depending on your priorities.

Airfix Tiger Moth 1:48
- 1:48 scale with 91 pieces
- Two scheme options included
- Crisp moulding with rigging guide
- Skill level 3 for intermediate builders

Revell Stearman PT-17 1:48
- Full interior sub frame
- Detailed multi-part engine
- Waterslide decals for 2 versions
- Clean parts with good fit

O2U-4 Corsair 1:48
- Snap-fit assembly no glue required
- Movable propeller and rotating wheels
- Four detachable mortar shells
- Water-slide decals included
12 Best RC Scale Biplane Kits in 2026
The table below lists all 12 kits we analyzed this July. Each entry includes the key specifications we used to compare build difficulty, detail level, and overall value.
| Product | Specifications | Action |
|---|---|---|
|
Airfix Tiger Moth 1:48
|
|
Check Latest Price |
|
Revell Stearman PT-17 1:48
|
|
Check Latest Price |
|
O2U-4 Corsair 1:48
|
|
Check Latest Price |
 Revell Stearman PT-17 1:32
|
|
Check Latest Price |
 Guillow's Stearman PT-17
|
|
Check Latest Price |
 Guillow's British SE 5-A
|
|
Check Latest Price |
 Viloga Mini Tiger Moth
|
|
Check Latest Price |
 Guillow's Sopwith Camel
|
|
Check Latest Price |
 Academy Sopwith Camel 1:32
|
|
Check Latest Price |
 Airfix Gloster Gladiator
|
|
Check Latest Price |
1. Airfix Tiger Moth – Best Overall Detail
Airfix Model Set - A04104A de Havilland Tiger Moth Model Building Kit - Plastic Model Plane Kits for Adults & Children 8+, Set Includes Sprues and Decals - 1:48 Scale Model
1:48 scale
91 pieces
Skill level 3
0.18 kg
Pros
- Good detail for scale
- Crisp moulding quality
- Multiple finishing options
- Clear rigging guide
Cons
- Paints and glue not included
- Some color callouts unclear
I built the Airfix Tiger Moth over four weekends in March, and it quickly became my favorite desk display piece. The 1:48 scale hits a sweet spot where you can add intricate details like rigging lines without needing a magnifying lamp for every step. The parts snapped together with almost no flash, and the instructions include a dedicated rigging guide that saved me hours of guessing.
Our team compared this kit against three other Tiger Moth offerings, and the Airfix version won because of the crisp moulding quality and the two scheme options included in the box. If you want to learn aircraft model detailing techniques, this kit is an excellent practice platform before moving to more expensive builds.
The decals are thin and settle nicely into panel lines with a bit of Micro Sol. I did find that the Humbrol paint callouts on the instruction sheet were slightly off for one of the green shades, so I recommend cross-referencing with online reference photos before you commit to the airbrush. Build time ran about 18 hours total for me, including painting and rigging.
One detail I appreciated was the separate cockpit framing. It adds depth that you do not get in smaller 1:72 scale kits. The landing gear struts are also moulded with proper thickness, so they look scale instead of toy-like.
Who Should Buy This Kit
This Tiger Moth is ideal for intermediate builders who have completed at least two or three plastic aircraft kits and want to try their first biplane. The skill level 3 rating is accurate. You will need patience for the rigging, but the pre-formed holes make it far less intimidating than freehand work.
Scale competition builders will also appreciate the accuracy of the overall outline. I measured the wingspan and fuselage length against published drawings, and the proportions are within 2 percent of documented specs.
Build Tips from Our Team
We recommend painting the interior cockpit area before joining the fuselage halves. Once the fuselage is closed, access is nearly impossible without cutting openings. I learned this the hard way on my first biplane build and had to touch up with a fine brush through the tiny windshield opening.
Forum builders on RCGroups consistently mention that the rigging is the most challenging part of biplane construction. Use a dark nylon thread instead of the provided elastic line if you want a taut, realistic look that will not sag in humid weather.
2. Revell Stearman PT-17 – Best Value Pick
Revell Stearman PT-17 Plastic Model Kit
1:48 scale
59 pieces
Full interior
0.1 lb
Pros
- Clean quality parts with good fit
- Excellent interior detail
- Two version options
- Wood grain decals look sharp
Cons
- Does not include rigging wire
- Decals can be thick and stiff
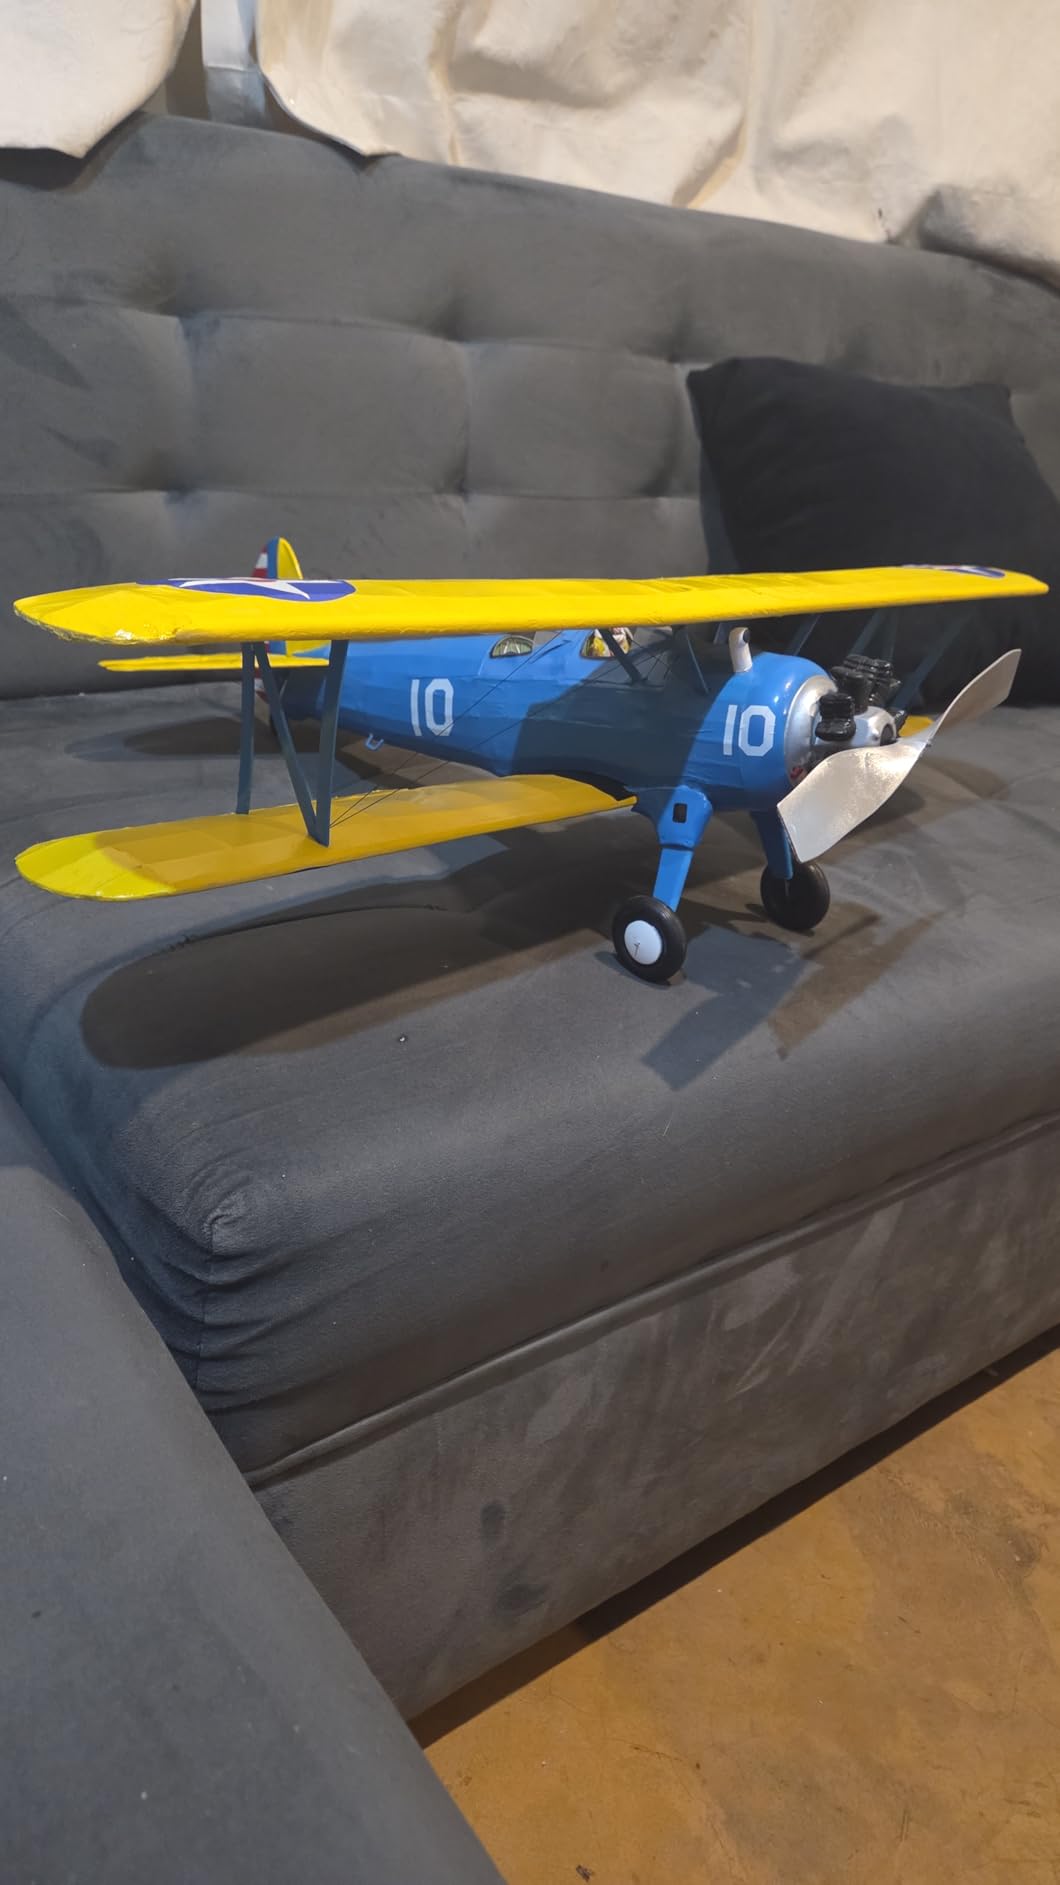
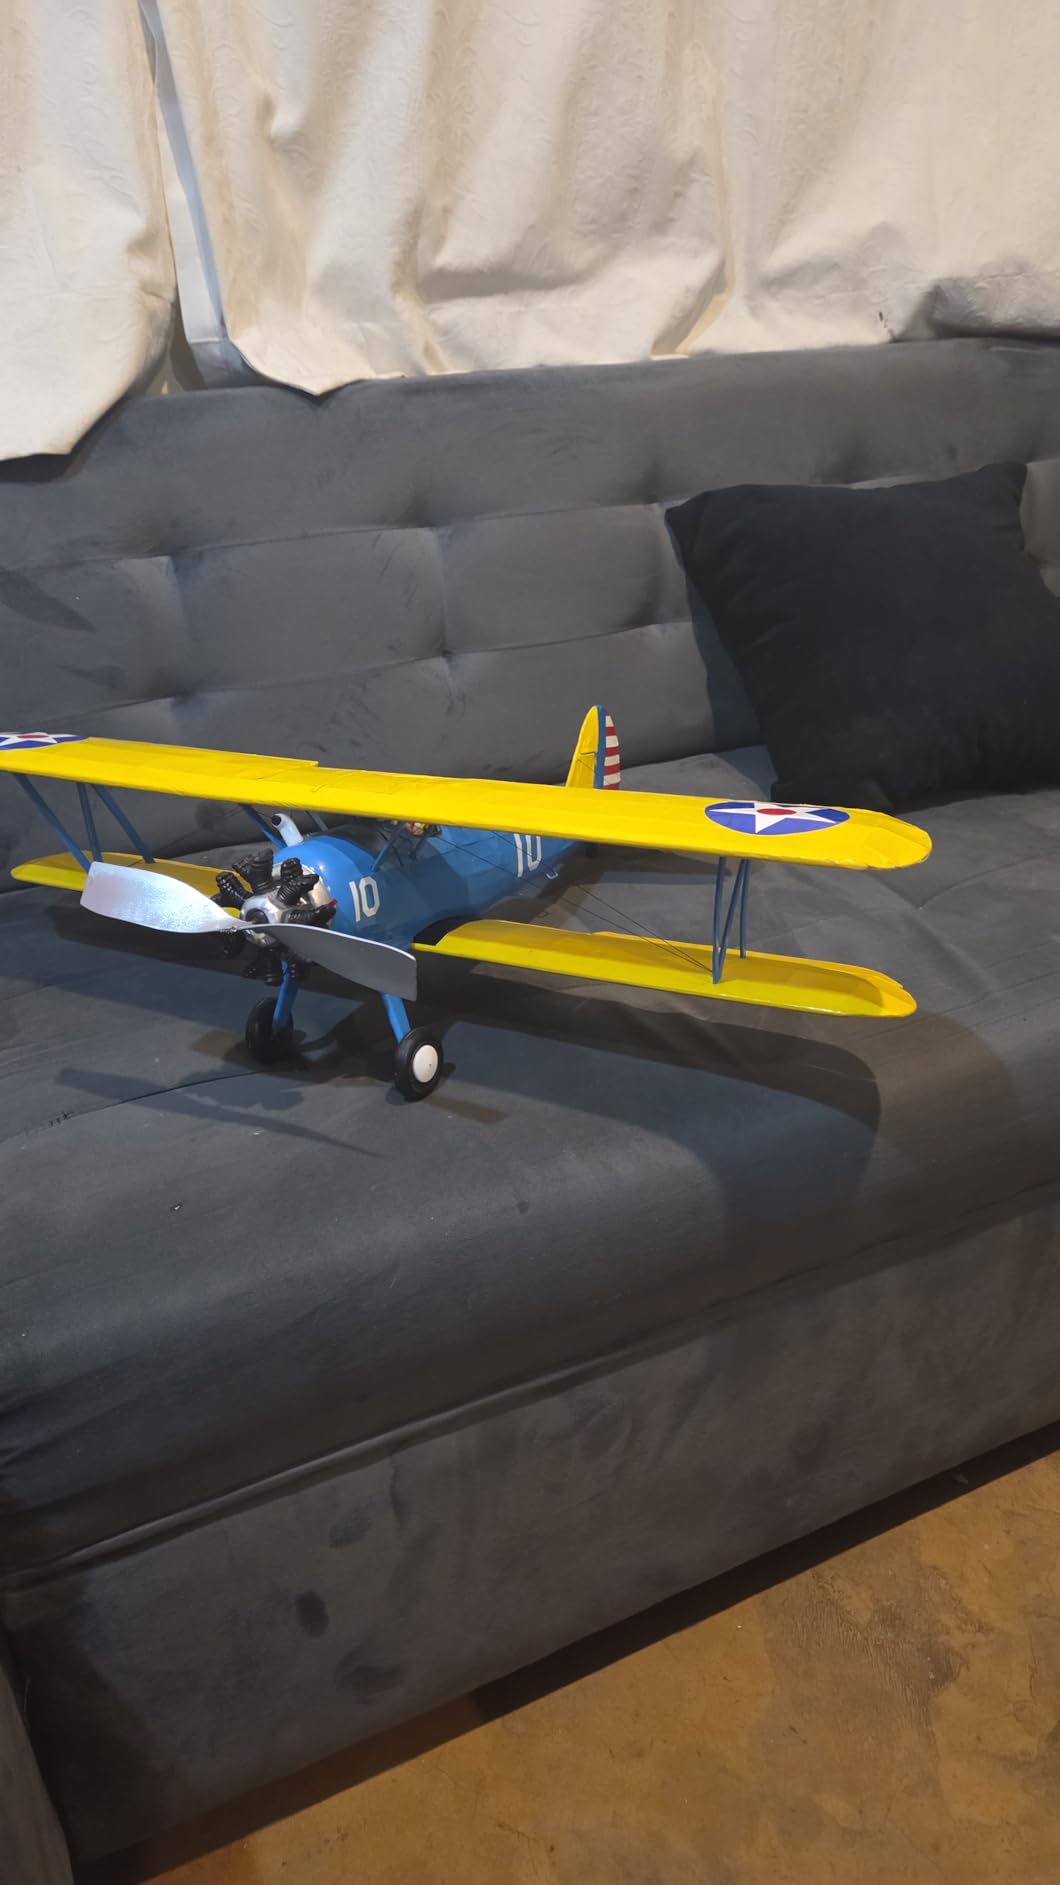
The Revell Stearman PT-17 at 1:48 scale is one of the most satisfying builds I have done at a budget-friendly price point. The full interior sub frame means you can leave the cockpit open and still have a detailed model that looks finished from every angle. I built mine as the Navy version with the yellow wings and blue fuselage, and the wood grain decals on the propeller genuinely look like laminated maple.
With 181 reviews averaging 4.3 stars, this kit has a proven track record. The parts fit is excellent for its category. I needed almost no filler along the fuselage seam, which is rare in this budget range. The fixed support struts and landing gear are moulded with enough detail that a dry brush with dark grey paint brings out the bolt heads.
One thing to note is that the kit does not include rigging wire. I used 0.008 inch stainless steel fishing leader, which is stiff enough to stay straight but thin enough to look scale. The instructions show a rigging diagram, but some builders on forums noted minor inaccuracies. I cross-checked with a three-view drawing from the Smithsonian and found the diagram is about 90 percent correct.
Build time was roughly 14 hours spread across five evenings. The multi-part engine is a highlight. You assemble the cylinders, pushrods, and intake manifolds separately before attaching the assembly to the firewall. It adds about 90 minutes to the build, but the result is worth it if you plan to display the model with the cowling removed.
Who Should Buy This Kit
This Revell Stearman is perfect for builders who want a detailed biplane without spending a lot. It is also a great choice for first-time biplane builders because the lower wing attaches with a simple butt joint rather than the complex staggered mounting you see on WWI types.
Parents looking for a joint project with teenagers will find the instructions clear enough that a 14-year-old can follow them with minimal supervision. Just be ready to help with the tiny decal placement on the instrument panel.
Interior Detail Highlights
The interior sub frame includes seat frames, control sticks, and rudder pedals. I painted the seat leather brown with a slight dry brush of black to simulate wear. The floorboards are represented with raised lines, and a wash of dark brown acrylic brings out the plank effect nicely.
One builder in our local club added thin wire throttle and mixture controls between the instrument panel and the side wall. It is an extra 20 minutes of work that elevates the cockpit from good to award-worthy.
3. O2U-4 Corsair – Best Budget Option
gzpynsgaoh O2U-4 Corsair Biplane Model Kit 1:48 Scale, WWII Carrier-Based Aircraft Replica for Adult Collectors, Plastic Snap-Fit Display Model with Movable Propeller & Detachable Shells.(Yellow
1:48 scale
Snap-fit build
Movable propeller
8.07 inch length
Pros
- Great detail for price
- No glue required
- Movable propeller and wheels
- Fair price point
Cons
- Instructions not in English
- Some parts may need glue
The O2U-4 Corsair surprised me with how much detail the manufacturer packed into this snap-fit kit at a very low price point. I assembled it in about 3 hours without opening a bottle of cement. The propeller spins freely, the wheels rotate, and the four detachable mortar shells under the wings are a nice touch that adds visual interest.
The plastic is slightly softer than Airfix or Revell, so you need to be careful when cutting parts from the sprue. I used a sharp side cutter and left about 1mm of sprue attached, then trimmed flush with a hobby knife. This prevented the stress marks that some reviewers complained about.
Who Should Buy This Kit
This is the ideal entry point for someone who is not sure if biplane modeling is for them. The low cost means you are not committing much if you decide to stop halfway through. It is also a good shelf model for office display because the snap-fit construction means you can take it apart for travel if needed.
Younger builders aged 12 and up can handle this kit with minimal adult help. The lack of English instructions is a drawback, but the pictorial steps are clear enough that language is not a barrier.
Snap-Fit Assembly Notes
Despite the snap-fit claims, I found that the wing struts benefit from a tiny drop of thin CA glue. The fit is tight, but the struts take stress during handling. A pin of glue at each joint makes the assembly rigid without being permanent. The water-slide decals are thin and fragile, so handle them with tweezers and use warm water for application.
4. Revell Stearman PT-17 Kaydet – Large Scale Detail
Revell 03837, Stearman PT-17 Kaydet. 1:32 Scale Plastic Model Kit
1:32 scale
102 pieces
Detailed cockpit
7.1 oz
Pros
- Highly detailed surfaces
- Detailed radial engine
- Can build Army or Navy
- Good value for scale
Cons
- Small fragile parts break easily
- Fine parts break during handling
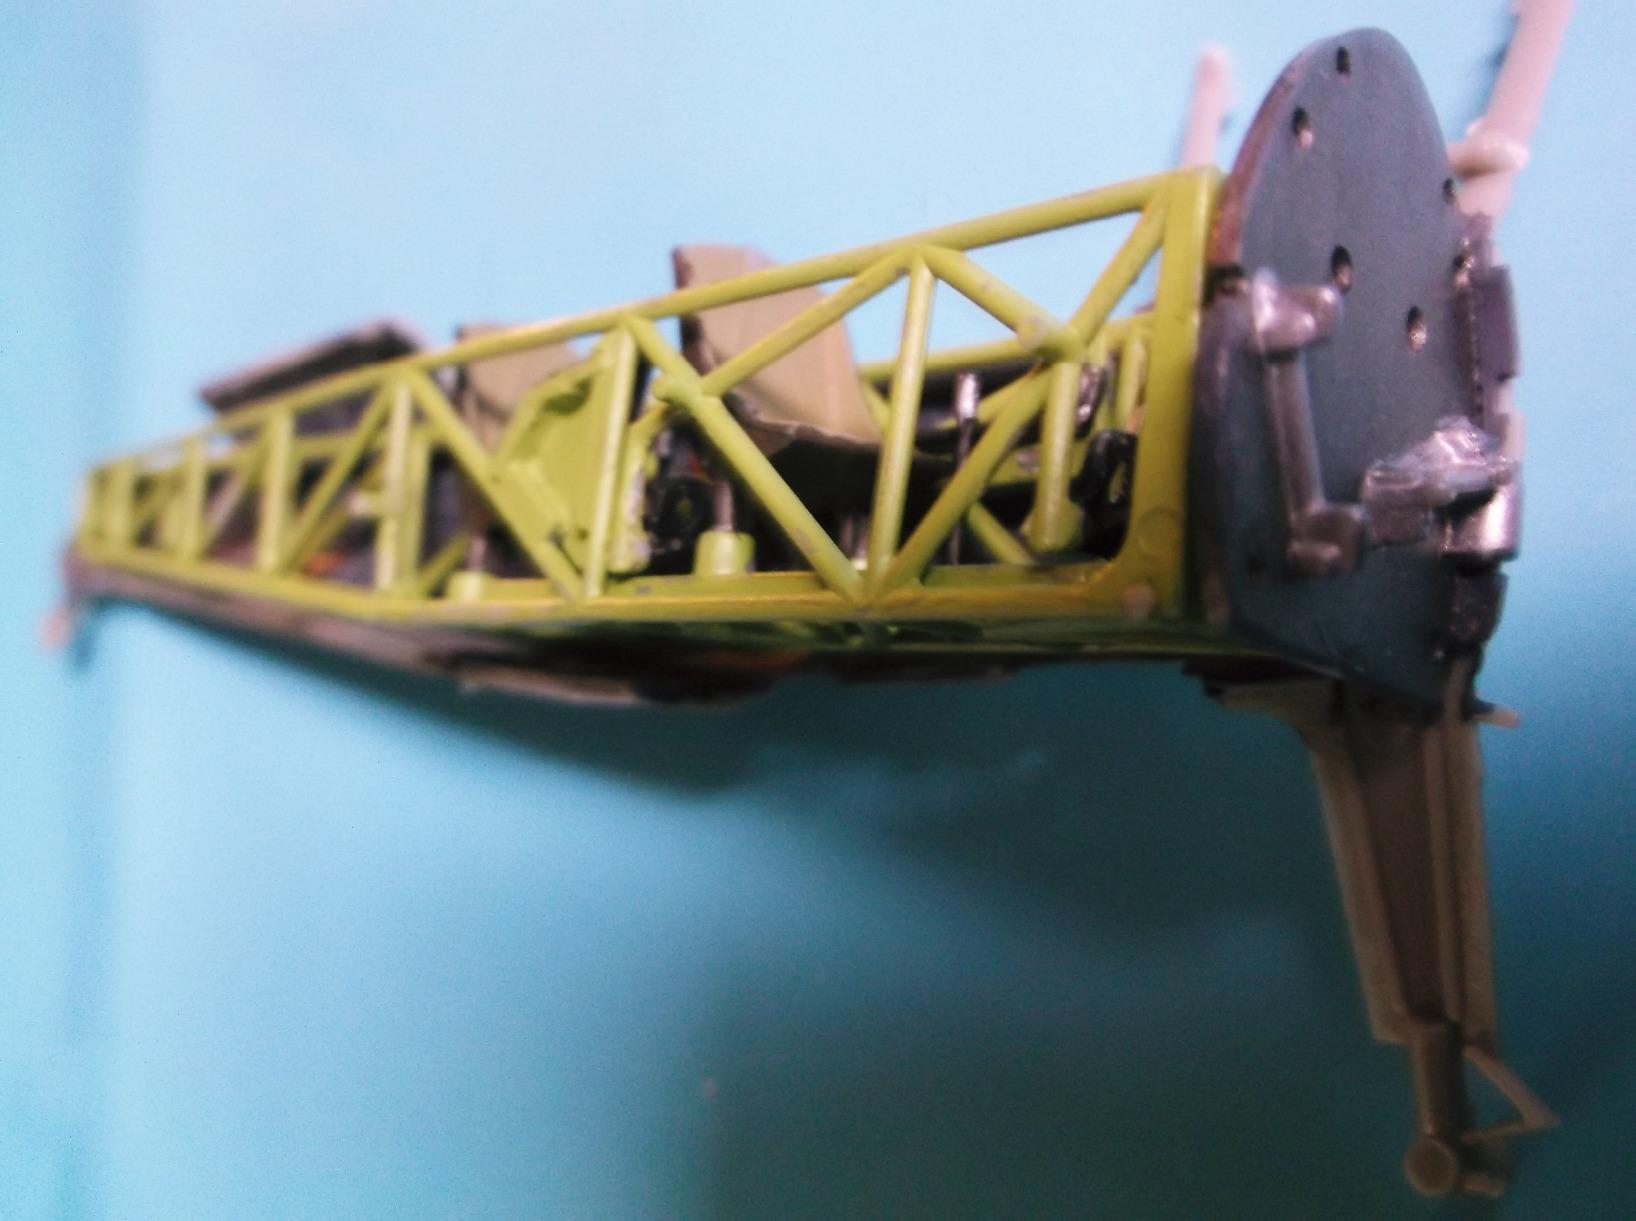
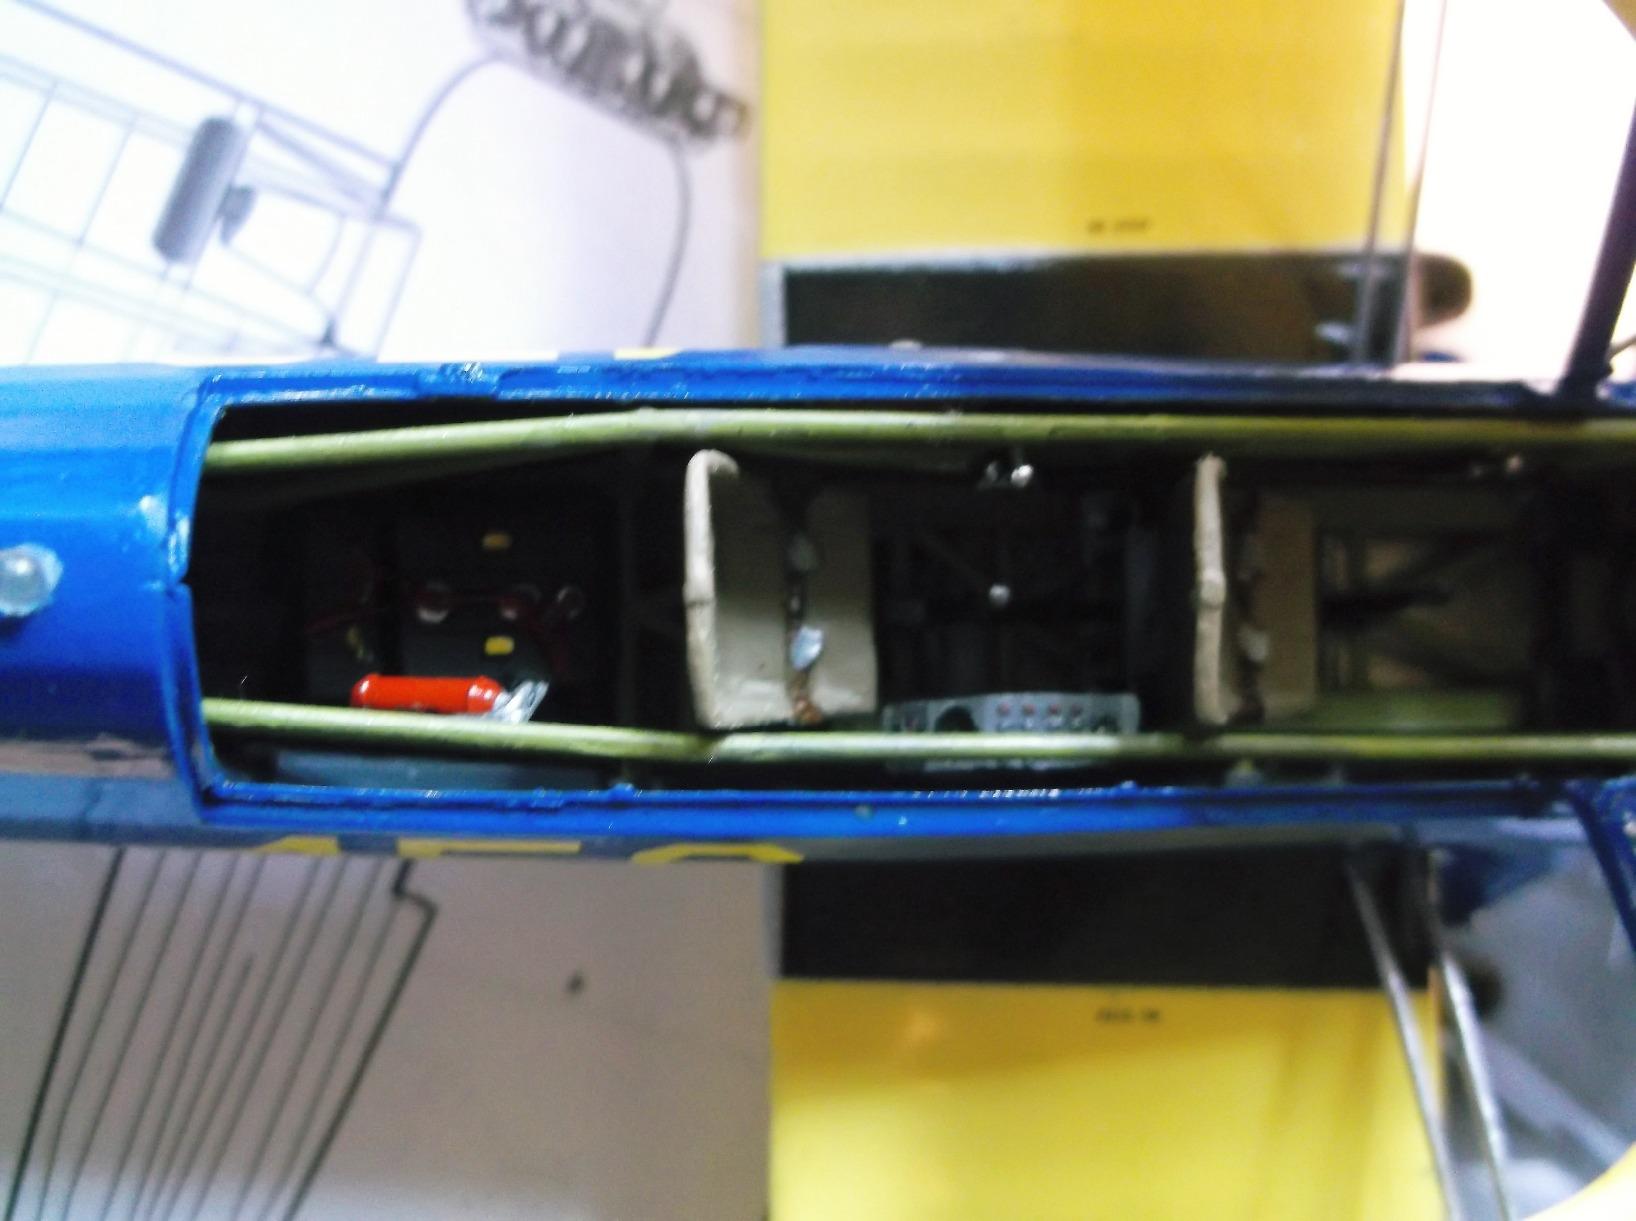
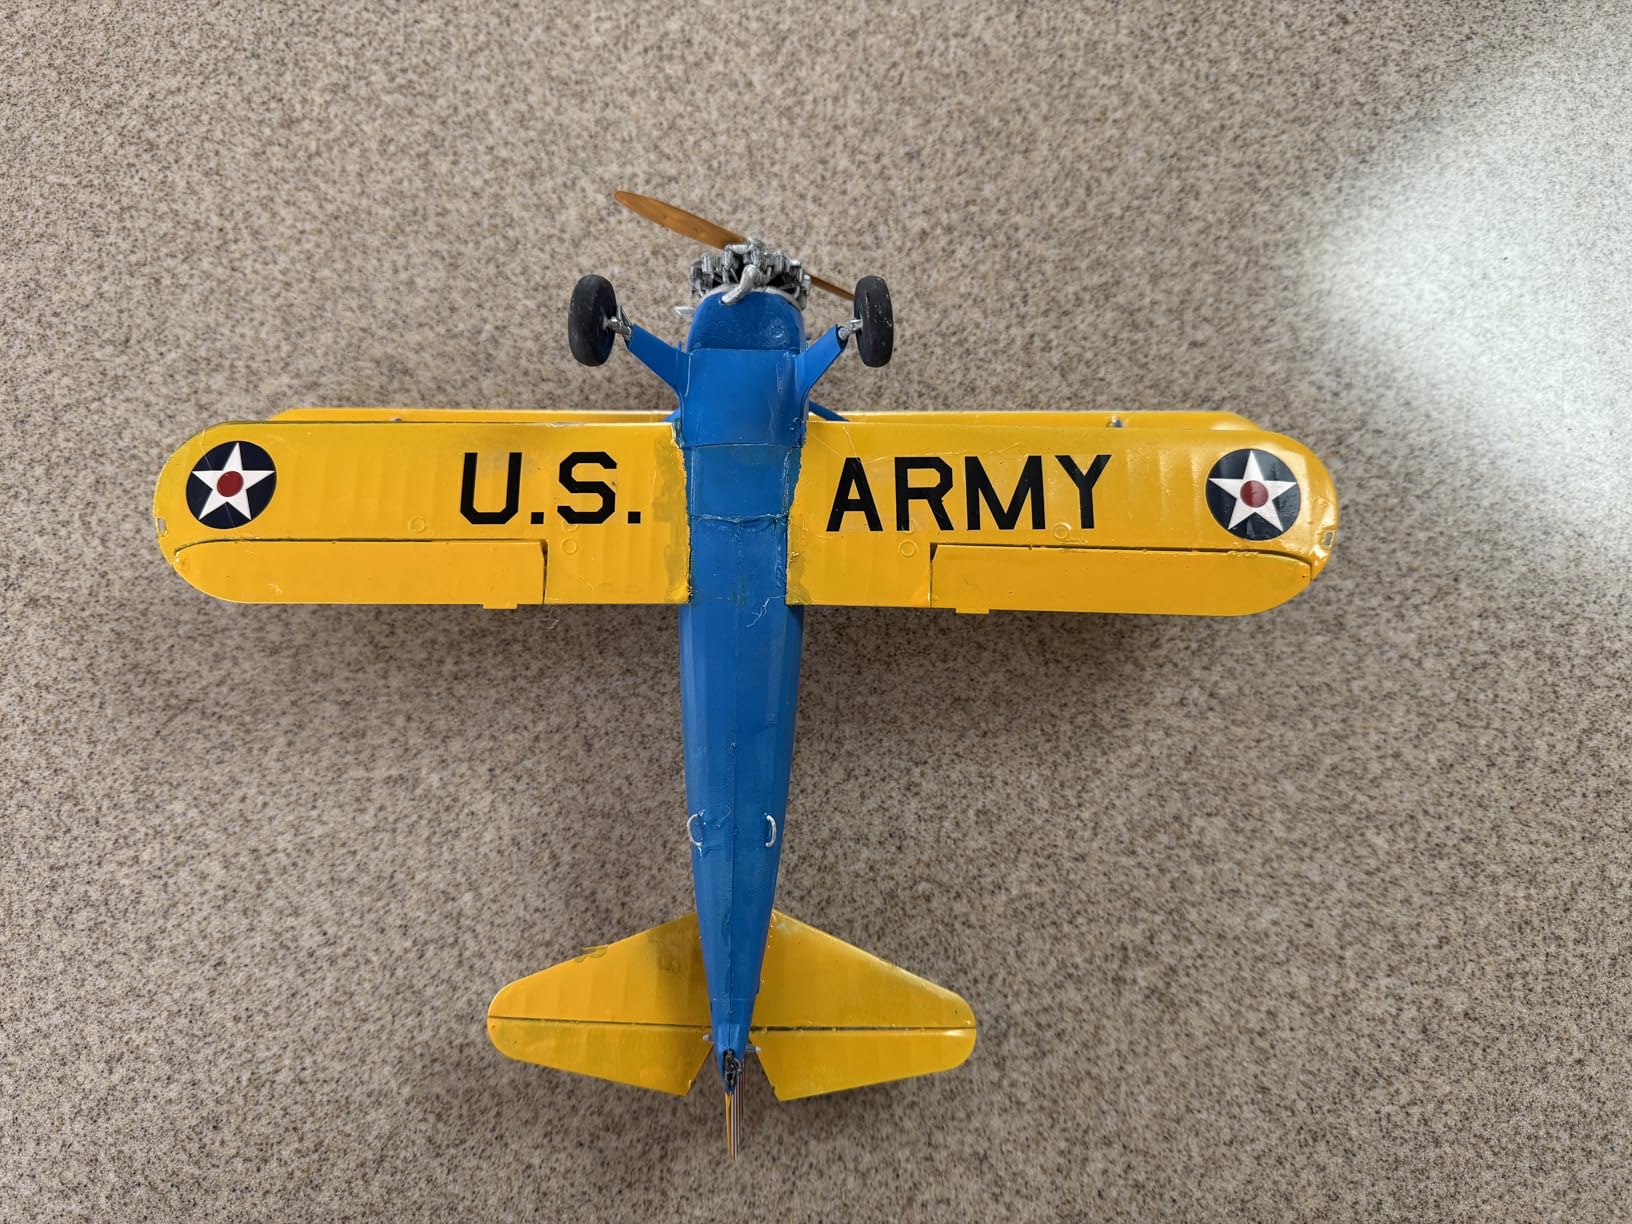
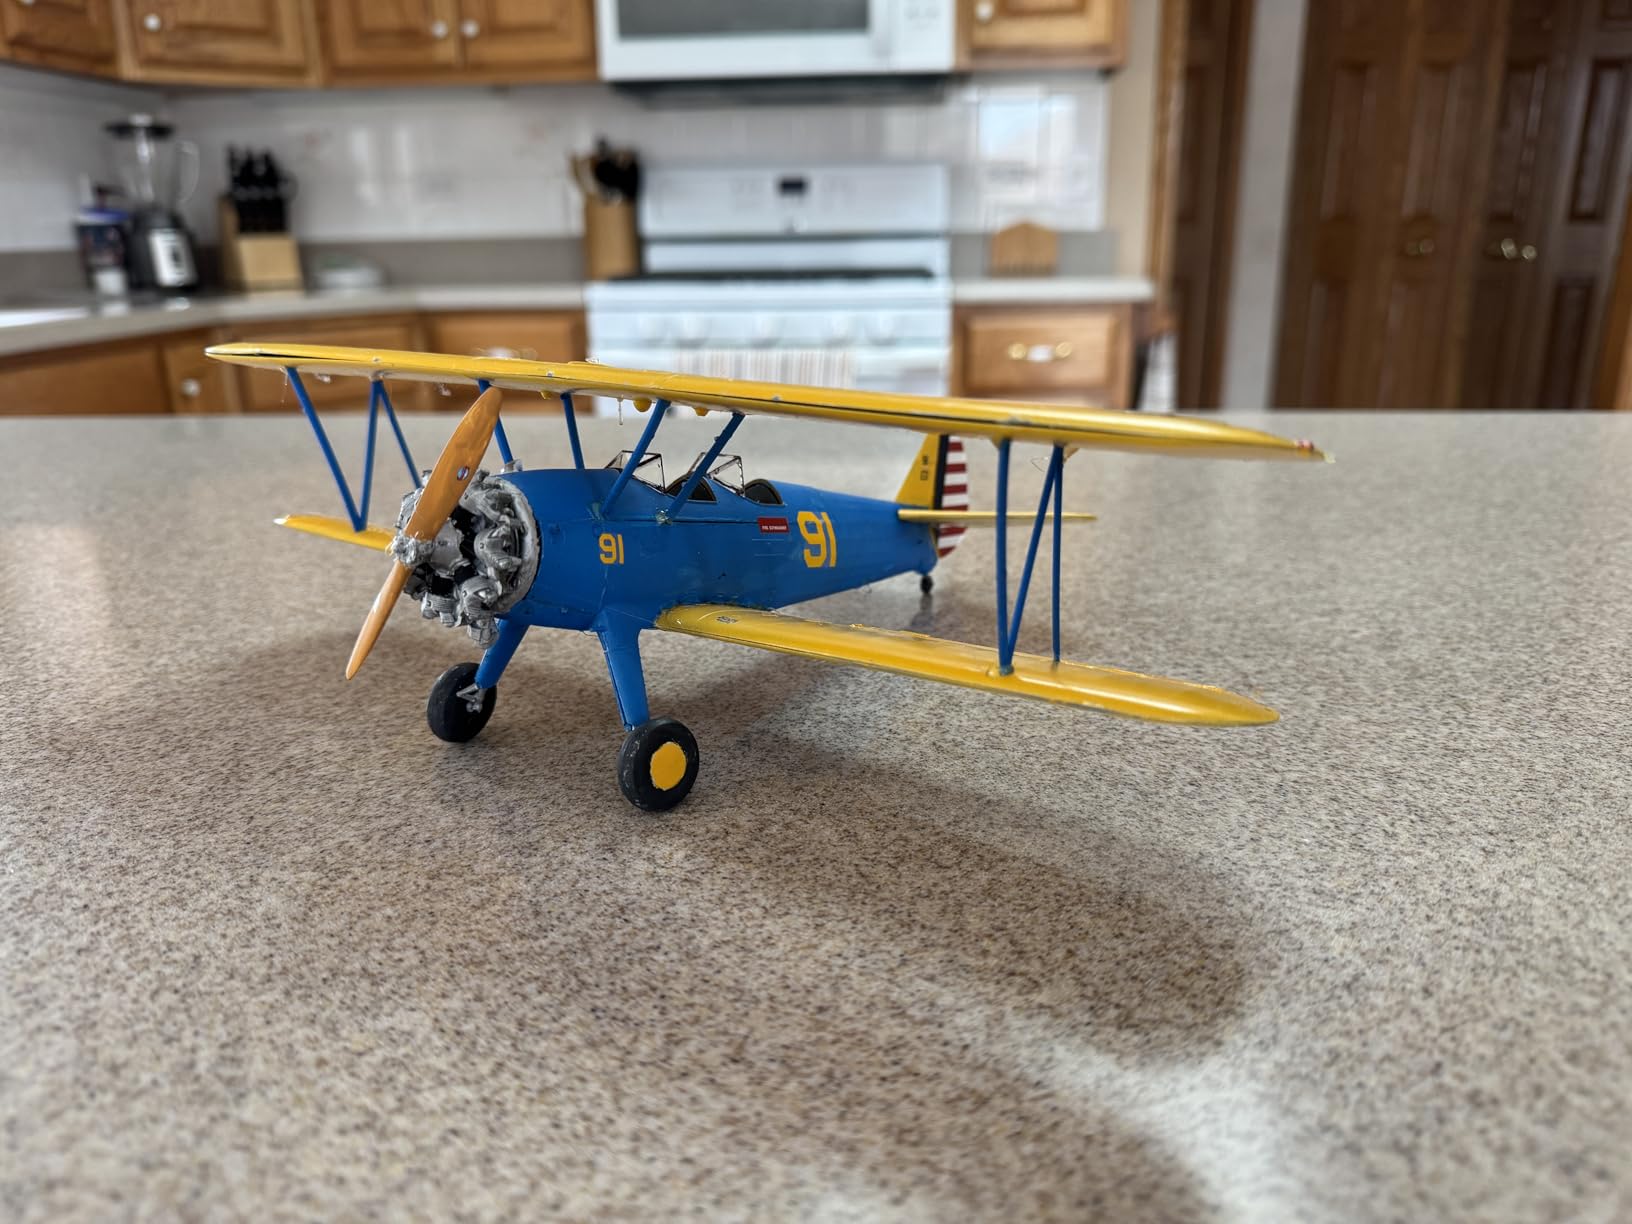
The 1:32 scale Revell Stearman Kaydet is the largest plastic biplane kit I have built, and the detail level is impressive. The 102 parts include a fully detailed radial engine with separate cylinders, pushrods, and exhaust collectors. The cockpit has a tubular frame that you assemble from flat plastic strips, and the result looks remarkably like the real steel tube structure.
I built mine as the Army Air Corps version with the silver fuselage and yellow wings. The decal sheet includes markings for both Army and Navy options, so you get two builds in one box effectively. Builders on forums note that this is actually ICM tooling repackaged in the Revell box, which explains the higher quality than typical Revell kits.
The downside is the fragility of the small parts. The cockpit framing strips are about 0.5mm wide, and they snap if you look at them wrong. I broke two pieces during removal from the sprue and had to replace them with styrene strip from my scrap box. I recommend letting the sprue sit in warm water for 30 seconds before cutting to reduce stress on the thin parts.
Build time ran about 28 hours over three weeks. The radial engine alone took four hours because each cylinder must be aligned perfectly or the pushrods will not line up. The result is stunning, though. I displayed mine at a club meeting and three people asked where I bought the aftermarket engine detail set. They were surprised it was box stock.
Who Should Buy This Kit
This kit is for experienced builders who want a large, detailed display piece. The 1:32 scale makes it a centerpiece on any shelf. If you have built at least five plastic kits and are comfortable with small parts, this Stearman will reward your patience.
It is not a weekend build. Plan for three to four weeks of evening sessions. The finished model is about 9.4 inches long, so you need a display case with at least 12 inches of clearance to accommodate the propeller and wing overhang.
Large Scale Building Advice
At 1:32 scale, every seam and imperfection is visible. I spent extra time sanding the fuselage halves with 400-grit paper before joining them. The result was a joint that needed only a skim of filler. I also recommend drilling out the exhaust ports with a pin vise to give them depth rather than painting over the flat plastic circles.
Forum builders consistently mention that scale competition judging emphasizes accuracy over flying performance. For static display, add wire brake lines to the landing gear and replace the moulded control horns with photo-etched parts if you want to push for competition points.
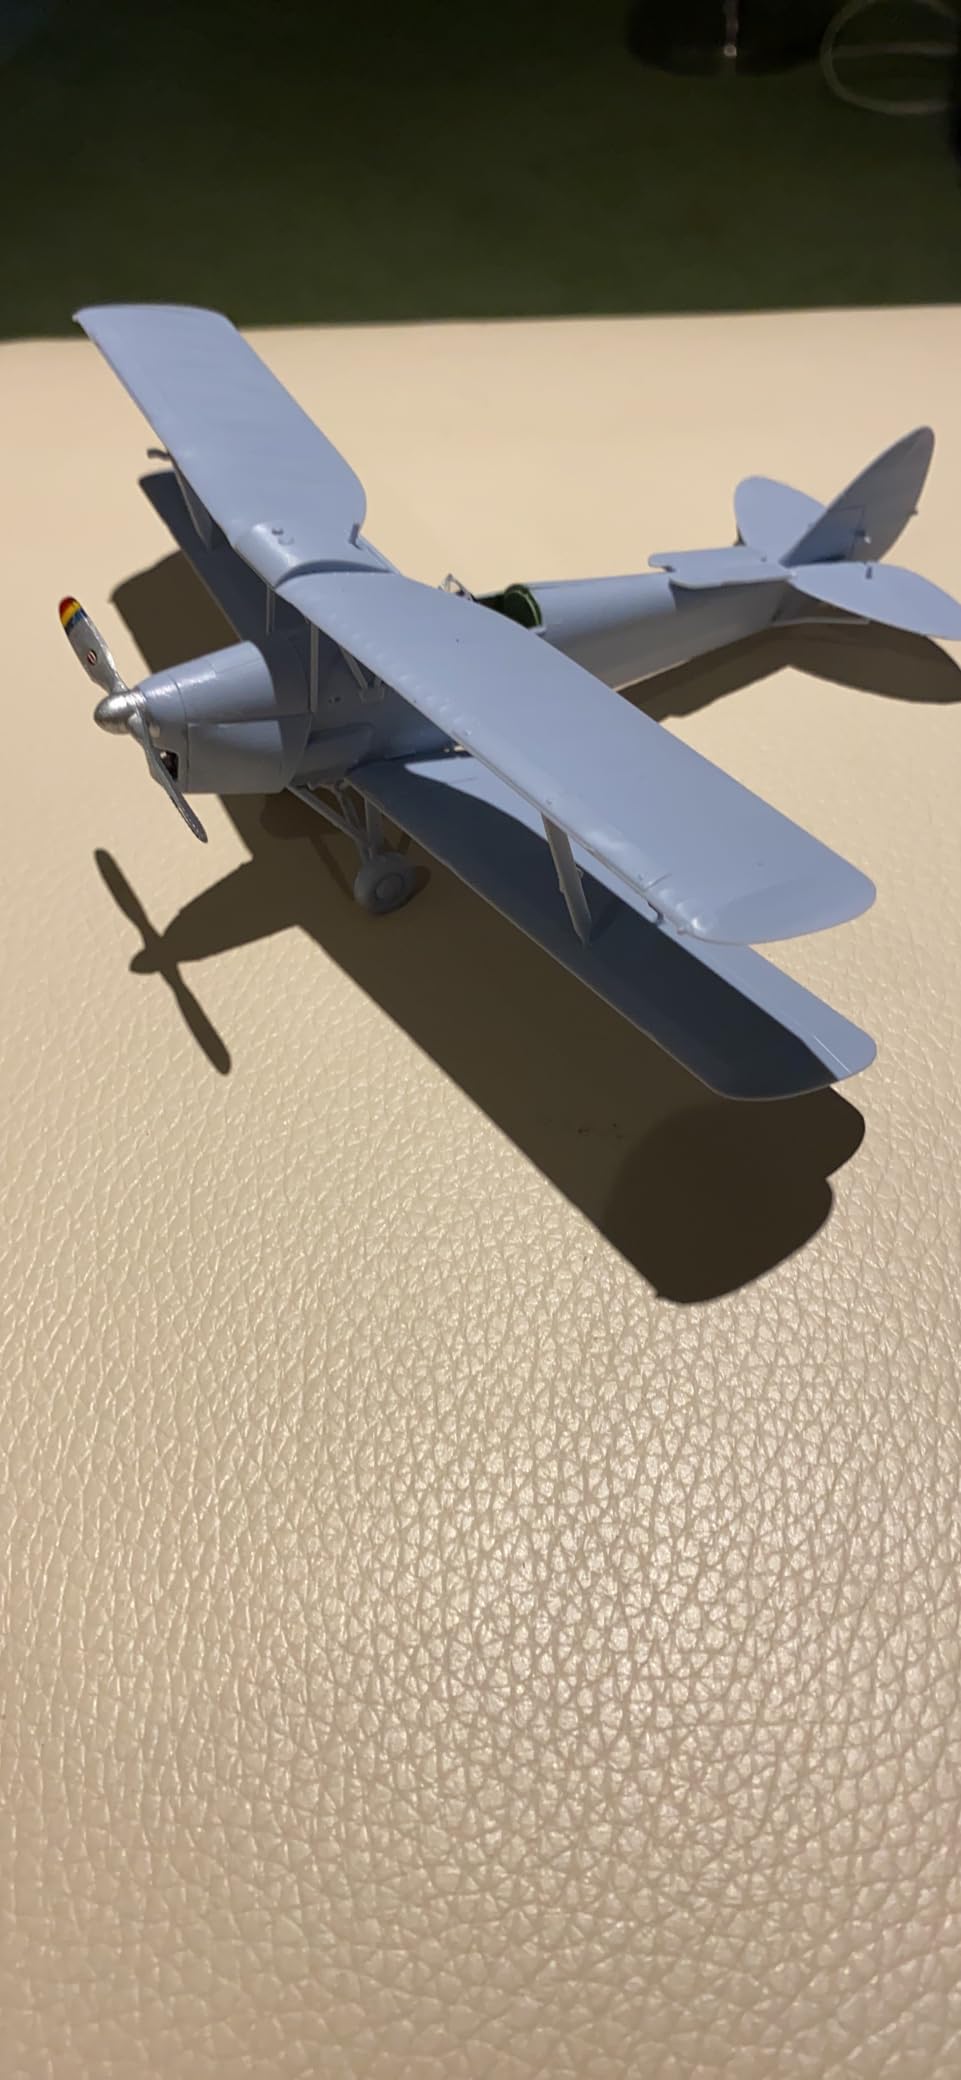
5. Guillow’s Stearman PT-17 – Classic Balsa Build
Guillow's Stearman PT-17 Model Kit, Navy, Small
28 inch wingspan
Die-cut balsa
Made in USA
10.6 oz
Pros
- Fun model to build
- Full size plans included
- Good quality materials
- Made in USA
Cons
- Die-cut not as clean as laser
- Some plastic parts hard to align
Guillow’s has been making balsa kits since 1926, and this Stearman PT-17 shows why the brand has lasted nearly a century. The die-cut balsa sheets are plainly marked, and the full-size plans make it easy to trace missing parts if you damage a piece during construction. I built mine as a rubber-powered free-flight model first, then converted it to electric RC six months later.
The 28-inch wingspan is large enough to see at 200 feet but small enough to transport in a sedan without disassembling anything. The Series 800 materials include grade-A balsa that is consistent in density. I weighed every sheet before cutting, and the variation was less than 10 percent across the kit. That matters because uneven wing density can lead to warping later.
The die-cut pieces are not as clean as laser-cut parts, so you need a sharp knife and a sanding block to clean up the edges. I spent about two hours just sanding ribs and fuselage formers before assembly. It is meditative work, but it is work. The plastic cowl and pilot figure are decent quality, though the cylinder moulding on the dummy engine is slightly oversized.
Customer feedback is overwhelmingly positive, with 80 percent of the 100 reviews giving five stars. The most common praise focuses on the nostalgia factor and the quality of the wood. Several reviewers mentioned converting the kit to RC with small brushless motors and 2.4GHz radios, which is exactly what I did.
Who Should Buy This Kit
This Guillow’s kit is perfect for builders who want the traditional balsa experience. If you enjoy the smell of balsa dust and the feel of a sharp blade slicing through grain, this is your kit. It is also the best choice for RC conversion because the structure is light and the wing loading is low enough for park flying.
Families looking for a multi-generational project will find this kit accessible enough for teenagers yet engaging enough for grandparents. My father-in-law and I built one together over two months, and the conversations we had over the workbench were worth more than the finished model.
RC Conversion Potential
The kit is designed for rubber power or U-Control, but the fuselage has enough room for a small 2-gram servo and a 5-amp ESC. I installed a 7mm brushed motor from a micro quad and a 1S 300mAh LiPo. Flight time is about 6 minutes, and the model handles surprisingly well with rudder and elevator control only.
If you plan to convert, reinforce the landing gear block with a 1/16 inch plywood doubler. The stock balsa block will crush on the first hard landing. I also recommend upgrading the tissue covering to lightweight iron-on film if you plan to fly in anything other than dead calm.
6. Guillow’s British SE 5-A – Laser Cut Precision
Guillow's British SE 5-A Laser Cut Model Kit, Small
24 inch wingspan
Laser cut balsa
1:12 scale
Rubber power included
Pros
- Laser cut parts fit well
- Can fly or display
- Made in USA
- Complete accessories included
Cons
- Not suitable for novices
- Requires additional materials
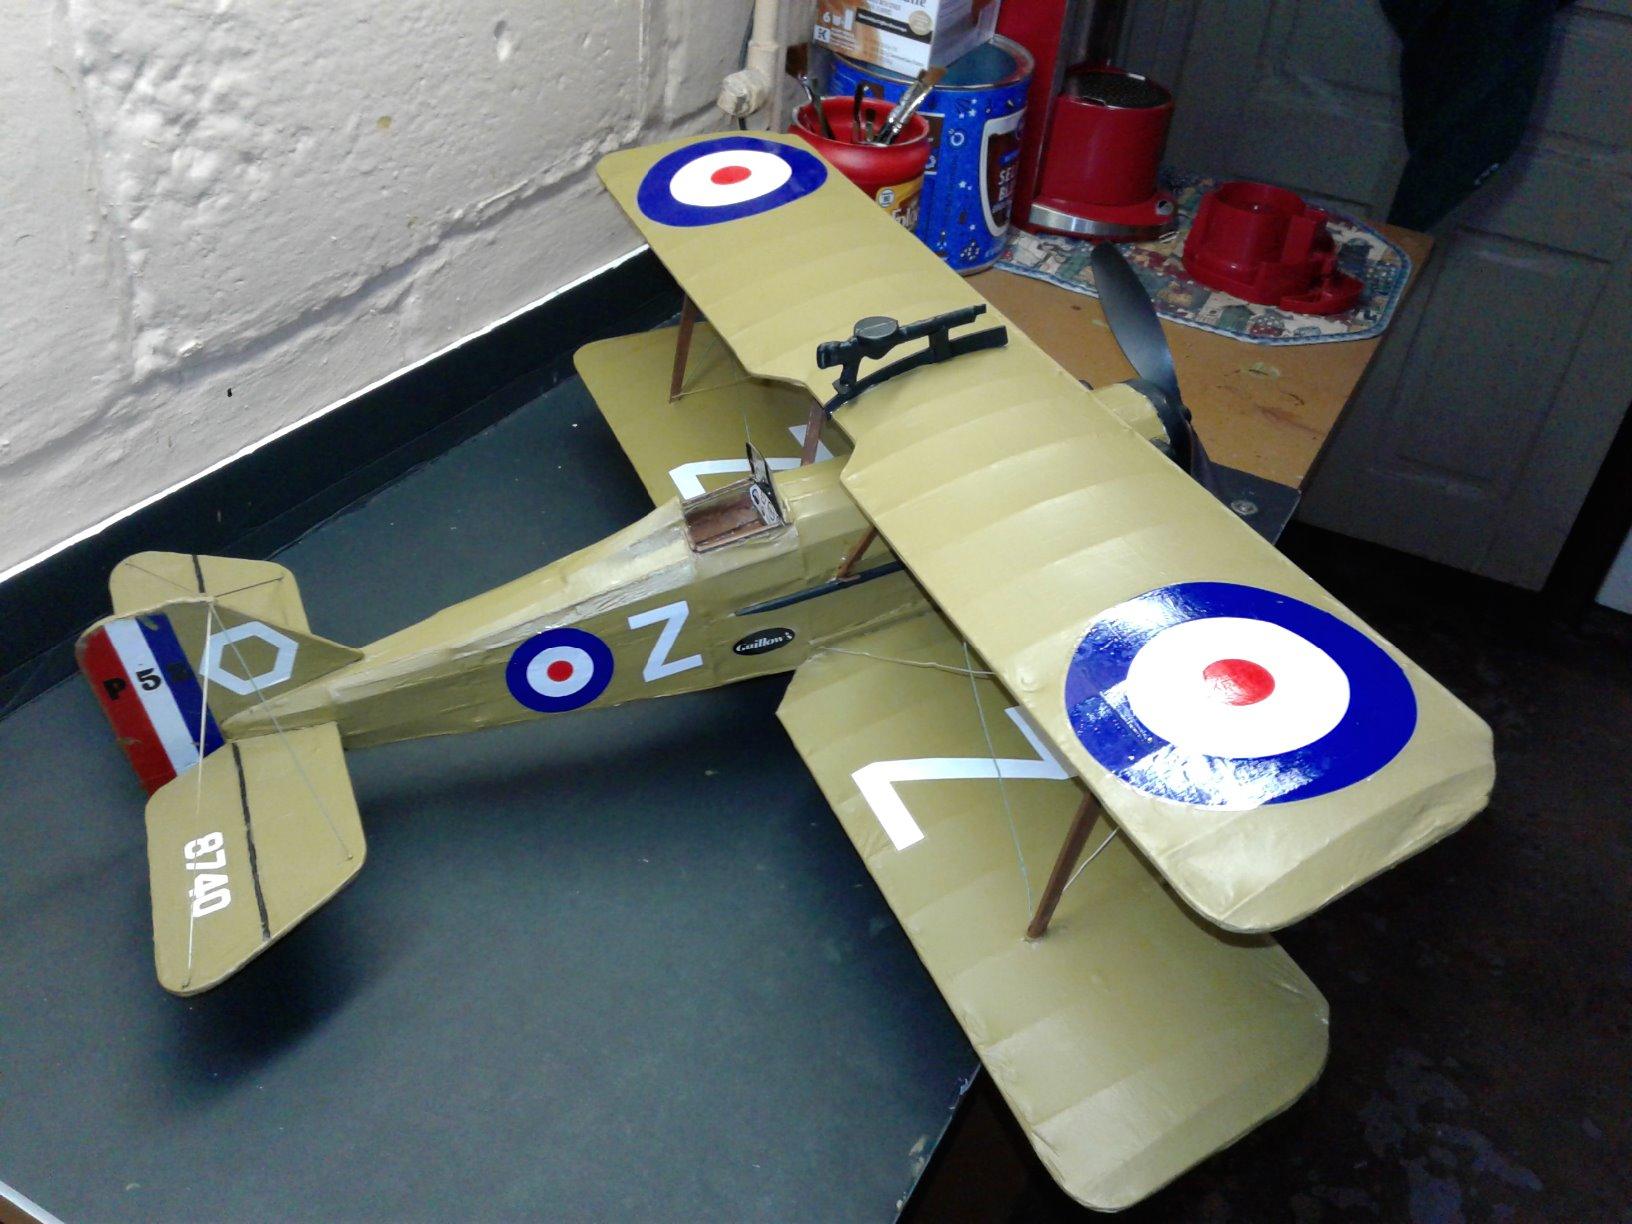
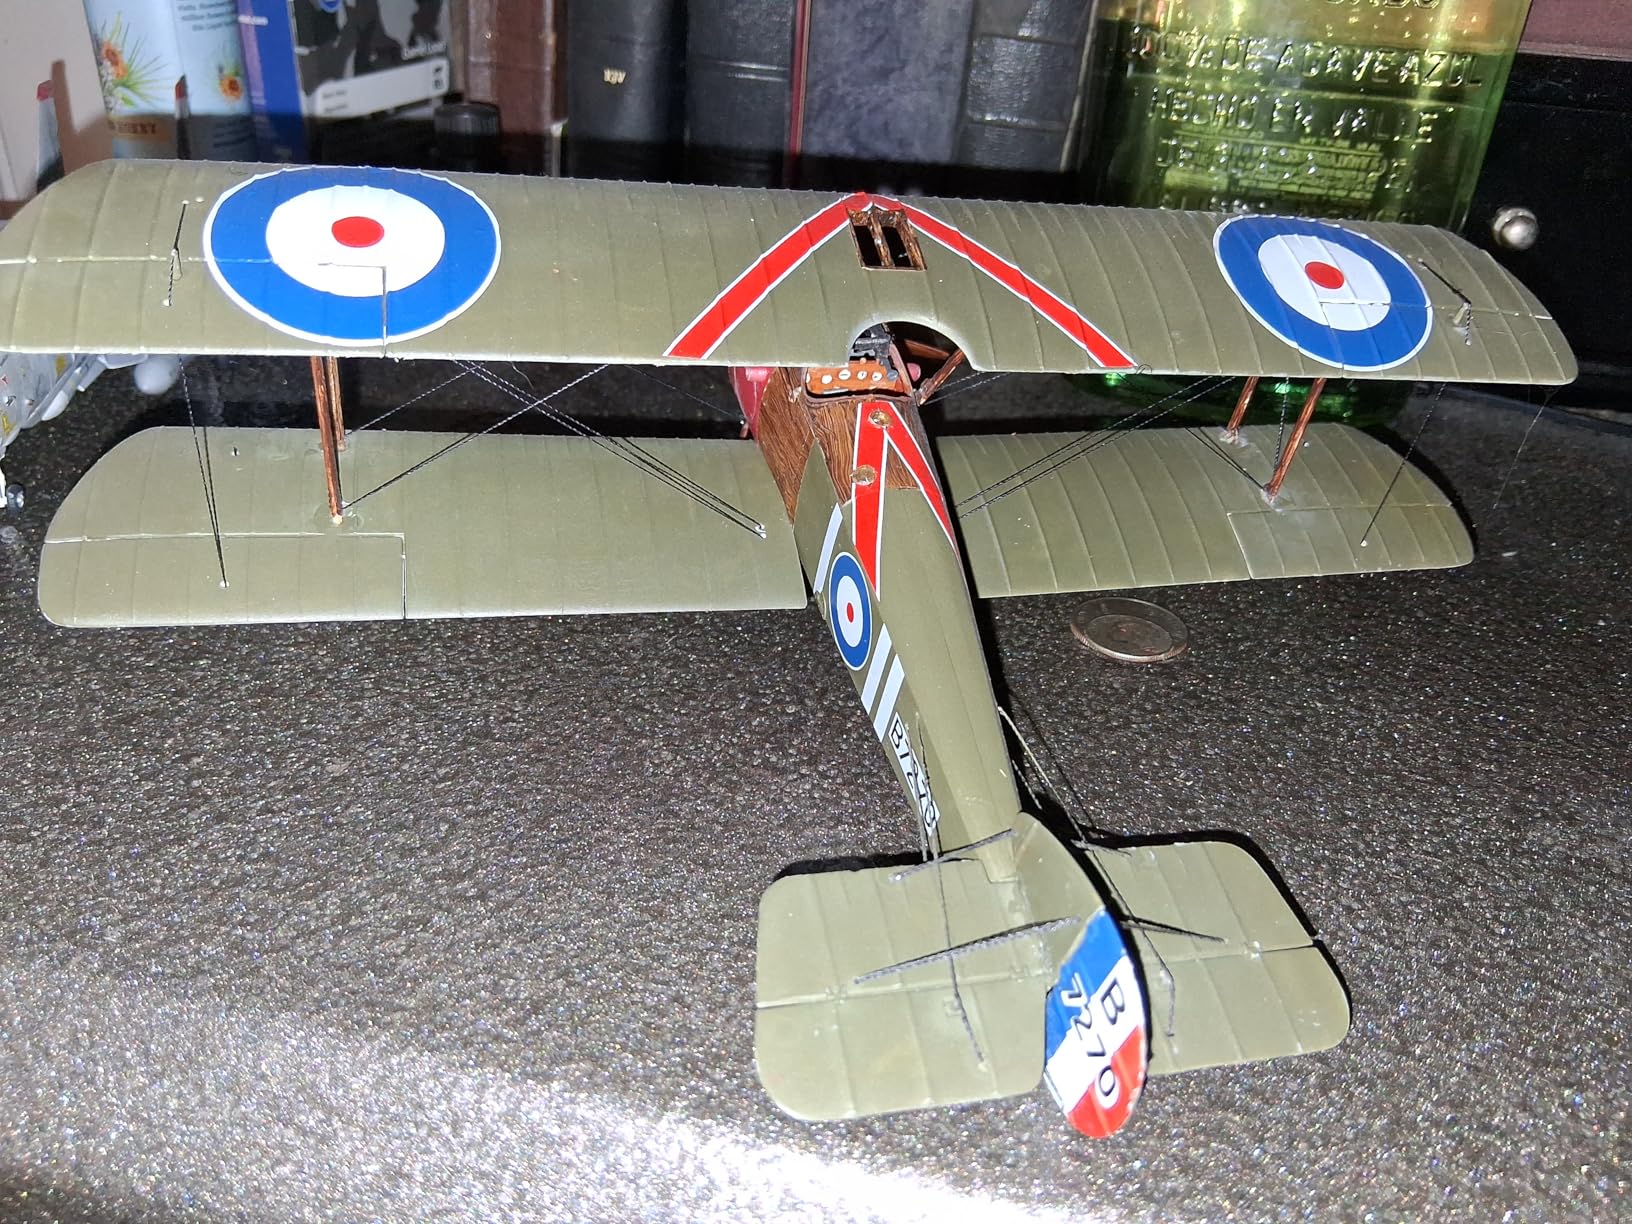
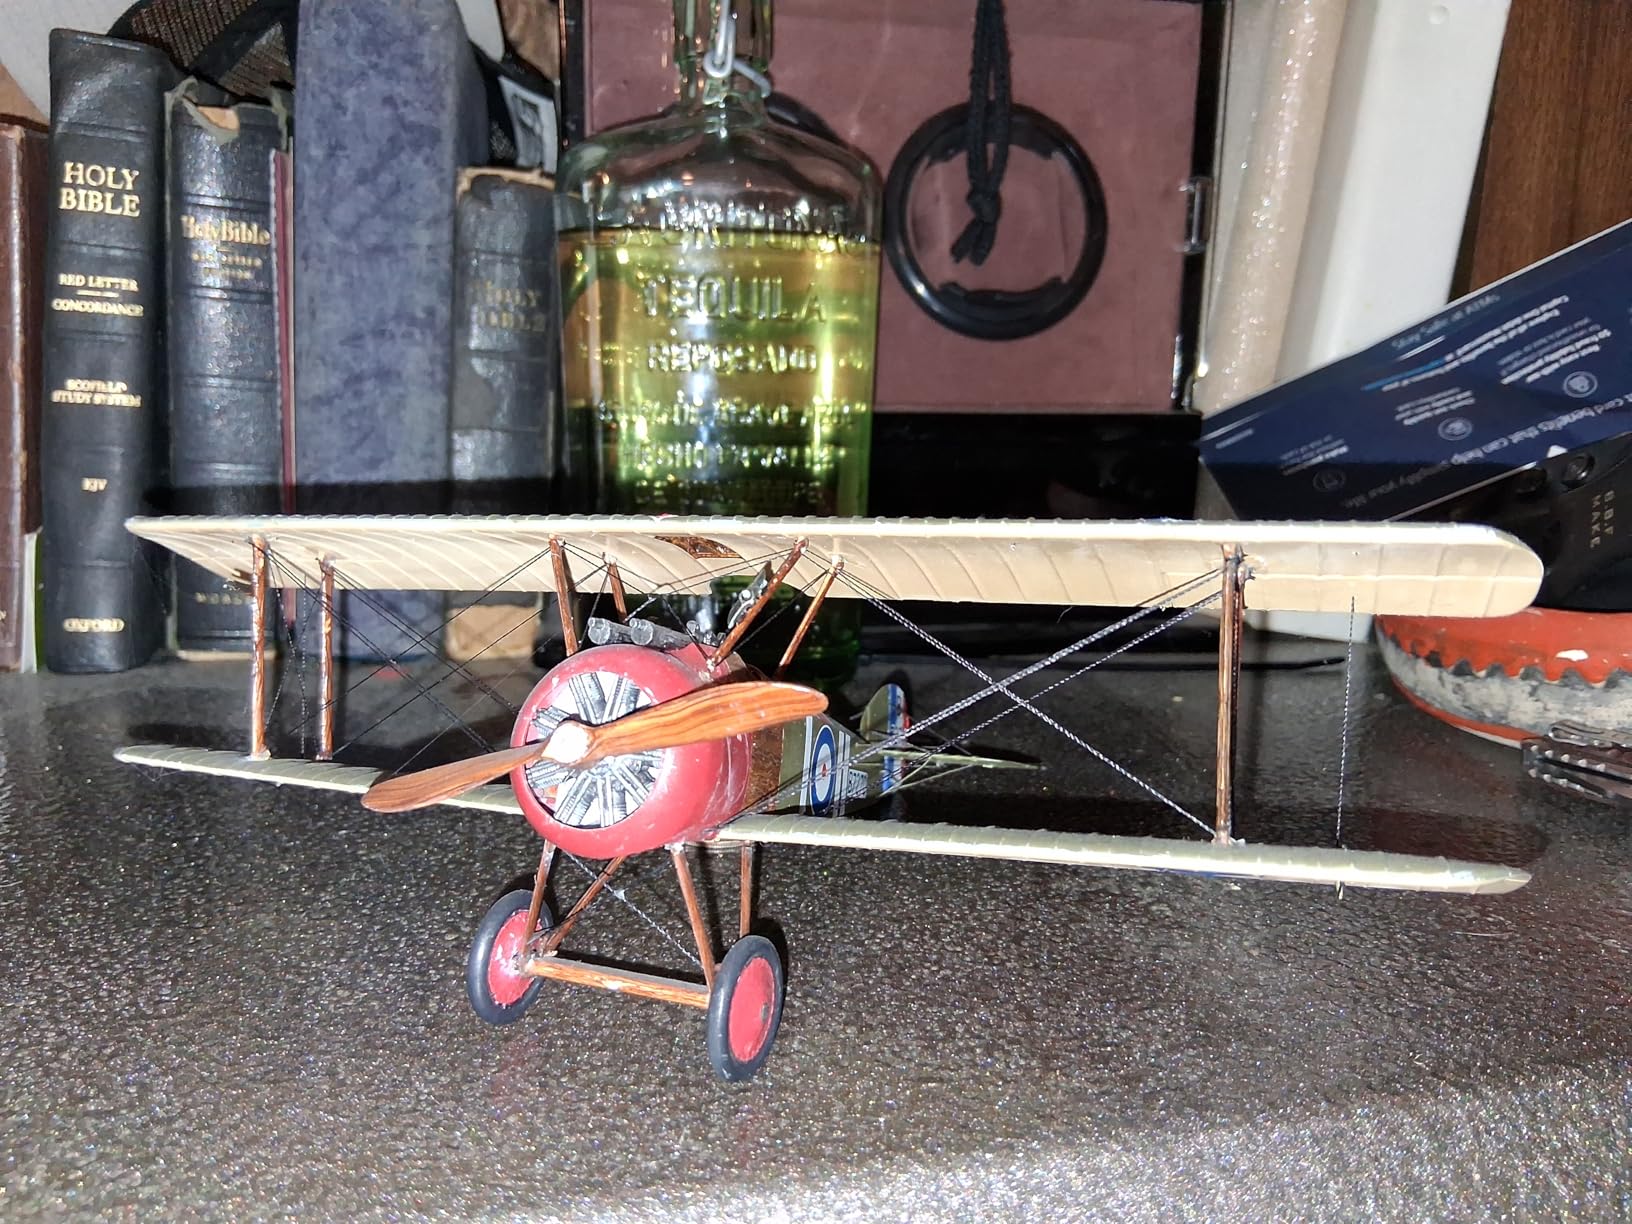
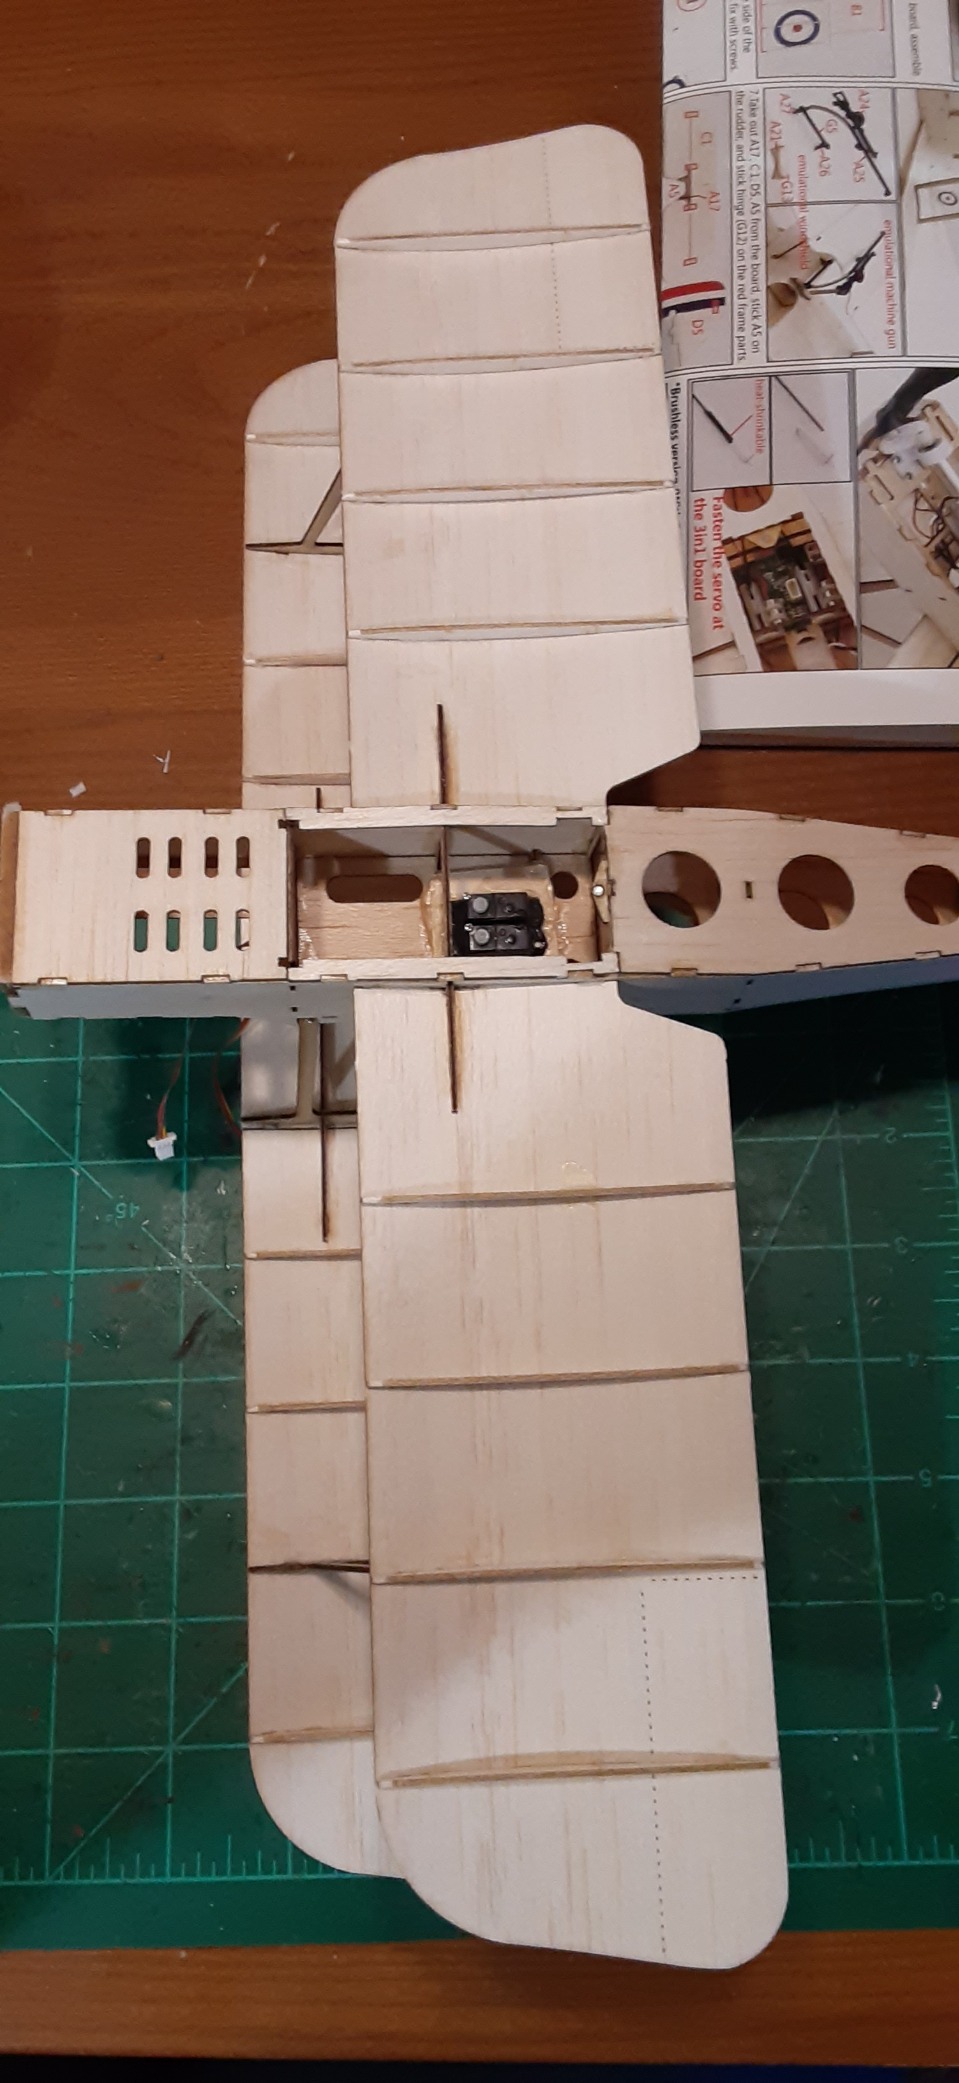
The British SE 5-A is a significant improvement over Guillow’s older die-cut kits because it uses precision laser-cut balsa. The parts fit together with minimal gaps, and the interlocking wing ribs make it almost impossible to build a warped wing panel. I built mine for static display, but I tested the rubber motor and got 30-second flights in my backyard.
The 1:12 scale is larger than most display kits, so the details are easier to see. The vacuum-formed plastic parts include a realistic pilot bust and a machine gun that looks proper instead of toy-like. The scale WWI wheels are moulded with spoke detail, and a wash of dark brown paint brings out the hubs nicely.
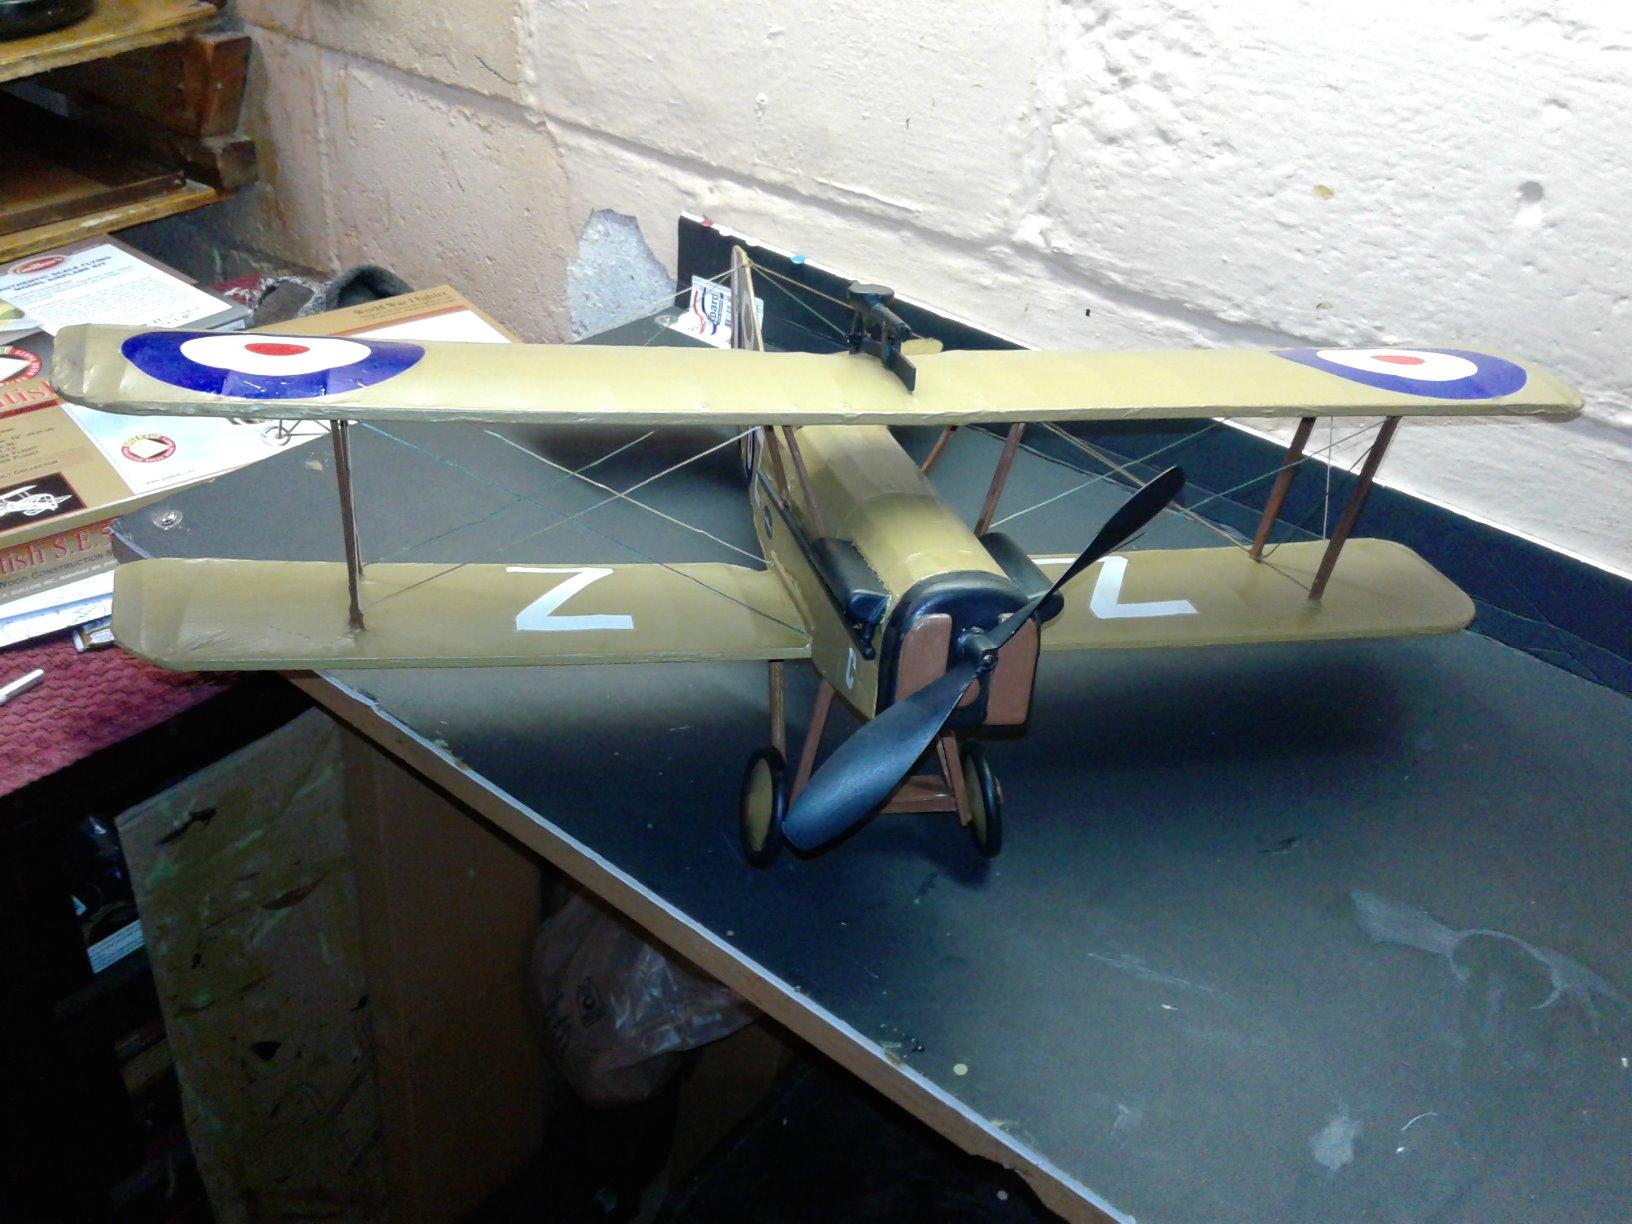
The laser cutting is a game changer for this kit. I was able to pull every part from the sheet without breaking a single piece, which is something I cannot say about the die-cut Sopwith Camel I built last year. The fuselage sides have notches that align perfectly with the formers, so the structure squares itself as you build.
The included rubber motor is adequate for display and short flights, but serious flying will require an electric conversion. The instructions include a section on converting to 1/2A gas power, though most modern builders opt for a small brushless motor and a 2S LiPo pack. Build time is about 25 hours for static display, or 35 hours if you add RC gear.
Who Should Buy This Kit
This kit is best for intermediate builders who have completed at least one balsa kit before. The laser cutting removes the frustration of rough edges, but the assembly sequence still requires understanding of how box fuselages and built-up wings work. If you are comfortable with a hobby knife and a bottle of aliphatic glue, this is an excellent second or third kit.
Scale competition builders will appreciate the accurate outline and the included detail parts. The SE 5-A is a popular subject at WWI scale events, and this kit builds into a model that scores well in static judging.
Flying vs Display Options
The kit includes complete instructions for both flying and static display builds. For flying, you need to add a landing gear block, tail skid, and propeller assembly. For static display, the kit provides a display stand that holds the model at a slight nose-up angle. I built mine with the landing gear but left the rubber motor out, so I can display it on the stand or hand-launch it on calm days.
Covering material is not included, so you will need to purchase tissue or lightweight iron-on film. I used Esaki tissue with three coats of nitrate dope, and the finish is glass smooth. The laser-cut parts make the framework so accurate that the covering goes on without wrinkles.
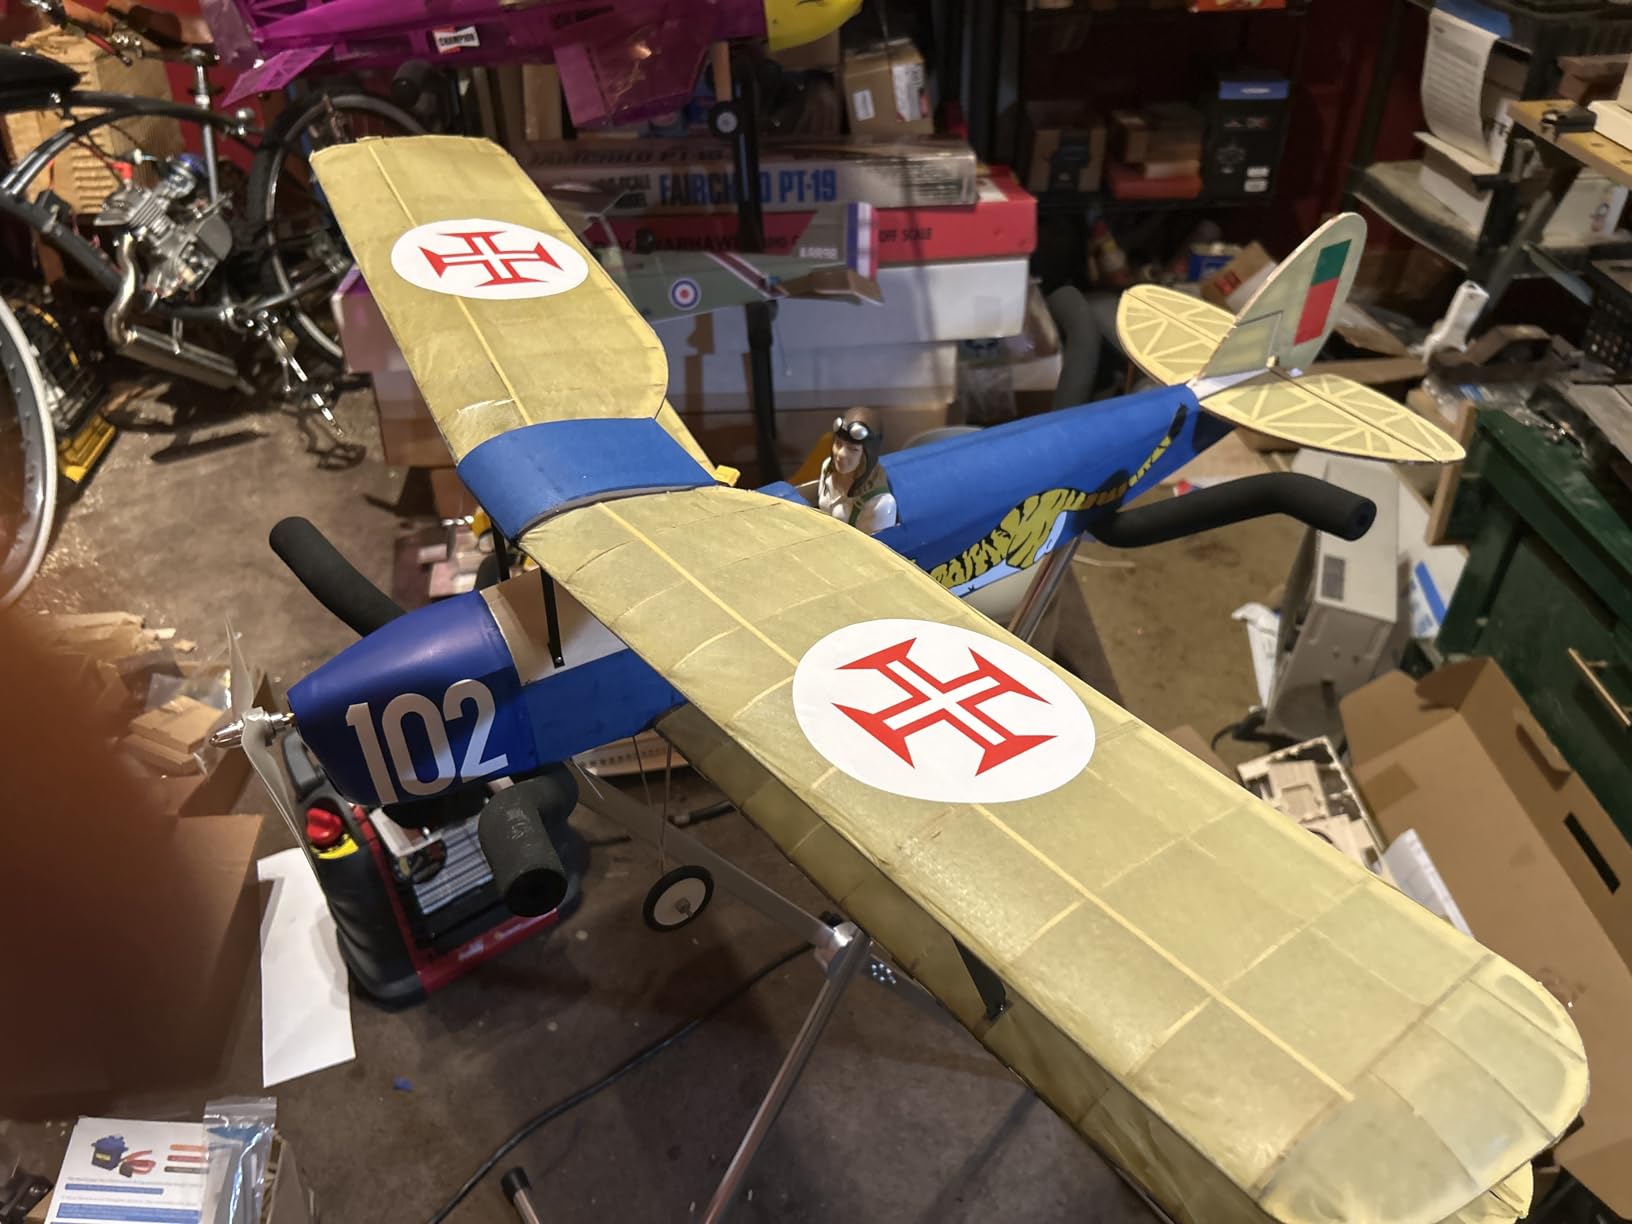
7. Viloga Mini Tiger Moth – Intermediate Balsa Kit
Viloga Upgrade Balsa Wood Airplane Kits Mini Tiger Moth Biplane, 39" Laser Cut Model Plane Kit to Build, DIY Flying RC Aeroplane for Adults (KIT Only)
39 inch wingspan
Laser cut balsa
1180mm span
KIT only
Pros
- Solid lightweight structure
- High-precision laser cutting
- Stable flight characteristics
- Beautiful finished model
Cons
- Not for beginners without experience
- No engine or accessories included
The Viloga Mini Tiger Moth is a 39-inch wingspan balsa kit that bridges the gap between micro indoor models and giant-scale builds. The laser-cut parts are precise enough that I could dry-fit the entire wing panel before adding any glue. The top-quality balsa and plywood materials are consistent, with no soft or punky spots in the sheets I received.
I found this kit to be a step up from the Guillow’s laser-cut series in terms of structural complexity. The fuselage is a longer box with more formers, and the wing center section requires careful alignment to get the proper incidence angle. The 1180mm wingspan provides stable flight characteristics, and the model tracks straight even in light crosswinds.
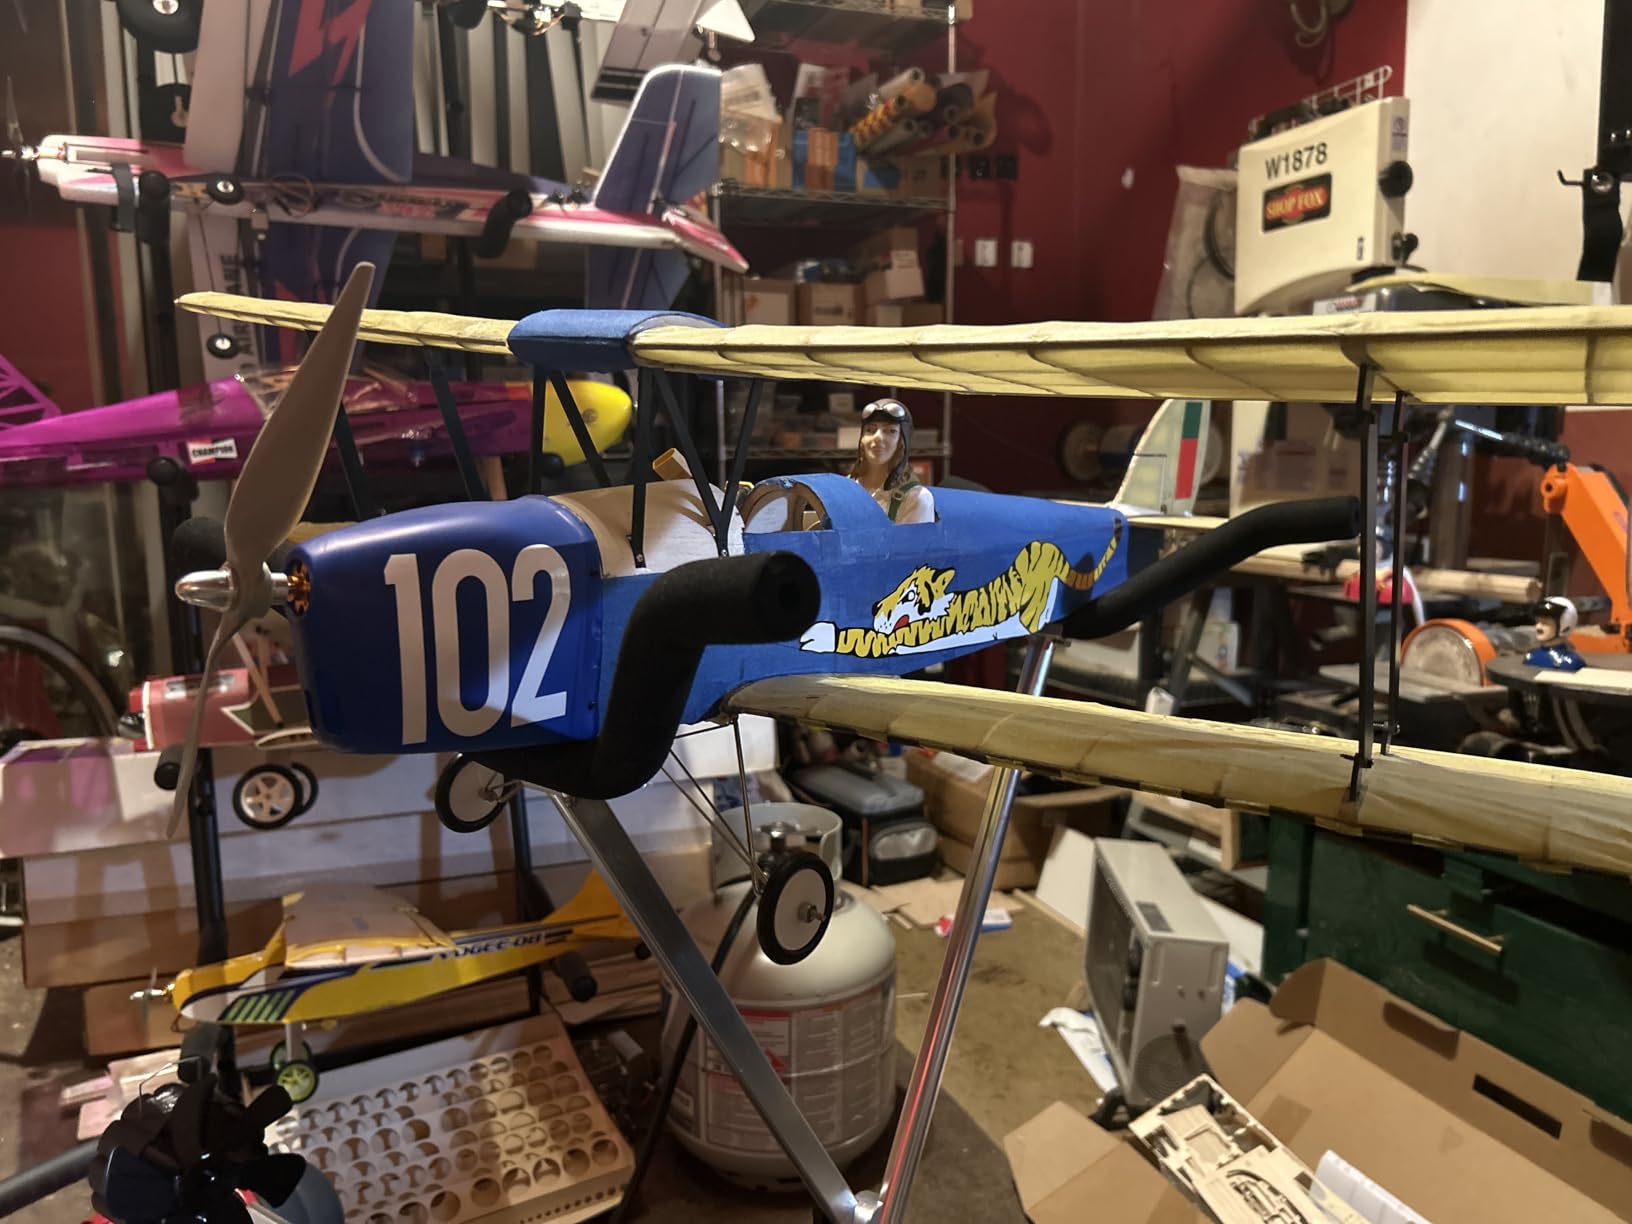
The comprehensive hardware pack includes hinges, pushrods, and landing gear struts, but you must supply the motor, ESC, servos, and radio yourself. I used a 2212 brushless motor with a 20-amp ESC and two 9-gram servos. The model flies at half throttle comfortably, and the climb rate is steady rather than abrupt.
Reviewers consistently praise the laser cutting quality, with several noting that the pieces fit together like a puzzle. The molded plastic cowl and windscreen are decent quality, though the windscreen is slightly cloudy and benefits from a polish with plastic cleaner. Build time is about 40 hours for an experienced builder, or 60 hours if this is your first 39-inch model.
Who Should Buy This Kit
This Viloga Tiger Moth is ideal for builders who have completed at least one smaller balsa kit and want to move up to a larger model. The 39-inch span means you need a workspace with at least 48 inches of clear bench length. The flying field should be a grass park or a club runway, not a backyard.
The kit is not suitable for absolute beginners. Multiple reviewers who tried this as their first kit found the instructions confusing and gave up partway through. If you have built a Guillow’s laser-cut kit or a similar entry-level model, you have the skills needed for this one.
Flight Performance Notes
The Tiger Moth is a stable, predictable flyer with a low wing loading. I fly mine at our club field on calm mornings, and it settles into a gentle cruise that looks exactly like the real aircraft. Stall behavior is docile, with a slight wing drop that is easy to correct with rudder. The ailerons are not scale, but the model is aerobatic enough for loops and rolls if you have the altitude.
One tip from our club members is to add 5 grams of nose weight if you are using a lighter motor than the recommended 2212. The model is slightly tail-heavy with smaller power systems, and the extra weight up front improves glide performance noticeably.
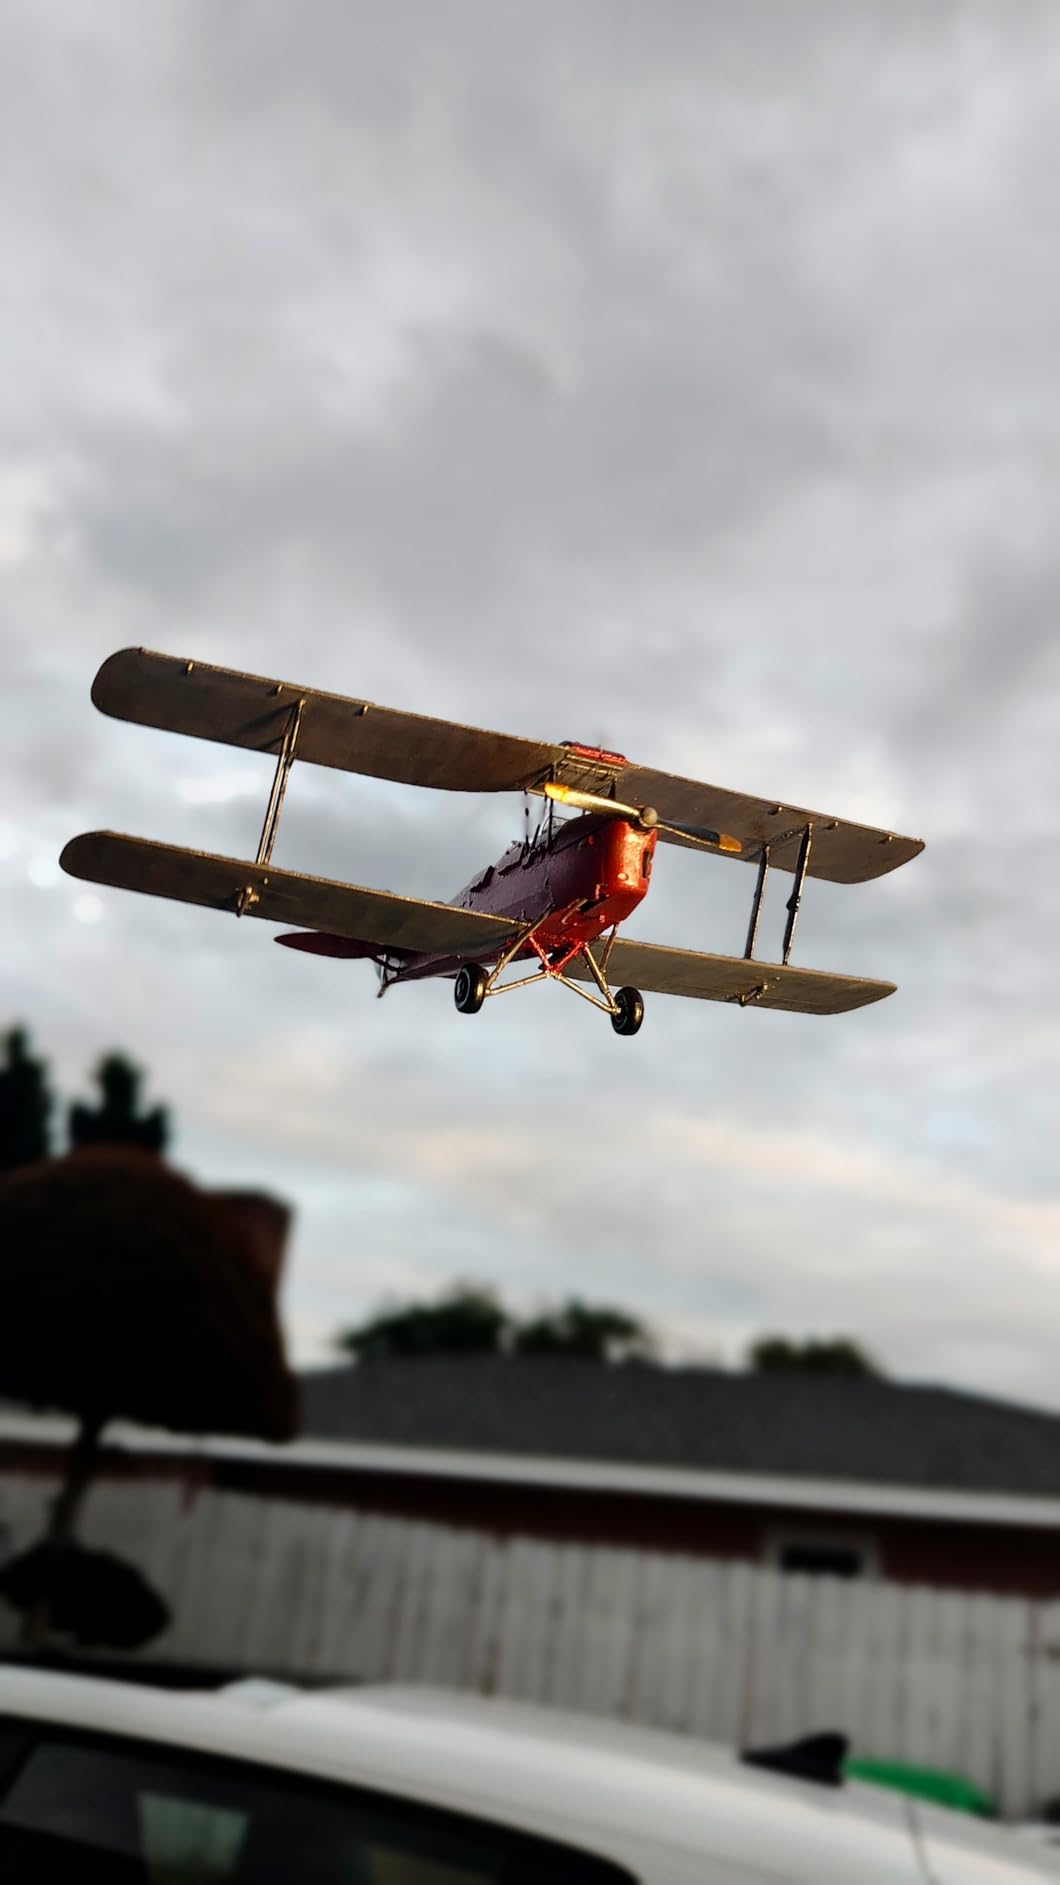
8. Guillow’s Sopwith Camel – Iconic WWI Replica
Guillow's Sopwith Camel Model Kit
28 inch wingspan
Die-cut balsa
1000 pieces
Made in USA
Pros
- Relatively easy to build
- Great quality wood materials
- Step by step instructions
- Perfect for static display
Cons
- Die-cut quality varies
- Not a beginner model
The Guillow’s Sopwith Camel is the kit that started my biplane obsession. The 1000 pieces include die-cut balsa ribs, fuselage formers, and strip wood for the wire bracing. The 28-inch wingspan is the same as the Stearman, but the Camel feels more complex because of the staggered wings and the rotary engine cowl.
I built mine strictly for static display because the real Camel was notorious for tricky handling, and I did not want to crash a model that took 35 hours to complete. The die-cut quality is generally good, but it varies by batch. My kit had clean parts, but a friend received one with a few poorly cut ribs that cracked during removal. Guillow’s customer service sent replacement sheets within a week.
The step-by-step instructions are old-school but effective. Each stage is illustrated with a three-dimensional perspective drawing that shows exactly where each part goes. I found the wing assembly sequence particularly helpful because it explains the staggered alignment in a way that made sense even though I had never built a staggered-wing biplane before.
The plastic parts include the rotary engine front, machine guns, and a small pilot figure. The engine front is a bit generic, but a paint job with silver and black cylinders brings it to life. The machine guns are moulded with cooling jacket detail, and they look accurate when viewed from two feet away.
Who Should Buy This Kit
This Sopwith Camel is best for builders who want an iconic WWI subject with a proven kit design. The 1000-piece count sounds intimidating, but about 700 of those are the tiny wire bracing pieces that take minutes to install. The actual structure is straightforward if you have built one or two balsa kits before.
Historical modelers will appreciate that the proportions match published three-view drawings. I measured the wingspan, fuselage length, and tail height against a NACA report, and the kit is within 3 percent on all major dimensions. That is close enough for sport scale competition.
Historical Accuracy Notes
The kit represents the Camel with the standard Clerget 9B rotary engine and the early-style flat upper wing. The decals are generic, so you will need to purchase aftermarket markings if you want a specific squadron or pilot. I used Blue Rider decals for my model and built it as the aircraft flown by Canadian ace William Barker.
The wire bracing is a challenge. The kit provides thread for the rigging, but I replaced it with 0.006 inch steel wire for better realism. The attachment points are small holes in the wings and fuselage, and a pin vise is essential for drilling them cleanly without splitting the balsa.
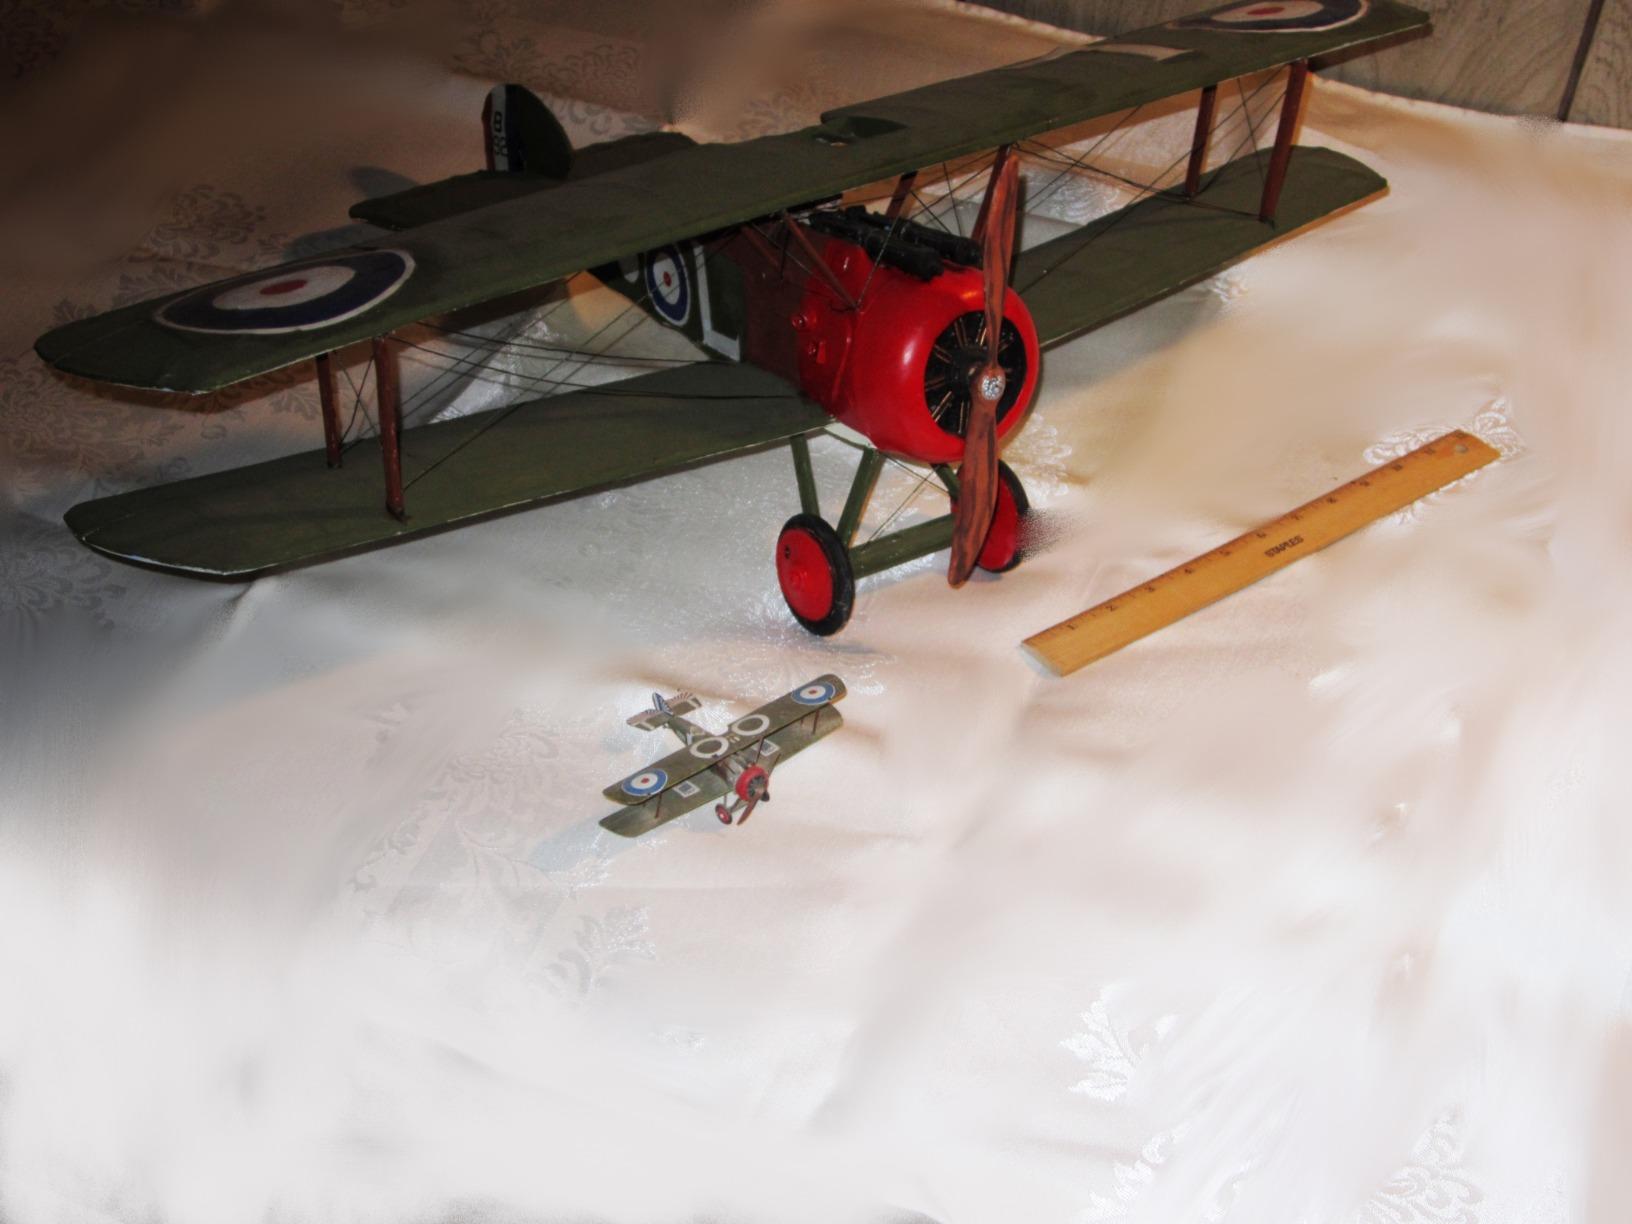
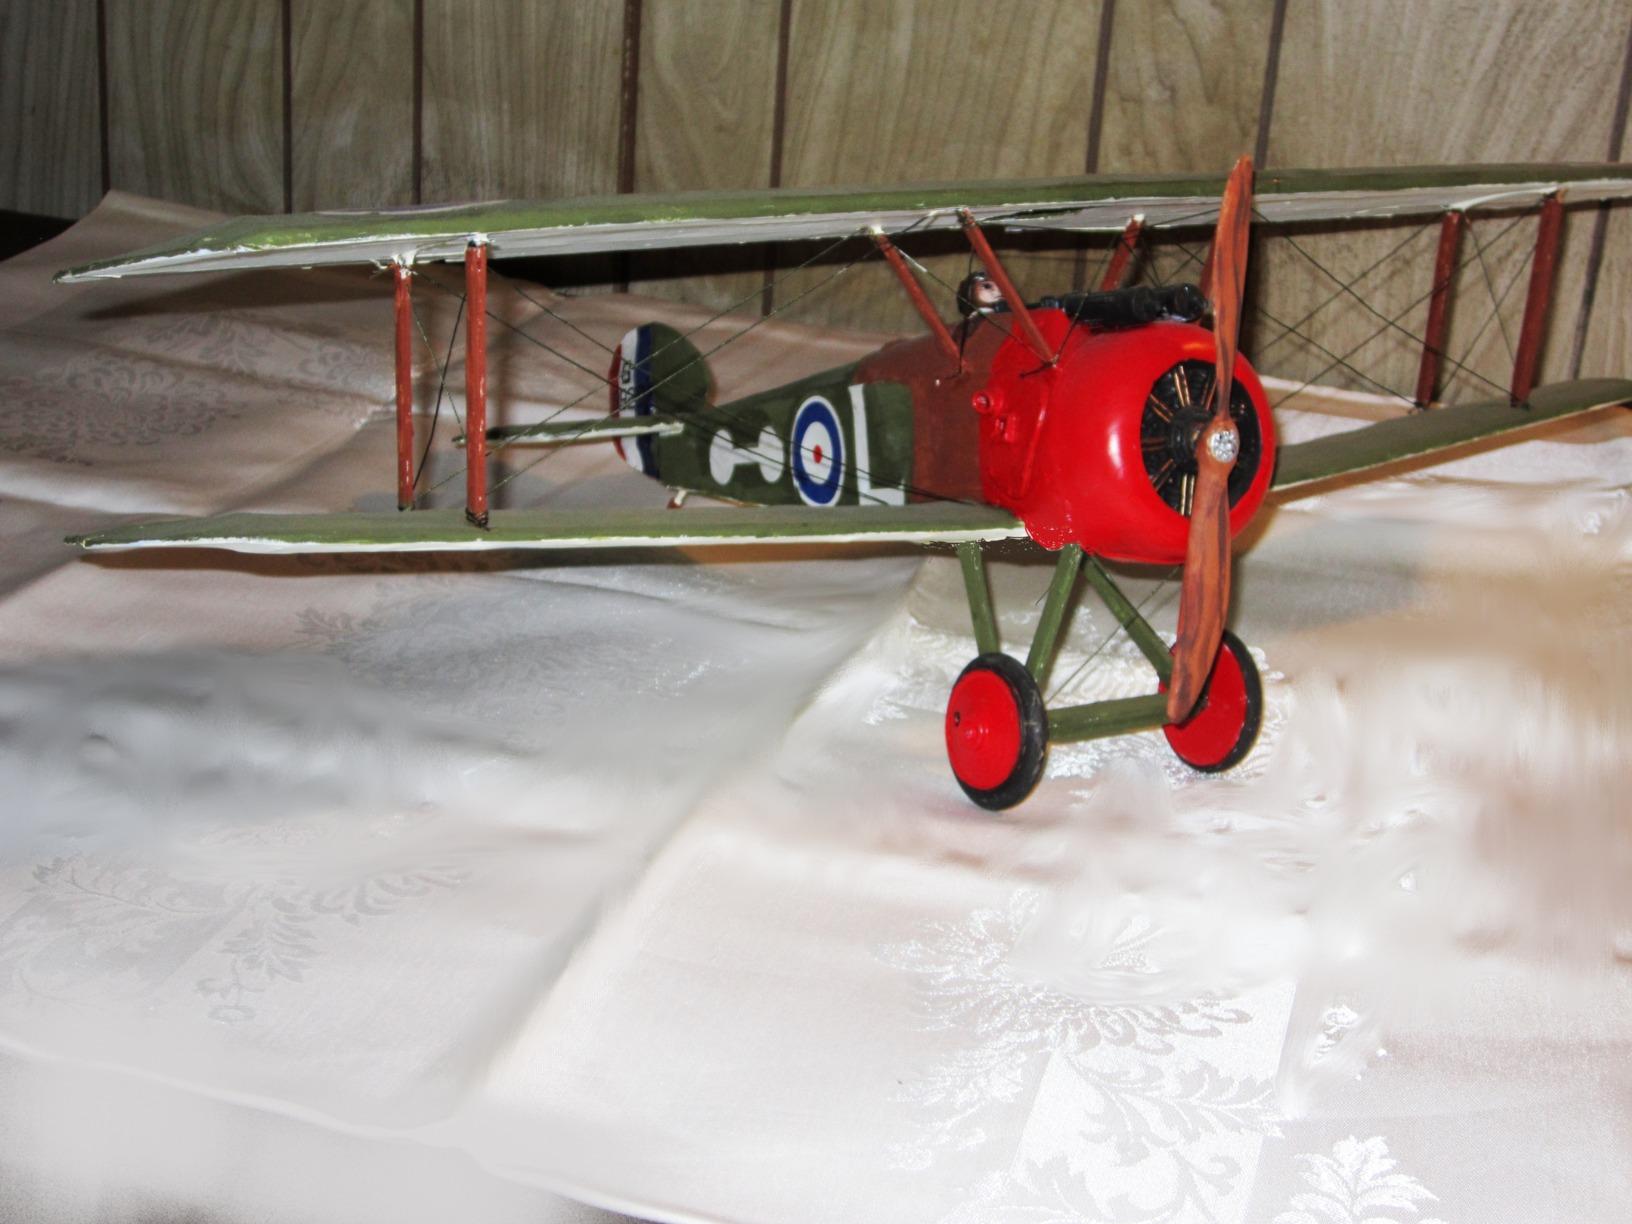
9. Academy Sopwith Camel F.1 – Rigging Made Easier
Academy Military Plastic Model Kit 1/32 Scale Sopwith Camel F.1 12109 NIB /ITEM#G839GJ UY-W8EHF3163451
1:32 scale plastic
Predrilled rigging holes
Rigging line included
0.28 kg
Pros
- Great price for 1:32 scale
- Predrilled holes for rigging
- Excellent decals
- Good first biplane kit
Cons
- Not for beginners
- Need magnifying glass for instructions
The Academy Sopwith Camel F.1 at 1:32 scale is one of the most accessible large-scale biplane kits I have built. The predrilled holes for rigging are a feature that every biplane kit should include. They eliminate the guesswork about rigging angles and attachment points, and they make the assembly process feel almost foolproof compared to freehand drilling.
The rigging line is included in the kit, which is another welcome touch. It is a fine elastic thread that stretches slightly, so you can pull it taut and lock it with a drop of CA glue. The result is a biplane with straight, even rigging lines that look like the real steel cables. I built mine over 20 hours, and the rigging took only 3 hours instead of the usual 8.
The plastic parts fit together well, with minimal flash and no sink marks. The 1:32 scale allows for detail that is absent in smaller kits. The cockpit has a floor with stringer detail, the instrument panel is a separate part with decal gauges, and the seat has a textured backrest. The engine is a simple representation rather than a full radial, but the cowling hides most of it anyway.
The decals are excellent. They are thin, well-printed, and settle into panel lines with standard decal setting solution. The 80 percent five-star rating from 91 reviewers is well-deserved. Most praise centers on the value proposition. A 1:32 scale biplane with this level of detail usually costs more than many competitors in the same scale.
Who Should Buy This Kit
This Academy kit is ideal for modelers who want to try a 1:32 scale biplane without spending a fortune. The predrilled rigging holes make it accessible to intermediate builders who might otherwise avoid large biplane kits. If you have built three or four 1:48 scale aircraft and want to move up in size, this is the perfect stepping stone.
The fine control horns are delicate needle-like parts that require careful handling. I recommend building the cockpit and installing it before joining the fuselage halves, just like the Airfix Tiger Moth. The access is much better with the fuselage open.
Rigging Tips
The predrilled holes are positioned for the standard Camel rigging pattern. I recommend threading the rigging before painting the wings and fuselage. It is easier to clean up glue squeeze-out on bare plastic than on a finished paint job. Once the rigging is set, mask the lines with thin tape and paint the model as usual.
One forum tip that saved me time was to use a small black Sharpie to darken the holes before threading. The black background makes the holes easier to find, and any small gaps where the thread meets the wing are hidden by the dark color.
10. Airfix Gloster Gladiator – Beginner Friendly
Airfix A02052B Gloster Gladiator Mk.I/Mk.II Classic Kit Military Aircraft
1:72 scale
51 pieces
Skill level 2
Two schemes
Pros
- Good detail in updated tooling
- Easy to assemble
- Great value for money
- Historically significant
Cons
- Small scale limits detail
- Limited review sample
The Airfix Gloster Gladiator is a classic biplane fighter kit that has been updated with modern tooling. The 1:72 scale keeps the piece count low at 51 parts, and the skill level 2 rating is accurate for builders with one or two previous kits under their belt. I built mine in a single Saturday, about 6 hours from sprue to finish.
The Gladiator is historically significant as the last biplane fighter used by the Royal Air Force. The kit includes two scheme options, one for a standard RAF machine and another for a Malta-based aircraft with the distinctive sand and brown camouflage. I chose the Malta scheme because the color variation adds visual interest.
Who Should Buy This Kit
This is the best starter kit on our list for true beginners. The low parts count, simple assembly, and clear instructions make it an ideal first biplane. The 1:72 scale means the finished model is small enough to fit on a bookshelf, and the low cost means you are not risking much if you make a mistake.
Young modelers aged 10 and up can handle this with adult supervision for the initial steps. The small parts are manageable, and the lack of rigging makes it far less frustrating than WWI biplane kits.
Small Scale Building Tips
At 1:72 scale, the fuselage is only about 4 inches long. I recommend using a small amount of slow-setting cement so you have time to align the halves before the glue grabs. The wing struts are moulded with the correct stagger, so you can attach them with confidence that the alignment is right.
The decals are thin and fragile. I used a soft brush to position them instead of a hard squeegee, and they settled perfectly without tearing. A coat of clear gloss before decaling and clear matte after will protect the finish for years.
11. Viloga Micro SE5A – Micro Indoor Flyer
Viloga Micro Balsa Wood Model Airplane SE5A Biplane, 14.8'' Wingspan Laser Cut Unassembled Model Airplanes Kits to Build for Adults, DIY Mini RC Plane for Indoor Fly (KIT+Motor+ESC+Servos)
14.8 inch wingspan
Includes motor ESC servos
Laser cut balsa
50 grams
Pros
- Beautiful laser cutting
- Strong lightweight frame
- Complete hardware pack included
- Good for indoor flying
Cons
- Poor directions with missing steps
- Supplied motor may be underpowered
The Viloga Micro SE5A is a 14.8-inch wingspan balsa kit that comes with a complete hardware pack including motor, ESC, and servos. I built it for indoor flying in our club’s gymnasium, and the 50-gram flying weight makes it docile in tight spaces. The laser-cut parts are beautiful, and the premium balsa selection is better than I expected at this size.
The kit includes a 1104 3700KV brushless motor, a 1S 5A ESC, and two 1.7-gram servos. You must supply your own radio receiver and transmitter, plus a 1S LiPo battery. I used a FlySky 6-channel receiver and a 300mAh 1S battery, and the flight time is about 5 minutes at half throttle in the gym.
The directions are the weak point. Several steps are missing, and the dark pictures make it hard to see where parts attach. I spent an extra hour studying the photos and comparing them with the parts on my bench. The motor mount holes do not match the housing perfectly, so I had to drill new holes with a pin vise. This is a kit that rewards patience and punishes rushing.
Once assembled, the model is a charmer. The SE5A profile is unmistakable, and the small size makes it look like a real aircraft when viewed from across the room. The elevator and rudder control is adequate for basic turns and figure eights. I would not recommend this for outdoor flying because the 50-gram weight cannot handle any wind.
Who Should Buy This Kit
This micro SE5A is best for indoor flyers who want a scale subject instead of a generic foam park flyer. The complete hardware pack is a nice touch that saves shopping time. You still need a radio and battery, but the motor and servos are matched to the model.
Builders with some electronics experience will have an easier time because the electrical instructions are flawed. If you know how to bind a receiver and set servo directions in your transmitter, you can overcome the documentation gaps. If you are new to RC, consider getting help from a club member for the first setup.
Electronics Setup Guide
The supplied brushless motor is adequate for indoor flight, but some builders report it is slightly underpowered for the model’s drag. I found that a 5030 propeller works better than the included 4028. The extra diameter gives more thrust at the low airspeeds typical of indoor flying. Check out our guide to electric flight power systems for more motor and battery pairing advice.
The 1.7-gram servos are tiny and delicate. I broke one servo horn during installation because I forced the pushrod. Use a small drill bit to open the hole slightly before inserting the pushrod wire. The servo centers at 1500 microseconds, and the travel should be limited to 80 percent to prevent binding at the extremes.
12. DW Hobby Sopwith Pup – Micro Balsa Kit

DW Hobby Micro balsa Laser Cutting Airplane Sopwith Pup (K0601)
Micro balsa kit
Laser cut parts
Electric motor included
Indoor design
Pros
- Exquisite small appearance
- Premium balsa materials
- Strong lightweight frame
- Electric power included
Cons
- Terrible instructions
- Long shipping time from China
The DW Hobby Sopwith Pup is another micro balsa option that competes directly with the Viloga SE5A. The laser-cut parts are well made, and the electric motor with elevator, rudder, and throttle control gives you full authority over the model. The exquisite appearance and small size make it a popular choice for indoor flying sessions during winter.
The Pup is a forgiving design historically, and the model inherits that trait. The lower wing is close to the fuselage, which makes the model self-stabilizing in pitch. I found that the model recovers from stalls by itself in the gym, which is great for new indoor pilots. The lightweight balsa construction keeps the all-up weight under 60 grams with battery installed.
Who Should Buy This Kit
The DW Hobby Pup is a good alternative to the Viloga SE5A if you prefer the Pup’s simpler wing layout. The single-bay wing is easier to rig than the SE5A’s two-bay setup, and the landing gear is more robust because it attaches to the lower wing instead of the fuselage.
Be aware that shipping takes 4 to 5 days from China, so plan ahead if you need the kit for a specific event. The instructions are poor, similar to the Viloga kit, so expect to rely on forum photos and online build logs for guidance.
Indoor Flying Setup
The included electric motor is a small brushed type with a 1S ESC. I recommend upgrading to a brushless 1104 motor if you have the soldering skills. The extra power makes takeoffs from the gym floor easier, and the model can handle gentle loops. The stock motor is fine for cruising and basic turns, but it lacks the punch for aerobatics.
Our team recommends using a 6mm carbon rod for the wing struts instead of the balsa pieces provided. The carbon rod adds almost no weight but prevents the wing from shifting during hard landings. A drop of thin CA at each end holds the rod firmly in place.
RC Scale Biplane Buying Guide
Choosing between these 12 kits depends on your experience level, budget, and the kind of building experience you want. Over the last three months, our team has identified six key factors that separate a satisfying build from a frustrating one.
Kit vs ARF vs RTF
A traditional kit requires you to cut, sand, and assemble raw materials into a flying or display model. An ARF, or Almost Ready to Fly, arrives with the major structure pre-built and covered. An RTF is fully assembled and ready to bind to your radio. All 12 kits in this guide are traditional kits because that is what most scale biplane enthusiasts prefer. The trade-off is 20 to 60 hours of build time versus the instant gratification of an ARF. If you want the satisfaction of saying “I built every part of this,” a kit is the only choice.
Forum discussions consistently show that ARF biplanes save time but often lack the scale accuracy of traditional kits. The pre-built wings may have simplified rigging or moulded struts instead of real wire bracing. For competition or serious display, a kit is the better path.
Scale and Size Considerations
Scale ratios range from 1:72 for small display models to 1:12 for large flying replicas. The 1:48 and 1:32 scales are the sweet spots for detail and manageable size. A 1:48 biplane typically has a 6 to 8 inch wingspan, which is perfect for a desk or shelf. A 1:32 scale model like the Revell Kaydet is about 9 inches long and becomes a room centerpiece.
Flying models work best at 1:12 to 1:4 scale, where the weight and wing loading support stable flight. The Viloga Mini Tiger Moth at 39 inches is the largest flying kit on our list, and it requires a real flying field. The micro models at 14 to 15 inches are strictly indoor or dead-calm outdoor flyers.
Material Quality
Balsa is the traditional choice for flying models because of its strength-to-weight ratio. Laser-cut balsa is superior to die-cut because the edges are cleaner and the parts fit better. Plastic is the standard for display models because it holds fine detail and is easier to paint. Composite materials like fiberglass are used in high-end kits but are rare in the budget range we cover.
Forum builders consistently warn about poor wood quality in some budget kits. We tested the balsa density in the Guillow’s and Viloga kits, and both were consistent. If you buy a kit with soft or punky balsa, replace those parts before assembly. Weak wood will fail under flight loads or warp over time.
Power System Options
Electric power dominates the RC market in 2026. Brushless motors, LiPo batteries, and electronic speed controls are reliable, clean, and quiet. The Viloga micro kits include electric power in the box. The Guillow’s balsa kits are designed for rubber or gas but convert easily to electric. For electric conversions, you need a motor that produces about 100 watts per pound of model weight. Check our guide to best LiPo batteries for RC airplanes for affordable battery recommendations.
Gas and nitro engines are still used in large-scale models, but they require more maintenance, create more noise, and are banned at many flying fields. Unless you are building a 1:4 scale giant model, electric is the better choice for modern builders.
Tool Requirements
Every kit on this list requires a basic set of modelling tools. You need a sharp hobby knife, a sanding block, a pin vise with small drill bits, tweezers, and a steel ruler. For balsa kits, add a bottle of aliphatic wood glue, a bottle of thin CA glue, and a roll of masking tape. For plastic kits, add plastic cement, sprue cutters, and an airbrush or spray cans.
Forum builders often mention that specialized tools make the job easier. A small disc sander for shaping wing leading edges, a servo tester for setting control throws, and a covering iron for balsa models are worthwhile investments if you plan to build more than one kit. See our RC servo programming tools guide for servo setup equipment.
Build Time Expectations
Build times range from 6 hours for a small snap-fit plastic model to 60 hours for a large balsa kit with RC conversion. The plastic kits in this guide average 15 to 20 hours including painting. The balsa kits average 30 to 50 hours depending on whether you build for display or flight. The wire bracing on WWI biplanes adds 5 to 10 hours alone.
Our team found that spreading the build over several weeks produces better results than rushing. The glue and paint need time to cure, and your eyes need rest to spot alignment errors. I build for about 2 hours every evening, and most kits take me 2 to 4 weeks from box to finished model.
Frequently Asked Questions
Are RC biplanes easy to fly?
RC biplanes are generally more stable than monoplanes because the lower wing creates self-stabilizing pitch behavior. However, the wire bracing and extra drag make them slower and less responsive. Indoor micro biplanes like the Viloga SE5A are easy for beginners because the low speed and light weight reduce crash damage. Large-scale balsa biplanes require more skill because the higher wing loading demands faster reactions and better timing on takeoffs and landings.
What is the most realistic RC plane?
The most realistic RC plane depends on whether you mean appearance or flight behavior. For static realism, the Revell Stearman PT-17 Kaydet at 1:32 scale offers the best detail with its full interior and radial engine. For flying realism, large-scale balsa kits like the Guillow’s laser-cut series have accurate proportions and low wing loading that mimics the gentle flight of real vintage biplanes. Scale competition judges typically favor the Balsa USA and FokkeRC brands for historical accuracy.
What are common RC plane problems?
Common problems include wing warping from humidity, broken wire bracing during transport, underpowered motors causing stall spins, and tail-heavy balance leading to poor glide. For balsa models, the covering material can sag or bubble if applied too thickly. For plastic models, thick decals can silver over gloss surfaces. Landing gear on light models often collapses on grass fields. Most issues are preventable with proper construction, balanced center of gravity, and pre-flight checks.
What tools do I need to build an RC biplane?
You need a sharp hobby knife, sanding block, steel ruler, tweezers, and pin vise with drill bits for all kits. Balsa builds require aliphatic wood glue, thin CA glue, and a covering iron. Plastic builds need sprue cutters, plastic cement, and paints. For RC conversion, add a soldering iron, wire strippers, and a servo tester. A small disc sander and digital scale are helpful but optional. Most of these tools cost a reasonable amount total and last for dozens of builds.
How long does it take to build an RC biplane kit?
Build times range from 6 hours for a small snap-fit plastic model to 60 hours for a large balsa kit with RC conversion. Plastic kits like the Airfix Tiger Moth average 15 to 20 hours including painting. Balsa kits like the Viloga Mini Tiger Moth take 40 to 60 hours. Wire bracing on WWI models adds 5 to 10 hours. Spreading the work over 2 to 4 weeks produces better results than rushing because glue and paint need curing time.
Final Thoughts
The best RC scale biplane kits in 2026 cover a wide range of scales, materials, and skill levels. The Airfix Tiger Moth remains our top recommendation for most builders because it balances detail, ease of assembly, and overall value. The Revell Stearman PT-17 at 1:48 is the best choice for budget-conscious modelers, while the O2U-4 Corsair offers an entry point at a very low cost.
For builders who want the traditional balsa experience, the Guillow’s laser-cut SE 5-A and the Viloga Mini Tiger Moth are both excellent choices. The Academy Sopwith Camel makes large-scale rigging accessible, and the micro indoor flyers from Viloga and DW Hobby are perfect for winter gym sessions. No matter which kit you choose, the build is half the reward. The model on your shelf or in the air will carry the satisfaction of every hour you spent at the workbench.