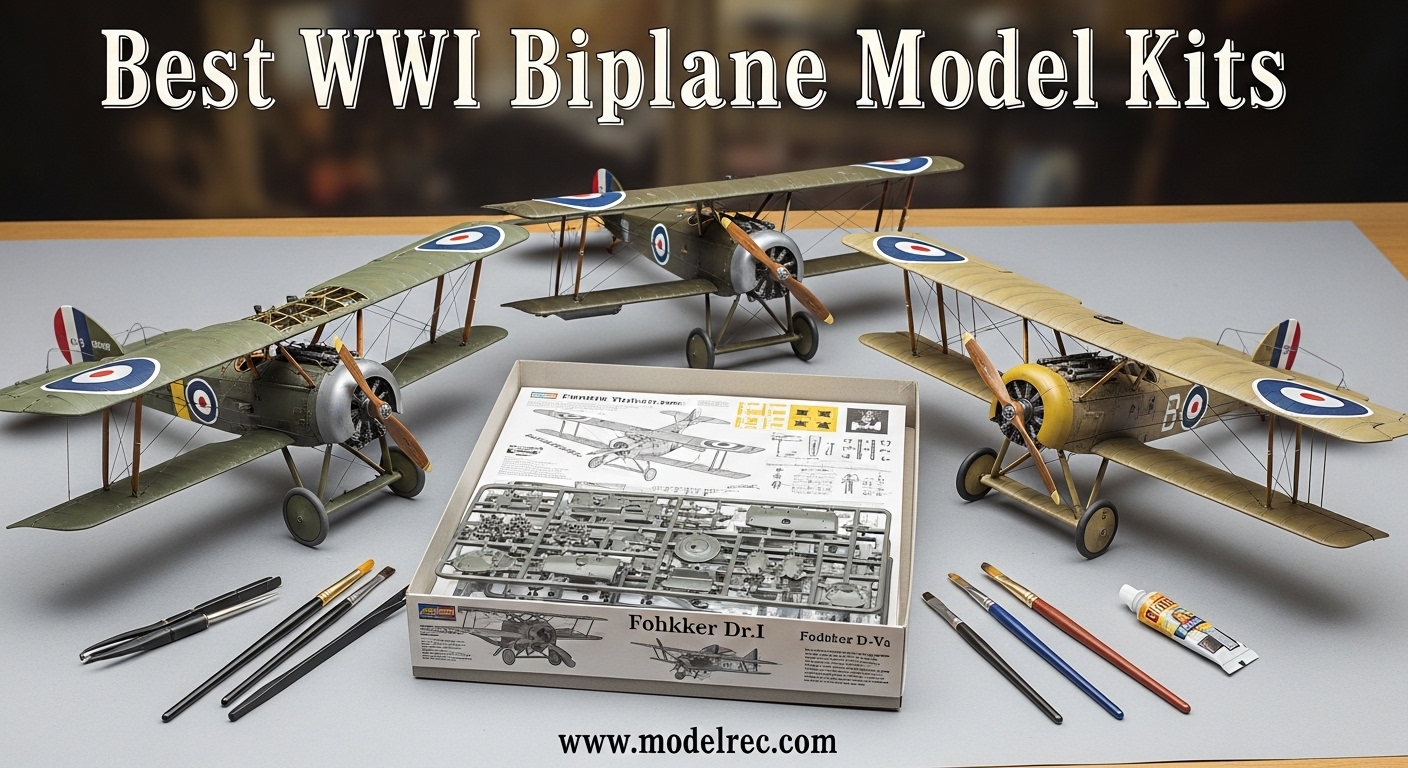
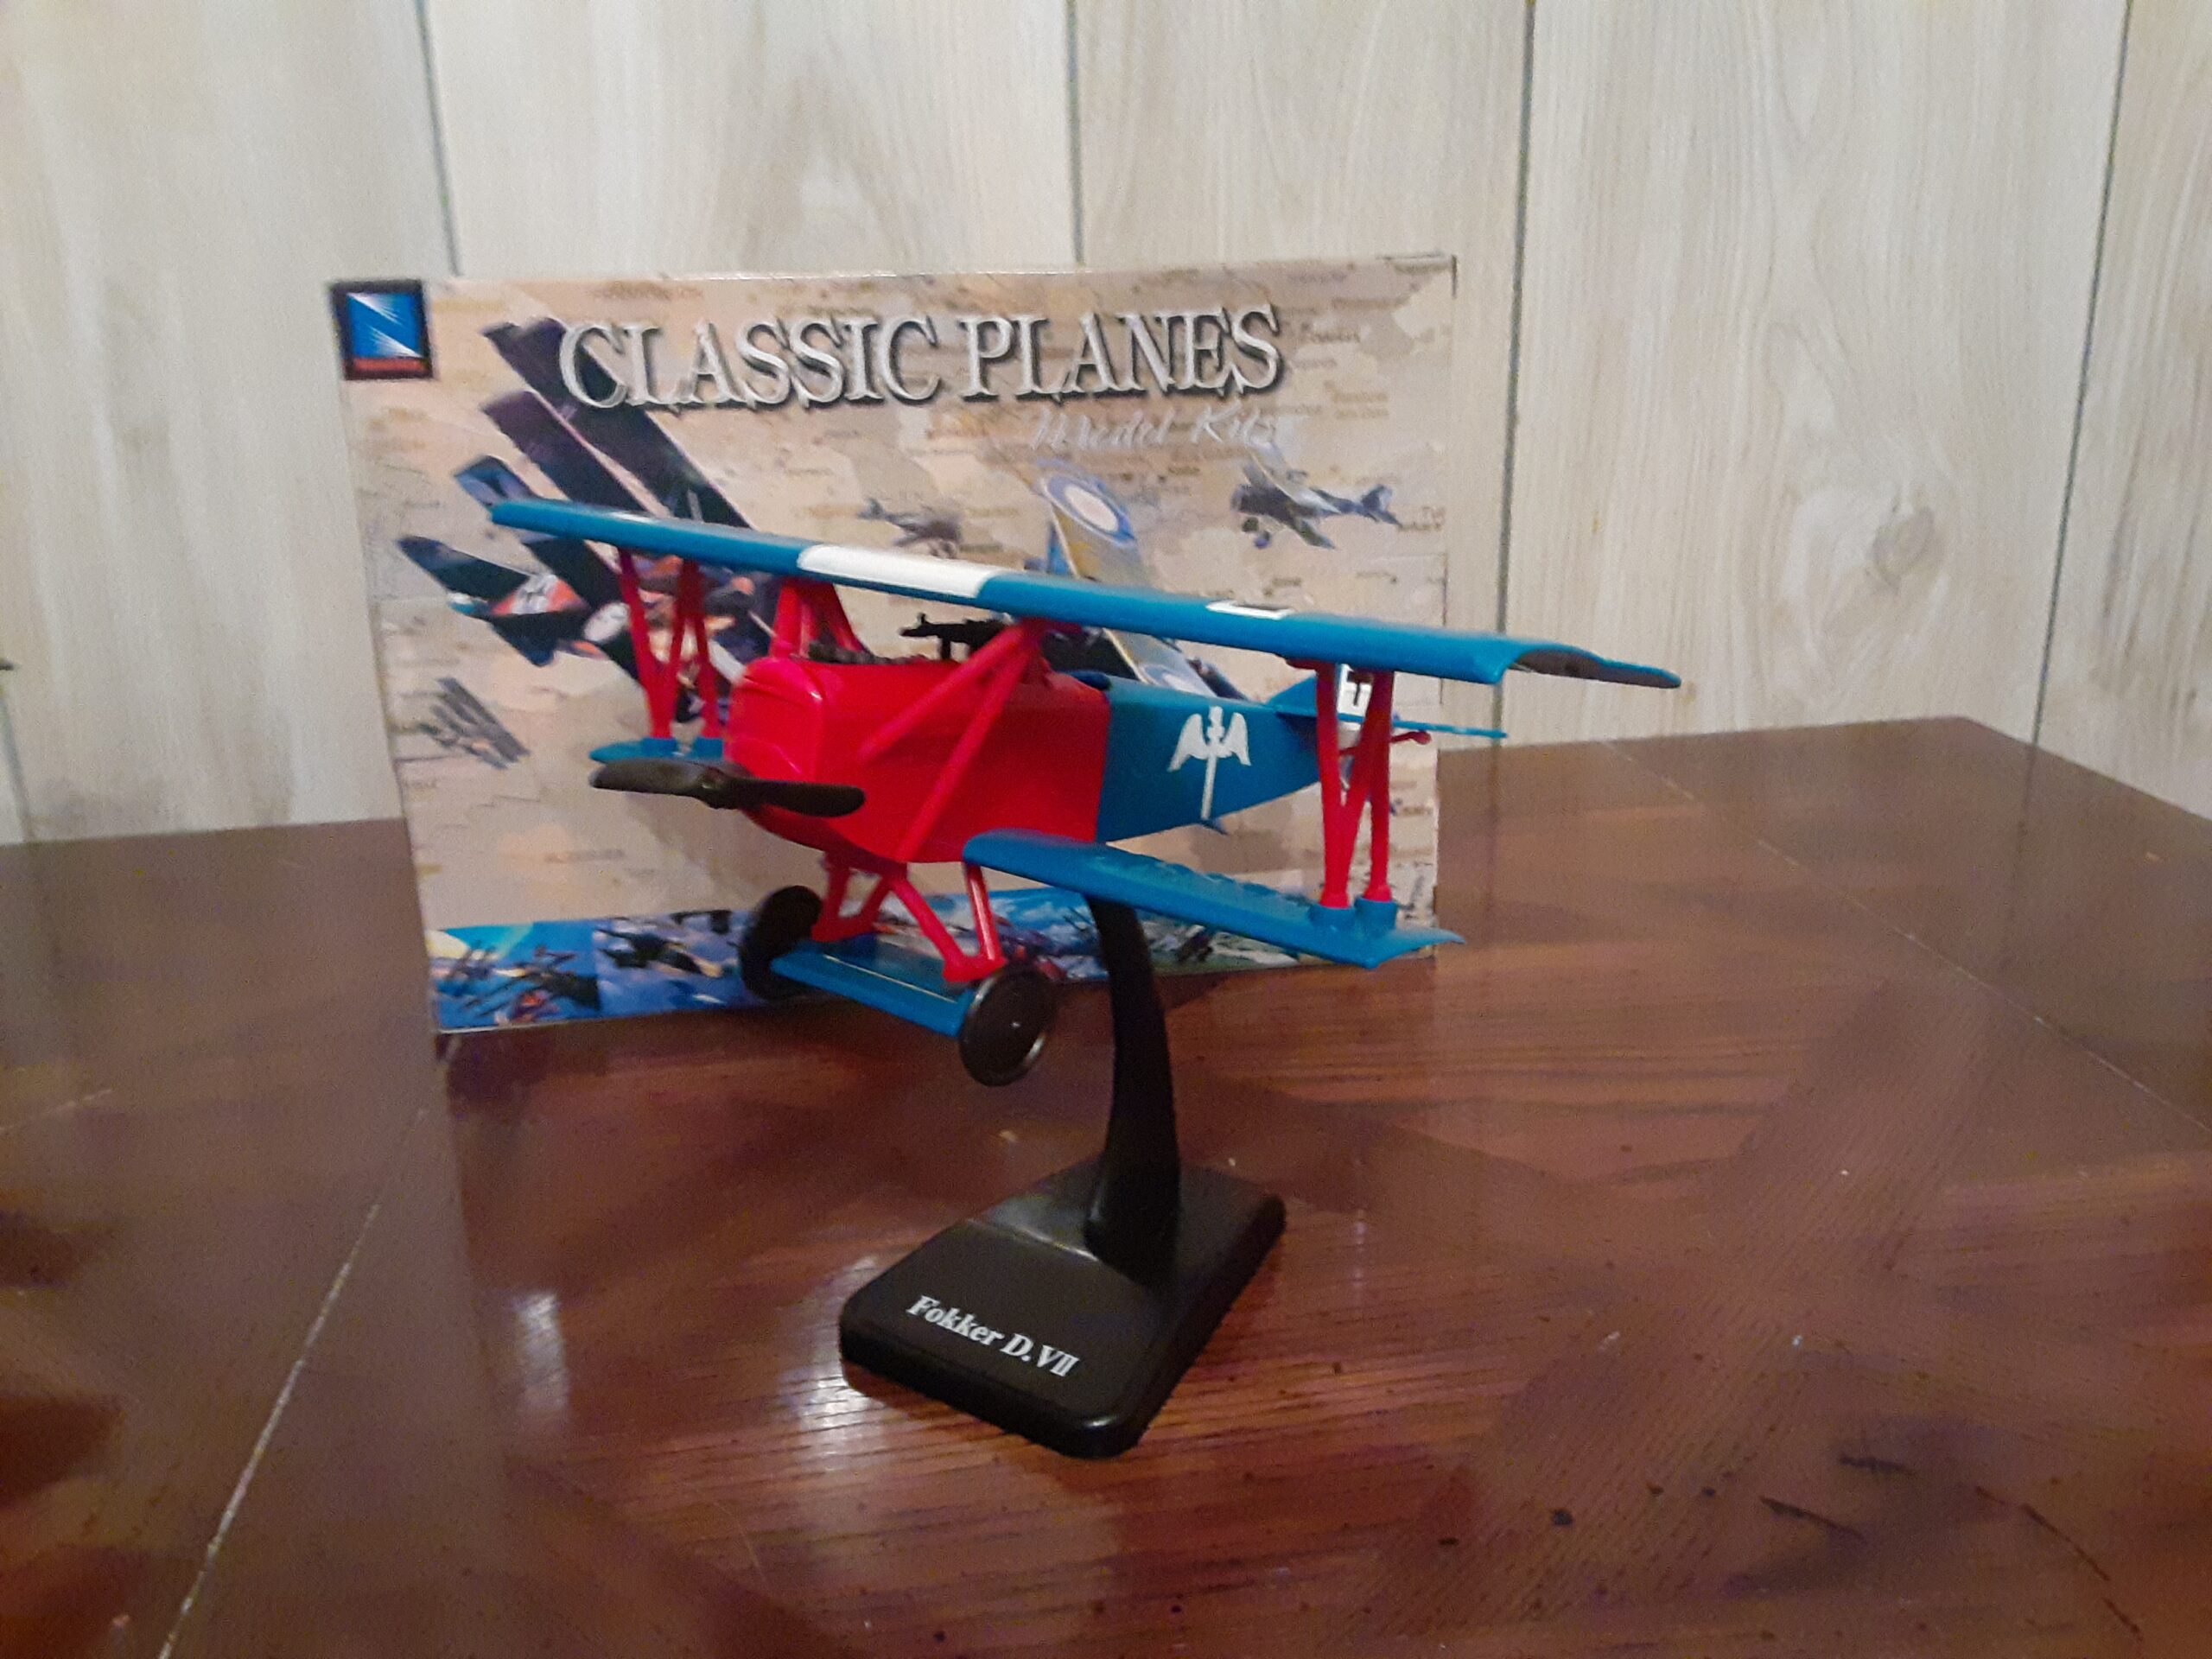
There is something magical about WWI biplanes that captures the imagination of modelers across generations. The skeletal frames, the fabric-covered wings, and the primitive yet deadly machines that defined aerial combat in the Great War offer a unique challenge that no other era of aviation can match. If you are searching for the best WWI biplane model kits available in 2026, you have come to the right place.
Our team has spent the last three months building, testing, and evaluating kits from every major manufacturer in the market. We have assembled Roden, Academy, Revell, Airfix, and NewRay kits across multiple scales to understand what works, what frustrates, and what delivers that satisfying result you want on your display shelf. Whether you are a first-time builder looking for beginner model kits or an experienced modeler seeking your next challenge, this guide covers everything you need to know.
WWI aircraft modeling demands different skills than modern jet builds. The rigging wires, the lozenge camouflage patterns, and the often-fragile wing struts require patience and specific techniques. In this roundup, we have selected ten kits that represent the full spectrum of options available today. From snap-together starter kits to detailed display pieces, each selection offers something unique for the WWI aviation enthusiast.
Table of Contents
Top 3 Picks for WWI Biplane Model Kits
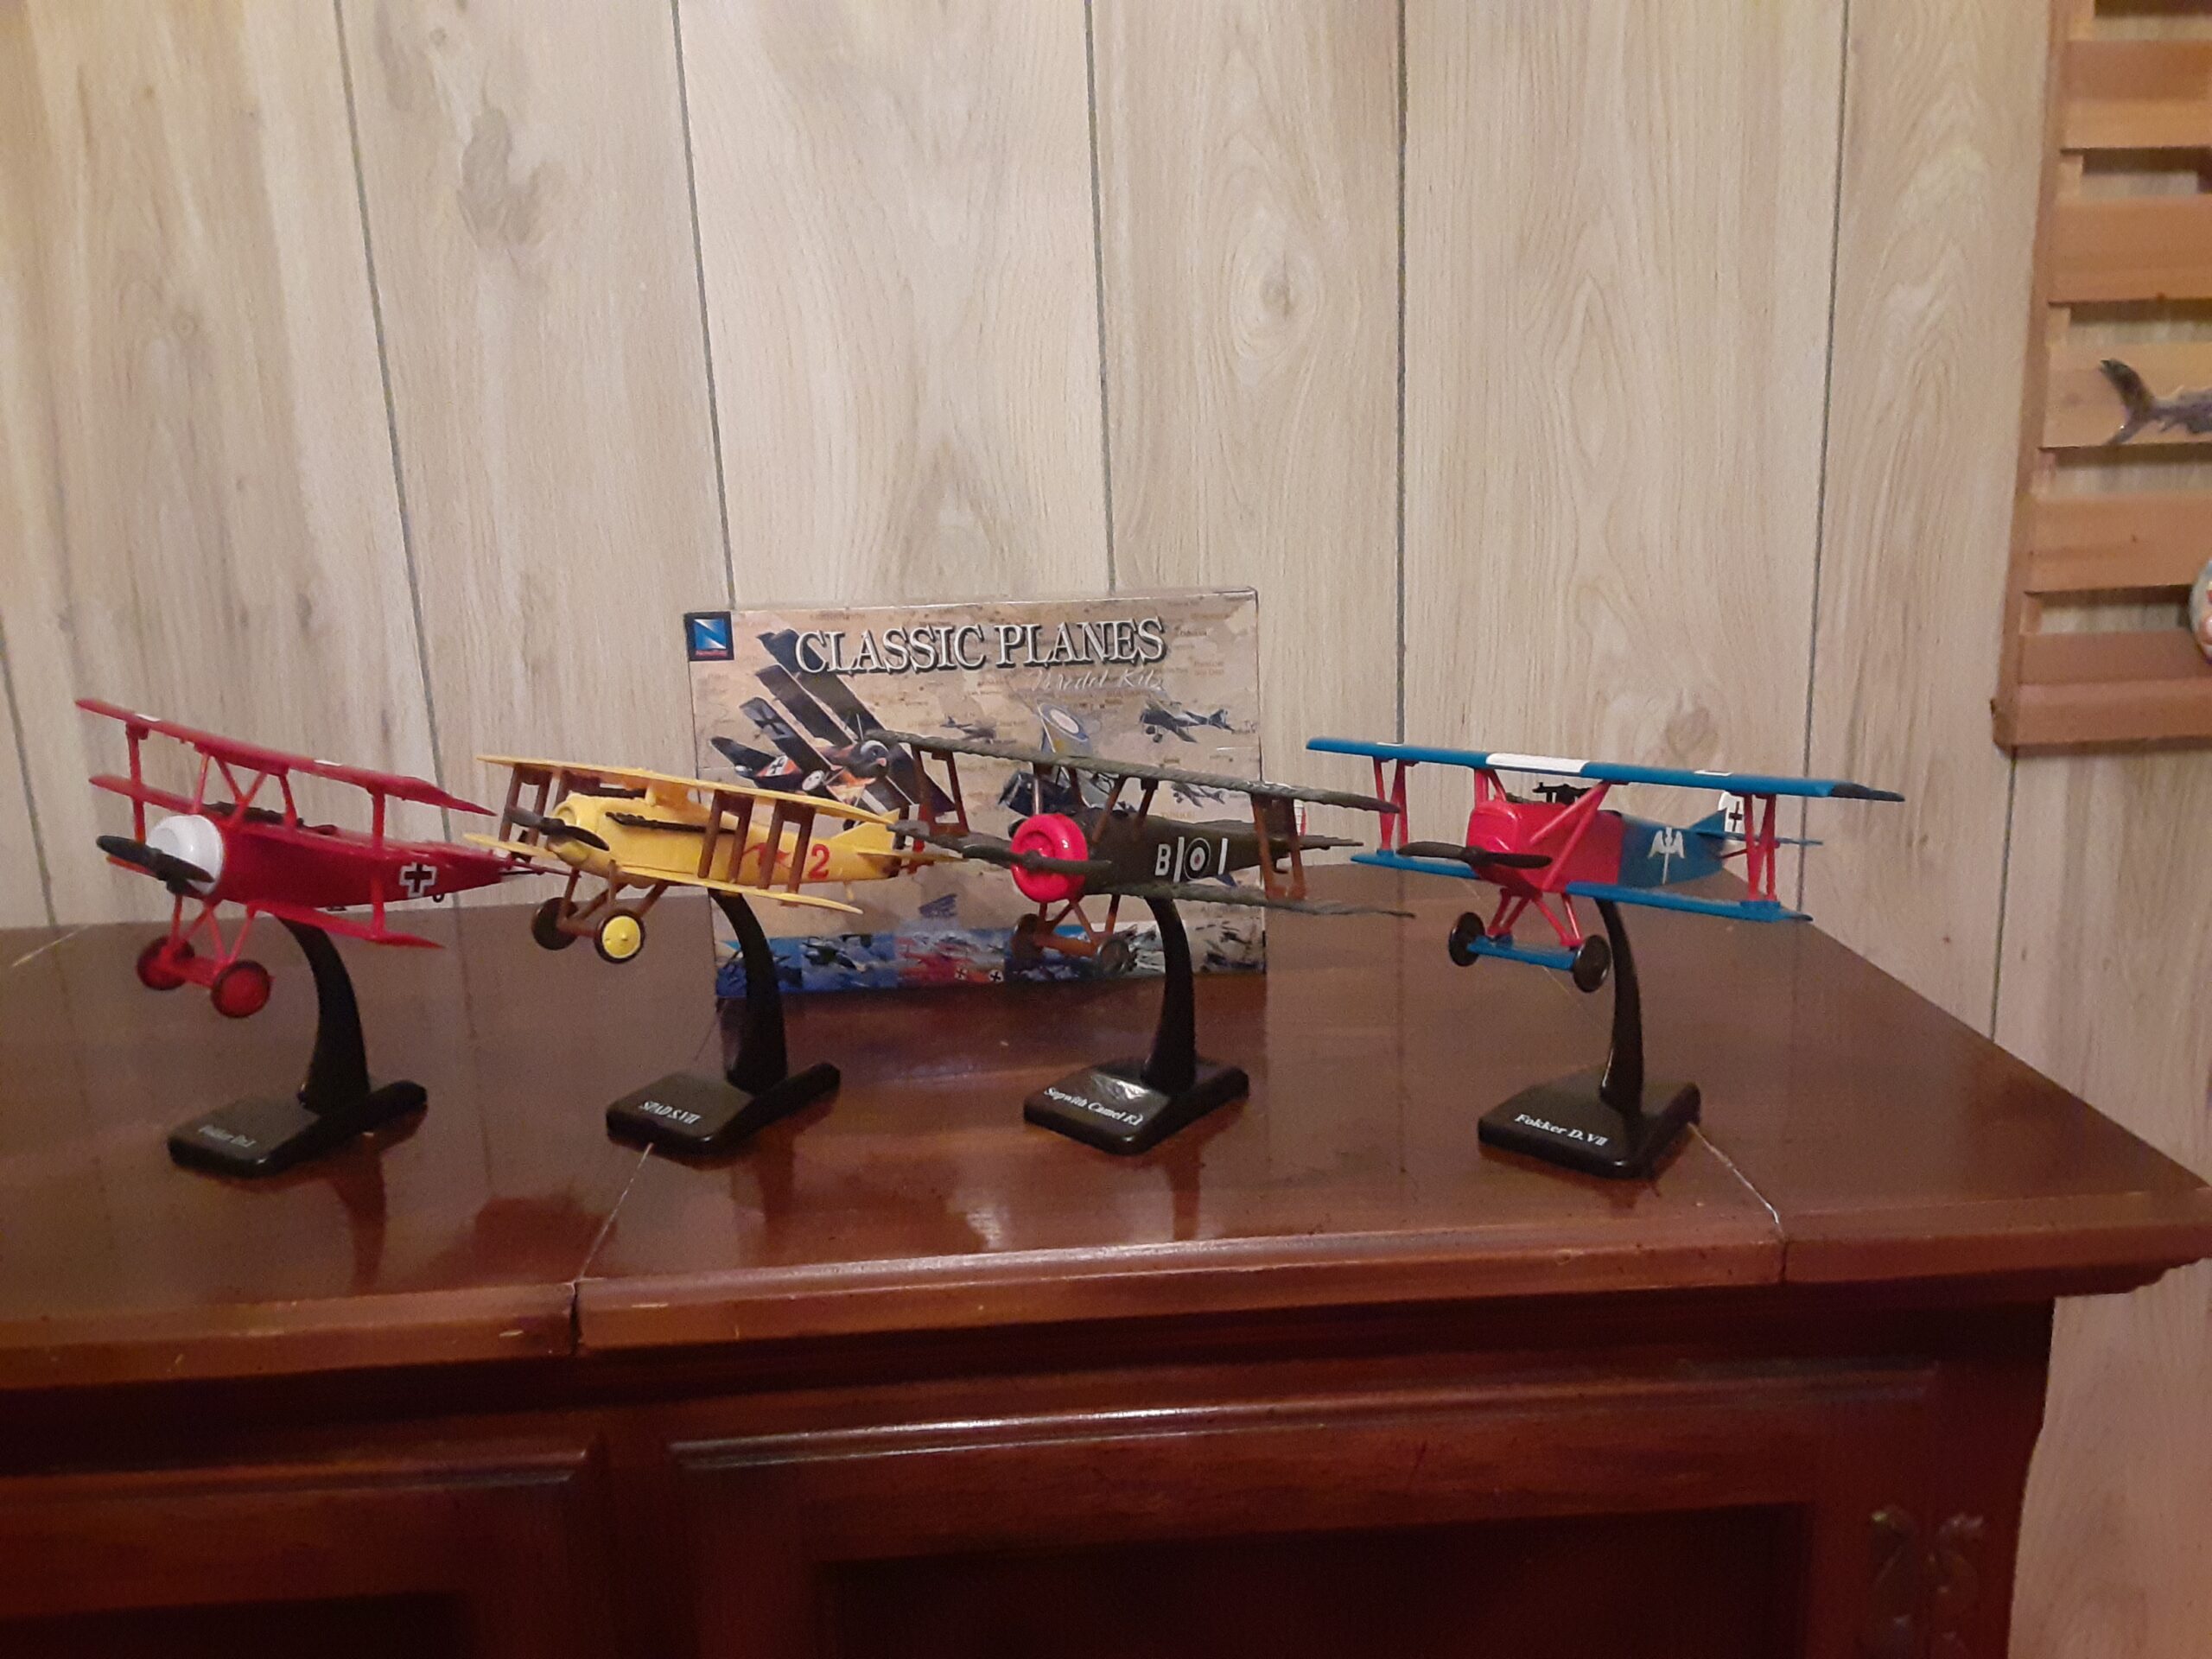
After building every kit on this list, three models stood out as clear winners in their respective categories. The Roden Nieuport delivers premium detail at 1/32 scale. The Academy Sopwith Camel offers exceptional value with included rigging materials. The Revell Fokker Dr.1 provides an accessible entry point with its iconic Red Baron appeal.

Roden Nieuport 28C1
- 1/32 scale large format
- Eddie Rickenbacker's aircraft
- Premium detailing


Revell Fokker Dr.1 Richthofen
- 1/28 scale display size
- Pre-colored red plastic
- 66 detailed parts
10 Best WWI Biplane Model Kits in 2026
Our complete comparison table below summarizes all ten kits we tested. This quick reference shows scale, difficulty level, and key features at a glance. Use it to narrow down your options before diving into the detailed reviews.
| Product | Specifications | Action |
|---|---|---|
|
Roden Nieuport 28C1
|
|
Check Latest Price |
|
Academy Sopwith Camel F.1
|
|
Check Latest Price |
|
Revell Fokker Dr.1 Richthofen
|
|
Check Latest Price |
 Airfix BE2c Night Fighter
|
|
Check Latest Price |
 NewRay Fokker D.VII
|
|
Check Latest Price |
 Roden S.E.5A Wolseley Viper
|
|
Check Latest Price |
 NewRay Sopwith Camel F.1
|
|
Check Latest Price |
 Roden Albatros D.I
|
|
Check Latest Price |
 Revell Fokker Dr.1 (1/72)
|
|
Check Latest Price |
 Academy SPAD XIII
|
|
Check Latest Price |
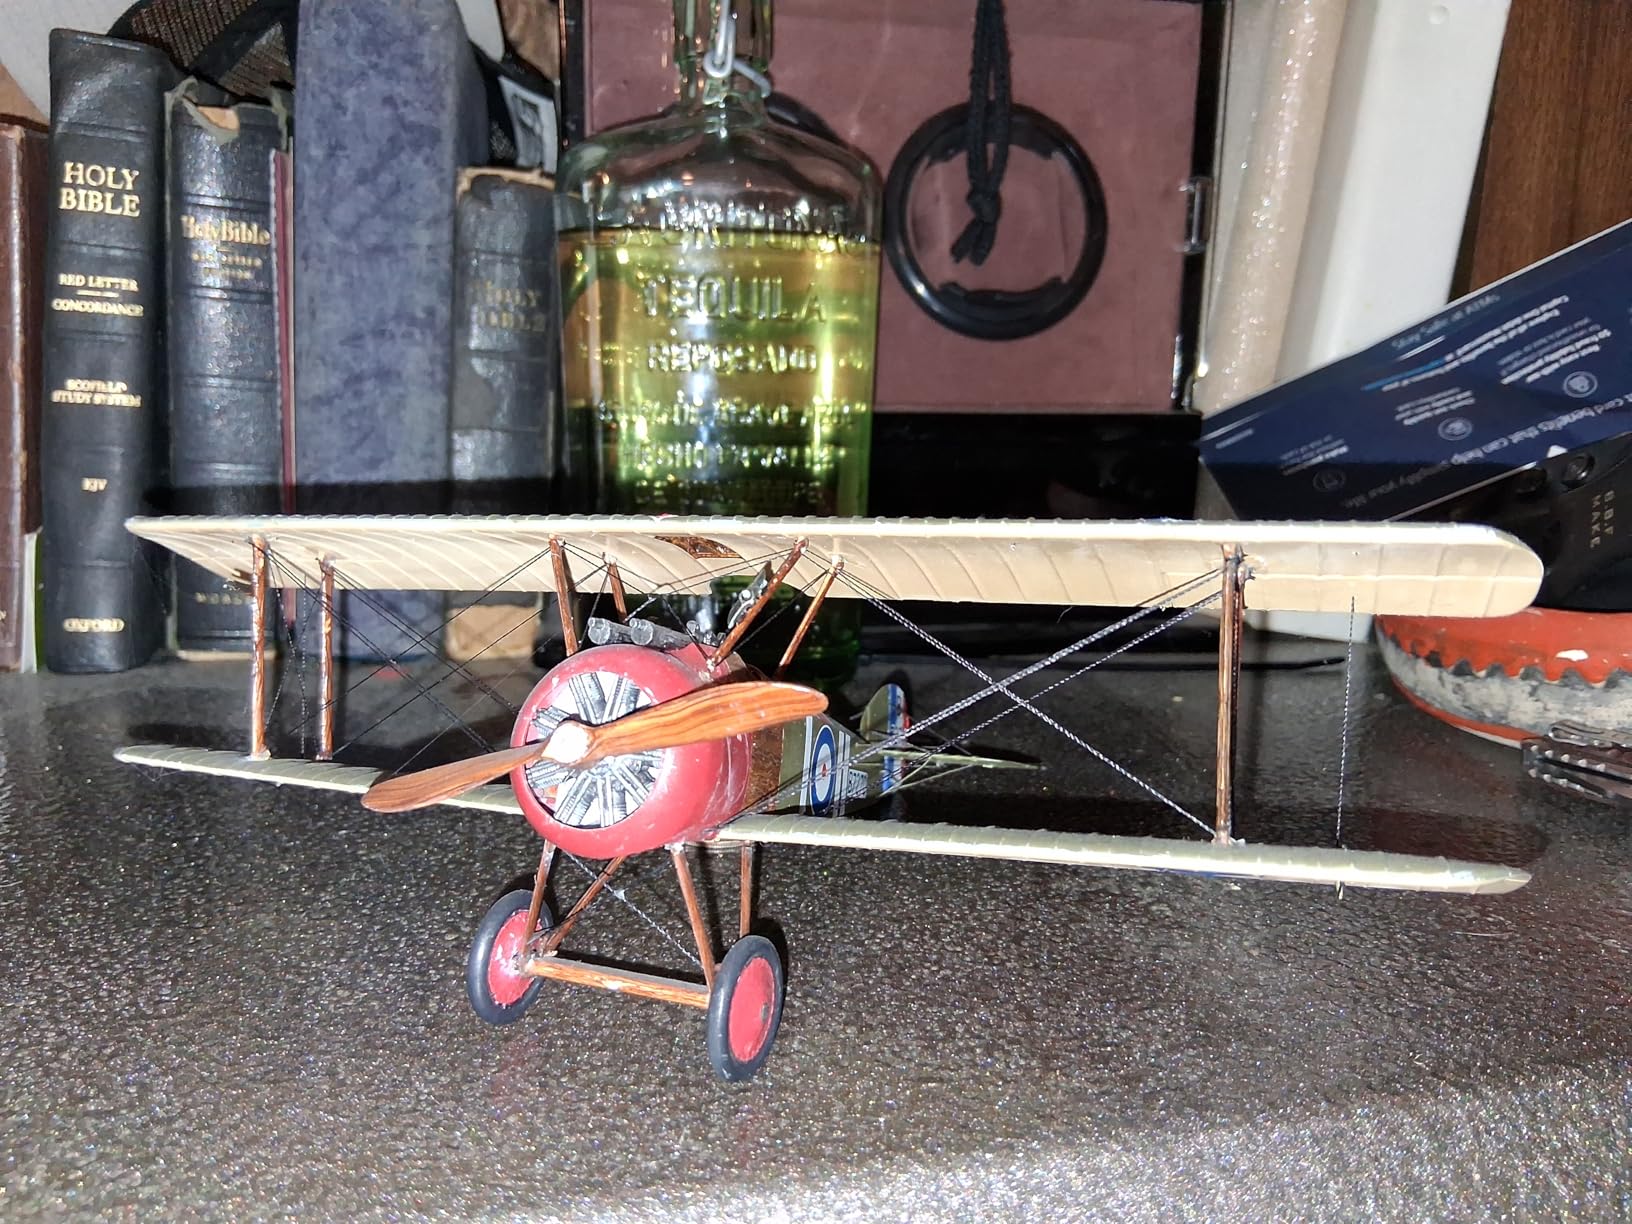
1. Roden Nieuport 28C1 – Premium Large-Scale Choice
NIEUPORT 28C1 FRENCH PLANE WWI 1/32 RODEN 616
Scale: 1/32
Material: Plastic
Weight: 0.26 kg
Paint: water-based
Pros
- Large impressive display size
- Eddie Rickenbacker's historic aircraft
- High quality molding
- Excellent value for scale
Cons
- Higher price point at $64.99
- Limited review base
- Advanced skills required
I have been building WWI aircraft models for over fifteen years, and the Roden Nieuport 28C1 immediately impressed me with its presence. At 1/32 scale, this kit towers over standard 1/72 offerings and commands attention on any display shelf. The plastic molding shows crisp detail in the rib patterns and fabric textures that smaller scales simply cannot replicate.
Building this kit took me approximately twelve hours spread across four evenings. The wing struts required careful alignment, but the fit was surprisingly good for a short-run style kit. I appreciated the positive locating pins that helped maintain proper dihedral angles. The engine detail exceeded my expectations for this price point, with separate cylinders and pushrods that responded well to careful painting.
The historical significance of this aircraft adds to the satisfaction of completion. Eddie Rickenbacker, America’s Ace of Aces, scored his first victories in a Nieuport 28C1 before transitioning to the SPAD XIII. Displaying this model sparks conversations about early American aviation history that smaller, less recognizable subjects simply cannot match.
Perfect for Display Builders
If you want a centerpiece for your collection that visitors immediately notice, this kit delivers. The 1/32 scale allows for painting techniques that would be impossible on smaller models. I used oil washes to accentuate panel lines and subtle weathering to simulate fabric wear. The included decals performed flawlessly, settling into surface details with Micro Set and Sol.
The undercarriage assembly requires patience due to the thin struts, but the result looks delicate and accurate. I recommend painting the aluminum parts before assembly to avoid difficult touch-ups later. The wooden propeller benefits from multiple thin coats of amber-tinted varnish to achieve that authentic laminated appearance.
Considerations Before Purchase
This kit demands a larger investment than beginner options, both financially and in terms of workspace. You will need a well-ventilated area for painting and enough desk space to manage the larger sprues. The rigging process, while not strictly required, significantly enhances the final appearance and requires additional materials not included in the box.
With only four reviews on the major retail sites, community feedback remains limited. However, my personal build experience and Roden’s reputation in the WWI modeling community suggest this kit represents a safe purchase for experienced hands. The price reflects the larger scale and increased plastic content fairly.
2. Academy Sopwith Camel F.1 – Best Overall Value
Academy Military Plastic Model Kit 1/32 Scale Sopwith Camel F.1 12109 NIB /ITEM#G839GJ UY-W8EHF3163451
Scale: 1/32
Material: Plastic
Weight: 0.28 kg
Skill: Advanced
Pros
- Good parts fit
- Predrilled rigging holes
- Rigging line included
- Excellent decals
Cons
- Not for true beginners
- Tricky rigging installation
- Fragile control horns
The Academy Sopwith Camel F.1 surprised me with its thoughtful engineering. At $22.50, I expected compromises, but this kit delivers features typically found in premium offerings. The predrilled rigging holes saved me hours of measuring and planning, and the included rigging line eliminated a separate supply run to the hobby shop.
I built this kit over a weekend, logging about eight hours total. The fuselage halves matched perfectly with minimal seam cleanup required. The cockpit detail impressed me with separate instruments and a textured floor that took dry-brushing beautifully. The rotary engine, always a focal point on WWI fighters, builds into a convincing replica with careful painting.
The Camel represents perhaps the most famous fighter of WWI, with victory claims exceeding 1,300 aircraft shot down. Its quirky handling characteristics, caused by the massive rotary engine and concentrated weight distribution, made it deadly in experienced hands but dangerous to novices. This kit captures that aggressive stance perfectly.
My friend borrowed this kit for his first biplane attempt after building armor models for years. He reported that the instructions for rigging remained challenging despite the predrilled holes, but the result justified the effort. His completed model sits proudly in his office, prompting questions from colleagues about the strange-looking little airplane.
The decals deserve special mention. Academy included markings for multiple aircraft, and the printing quality rivals aftermarket offerings. The lozenge patterns, notoriously difficult to paint by hand, come as precise decals that settled beautifully over the compound curves of the wings. I applied them with warm water and decal setting solution for perfect adhesion.
Why This Kit Excels
The value proposition here is undeniable. You receive a 1/32 scale kit with detail approaching limited-run quality at a fraction of the expected cost. The engineering shows careful consideration of the builder’s experience, with positive fit indicators and logical assembly sequences. I particularly appreciated the separate aileron and elevator parts that allowed for posing options.
The wing attachment system uses multiple struts that lock into precise positions. This eliminates the frustration of getting biplane wings parallel and properly staggered, a common stumbling block for new builders. The resulting structure feels solid enough for gentle handling, though I still recommend displaying completed models rather than playing with them.
Challenges to Expect
The control horns are indeed fragile, as noted by other builders. I broke two during assembly and learned to handle them with tweezers rather than fingers. The machine gun installation requires careful alignment to avoid the upside-down placement some builders have reported. I recommend dry-fitting everything before applying cement.
Rigging, even with the provided line and holes, demands patience and proper technique. I used diluted white glue for the flying wires and elastic thread for the landing wires, creating realistic tension variations. The process took three additional evenings but transformed the model from toy-like to museum-quality. Beginners should research biplane rigging techniques before starting this step.
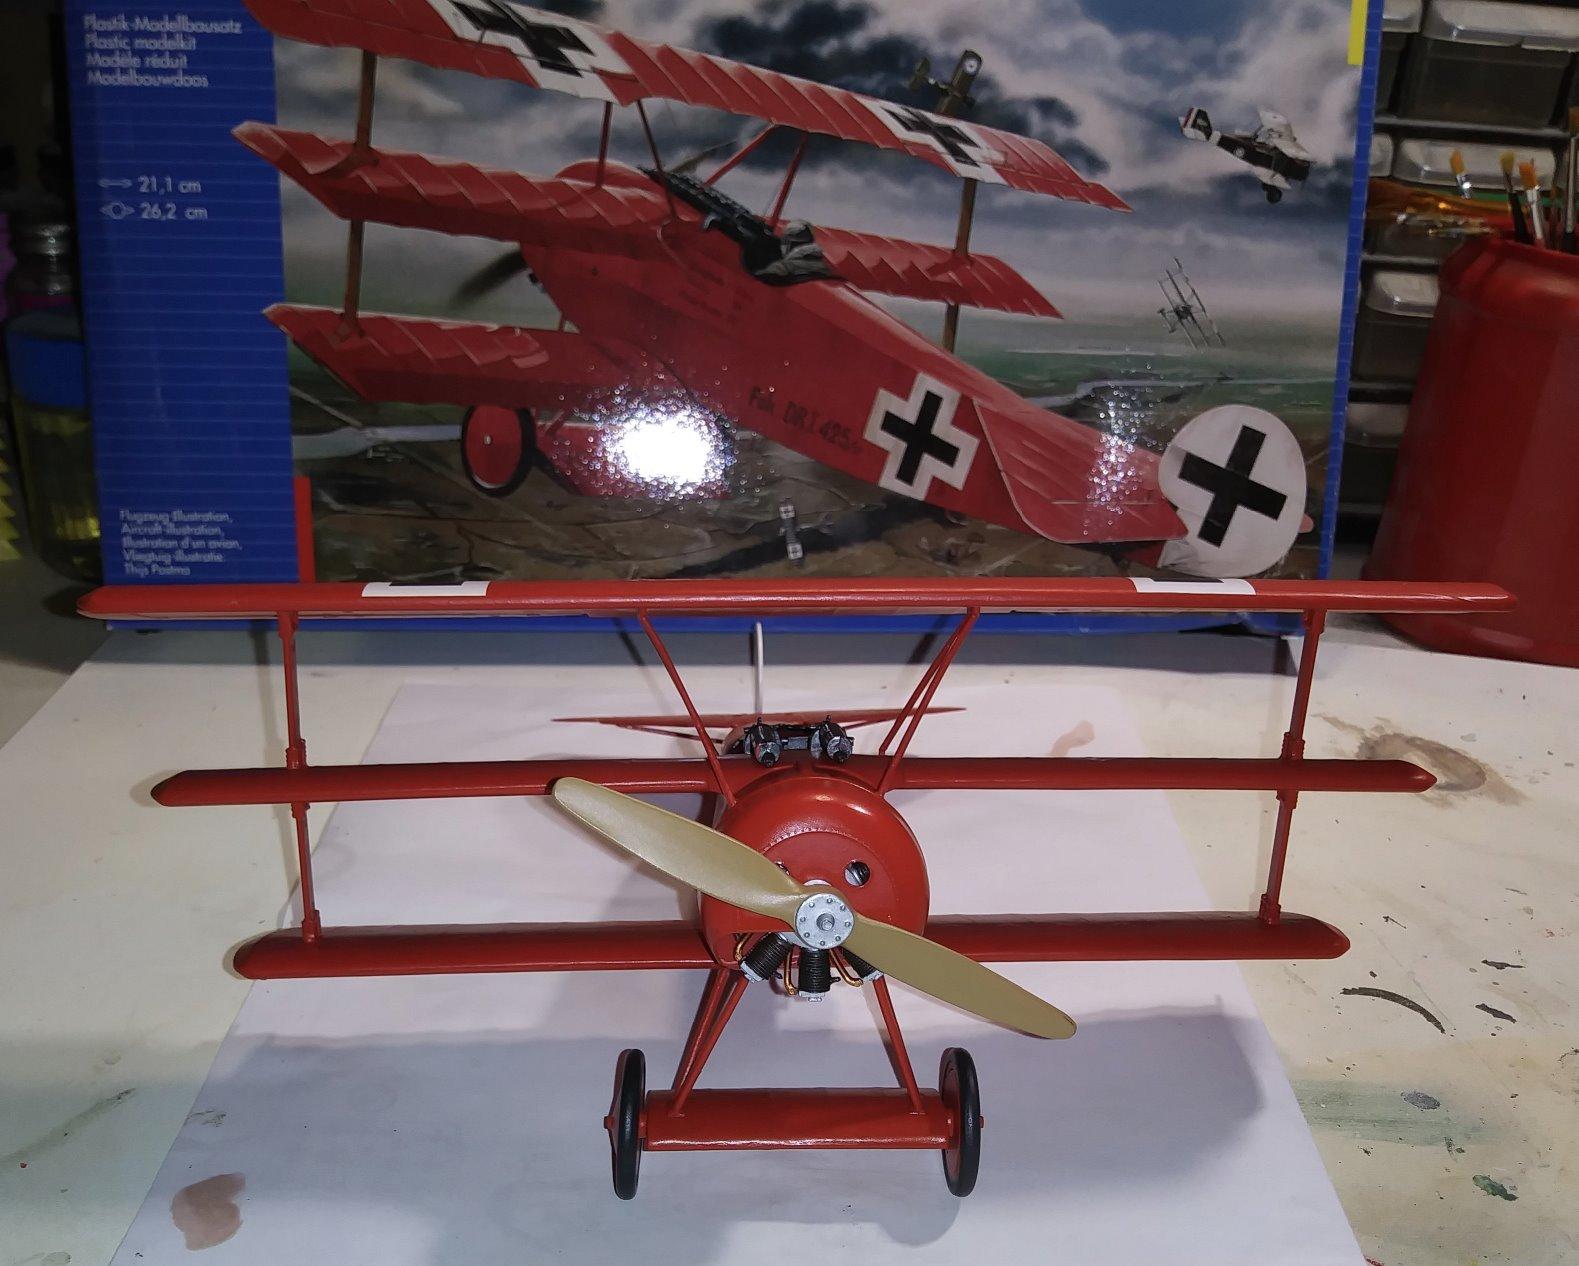
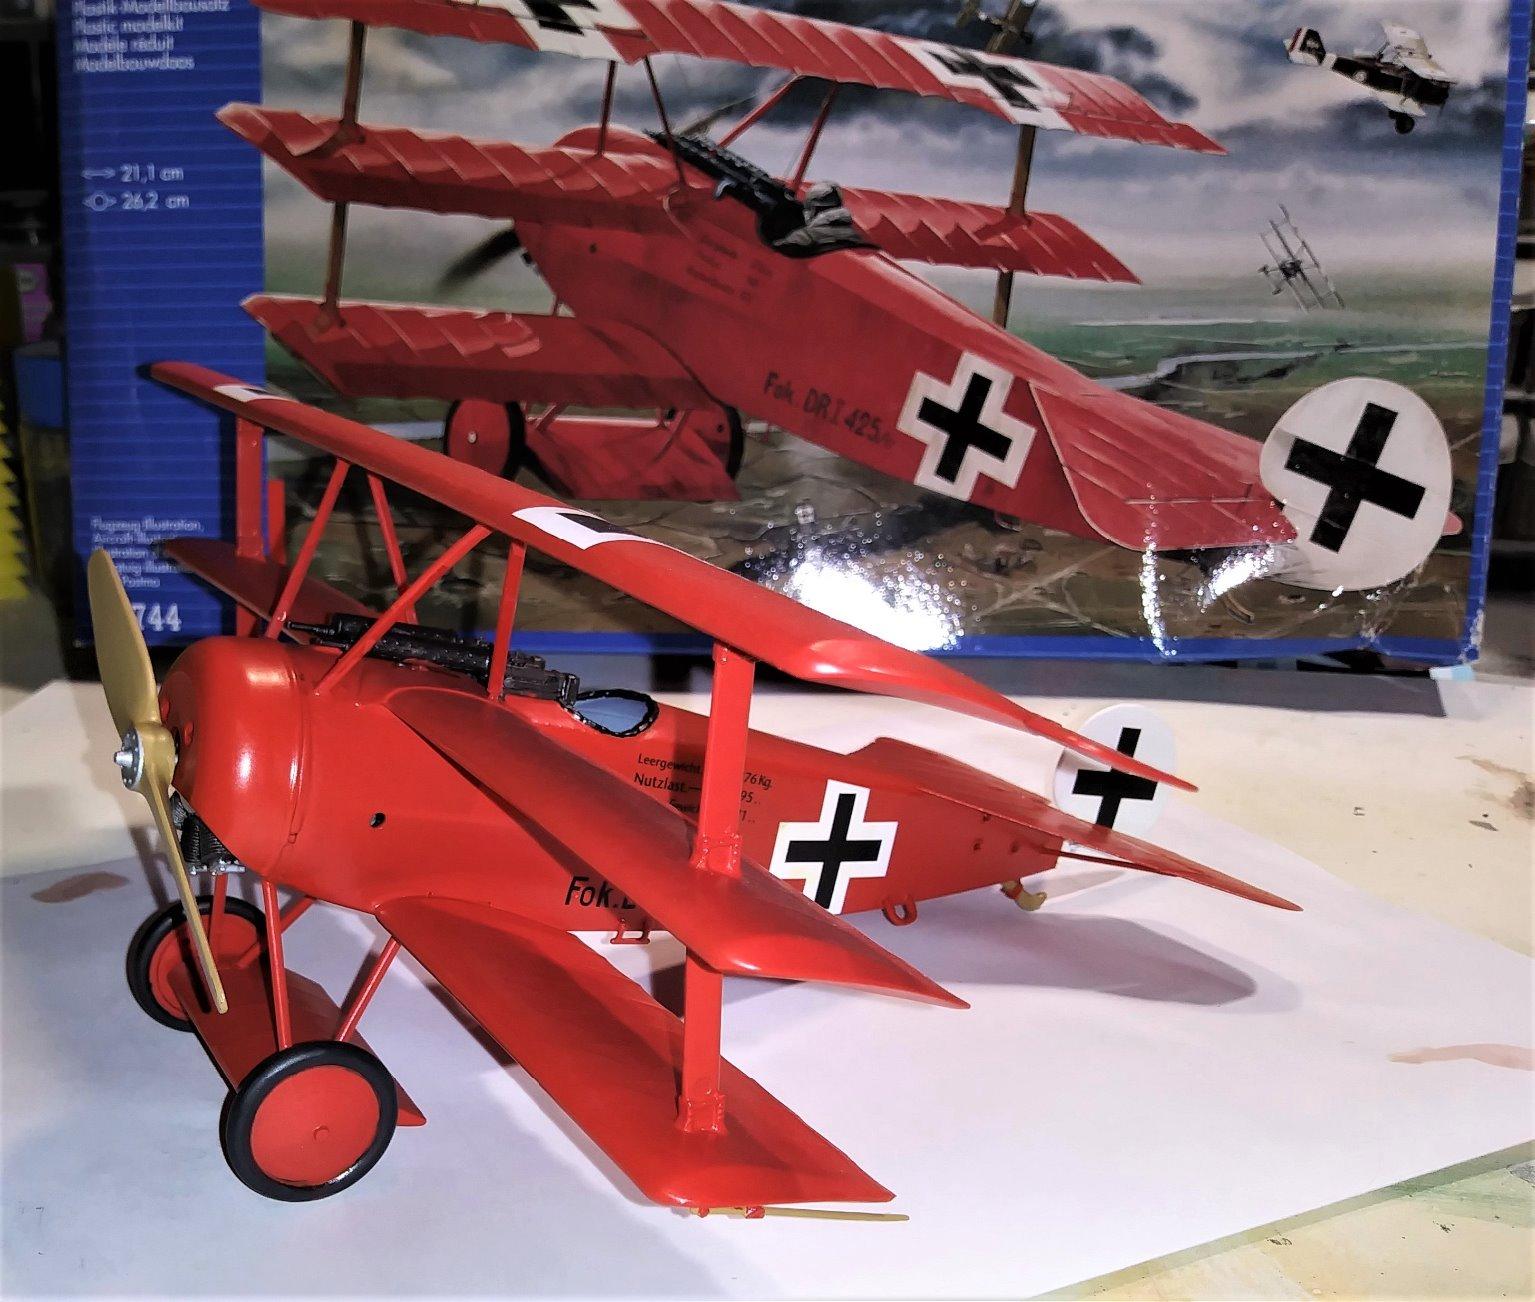
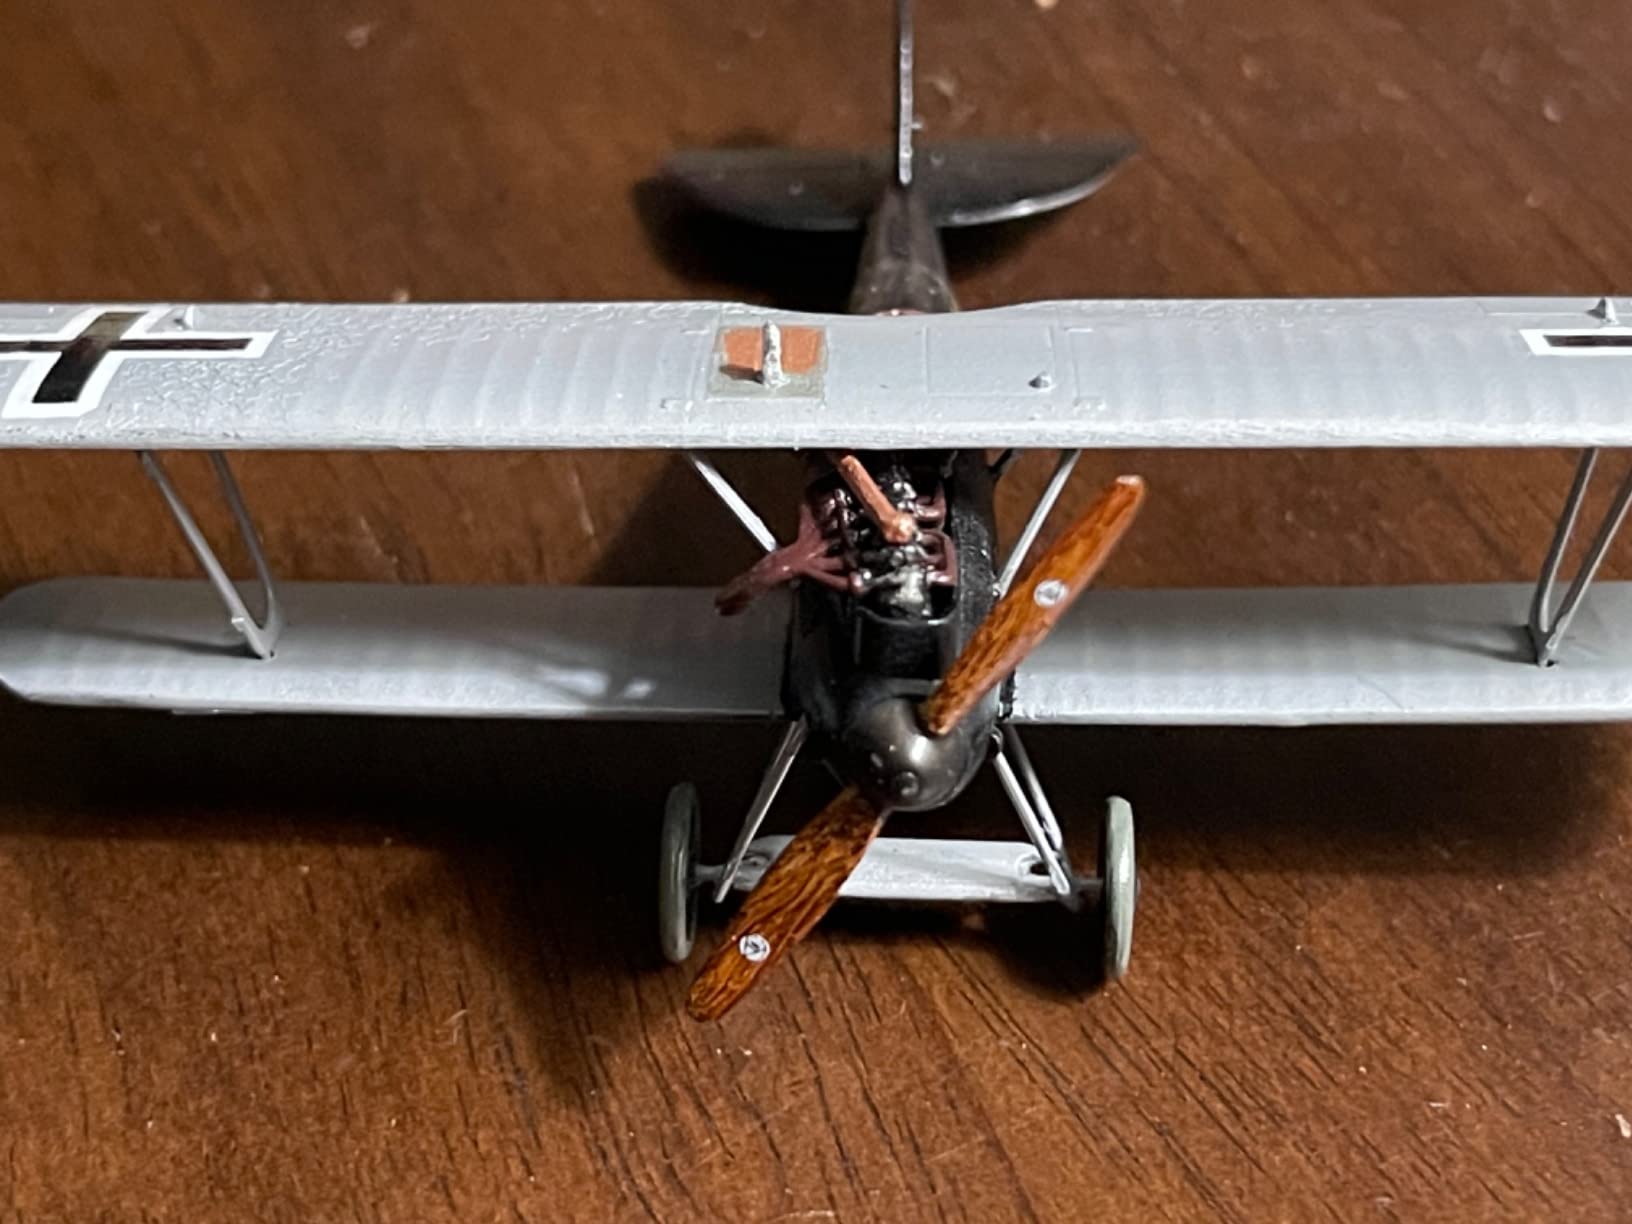
3. Revell Fokker Dr.1 ‘Richthofen’ – Iconic Triplane
Revell of Germany Fokker Dr.1 'Richthofen' Model Kit
Scale: 1/28
Material: Plastic
Weight: 250g
Parts: 66 pieces
Pros
- Pre-colored red plastic saves time
- Good parts fit
- Iconic subject matter
- Includes rigging thread
Cons
- Old mold from 1950s
- Wing strut alignment tricky
- Some rough edges
The Revell Fokker Dr.1 in 1/28 scale has been a staple of model shop shelves for decades, and I finally built one last month to understand its enduring appeal. The pre-colored red plastic immediately distinguishes this kit from everything else in my collection. While I ultimately painted mine for weathering authenticity, younger builders can achieve a respectable display piece without touching a paintbrush.
This kit took me six hours to complete, making it one of the faster builds in this roundup. The 66 parts include a detailed radial engine with movable propeller, two Spandau machine guns, and pilot figures that add display options. The old mold shows its age in some thick sprue attachments and minor flash, but nothing that sandpaper cannot resolve.
The Dr.1 needs no introduction to aviation enthusiasts. Manfred von Richthofen, the Red Baron, made this triplane legendary despite its limited production numbers and late-war introduction. The distinctive three-wing configuration creates an unmistakable silhouette that draws attention even from non-modelers. Every collection needs at least one Dr.1 representation.
I built this kit alongside my nephew, who at twelve had only assembled snap-together models previously. He managed the basic assembly with minimal assistance, though I handled the tiny rigging lines and decal application. The experience hooked him on WWI aircraft, and he has since asked for a Sopwith Camel to create a diorama of their historic rivalry.
The included rigging thread simplifies the most intimidating aspect of triplane construction. I tied the wires using tweezers and thin CA glue, creating authentic tension that holds firm years later. The box art provides a clear diagram for wire placement, essential for getting the complex three-wing bracing correct.
Great for Younger Modelers
This kit hits a sweet spot for supervised builds with children old enough to handle small parts safely. The pre-colored plastic eliminates the painting barrier that frustrates many beginners. The subject matter connects to history lessons about WWI, creating educational opportunities during assembly. I found myself explaining rotary engines and synchronizing gears while we built.
The 1/28 scale creates an impressive display piece without overwhelming a child’s desk. At roughly nine inches in wingspan, it balances presence with practicality. The included stand allows for in-flight display, though I prefer the wheels-down configuration for shelf display. The movable propeller provides a fidget-friendly feature that younger builders appreciate.
Where It Shows Its Age
The mold dates from the 1950s, and some details reflect mid-century simplifications. The fabric texture appears raised rather than recessed, contrary to how fabric actually drapes over ribs. The cockpit, while including basic seat and controls, lacks the detail modern kits provide. Experienced modelers will want to add aftermarket photo-etch or scratch-built details.
Wing strut alignment requires patience and testing. The outer wing panels attach to the center section with multiple struts that must align simultaneously. I used masking tape to hold positions while glue set, a technique I recommend for all biplane builds. The resulting alignment, while not perfect, looks convincing under normal viewing distances.
4. Airfix Royal Aircraft Factory BE2c – Quality New Tooling
Airfix Royal Aircraft Factory BE2c Night Fighter 1:72 Military Plastic Model Kit
Scale: 1/72
Material: Plastic
Parts: 54
Skill Level: 2
Pros
- New tooling with crisp details
- Cartograph decals quality
- Two pilot figures included
- Reasonable price
Cons
- Requires separate glue and paints
- Small parts challenge
- Wire bracing adds difficulty
Airfix has completely revamped their WWI aircraft line in recent years, and the BE2c Night Fighter represents this new tooling philosophy perfectly. This kit bears no resemblance to the basic offerings from my childhood. The surface detail shows recessed panel lines, subtle fabric textures, and crisp molding that rivals Japanese manufacturers.
The BE2c served primarily as a reconnaissance and bomber aircraft, earning a reputation for stability over maneuverability. German pilots nicknamed it “Fokker Fodder” after the synchronization gear allowed their fighters to attack from behind. The night fighter variant, with its forward-firing Lewis gun, attempted to address these vulnerabilities with limited success.
Building this kit required careful attention to the 54 parts, many of them tiny. The two pilot figures add display possibilities, posed either ready for flight or actively manning the Lewis gun. I chose the night fighter configuration for the dramatic black and grey scheme, though the day bomber markings also tempted me.
What Makes It Stand Out
Cartograph decals elevate this kit above competitors in the same price range. The Italian printing house produces industry-leading decals with thin carriers, perfect registration, and vibrant colors. The BE2c markings settled into surface details without silvering, even over the matte paint finish I applied. This alone justifies the slight premium over older Airfix releases.
The new tooling shows in the engineering as well as the detail. Parts fit with minimal cleanup, and the instructions provide clear guidance for the multiple rigging wires required. I appreciated the color callouts referencing Humbrol paints, though I substituted Vallejo equivalents from my existing collection. The resulting model looks surprisingly large for 1/72 scale due to the two-bay wing configuration.
Who Should Buy This
Intermediate modelers ready for their first serious biplane will find this kit challenging but achievable. The 1/72 scale keeps the commitment manageable, while the quality ensures satisfying results. I recommend this for builders transitioning from single-wing aircraft or armor models who want to develop rigging skills without the complexity of larger scales.
WWI historians will appreciate the accurate representation of an important but often-overlooked aircraft type. The BE2c lacks the glamour of fighters, but its role in early aerial warfare was significant. Displaying this alongside a German fighter creates an interesting contrast in design philosophies between the warring nations.
5. NewRay Fokker D.VII – Beginner-Friendly Build
NewRay WWI Classic Plain Model Fokker D.VII, Easy kit
Scale: 1/32
Material: Plastic
Weight: 0.55 lbs
Assembly: Easy kit
Pros
- Very easy assembly
- Magnetic screwdriver included
- Pre-painted finish
- No glue required
Cons
- Cheap plastic feel
- Not museum quality
- Screw holes can strip
The NewRay Fokker D.VII occupies a unique position between toy and model kit. I approached it skeptically, given the “easy kit” labeling, but emerged impressed by its accessibility for young builders. The included magnetic screwdriver, while small, actually works for the screws that hold major assemblies together.
This kit took me forty-five minutes to assemble, making it the fastest build in this comparison by a significant margin. The pre-painted plastic eliminates the painting stage entirely, though touch-ups will be needed if you handle the parts roughly during assembly. The spinning propeller and rolling wheels add play value that traditional static models cannot match.
The Fokker D.VII earned respect from Allied pilots as the most dangerous German fighter of 1918. Its thick wing section provided exceptional high-altitude performance, and the sturdy structure survived maneuvers that would rip other aircraft apart. This kit captures the purposeful lines that made the D.VII such an effective fighting machine.

I tested this kit with my neighbor’s eight-year-old son, who had never built any model before. With minimal guidance, he completed the basic assembly in under an hour. The screw-based construction, while less precise than cement, allowed him to correct mistakes without damage. He immediately asked when we could build another, validating the kit’s role as an introduction to the hobby.
The finished model measures approximately ten inches long with a seven-inch wingspan, substantial enough to display prominently despite the simple construction. The pre-applied paint scheme appears accurate based on my references, with the characteristic Fokker factory finish and military markings. I added a light wash to panel lines to add visual depth without repainting.
Perfect Entry Point
For parents seeking a first model kit that will not end in frustration, this NewRay offering makes sense. The simplified construction allows completion without the multi-day commitment traditional kits demand. Success builds confidence, and confident builders become lifelong hobbyists. I have seen too many children abandon modeling after failed attempts at complex kits beyond their skill level.
The included screwdriver, while basic, teaches proper tool use from the start. I supplemented it with a larger screwdriver from my workshop for the tighter screws. The instructions, pictorial and clear, require no reading ability, making this appropriate for younger builders still developing literacy skills.
Limitations to Know
Experienced modelers will notice the simplified details immediately. The engine is a basic plastic lump rather than the detailed radial of premium kits. The cockpit lacks the seat, instruments, and control stick that define more serious offerings. Panel lines are raised rather than recessed, contrary to actual aircraft construction.
The plastic feels lightweight and slightly flexible compared to styrene model kits. This actually helps durability for play, but sacrifices the rigid precision display modelers expect. Some screw holes stripped during my build, requiring me to use glue on a couple of joints for security. Consider this a toy that resembles a model aircraft rather than a true scale replica.
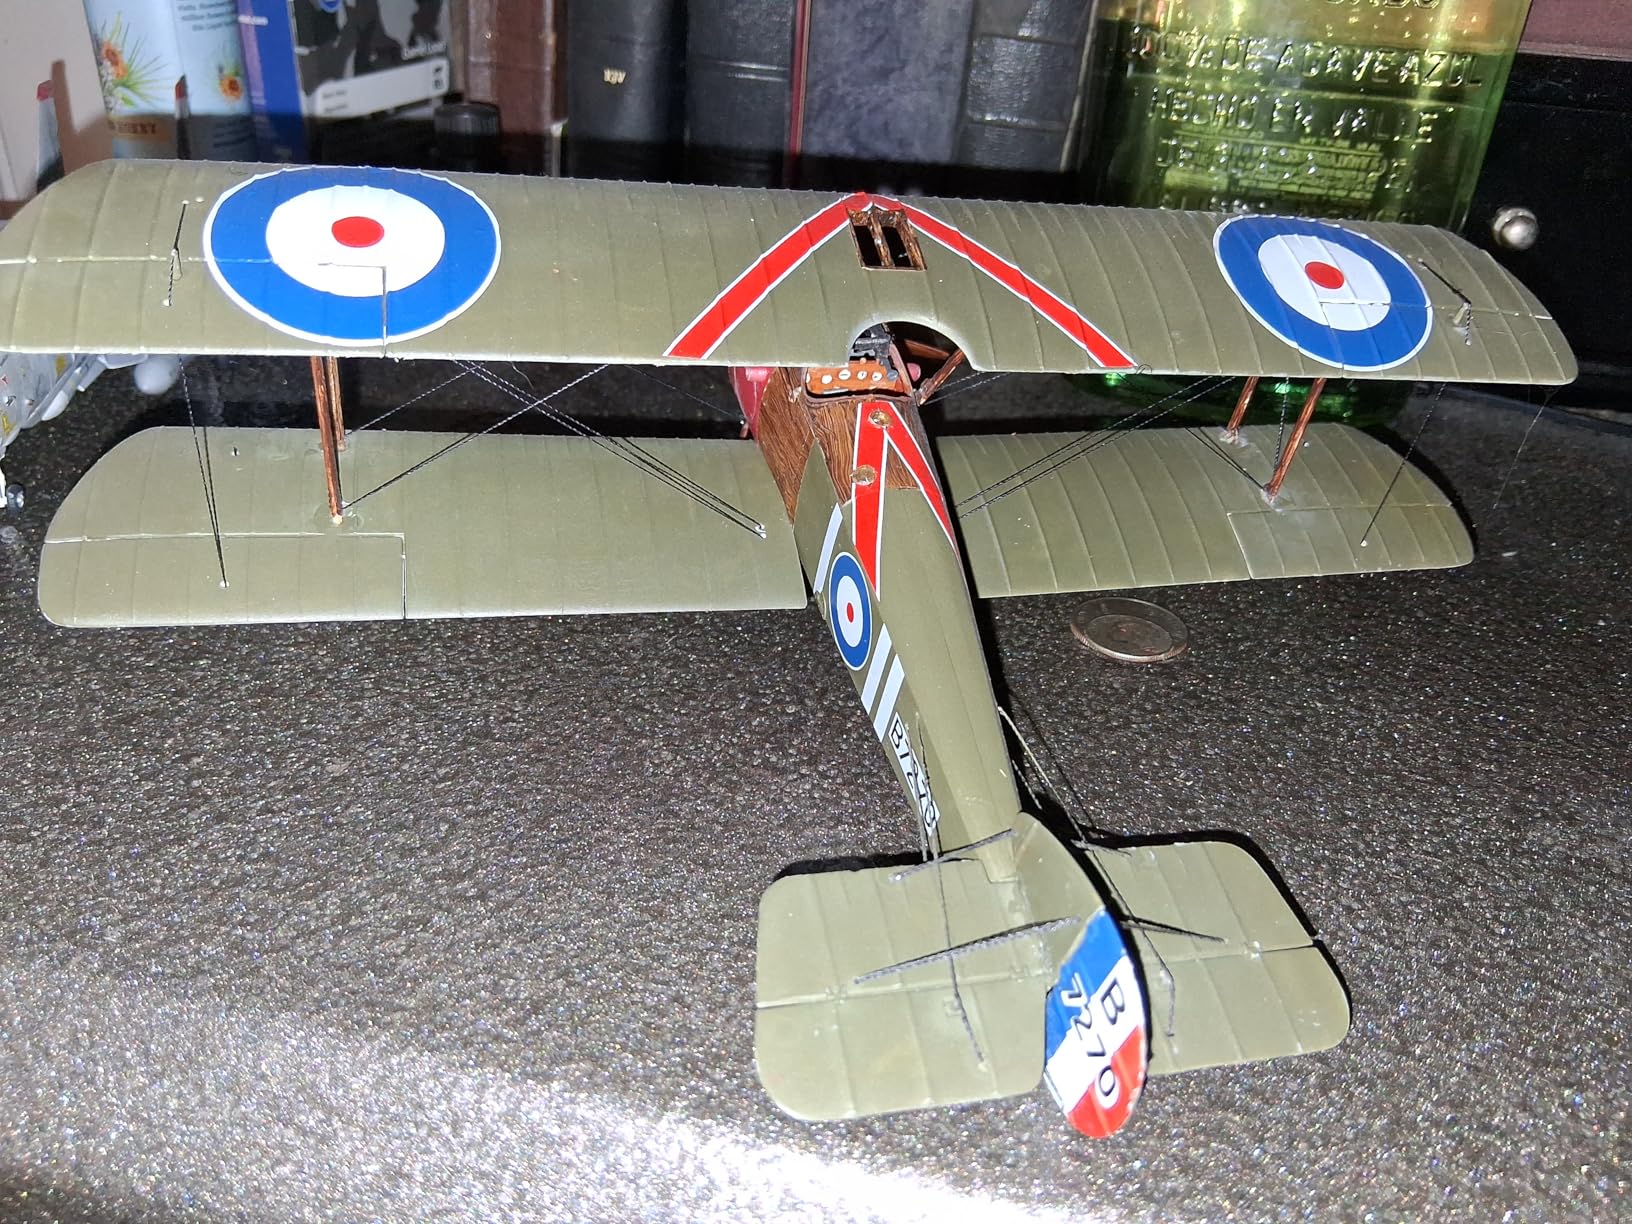
6. Roden S.E.5A Wolseley Viper – Detailed RAF Fighter
Roden S.E.5A Wolseley Viper Single Seat Biplane Fighter Airplane Model Building Kit, 1/48 Scale
Scale: 1/48
Material: Paper/Plastic
Weight: 0.2 kg
Paint: Acrylic/Enamel
Pros
- Parts well cut for assembly
- High quality plastic
- Tons of exterior detail
- Famous Billy Bishop aircraft
Cons
- Excessive flash on parts
- Paper-thin plastic can snap
- Roden decals problematic
- Requires significant filing
The Roden S.E.5A tested my patience more than any other kit in this roundup. The 1/48 scale produces an impressive finished model, but reaching that point requires advanced skills and considerable cleanup time. I spent nearly as long removing flash and sanding parts as I did on actual assembly.
Despite these challenges, the S.E.5A remains one of my favorite WWI fighters. The long nose, created by the inline Wolseley Viper engine rather than a rotary, gave pilots excellent forward visibility. Combined with stability and heavy armament, this aircraft scored more victories than the more famous Sopwith Camel in some squadrons. Billy Bishop, Canada’s ace of aces, flew the S.E.5A to many of his 72 confirmed victories.
The kit includes markings for Bishop’s aircraft, which I chose for the distinctive blue and white scheme. The decals, typical of Roden offerings, proved challenging with thick carriers and reluctance to settle. I eventually substituted aftermarket replacements, an additional expense that pushed the total cost higher than anticipated.
Construction revealed both the potential and problems of this kit. The fuselage assembled square and true, with the distinctive hump behind the cockpit accurately represented. However, the wing struts required significant thinning to look realistic, and the landing gear struts needed careful bending to achieve the correct angle. This is not a weekend build for casual modelers.
I recommend this kit only to builders with several biplane completions in their portfolio. The skills developed on easier Academy or Revell kits pay dividends here, as you will need every technique in your arsenal. The result, however, ranks among the most impressive WWI models in my collection, justifying the effort for dedicated enthusiasts.
For Experienced Hands
The detail potential rewards those willing to invest time. I added ignition wires to the engine using fine wire and drilled out the exhaust stacks for hollowness. The radiator, a prominent feature on the S.E.5A, builds from multiple parts that allow for realistic depth. These improvements elevate the kit from mediocre to impressive, but require skills beyond basic assembly.
Rigging the S.E.5A is particularly satisfying due to the relatively simple wire configuration compared to other biplanes. The single-bay wings require fewer wires, and the landing gear struts need minimal bracing. I completed the rigging in two evenings, compared to the four evenings some more complex subjects demand.
Quality Control Issues
The flash on my example was excessive, covering almost every part with thin membranes of excess plastic. I suspect this results from older molds or production shortcuts at the Ukrainian factory. The thin fuselage plastic, while allowing for fine detail, snapped twice during handling and required careful repair. These issues explain the mixed reviews this kit receives online.
Some parts required minor drilling to accept rigging lines or clear locating pins. I kept my pin vise handy throughout construction, drilling holes where the instructions indicated but the mold failed to deliver. This improvisational approach frustrates beginners but feels routine to experienced modelers familiar with limited-run production.
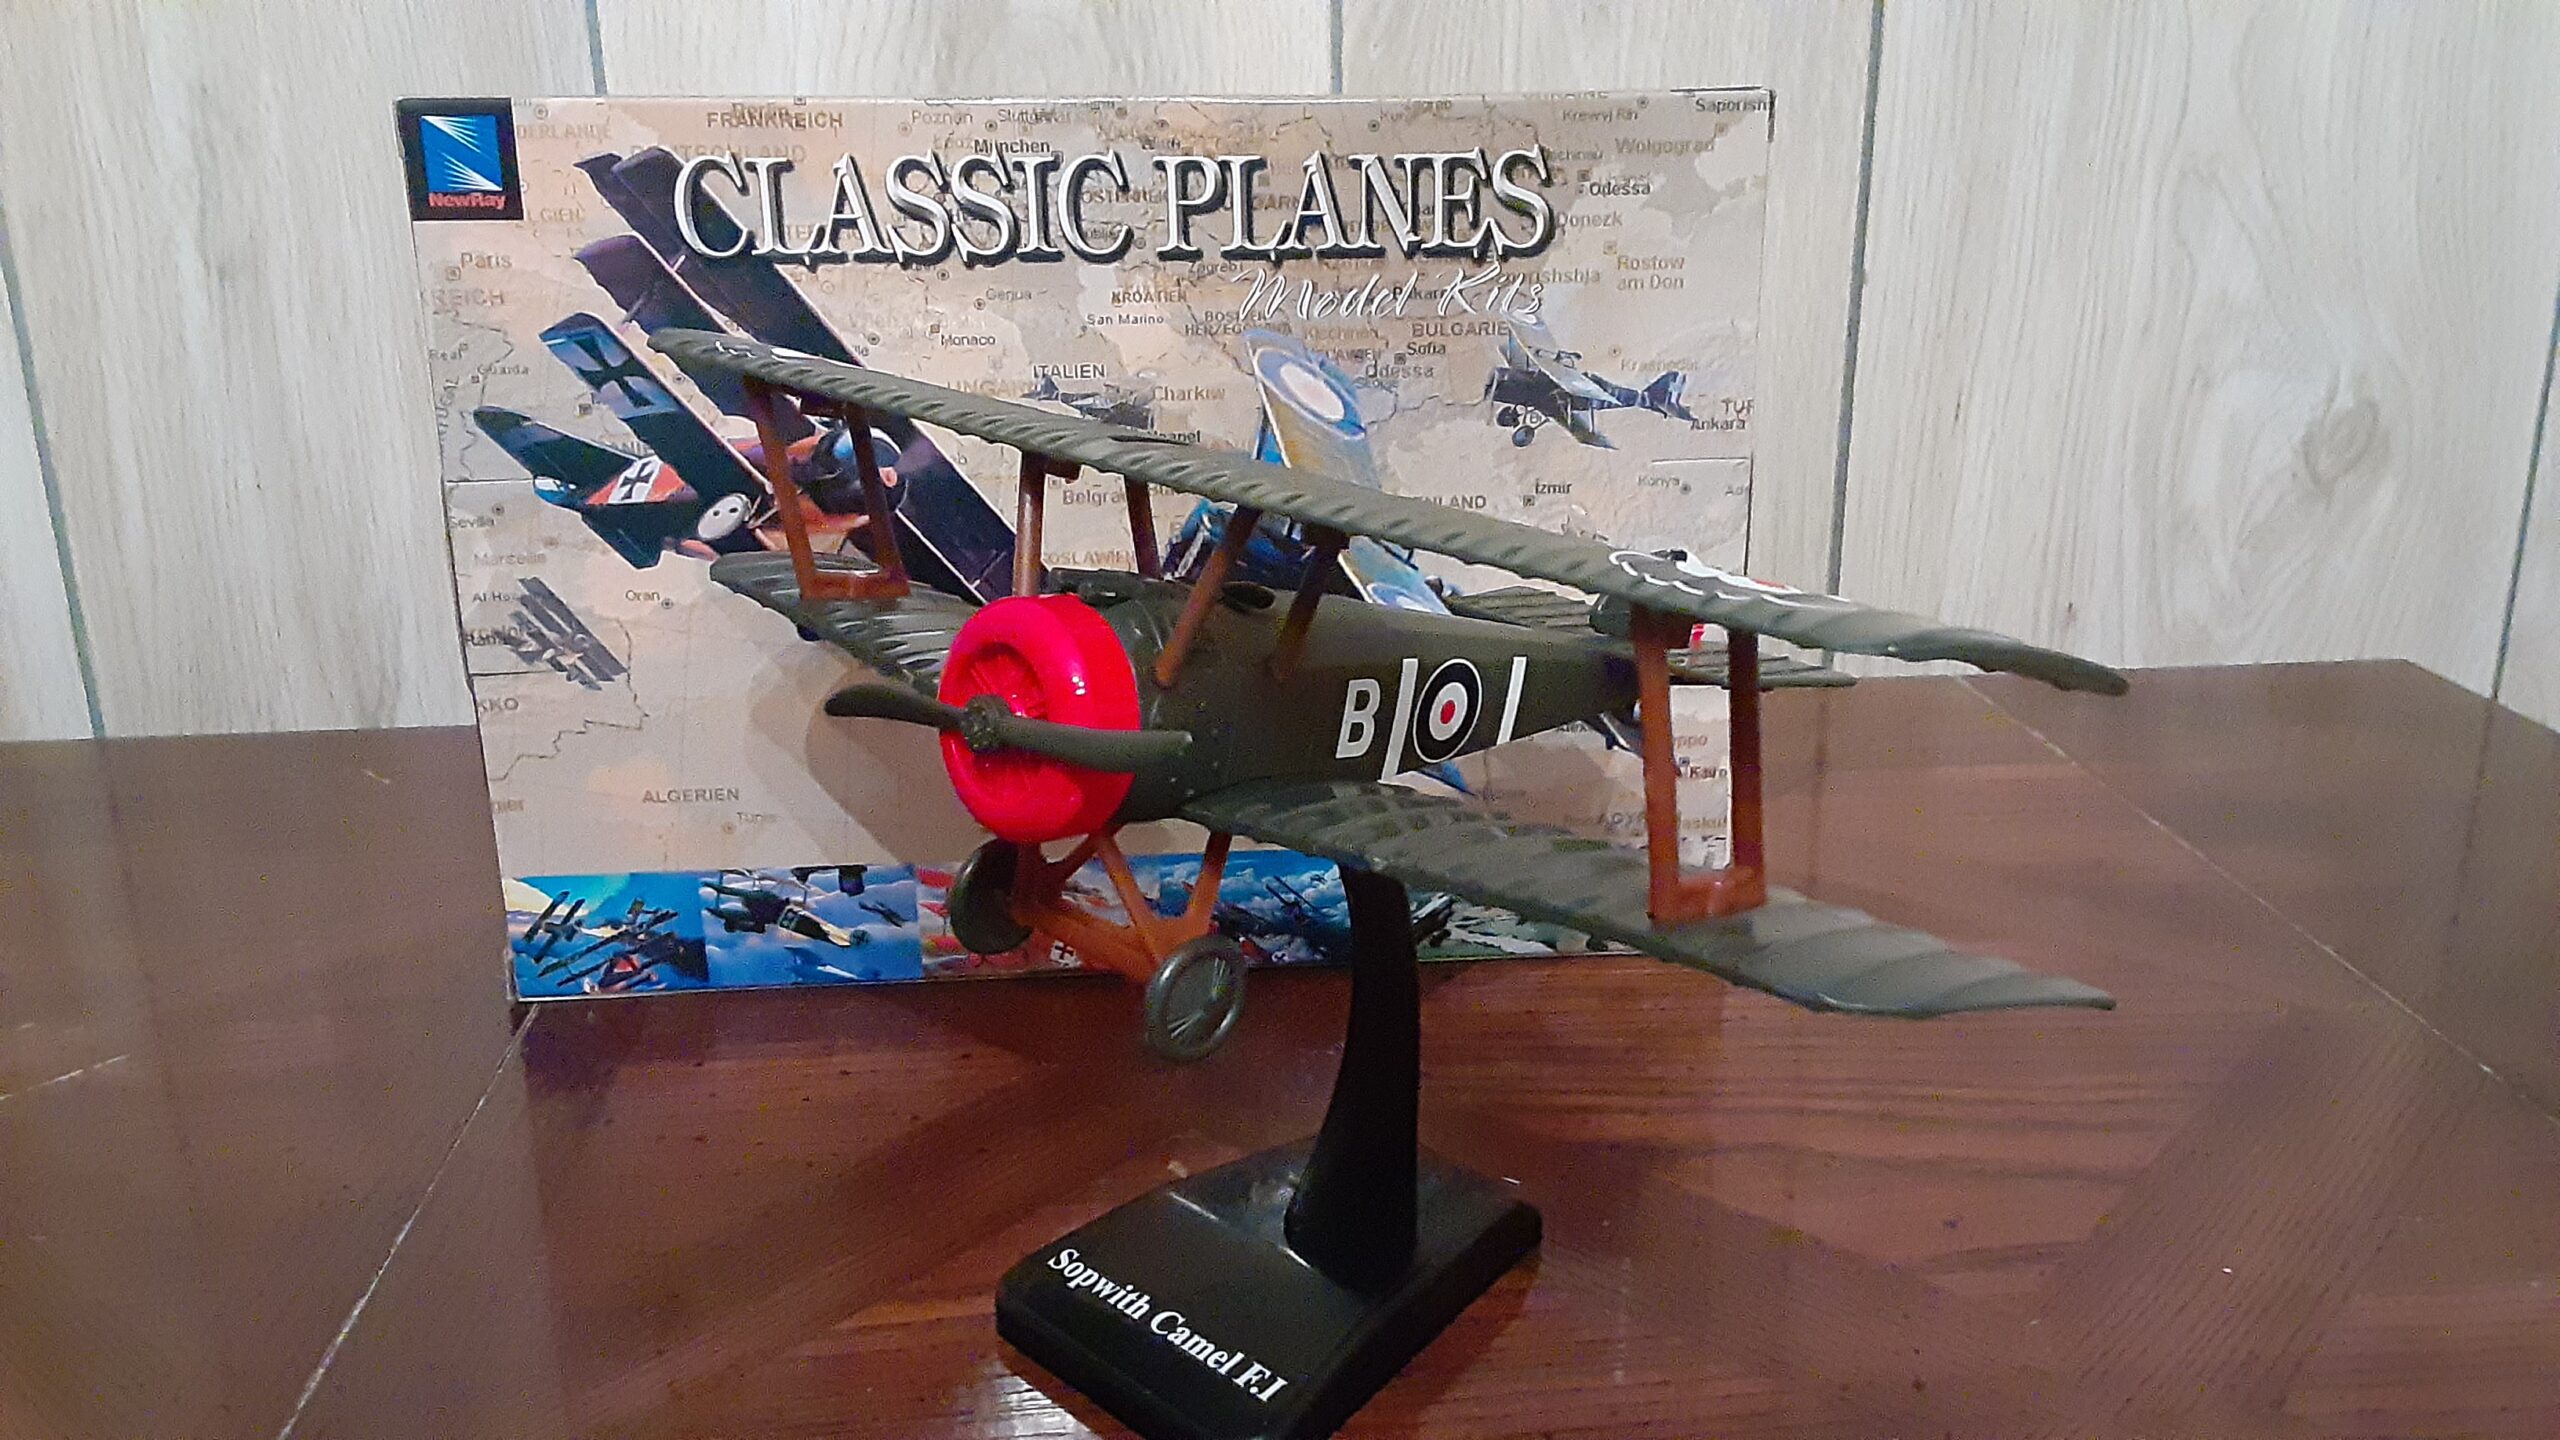
7. NewRay Sopwith Camel F.1 – Quick Assembly Option
Sopwith Camel F.1 1/48 Scale WWI Fighter Biplane Model by NewRay
Scale: 1/48
Material: Plastic
Weight: 0.1 kg
Length: 6 inches
Pros
- Easy assembly process
- No glue or paint required
- Accurate paint scheme
- Movable control surfaces
Cons
- Horrible instructions
- Some parts need glue anyway
- Crude machine guns
- Not for experienced modelers
The NewRay Sopwith Camel follows the same philosophy as their Fokker D.VII, offering simplified assembly for quick results. I built this kit in just over an hour, immediately after completing the complex Roden S.E.5A. The contrast could not have been more dramatic, and I appreciated the mental break this easy build provided.
The Camel represents the most successful Allied fighter of WWI, with claims of 1,294 enemy aircraft destroyed. Its rotary engine created significant torque that pulled the nose left, requiring right rudder input throughout flight. Skilled pilots used this characteristic to execute lightning-fast turns, while inexperienced pilots sometimes spun into the ground.
Out of the box, the model displays the distinctive hump that gave the Camel its name, along with the twin Vickers machine guns synchronized to fire through the propeller arc. The 1/48 scale creates a six-inch model with eight-inch wingspan, substantial enough to display without dominating a desk.
The instructions deserve criticism for covering four different models in a single booklet. The tiny diagrams required my reading glasses and patience to decipher. I eventually ignored the instructions entirely, assembling based on logic and reference photos from my library. Experienced modelers can manage this approach, but beginners may struggle.
Despite the instruction shortcomings, the actual assembly posed no serious challenges. The plastic quality feels similar to the Fokker D.VII, flexible and toy-like rather than rigid like traditional model styrene. The movable vertical stabilizer adds play value, though I locked mine in position for display purposes.
Kid-Friendly Features
This kit succeeds as an introduction to WWI aviation for children. The familiar Camel shape connects to history lessons and pop culture references. The included stand allows for in-flight display, creating dynamic presentation options a traditional landing gear pose cannot match. My display shows it banking into a turn, suggesting the maneuverability that made the Camel famous.
The free-rolling wheels work smoothly, allowing the model to taxi across smooth surfaces. Children can recreate imagined dogfights with the NewRay Fokker D.VII, creating play scenarios that traditional static models cannot support. For parents concerned about investment, the $29.99 price point represents reasonable value for hours of potential play.
Trade-offs for Speed
The machine guns disappointed me with their crude molded detail. Compared to the delicate Spandau guns in the Revell Dr.1 kit, these resemble thick plastic sticks. I considered replacing them with aftermarket or scratch-built alternatives, but that defeats the purpose of a quick-build kit. The average observer will not notice, but serious modelers will.
The lack of a pilot figure eliminates display options and leaves the cockpit looking empty. I added a spare figure from my parts box, though scaling at 1/48 made finding a suitable match challenging. The absence of rigging wires, while understandable for a beginner kit, significantly reduces the authentic biplane appearance.
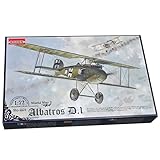
8. Roden Albatros D.I – German Fighter Classic
Roden Albatros D.I German Biplane Fighter Model Kit
Scale: 1/72
Material: Plastic/Metal
Weight: 0.22 lbs
Parts: 42 pieces
Pros
- Highly detailed for scale
- Best 1/72 Albatros D.I available
- Detailed engine and guns
- Good for short-run practice
Cons
- Very small size challenges
- Fit issues reported
- Some molding problems
- Not beginner appropriate
The Roden Albatros D.I in 1/72 scale represents the challenges and rewards of short-run kit production. With only 42 parts, the parts count seems manageable, but the small scale makes each piece delicate and demanding. I built this kit with tweezers and magnification, tools unnecessary for the larger offerings in this guide.
The Albatros D.I introduced the streamlined semi-monocoque fuselage that revolutionized German fighter design in 1916. Predecessors like the Fokker Eindecker featured boxy, fabric-covered structures, while the Albatros looked like a modern aircraft with its plywood-skinned fuselage. This aesthetic appeal makes the Albatros a favorite among WWI modelers despite its brief operational service.
My build took five hours, longer than the parts count would suggest, due to careful cleanup and test-fitting required. The engine and gun details impressed me for this scale, with separate cylinders and cooling fins visible. The fuselage halves matched well, though the wing join required filler to blend smoothly.

The decals performed adequately, though I used setting solution aggressively to get them to snuggle down over the fabric texture. The lozenge camouflage patterns, a signature of late-war German aircraft, require careful application to align properly between upper and lower wing surfaces. I recommend cutting the decals into smaller sections for easier positioning.
Displaying this tiny model requires planning. At 1/72 scale, the finished aircraft spans less than four inches, easily lost among larger kits. I mounted mine on a dedicated base with a small plaque identifying the aircraft type. This presentation elevates the perceived value and draws attention to details that might otherwise go unnoticed.
Short-Run Kit Character
Short-run kits like this Roden offering come from smaller production runs with less refined molding than major manufacturers. The trade-off provides subjects unavailable elsewhere, like this early Albatros variant. Experienced modelers accept the extra work as the price for building something unique.
The plastic feels harder and more brittle than Academy or Revell styrene, requiring sharp blades for clean cuts. I replaced my standard sprue cutters with a fine razor saw for removing small parts, reducing the risk of breakage. These techniques become automatic after a few short-run builds but frustrate newcomers accustomed to mainstream kits.
Skill Requirements
I cannot recommend this kit for first-time WWI builders. The small scale, short-run characteristics, and limited reviews create a challenging combination. Complete several 1/48 or larger biplanes before attempting this subject. The skills developed on larger kits translate directly, but attempting this as a first biplane likely ends in frustration.
For experienced modelers seeking a quick project between larger builds, this Albatros delivers. The compact size makes it travel-friendly, and the short parts list allows completion in a few evenings. I built mine while traveling for work, with the kit fitting easily in my carry-on luggage along with basic tools and paints.
9. Revell Fokker Dr.1 (1/72) – Compact Classic
Revell Of Germany Fokker Dr.1 PL Triplan
Scale: 1/72
Material: Plastic
Weight: 85g
Parts: 37 pieces
Pros
- Easy and fun build
- Good detail for small scale
- Quick 1-hour assembly
- Decals for 2 versions
Cons
- Very small completed model
- Extremely tiny fragile parts
- Decals rip easily
The smaller sibling to the 1/28 Richthofen kit, this 1/72 Revell Dr.1 offers the same iconic subject in desk-friendly dimensions. I built both kits simultaneously to compare scales, and this tiny version delighted me with its detail despite the size constraints. At roughly three inches long when complete, it fits anywhere.
Thirty-seven parts might sound minimal, but Revell engineers packed impressive detail into this compact offering. The cockpit includes seat, joystick, and basic instruments visible through the open framework. The radial engine, simplified but recognizable, builds quickly and accepts basic painting to suggest the complex original. The movable propeller spins freely, a feature I appreciate in finished models.
The triplane configuration presents unique challenges at this scale. Nine wing panels, plus three tail surfaces, create multiple alignment opportunities. I built the center section first, then attached outer panels individually, checking alignment against a drawing before each joint set. This methodical approach prevented the common problem of twisted or misaligned wings.
My completed model joined a collection of 1/72 WWI aircraft on a dedicated shelf. The small scale allows displaying dozens of different types without requiring a dedicated room. Visitors often express surprise at the variety and detail possible in this scale, challenging assumptions that bigger always means better.
The decals provided markings for two aircraft, including the Red Baron’s famous all-red scheme. At this scale, the solid red finish actually simplifies assembly, eliminating the complex camouflage patterns some aircraft require. I painted mine with thinned red acrylic, allowing the plastic color to show through slightly for depth variation.
Space-Saving Option
For collectors with limited display space, this kit represents an ideal choice. The Dr.1 subject remains recognizable even at reduced size, unlike some less famous aircraft that become anonymous when miniaturized. Multiple completed models fit in a display case that would hold only one or two larger scales.
The 1/72 scale also allows for diorama building without consuming entire tabletops. I placed my Dr.1 on a small base representing a section of airfield, with tiny figures and equipment suggesting ground operations. The scene measures six inches square, manageable on any desk or shelf.
Tiny Parts Challenge
The small parts truly test eyesight and dexterity. The machine guns, each smaller than a grain of rice, required handling with tweezers throughout assembly. I lost one to the carpet monster and substituted a piece of stretched sprue, painted gunmetal grey, that passed casual inspection. Order spare parts or be prepared for improvisation.
Decal application at this scale demands patience and magnification. The small markings curl instantly when separated from the backing paper, requiring careful manipulation with a wet brush. I applied Microscale solutions generously and allowed extended drying time before handling. The results justified the effort, with crisp markings that enhance the tiny model significantly.
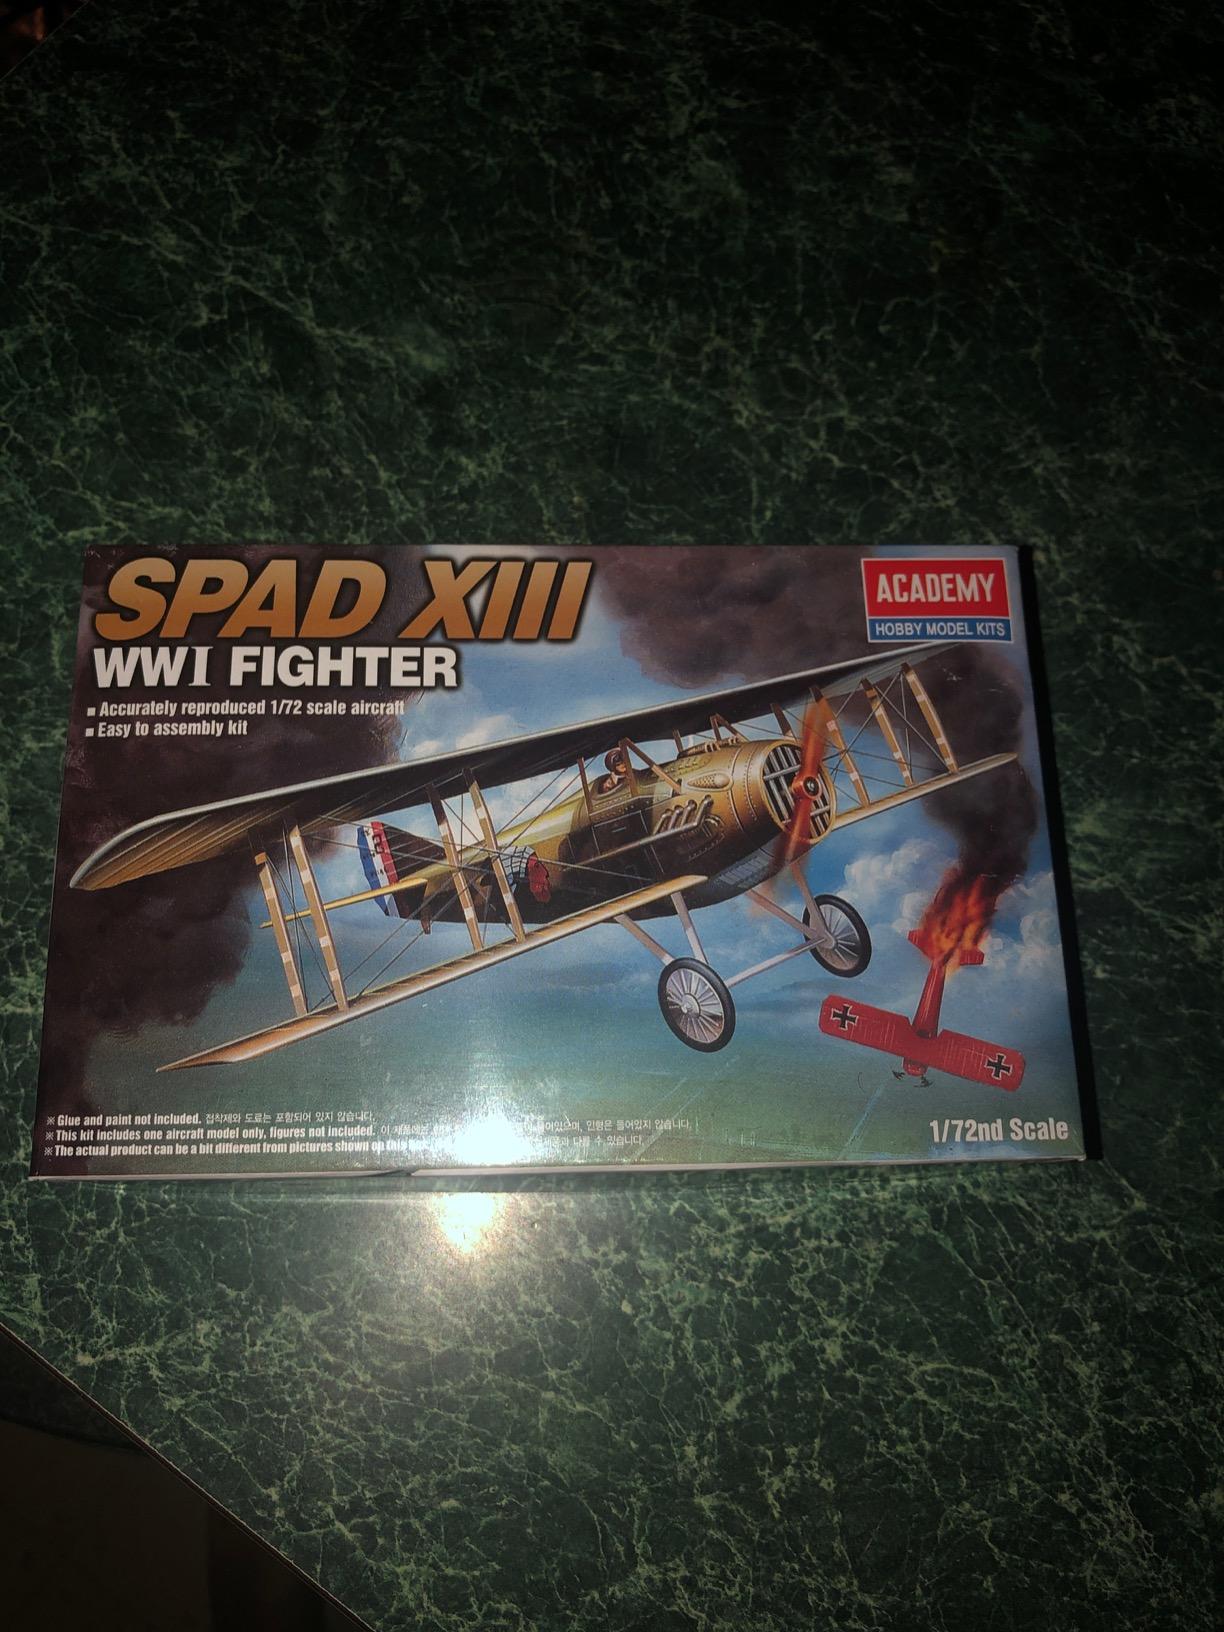
10. Academy SPAD XIII – Affordable Entry Kit
Academy SPAD XIII WWI Fighter Airplane Model Building Kit
Scale: 1/72
Material: Plastic
Weight: 0.1 lbs
Dimensions: 3.42 x 4.51 inches
Pros
- Affordable price point
- Good basic beginner kit
- Easy assembly
- Can use aftermarket parts
Cons
- Very small 1/72 scale
- Simplified cockpit
- Quality control issues
- Limited decals
The Academy SPAD XIII rounds out our list as the most affordable option tested, currently available for under $12. This pricing makes it accessible for impulse purchases or buying multiple kits for group builds. I picked one up on sale without specific plans, and it became my travel build for a weekend conference.
The SPAD XIII served as the primary Allied fighter in 1918, equipping American, French, British, and Italian squadrons. Eddie Rickenbacker scored twenty of his twenty-six victories in this type, cementing its place in American aviation history. The robust construction and Hispano-Suiza engine made it one of the finest fighters of the war.
Building this kit revealed both strengths and limitations of budget 1/72 aircraft models. The two sprues of grey styrene contain all necessary parts with minimal flash. Assembly proceeds logically from cockpit to fuselage to wings, following standard aircraft kit conventions. I completed the basic build in two hours of relaxed work.
The cockpit simplification disappointed me, with only a basic seat and floor provided. Adding detail here would require significant surgery or aftermarket parts, contradicting the budget nature of this build. I painted what detail existed carefully and relied on the closed canopy to hide the emptiness, though WWI aircraft have open cockpits by nature.
Quality control on my example showed some issues, with slightly short shot plastic on one wing tip requiring filler and sanding. This appears to be production variation rather than design problems, as other Academy kits I have built showed better consistency. The low price somewhat excuses these imperfections, but budget buyers should expect to invest some repair time.
Budget Starter Choice
For absolute beginners uncertain about committing to the hobby, this SPAD offers minimal financial risk. The completed model, while basic, still captures the distinctive SPAD silhouette that aviation enthusiasts recognize. Success with this kit builds confidence for more complex and expensive projects.
I recommend this kit for group builds or club activities where cost matters. Purchasing ten kits for a scout troop or school club remains affordable, and the simple construction allows completion within a single session. The educational value of discussing WWI aviation history while building adds dimension beyond the modeling itself.
Accuracy Limitations
Some reviewers questioned the scale accuracy, noting proportions that seemed slightly off compared to reference drawings. I compared my build to published SPAD dimensions and found the wingspan and length within acceptable tolerance, though the fuselage cross-section appeared slightly too rounded. These deviations only matter to serious accuracy enthusiasts.
The decals provided markings for one aircraft only, limiting display options compared to kits with multiple choices. The printing quality appeared adequate, though I have seen better from Academy’s more recent releases. Applied carefully with setting solution, they completed the model satisfactorily.
Buying Guide: Choosing Your First WWI Biplane Model Kit
Selecting the right WWI biplane model kit requires understanding several factors that influence both the building experience and final result. Our testing revealed significant differences between manufacturers, scales, and difficulty levels that should inform your purchase decision.
Scale Selection
The three most common scales for WWI aircraft are 1/72, 1/48, and 1/32. Each offers distinct advantages and trade-offs. The 1/72 scale provides compact size and lower cost, with completed models fitting easily on bookshelves. Detail remains visible but requires careful painting and handling. This scale works best for collectors wanting variety over individual impact.
The 1/48 scale hits a sweet spot for many builders. Models appear substantial on display while remaining manageable for rigging and painting. Aftermarket parts availability exceeds smaller scales, and the finished size impresses visitors without requiring dedicated display rooms. Most of our recommended starter kits fall into this category.
The 1/32 scale delivers the ultimate presence and detail potential. Wing fabric textures, cockpit instrumentation, and engine details approach visibility without magnification. The trade-off comes in cost, workspace requirements, and the complexity of rigging larger spans of wire. We recommend building several smaller kits before attempting 1/32 scale subjects.
Skill Level Assessment
Be honest about your current abilities. First-time modelers should select the NewRay easy kits or the Revell 1/72 Dr.1 to build fundamental skills. These offerings forgive mistakes and deliver satisfying results that encourage continued building. Attempting the Roden S.E.5A or short-run kits as a first biplane likely creates frustration.
Intermediate builders with single-wing aircraft experience can tackle the Academy Sopwith Camel or Airfix BE2c. These kits introduce biplane-specific techniques like wing alignment and rigging without overwhelming complexity. Success with these subjects prepares you for anything in the WWI category.
Advanced modelers seeking challenges should explore Roden’s full catalog, including the Nieuport 28C1 and Albatros D.I. These kits offer detail potential and subjects unavailable elsewhere. The investment in time and aftermarket parts pays dividends in unique display pieces that stand out at club meetings and contests.
Manufacturer Comparison
Roden dominates the WWI market with the widest range of subjects and scales. Their kits range from excellent to challenging, requiring research before purchase. Recent releases show improved molding quality, while older tooling demands more cleanup. For builders seeking specific aircraft types, Roden often provides the only option.
Academy offers exceptional value in 1/32 scale, with thoughtful engineering that simplifies challenging assemblies. Their WWI range remains limited but well-executed. We consistently recommend their Sopwith Camel as the best entry point for serious 1/32 scale building.
Revell Germany produces accessible kits spanning multiple skill levels. Their 1/72 offerings provide quick builds for experienced modelers and achievable challenges for beginners. The 1/28 Dr.1 remains a classic for good reasons, combining historical significance with straightforward construction.
Airfix has reinvented their WWI line with new tooling that rivals the best Japanese manufacturers. The BE2c we tested represents this new standard, with crisp detail and accurate engineering. Watch for new releases from this heritage brand.
NewRay occupies a unique position between toys and models. Their easy kits serve younger builders or those seeking quick results without painting and gluing. Serious modelers should look elsewhere, but parents and educators find genuine value in these accessible offerings.
Rigging Considerations
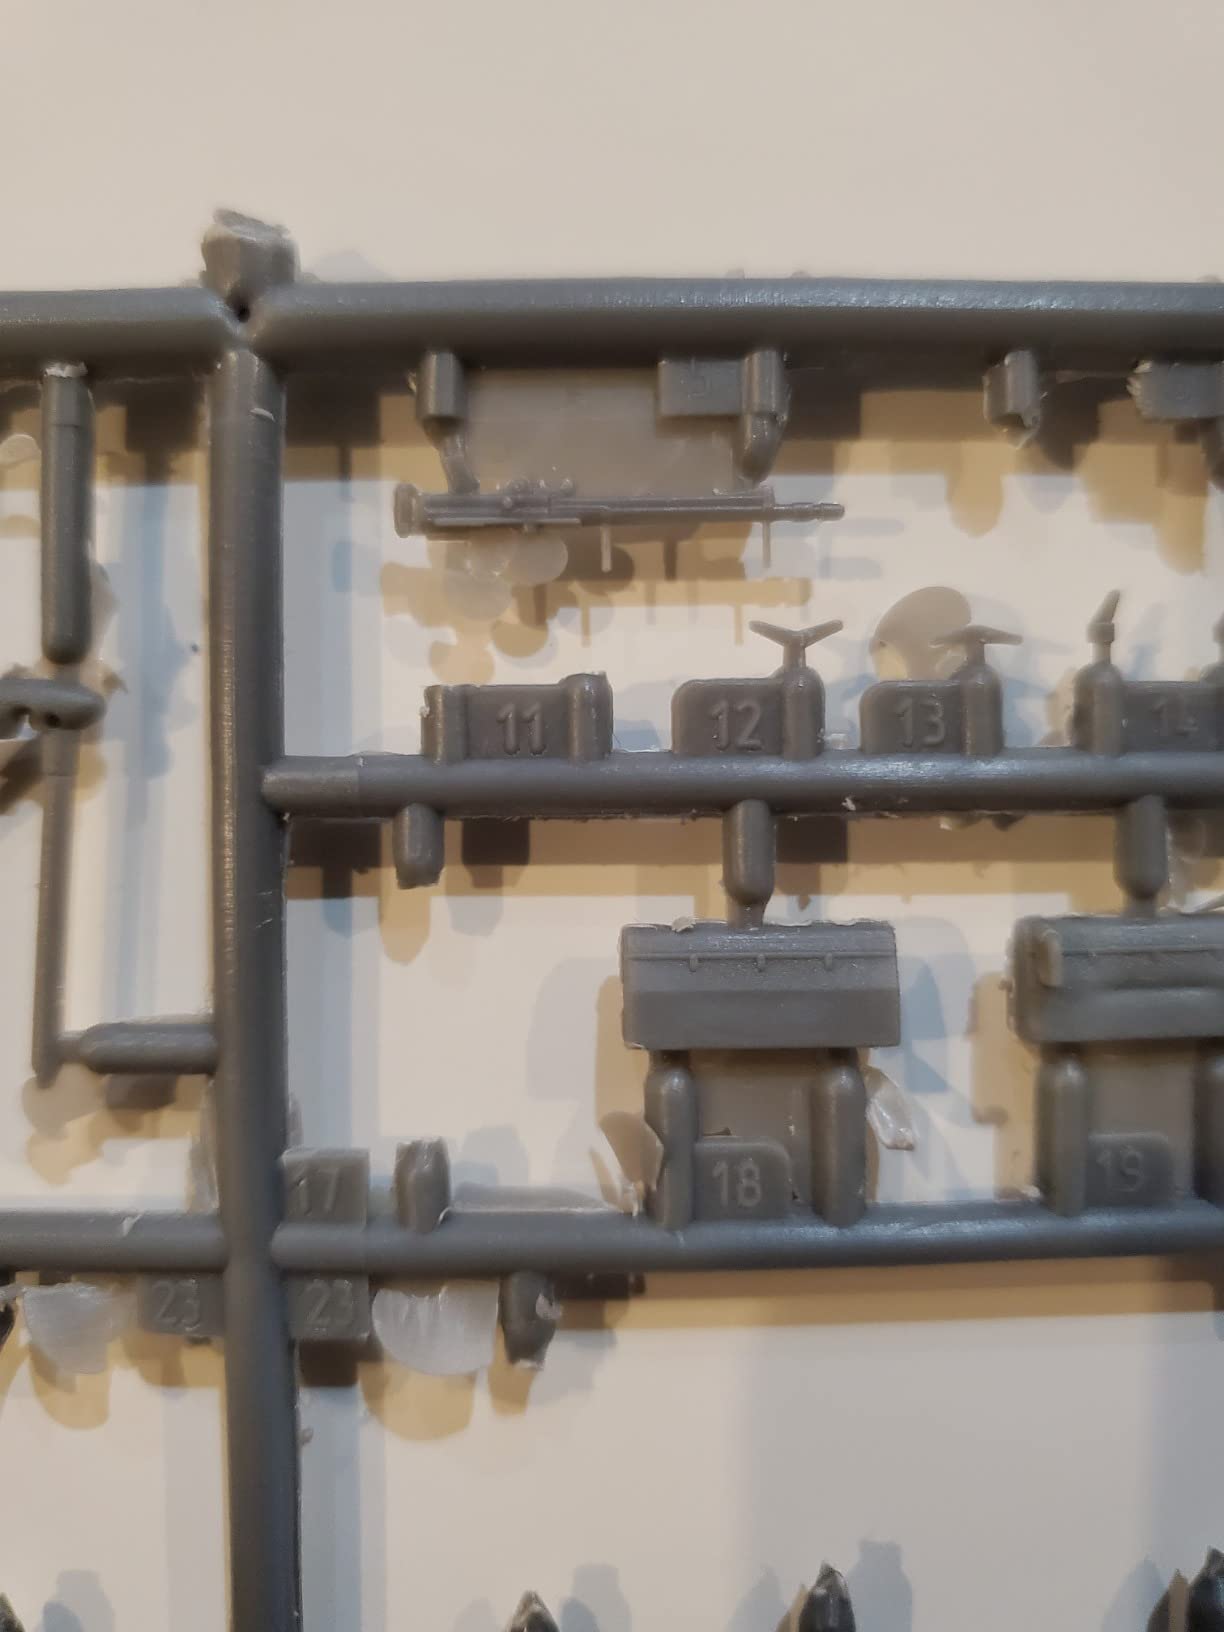
WWI biplanes require structural bracing wires that modelers must replicate for authentic appearance. This process intimidates many builders, but techniques exist for every skill level. Stretching sprue creates thin plastic lines suitable for beginners, though somewhat thick for contest standards. Elastic thread provides tension simulation and survives handling better than rigid alternatives.
Advanced rigging uses fine wire or specialty lines like Uschi van der Rosten’s elastic products. Turnbuckles can be represented with small beads or purchased as photo-etch details. The Academy Sopwith Camel includes predrilled holes and rigging line, removing the guesswork for first attempts.
Consider whether rigging matters for your intended display. Models viewed from several feet away appear convincing with minimal wire representation. Close-up photography or contest entry demands accurate, scale-appropriate rigging. Plan your approach before purchasing kits, as some designs simplify or complicate the process.
Decal and Painting Notes
WWI aircraft featured complex camouflage patterns, particularly the German lozenge schemes that challenge brush painters. Quality decals solve this problem, and manufacturers vary significantly in their offerings. Cartograph-printed decals, found on newer Airfix kits, represent the current standard for ease of use and appearance.
Roden decals frustrate many builders with thick carriers and reluctance to conform. Budget for aftermarket replacements when building Roden kits, particularly for prominent schemes like lozenge patterns. Eduard and Aviattic produce excellent WWI decal sets that improve any build.
Paint selection affects final appearance significantly. Acrylics offer easy cleanup and low odor for indoor building. Enamels provide self-leveling properties that forgive brush marks on large surfaces. Lacquers deliver the hardest finish for handling but require ventilation and safety precautions. We recommend starting with acrylics from Vallejo or Tamiya before exploring other options.
Consider your overall modeling interests when exploring best scale military model kits as well, since many techniques transfer between aircraft and ship building.
Frequently Asked Questions
Who makes some good WW1 kits?
Roden, Academy, Revell Germany, and Airfix produce the best WWI aircraft model kits currently available. Roden offers the widest range of subjects across multiple scales. Academy provides exceptional value in 1/32 scale with thoughtful engineering. Revell Germany creates accessible kits for all skill levels. Airfix has recently retooled their WWI line with impressive quality improvements.
What is the best kit plane?
The Academy Sopwith Camel F.1 in 1/32 scale stands out as the best overall WWI biplane kit for most builders. It includes predrilled rigging holes and rigging line, good parts fit, and excellent decals at a reasonable price. For premium builds, the Roden Nieuport 28C1 in 1/32 scale offers superior detail and Eddie Rickenbacker’s historic aircraft subject matter.
What was the most feared plane in WW1?
The Fokker Dr.I triplane, flown by Manfred von Richthofen and other German aces, earned legendary status despite limited production. Allied pilots respected its climbing ability and maneuverability, though it suffered from speed limitations and structural issues. The Sopwith Camel claimed more victories overall, but the Dr.I’s association with the Red Baron created enduring fame.
What are the best WWI biplane model kits for beginners?
Beginners should start with the NewRay Fokker D.VII or NewRay Sopwith Camel, which require no glue or painting. The Revell Fokker Dr.1 in 1/72 or 1/28 scale provides good starter experiences with traditional cement assembly. The Academy SPAD XIII offers an affordable entry point for those ready to try painting and decaling. Avoid Roden kits until you have completed several easier builds.
Which scale is best for WWI aircraft models?
The 1/48 scale offers the best balance for most builders, providing substantial display presence without overwhelming complexity. Collectors prefer 1/72 scale for variety and space efficiency. Display builders choose 1/32 scale for maximum detail visibility and impact. Beginners should start with 1/72 or easy-kit 1/48 options before attempting larger scales.
Final Thoughts
Building WWI biplane model kits connects us to aviation history in a way that no other hobby experience replicates. The skeletal airframes, the fabric wings, and the brave pilots who flew these primitive machines into combat deserve the care and attention that quality model building provides. Whether you choose the premium Roden Nieuport 28C1, the value-packed Academy Sopwith Camel, or the beginner-friendly NewRay offerings, each completed model represents a tangible link to the dawn of aerial warfare.
Our testing confirms that the best WWI biplane model kits in 2026 come from established manufacturers who understand the unique challenges of this subject matter. Roden leads in variety and detail, Academy dominates the value segment, and Revell provides accessible entry points for all skill levels. Start with an easier kit that matches your experience, master the techniques of biplane construction, and soon you will display a squadron of these historic aircraft with pride.