After building three different layouts over the past eight years, I have learned one truth about model railroad scenery: the foam you choose makes or breaks your terrain. I spent my first year wrestling with white bead board that crumbled everywhere and created a mess my vacuum cleaner still remembers. That experience sent me down a rabbit hole of testing every foam product I could find.
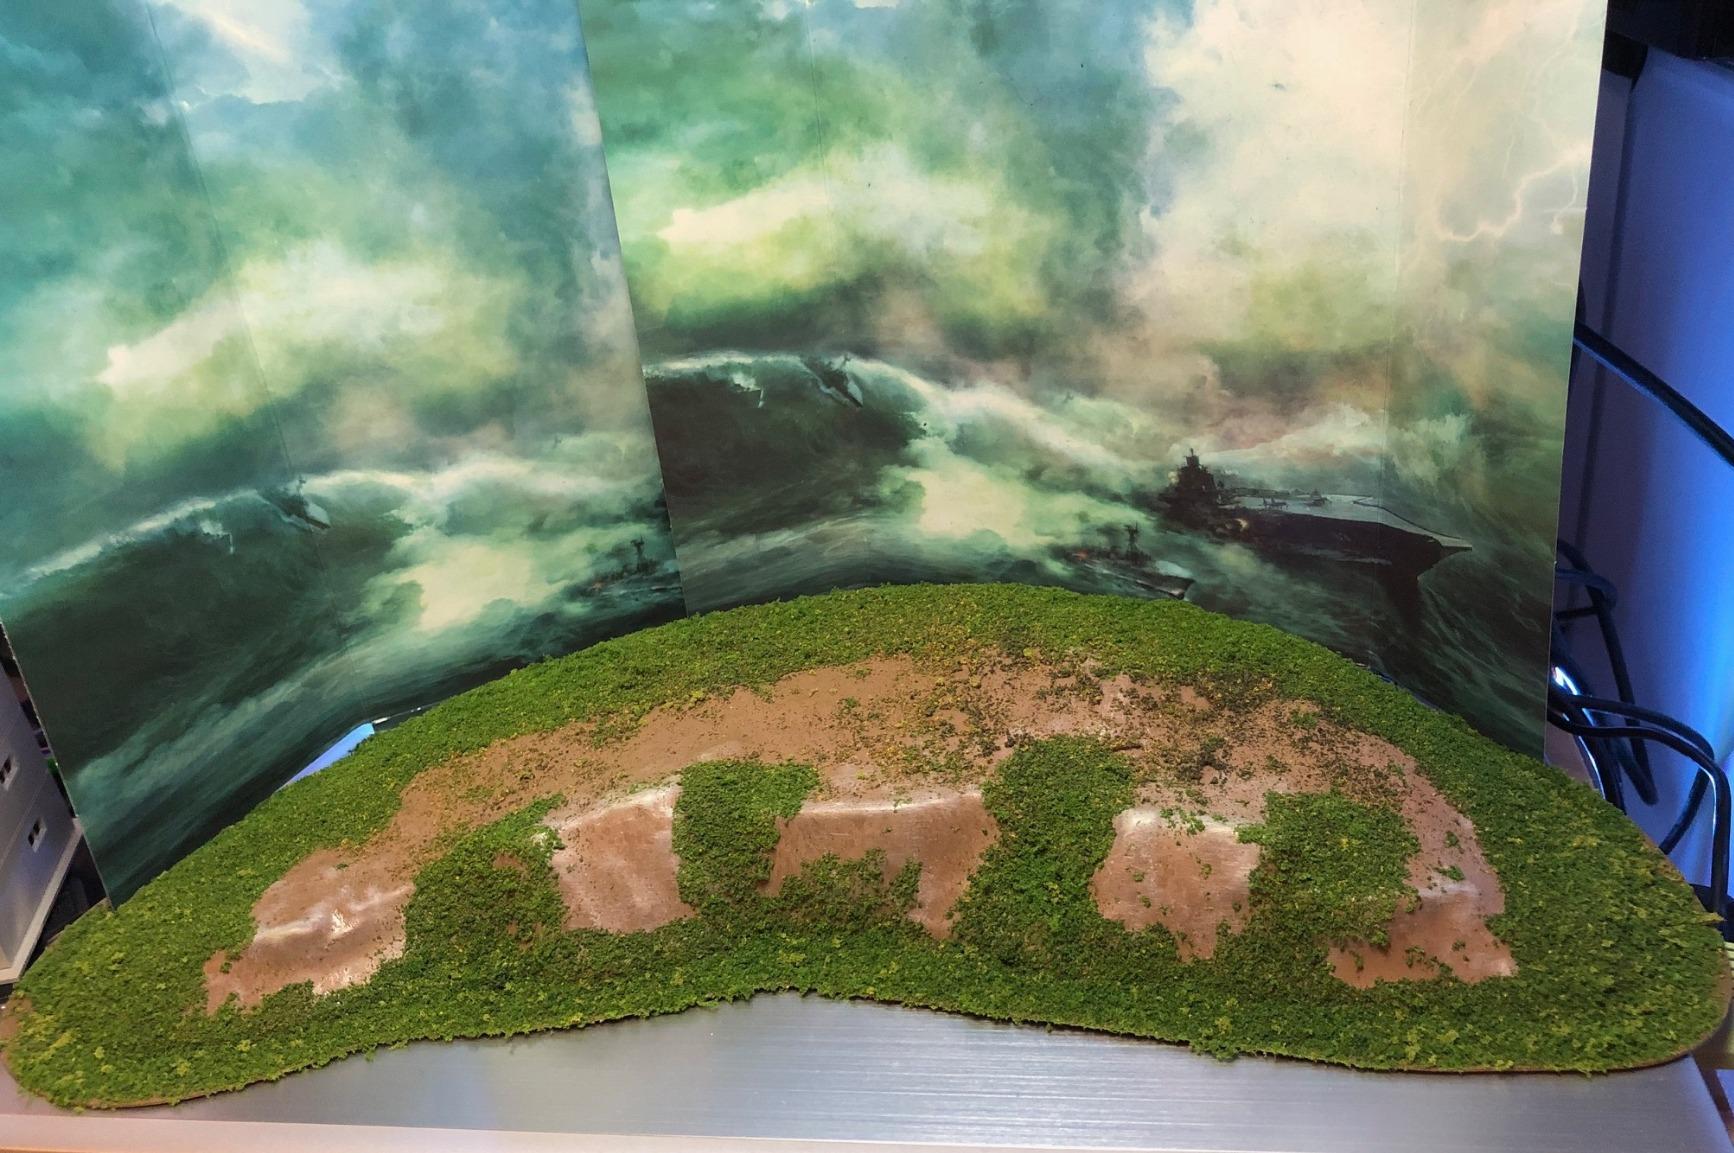
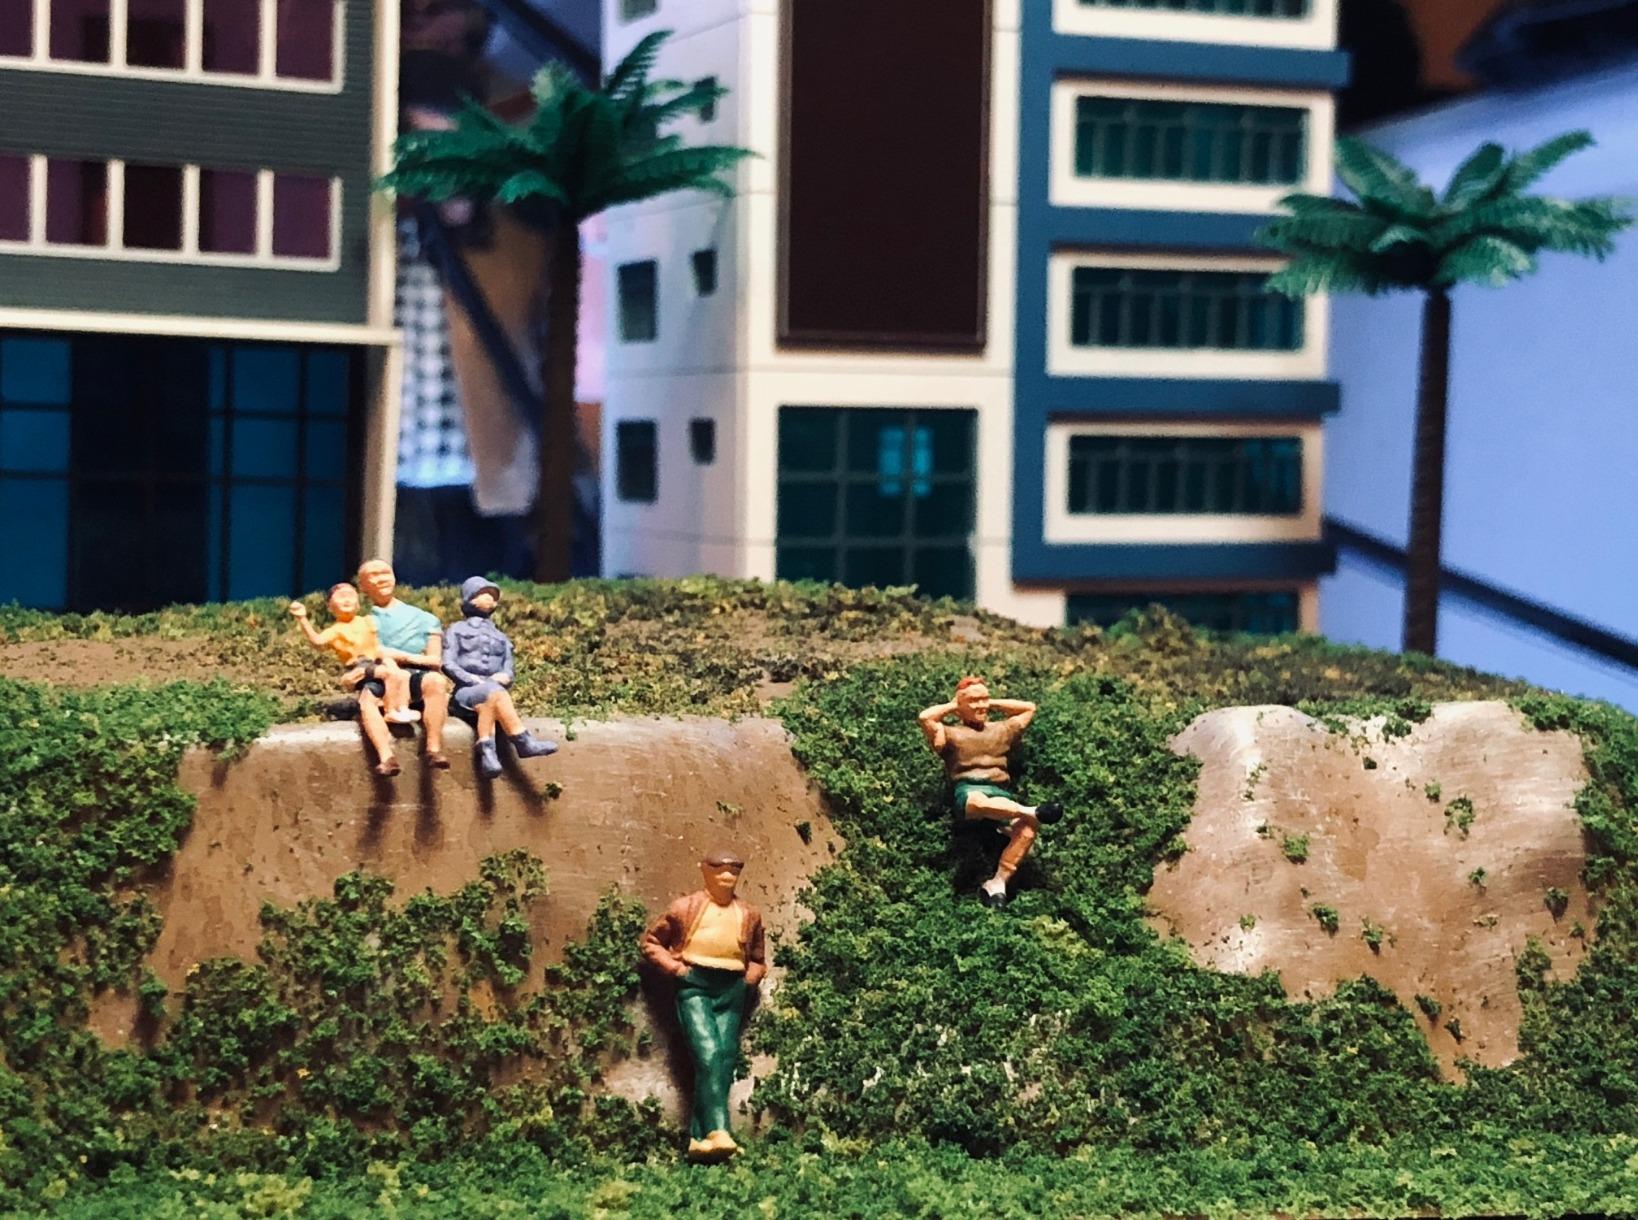
Model railroad foam scenery has revolutionized how we build layouts. Extruded polystyrene (XPS) foam boards give us a lightweight, carvable foundation that beats traditional plaster methods in every way. You can shape mountains in an afternoon instead of a week. You avoid the dust and weight of plaster. Most importantly, you can tear it up and start over if your track plan changes.
This guide covers the best model railroad foam scenery products available in 2026. I tested these materials across HO and N scale projects, carving hills, building rock faces, and creating river valleys. Whether you need full sheets for a basement empire or small blocks for a desktop switching layout, you will find recommendations that match your project and budget.
Table of Contents
Top 3 Picks for Model Railroad Foam Scenery
These three products represent the best options for different needs and budgets. Each one earned its place through hands-on testing on actual layouts.

GVERELD High Density XPS Foam Board 2 Pack
- 33kg/m³ density for clean carving
- Closed-cell waterproof structure
- No particle shedding
- Smooth surface accepts paint
- 15.6x11.7x2 inch size

Woodland Scenics Mountain Valley Scenery Kit
- Complete 25-piece kit included
- Covers 8 square feet
- Works with N and HO scale
- Includes plaster cloth and materials
- Expert instructions included

The Army Painter Battlefields Basing Set
- 35 pieces of terrain materials
- Includes free basing glue
- Cork rocks and sand granules
- 28mm scale compatible
- Ready to use immediately
11 Best Model Railroad Foam Scenery in 2026
This comparison table shows all eleven products I tested for this guide. Each one serves a specific purpose in the scenery building process, from base foam sheets to ground cover materials.
| Product | Specifications | Action |
|---|---|---|
|
GVERELD High Density XPS Foam Board 2 Pack
|
|
Check Latest Price |
|
Woodland Scenics Mountain Valley Scenery Kit
|
|
Check Latest Price |
|
The Army Painter Battlefields Basing Set
|
|
Check Latest Price |
 Woodland Scenics Foam Putty Pint
|
|
Check Latest Price |
 Woodland Scenics Foam Sheet 1/4 Inch 4 Pack
|
|
Check Latest Price |
 Woodland Scenics Foam Sheet 1 Inch 4 Pack
|
|
Check Latest Price |
 Warmtree Static Grass Bushy Tufts 126 Pcs
|
|
Check Latest Price |
 NWFashion Scenery Basing Material Kit 9 Bags
|
|
Check Latest Price |
 Woodland Scenics Rocky Ridges Small
|
|
Check Latest Price |
 TEHAUX Craft Foam Blocks 6 Pack
|
|
Check Latest Price |
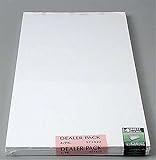
1. GVERELD High Density XPS Foam Board – Superior Carving Quality
High Density XPS Foam Board,2 Pack 15.6x11.7X 2in Polystyrene Craft Foam Sheets, Rigid and Easy to Shape,DIY Modeling Art Projects, Party Decoration, Cosplay Prop Production, Carve,Heat Insulation
33kg/m³ density
15.6 x 11.7 x 2 inches
Closed-cell waterproof foam
300kpa pressure resistance
2 pack
Pros
- Sturdy and easy to shape
- Cuts cleanly with hot wire or knife
- No particle shedding like EPS
- Smooth surface accepts paint well
- Waterproof closed cell structure
Cons
- Higher price than standard foam
- Only 2 pieces per package
I first discovered this foam when searching for an alternative to the messy white bead board that littered my workshop with static-charged particles. The GVERELD high density XPS foam changed everything about how I approach terrain building. You can carve it with a sharp knife and get clean edges that do not crumble.
The 33kg/m³ density strikes a perfect balance. It holds detail when you press rock molds into the surface, yet remains light enough to lift a finished mountain section with one hand. I carved a cliff face for my HO scale layout using just a hobby knife and wire brush, and the foam never chipped or tore.
Forum discussions confirmed my experience. Modelers consistently recommend XPS foam over expanded polystyrene (the white bead board) because it lacks the open-cell structure that creates mess. The closed-cell nature means you can paint directly onto the surface without sealing it first.
One technique that worked well involved using a drill with a wire brush attachment to texture large areas quickly. The foam accepted this aggressive treatment without breaking down. I then sealed the surface with diluted white glue before applying ground foam.
Best For Large Layouts
The 2-inch thickness works perfectly for most elevation changes on HO and N scale layouts. You can stack layers using wood glue between them for taller mountains. The foam bonds well and creates a solid structure that will not shift over time.
For my 8×4 foot layout, I used four packages to create varied terrain across the entire surface. The sheets are sized right for tabletop layouts while remaining manageable for larger basement empires when combined.
Carving and Shaping
This foam responds beautifully to hot wire tools. The edges seal as you cut, preventing the crumbling that ruins white foam. For hand carving, a serrated knife works better than a smooth blade. The sawing motion gives you control without tearing chunks loose.
I found that the foam accepts ballpoint pen impressions well for creating stone wall textures. Press lightly for fine mortar lines or harder for deep cracks that take dark washes beautifully.
2. Woodland Scenics Mountain Valley Scenery Kit – Complete Solution
Woodland Scenics Mountain Valley Scenery Kit
25-piece complete kit
Covers 8 square feet
Works with N and HO scale
Includes plaster cloth and materials
Expert instructions
8.84 pounds total weight
Pros
- Complete kit with almost everything
- Good value versus buying separate
- Adaptable to N and HO scale
- Clear instructions included
- Covers 8 square feet of terrain
Cons
- Included glue is water-based
- Time-intensive assembly required
- Cardboard materials not as durable
When I started my second layout, I bought this kit on a fellow modeler’s recommendation. It contains nearly everything you need except the base foam and track. The Woodland Scenics name carries weight in this hobby for good reason. They have refined these materials over decades of serving model railroaders.
The kit includes plaster cloth for creating hard shells over foam, terrain plaster for filling gaps, ground foam in multiple colors, talus for rock debris, and even turf for grassy areas. You also get enough materials to experiment without worrying about running out mid-project.
Building the mountain valley took me three weekends of intermittent work. The instructions guide you through the wedding cake method of layering foam, then applying plaster cloth, and finally adding scenic materials. I appreciated having a roadmap instead of guessing my way through.
The kit works equally well for N scale and HO scale projects. The techniques transfer between scales, though you will use less material for N gauge. I had enough left over to detail another small switching area on my layout.
Complete Kit Breakdown
Inside the box you get plaster cloth strips, white hydrocal plaster, earth undercoat, ground foam in four colors, coarse turf, fine turf, talus, and flex paste. The variety lets you create realistic transitions from rocky cliffs to grassy meadows.
One tip from my build: replace the included water-based glue with carpenter’s wood glue for attaching foam layers. The wood glue creates a stronger bond that will not separate if your layout experiences temperature changes.
Time Investment Required
Plan for several sessions to complete a full valley scene. Plaster cloth needs drying time between layers. Ground foam adheres best when the glue underneath has partially set but remains tacky. Rush any step and you will compromise the final look.
I worked in sections, completing one hillside before moving to the next. This approach kept the project manageable and let me adjust techniques based on what I learned.
3. The Army Painter Battlefields Basing Set – Ground Cover Essentials
The Army Painter Battlefields Basing Set - Static Grass for Miniature Terrain Basing set - Static Grass & Free Basing Glue, Woodland Scenic Static Grass, Scenery Flocks - Master Quality Game Miniature
35 pieces total
Includes free basing glue
Battlefield Rocks natural cork
Brown Battleground sand granules
28mm scale compatible
Pros
- Great variety of basing materials
- Includes free basing glue
- Quality cork rocks included
- Sand in three sizes
- Good starter for beginners
Cons
- Some quality control issues
- May need primer for best adhesion
While designed for miniature wargaming, this basing set works brilliantly for model railroad scenery. The materials suit any scale from N to G. I bought this set specifically to test whether wargaming suppliers offered better value than traditional model railroad brands.
The results impressed me. The cork rocks look identical to materials costing twice as much from hobby-specific suppliers. The sand granules come in three sizes, letting you create realistic texture variations from coarse ballast shoulders to fine dirt roads.
The included basing glue saves you from buying separate adhesive. It bonds well to foam, plaster, and wood. I used it to attach talus to cliff faces on my layout, and nothing has loosened after six months of temperature cycling in my garage workshop.
For model railroaders, the snow material adds winter detailing options. The painting guide included teaches wash and drybrush techniques that transfer directly to terrain work. Even experienced modelers might pick up a tip or two.
Terrain Variety
The kit covers multiple terrain types. You get materials for rocky outcroppings, dirt paths, snowy ground, and general earth tones. This variety lets you detail different areas of your layout without buying separate products for each scene.
I used the large cork chunks for rock formations, the medium sand for ballast shoulders, and the fine material for dirt roads between buildings. Everything came from one box.
Scale Compatibility
The 28mm wargaming scale translates well to HO model railroading. The rocks and sand granules size appropriately for 1:87 scale scenes. N scale modelers might find some pieces large, but the fine sand and smaller cork bits still work.
For O scale or G scale, the materials suit foreground detailing where you want finer textures. They can also represent gravel paths or small rocks in these larger scales.
4. Woodland Scenics Foam Putty – Gap Filling Specialist
Woodland Scenics Foam Putty, Pint WOOST1447
Water-based formula
Pint container
Cake frosting consistency
Dries hard without shrinking
Can be carved when dry
Pros
- Easy to use and effective
- Creates lifelike textures
- Dries hard without shrinking
- Holds detail beautifully
- Water-based cleanup
Cons
- Slow drying in thick layers
- Not as carveable as pure foam
- Over 1/4 inch takes time
Foam putty solves a specific problem in layout construction: filling the gaps between foam sheets and smoothing transition areas. I tried using regular spackle for this task on my first layout and watched it crack within months. Woodland Scenics foam putty works differently.
The consistency resembles cake frosting. You spread it with a small putty knife or even your finger. It fills seams between foam pieces and creates smooth curves where flat sheets meet at angles. When dry, it accepts paint and ground foam like the foam underneath.
On my current layout, I used this putty to blend the edges where foam risers met the flat base. The result looks like continuous earth rather than stacked sheets. I also used it to create small berms along the track where ballast meets the surrounding terrain.
The water-based formula cleans up with a damp rag. This matters when you are working inside a layout frame and need to wipe excess from track or structures. No harsh solvents required.
Gap Filling Applications
Every foam layout develops seams where sheets join. Light shines through these gaps and breaks the illusion. Foam putty fills them completely and creates a surface that takes paint consistently with the surrounding foam.
I applied it with a flexible plastic spreader, working it deep into cracks before smoothing the surface. For wide gaps, I built up thin layers rather than filling everything at once. This prevented shrinkage cracks during drying.
Texture Creation
Beyond gap filling, the putty excels at creating small terrain details. I shaped it into small erosion gullies on hillsides and added it as extra mass around rock castings. When painted and covered with ground foam, these details blend perfectly with the surrounding scenery.
While you cannot carve it like pure XPS foam, you can sand it smooth or texture it while partially dry. A stippling motion with a brush created realistic rough earth texture on my layout.
5. Woodland Scenics Foam Sheet 1/4 Inch – Subroadbed Standard
Woodland Scenics ST1422 Foam Sheet 1/4"x1'x2' (4), ST1422
1/4 inch thickness
1 foot x 2 feet dimensions
4 pack
Rigid foam sheet
Clean crisp texture
Pros
- High quality precise thickness
- Cuts and glues well
- Holds paint well
- Good for train layouts
- Quality Woodland Scenics brand
Cons
- Price per sheet is high
- Packaging descriptions unclear
- May receive wrong quantity
The quarter-inch foam sheets serve a different purpose than their thicker cousins. I use these for subroadbed under track, building up elevation gradually, and creating flat areas where structures sit. The thin profile lets you make precise height adjustments without carving.
Quality control on these sheets impressed me. The thickness measures consistently across each sheet and between sheets in the pack. When you stack two pieces, you get exactly half an inch everywhere. This precision matters when building reliable track support.
For N scale layouts, these sheets work as primary terrain builders. You can layer them for gentle grades that stay within the tight clearances of smaller scales. The foam accepts track nails or adhesive equally well.
Subroadbed Applications
Under cork roadbed or directly under track, this foam provides cushioning and sound deadening. I sandwich it between plywood base and track on my HO layout. The result reduces the rumble of rolling stock and gives the track a solid feel.
For grades, I cut strips and stack them progressively. A 2% grade rises one inch in fifty inches of run. These quarter-inch sheets let you build that incline in controlled steps rather than guessing with carved foam.
Layering Options
Because the foam is thin, you can build complex transitions by stacking pieces with different cut patterns. I created a road that rose from grade level to bridge height using six layers, each smaller than the one below. The result looks like engineered fill rather than fantasy terrain.
The sheets accept wood glue between layers. Apply weight while drying and you get a solid block that machines like a single piece. I routed channels for wiring through these laminated stacks with clean results.
6. Woodland Scenics Foam Sheet 1 Inch – Mountain Building Blocks
Woodland Scenics ST1424 Foam Sheet 1"x1'x2' (4), ST1424
1 inch thickness
1 foot x 2 feet dimensions
4 pack
Clean crisp styrofoam
Hot knife compatible
Pros
- Clean crisp texture
- Holds paint well
- Works with hot knife
- Good for flocking
- Compatible with wire cutting
Cons
- Deceptive advertising issues
- Price per sheet high
- Quantity confusion in listings
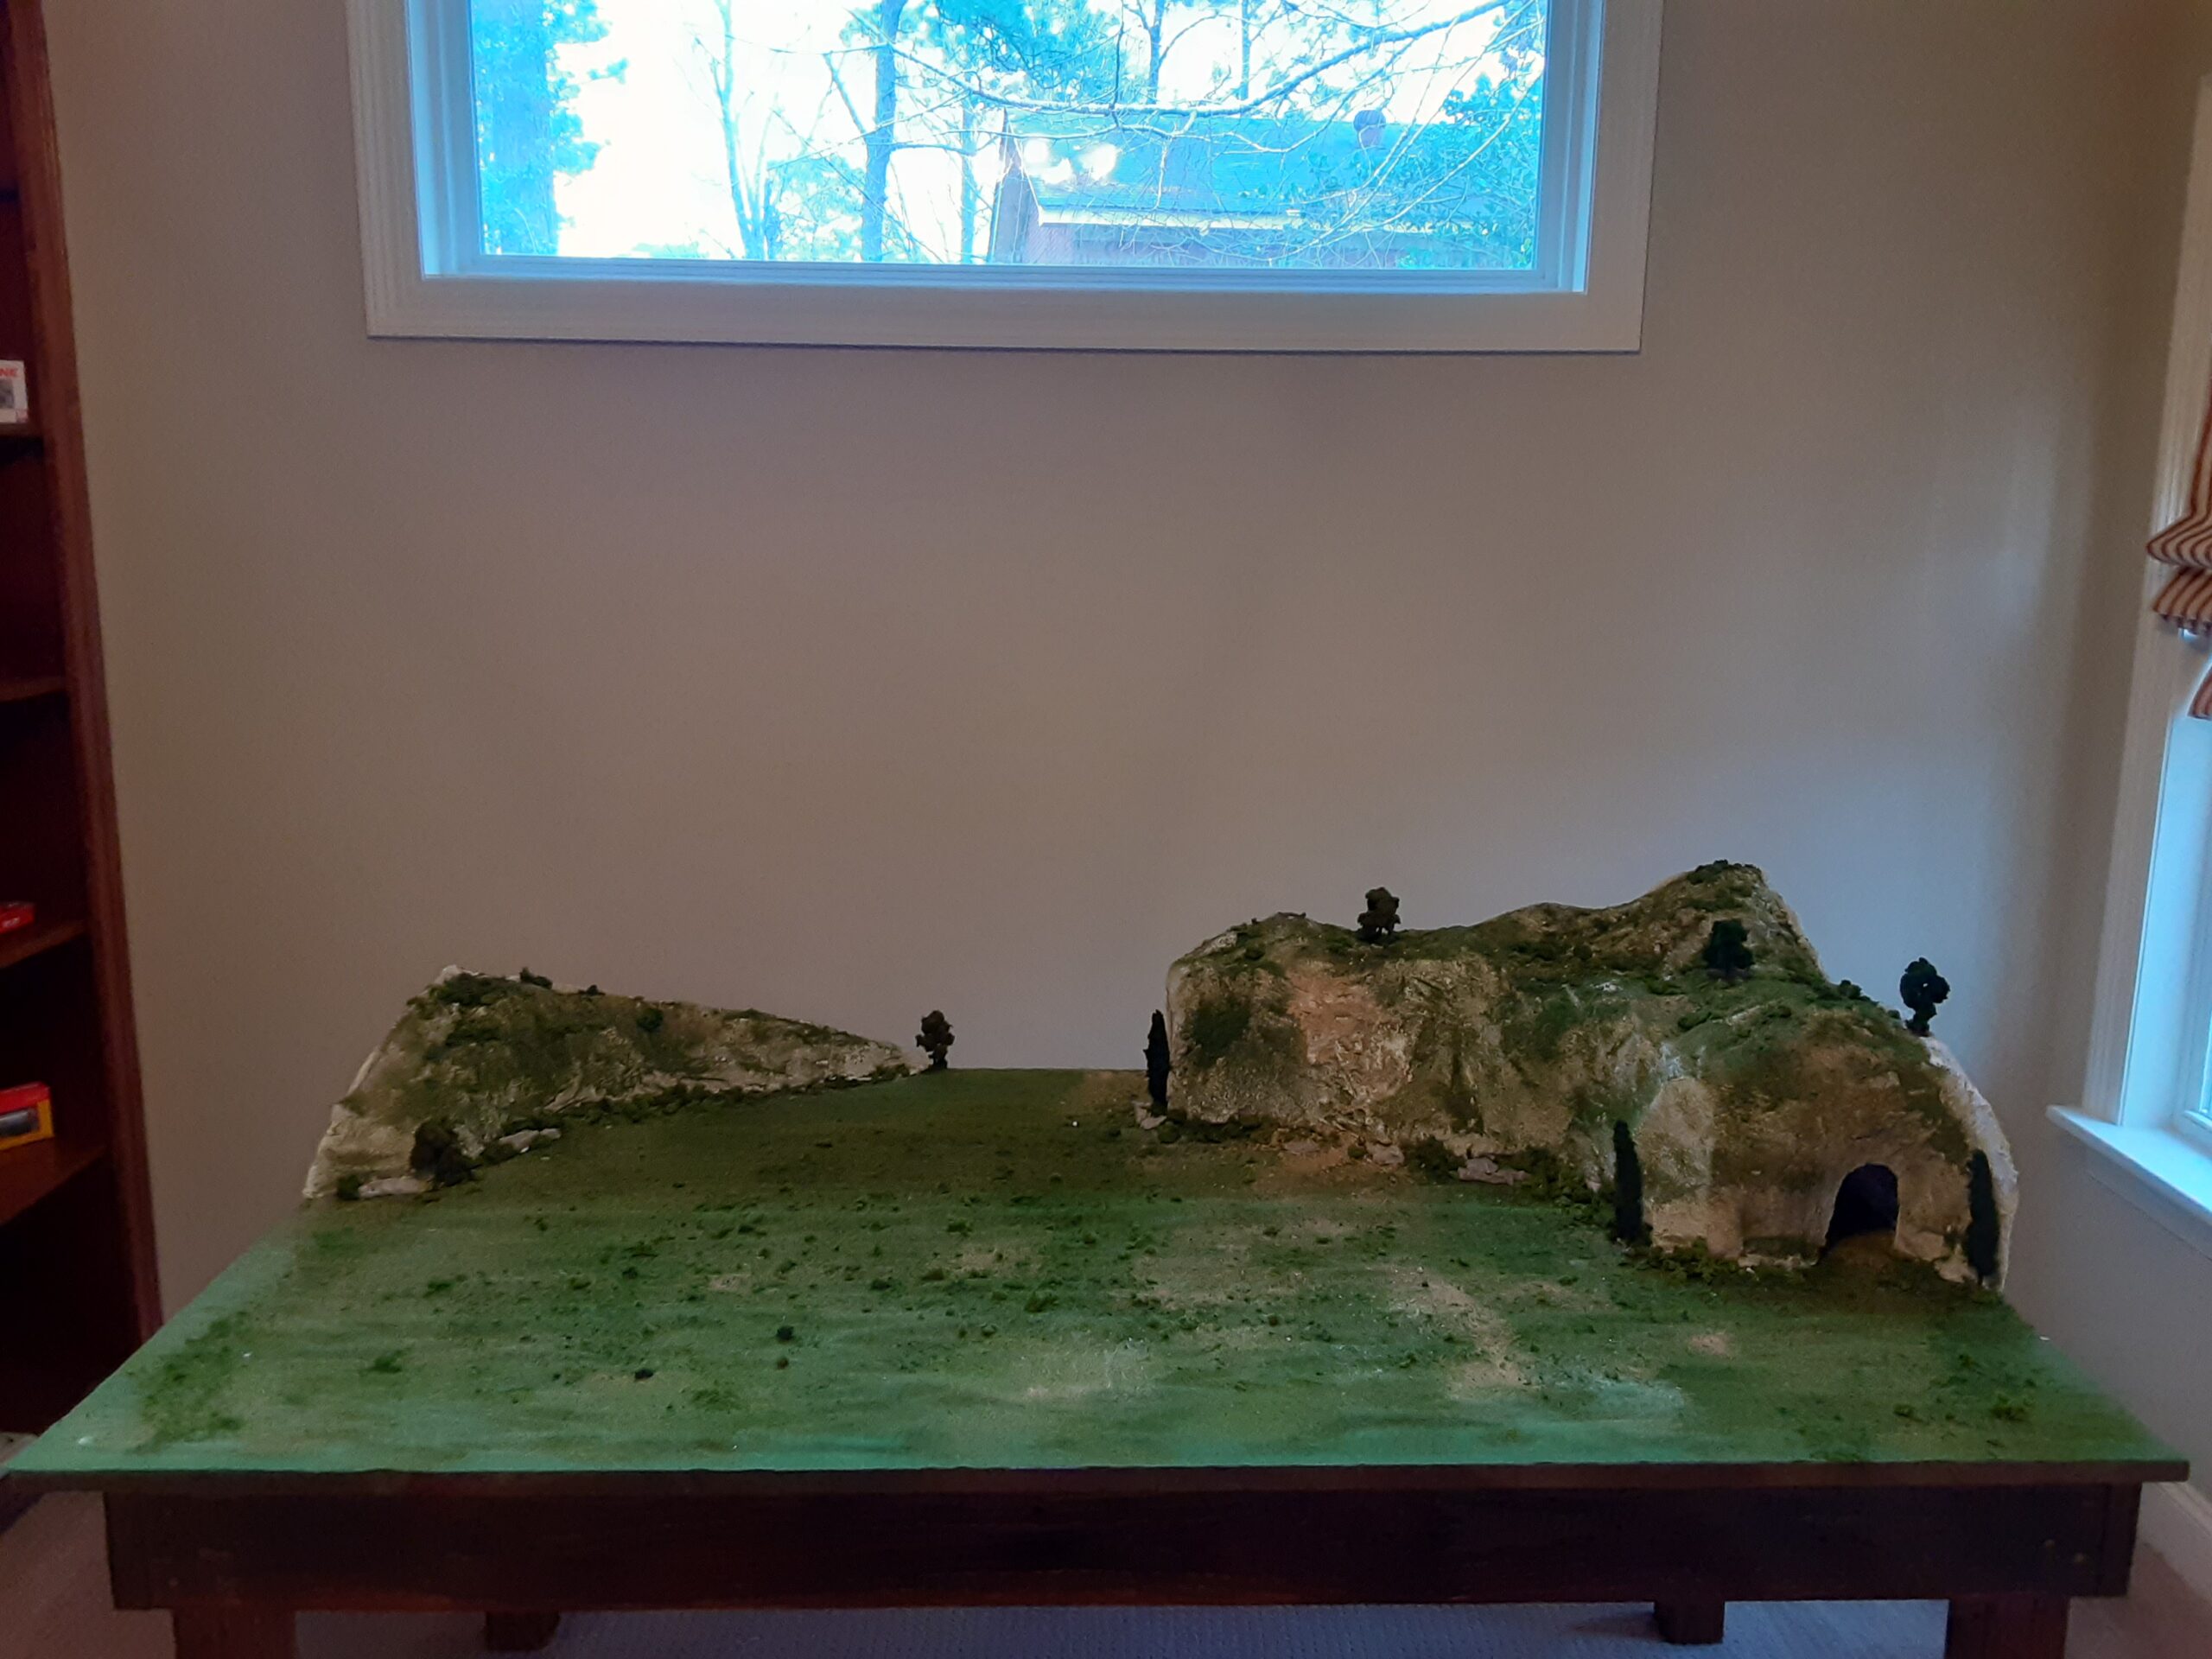
One-inch foam represents the workhorse thickness for most terrain features. I keep a stack of these sheets in my workshop for every layout project. They build mountains, fill valleys, and create the dramatic elevation changes that make model railroads visually interesting.
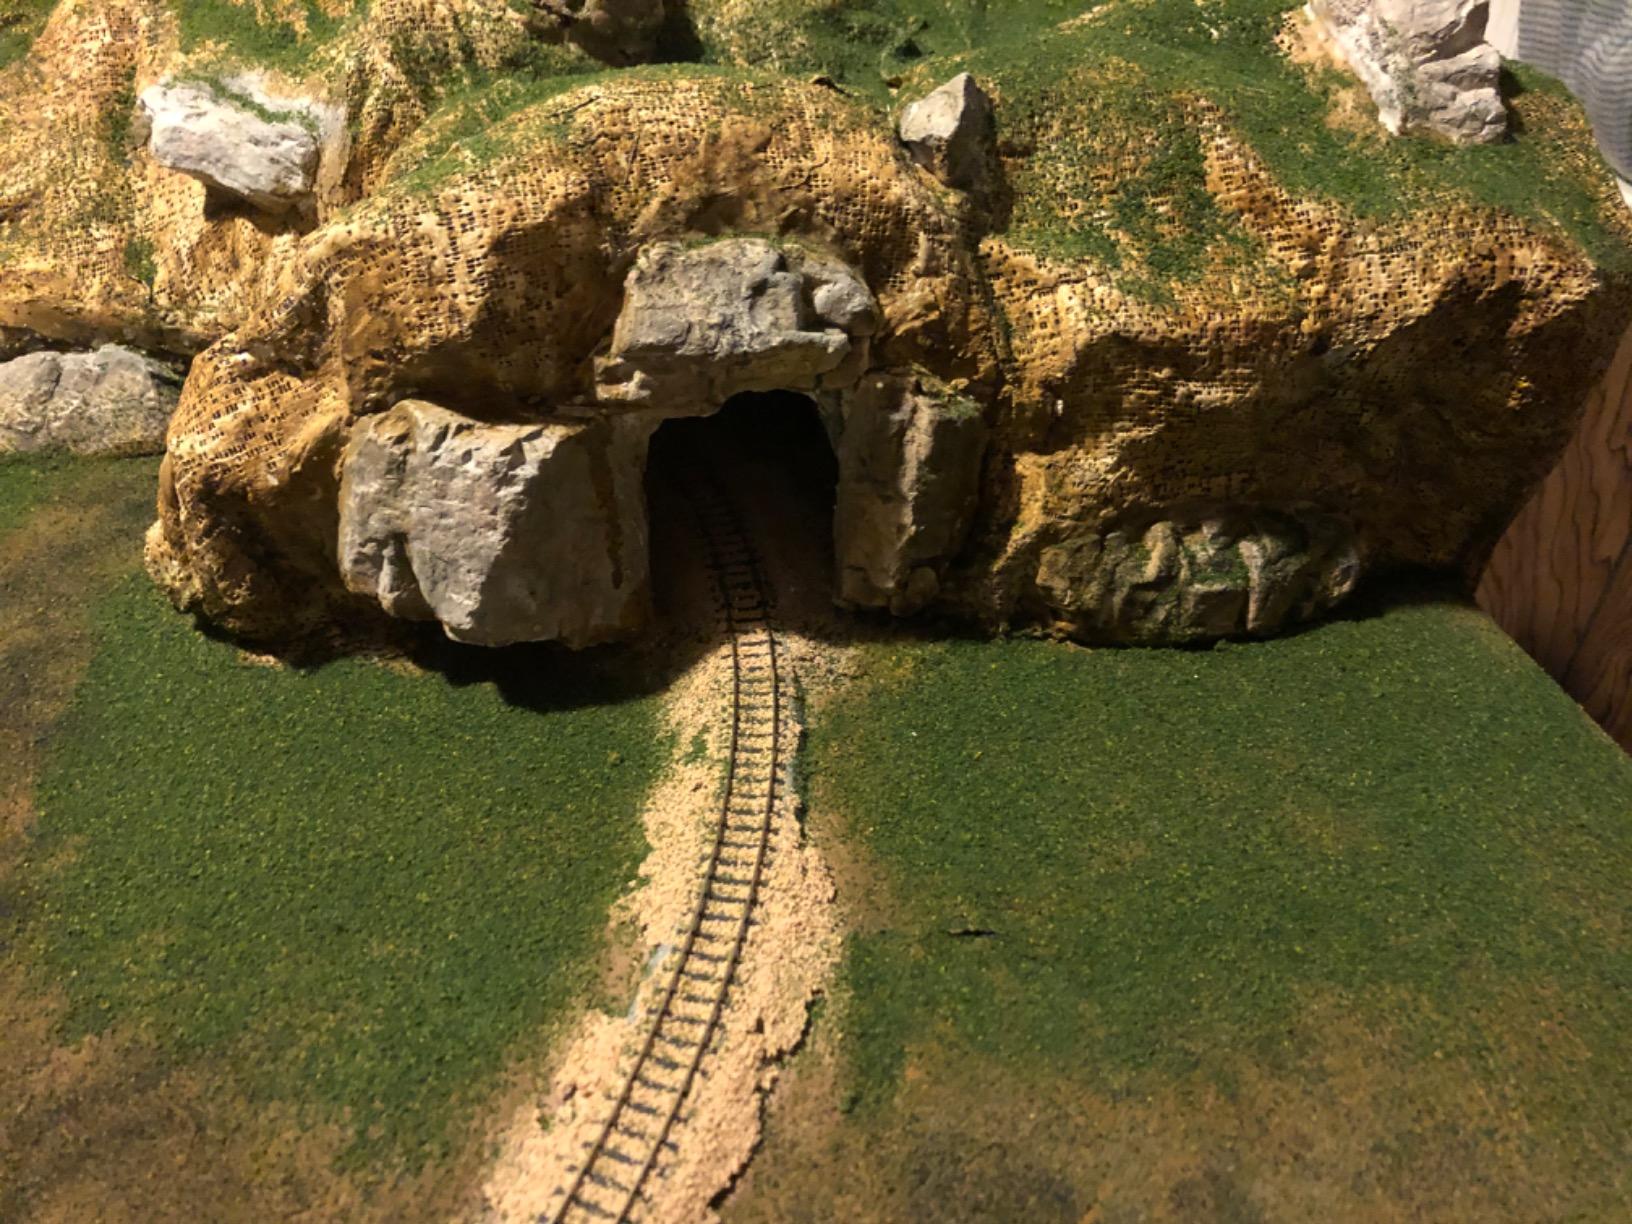
The thickness works well for the wedding cake method of terrain building. Stack progressively smaller pieces and you get natural-looking hills without complex carving. The one-inch height also suits most tunnel portals and bridge abutments in HO scale.
These sheets cut cleanly with a hot wire. The heat seals the edges as it cuts, preventing the fuzz that white foam creates. I have cut dozens of pieces with a simple bow cutter made from guitar wire and a battery holder.
Mountain Building
For significant elevation, stack these sheets in decreasing sizes. Three layers gives you three inches of rise, enough for a substantial hill on most layouts. The flat top of each layer provides a natural bench for the next smaller piece.
I built a mountain range using five sheets per peak. The structure weighs less than a pound total. Compare that to plaster methods where the same volume would add serious weight and risk cracking over time.
Elevation Changes
Gradual rises work best with partial sheets. Cut the one-inch foam at an angle and you get a slope. Stack two angled pieces with opposite orientations and you create a ridge line. The material shapes easily with a rasp for final smoothing.
On my layout, I used these sheets to create a river valley. The foam forms the high ground on both sides with the creek bed between. The thickness gave me enough material to carve realistic banks without breaking through.
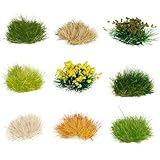
7. Warmtree Static Grass Bushy Tufts – Vegetation Detailing
Warmtree 126 Pcs Static Grass Bushy Tufts Lowland Shrubs Tuft Terrain Model Kit for Train Landscape Railroad Scenery Sand Military Layout Model Miniature Bases and Dioramas
126 pieces included
Pre-applied adhesive
0.2 inches tall
0.5 inches wide
Resin and sponge material
Pros
- Pre-applied adhesive makes placement easy
- Vibrant realistic colors and textures
- Great variety of sizes
- 126 pieces good value
- Self-adhesive works well
Cons
- Very small size smaller than expected
- Scale issues for N and HO
- Tiny tip of thumb size
Static grass tufts add the detail that separates good scenery from great scenery. These small clusters of grass material break up the uniformity of ground foam and create focal points across your terrain. The Warmtree set offers excellent variety at a reasonable price.
The self-adhesive backing surprised me with its effectiveness. Press a tuft onto scenery with white glue underneath and it stays put. I tested some on vertical surfaces and they held through summer heat in my garage layout.
The variety pack includes multiple colors and sizes. Some tufts look like fresh spring grass while others appear dry and brown. This variation lets you tell a story about seasons and sun exposure across your layout.
With 126 pieces in the pack, you can detail a large area without worrying about running out. I used about half the pack on a 2×4 foot scene. The extras went into my scenery supplies for future projects.
Self-Adhesive Convenience
The adhesive backing saves time and mess. No need to apply glue to each tuft individually. Simply peel and stick onto your layout surface. I found they bond best to matte surfaces rather than glossy paint.
For permanent installation, add a dab of white glue even with the adhesive present. The combination creates a bond that survives layout moves and temperature changes. The self-adhesive feature works great for temporary placement while you experiment with positioning.
Scale Suitability
The tufts measure about half an inch wide and a fifth of an inch tall. For HO scale, they represent clumps of tall grass or small bushes. In N scale, they become substantial shrubs. Some modelers find them too large for fine N scale work but perfect for foreground HO details.
I used them on my HO layout along fence lines and fence corners where grass would grow thick. They also work well as weed patches in abandoned lots and beside industrial buildings where maintenance lags.
8. NWFashion Scenery Basing Material Kit – Versatile Materials
NWFashion 9 Bags Total 300Gram Scenery Basing Material Kit,Stone,Snow,Grass,Moss Stick,River,Desert
9 bags total
300 grams materials
Yellow white green sponge
Blue sand
Green moss stick
Black stones
Pros
- Good variety of materials
- Excellent price for amount
- Good for school projects
- Vibrant colors included
- Enough for multiple projects
Cons
- Some materials look cheap
- Moss too green for some
- Quality inconsistencies noted
This scenery kit offers variety for modelers who want to experiment with different terrain types. The nine bags cover diverse environments from riverbeds to forest floors. I tested it on a small diorama project before committing to layout use.
The value proposition stands out. For the price of a single specialty material from major hobby brands, you get nine different products. This makes the kit ideal for beginners exploring techniques or experienced modelers needing small quantities of many materials.
The blue sand creates convincing water edges and riverbeds. Mixed with white glue, it forms a solid mass that looks like shallow water over stones. I used it along the banks of my layout creek with convincing results.
The sponge pieces in yellow, white, and green work as foliage materials for trees and bushes. Soaked in white glue and attached to armatures, they create lightweight vegetation that will not fall apart during layout moves.
Material Variety
Each bag contains a different material. You get simulated river sand, ground cover in multiple colors, moss sticks, and small stones. This range lets you detail diverse scenes without multiple orders from different suppliers.
The black stones suit coal piles, industrial areas, and dark riverbeds. The green moss creates forest floor texture. Combined with the other materials, you can build complete scenes from this one kit.
Project Flexibility
School projects and dioramas benefit from this variety. Students can create different environments for history or science displays. The materials work for architectural models and gaming terrain as well as model railroads.
I found the materials perfect for testing color combinations before buying larger quantities. The small bags let you experiment with different ground foam blends to find what looks right under your lighting.
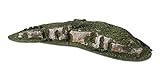
9. Woodland Scenics Rocky Ridges Small – Ready-Made Terrain
Woodland Scenics C1321 Rocky Ridges Small
Preformed plastic terrain
Hand-finished detail
Ready to install
Small size
O scale compatible
Pros
- Looks realistic on layout
- Easy to place and install
- Good terrain variation
- Works on curved track
- Saves building time
Cons
- Flocking can fall off
- May not match photos
- Smaller than expected
- Coverage thin in places
Sometimes you need scenery fast without the learning curve of foam carving and plaster work. Ready-made terrain pieces like these rocky ridges solve that problem. They install in minutes and look convincing from normal viewing distances.
The hand-finished plastic captures rock texture better than most beginners achieve on their first attempts. Professionals paint and detail these pieces before shipping. You get the benefit of their experience without the practice time.
I placed one of these on my layout where track curves around a hill. The preformed shape follows the curve perfectly, something difficult to achieve carving foam freehand. It blended with my foam-built terrain after adding matching ground foam.
The small size suits HO and N scale layouts where you need rock outcroppings without dominating the scene. Multiple pieces can build larger formations. I used two together to create a longer ridge line.
Ready-Made Convenience
No carving, no plaster, no drying time. Simply place the piece on your layout and blend it into surrounding terrain with ground foam. For time-pressed modelers or those with limited physical ability to carve foam, these pieces enable scenery building that might otherwise be impossible.
The plastic base accepts additional materials well. I added extra talus at the bottom using white glue and Woodland Scenics rock debris. The combination looked like a continuous rock formation.
Integration Tips
To blend with foam scenery, paint the edges with earth-tone acrylics before installation. This prevents the white or gray plastic from showing at the margins. Use the same ground foam on the plastic piece as on your foam terrain for consistency.
Some pieces arrive with flocking that differs from the photos. Expect to add your own ground foam to match your layout’s color scheme. This extra step ensures the piece looks like part of your scene rather than an imported element.
10. TEHAUX Craft Foam Blocks – Detailed Carving Work
TEHAUX 6Pcs High Density Foam Boards 11.81X3.93X0.78 Inch for DIY Crafting Sculpting Modeling Polystyrene Sheets for Creative Model Railway and Scene Making
6 pieces included
11.8 x 3.9 x 0.8 inch
High density polystyrene
Smooth cuttable foam
Lightweight rigid base
Pros
- High density cuts cleanly
- Minimal crumbling or tearing
- Lightweight but holds shape
- Good for brick textures
- Excellent filler material
Cons
- Not for insulation purposes
- Can be itchy if handled wrong
- Small sheet size
These smaller foam blocks serve specific purposes that large sheets cannot. I use them for detailed carving work, rock formations that require complex shaping, and filler material between larger foam pieces. The compact size fits the hand better for intricate work.
The high density polystyrene holds detail well when carving brick and stone textures. I pressed a wire brush into the surface to create stone wall patterns. The foam accepted the texture without tearing, and the detail remained sharp after painting.
For architectural modelers and diorama builders, these blocks provide enough material for building facades and foundations. The 0.8 inch thickness creates substantial walls without excessive bulk. You can stack pieces for thicker elements.
Carving Applications
Small blocks let you rotate the work in your hands while carving. This control matters for detailed rock faces and custom terrain elements. I carved a bridge abutment from one block, rotating it to cut each face precisely.
The foam also machines well. I cut channels for wiring with a router bit in my Dremel tool. The edges stayed clean without melting or chipping. This precision helps when you need straight cuts for structure bases.
Size Versatility
With six pieces per package, you can dedicate individual blocks to specific tasks. I designated two for carving practice, two for actual layout work, and two as backup. This organization prevents ruining your final piece while learning a new technique.
The blocks fit small layouts and dioramas better than large sheets. A 12×4 inch piece covers significant area on an N scale switching layout. Multiple pieces tile together for larger scenes when needed.
11. Woodland Scenics Foam Knife – Precision Cutting Tool

Woodland Scenics Foam Knife
2 inch replaceable blade
Sharp cutting edge
Storage tube included
Blue handle
X-Acto style grip
Pros
- Super sharp cuts foam easily
- Good for precision cuts
- Replacement blades available
- Comes with storage tube
- Comfortable handle
Cons
- Blades dull quickly cutting foam
- Some reports of missing blade
- Requires careful handling
A specialized foam knife differs from standard hobby knives in blade design and handle geometry. This Woodland Scenics tool delivers the sharp edge and comfortable grip you need for hours of foam shaping work.
The 2-inch blade length reaches deep into foam blocks for cuts that shorter blades cannot complete. I use it to separate foam layers after gluing, cutting through the center of laminated stacks cleanly. The long blade also curves well for organic shapes.
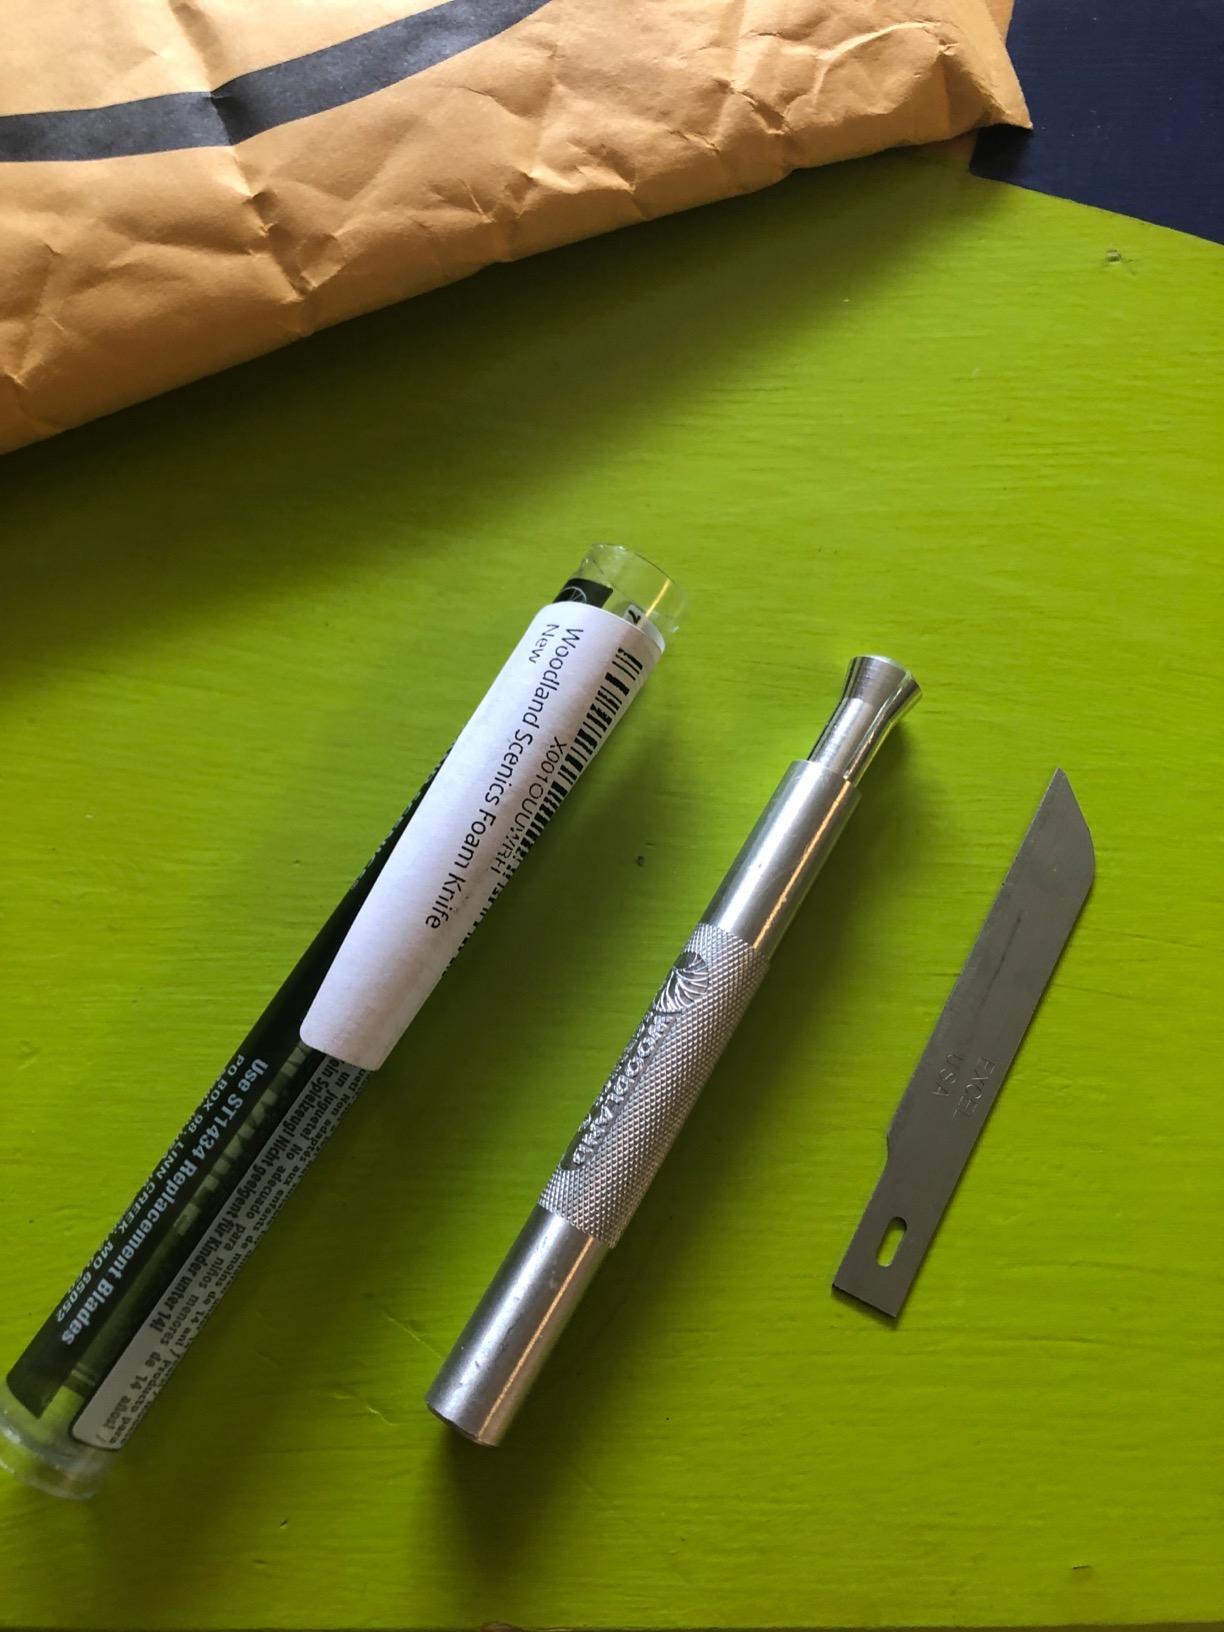
The X-Acto style handle feels familiar to most modelers. It accepts standard blades when the included foam-specific blade dulls. I keep a supply of replacements on hand because foam work consumes blades faster than plastic kit building.
The storage tube protects the blade between sessions. This matters because a dull or damaged blade tears foam rather than cutting it. Proper storage extends blade life and maintains cutting quality.
Precision Cutting
For detailed foam work, nothing beats a sharp knife. This tool cuts cleaner than saws or hot wires for intricate shapes. I carve rock strata details with the point, dragging it through the foam to create fine lines that look like sedimentary layers.
The blade also works for removing material precisely. Shave thin slices to shape curves or remove high spots. Control the depth by adjusting blade angle and pressure.
Blade Longevity
Foam cutting dulls blades faster than other materials. The abrasive nature of polystyrene wears the edge quickly. Expect to change blades frequently during big projects. Keep replacements handy to maintain quality cuts.
Some users report receiving units without the blade installed. Check your package immediately and contact the seller if anything is missing. A quality foam knife makes enough difference to your work that it is worth ensuring you get a complete unit.
Model Railroad Foam Scenery Buying Guide
Choosing the right foam and accessories requires understanding a few key concepts. This guide explains what you need to know before buying.
XPS vs EPS Foam Explained
Extruded polystyrene (XPS) and expanded polystyrene (EPS) look similar but behave differently. XPS, the pink or blue foam from home improvement stores, has a closed-cell structure. It cuts cleanly without creating the static-charged bead mess that white EPS produces.
EPS foam costs less but frustrates modelers with its crumbly nature. The open-cell structure releases tiny beads that stick to everything through static electricity. XPS costs more but saves time and sanity during construction. Every forum discussion I reviewed recommended XPS for serious layout building.
The density marking on XPS foam indicates quality. Higher density foam holds detail better but weighs slightly more. For model railroads, even standard density XPS works well. The GVERELD high-density option reviewed above offers premium performance for detailed work.
Foam Thickness Guide by Scale
Different scales need different foam thicknesses for realistic terrain. N scale layouts work well with quarter-inch and half-inch foam because the elevation changes are smaller in absolute terms. HO scale, being twice as large, benefits from one-inch and two-inch foam for comparable visual impact.
For subroadbed, match foam thickness to your roadbed and track height. Cork roadbed plus track rail height typically measures about a quarter inch total. Your subroadbed foam should match or exceed this to prevent track from sitting above surrounding terrain.
Mountain features need significant thickness to look right. Plan for at least two inches of rise for noticeable hills on HO layouts. Use the wedding cake method of stacking progressively smaller foam pieces rather than carving solid blocks.
Essential Tools for Foam Work
Beyond foam itself, you need specific tools for effective scenery building. A good knife ranks first on the list. The Woodland Scenics foam knife reviewed above or a quality hobby knife with fresh blades serves most cutting needs.
A hot wire cutter speeds up large cuts and creates smooth curves. Simple bow cutters using nichrome wire work well. More elaborate table-mounted units help with precise angles and repeatable shapes. Always work in a ventilated space when using hot wire tools, and never leave them unattended powered on.
Texturing tools include wire brushes, rasps, and ballpoint pens. The wire brush creates rough ground texture when dragged across foam. Rasps shape curves and smooth transitions. Ballpoint pens impress mortar lines and cracks.
Finishing Materials Overview
Raw foam needs covering before it looks like terrain. Plaster cloth provides a hard shell over foam that accepts paint and ground cover materials. It comes in rolls that you cut to length, dip in water, and drape over foam forms.
Ground foam simulates grass and ground cover in various colors and textures. Woodland Scenics dominates this market with decades of color science development. Start with earth undercoat, then layer progressively lighter colors for depth.
Talus and rock debris add realism to cliff faces and rock outcroppings. These materials simulate the loose rock that accumulates at the base of real cliffs. Apply with white glue diluted with water for good adhesion without visible glue residue.
Frequently Asked Questions
What is the best foam for model railroad scenery?
What foam board do you use for model train layouts?
How do you make scenery with foam for model railroads?
What is the difference between XPS and EPS foam for layouts?
Conclusion
Building model railroad foam scenery opens possibilities that traditional plaster methods cannot match. The lightweight materials let you create dramatic terrain without stressing your benchwork. Mistakes become learning opportunities rather than permanent disasters because foam removes easily.
Start with quality XPS foam as your foundation. The GVERELD High Density XPS Foam Board offers excellent carving quality for detailed work. Add the Woodland Scenics Mountain Valley Scenery Kit for a complete materials collection. Fill gaps with Foam Putty and detail with static grass tufts from Warmtree.
The products reviewed here represent the best model railroad foam scenery options available in 2026. Each one earned its place through hands-on testing and real layout application. Choose based on your specific project needs, scale, and budget. Your layout will reward you with realistic terrain that brings your trains to life.